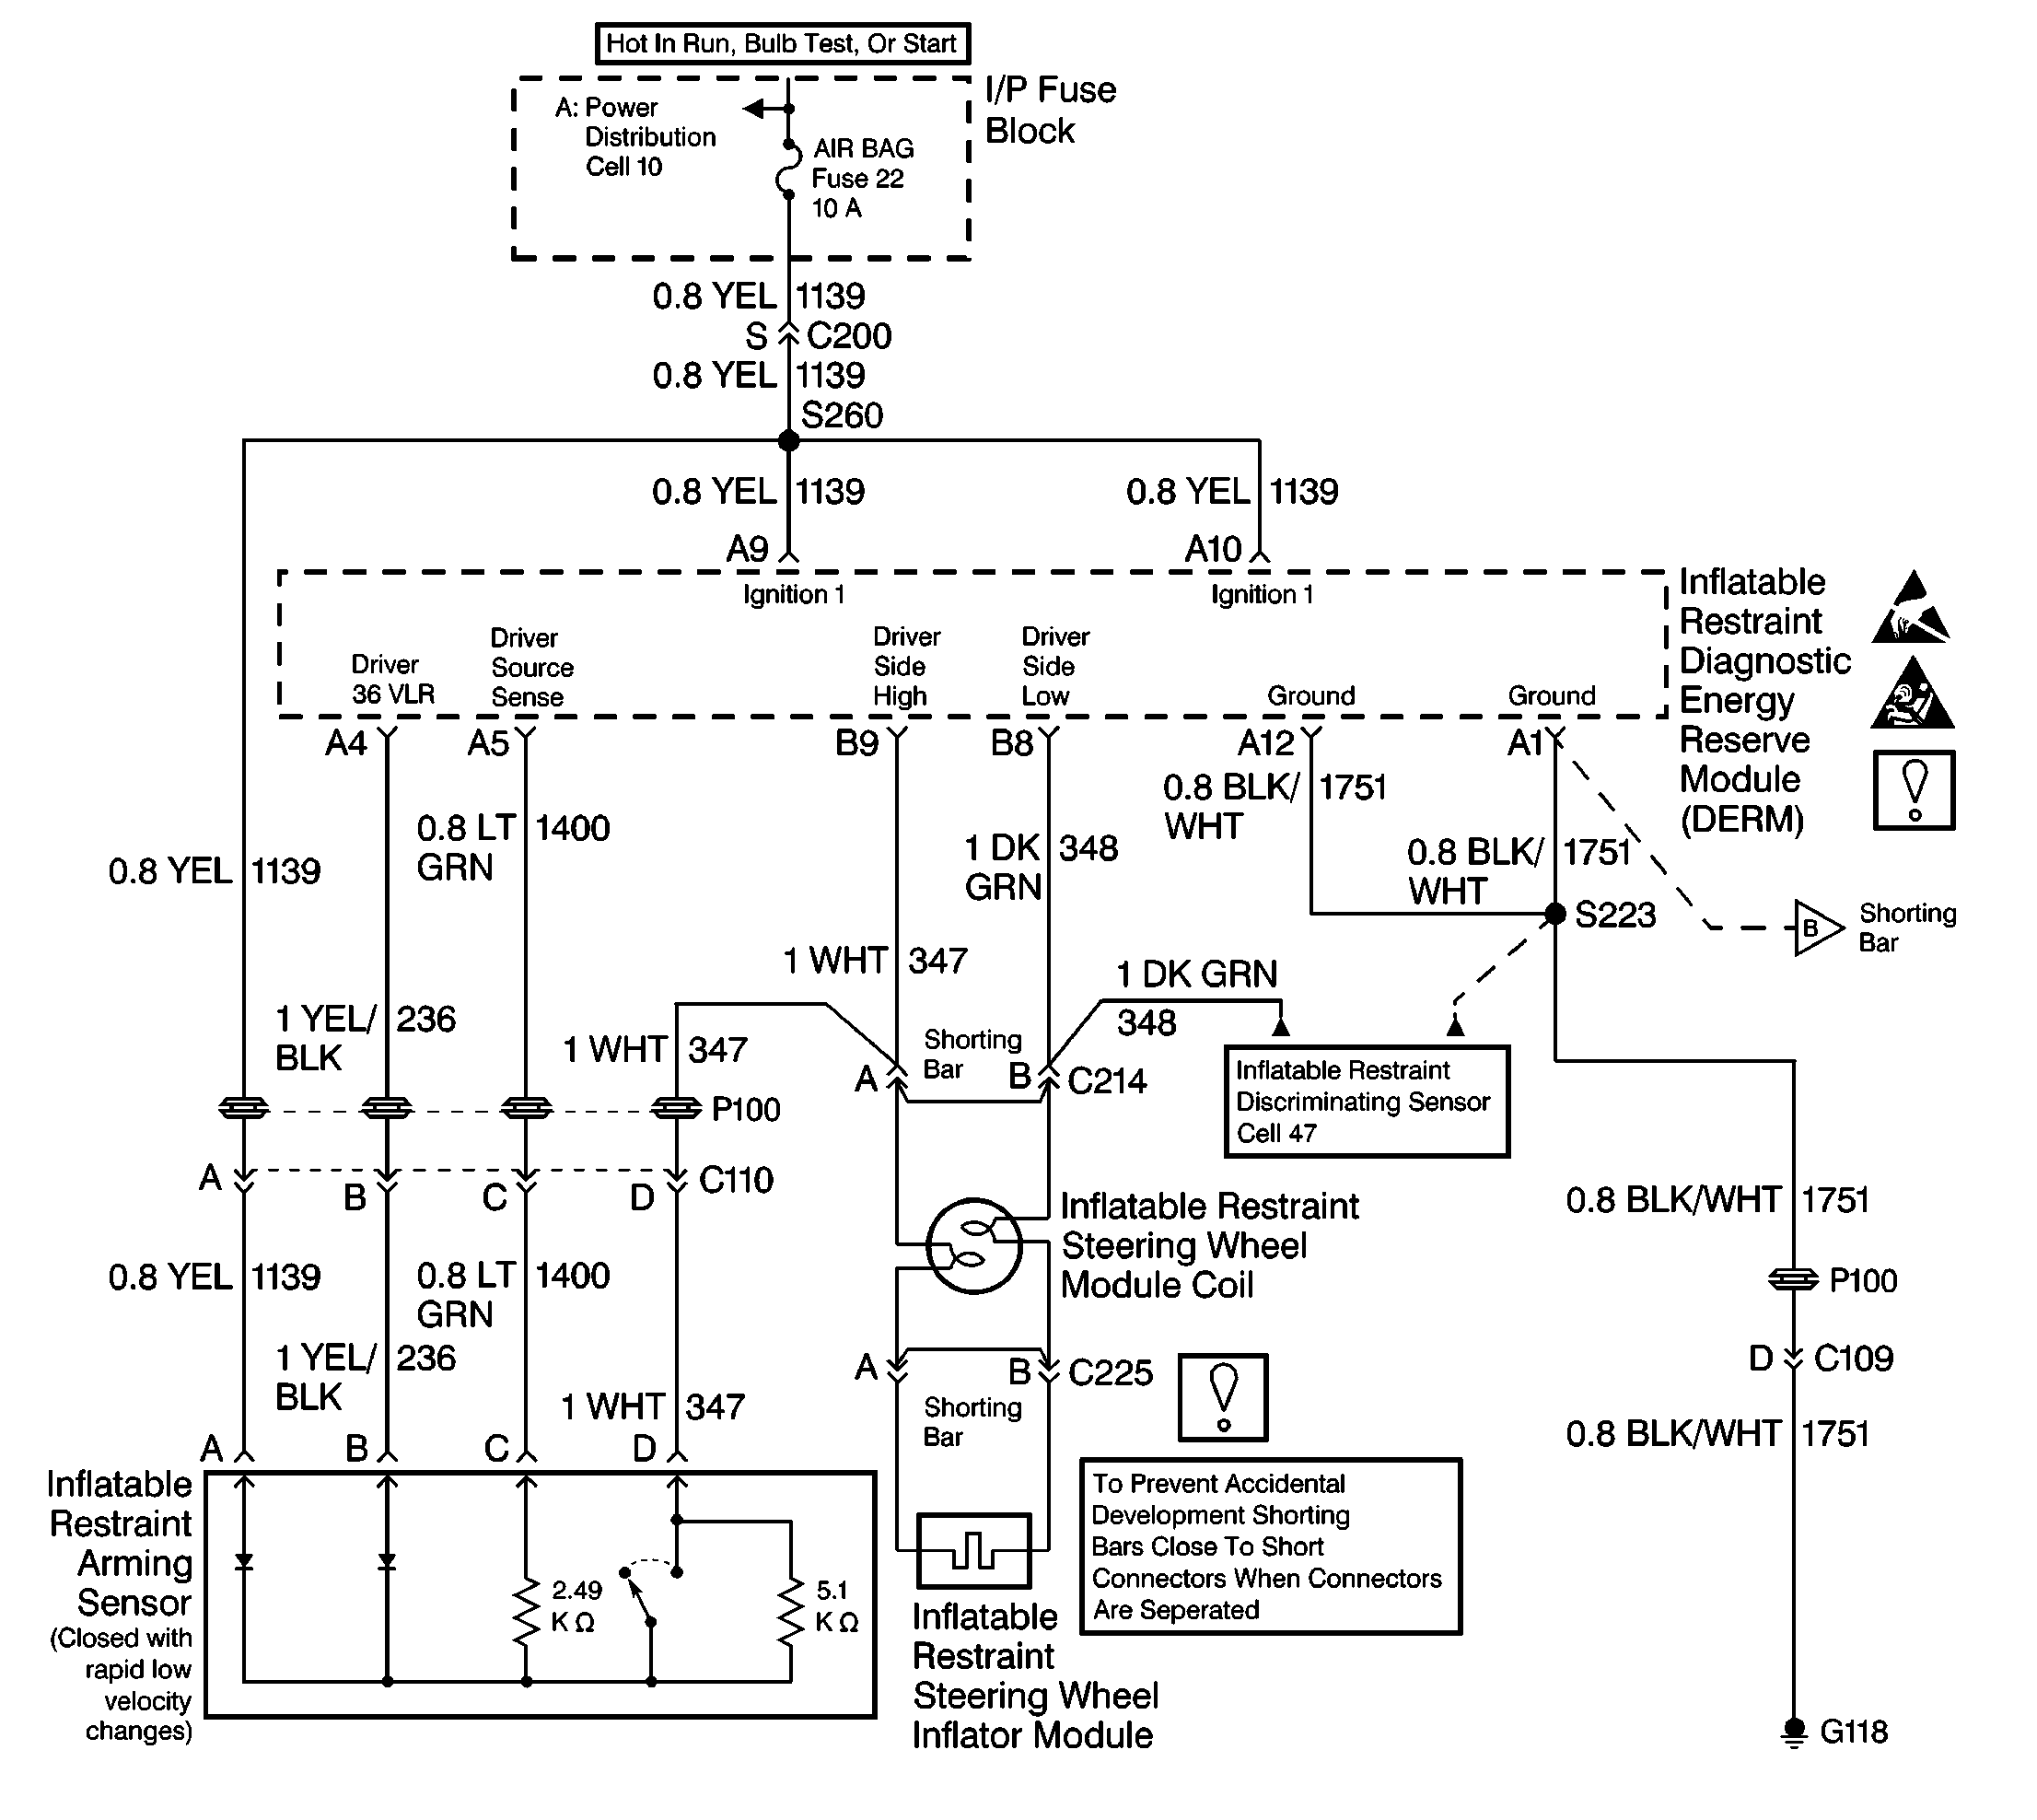
Circuit Description
During the Turn On tests performed at the beginning of each ignition cycle, the inflatable restraint Diagnostic Energy Reserve Module (DERM) delays charging of the Driver 36 VLR terminal A4 power supply. After the delay has expired the Driver 36 VLR power supply is allowed to charge. The DERM monitors the Driver 36 VLR power supply to ensure that it has charged to a voltage above a specified value within 10 seconds after ignition 1 voltage is first applied to the DERM. When the Driver 36 VLR power supply does not reach the specified voltage within the allowed time, or once reaching the specified voltage, falls below it for 500 milliseconds, DTC B1042 is set.
Conditions for Setting the DTC
The voltage measured at the Driver 36 VLR power supply does not exceed a specified value within 10 seconds after ignition 1 voltage is first applied to the DERM, or, once the Driver 36 VLR power supply reaches the specified value, the Driver 36 VLR power supply falls below the specified value for 500 milliseconds during continuous monitoring.
Action Taken When the DTC Sets
The DERM turns on the AIR BAG warning lamp and sets a diagnostic trouble code.
Conditions for Clearing the DTC
The voltage measured at the Driver 36 VLR terminal A4 is above a specified value for 500 milliseconds during continuous monitoring.
Diagnostic Aids
An intermittent condition may be caused by one of the following reasons:
| • | A short from the Driver 36 VLR to B+ |
| • | An open from the Driver 36 VLR to ground |
| • | A short inside the inflatable restraint arming sensor |
Test Description
Refer to the step numbers on the diagnostic table:
-
Start at the SIR Diagnostic System Check for all diagnosis.
-
This test determines if the diagnostic trouble code has set falsely.
-
This test checks whether a malfunctioning inflatable restraint arming sensor is preventing the Driver 36 VLR from charging. This test will cause DTC B1014 (Inflatable Restraint Arming Sensor Disconnected) to set.
-
This test determines if a short to B+ is preventing the Driver 36 VLR from charging.
-
This test locates a short to B+ which is preventing the Driver 36 VLR from charging.
-
This test determines if a short-to-ground is preventing the Driver 36 VLR from charging.
-
This test locates the short-to-ground that is preventing the Driver 36 VLR from charging.
When measurements are requested in this table, use J 39200 Digital Multimeter with correct terminal adapter fromJ 35616 Connector Test Adapter Kit. When a check for proper connection is requested, refer to Intermittents and Poor Connections in Section 8A4. When a wire, connector or terminal repair is requested, use J-38125 Terminal Repair Kit and refer to Wiring Repair.
Step | Action | Value | Yes | No |
|---|---|---|---|---|
Was the SIR Diagnostic System Check performed? | -- | |||
Is the specified voltage more than the value specified? | 32.5 V | |||
Is the displayed voltage about the same as the recorded voltage? | -- | |||
4 |
Has the sensor been replaced? | -- | -- | |
Using the Scan Tool SIR Data List Function select Ignition. Is the displayed voltage about the same as the recorded voltage? | -- | |||
Is the displayed voltage about the same as the recorded voltage? | -- | |||
7 |
Has the short circuit been repaired? | -- | -- | |
8 |
Has the short circuit been repaired? | -- | -- | |
Turn OFF the ignition switch. Is the recorded voltage on the repair order less than the value specified? | 1 V | |||
Does the scan tool display a value less than the value specified? | 1 V | |||
11 |
Has the short circuit been found and repaired? | -- | ||
12 | Replace the DERM. Has the DERM been replaced? | -- | -- | |
13 |
Has the short circuit been repaired? | -- | -- | |
14 |
Have all the SIR system components been reconnected and mounted? | -- | -- | |
15 | Clear the SIR Diagnostic Trouble Codes. Have the SIR Diagnostic Trouble Codes been cleared? | -- | -- |
