Refer to
DIESEL PCM, DLC, I/P
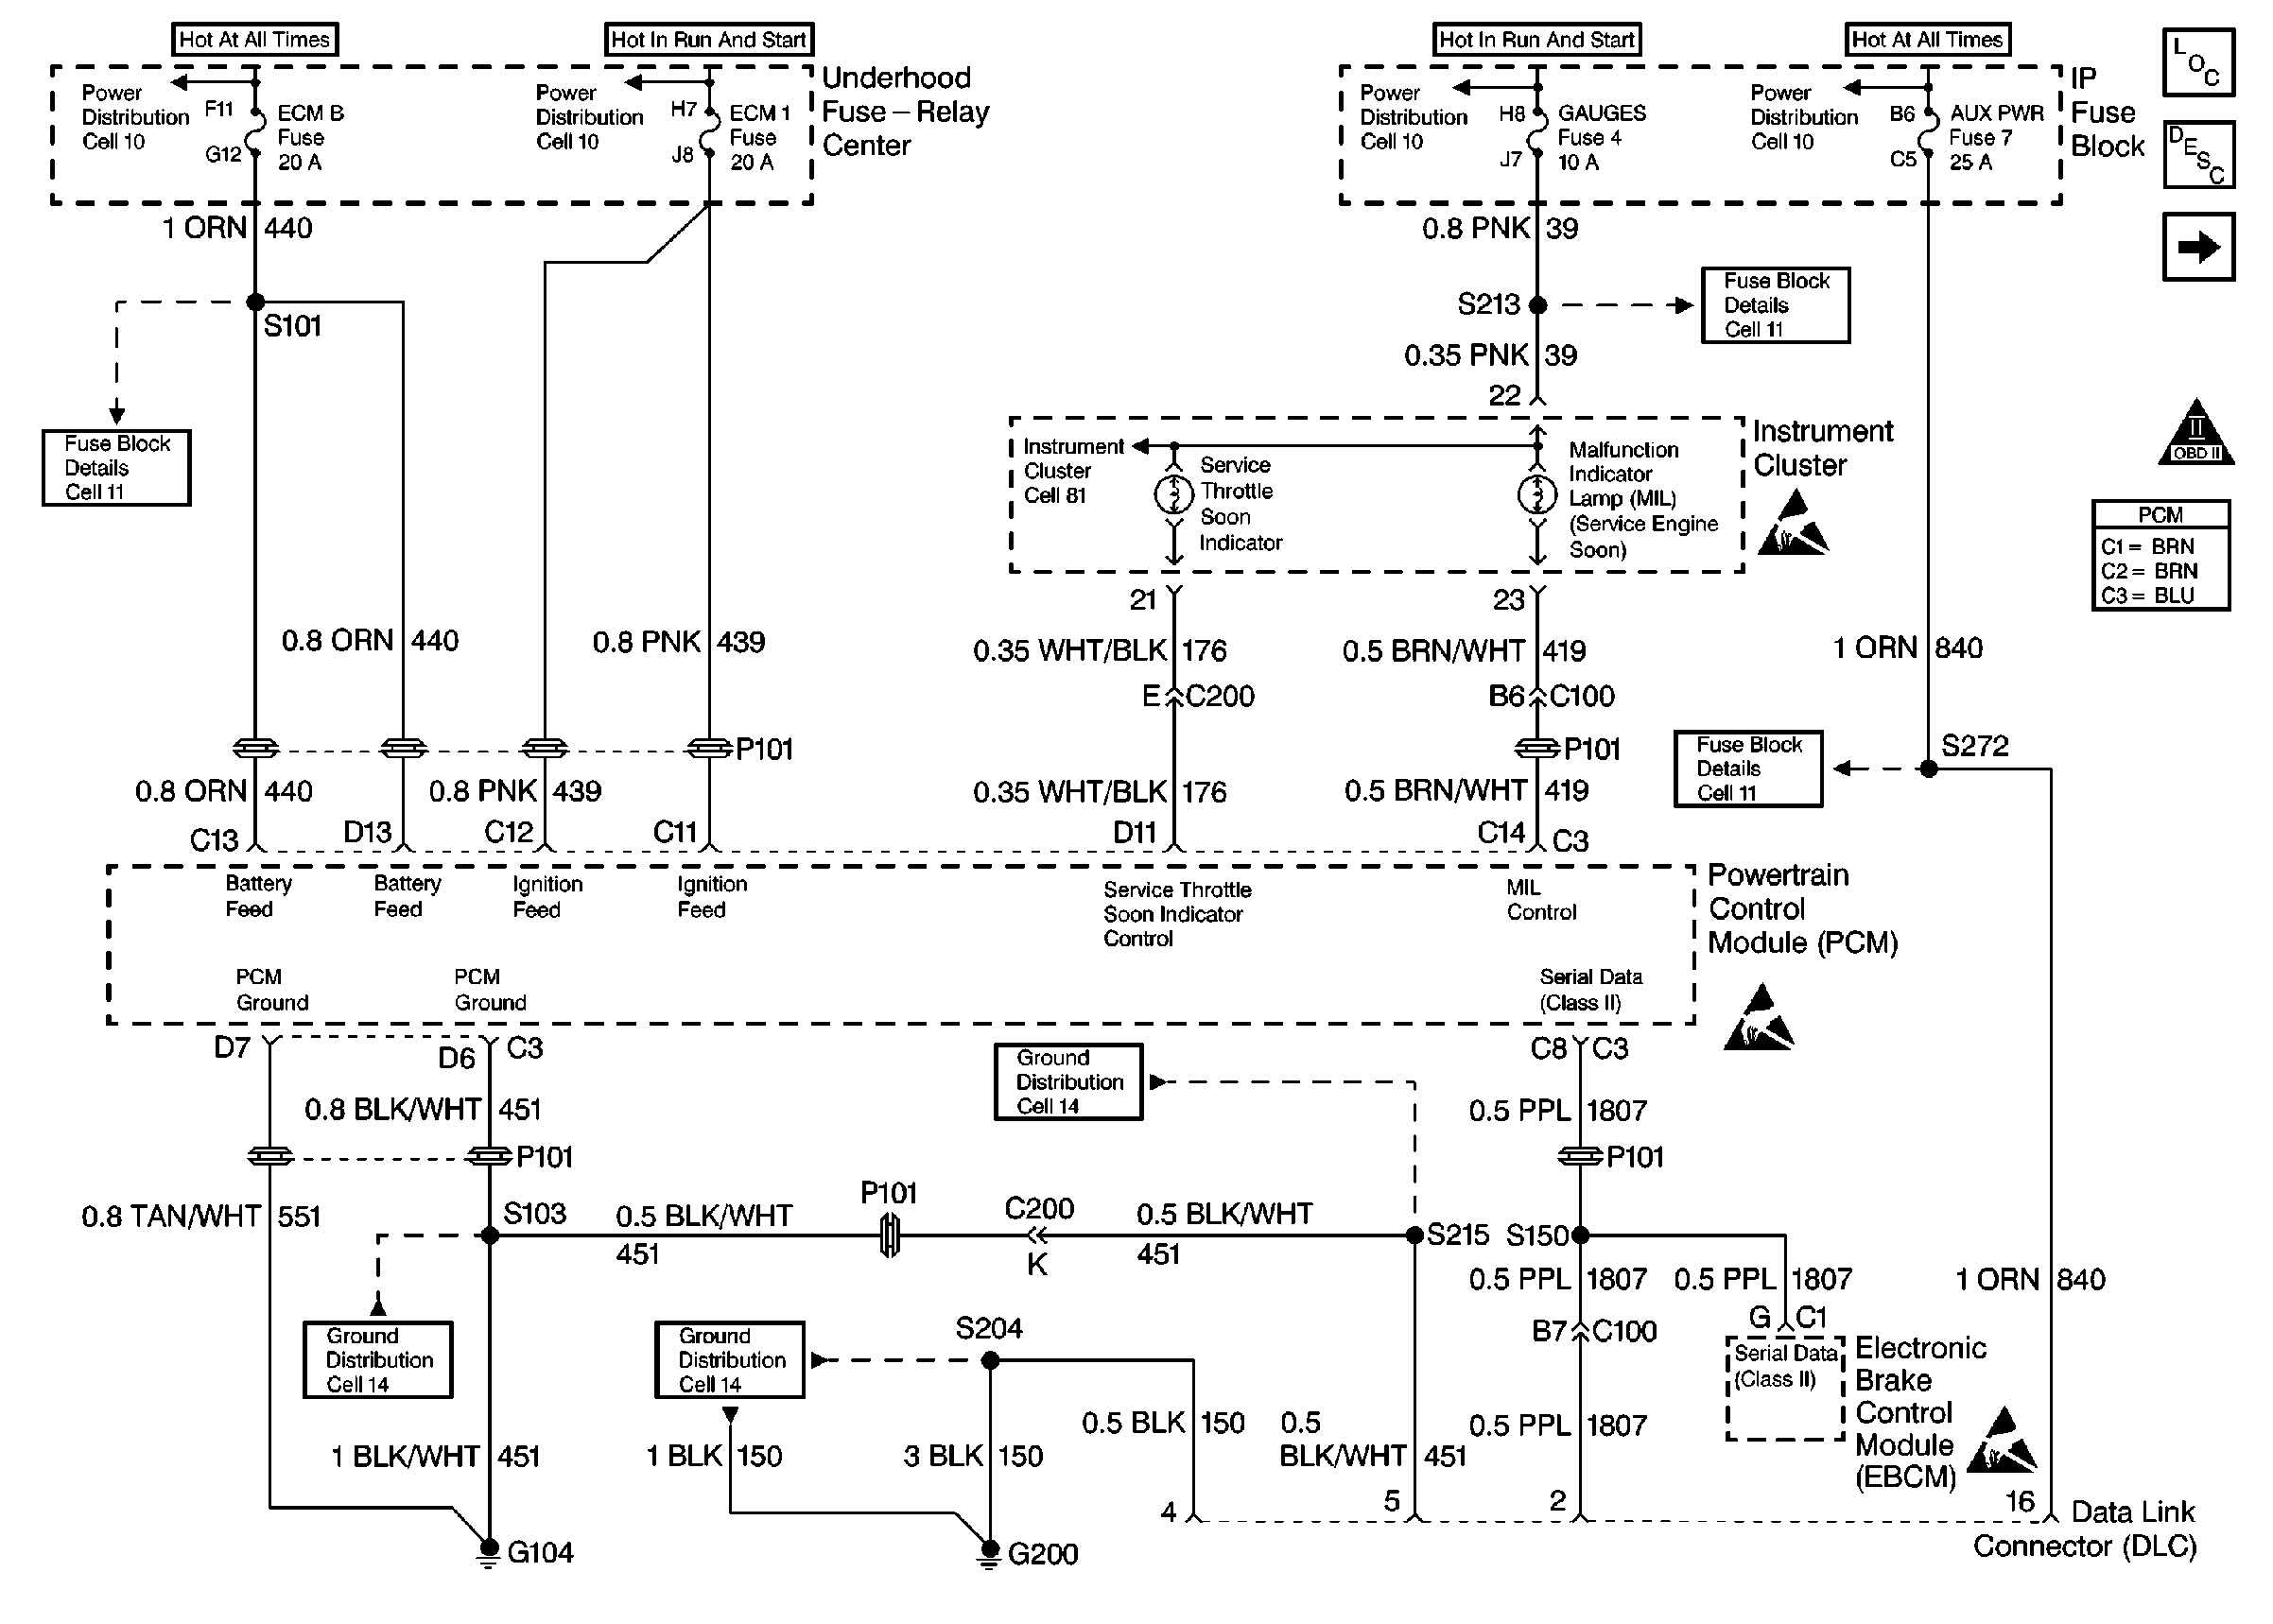
.
Circuit Description
The On Board Diagnostic (OBD) System Check is an organized approach in identifying a problem created by an electronic engine system fault. The OBD system check is the starting point for any driveability diagnosis. The OBD system check directs the service technician to the next step in diagnosing the complaint. Do not perform this check if no driveability complaint exists. Understanding the table correctly reduces the diagnostic time. Understanding the table correctly prevents the replacement of good parts.
Diagnostic Aids
Important: Do not clear the DTCs unless directed by a diagnostic procedure. Clearing the DTCs will also clear valuable freeze frame and failure records data.
Inspect all related wiring and connections including the connections at the PCM. These may cause an intermittent malfunction.
Check any circuitry that is suspected of causing an intermittent problem for the following conditions:
| • | Backed out terminals |
| • | Improper mating |
| • | Broken locks |
| • | Improperly formed or damaged terminals |
| • | Poor terminal to wiring connections |
| • | Physical damage to the wiring harness |
| • | Corrosion |
Test Description
The numbers below refer to the step number in the diagnostic table.
-
When the ignition is turned on, the MIL will momentarily flash ON and OFF and then remain on until the engine is running if no Diagnostic Trouble Codes (DTCs) are stored.
-
The diagnostic tables in this section are designed for use with a properly functioning scan tool. Before beginning any other diagnostic procedures, correct the serial data communications. The Class II Serial Data will not transmit if the system voltage measures below 9.0 volts or above 16.0 volts.
-
Whenever multiple DTCs are stored, refer to the DTC Tables in the following order:
-
By storing the Freeze Frame Data and the Failure records selection in the scan tool, an electronic copy of the freeze frame data and the failure records taken when the fault occurred is stored which can be referred to later.
-
Checking the sensors for proper operation during warm up can be a crucial step in correctly diagnosing any driveability concern. Careful observation of these sensors during the engine warm up may reveal a slow responding sensor or a sensor that malfunctions only within a small portion of its range.
After the engine is at the normal operating temperature, a comparison of the actual control system data with the typical values is a quick way to determine if any parameter is not within limits. Keep in mind that a base engine problem (i.e. advanced cam timing) may substantially alter sensor values.
Check the following sensors for proper operation:
| 1. | PCM Error DTCs |
| 2. | System voltage DTCs |
| 3. | Component level DTCs (DTCs that indicate a malfunctioning part) |
| 4. | System level DTCs (DTCs that indicate a system fault) |
| • | The Engine Coolant Temperature (ECT) sensor for initial coolant temperature reading at ambient. Then observe the rise in the temperature while the engine is warming up. |
Step | Action | Value(s) | Yes | No |
|---|---|---|---|---|
Is the MIL ON? | -- | |||
Does the scan tool display PCM data? | -- | Go to No Scan Tool Data | ||
Check for DTCs using the scan tool. Were any last test failed, history, or MIL request DTCs set? | -- | |||
Using the scan tool, store the Freeze Frame Data and the Failure Records Data. Is the action complete? | -- | Go to the Applicable DTC Table | -- | |
5 | Does the engine start and continue to run? | -- | ||
Are the displayed values normal or within typical ranges? | -- | Go to the Driveability Symptoms Tables | Go to the Applicable DTC Table |
