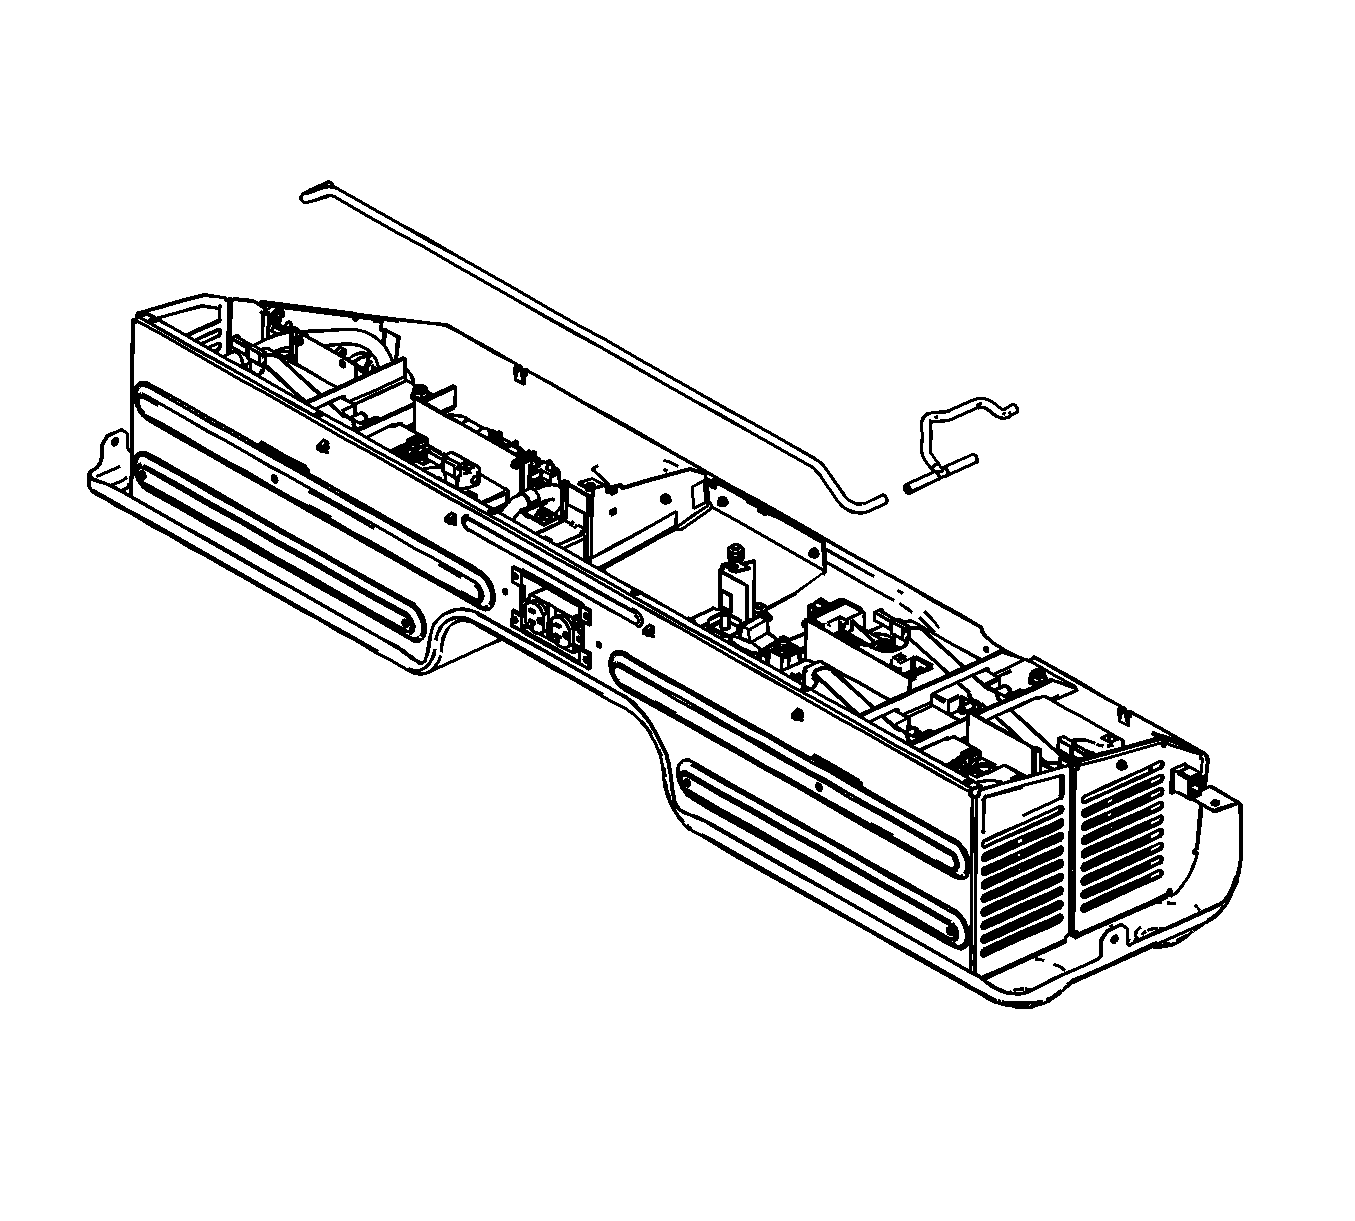
Generator Battery Carrier Disassemble/Assemble 5.3L w/RPO HP2
Tools Required
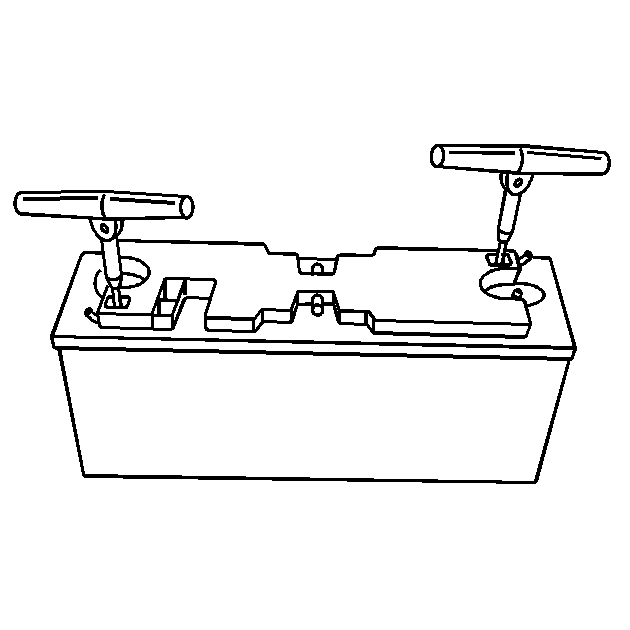
J 43679 Battery Removal Handles
Caution: To help avoid personal injury, disable the 36V system anytime you perform service work on or around the generator battery carrier. The 36V system will still be active after you have disabled the generator battery carrier.
Caution: To help avoid personal injury, always disconnect the 36V generator battery carrier before doing any work to the generator battery carrier system. To disconnect the generator battery carrier, turn the engine off and turn OFF the service disconnect switch, which is located on the passenger side of the generator battery carrier.
Disassembly Procedure
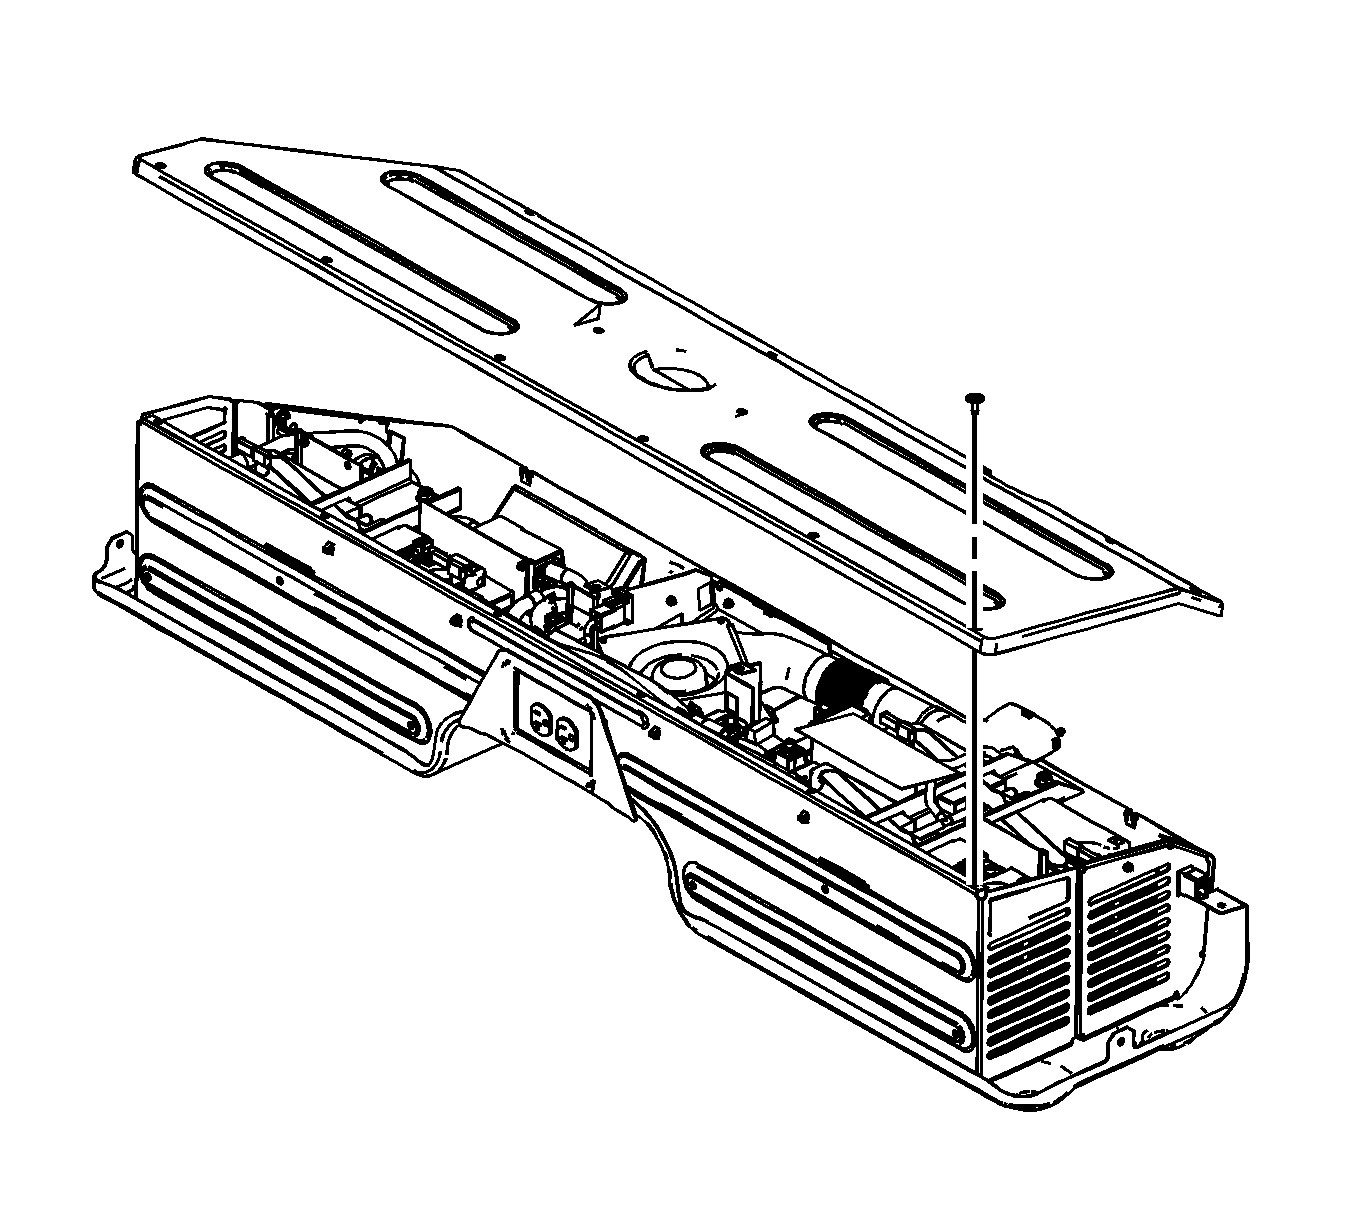
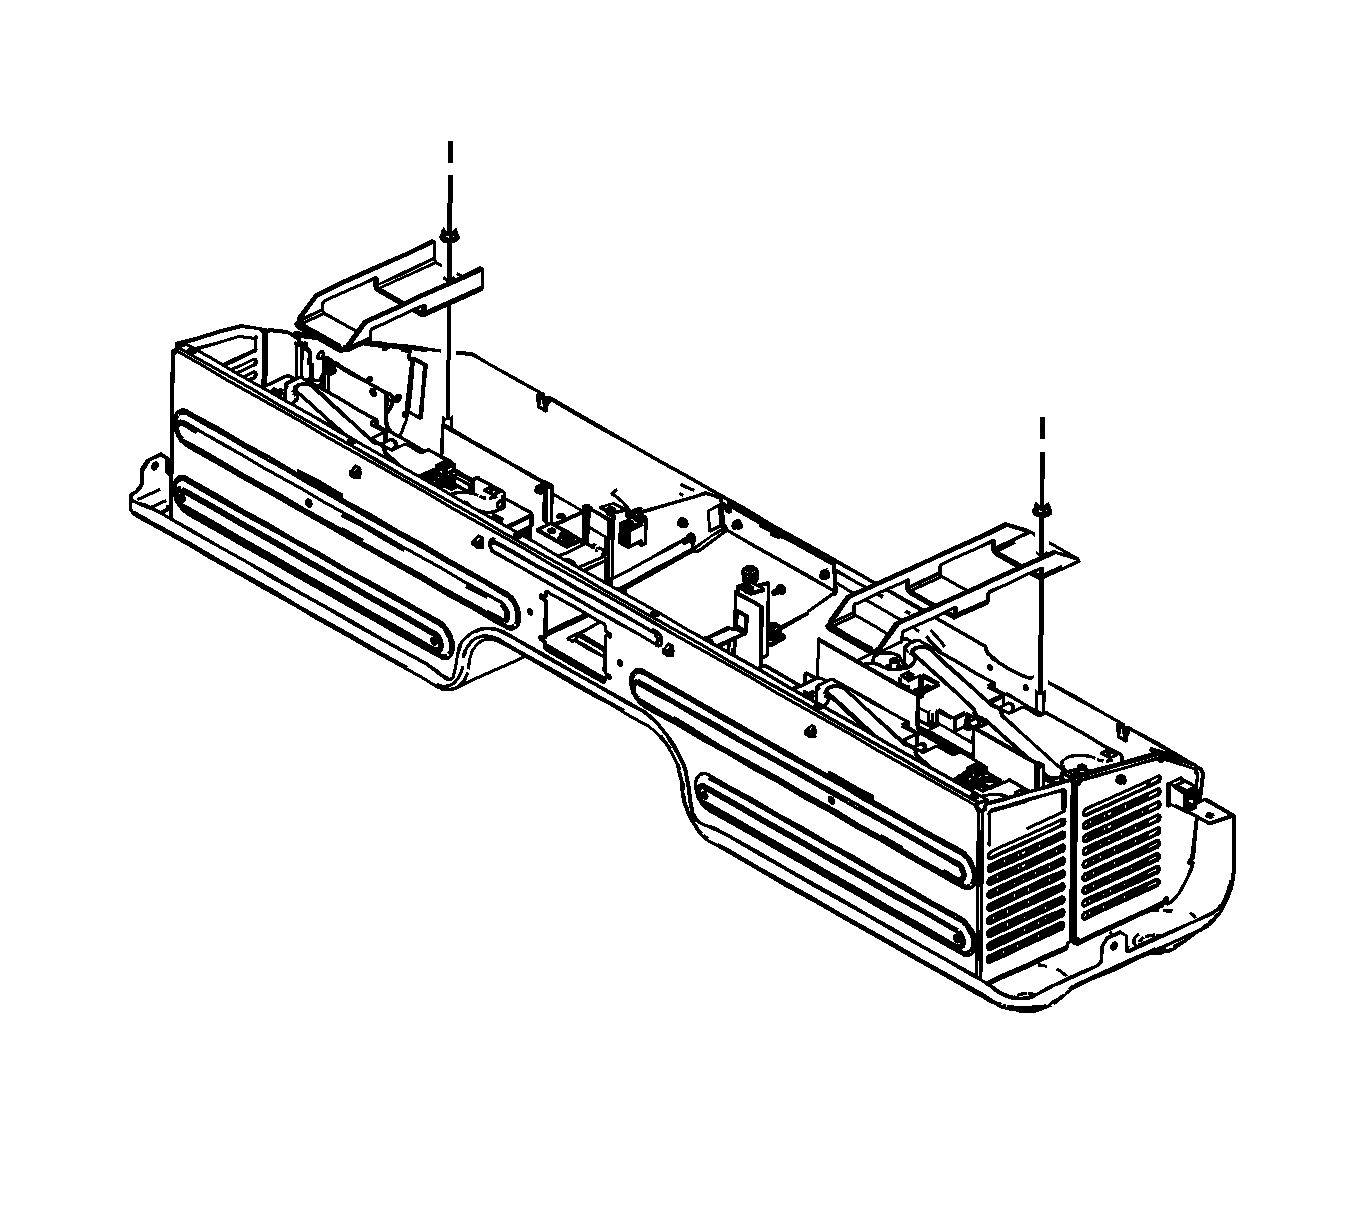
- Remove the generator battery carrier. Refer to Generator Battery Carrier Replacement .
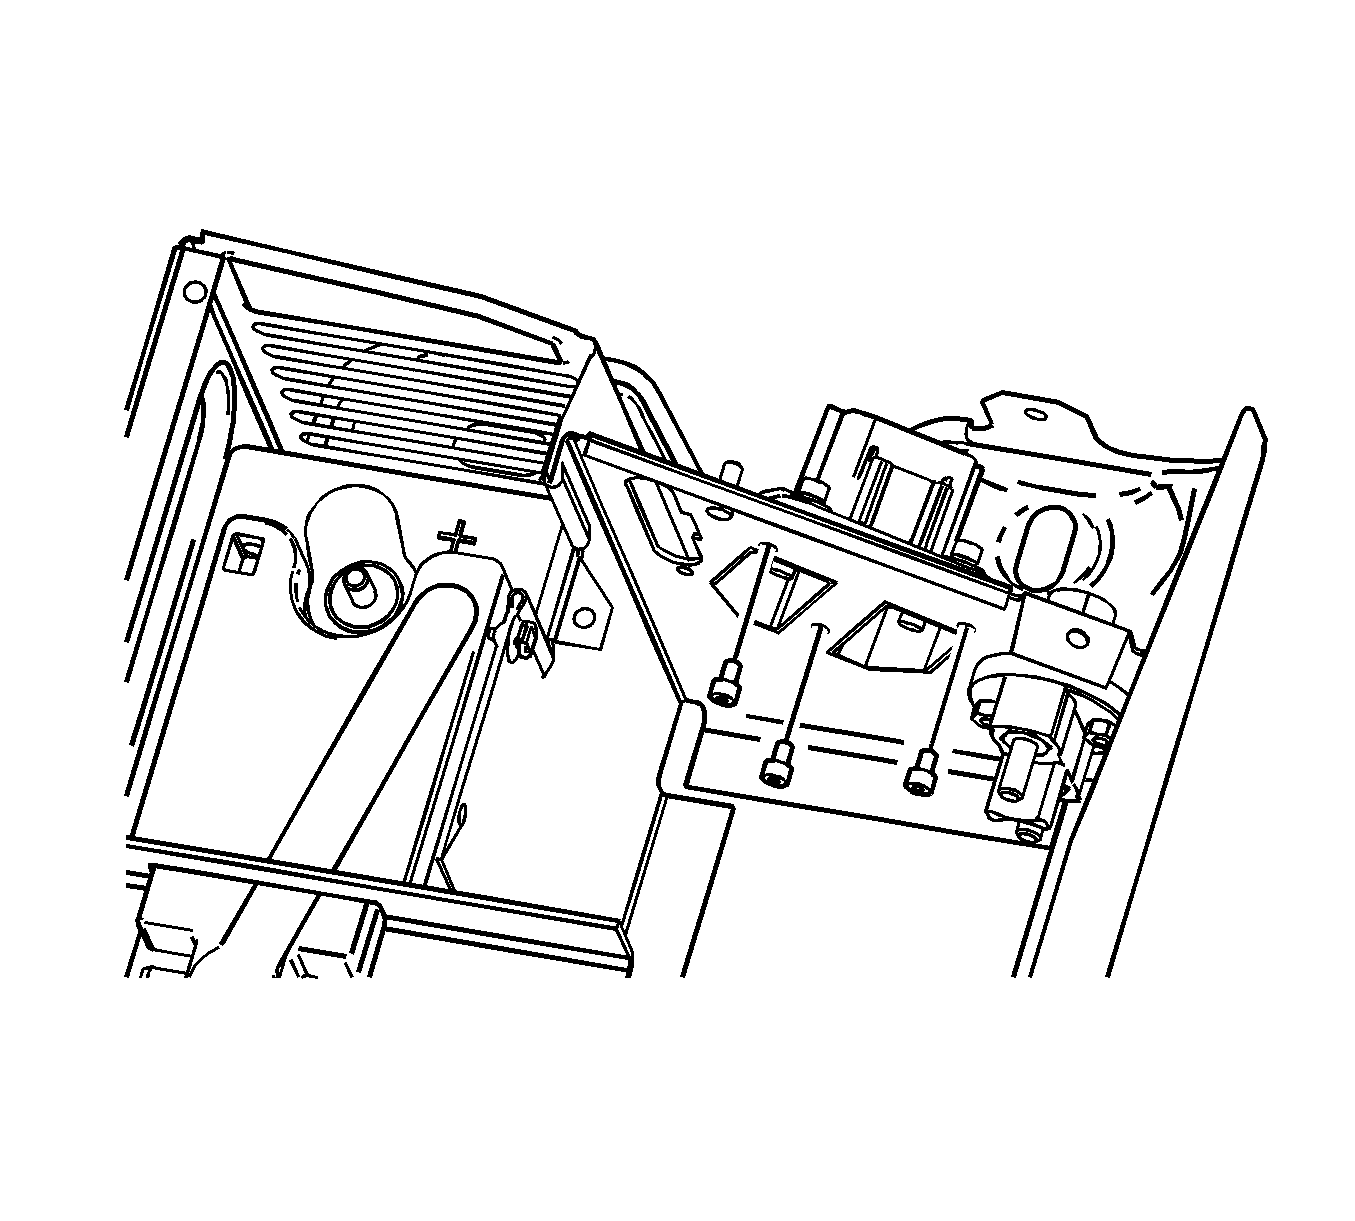
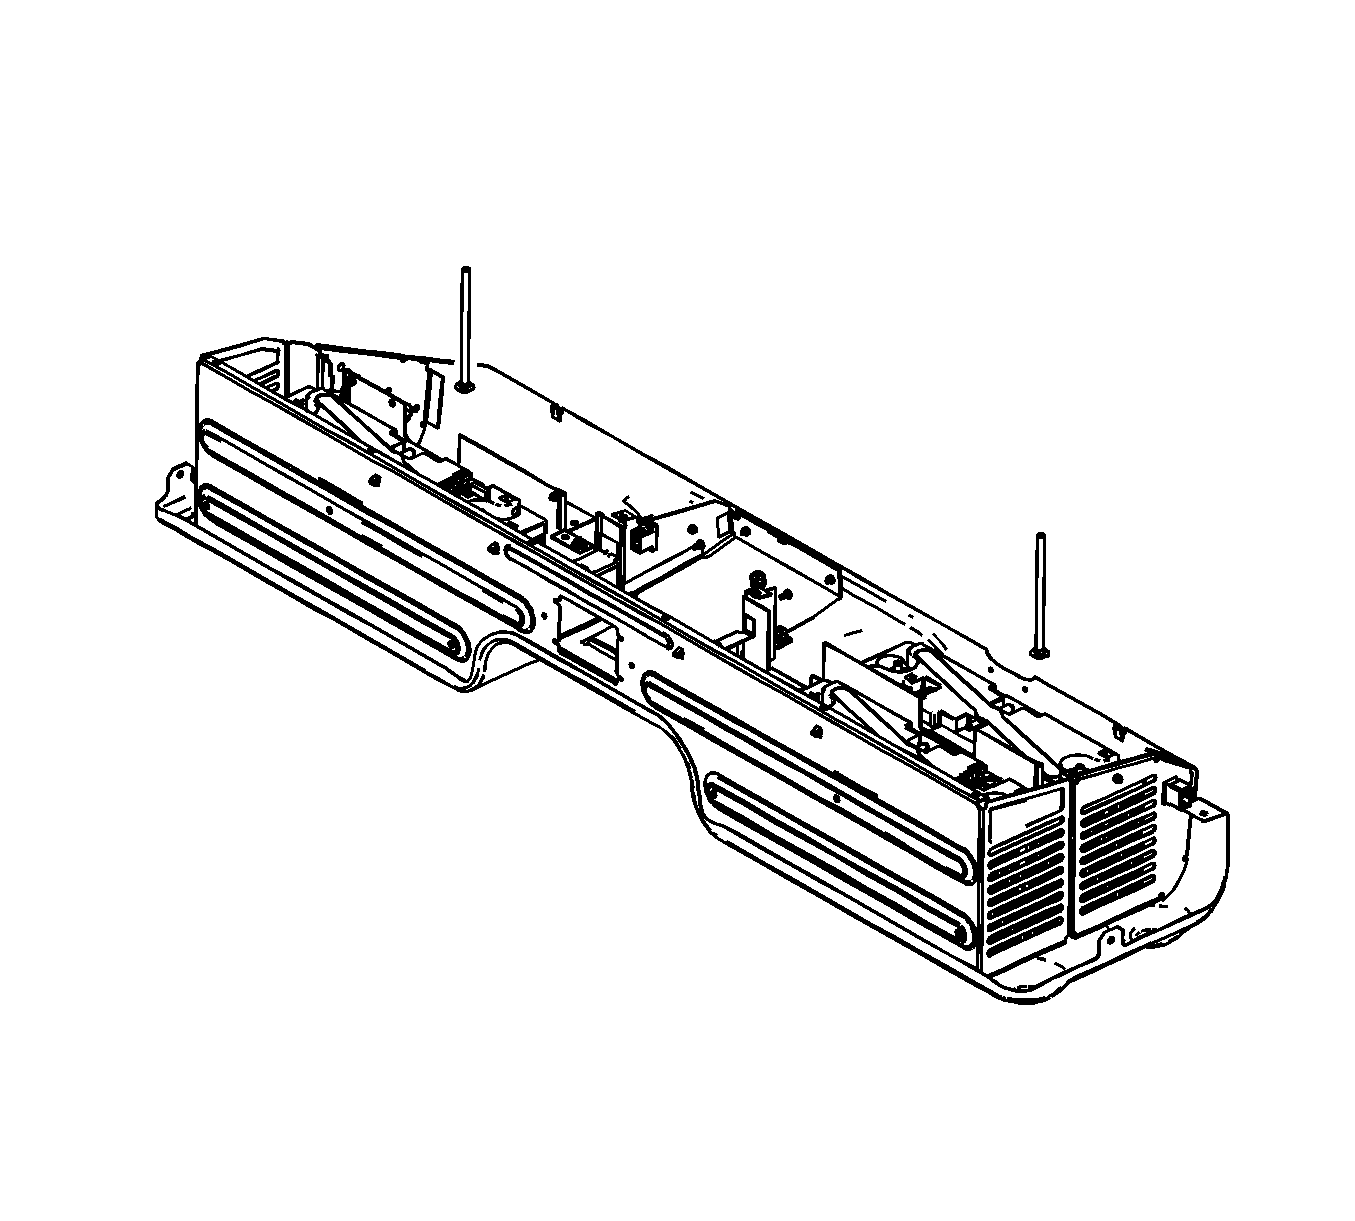
- Remove the generator battery carrier intermediate cover screws.
- Remove the generator battery carrier intermediate cover.
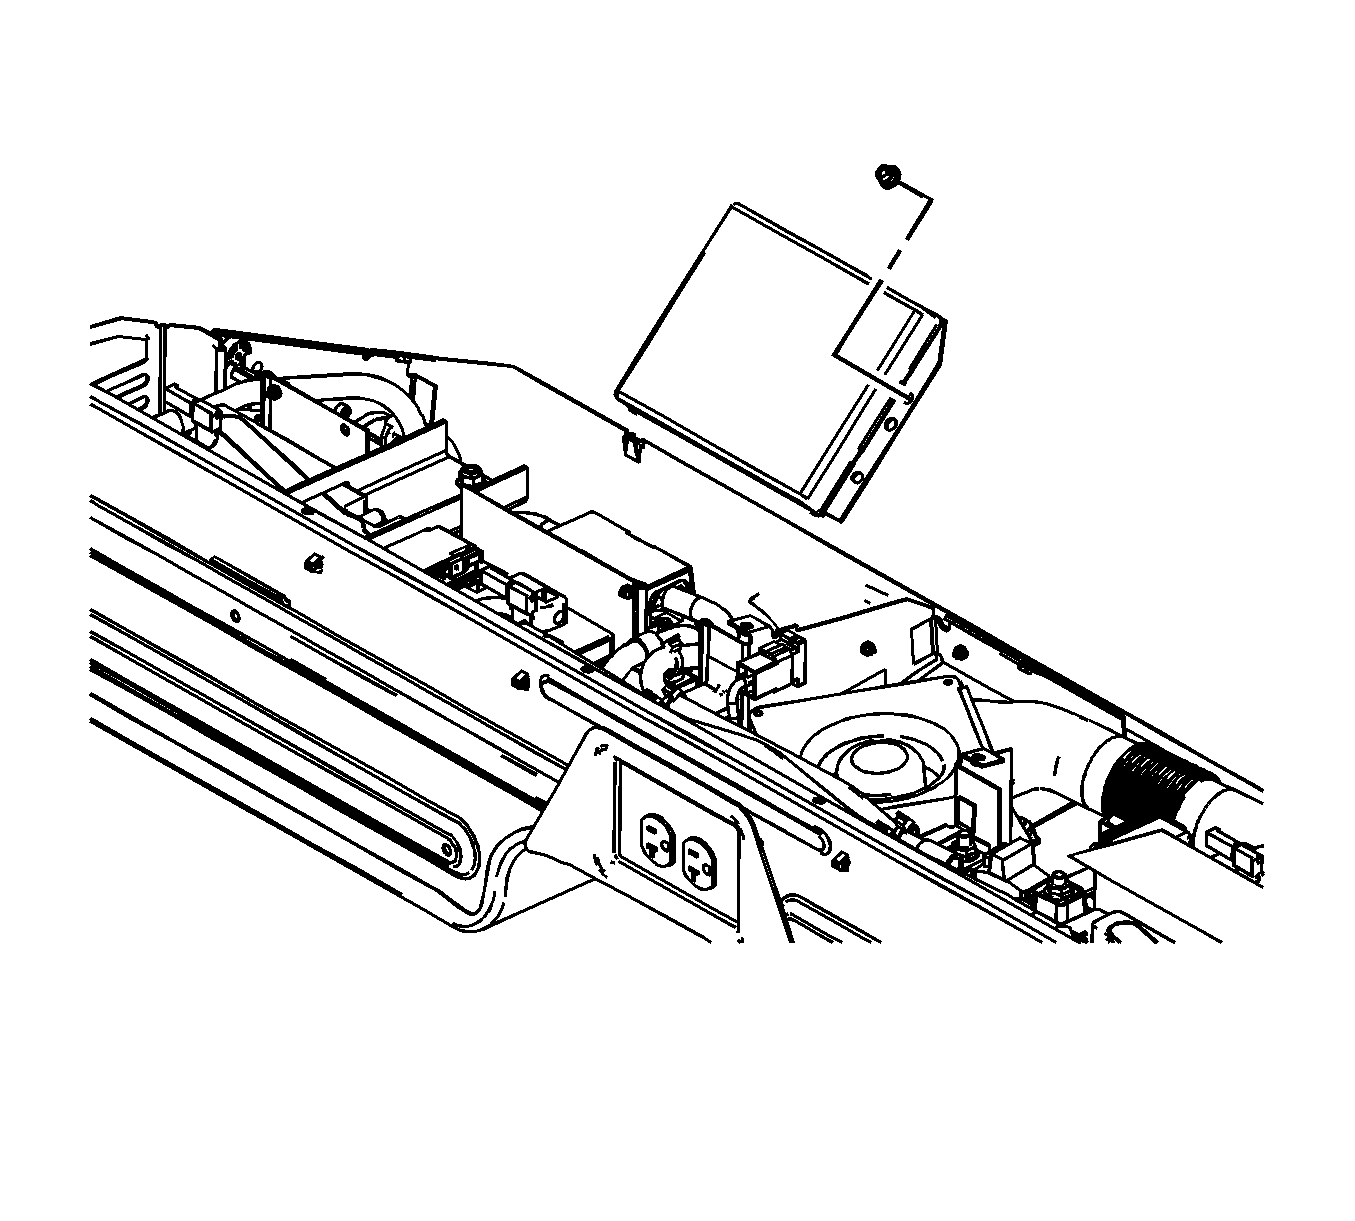
- Remove the control module nuts.
- Lift the control module up off of the studs.
- Disconnect the control module electrical connectors.
- Remove the control module.
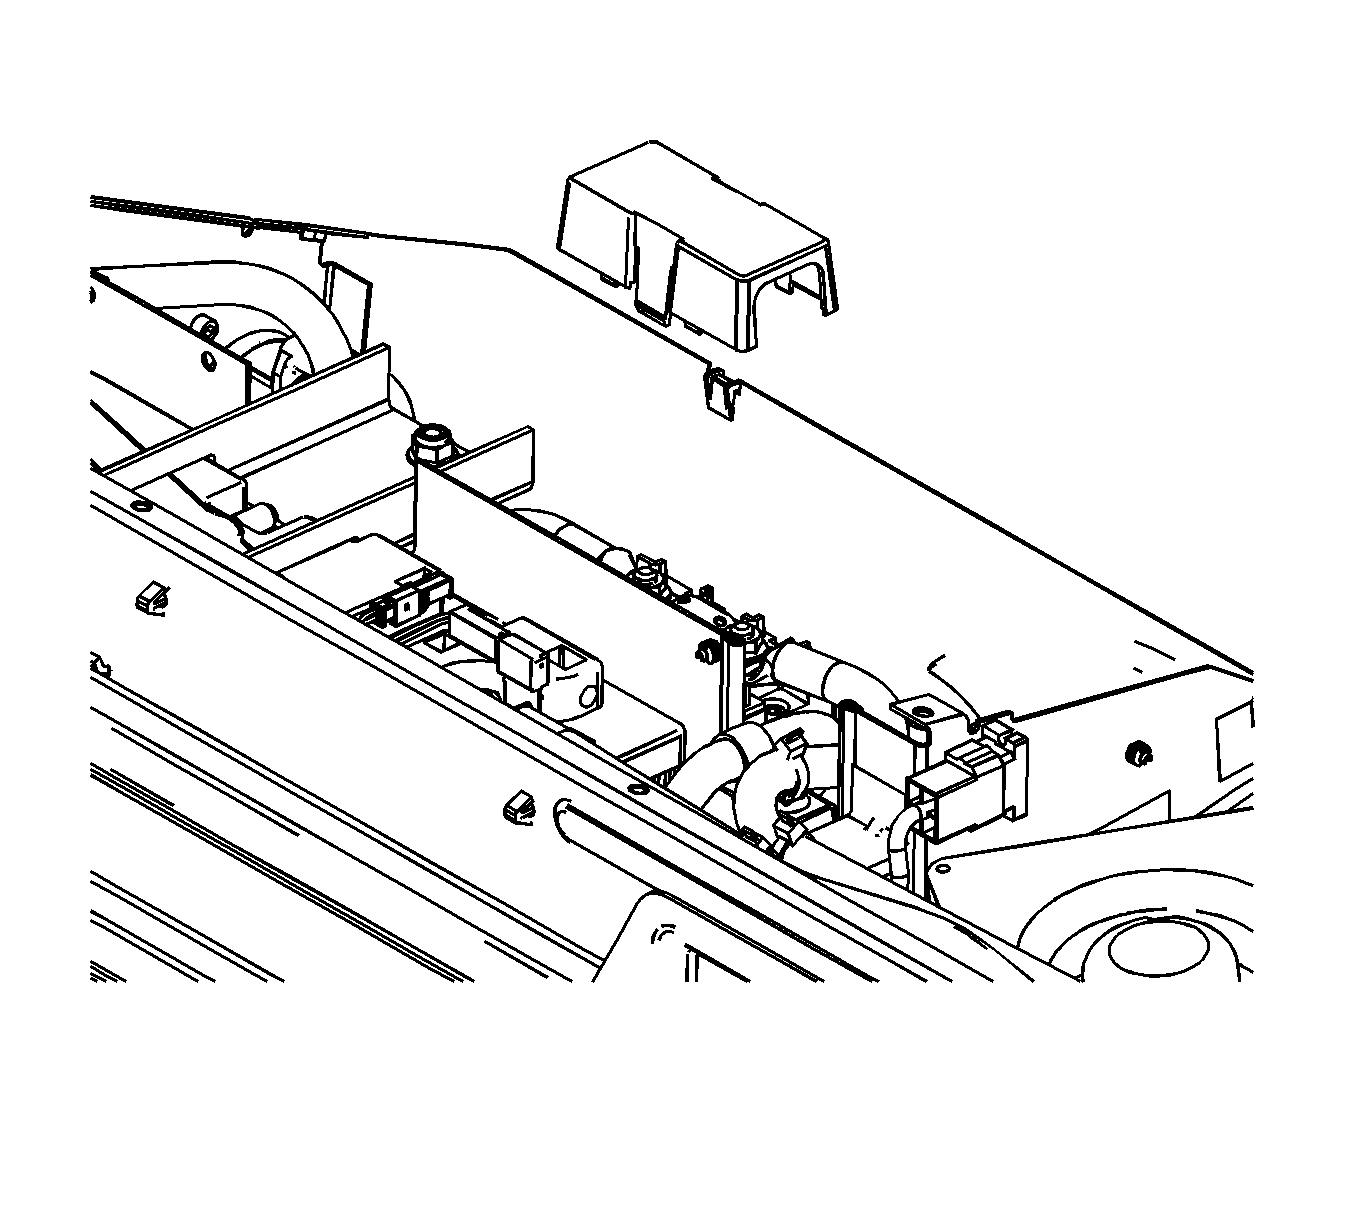
- Remove the maxi-fuse cover.
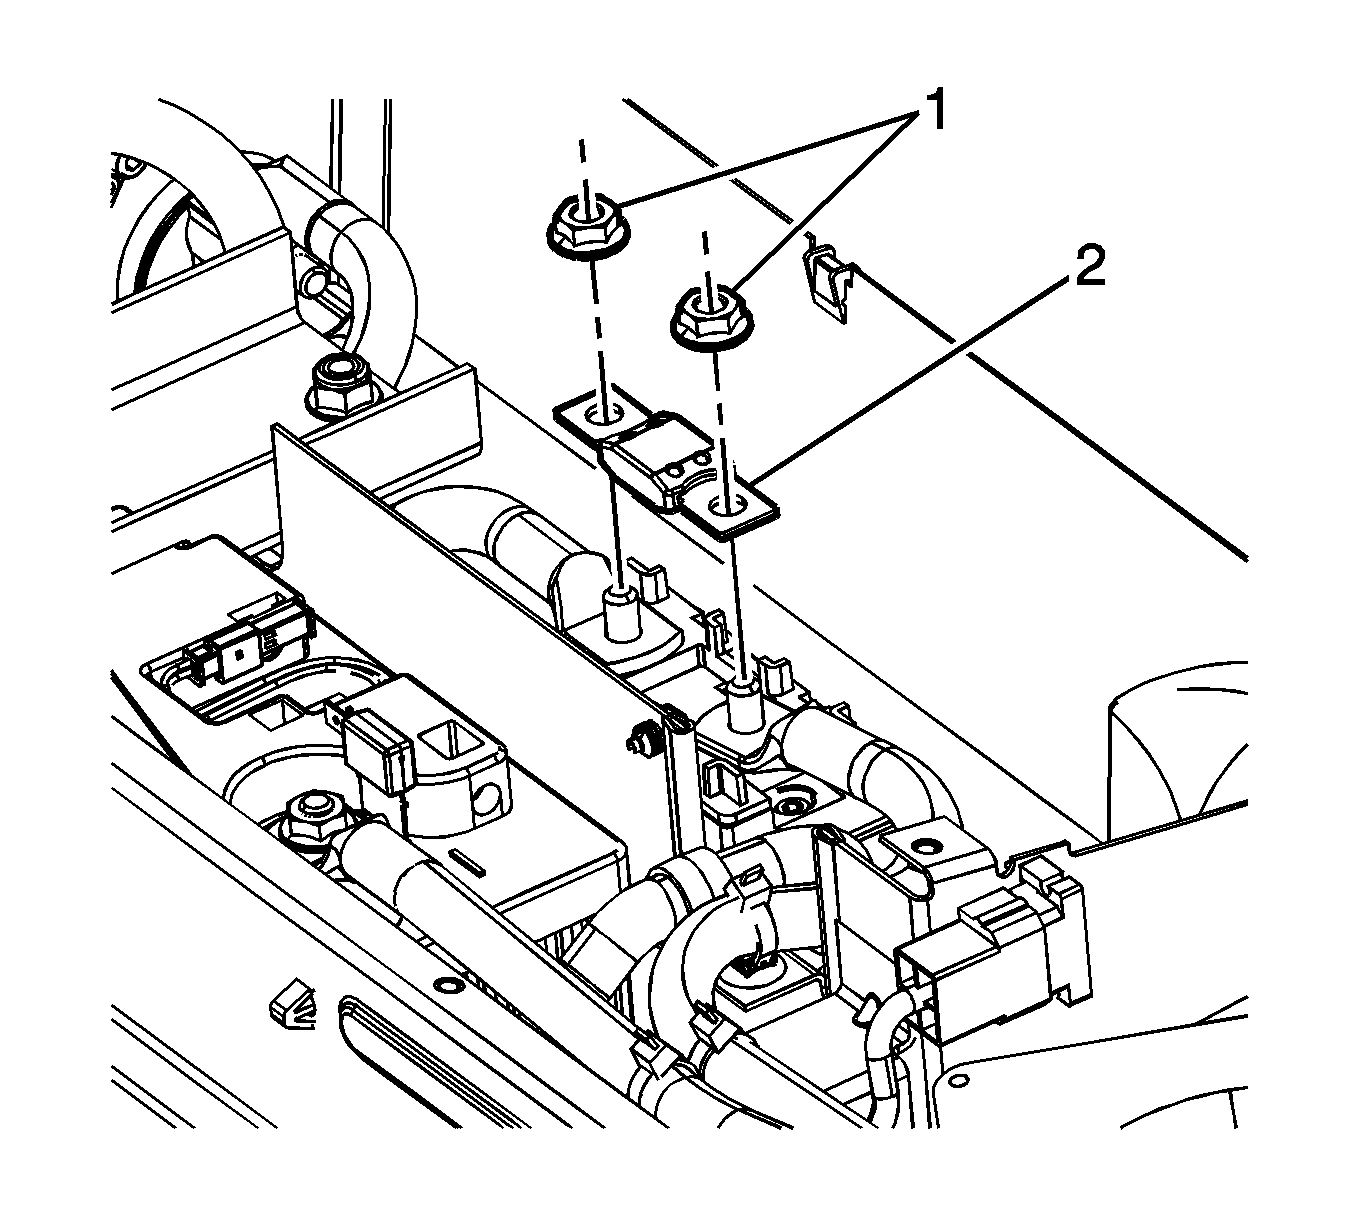
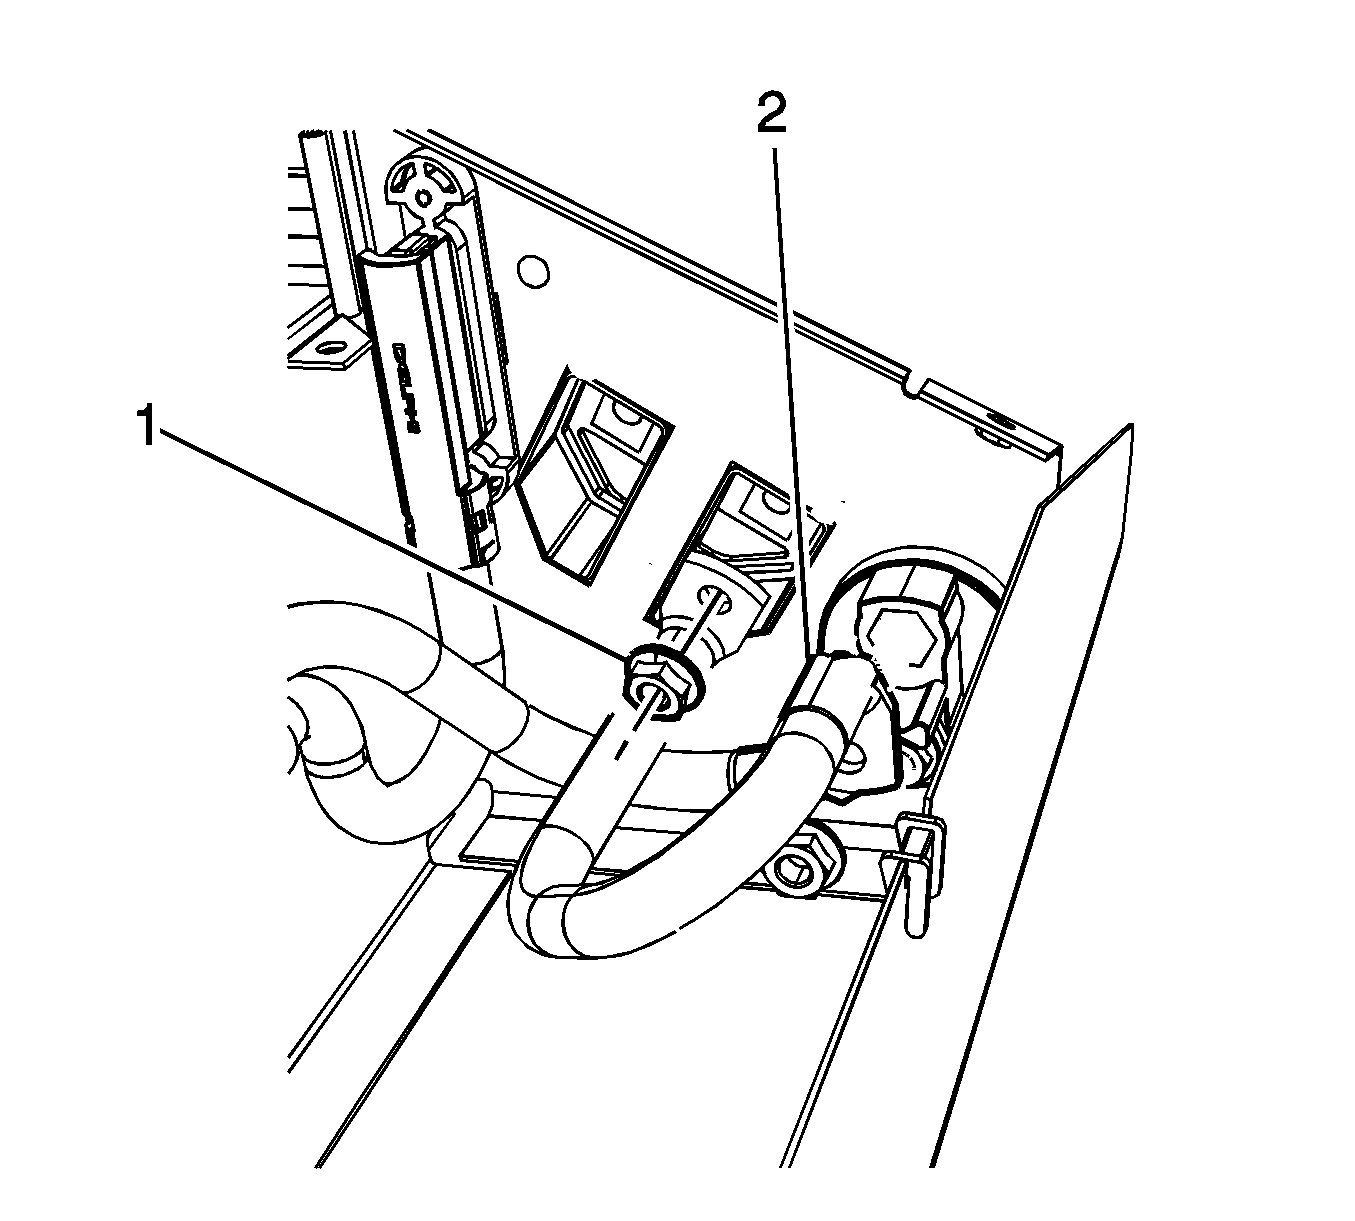
- Remove the maxi-fuse nuts (1).
- Remove the maxi-fuse (2).
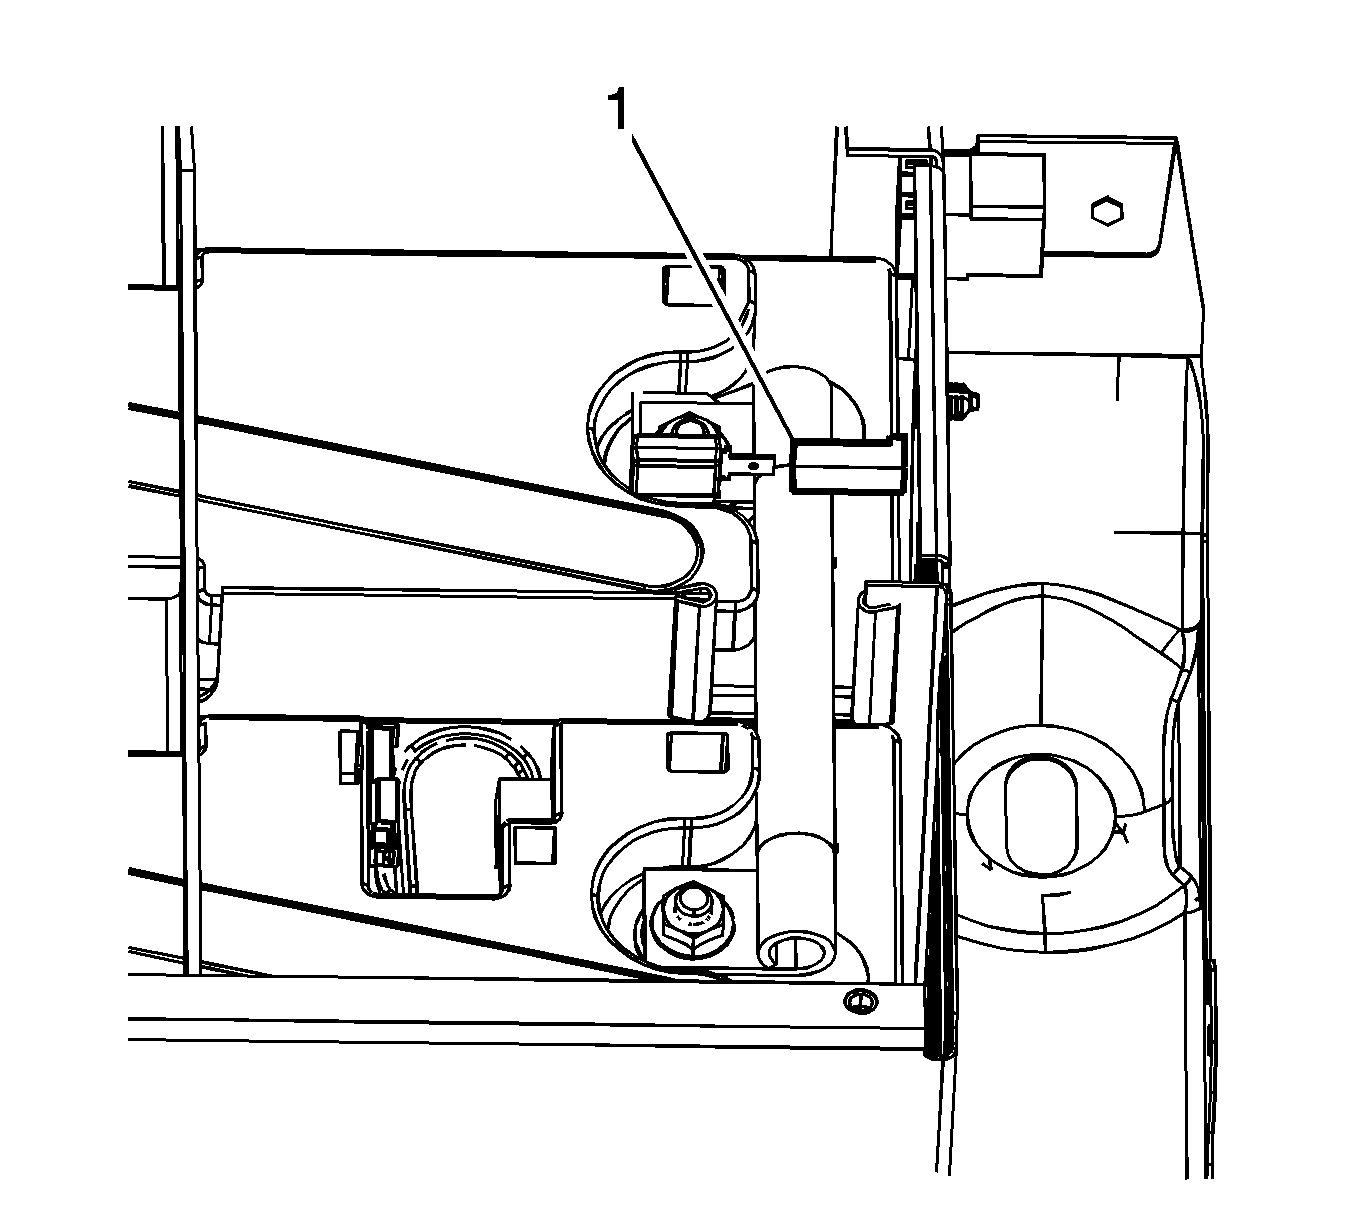
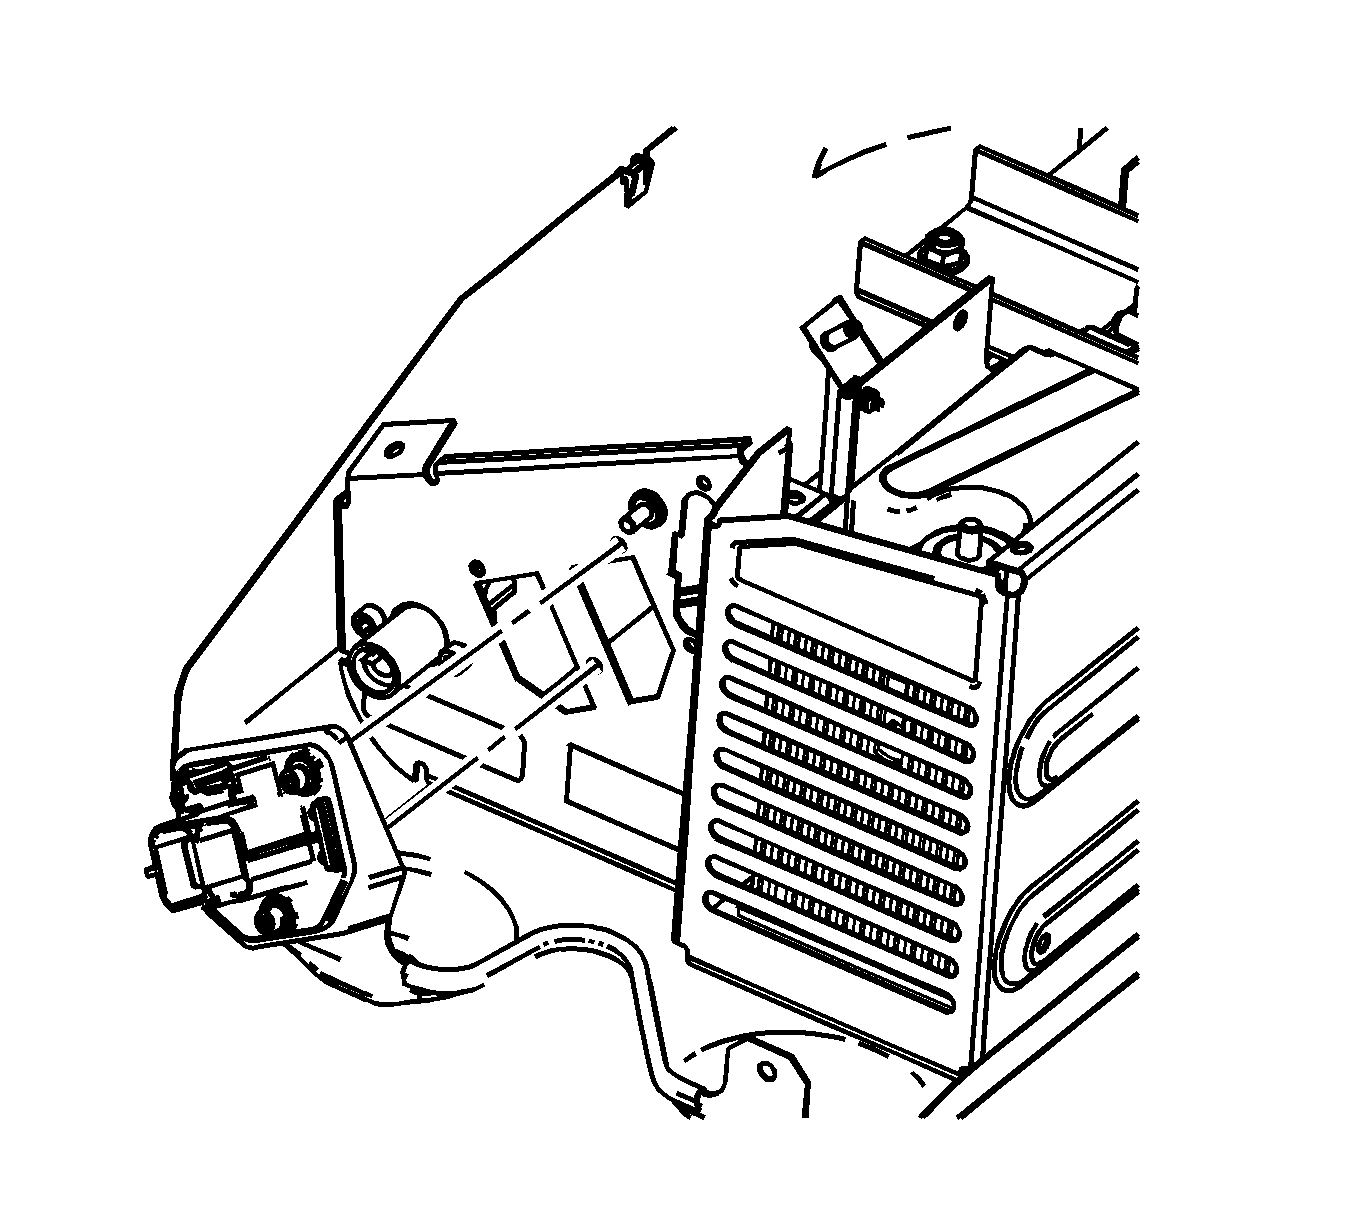
- Disconnect the battery resistor electrical connector (1), labeled XR3 from the number 3 battery negative terminal resistor.
- Remove the power cable nut (2) from the current sensor.
- Remove the battery 2 to battery 3 power cable nuts (1).
- Remove the battery resistor (4) from the number 3 battery negative terminal.
- Cut the tie straps securing the power cables to the generator battery carrier.
- Remove the power cables (3).
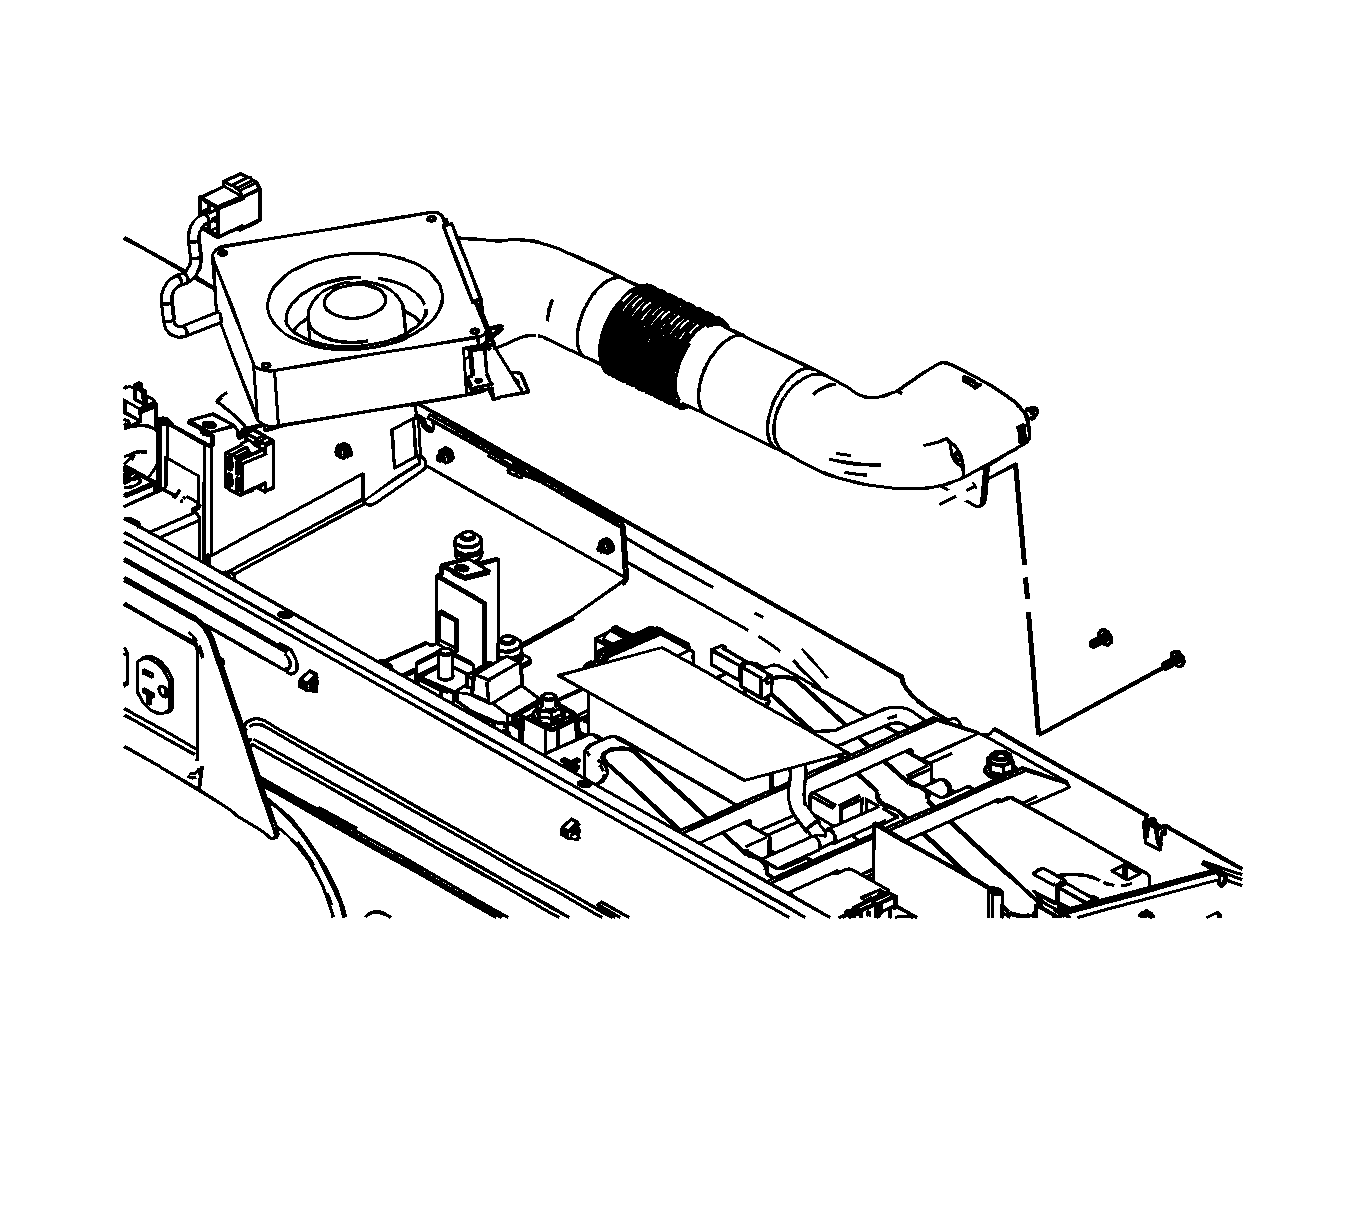
- Disconnect the outlet duct from the generator battery carrier duct.
- Disconnect the battery vent tube that is inside the outlet duct.
- Disconnect the fan electrical connector.
- Remove the fan screws.
- Remove the push pin fasteners.
- Remove the screws attaching the air duct hose to the generator battery carrier.
- Remove the fan and air duct hose.
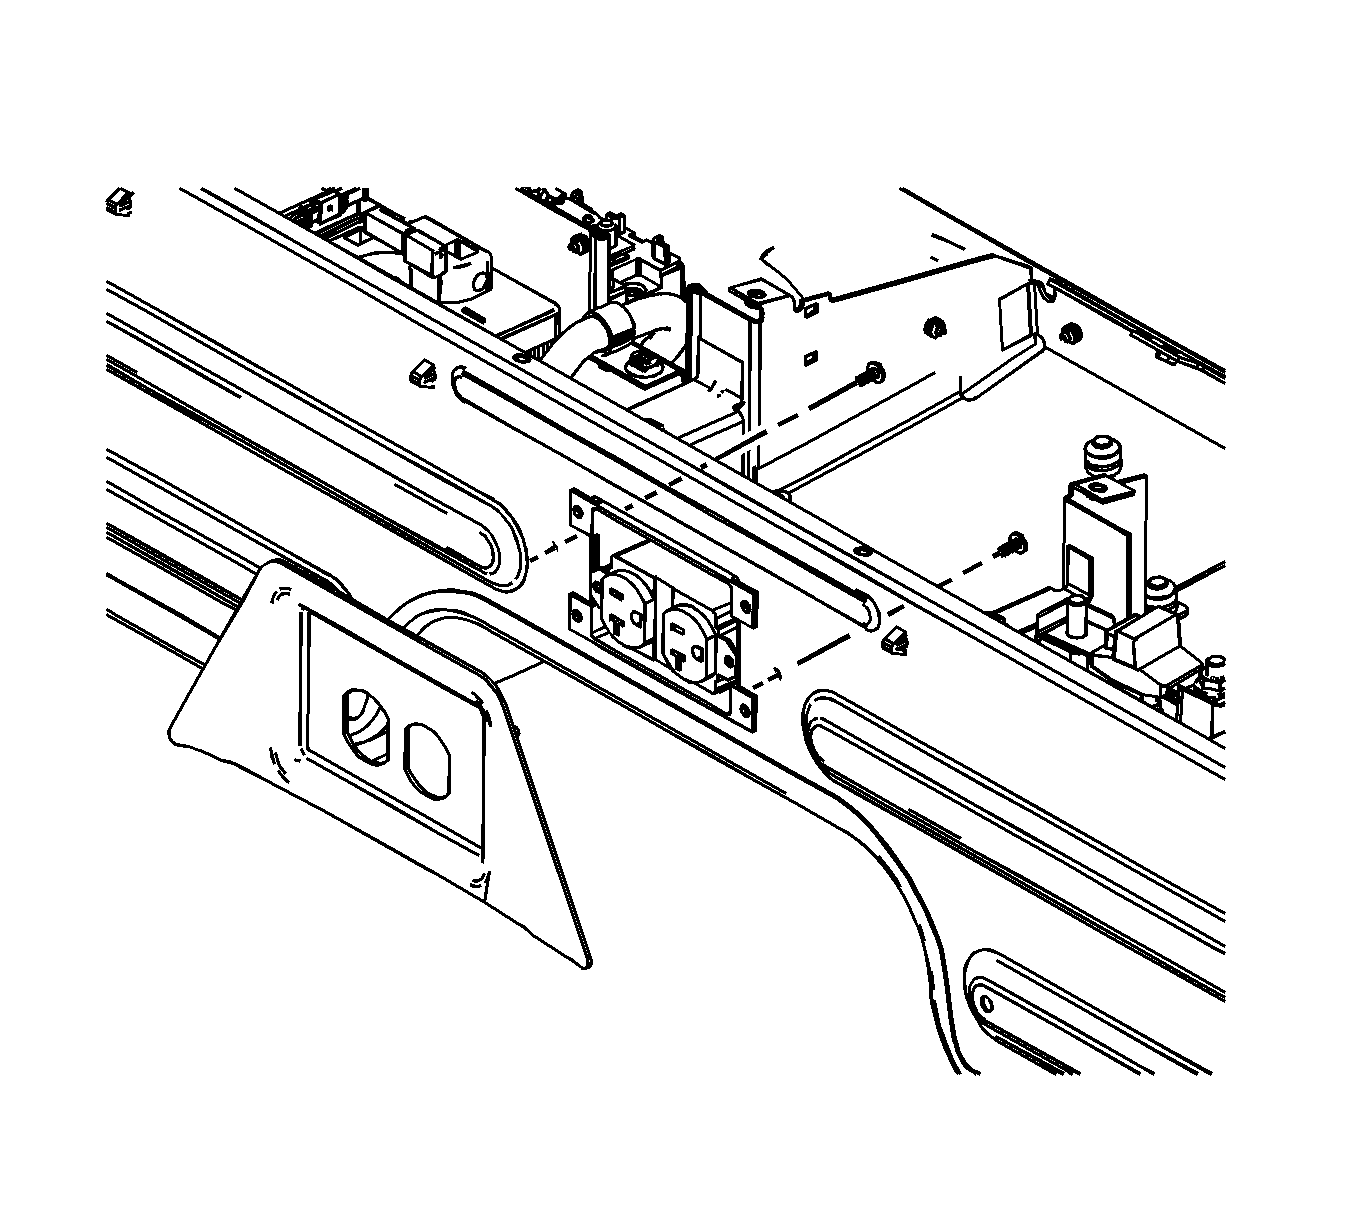
- Remove the receptacle outlet cover screws.
- Carefully pull the receptacle box out of the generator battery carrier.
- Insert a flat-bladed screwdriver into the openings on top of the receptacle box in order to release the tabs securing the outlet cover.
- Remove the receptacle outlet cover.
- Disconnect the battery vent hose(s) from the batteries.
- Disengage the retainers securing the battery vent hose(s).
- Remove the battery vent hose(s) from the carrier.
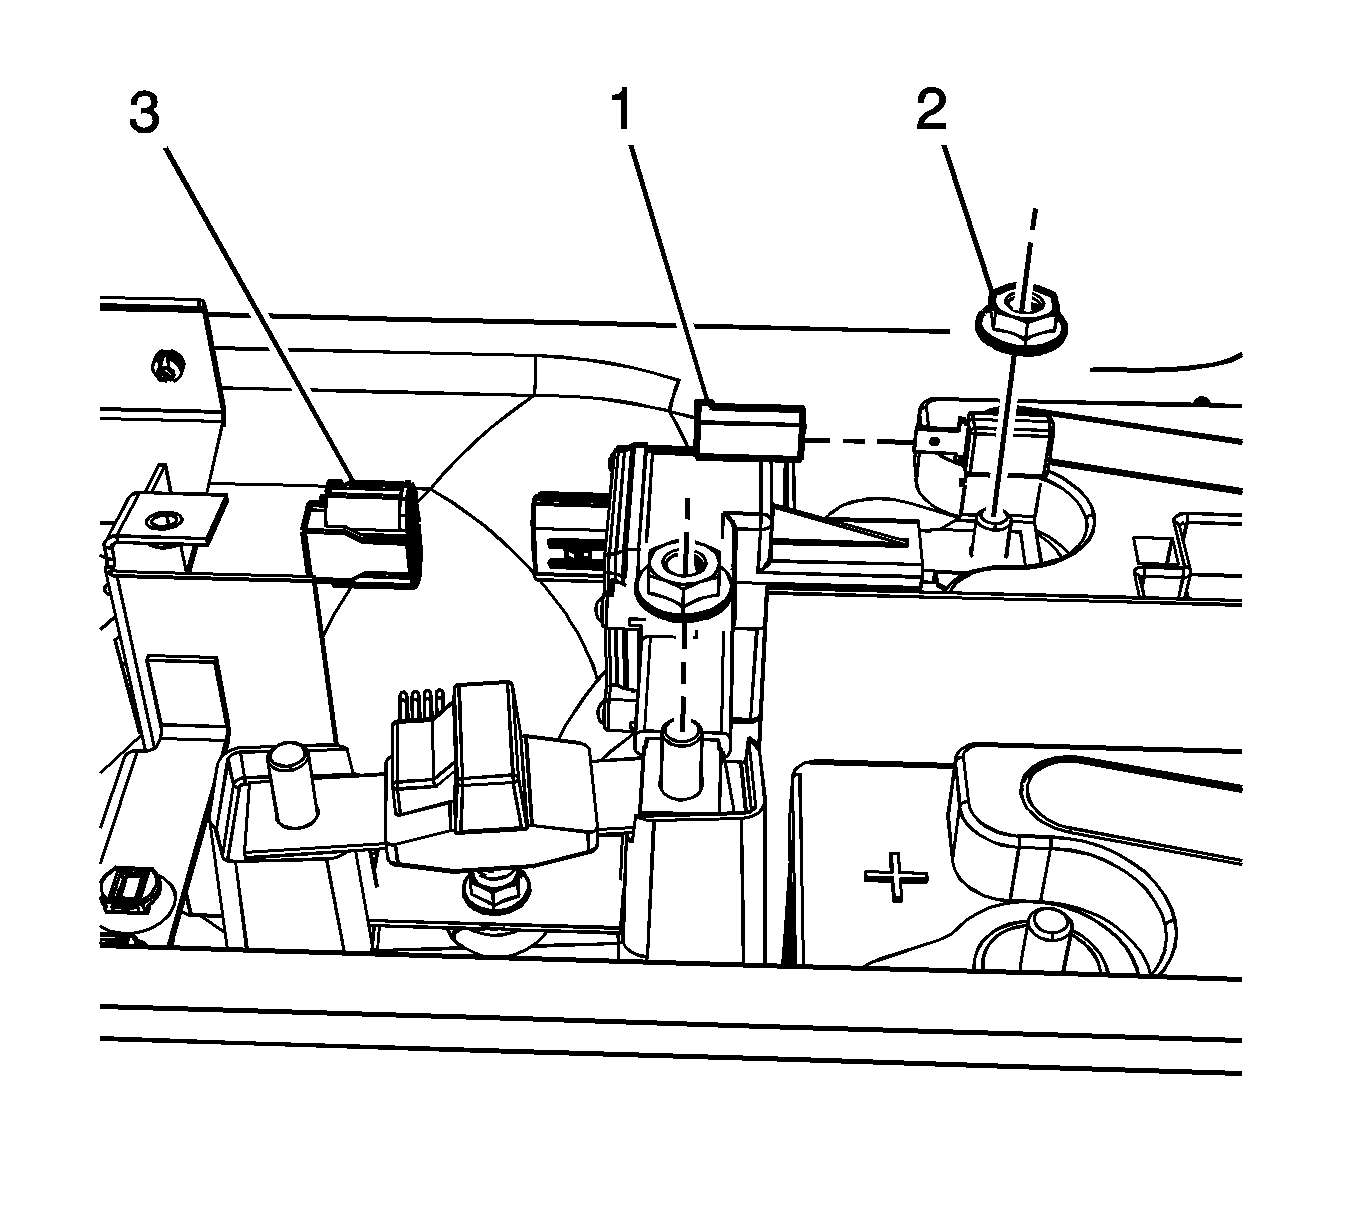
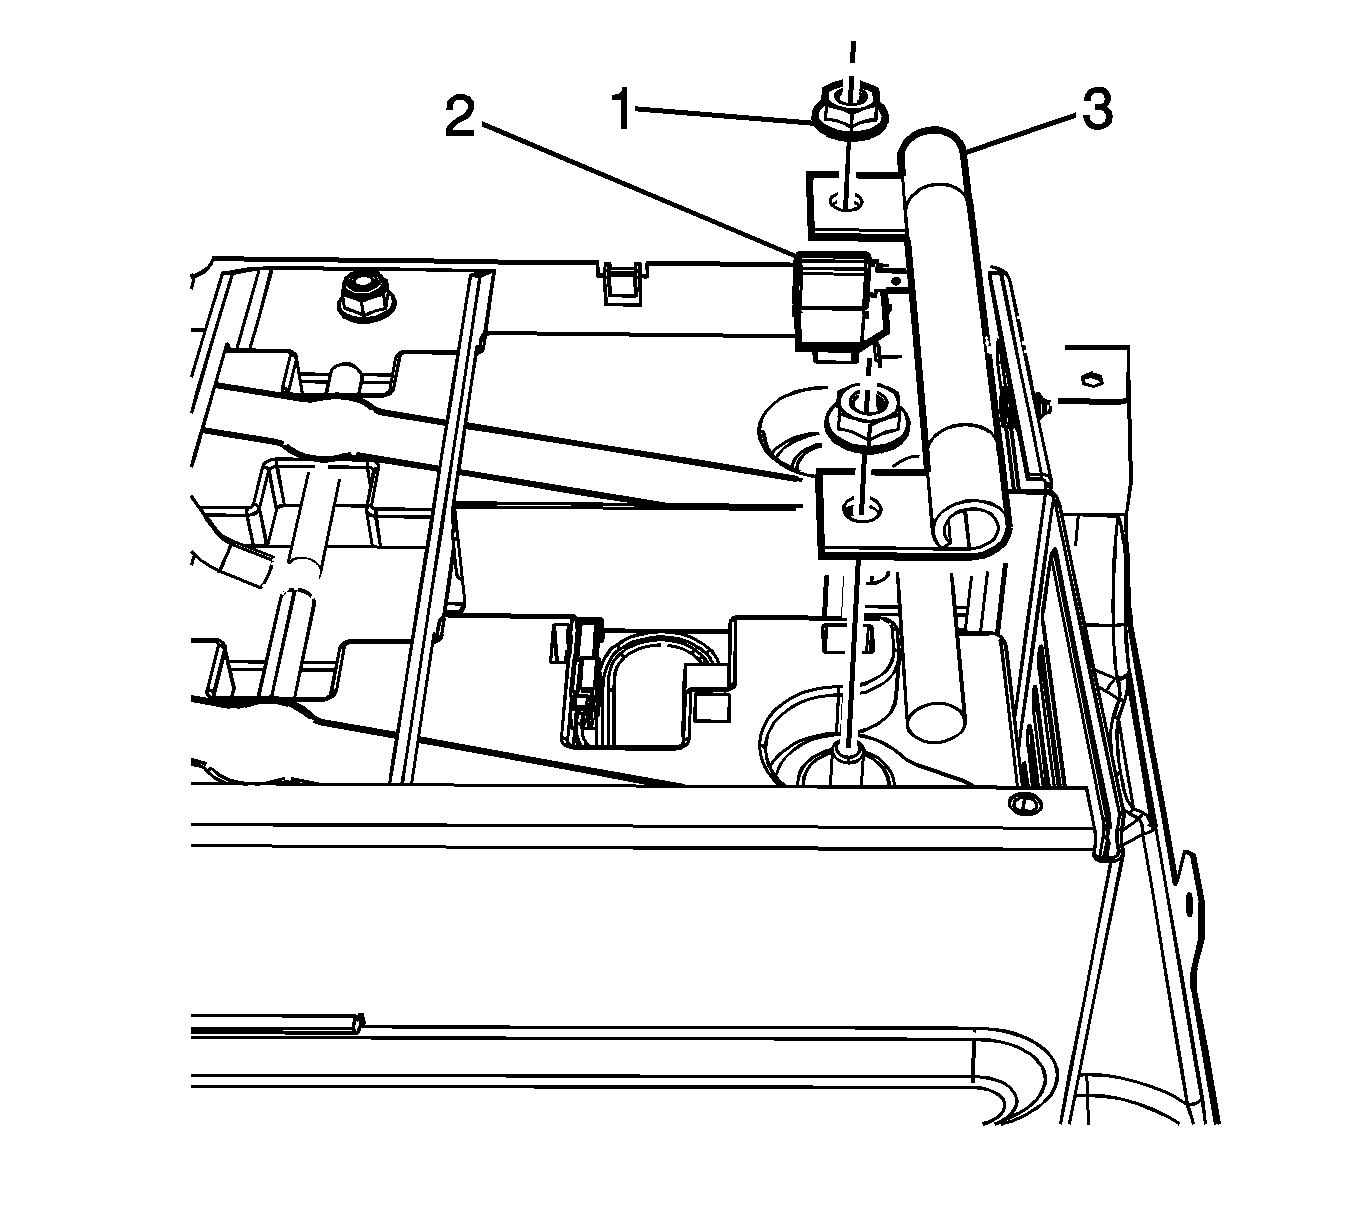
- Disconnect the battery resistor electrical connector (1), labeled XR1 from the number 1 battery negative terminal.
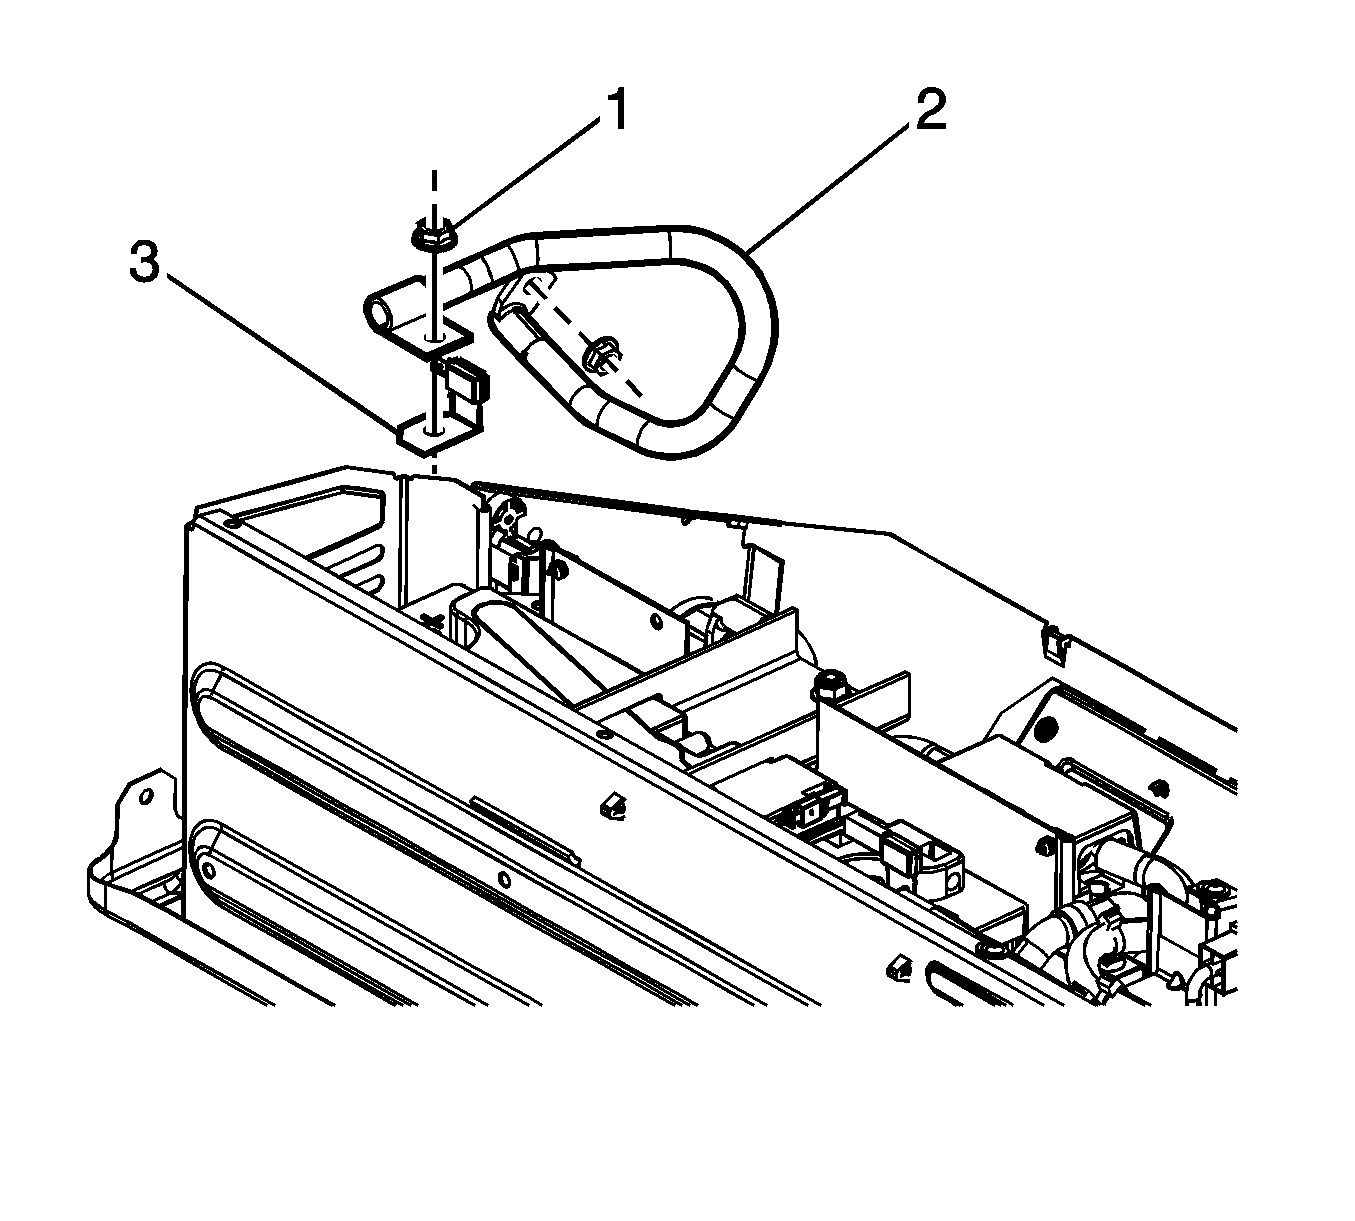
- Remove the battery cut-off switch nuts (2).
- Remove the battery resistor from the number 2 battery terminal.
- Disconnect the battery cut-off switch electrical connector.
- Disconnect the high current sensor electrical connector (3).
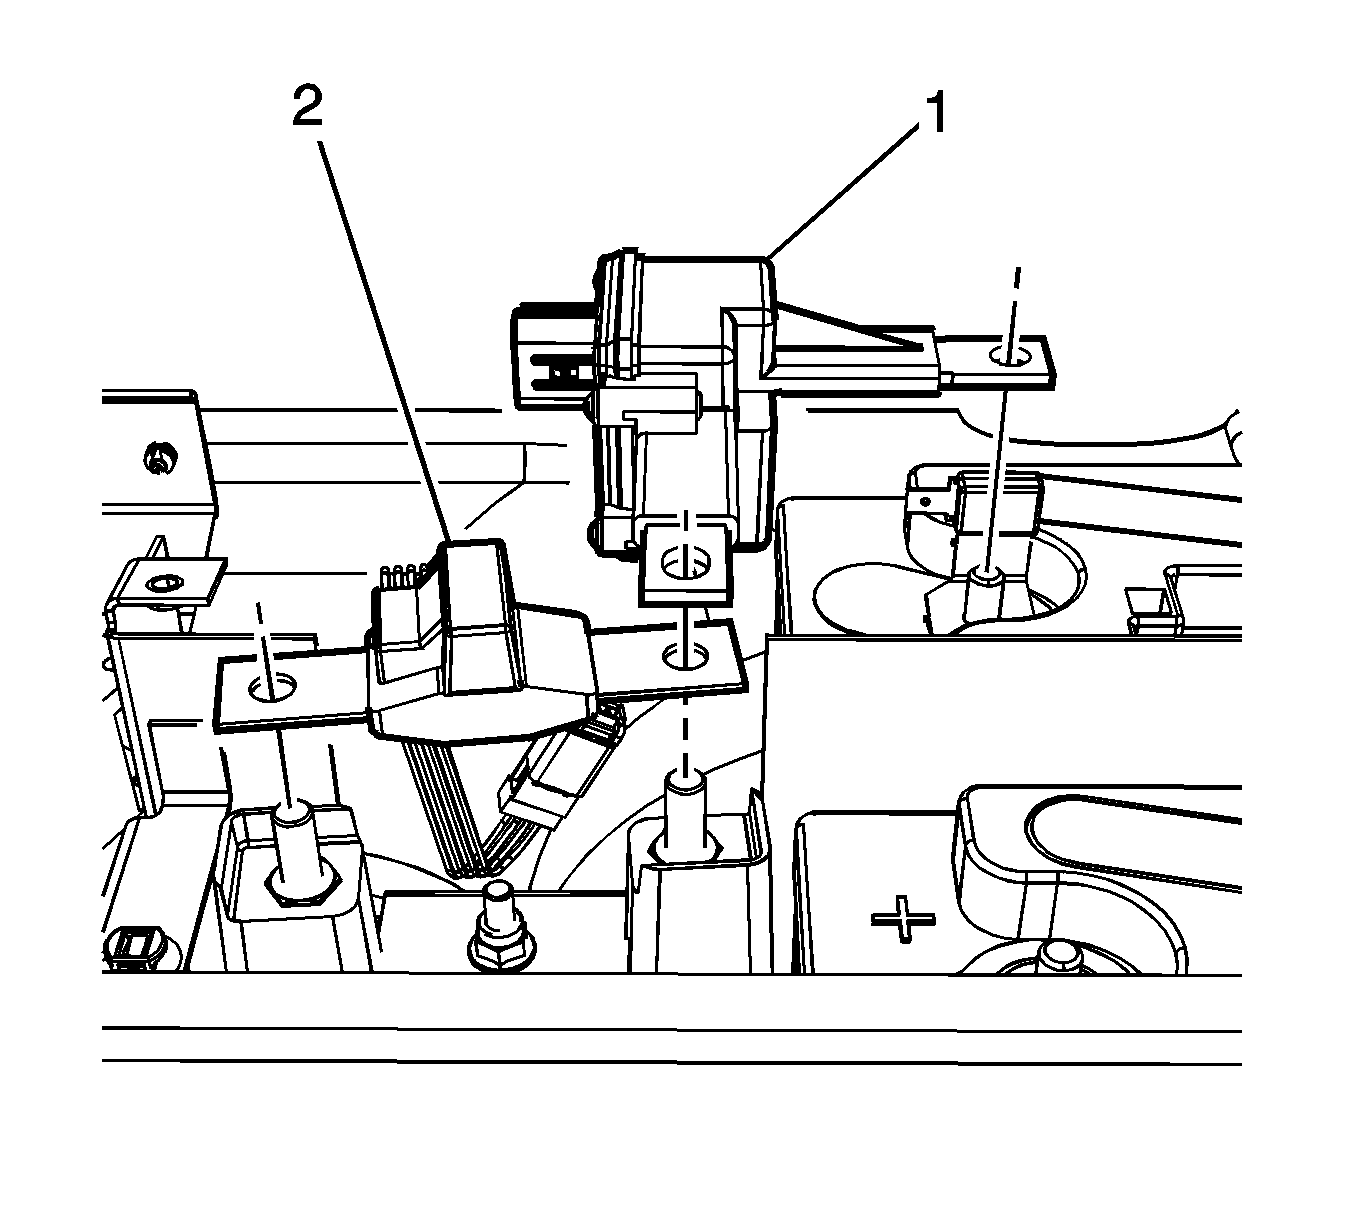
- Remove the battery cut-off switch (1) and high current sensor (2).
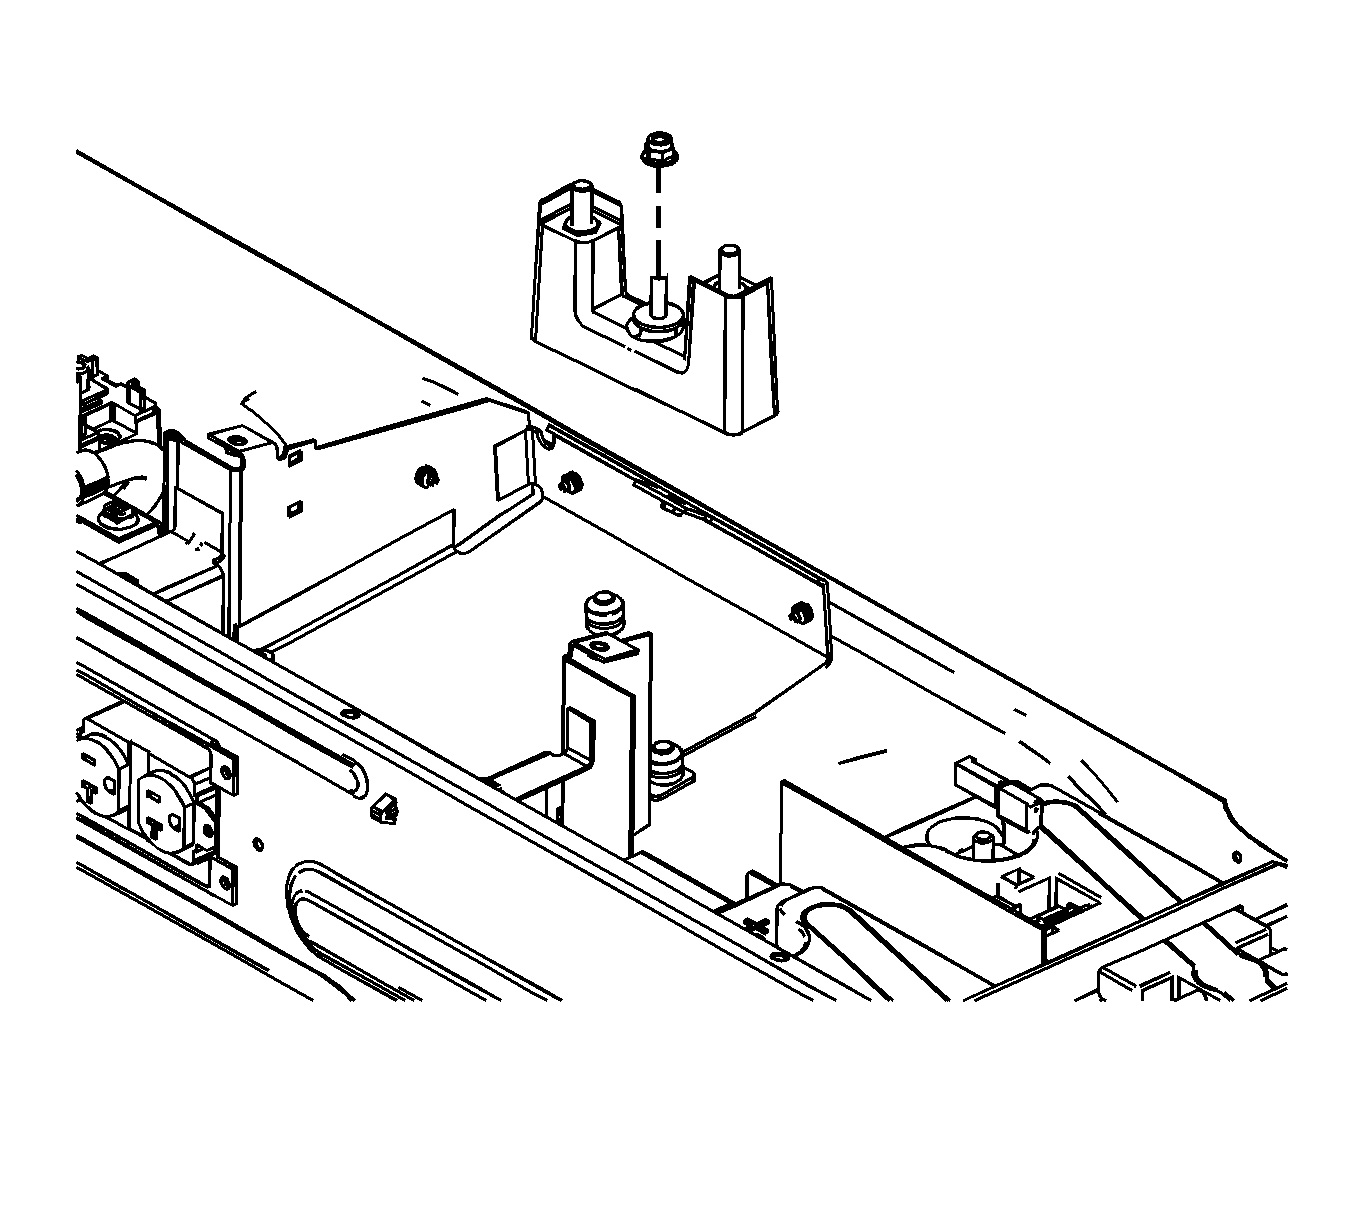
- Remove the high current sensor carrier nut.
- Remove the high current sensor carrier.
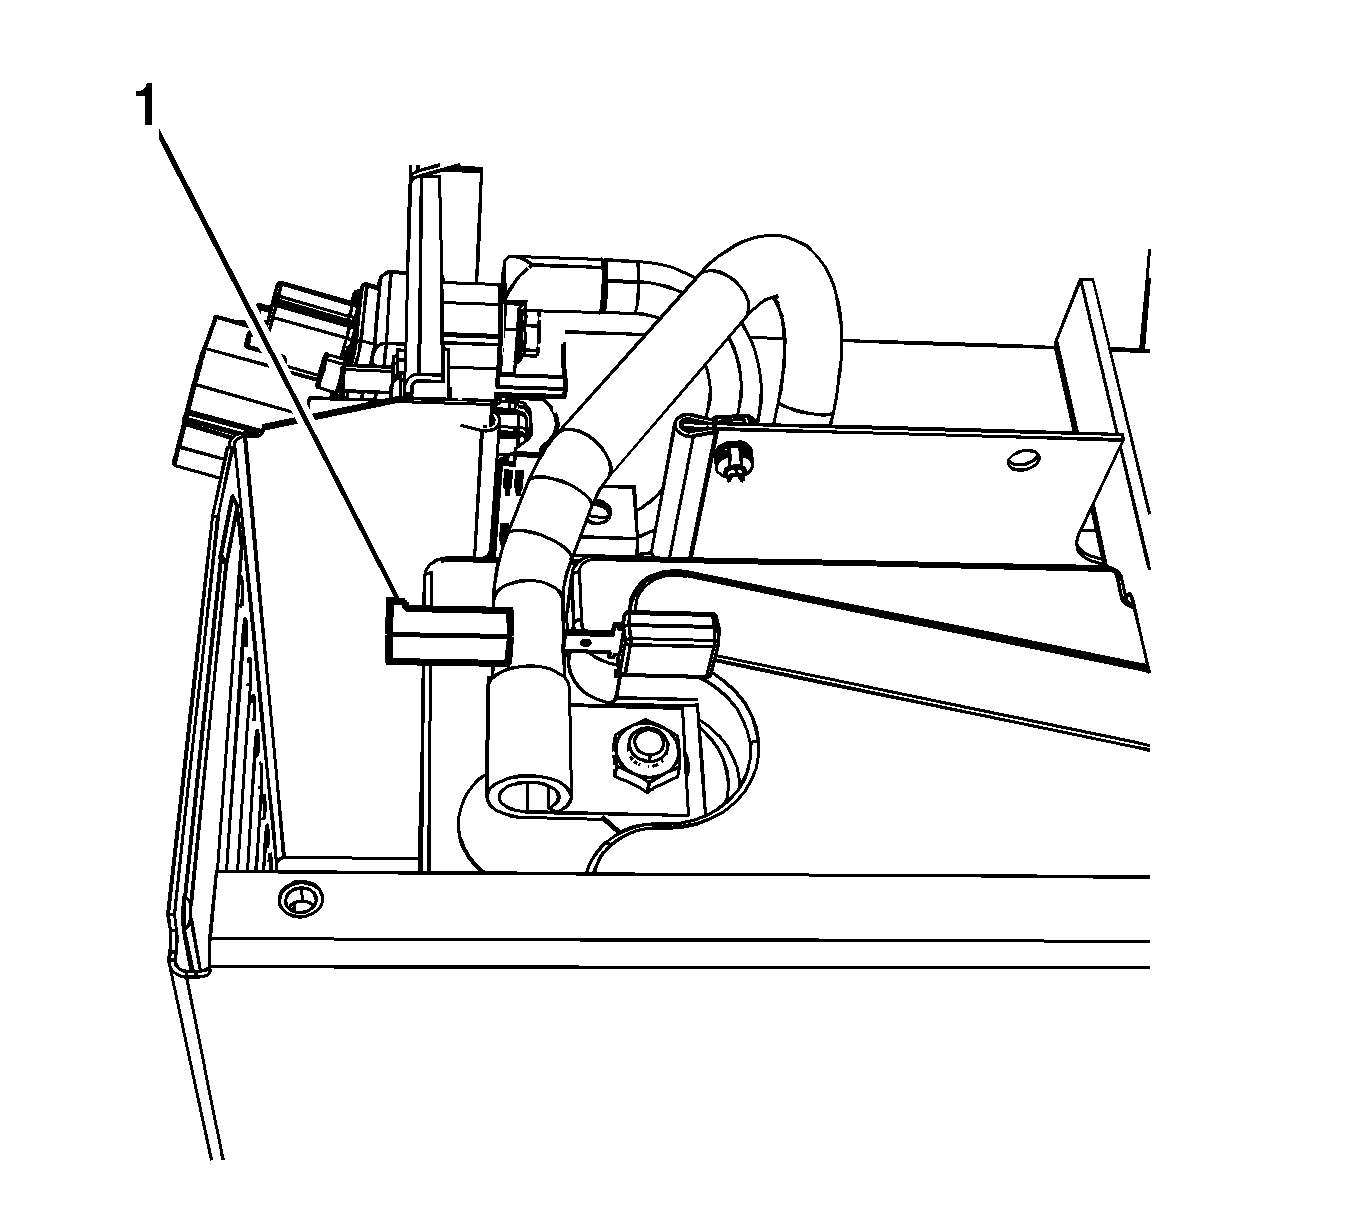
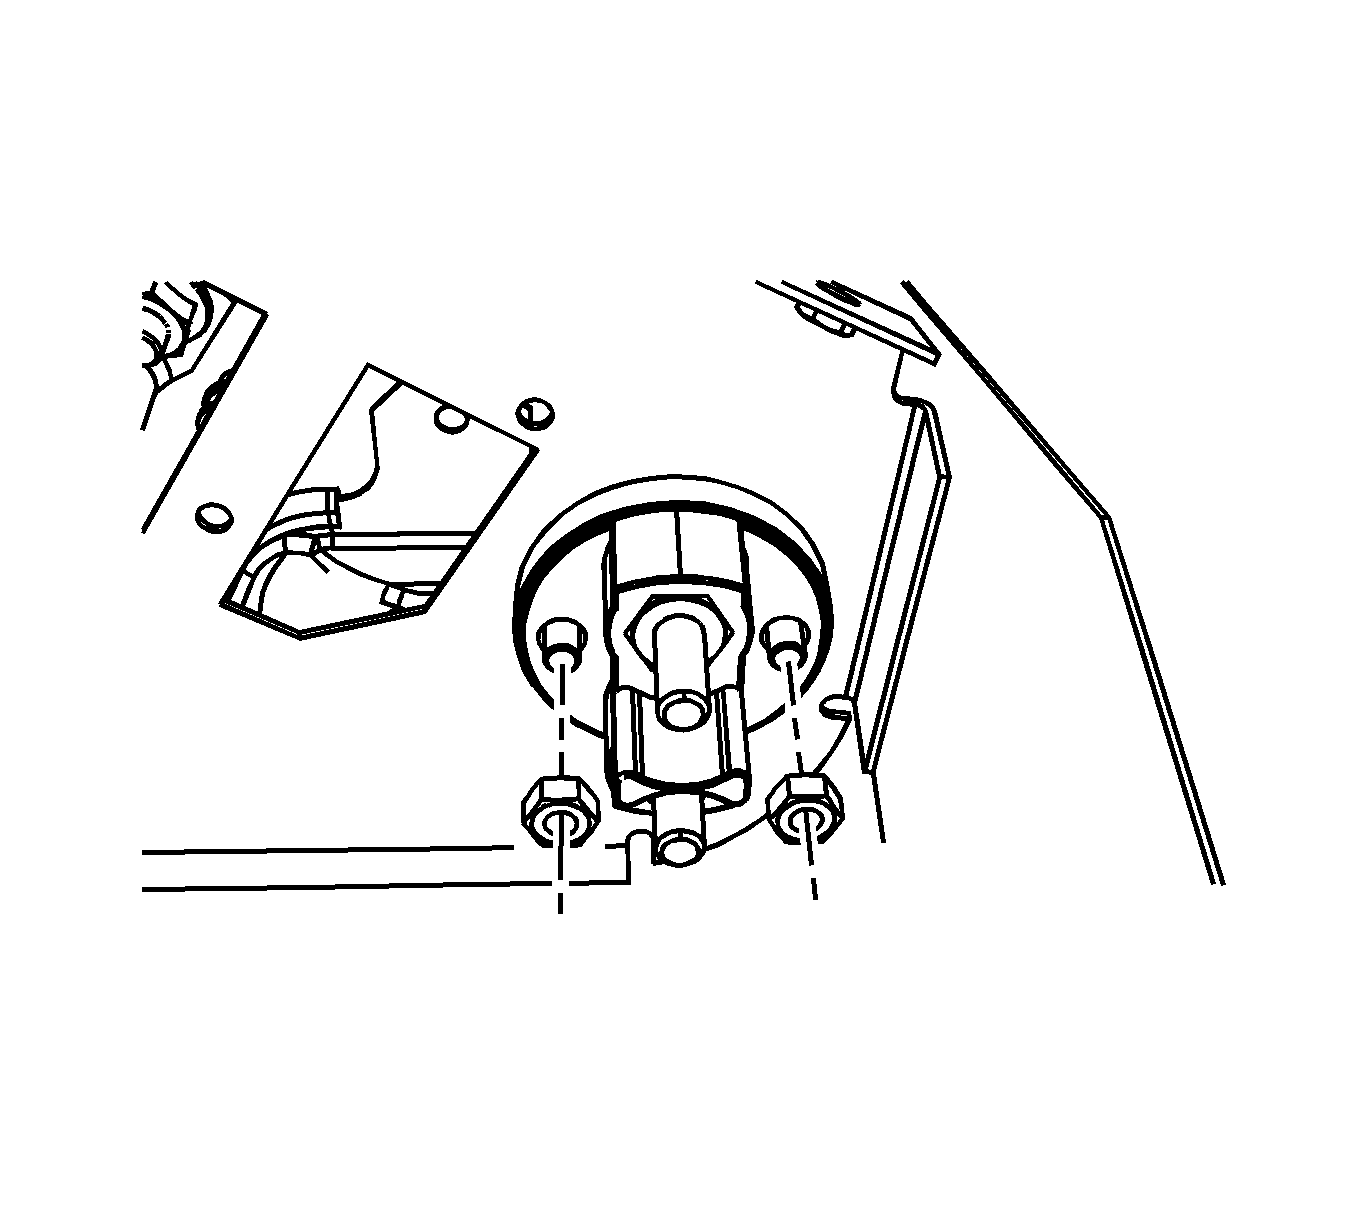
- Disconnect the battery resistor electrical connector (1), labeled XR2 from the number 1 battery positive terminal.
- Remove the power cable nuts (1) from battery 1 and battery 2.
- Remove the power cable (3) from battery 1 and battery 2.
- Remove the battery resistor (2) from the number 1 battery positive terminal.
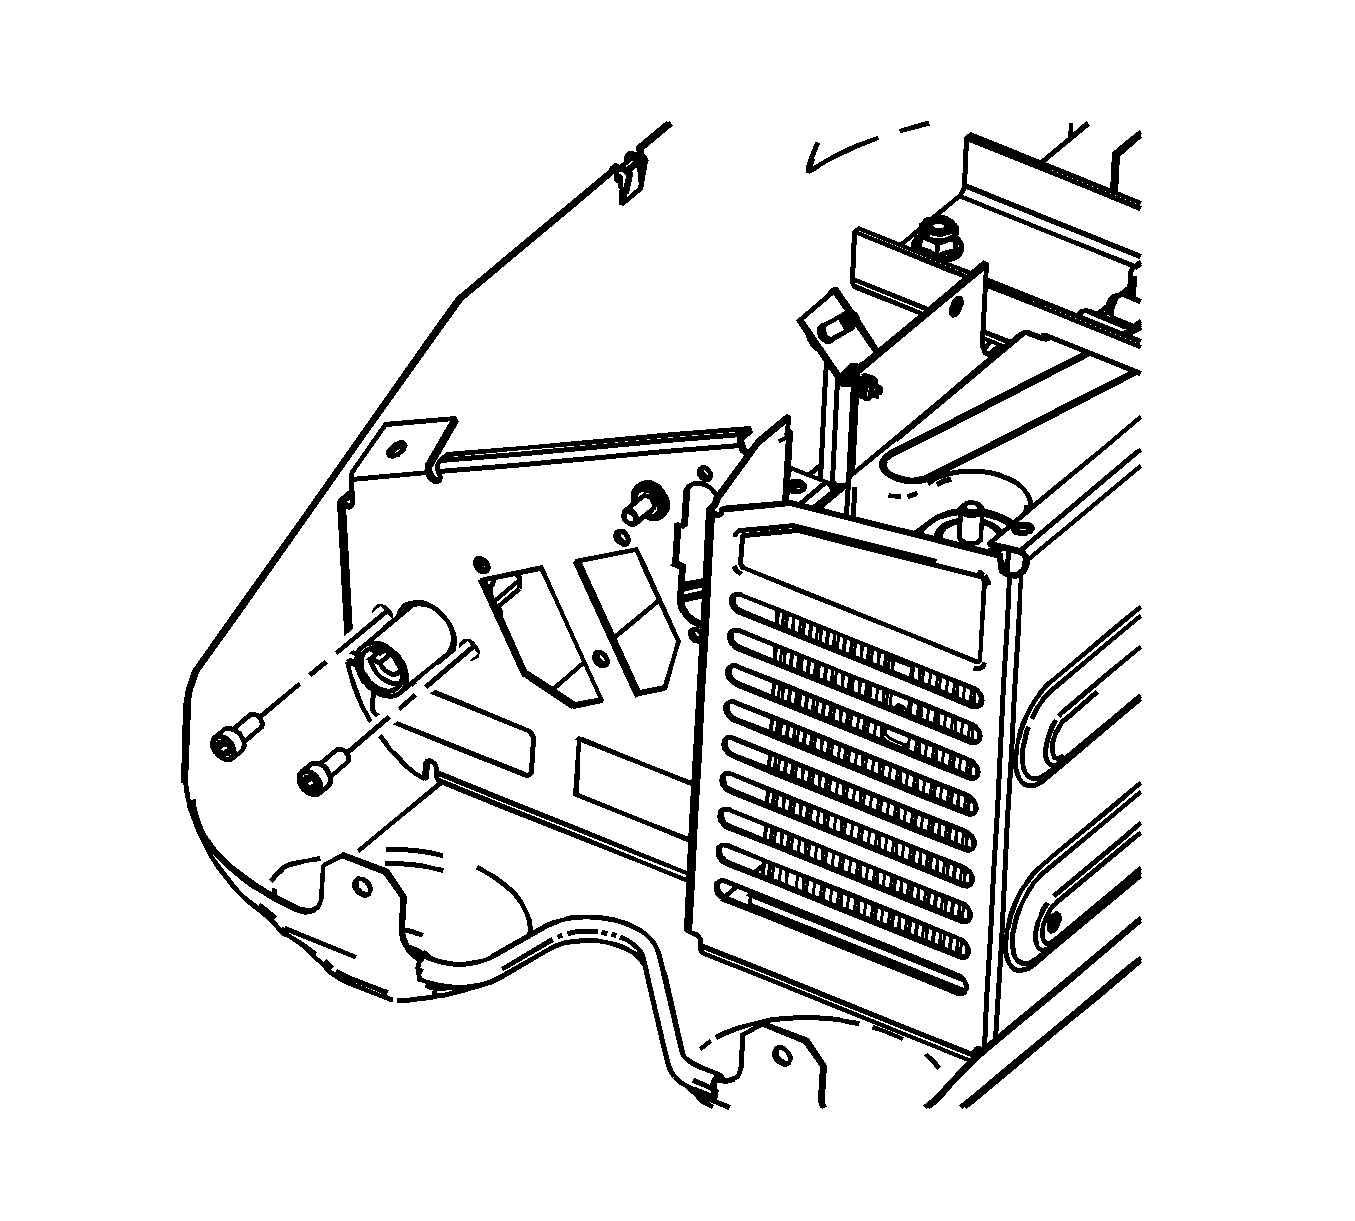
- Disconnect the battery resistor electrical connector (1), labeled XR4 from the number 3 battery positive terminal.
- Remove the power cable nuts (1) from the number 3 battery and high current connector.
- Remove the battery resistor (3) from the number 3 battery positive terminal.
- Remove the power cable (2).
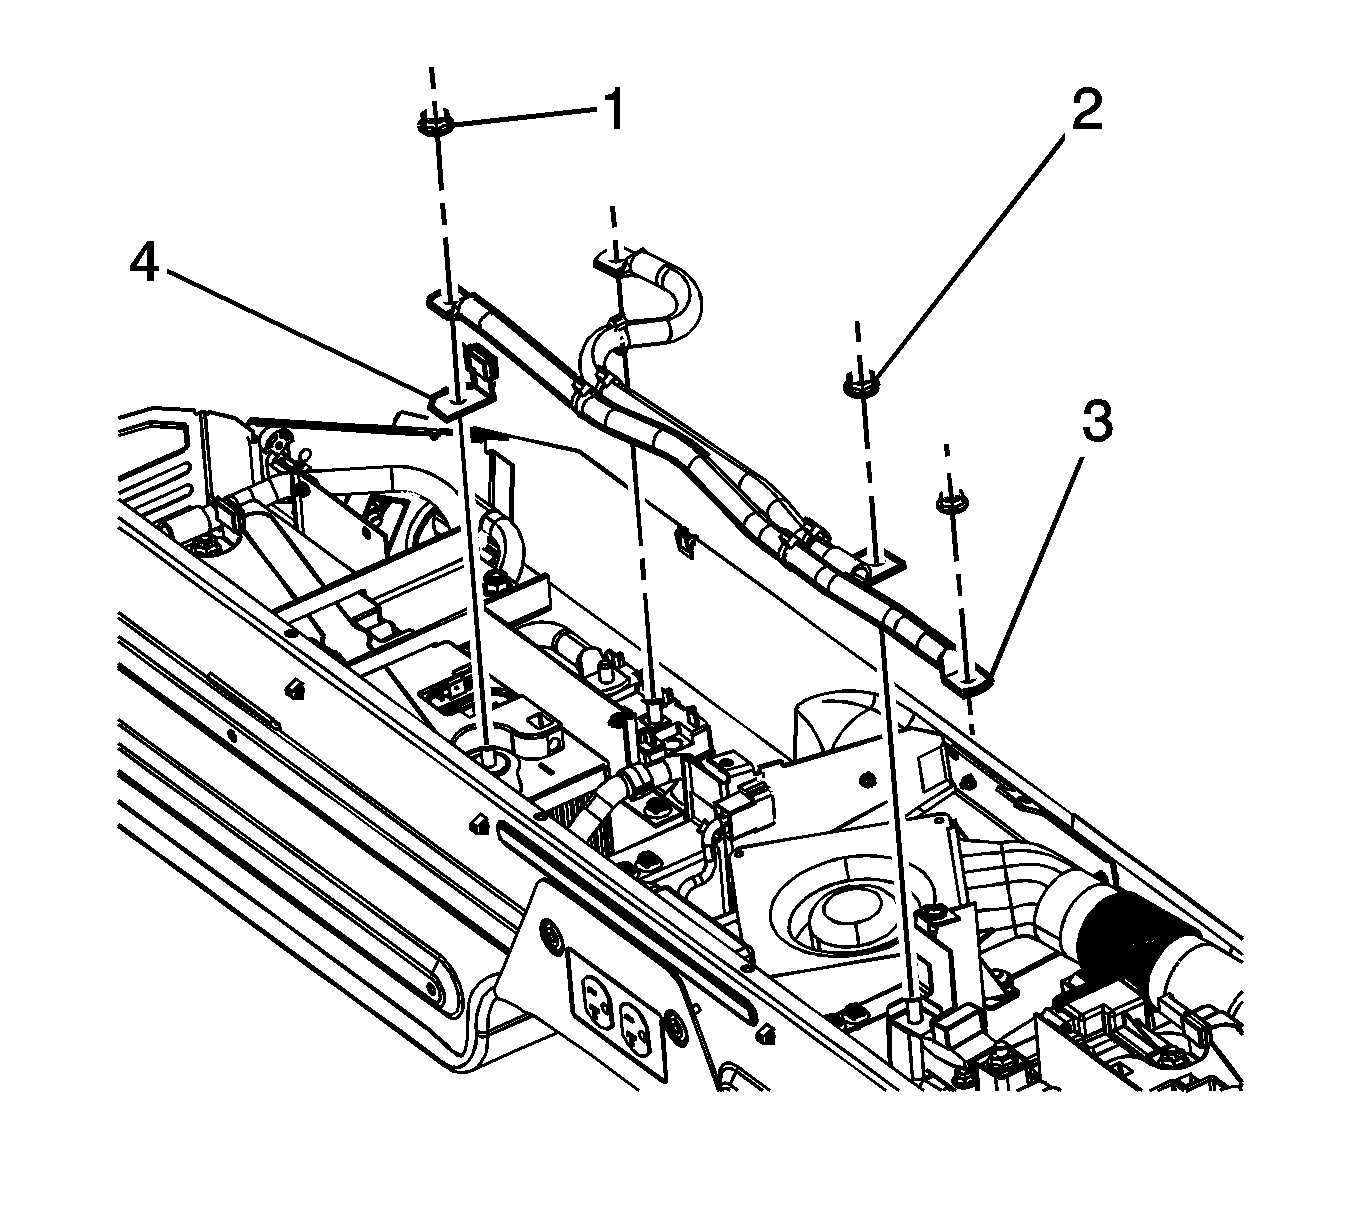
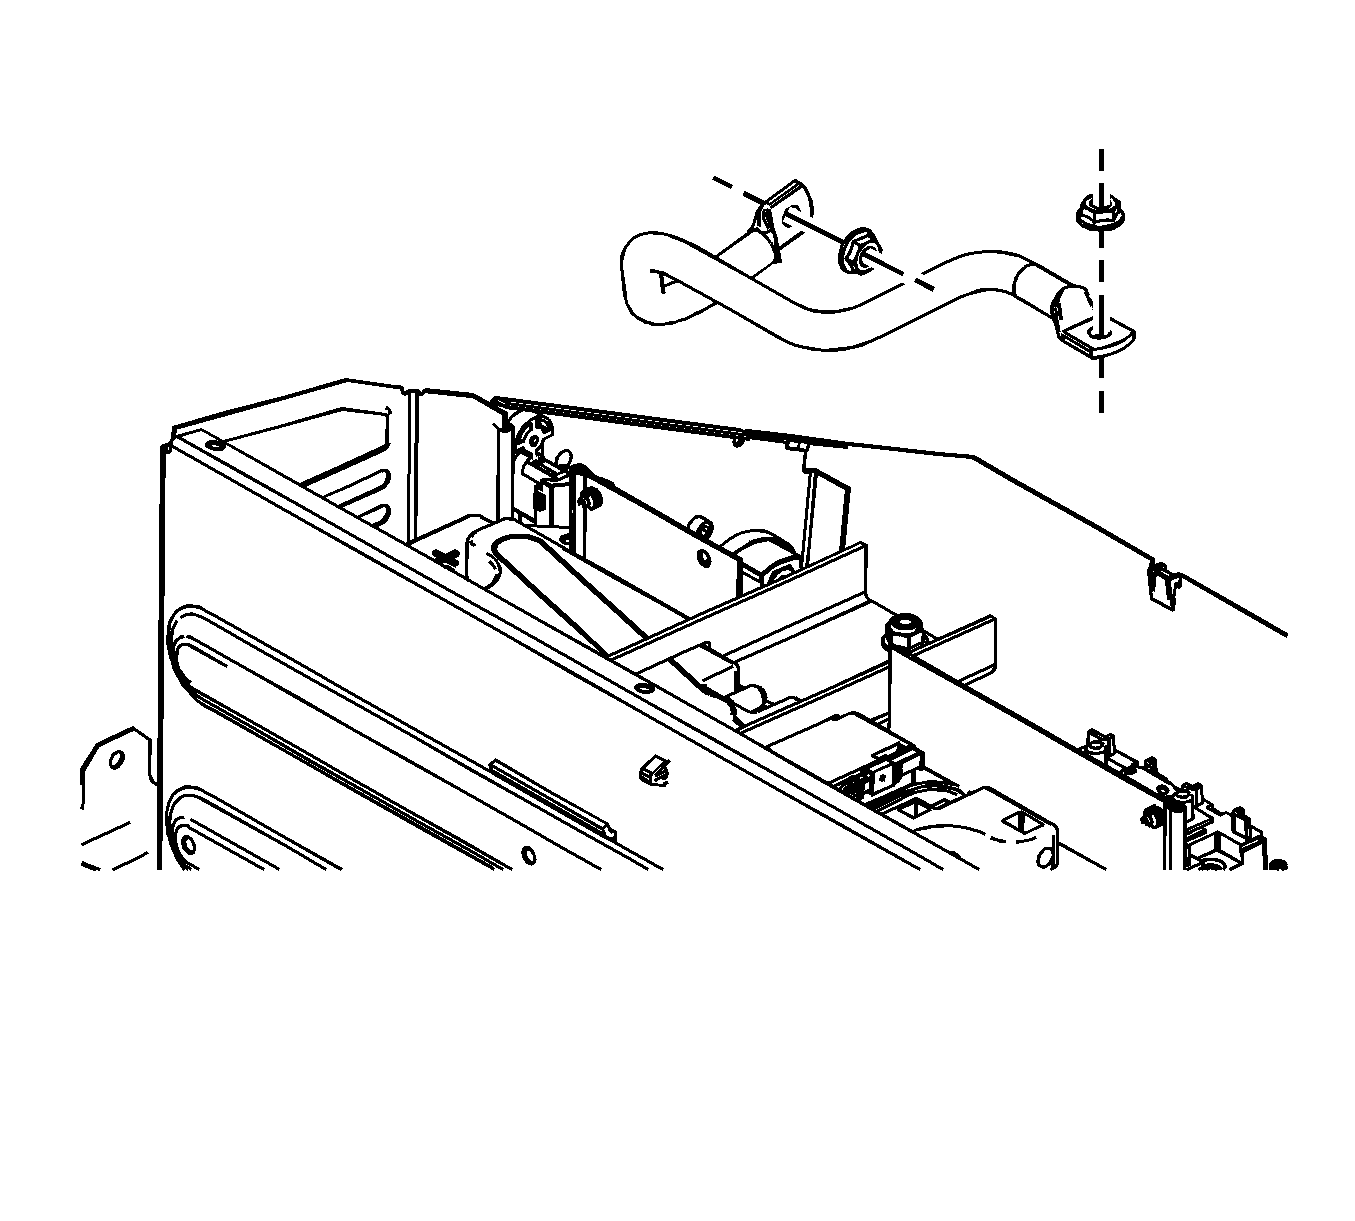
- Remove the service disconnect power cable nuts (1) from the high current connector and the service disconnect switch.
- Remove the power cable (2).
- Cut the tie straps securing the power cable to the generator battery carrier.
- Remove the service disconnect power cable nut from the service disconnect switch.
- Remove the power cable.
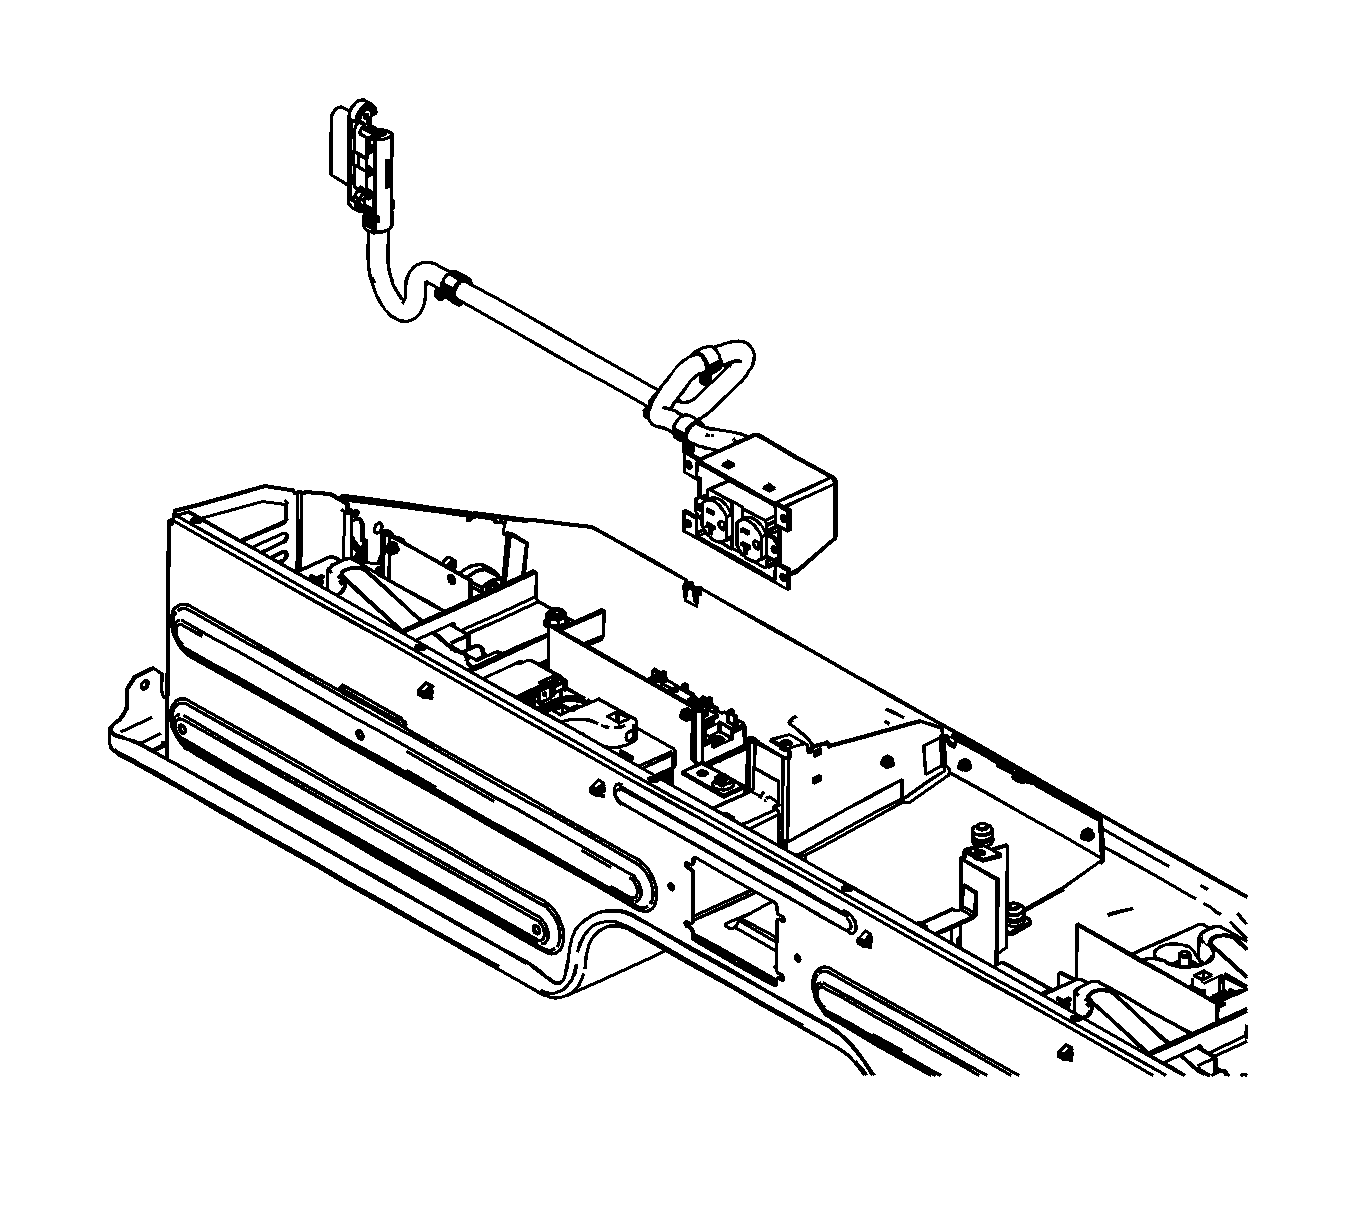
- Remove the 120-volt cable connector screws.
- Disconnect the retainers securing the 120-volt cable to the generator battery carrier.
- Remove the 120-volt cable.
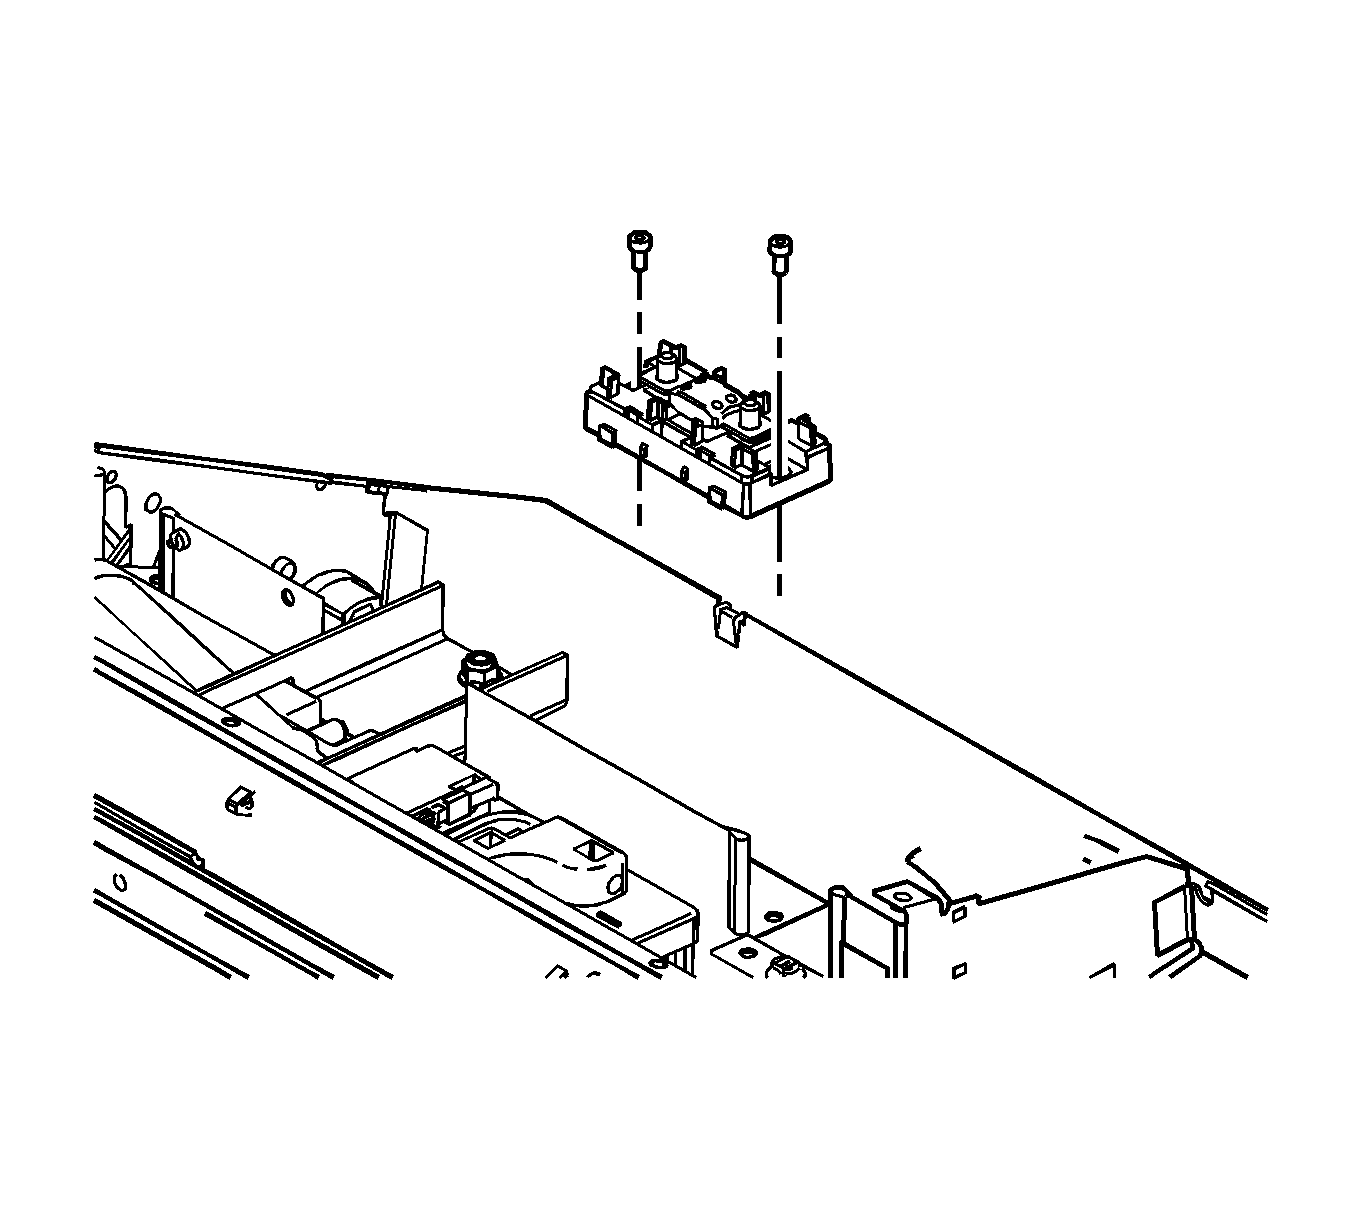
- Remove the fuse holder screws.
- Remove the fuse holder.
- Remove the high current connector screws.
- Remove the high current connector.
- Remove the service disconnect switch nuts.
- Remove the service disconnect switch screws.
- Remove the service disconnect switch.
- Remove the battery hold down bracket nuts.
- Remove the battery hold down brackets.
- Remove the battery hold down bolts.
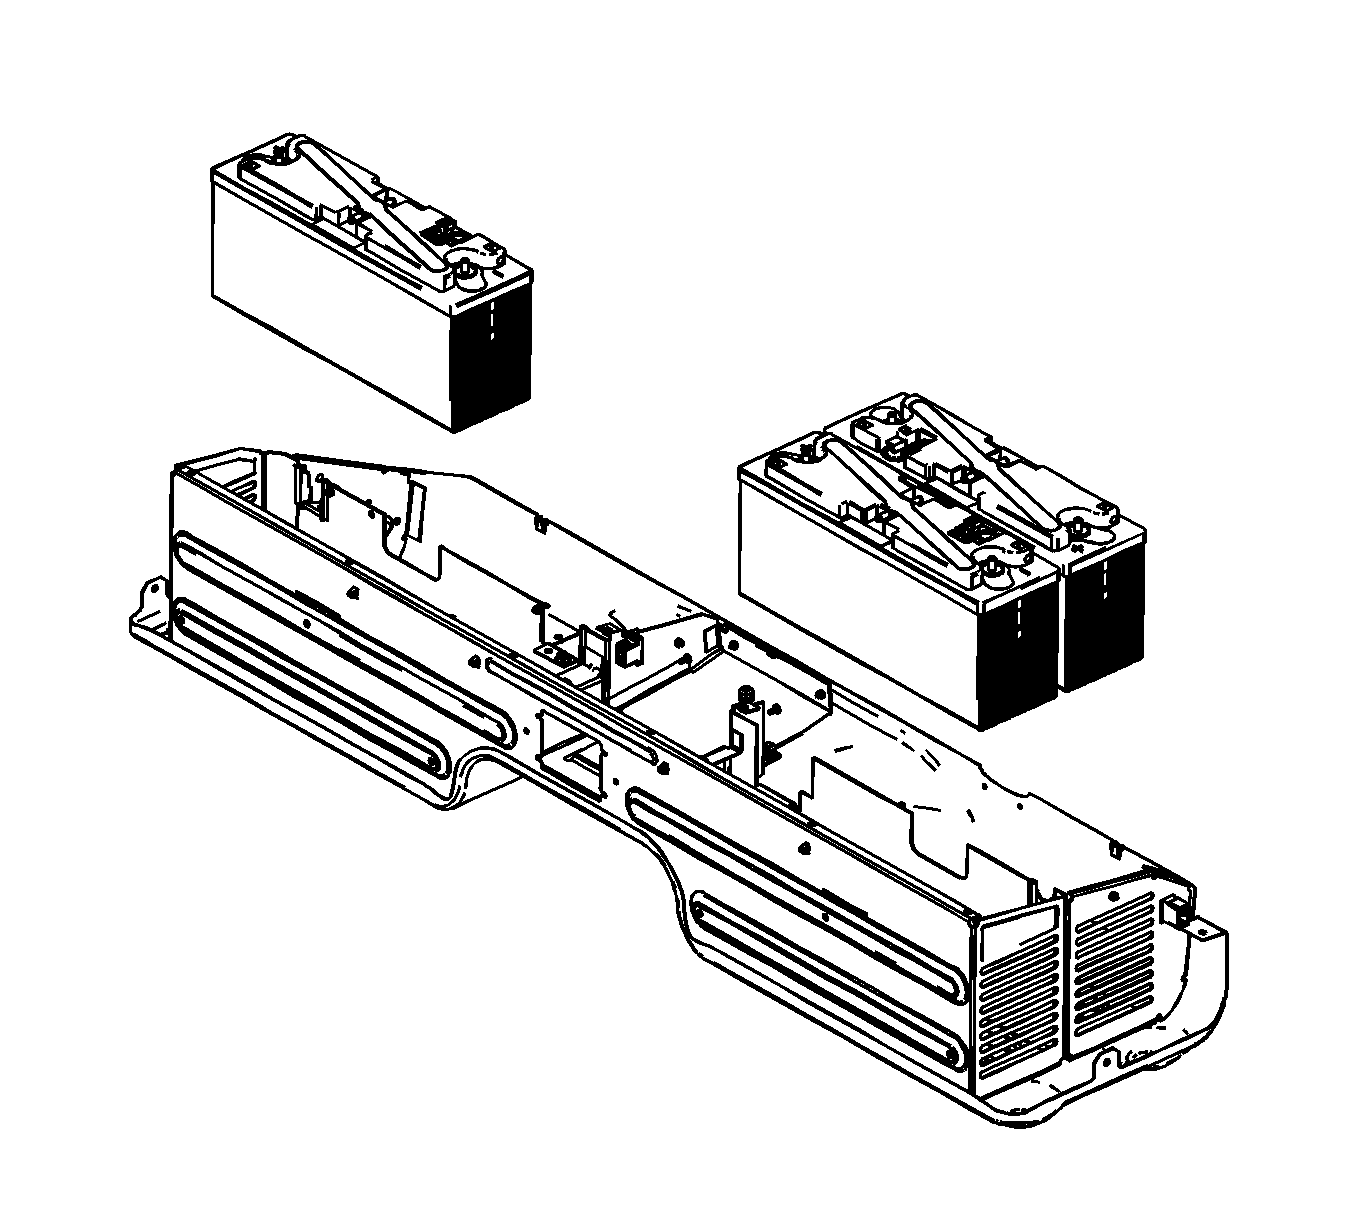
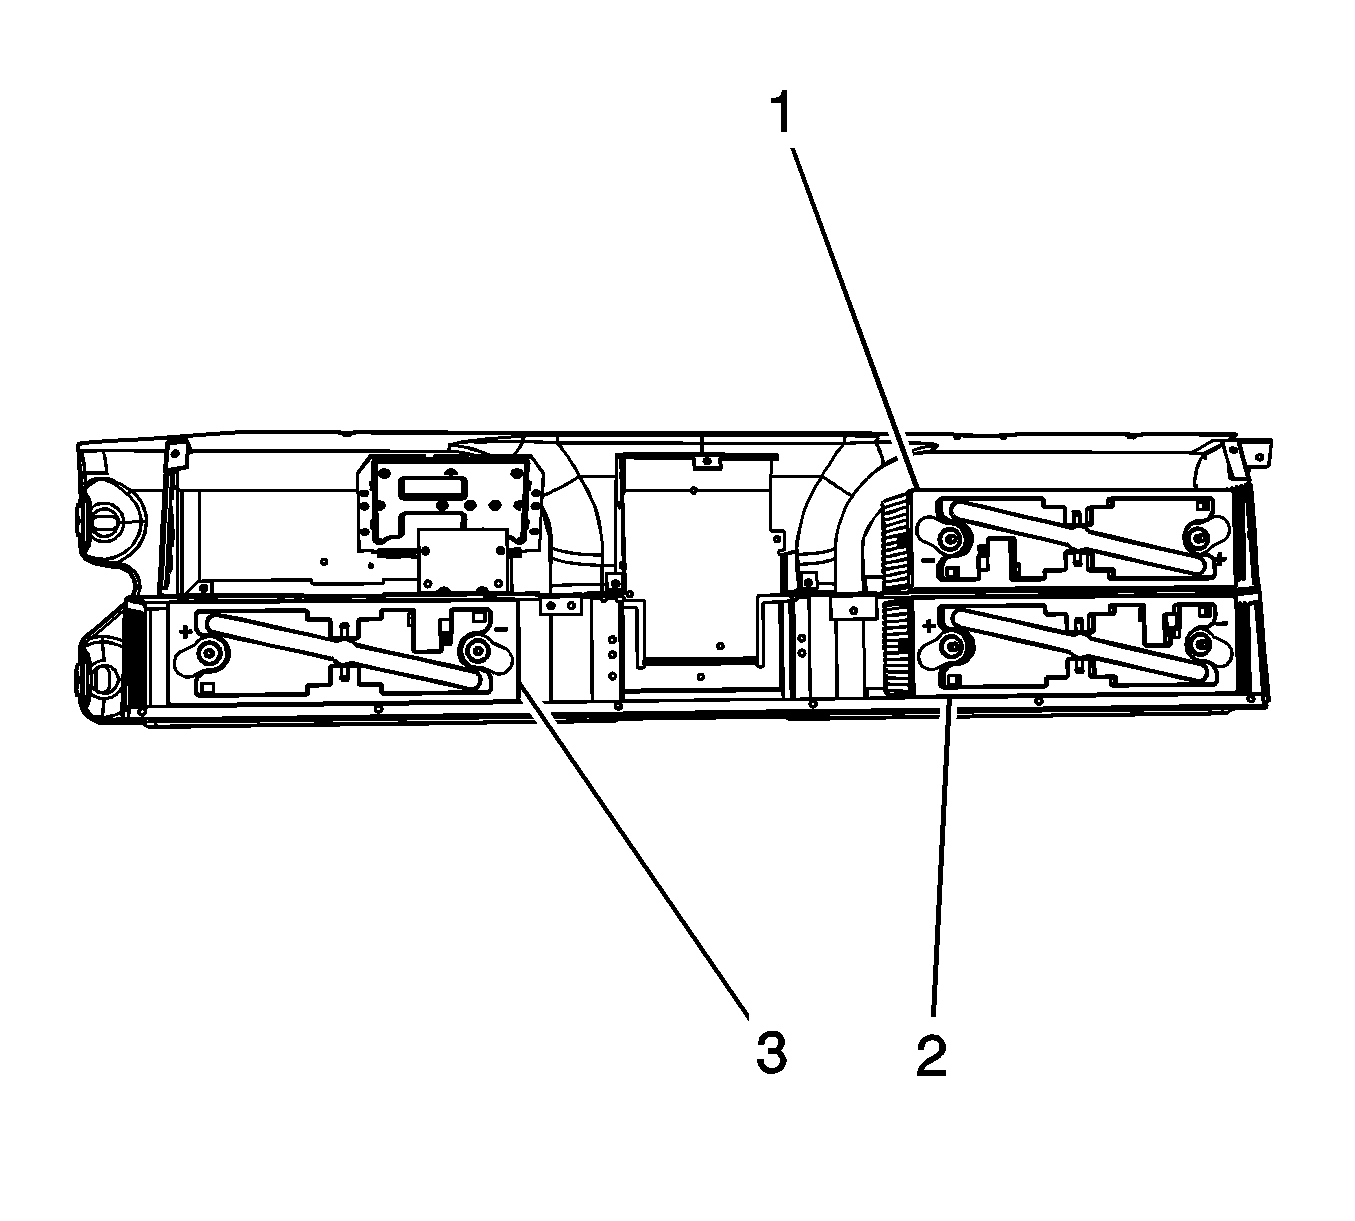
- Using J 43679 , remove the batteries.
- Remove the ground wire bolt.
- Disengage the retainers securing the internal signal harness to the generator battery carrier.
- Remove the internal signal harness from the generator battery carrier.
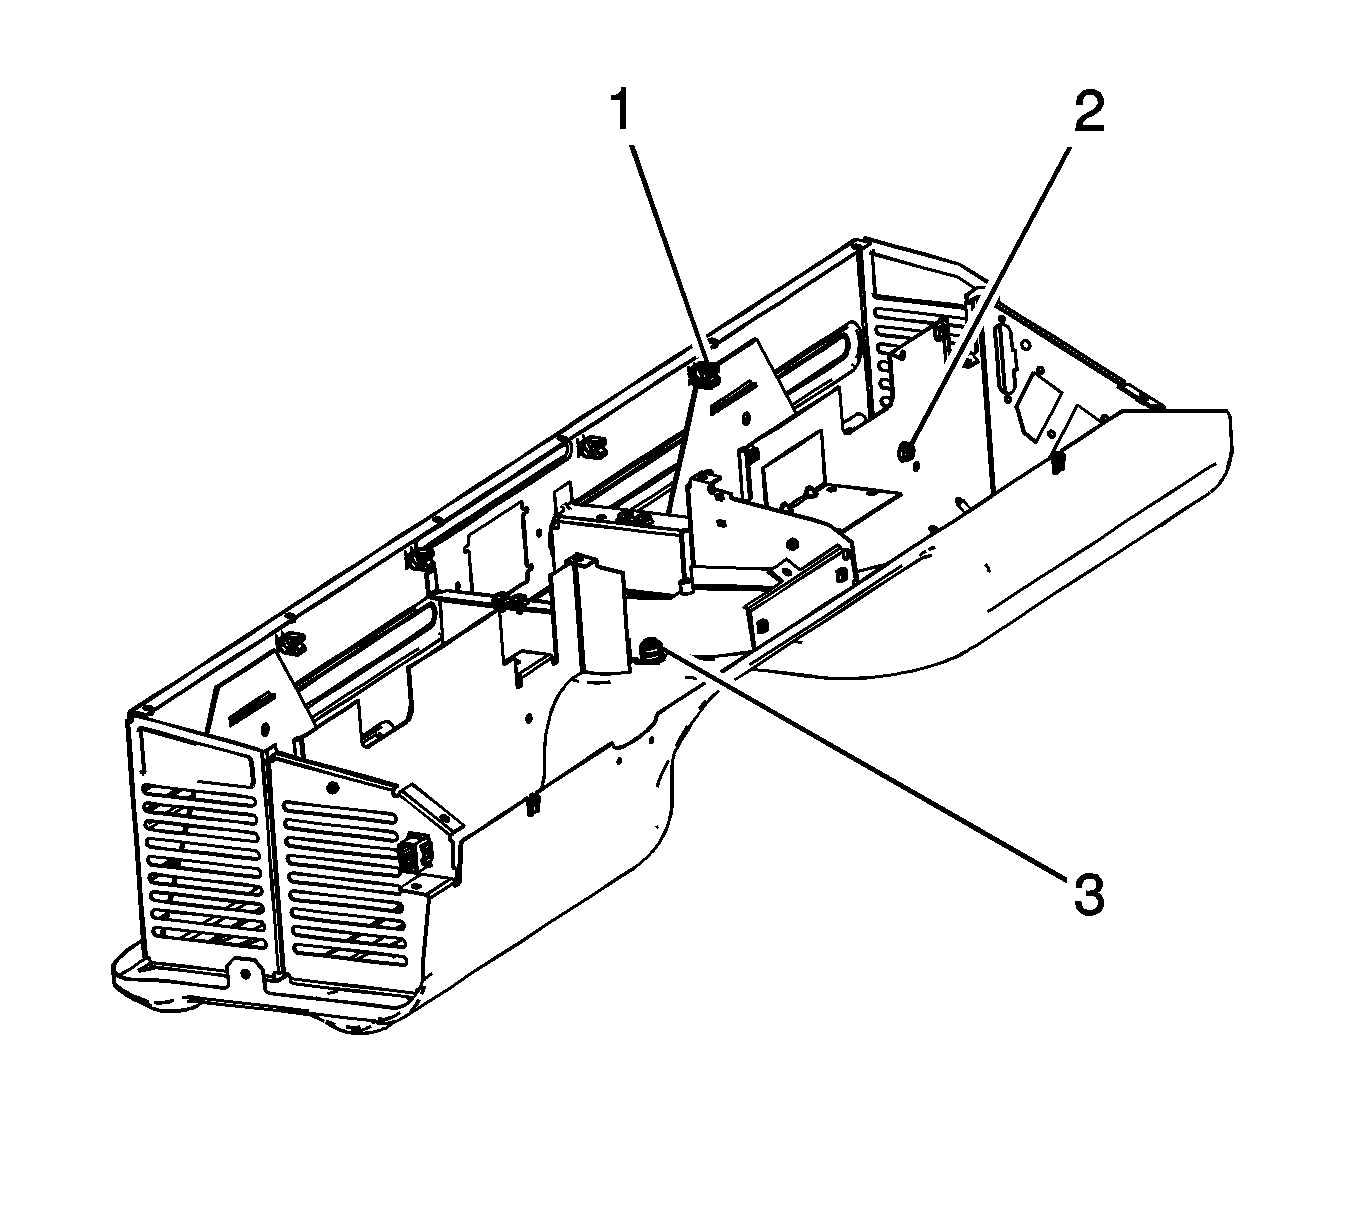
- If necessary, remove any retainers (1), clips (2), or fasteners (3).


Assembly Procedure
- If necessary, install any retainers (1), clips (2), or fasteners (3).
- Install the internal signal harness from the generator battery carrier.
- Engage the retainers securing the internal signal harness to the generator battery carrier.
- Install the ground wire bolt.
- Using J 43679 , install the batteries.
- Ensure that the batteries (1, 2, and 3) have the positive and negative terminals properly oriented.
- Install the battery hold down bolts.
- Install the battery hold down brackets.
- Install the battery hold down bracket nuts.
- Install the service disconnect switch.
- Install the service disconnect switch screws.
- Install the service disconnect switch nuts.
- Install the high current connector.
- Install the high current connector screws.
- Install the fuse holder.
- Install the fuse holder screws.
- Install the 120-volt cable.
- Connect the retainers securing the 120-volt cable to the generator battery carrier.
- Install the 120-volt cable connector screws.
- Install the power cable from the service disconnect switch to the fuse block.
- Install the service disconnect power cable nut to the service disconnect switch.
- Install NEW tie straps securing the power cable to the generator battery carrier.
- Install the power cable (2) to the service disconnect switch and to the high current connector.
- Install the service disconnect power cable nuts (1) to the high current connector and service disconnect switch.
- Install the battery resistor (3) to the number 3 battery positive terminal.
- Install the power cable (2) to the high current connector and the number 3 battery.
- Install the power cable nuts (1) to the number 3 battery and high current connector.
- Connect the battery resistor electrical connector (1), labeled XR4 to the number 3 battery positive resistor.
- Install the battery resistor (2) to the number 1 battery positive terminal.
- Install the power cable (3) to battery 1 and battery 2.
- Install the power cable nuts (1) to battery 1 and battery 2.
- Connect the battery resistor electrical connector.
- Connect the battery resistor electrical connector (1), labeled XR2 to the number 1 battery positive resistor.
- Install the high current sensor carrier.
- Install the high current sensor carrier nut.
- Install the battery resistor to the number 1 battery negative terminal.
- Install the high current sensor (2).
- Install the battery cut-off switch (1).
- Connect the battery cut-off switch electrical connector (3).
- Connect the battery resistor electrical connector (1), labeled XR1 to the number 1 battery negative terminal resistor.
- Install the battery cut-off switch nuts (2).
- Connect the high current sensor electrical connector.
- Install the battery vent hose(s) to the generator battery carrier.
- Engage the retainers securing the battery vent hose(s).
- Connect the battery vent hose(s) to the batteries.
- Install the receptacle outlet cover.
- Install the receptacle outlet cover screws.
- Install the fan and air duct hose.
- Install the screws attaching the air duct hose to the generator battery carrier.
- Install the push pin fasteners.
- Install the fan screws.
- Connect the fan electrical connector.
- Connect the generator battery carrier vent tube to the outlet duct.
- Connect the outlet duct to the generator battery carrier air duct.
- Install the battery resistor (4) to the number 3 battery negative terminal.
- Install NEW tie straps securing the power cables to the generator battery carrier.
- Install the power cables (3).
- Install the battery 2 to battery 3 power cable nuts (1).
- Install the power cable nut (2) to the current sensor.
- Connect the battery resistor electrical connector (1), labeled XR3 to the number 3 battery negative terminal resistor.
- Install the maxi-fuse (2).
- Install the maxi-fuse nuts (1).
- Install the maxi-fuse cover.
- Connect the control module electrical connectors.
- Install the control module.
- Install the control module nuts.
- Install the generator battery carrier intermediate cover.
- Install the generator battery carrier intermediate cover screws.
- Install the generator battery carrier. Refer to Generator Battery Carrier Replacement .
Notice: Refer to Fastener Notice in the Preface section.
Tighten
Tighten the bolt to 2 N·m (18 lb in).
Tighten
Tighten the nuts to 10 N·m (89 lb in).
Tighten
Tighten the screws to 6 N·m (53 lb in).
Tighten
Tighten the nuts to 6 N·m (53 lb in).
Tighten
Tighten the screws to 5 N·m (44 lb in).
Tighten
Tighten the screws to 2 N·m (18 lb in).
Tighten
Tighten the screws to 6 N·m (53 lb in).
Tighten
Tighten the nut to 10 N·m (89 lb in).
Important: The power cable must be installed to the negative side of the high current connector.
Tighten
Tighten the nuts to 10 N·m (89 lb in).
Tighten
Tighten the nuts to 10 N·m (89 lb in).
Tighten
Tighten the nuts to 10 N·m (89 lb in).
Tighten
Tighten the nut to 10 N·m (89 lb in).
Important: The high current sensor orientation is VERY important. The sensor wiring MUST be pointed towards the rear of the vehicle, and also the etched numbers on one side of the sensor terminal MUST be on the battery cut-off switch side.
Tighten
Tighten the nuts to 10 N·m (89 lb in).
Tighten
Tighten the screws to 0.5 N·m (4.4 lb in).
Tighten
Tighten the nuts to 0.5 N·m (4.4 lb in).
Tighten
Tighten the nuts to 1 N·m (9 lb in).
Tighten
Tighten the nuts to 10 N·m (89 lb in).
Tighten
Tighten the nuts to 10 N·m (89 lb in).
Tighten
Tighten the nuts to 6 N·m (53 lb in).
Important: Ensure that the generator battery carrier intermediate cover is installed between the generator battery metal carrier and the 120-volt receptacle faceplate.
Tighten
Tighten the screws to 6 N·m (53 lb in).
