Generator Rotor Replacement 5.3L Engine w/RPO HP2
Tools Required
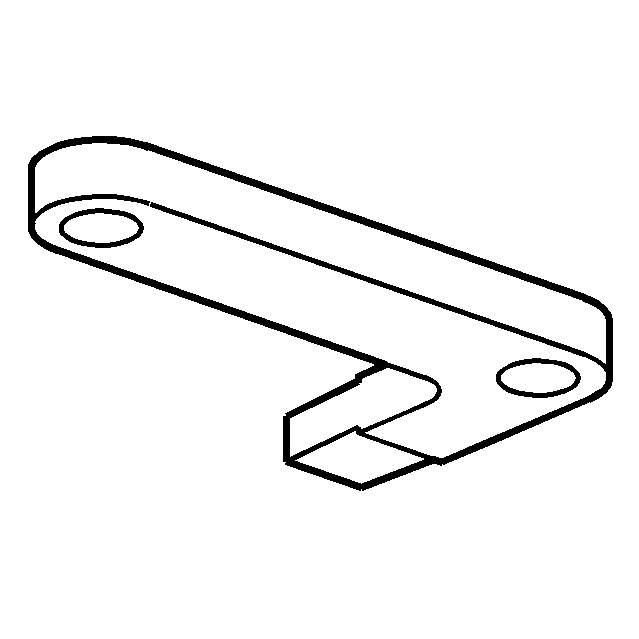
J 46093 Rotor and Flexplate Holding Tool
Caution: To help avoid personal injury, disable the 36V system anytime you perform service work on or around the generator battery carrier. The 36V system will still be active after you have disabled the generator battery carrier.
Caution: To help avoid personal injury, always disconnect the 36V generator battery carrier before doing any work to the generator battery carrier system. To disconnect the generator battery carrier, turn the engine off and turn OFF the service disconnect switch, which is located on the passenger side of the generator battery carrier.
Caution: To help avoid personal injury, always treat the 3-phase cable and connectors as if voltage is present and as if the surface of all parts of the cable is hot.
Removal Procedure
- Remove the transmission. Refer to Transmission Replacement .
- Remove the starter/generator stator stud.
- Remove the starter/generator stator.
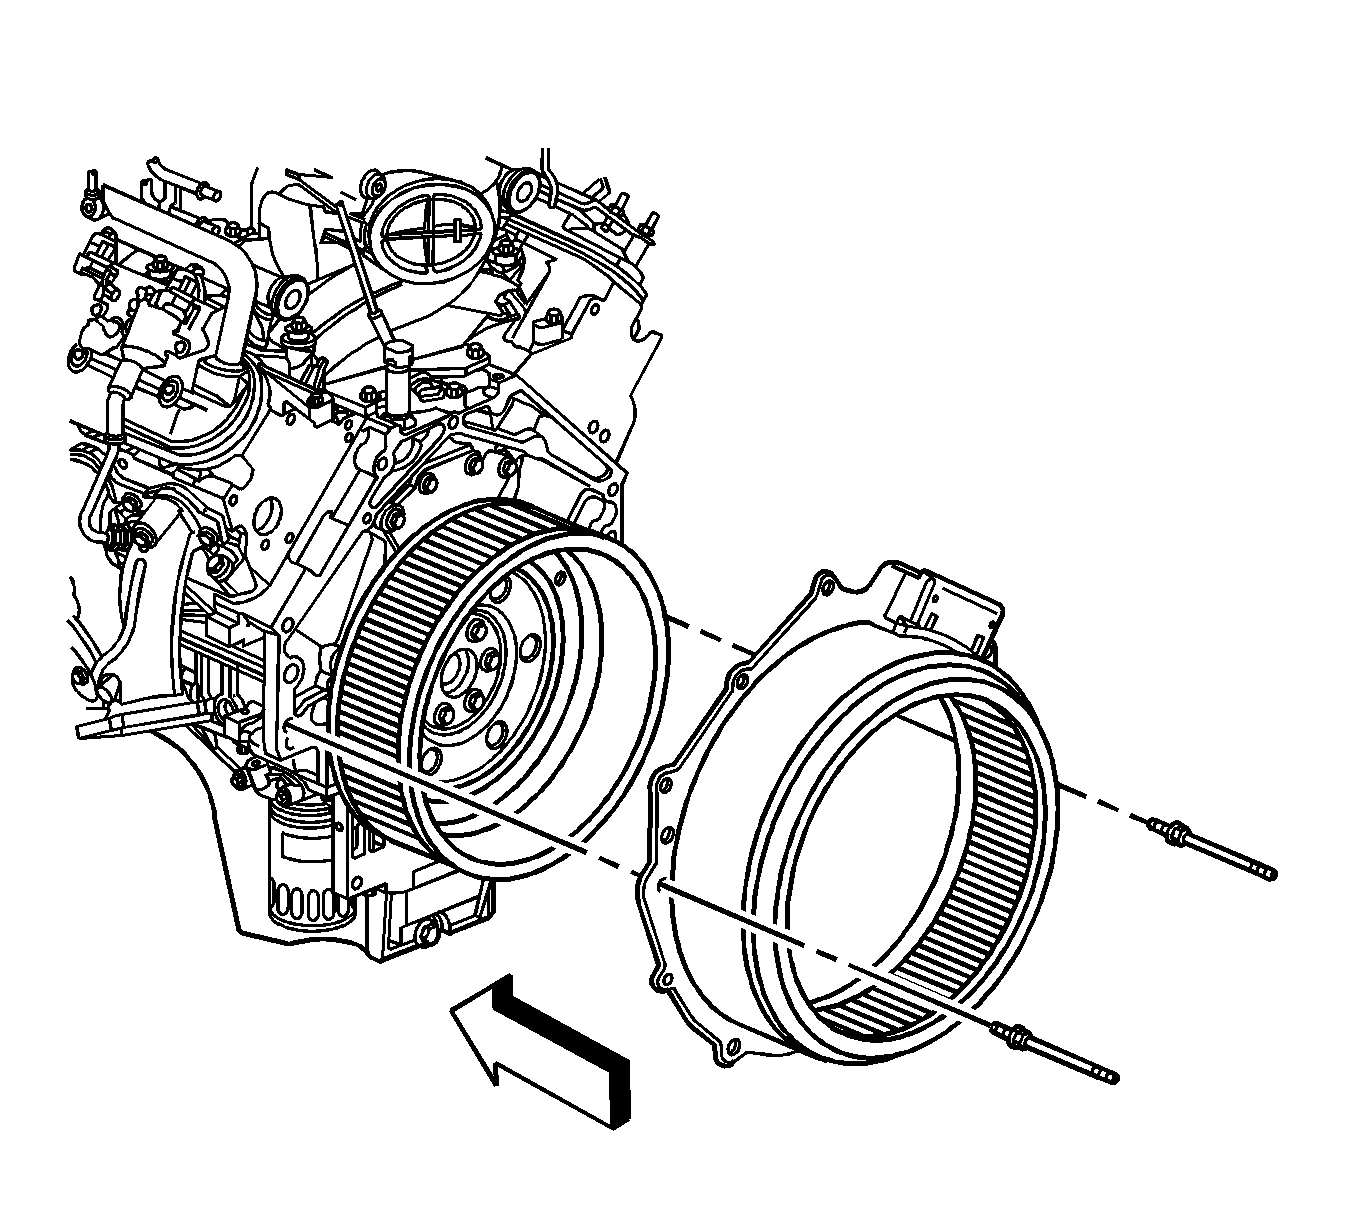
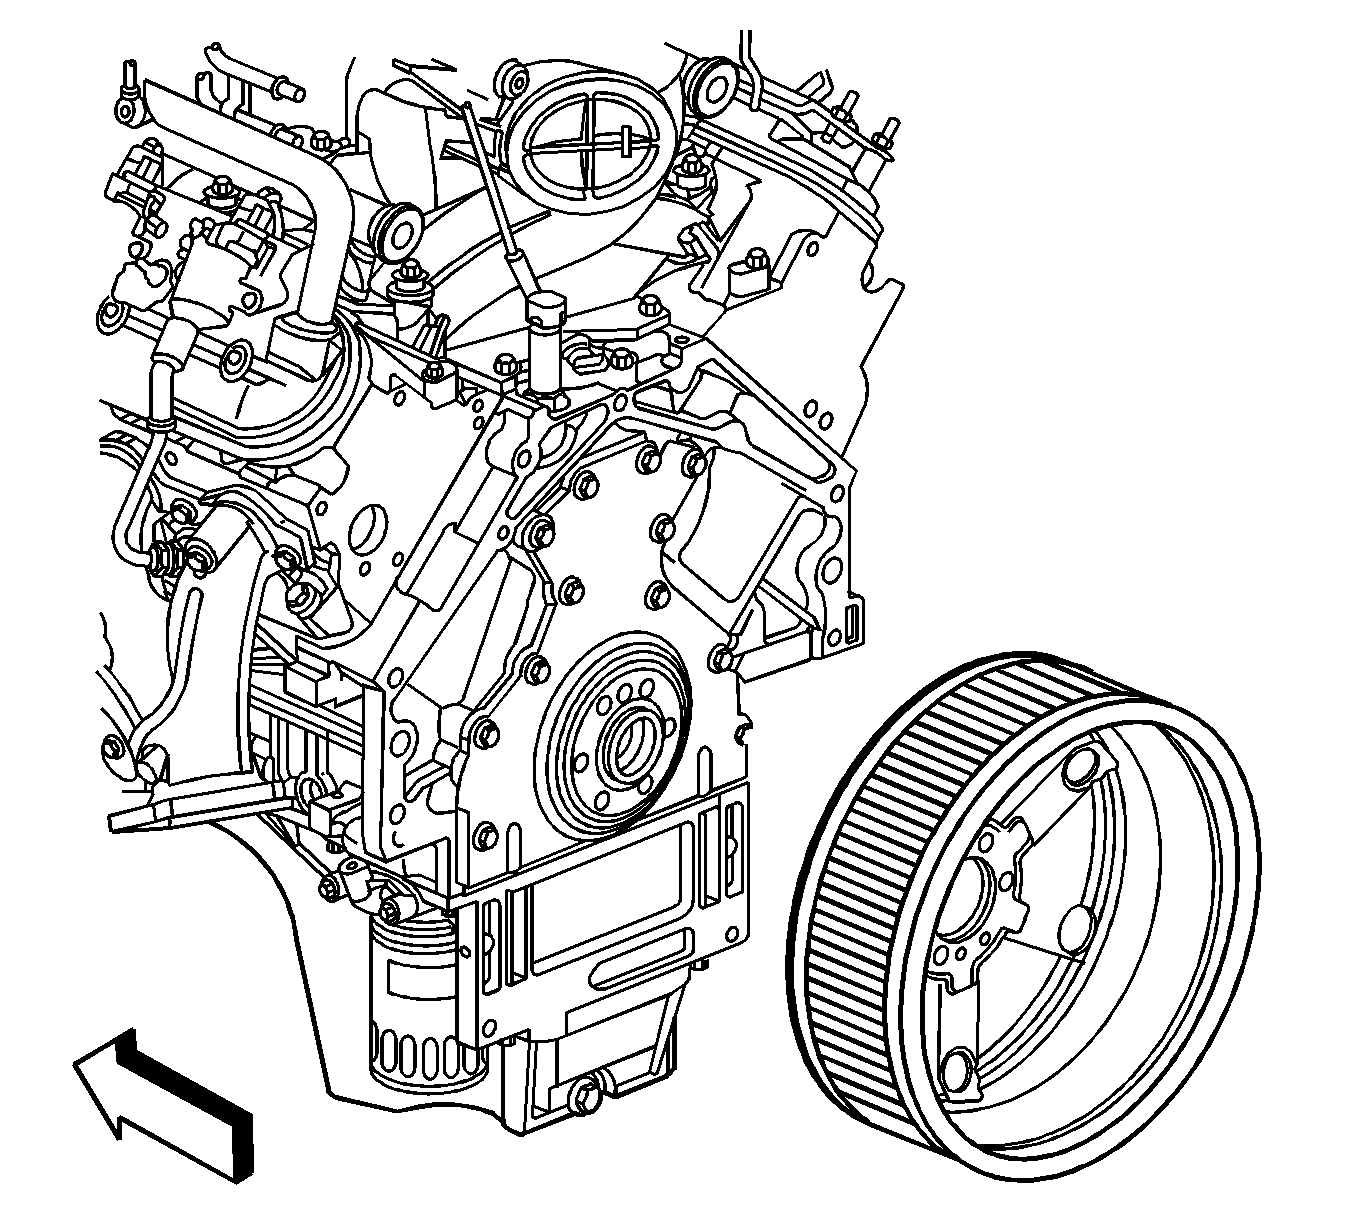
- Install the J 46093 (1) and bolts.
- Remove the flexplate bolts.
- Remove the flexplate.
- Insert 2 bolts into the holes in the starter/generator rotor.
- Tighten the bolts in order to pull the rotor off.
- Remove the starter/generator rotor.
Rotate the stator until the 3-phase cable junction block is near the bottom.
Notice: Refer to Fastener Notice in the Preface section.
The flange of the J 46093 should locate into the hole in the flexplate. Use two M10 1.5 x 40 mm bolts for proper tool operation.
Tighten
Tighten the bolts to 50 N·m (37 lb ft).
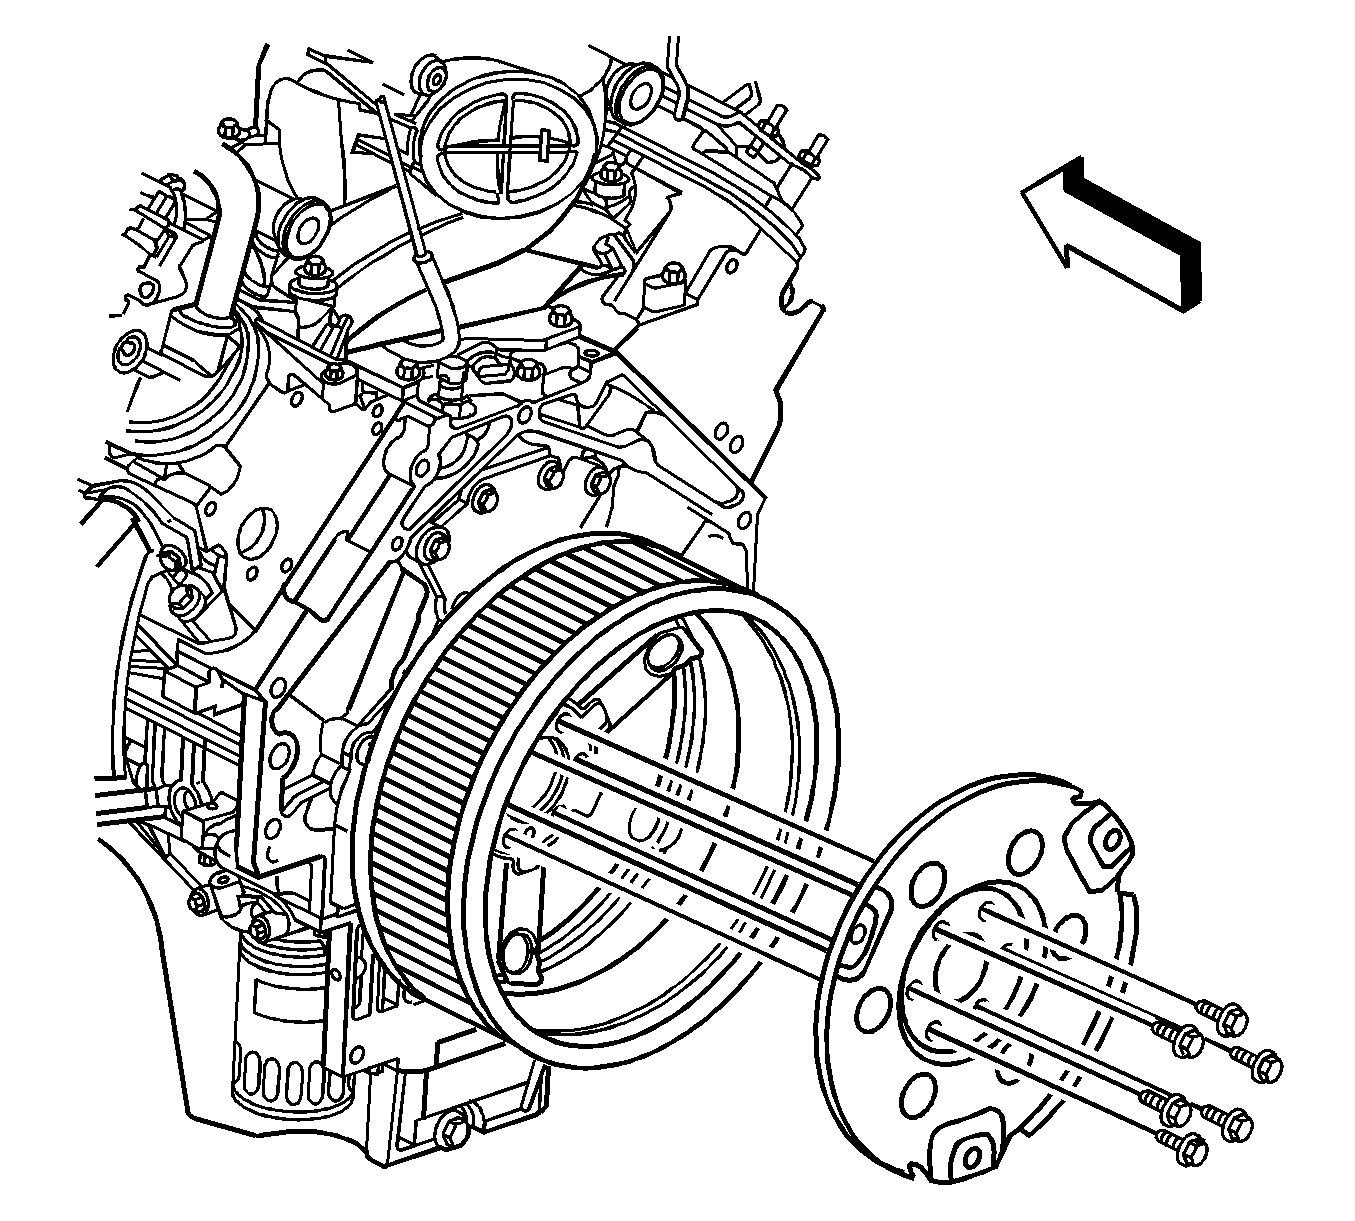
Important: DO NOT use pry bars to remove the starter/generator rotor.
Installation Procedure
- Install the starter/generator rotor.
- Install the flexplate.
- Install the flexplate bolts.
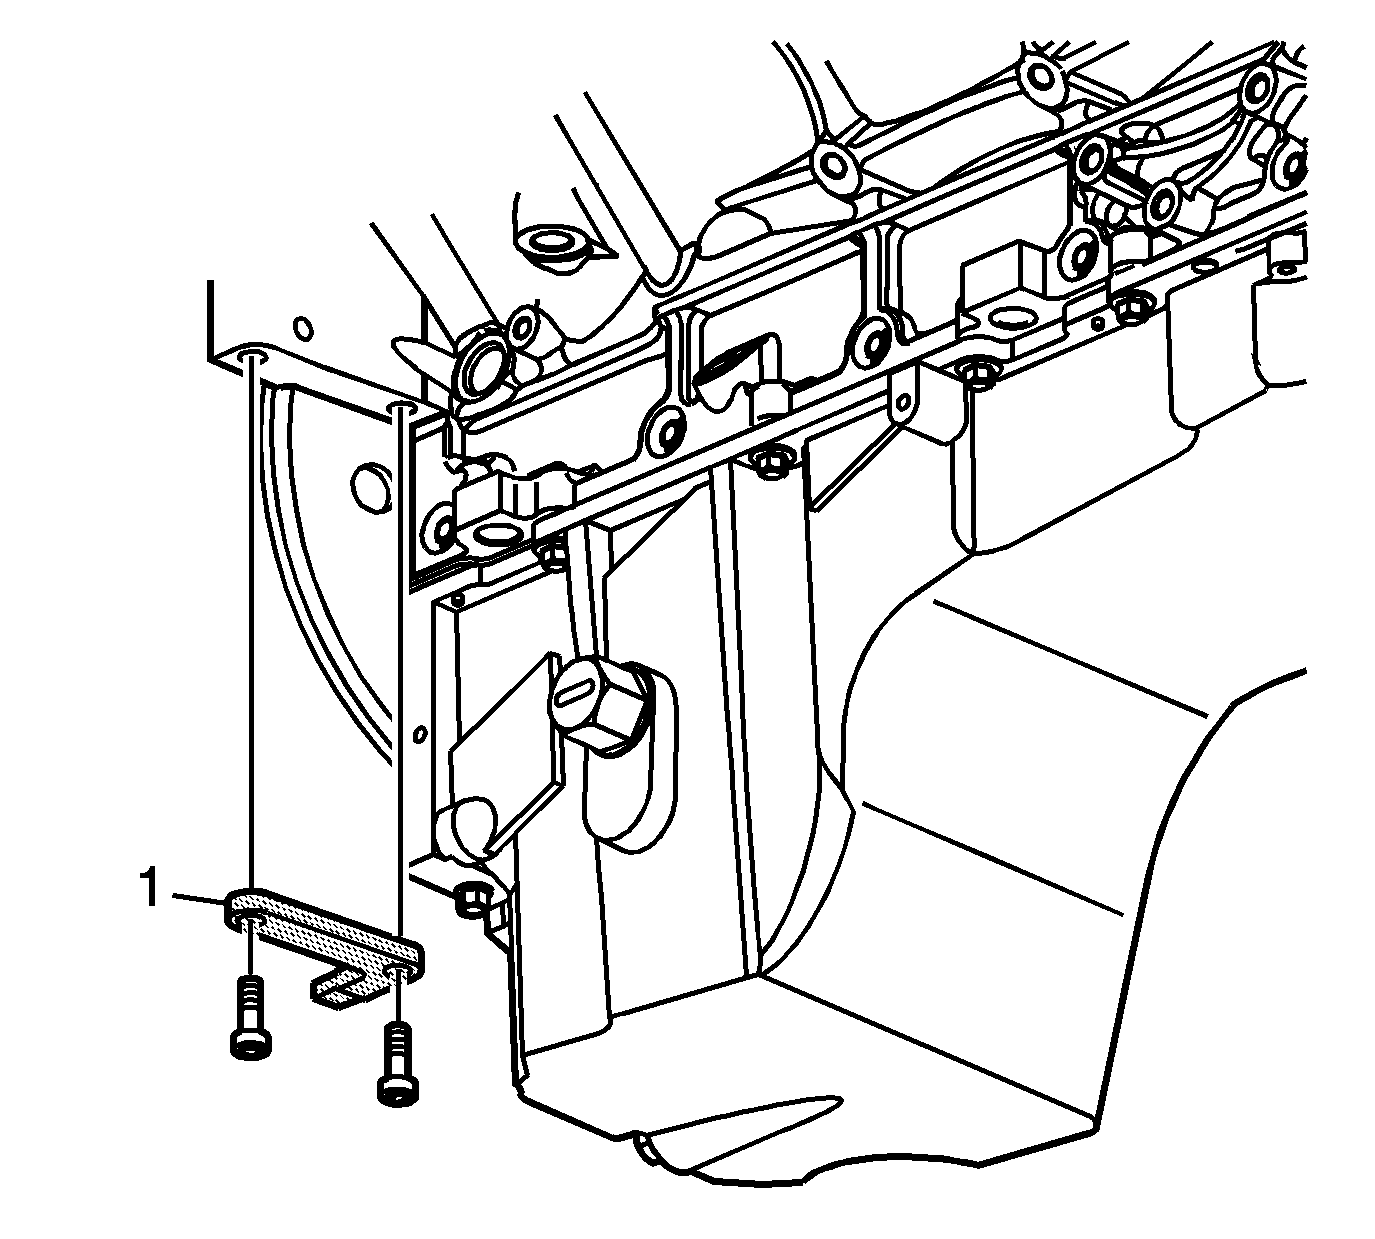
- Remove the J 46093 (1) and bolts.
- Install the starter/generator stator.
- Install the starter/generator stator stud.
- Install the transmission. Refer to Transmission Replacement .
Notice: Refer to Fastener Notice in the Preface section.
Tighten
Tighten the bolts to 100 N·m (74 lb ft).
Tighten
Tighten the stud to 16 N·m (12 lb ft).
