For 1990-2009 cars only
Special Tools
J 45059 Angle Meter
Removal Procedure
- Drain the cooling system. Refer to Cooling System Draining and Filling .
- Remove the drive belt. Refer to Drive Belt Replacement .
- Remove the lower intake manifold. Refer to Lower Intake Manifold Replacement .
- Remove the left exhaust manifold. Refer to Exhaust Manifold Replacement - Left Side .
- Remove the left side pushrods. Refer to Valve Rocker Arm and Push Rod Replacement .
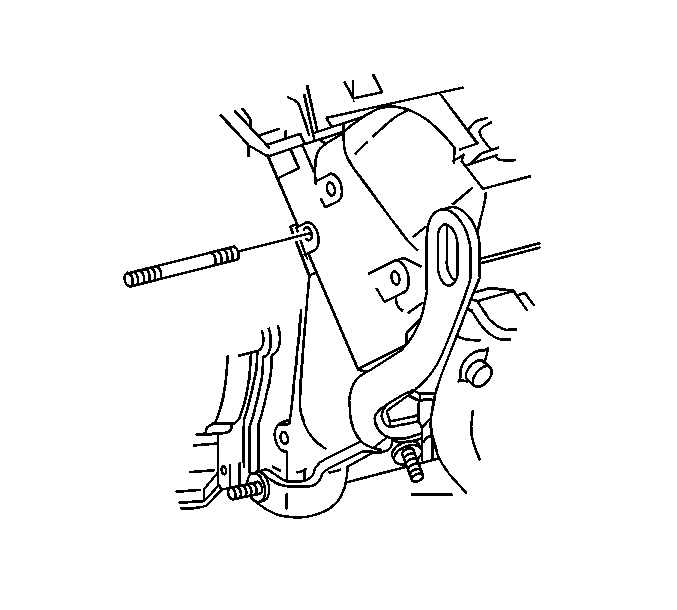
- Remove the junction block bracket bolt.
- Position the bracket and wiring harness aside.
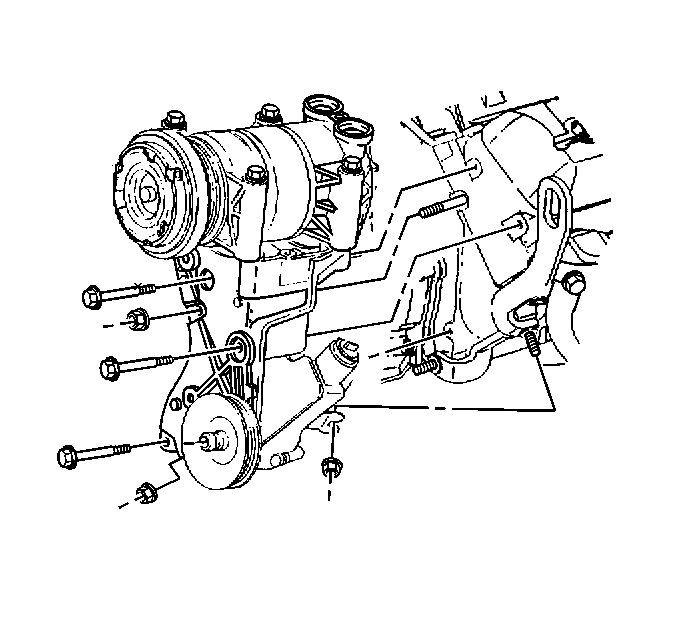
- Loosen the power steering (P/S) pump rear bracket nut.
- Remove the P/S pump rear bracket front nut.
- Remove the bolts and nut for the P/S pump bracket.
- Leave the air conditioning (A/C) compressor, if equipped, and the P/S pump on the bracket.
- Slide the P/S pump bracket off of the stud and set aside.
- Remove the P/S pump bracket stud.
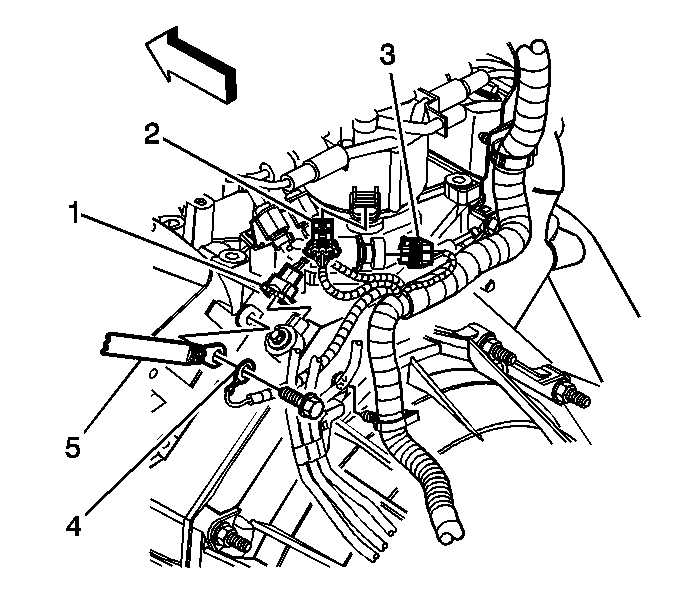
- Remove the harness ground bolt.
- Position the harness ground (4) and ground strap (5).
- Remove the engine coolant temperature (ECT) sensor.
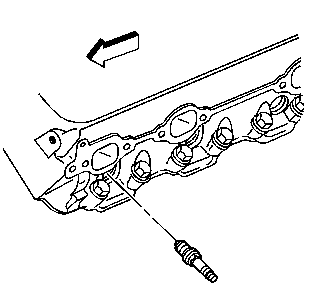
- Remove the spark plugs.
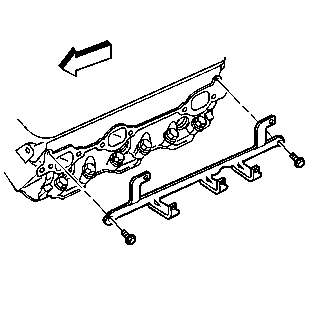
- Remove the spark plug wire support bolts and support.
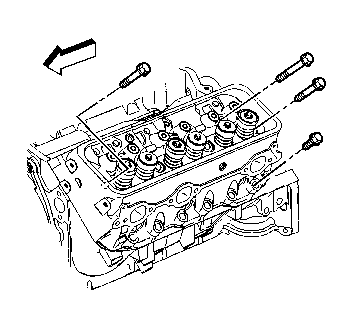
- Remove and discard the cylinder head bolts.
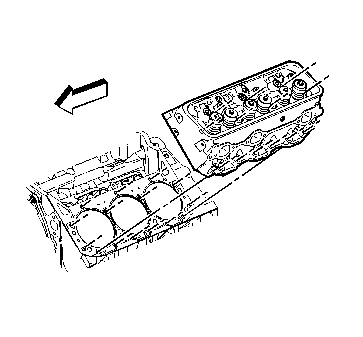
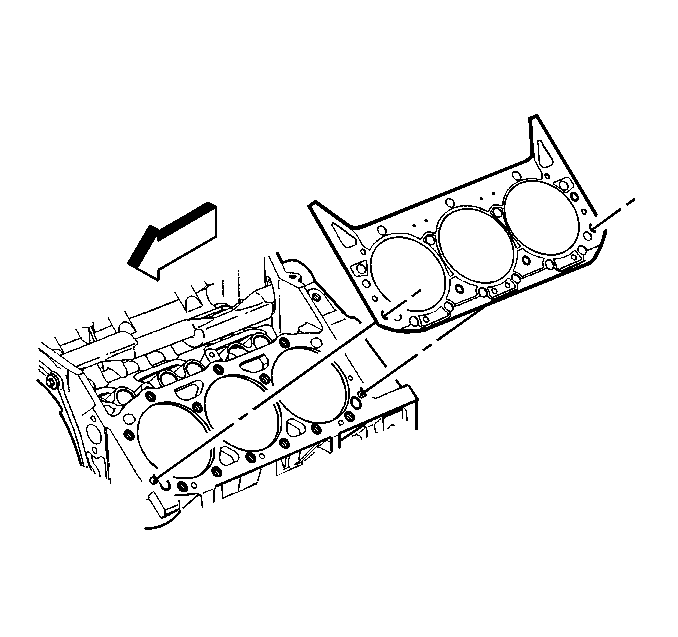
- Remove the cylinder head.
- Remove and discard the cylinder head gasket.
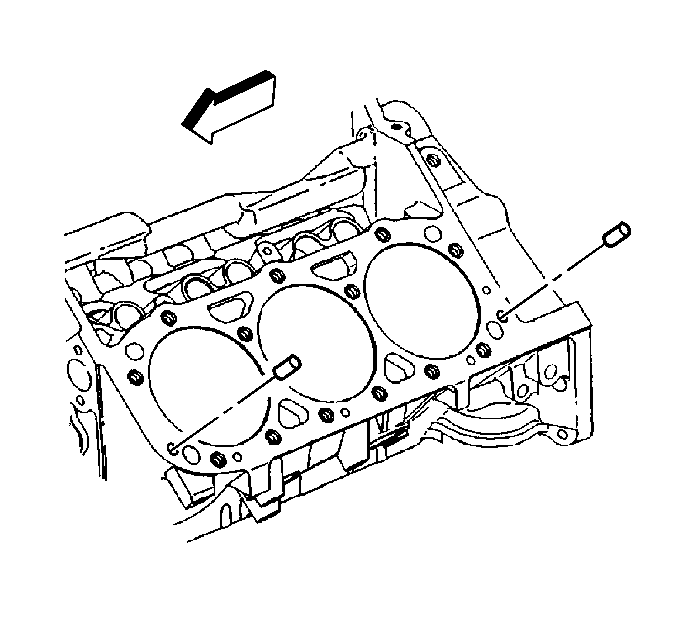
- Remove the cylinder head locator pins, if necessary.
- Clean and inspect the cylinder head, if necessary. Refer to Cylinder Head Cleaning and Inspection .
- Disassemble the cylinder head, if necessary. Refer to Cylinder Head Disassemble .

Installation Procedure
- Assemble the cylinder head, if necessary. Refer to Cylinder Head Assemble .
- Install the cylinder head locator pins, if necessary.
- Install a NEW cylinder head gasket.
- Install the cylinder head.
- Apply sealant to the threads of NEW cylinder head bolts. Refer to Adhesives, Fluids, Lubricants, and Sealers for the correct part number.
- Install the cylinder head bolts finger tight.
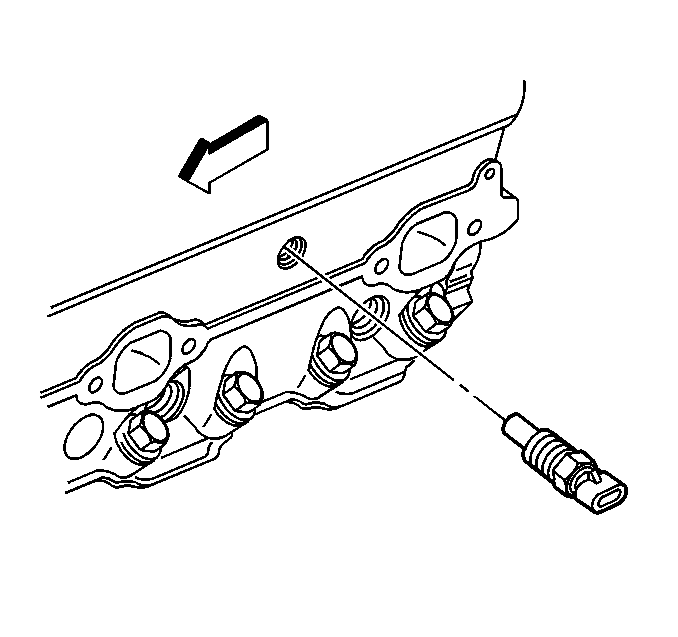
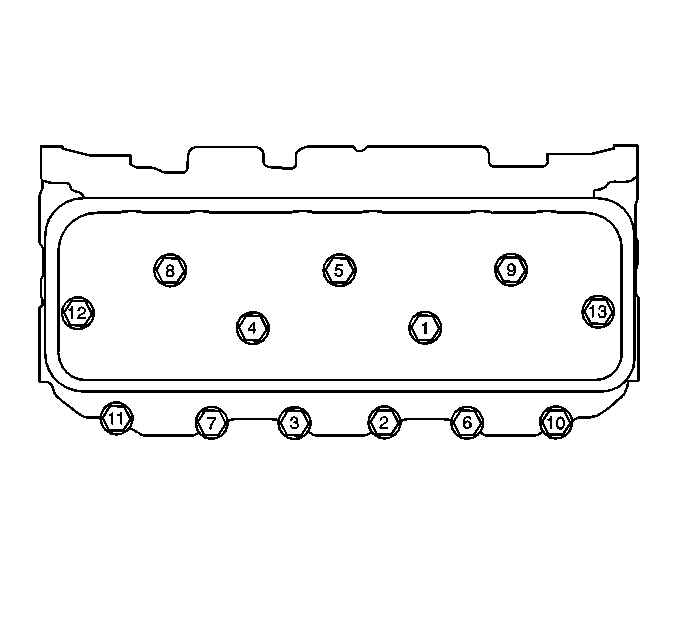
- Tighten the cylinder head bolts using the sequence shown.
- Tighten the bolts a first pass to 30 N·m (22 lb ft).
- Tighten the long bolts (1, 4, 5, 8, 9) a final pass to 75 degrees using J 45059 .
- Tighten the medium bolts (12, 13) a final pass to 65 degrees using J 45059 .
- Tighten the short bolts (2, 3, 6, 7, 10, 11) a final pass to 55 degrees using J 45059 .
- Install the spark plug wire support and bolts.
- Install the spark plugs.
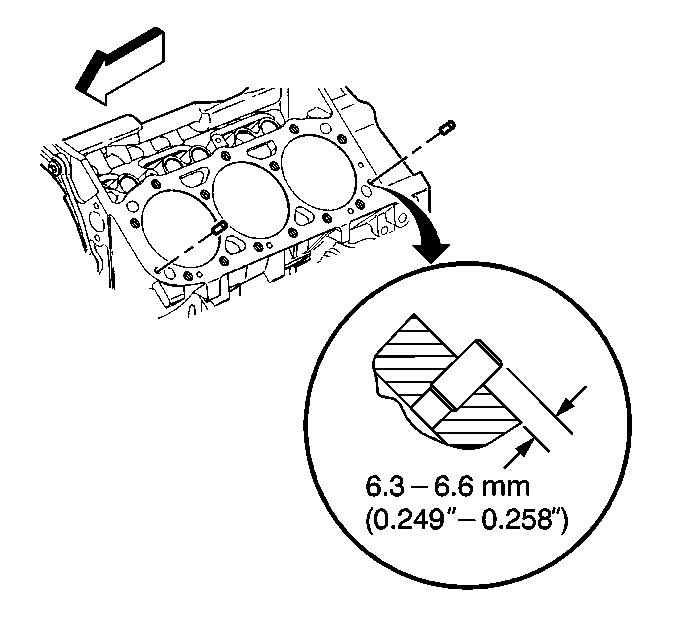
- If installing NEW spark plugs measure for the correct gap. Adjust the spark plug gap if necessary.
- Install the ECT sensor. If reusing the old sensor, apply sealant to the threads. Refer to Adhesives, Fluids, Lubricants, and Sealers for the correct part number.
- Position the ground strap (5) and harness ground (4).
- Install the harness ground bolt.
- Install the P/S pump bracket stud.
- Slide the P/S pump bracket rearward.
- Install the bolts and nuts for the P/S pump bracket.
- Install the P/S pump rear bracket front nut.
- Tighten the P/S pump rear bracket nut.
- Position the bracket and wiring harness.
- Install the junction block bracket bolt.
- Install the left side pushrods. Refer to Valve Rocker Arm and Push Rod Replacement .
- Install the left exhaust manifold. Refer to Exhaust Manifold Replacement - Left Side .
- Install the lower intake manifold. Refer to Lower Intake Manifold Replacement .
- Install the drive belt. Refer to Drive Belt Replacement .
- Fill the cooling system. Refer to Cooling System Draining and Filling .
Important: Do not use any type of sealer on the cylinder head gasket.
Notice: Refer to Fastener Notice in the Preface section.
Tighten
Tighten
Tighten the bolts to 12 N·m (106 lb in).
Specification
Spark plug gap to 1.52 mm (0.060 in).
Tighten
| • | Tighten the plugs in a USED cylinder head to 15 N·m (11 lb ft). |
| • | Tighten the plugs on the initial installation of a NEW cylinder head to 30 N·m (22 lb ft). |
Tighten
Tighten the sensor to 20 N·m (15 lb ft).
Tighten
Tighten the bolt to 16 N·m (12 lb ft).
Tighten
Tighten the stud to 20 N·m (15 lb ft).
Tighten
Tighten the bolts and nuts to 41 N·m (30 lb ft).
Tighten
Tighten the bolt to 25 N·m (18 lb ft).
