Exhaust Manifold Pipe Replacement 6.0, 6.6, and 8.1L Engines
Removal Procedure
Caution: Refer to Exhaust Service Caution in the Preface section.
Caution: Refer to Protective Goggles and Glove Caution in the Preface section.
- Raise and suitably support the vehicle. Refer to
Lifting and Jacking the Vehicle
in General Information.
- Support the transmission with a suitable transmission jack.
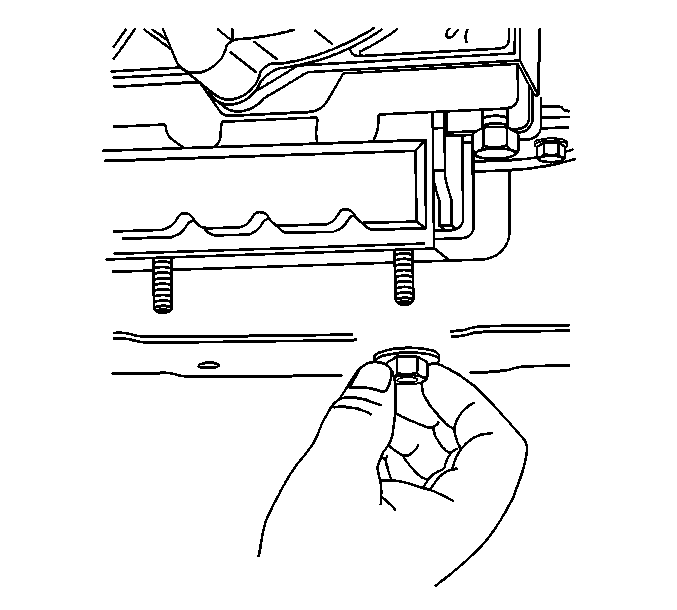
- Remove the transmission mount to transmission support nuts.
- Raise the transmission off of the transmission support.
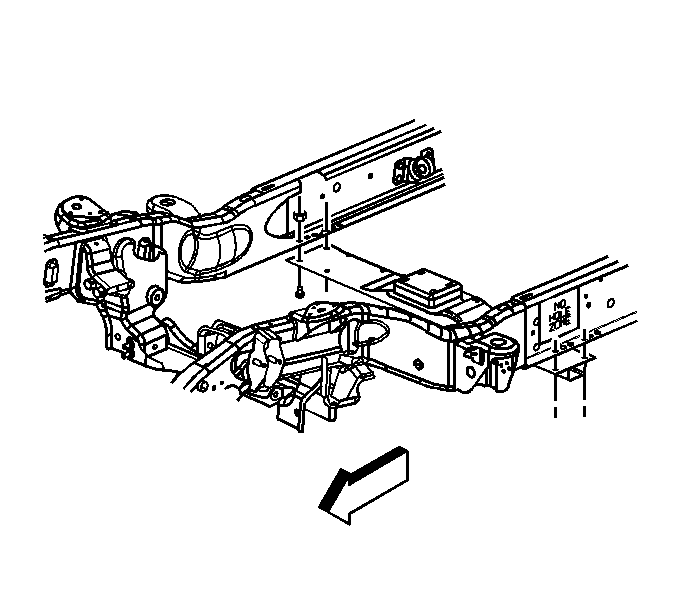
- Remove the transmission support crossmember bolts.
- Remove the transmission support crossmember.
- Depending on which side is being replaced, perform one of the following steps:
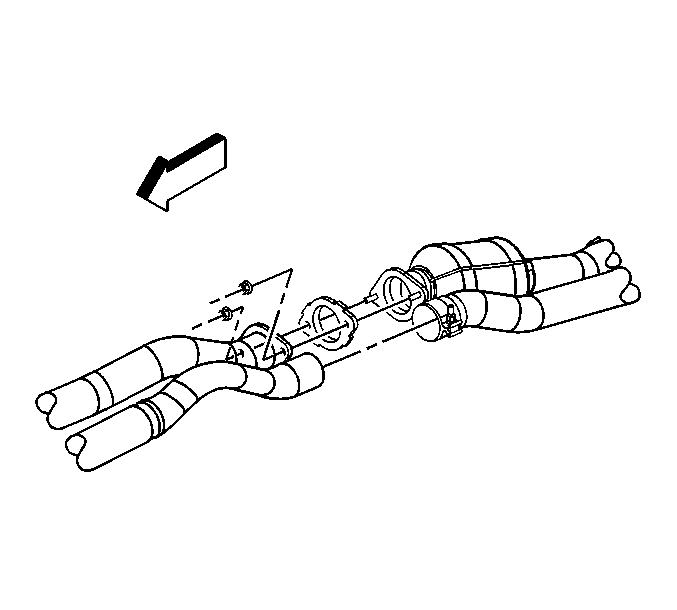
| • | Remove the exhaust muffler nuts. |
| • | Loosen the exhaust pipe clamp. |
- Remove the necessary exhaust system hangers so that the pipes can be separated.
- Use a jack stand to support the exhaust.
- If equipped with a 6.0, or 8.1L engine, perform the following:
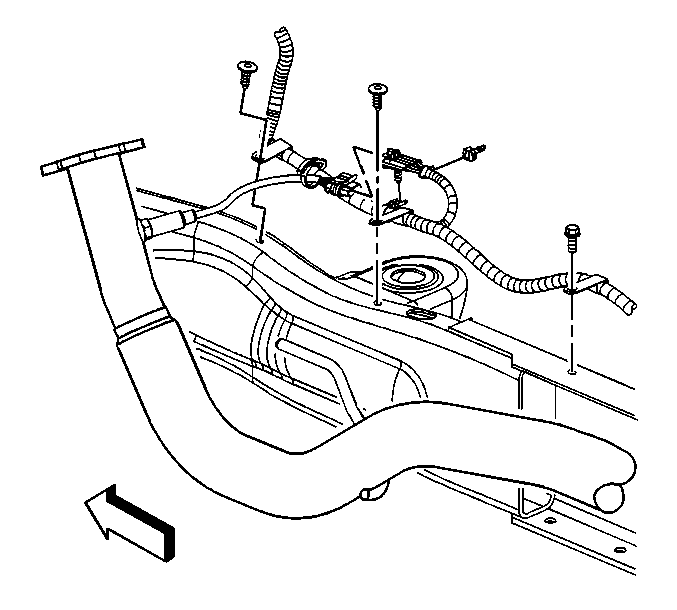
| 10.1. | Remove the clip around the engine harness and the oxygen sensor pigtail. |
| 10.2. | Disconnect the connector position assurance (CPA) retainer. |
| 10.3. | Disconnect the oxygen sensor electrical connector. |
| 10.4. | Remove the oxygen sensor. |
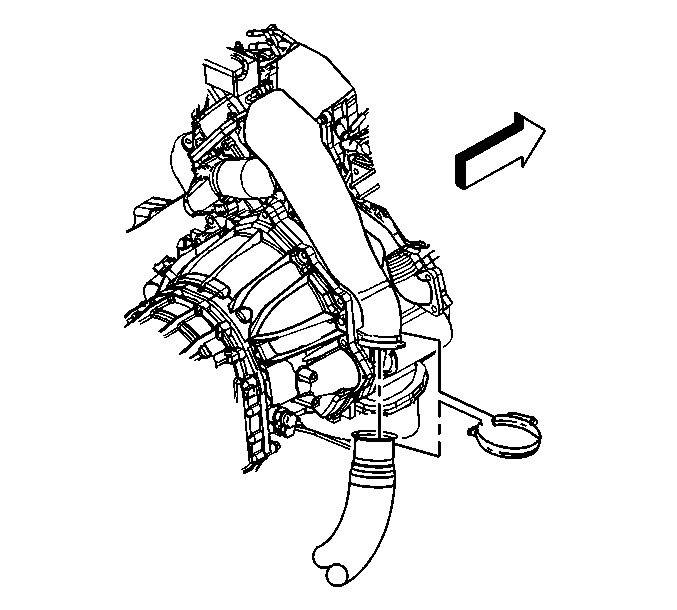
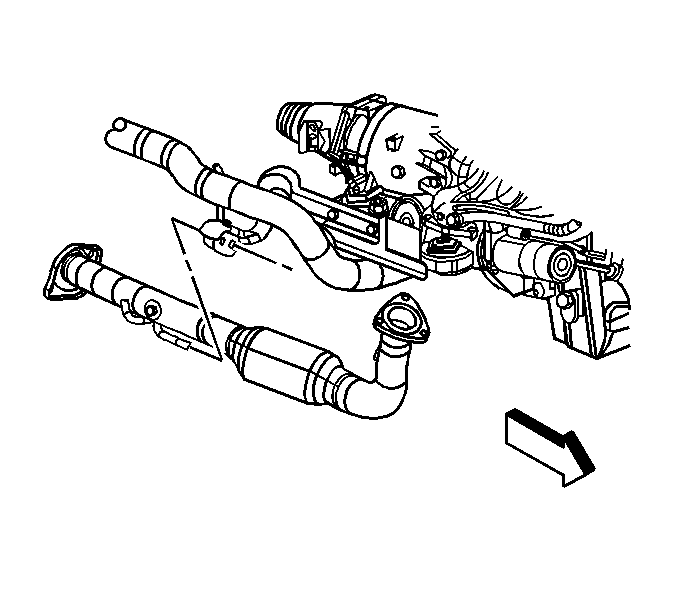
- if equipped with a 6.0, or 8.1L engine, remove the exhaust manifold pipe nuts.
- Using the transmission jack, lower the transmission slightly.
- If equipped with the 6.6L engine, remove the exhaust muffler nuts.
- If equipped with a 6.6L engine, loosen the exhaust pipe clamp.
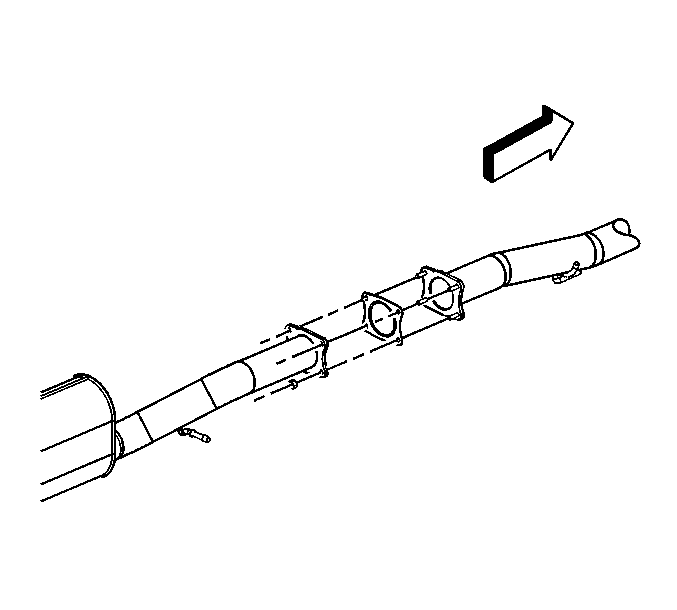
- Slide the exhaust pipe clamp up onto the exhaust pipe adapter.
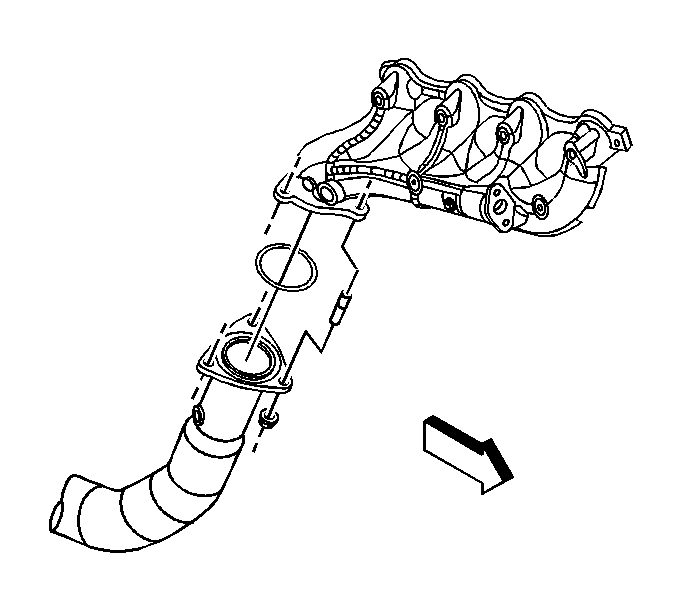
- If equipped with a 6.0, or 8.1L engine, remove the exhaust manifold pipe.
- Slide the exhaust manifold pipe hanger out of the exhaust pipe hanger bracket.
- Discard the exhaust manifold pipe seal.
- If equipped with a 6.0L engine, with regular production option (RPO) Y91, remove
the exhaust manifold pipe.
- Slide the exhaust manifold pipe hanger out of the exhaust pipe hanger bracket.
- Discard the exhaust manifold pipe seal.
- If equipped with a 6.6L engine, remove the exhaust manifold pipe.
- Slide the exhaust manifold pipe hanger out of the exhaust pipe hanger bracket.
Installation Procedure
Notice: Refer to Exhaust System Inspection Notice in the Preface section.
- If equipped with a 6.6L engine, install the exhaust manifold pipe.
- Apply water based lubricant to the exhaust pipe hanger bracket, in order to aid in installation.
- Slide the exhaust manifold pipe hanger into the exhaust pipe hanger bracket.
- If equipped with a 6.0L engine, with RPO Y91, install a new exhaust manifold
pipe seal to the exhaust manifold pipe.
- Install the exhaust manifold pipe.
- Apply lubricant to the exhaust pipe hanger bracket, in order to aid in installation.
- Slide the exhaust manifold pipe hanger into the exhaust pipe hanger bracket.
- If equipped with a 6.0, or 8.1L engine, install a new exhaust manifold pipe seal to the exhaust manifold
pipe.
- Install the exhaust manifold pipe.
- Apply lubricant to the exhaust pipe hanger bracket, in order to aid in installation.
- Slide the exhaust manifold pipe hanger into the exhaust pipe hanger bracket.
- If equipped with the 6.6L engine, install the exhaust muffler nuts until snug.
Notice: Refer to Fastener Notice in the Preface section.
Important: Ensure that the manifold pipe is square to the exhaust pipe adapter.
- If equipped with a 6.6L engine, slide the exhaust pipe clamp down and around the pipe connection.
- Tighten the exhaust pipe clamp and muffler nuts.
Tighten
| • | Tighten the clamp to 40 N·m (30 lb ft). |
| • | Tighten the nuts to 40 N·m (30 lb ft). |
- If equipped with a 6.0L or 8.1 L engine, install the exhaust manifold
pipe nuts.
Tighten
Tighten the nuts to 50 N·m (39 lb ft).
- Using the transmission jack, raise the transmission.
- If equipped with a 6.0, or 8.1L engine, and the exhaust manifold pipe was replaced
perform the following:
| 17.1. | Apply anti-seize compound GM P/N 12377953 or equivalent to the threads of the old oxygen sensor. |
| 17.2. | Install the old oxygen sensor. |
Tighten
Tighten the sensor to 42 N·m (31 lb ft).
- If equipped with a 6.0, or 8.1L engine, and the exhaust manifold pipe was not replaced perform the following:
| 18.1. | Connect the oxygen sensor electrical connector. |
| 18.2. | Connect the CPA retainer. |
| 18.3. | Install the clip around the engine harness and the oxygen sensor pigtail. |
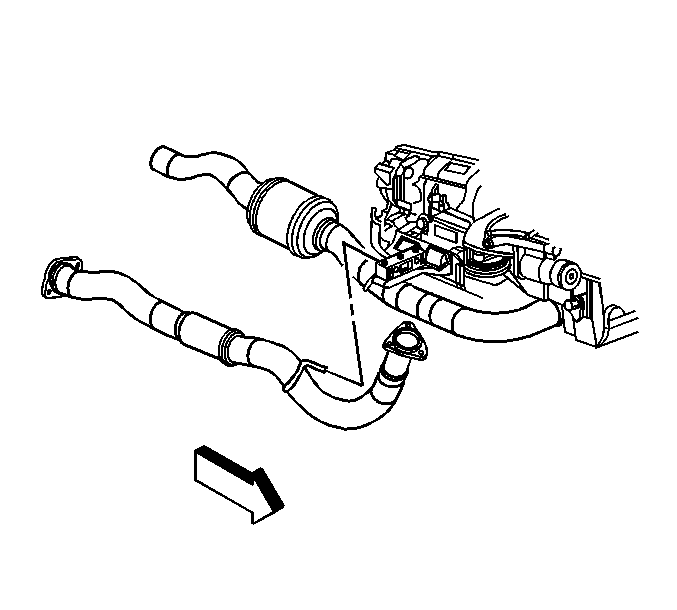
- Install the exhaust pipe/catalytic converter to the vehicle.
- Install the exhaust system hangers.
- Depending on which side is being replaced, perform one of the following steps:
| • | Install the exhaust muffler nuts. |
Tighten
Tighten the nuts to 40 N·m (30 lb ft).
| • | Install a NEW exhaust pipe clamp. |
Tighten
Tighten the clamp to 44 N·m (33 lb ft).
- Install the transmission support crossmember.
- Install the transmission support crossmember bolts.
Tighten
Tighten the bolts to 95 N·m (70 lb ft).
- Lower the transmission onto the transmission support.
- Install the transmission mount to transmission support nuts.
Tighten
Tighten the bolts to 40 N·m (30 lb ft).
- Remove the support from the transmission.
- Lower the vehicle.
