Brake Caliper Overhaul Front
Removal Procedure
Tools Required
J 24548 Piston Ring
Compressor
- Remove the fluid from the caliper.
- Pad the interior of the caliper with clean shop towels.
Caution: Do not place your fingers in front of the piston in an attempt to catch
or protect it when applying compressed air. This could result in serious injury.
Notice: Use only enough air to ease the piston out of the bore. If the piston
is blown out, even with the padding, it can be damaged.
- Remove the piston by directing compressed air into the caliper fluid
inlet.
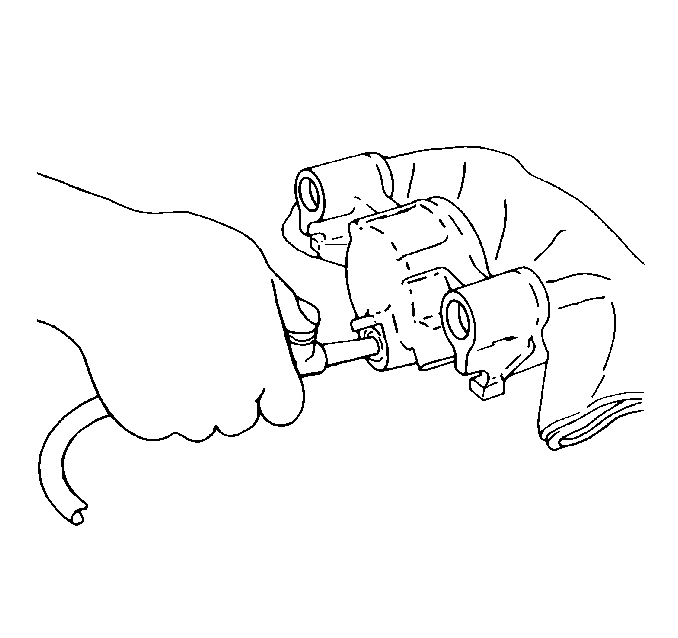
- Remove the boot.
- Remove the piston seal with a non metal tool.
- Remove the bleeder valve.
- Clean the following components with denatured alcohol:
- Dry the parts and blow out the passages with dry, filtered, compressed
air.
- Inspect the piston for the following conditions:
| • | Damage to the chrome plating |
- Inspect the caliper bore for the following conditions:
- Replace as necessary.
- Use crocus cloth to polish out any light corrosion.
- Replace the caliper if the corrosion cannot be removed. Refer
to
Brake Caliper Replacement
.
Installation Procedure
- Lubricate the new piston seal, caliper bore, and piston.
- Seal the lips on the boot with clean brake fluid.
- Install the piston seal.
- Make sure the seal is not twisted in the caliper groove.
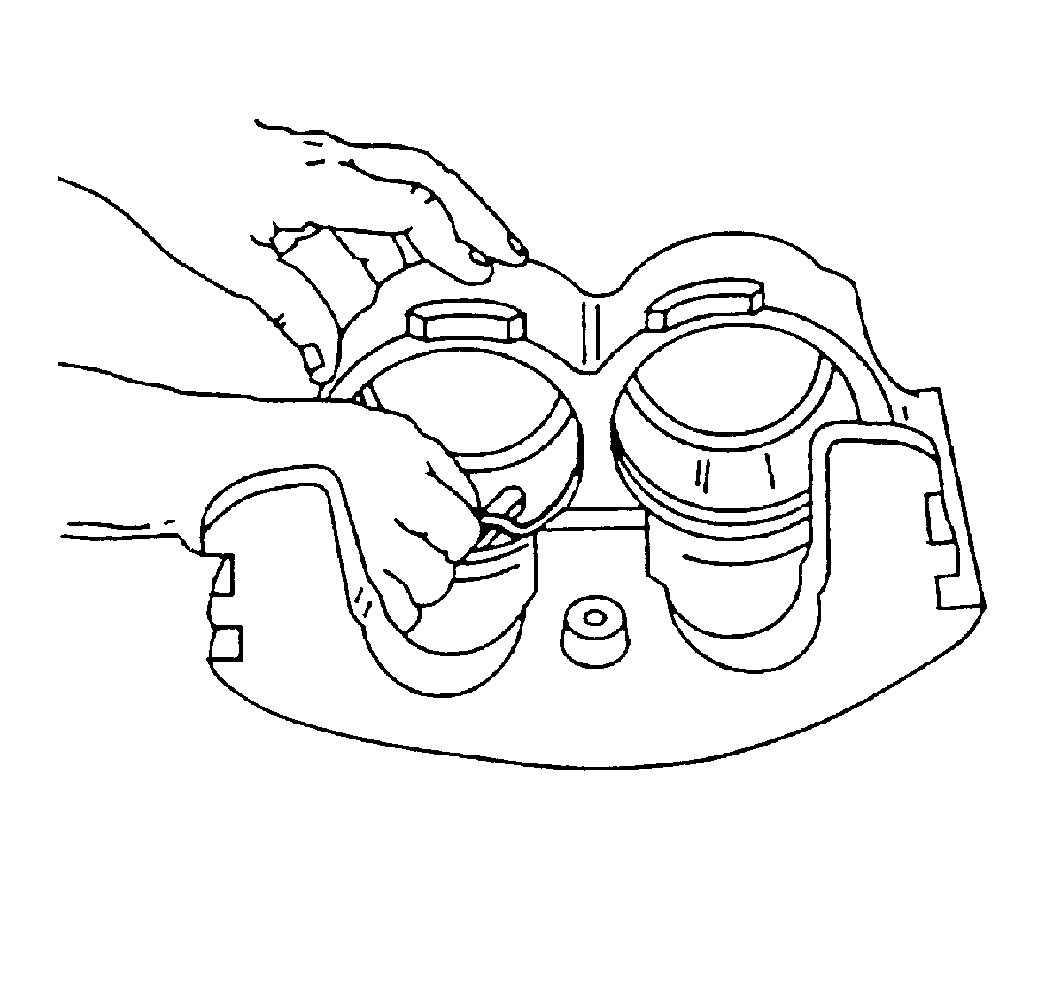
- Install the boot on the J 24548
.
| 5.1. | Place the large diameter of the boot over the tool. |
| 5.2. | Carefully work the small diameter over the tool. |
| 5.3. | Slide the large diameter off of the tool. |
- Install the large lip
of the boot in the caliper bore groove. The lip of the boot must firmly seat
in the groove.
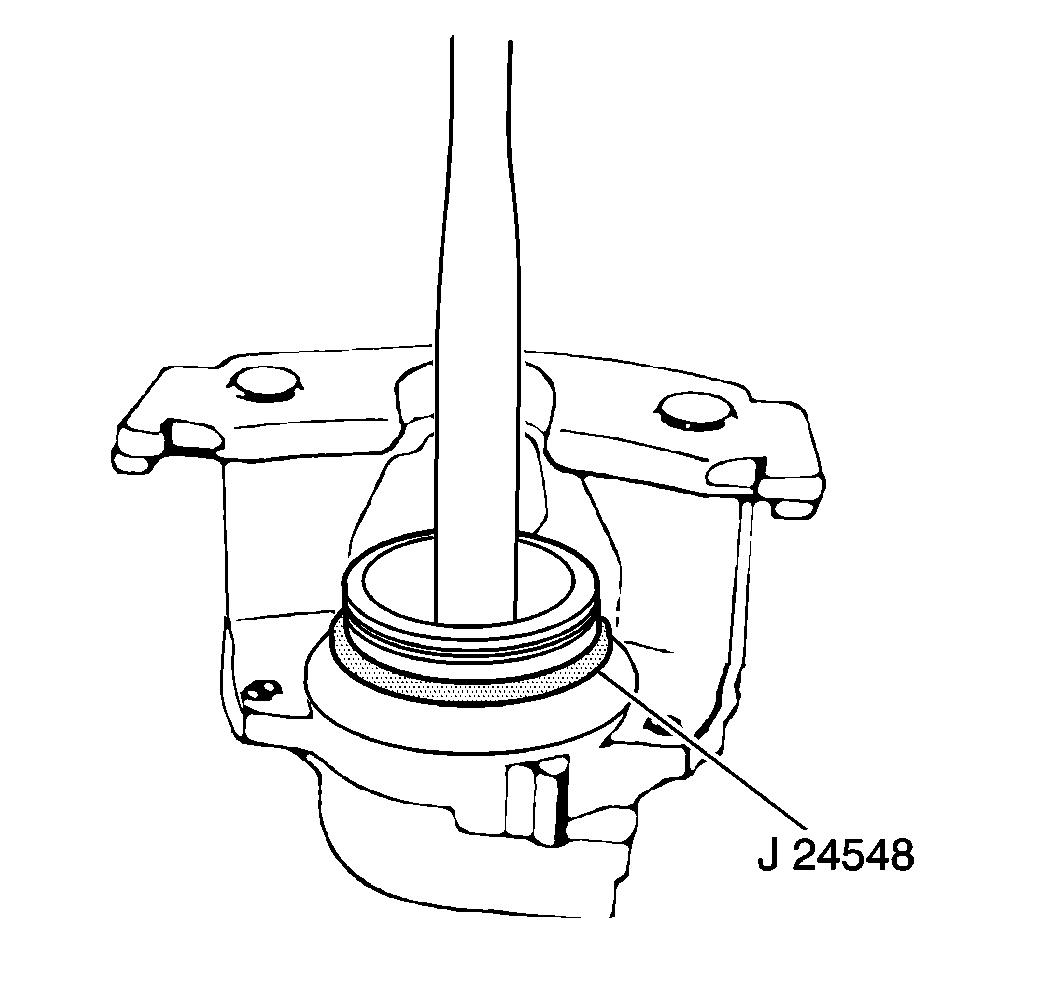
- Install the piston inside
the J 24548
.
- Install the piston halfway into the bore.
| 8.2. | Make sure the boot is firmly seated. |
- Install the bleeder valve.
Brake Caliper Overhaul Rear
Disassembly Procedure
- Remove the brake fluid from the brake caliper.
- Clean the exterior of the brake caliper.
- Pad the exterior of the brake caliper with a clean shop towel.
Important: Use just enough air pressure to ease the piston out of the bore. If
only one piston is blown loose, you may have to reinsert the piston part way
and block the piston in position. Apply air pressure in order to free the
remaining position.
Caution: Do not place your fingers in front of the piston in order
to catch or protect the piston while applying compressed air. This could result
in serious injury.
Notice: Use only enough air to ease the piston out of the bore. If the piston
is blown out, even with the padding, it can be damaged.
- Remove the pistons from the bore by directing compressed air into the
brake caliper fluid inlet.
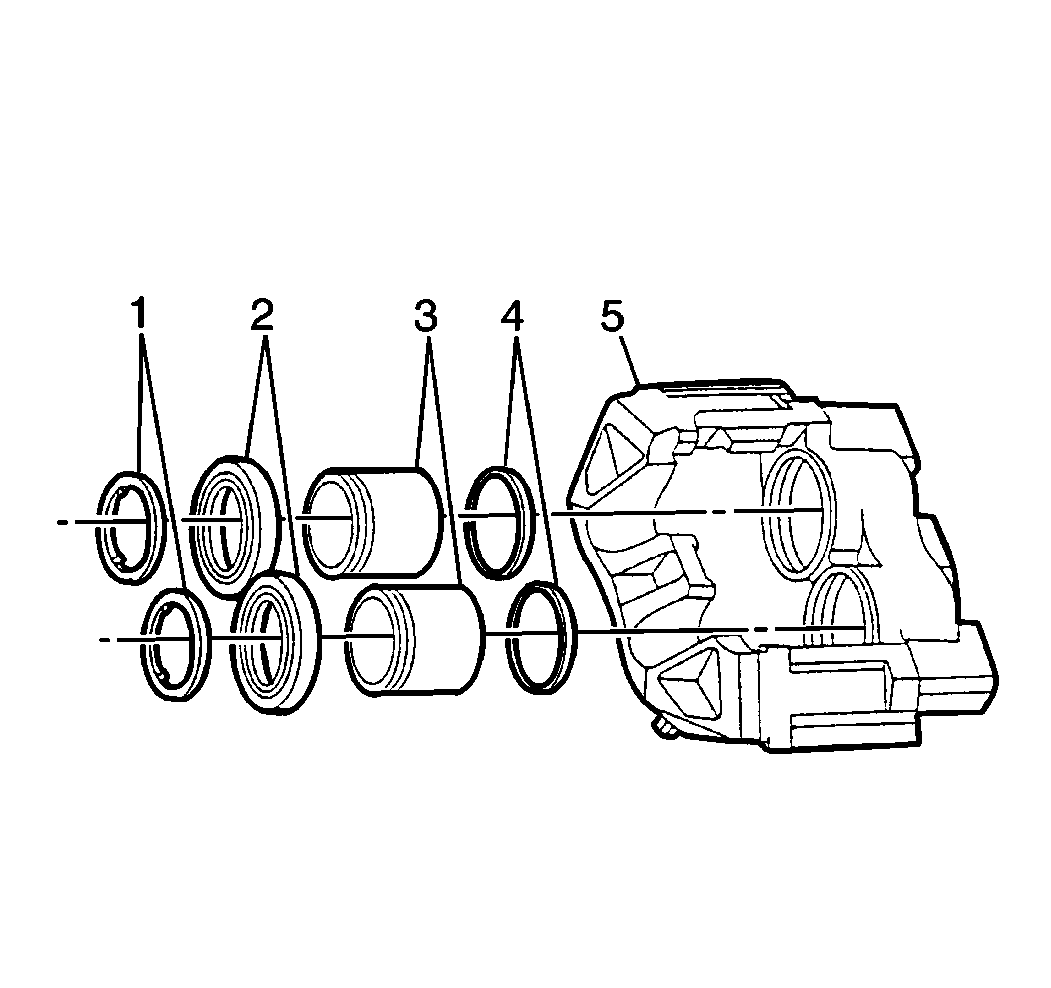
- Remove the heat shields
(1).
- Remove the dust boots (2).
- Remove the piston seals
from the groove in the brake caliper bore using a pointed piece of wood or
plastic.
- Remove the bleeder valve.
- Clean all parts with brake parts cleaner GM P/N 12345754,
or equivalent, or use new brake fluid.
- Use dry, filtered, nonlubricated compressed air to dry parts and
blow out all of the passages in the brake caliper housing and the bleeder
screw valve.
- Clean the V-ways with a wire brush.
- Inspect the surfaces of the support rails for rust or corrosion.
- Inspect the brake caliper housing for cracks or other damage.
Replace the brake caliper housing if necessary.
- Inspect the outside diameter of the pistons for the following
conditions:
Important: The outside diameter of the piston is the primary sealing surface of
the brake caliper. The piston diameter is manufactured to very close tolerances.
Refinishing by any means or the use of abrasives is not acceptable.
- If any surface defects are found, replace the piston.
- Inspect the brake caliper bore for the following conditions:
- The piston bore is not plated. Polish out stains or minor corrosion
with crocus cloth.
Do not use emery cloth or any form of abrasive.
- Clean the brake caliper after using the crocus cloth.
- If the bore cannot be cleaned in this manner, replace the brake
caliper. Refer to
Brake Caliper Replacement
.
Assembly Procedure
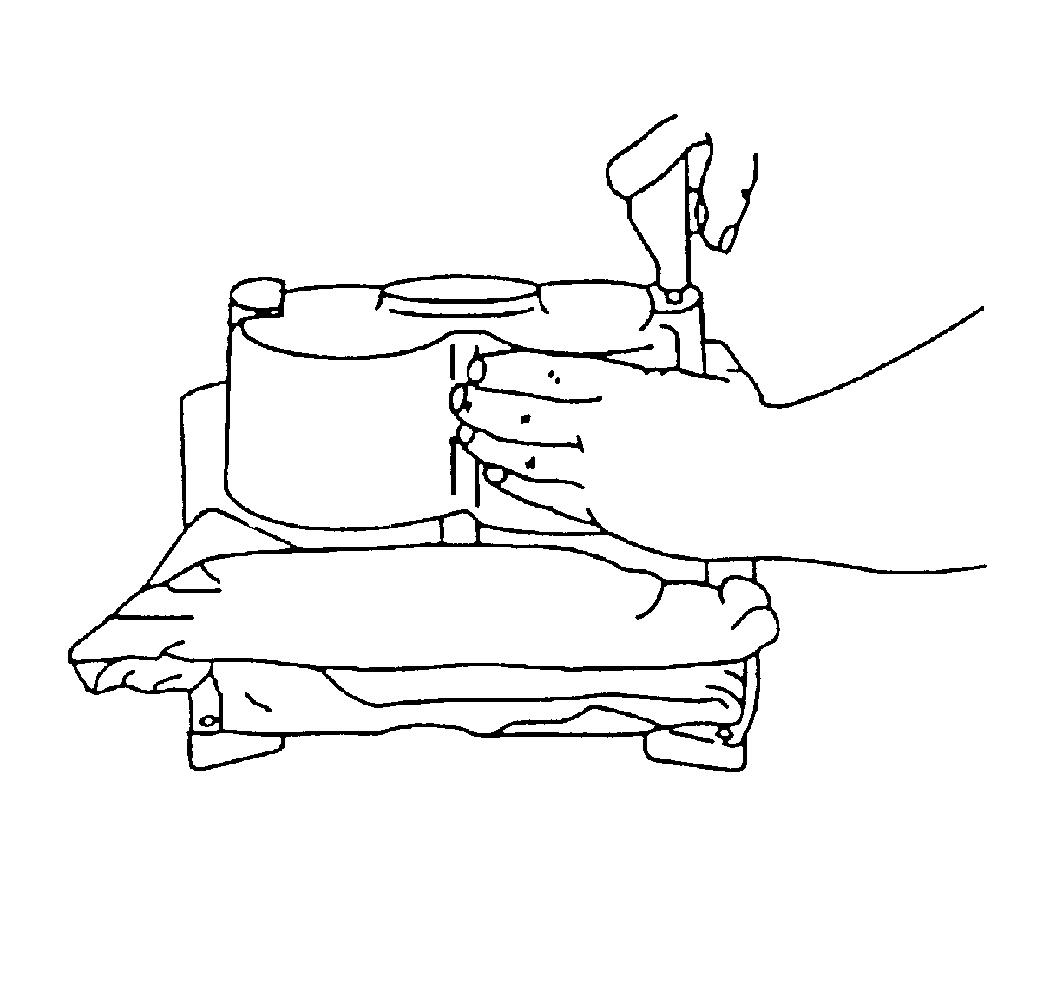
- Place the brake caliper housing on a clean work bench with the
open ends of the bores facing up.
- Install a new piston seal
in the seal groove of the piston bore using the following procedure:
| 2.1. | Dip the new piston seal in clean brake fluid. |
| 2.2. | Gently work the piston seal around the piston bore with a finger
until the seal seats in the groove. |
| 2.3. | Be sure the piston seal is not twisted or rolled in the groove. |
- Lubricate the piston and the bore with new brake fluid.
Gently push the piston into the bore.
- Rotate the piston slightly in order to prevent dislodging the
seal.
- Press the dust boot (2)
into the counterbore in the brake caliper housing (5).
- The dust boot overlaps the stepped edge of the piston (3).
- Install the heat shield (1) on the piston with the chamfer facing
out.
Notice: Use the correct fastener in the correct location. Replacement fasteners
must be the correct part number for that application. Fasteners requiring
replacement or fasteners requiring the use of thread locking compound or sealant
are identified in the service procedure. Do not use paints, lubricants, or
corrosion inhibitors on fasteners or fastener joint surfaces unless specified.
These coatings affect fastener torque and joint clamping force and may damage
the fastener. Use the correct tightening sequence and specifications when
installing fasteners in order to avoid damage to parts and systems.
- Install the bleeder
valve.
Tighten
Tighten the bleeder valve to 17 N·m (13 lb in).
