Starter Replacement Diesel
Removal Procedure
Notice: Never operate the starter motor more than 15 seconds at a time without pausing to allow it to cool for at least 2 minutes. Overheating, caused by excessive cranking, will damage the starter motor.
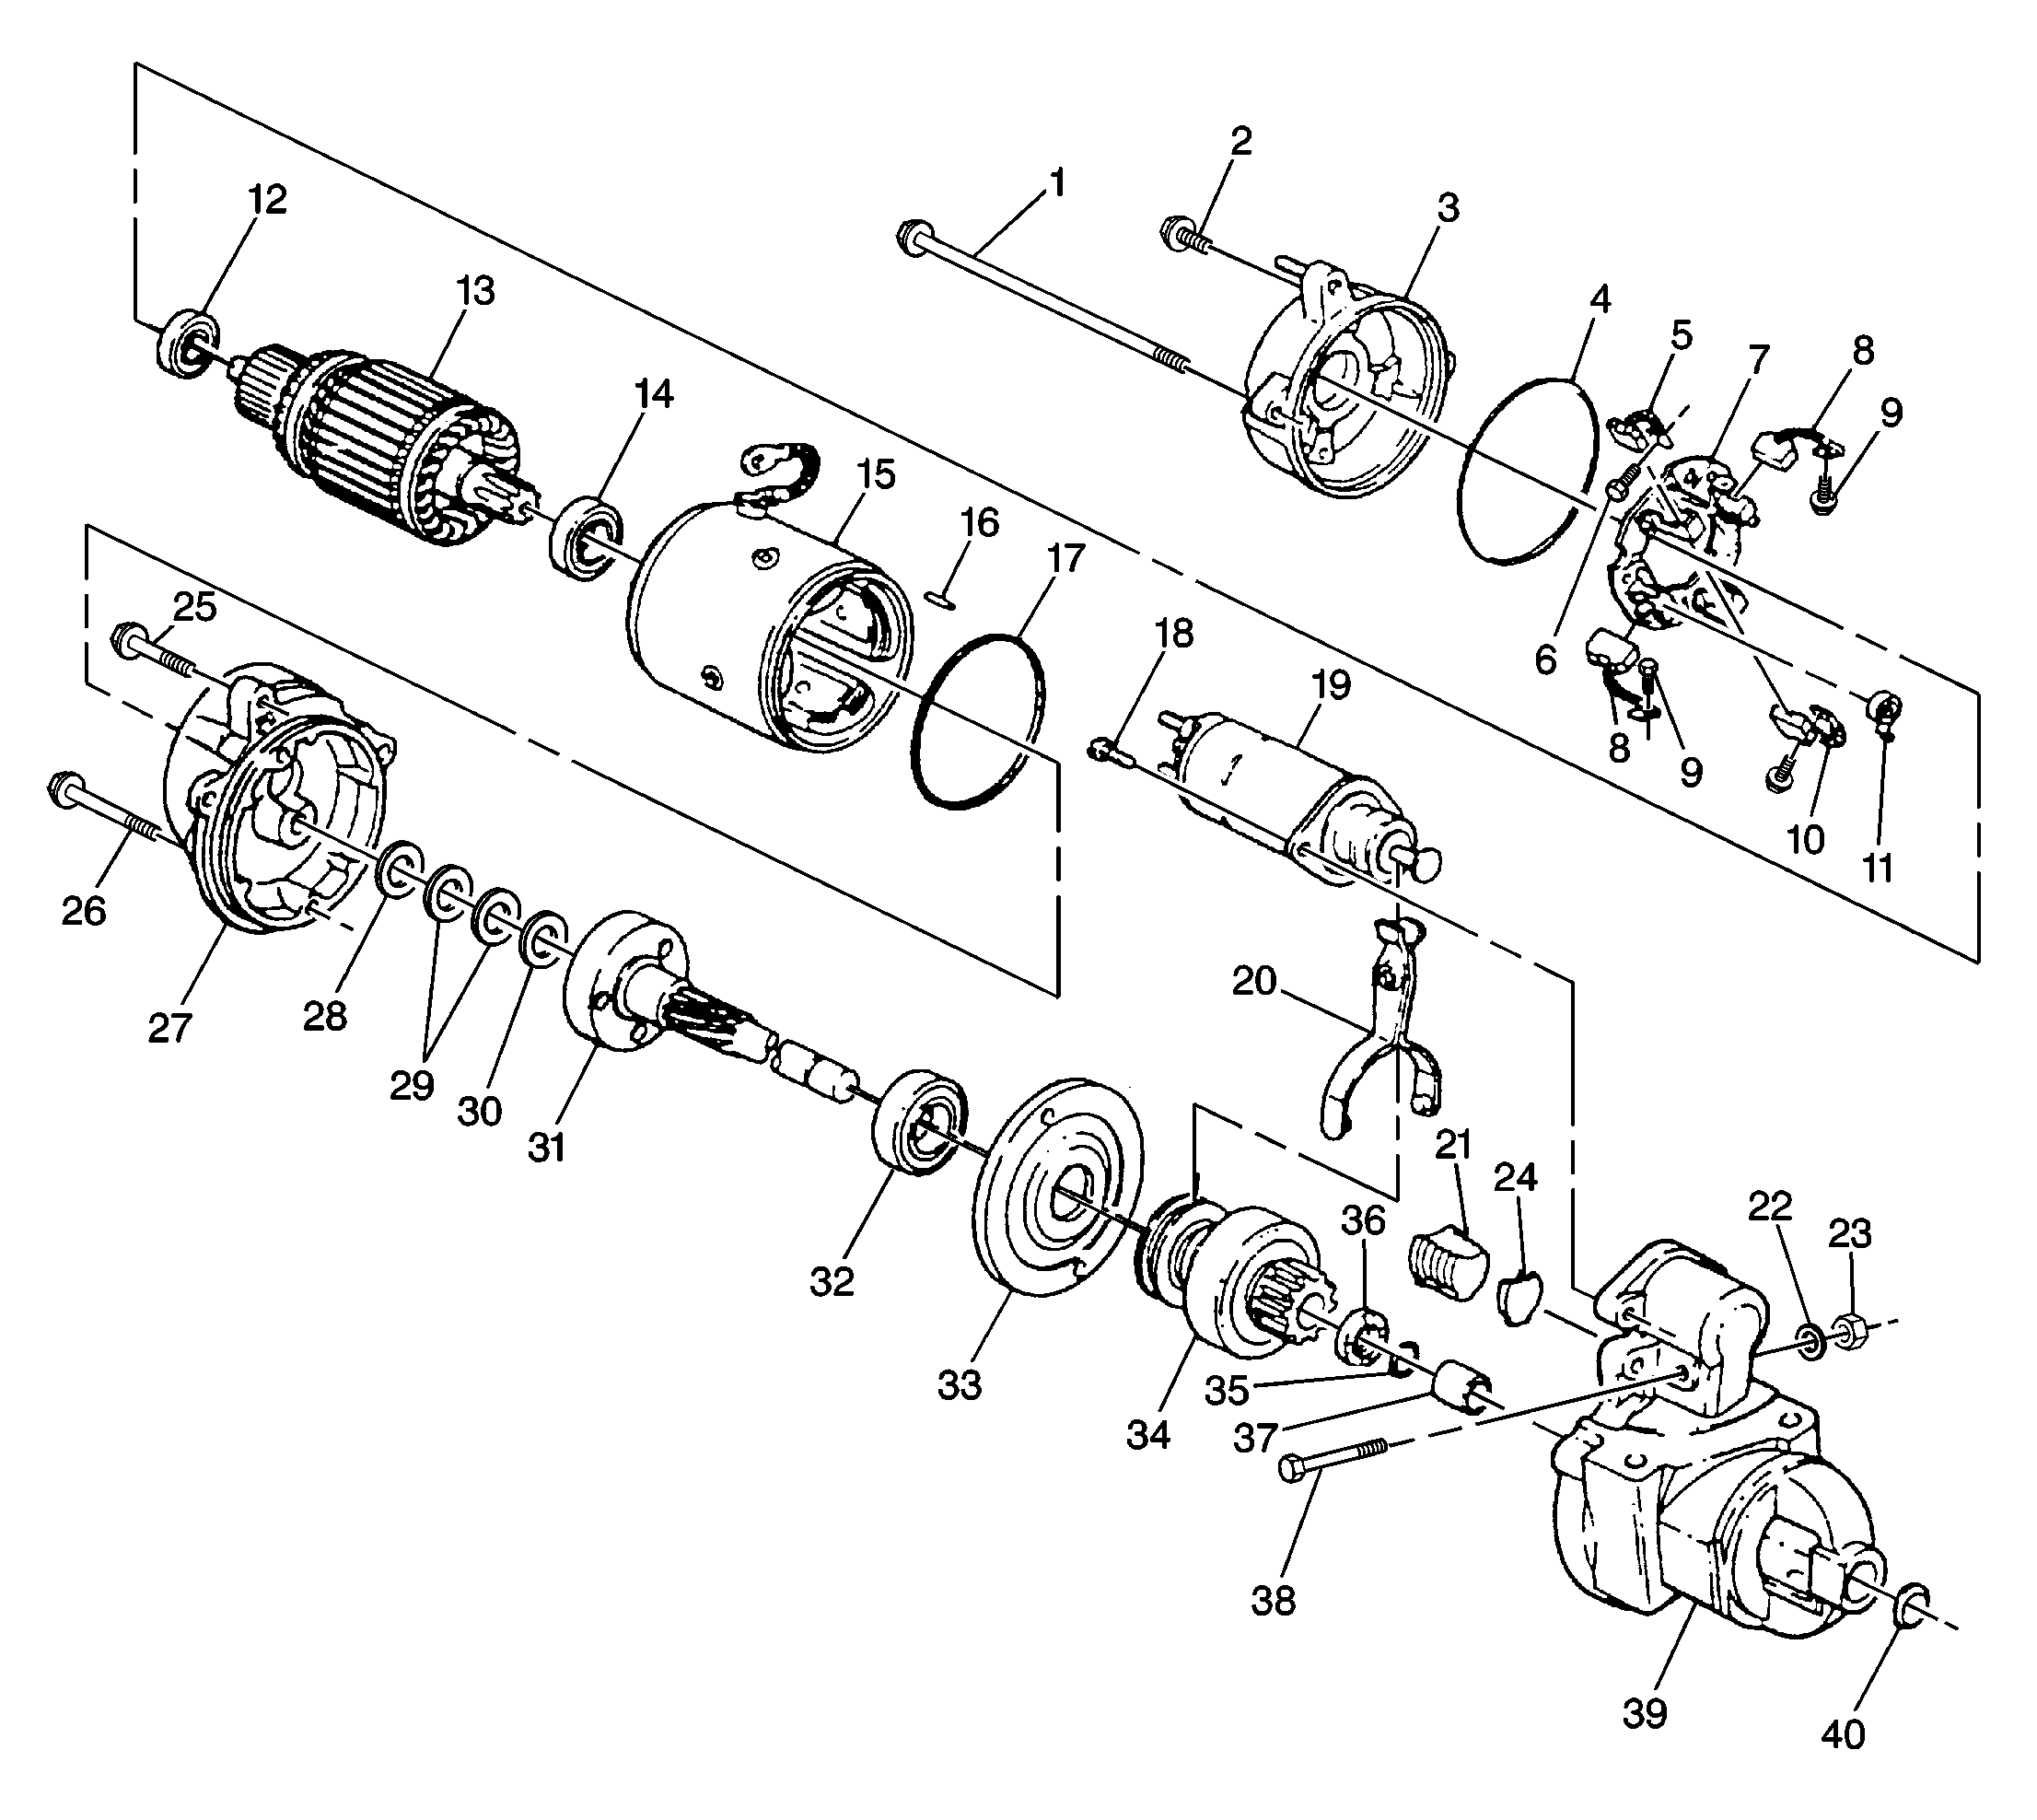
Starter motors do not require lubrication except during overhaul.
If the battery, wiring, and switches are in good condition, and the
engine is functioning properly, remove the starter motor and refer to
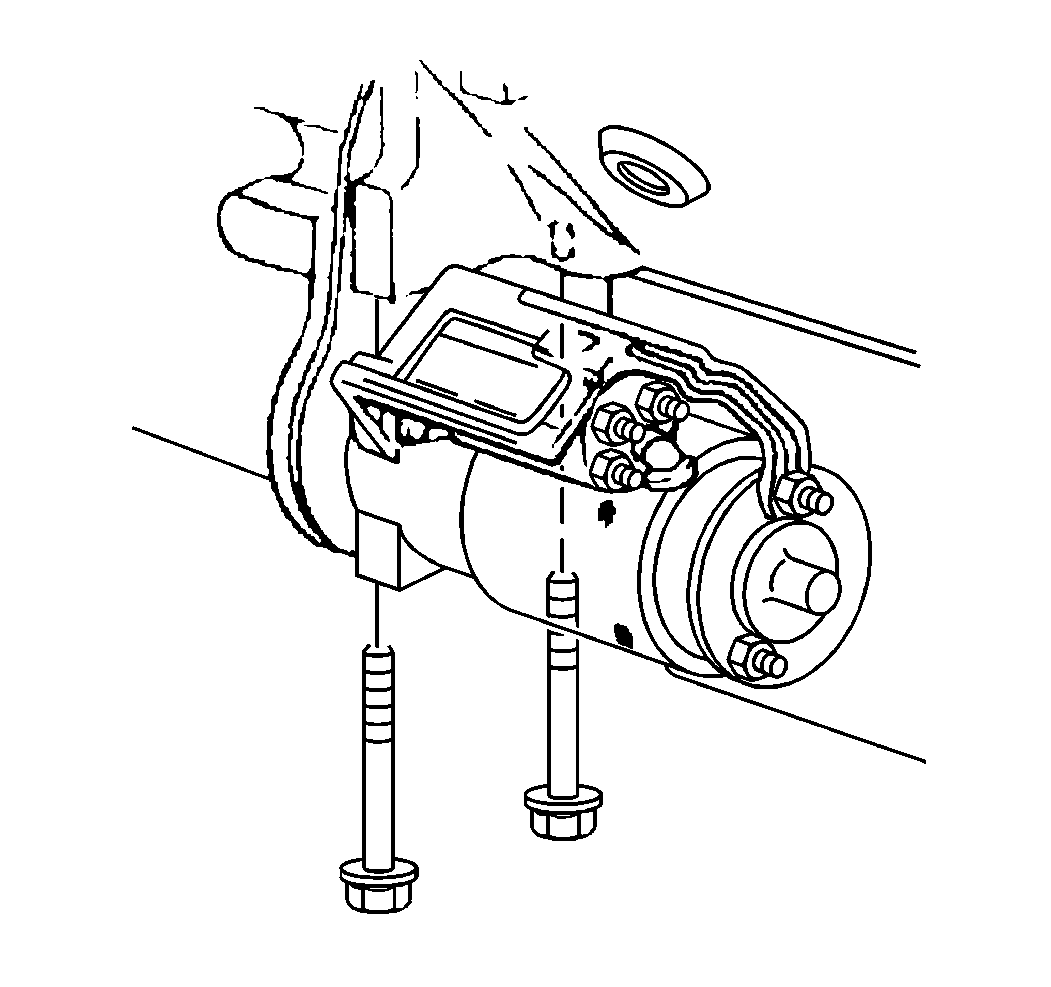
- Disconnect the negative battery cable.
- Disconnect the wires from the starter solenoid.
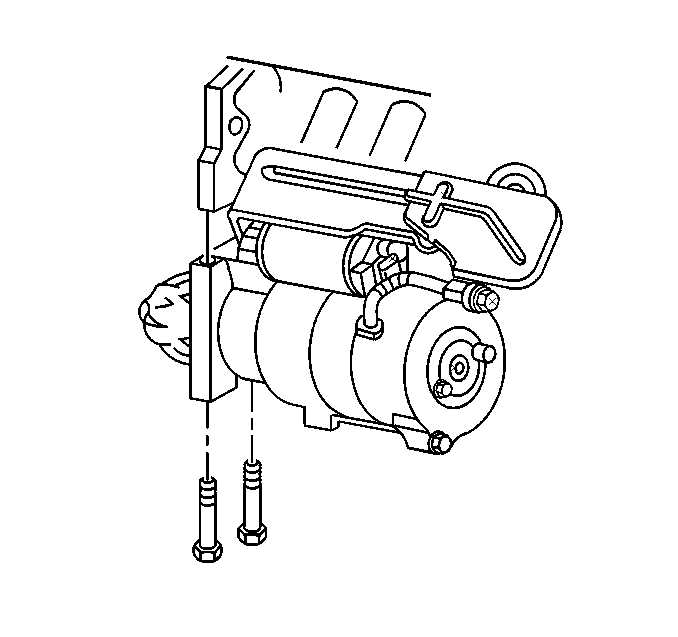
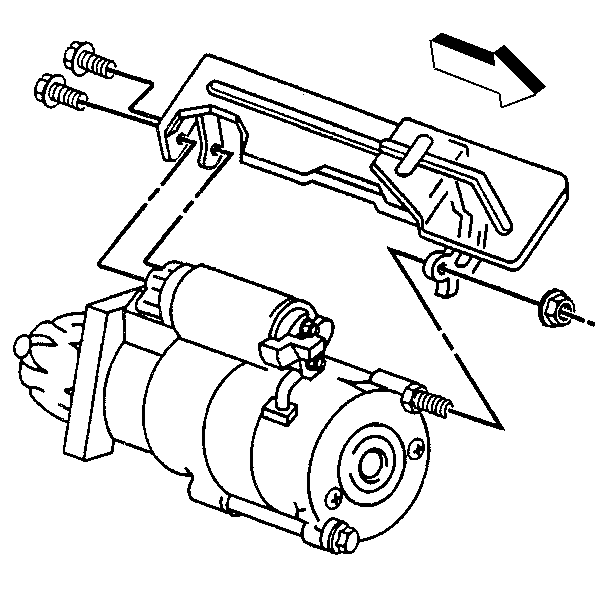
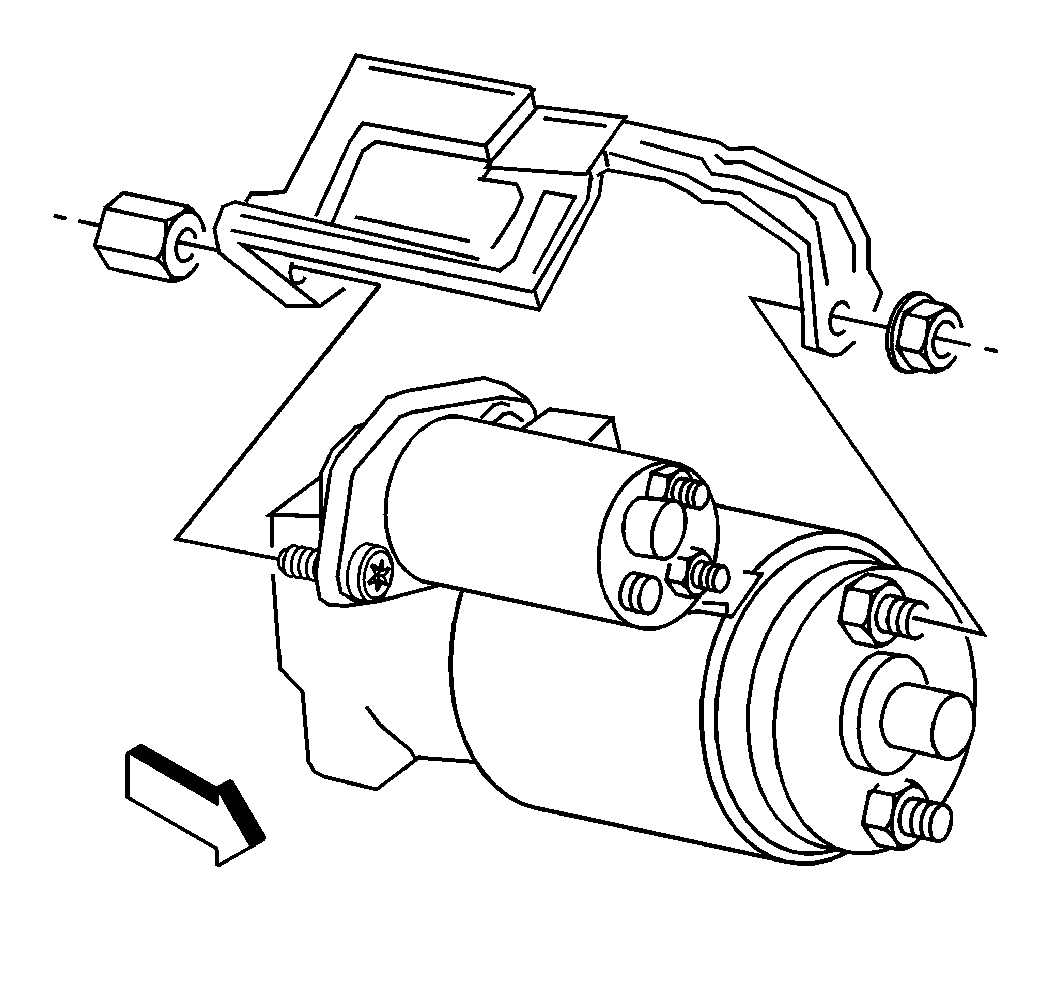
- Remove the two bolts, the washers (if present), and the shims that hold the starter to the engine.
- Remove the starter to the engine.
- Remove the starter shield.
Caution: Unless directed otherwise, the ignition and start switch must be in the OFF or LOCK position, and all electrical loads must be OFF before servicing any electrical component. Disconnect the negative battery cable to prevent an electrical spark should a tool or equipment come in contact with an exposed electrical terminal. Failure to follow these precautions may result in personal injury and/or damage to the vehicle or its components.
Installation Procedure
- Install the braces or shields to the starter motor, if equipped.
- Install the two bolts through the washers and through the starter to the engine.
- Connect the wires and install the outer nuts to the solenoid terminals.
- Connect the negative battery cable.
Notice: Use the correct fastener in the correct location. Replacement fasteners must be the correct part number for that application. Fasteners requiring replacement or fasteners requiring the use of thread locking compound or sealant are identified in the service procedure. Do not use paints, lubricants, or corrosion inhibitors on fasteners or fastener joint surfaces unless specified. These coatings affect fastener torque and joint clamping force and may damage the fastener. Use the correct tightening sequence and specifications when installing fasteners in order to avoid damage to parts and systems.
Tighten
Tighten the starter bolts to 50 N·m (37 lb ft).
Tighten
Tighten the inner nuts on the solenoid battery terminal and the S terminal
to 9 N·m (80 lb in).
Starter Replacement 5.7L and 7.4L
Removal Procedure
- Disconnect the negative battery cable.
- Disconnect the wires from the starter solenoid.
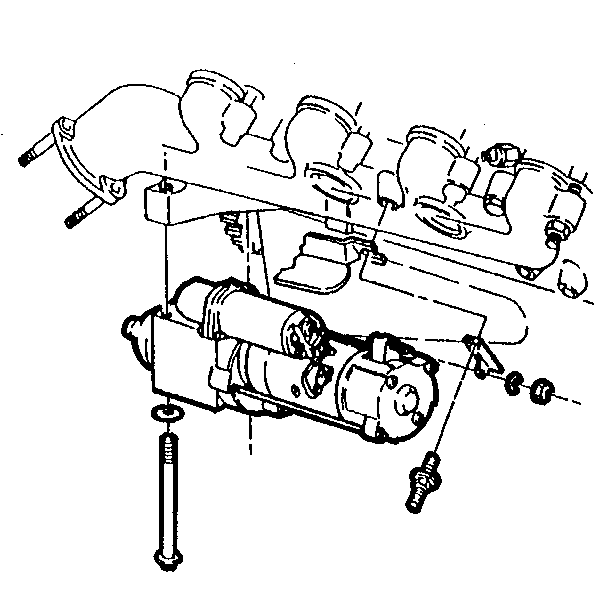
- Remove the torque converter inspection cover (7.4L engine with electronically controlled transmission only).
- Remove the two bolts, the washers (if present), and the shims that hold the starter to the engine.
- Remove the starter from the engine.
- Remove the starter shield.
Caution: Unless directed otherwise, the ignition and start switch must be in the OFF or LOCK position, and all electrical loads must be OFF before servicing any electrical component. Disconnect the negative battery cable to prevent an electrical spark should a tool or equipment come in contact with an exposed electrical terminal. Failure to follow these precautions may result in personal injury and/or damage to the vehicle or its components.
Notice: Never operate the starter motor more than 15 seconds at a time without pausing to allow it to cool for at least 2 minutes. Overheating, caused by excessive cranking, will damage the starter motor.
Installation Procedure
- Install the braces or shields to the starter motor, if equipped.
- Install the two bolts through the washers and through the starter to the engine.
- Connect the wires and install the outer nuts to the solenoid terminals.
- Install the torque converter inspection cover (7.4L engine).
- Connect the negative battery cable.
Notice: Use the correct fastener in the correct location. Replacement fasteners must be the correct part number for that application. Fasteners requiring replacement or fasteners requiring the use of thread locking compound or sealant are identified in the service procedure. Do not use paints, lubricants, or corrosion inhibitors on fasteners or fastener joint surfaces unless specified. These coatings affect fastener torque and joint clamping force and may damage the fastener. Use the correct tightening sequence and specifications when installing fasteners in order to avoid damage to parts and systems.
Tighten
Tighten starter bolts to 40 N·m (30 lb ft).
Tighten
Tighten the inner nuts on the solenoid battery terminal and the S terminal
to 2 N·m (18 lb in).
Starter Replacement 4.3L
Removal Procedure
- Disconnect the negative battery cable.
- Disconnect the wires from the starter solenoid.
- Remove the two bolts, the washers (if present), and the shims that hold the starter to the engine.
- Remove the starter from the engine.
- Remove the starter shield.
Caution: Unless directed otherwise, the ignition and start switch must be in the OFF or LOCK position, and all electrical loads must be OFF before servicing any electrical component. Disconnect the negative battery cable to prevent an electrical spark should a tool or equipment come in contact with an exposed electrical terminal. Failure to follow these precautions may result in personal injury and/or damage to the vehicle or its components.
Notice: Never operate the starter motor more than 15 seconds at a time without pausing to allow it to cool for at least 2 minutes. Overheating, caused by excessive cranking, will damage the starter motor.
Installation Procedure
- Install the braces or shields to the starter motor, if equipped.
- Install the two bolts through the washers and through the starter to the engine.
- Connect the wires and install the outer nuts to the solenoid terminals.
- Connect the negative battery cable.
Notice: Use the correct fastener in the correct location. Replacement fasteners must be the correct part number for that application. Fasteners requiring replacement or fasteners requiring the use of thread locking compound or sealant are identified in the service procedure. Do not use paints, lubricants, or corrosion inhibitors on fasteners or fastener joint surfaces unless specified. These coatings affect fastener torque and joint clamping force and may damage the fastener. Use the correct tightening sequence and specifications when installing fasteners in order to avoid damage to parts and systems.
Tighten
Tighten starter bolts to 50 N·m (37 lb ft).
Tighten
Tighten the inner nuts on the solenoid battery terminal and the S terminal
(except on the 28-MT) to 2 N·m (18 lb in).
