LOOSE FIT BETWEEN COLUMN & STEERING SHAFT-INSPECT BEARING

SUBJECT: LOOSE FIT CONDITION BETWEEN COLUMN AND STEERING SHAFT (SERVICE MANUAL UPDATE SECTION 3B-STEERING; APPLICABLE TO THE FOLLOWING MODELS)
MODELS: 1981-1990 C5D, C6D, C7D, S7, B6, P4, AND P6 (EXCEPT P6 WITH RPO BQE OR BOG)
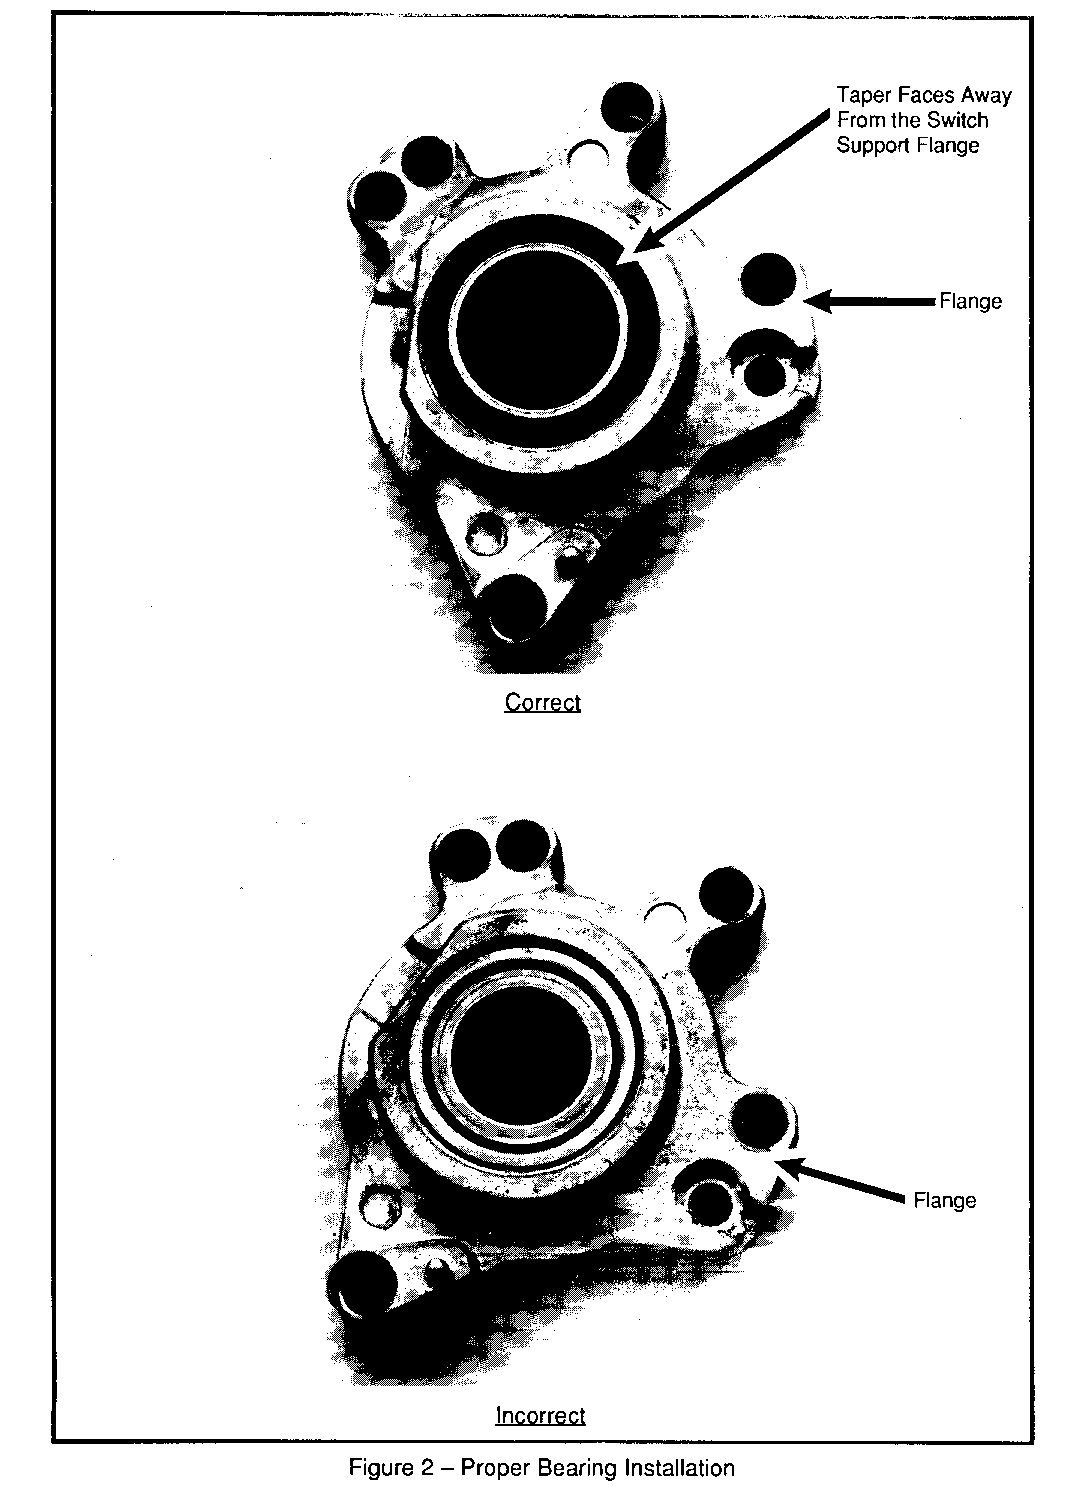
Some of the models stated above with the standard steering column may demonstrate a loose fit condition between the column and steering shaft without impairing vehicle maneuverability. The problem may be due to an improperly installed service steering shaft upper bearing (P/N 2065656 Figure 1 Item 16). Service manuals displaying the assembly of the steering column are incorrect. They indicate the upper bearing should be installed in the switch support bracket (P/N 2065660 Figure 1 item 17) with the tapered edge facing the steering column. These installation instructions should state that the taper faces the steering wheel. Figure #2 shows correct and incorrect installation of the upper bearing in the switch support bracket.
For vehicles with the above conditions, both the steering shaft upper bearing and the switch support bracket should be replaced.
SERVICE PROCEDURE (Switch Support Bracket):
() Remove
- Position the front wheels straight ahead.
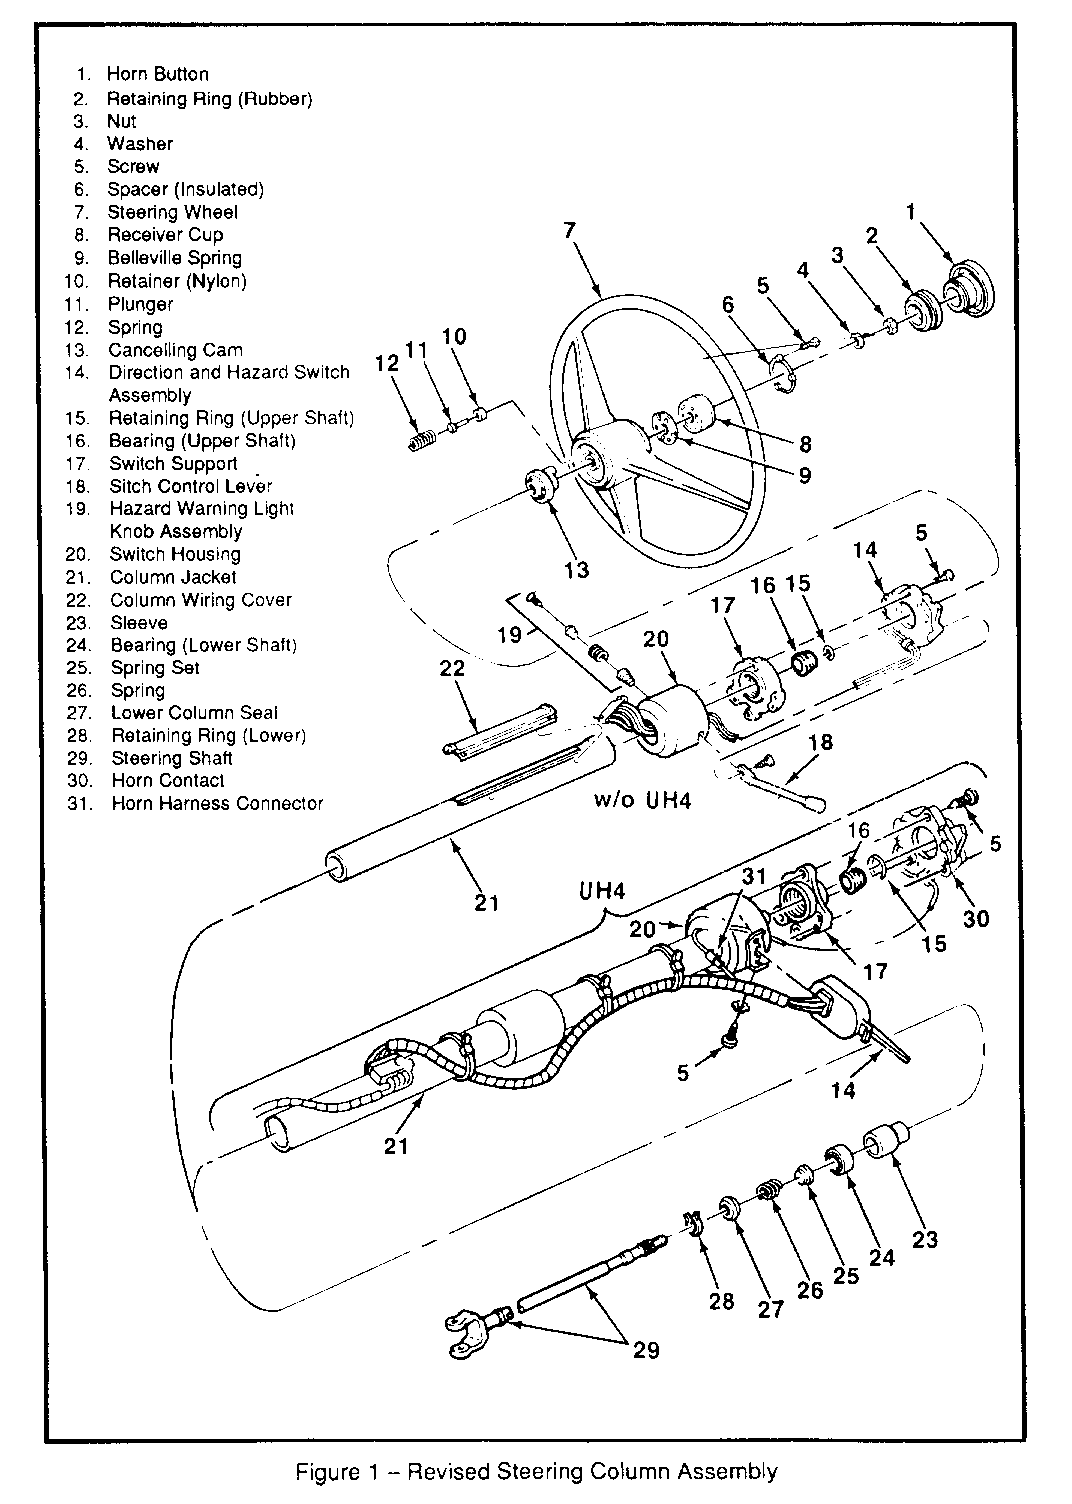
A. Remove and/or Disconnect the following (see Figure 1)
1. Negative battery cable.
2. Horn button and contact assembly (1, 2, 5, 6, 8, 9).
3. Steering wheel nut (3) and washer (4).
- Mark the shaft and steering wheel for reassembly.
4. Steering wheel (7).
- Use tool J 1859-03.
5. Turn signal lever (18) and cancelling cam (13).
6. Hazard warning button assembly (19) (without RPO UH4 only).
7. Directional switch retaining screws (5).
8. Directional switch (14) (RPO UH4 - horn contact (30).
* Pull the switch and its wiring up and over the end of the steering shaft.
* Install the three directional screws into the holes in the switch support.
* Tighten the screws.
* Place tool J 29740 over the end of the steering shaft.
* Install a nut and turn it clockwise to pull up the steering shaft. The upper shaft retaining ring 15 can be removed from its groove using a screw driver and snap ring pliers.
* Remove J 29740 and nut from the steering shaft.
9. Directional switch screws (5).
10. Shaft retaining ring (15).
11. Switch support and bearing assembly 15, 16, 17.
B. Install or Connect
1. Bearing (16) into the switch support (17) by tapping with a light hammer.
! Important
The taper on the bearing inner race faces towards the steering wheel (7) (See Figure 2).
2. Support the bearing (16) on the column (29).
- Align the screw holes in the support (17) with the holes in the switch housing (20).
3. Retaining ring (15) onto the steering shaft (29) as far as possible.
4. Three directional switch screws (5) into the switch support (17). Tighten the screws.
5. Retaining ring (15).
*Place J 29740 over the end of the steering shaft.
*Install a nut and turn it clockwise. The retaining ring can be pushed into its groove with a screwdriver.
*Be sure the retaining ring is firmly seated in its groove.
*Remove J 29740 and the nut.
*Remove the directional switch screws.
6. Directional switch (14) and screws (5) (RPO UH4 - horn contact (30).
7. Hazard warning switch button, knob, and spring (19). Tighten the screws (without UH4 only).
8. Directional switch cancelling cam (13) and lever (18) (RPO UH4 cancelling cam only).
9. Steering wheel (7).
- Align marks made during disassembly.
- Turn signal control assembly must be in the neutral position.
10. Horn lead assembly (5, 6, 8, 9).
11. Steering wheel nut (3) and washer (4).
- Tighten nut to 40 N-m (30 lbs. ft.)
12. Retainer (2) and horn button cap. (1)
13. Negative battery cable.
SERVICE PARTS INFORMATION
Part Quantity Number Description Required -------------------------------------- 2065656 steering column 1 upper bearing
.-2065660 switch support bracket
Parts are currently available through GMSPO.
WARRANTY INFORMATION
Vehicles repaired under warranty should use:
Labor Operation: E7020
Labor Time: 0.8 hrs.
General Motors bulletins are intended for use by professional technicians, not a "do-it-yourselfer". They are written to inform those technicians of conditions that may occur on some vehicles, or to provide information that could assist in the proper service of a vehicle. Properly trained technicians have the equipment, tools, safety instructions and know-how to do a job properly and safely. If a condition is described, do not assume that the bulletin applies to your vehicle, or that your vehicle will have that condition. See a General Motors dealer servicing your brand of General Motors vehicle for information on whether your vehicle may benefit from the information.
