For 1990-2009 cars only
Tools Required
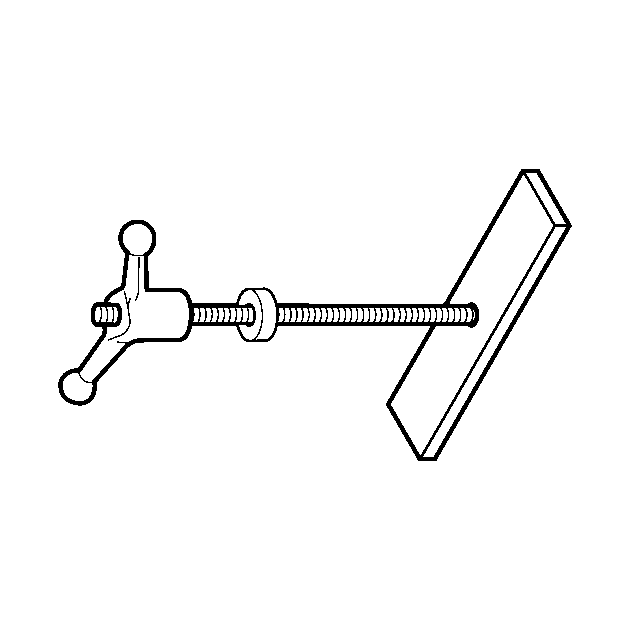
| • | J 24204-2 Bar and Stud Assembly |
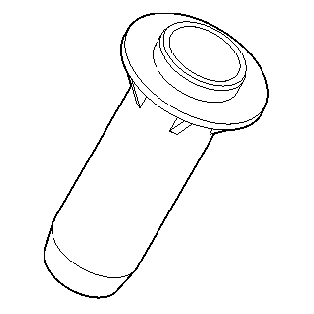
| • | J 43772 Torque Converter Seal Installer |
| • | J-47339-1 Piston Return Spring Compressor |
| • | J-47339-2 Seal Area Protector |
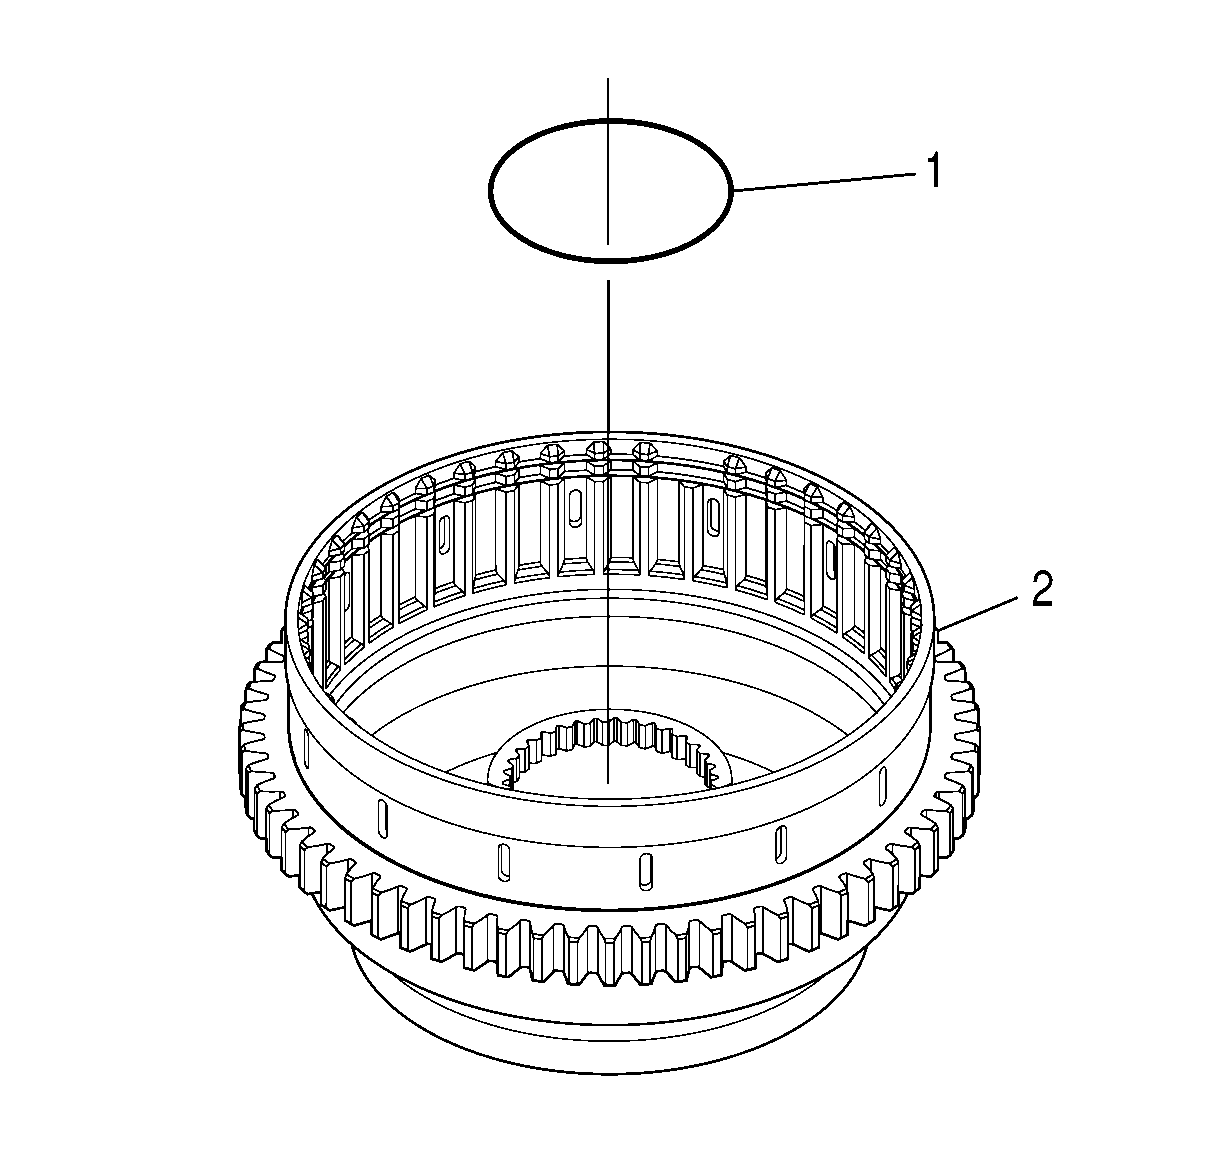
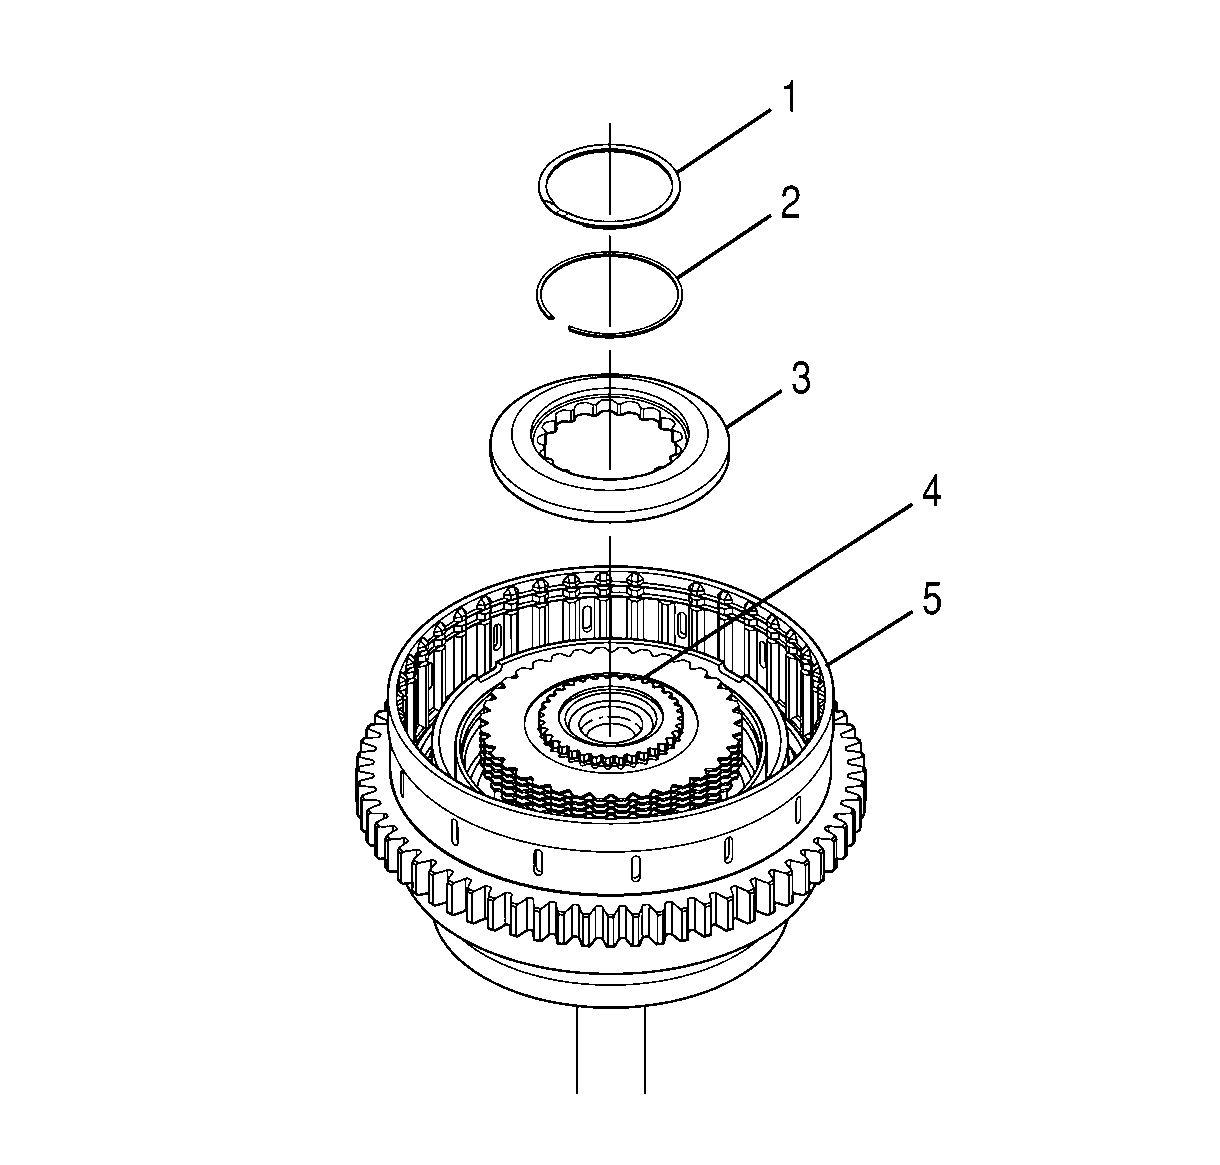
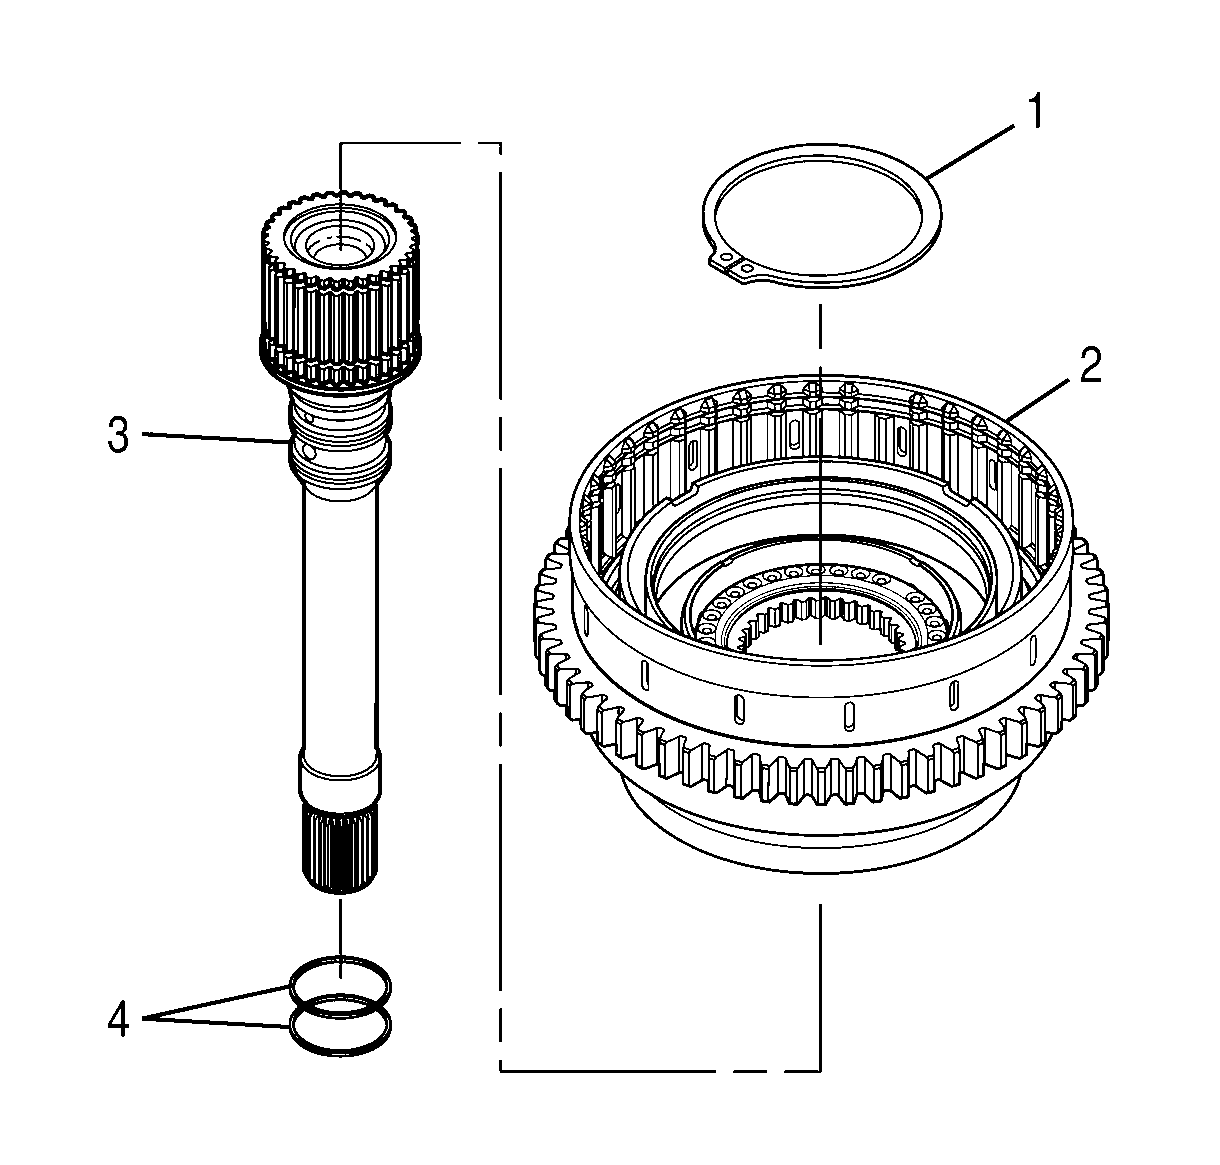
- Position the 1-2-3-4, 4-5-6 clutch assembly (4) on the work table so that the rear of the assembly is up.
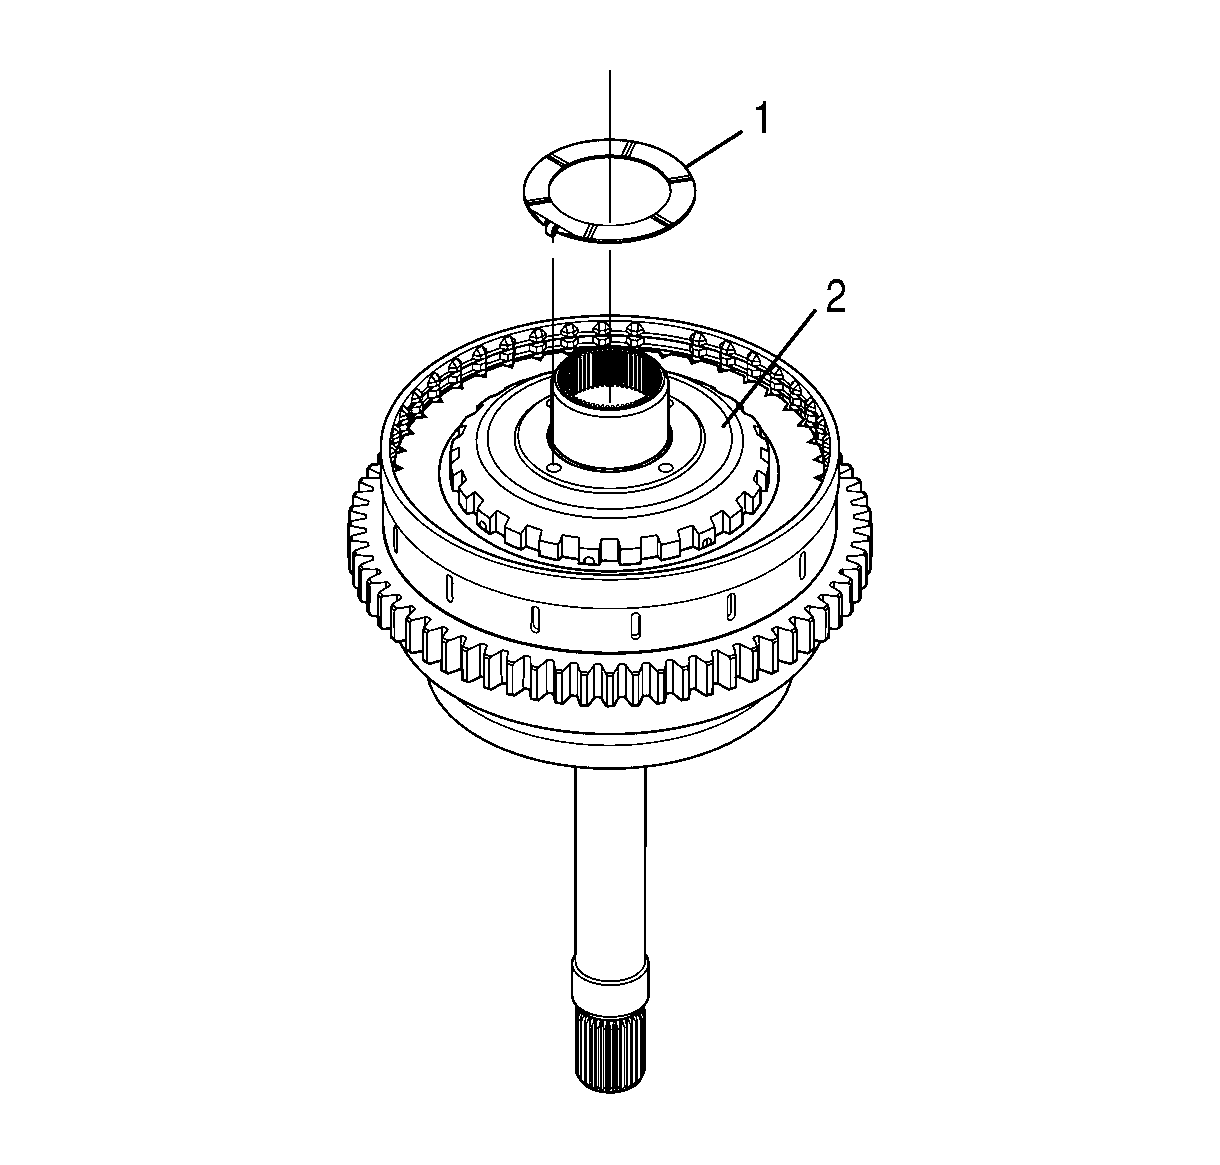
- Remove the retaining ring (1) from the 1-2-3-4, 4-5-6 clutch assembly.
- Remove the input sun gear (3) with the input drive flange (2) attached.
- Remove the input sun gear from the drive flange.
- Remove the bronze thrust washer (1) from the 4-5-6 drive hub (2).
- Remove the 4-5-6 drive hub (1).
- Remove the thrust bearing assembly (2) from the rear of the 1-2-3-4 clutch drive hub (3) or the front of the 4-5-6 clutch drive hub (1).
- Remove the 1-2-3-4 clutch drive hub (3).
- Remove the thrust bearing assembly (4) from the rear of the turbine shaft (5) or the front of the 1-2-3-4 clutch drive hub (3).
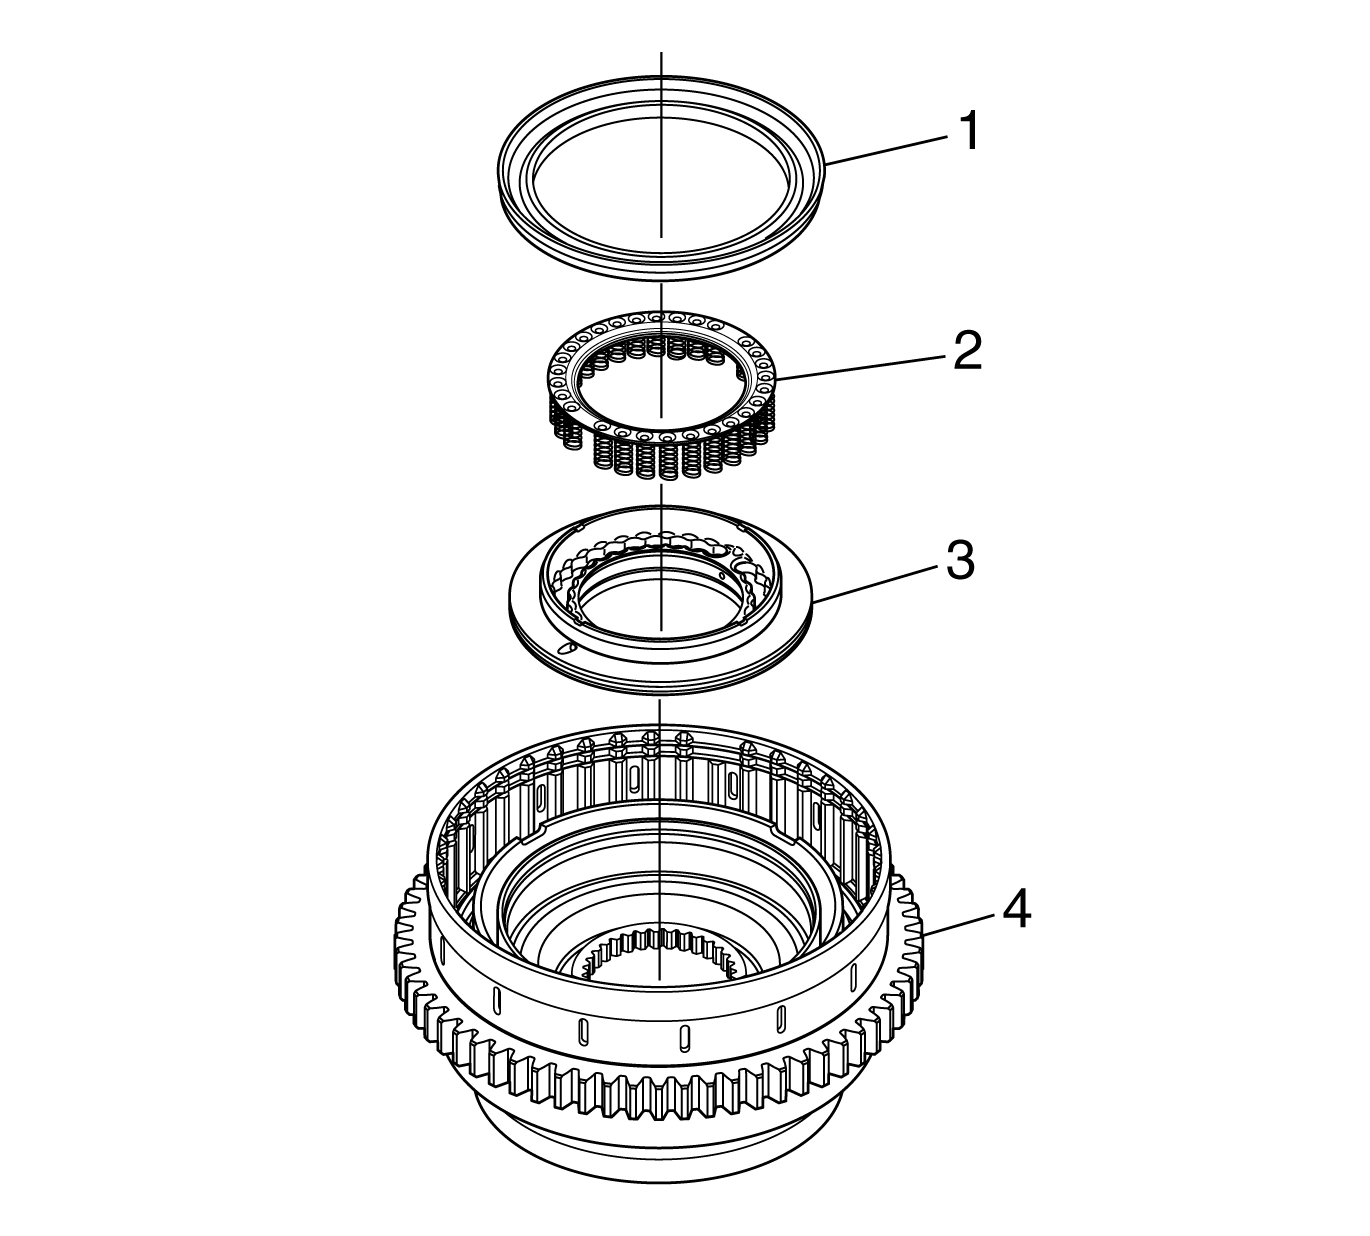
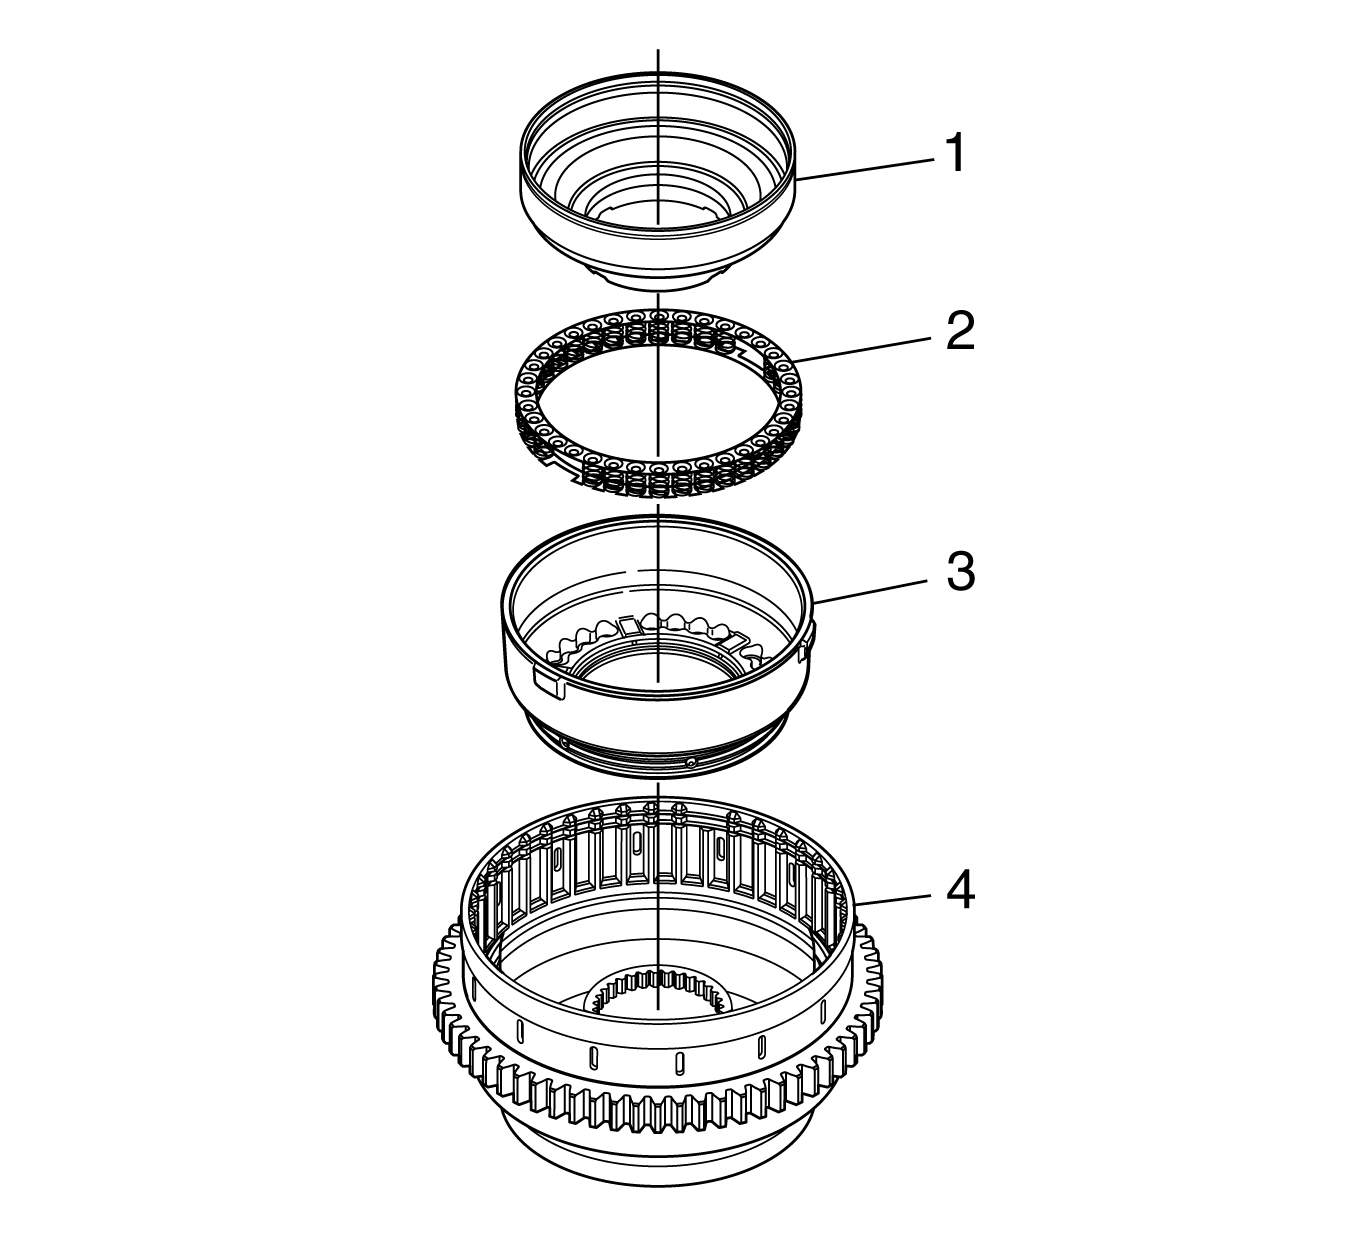
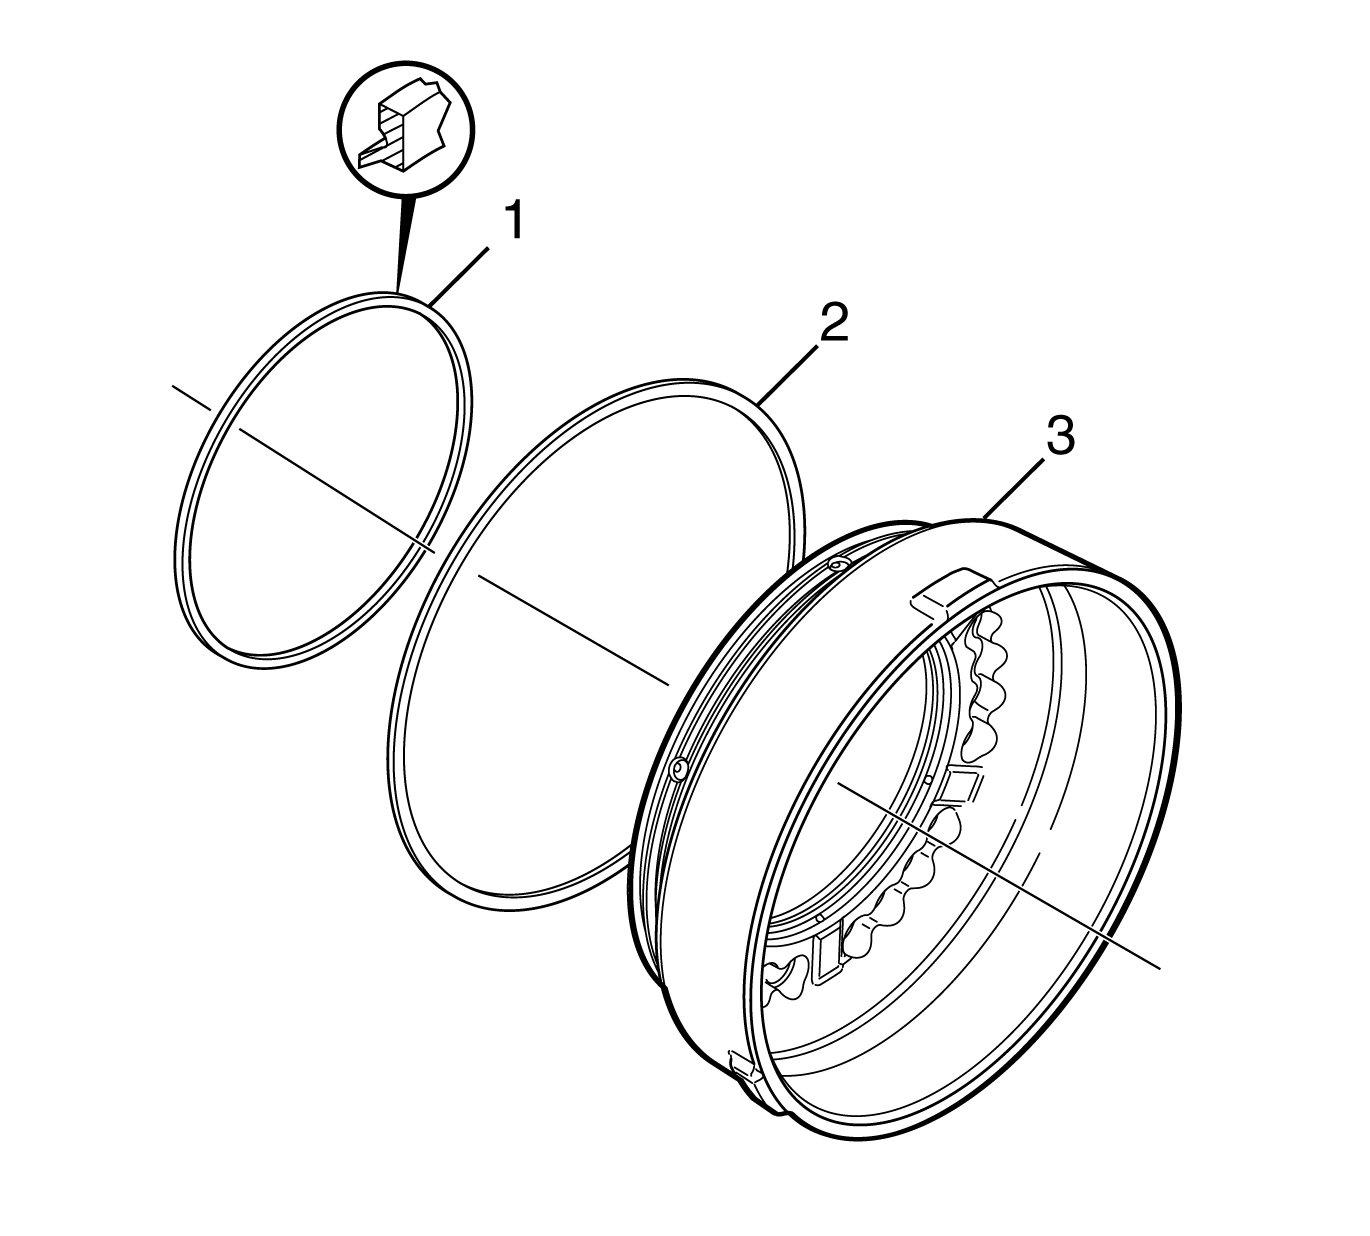
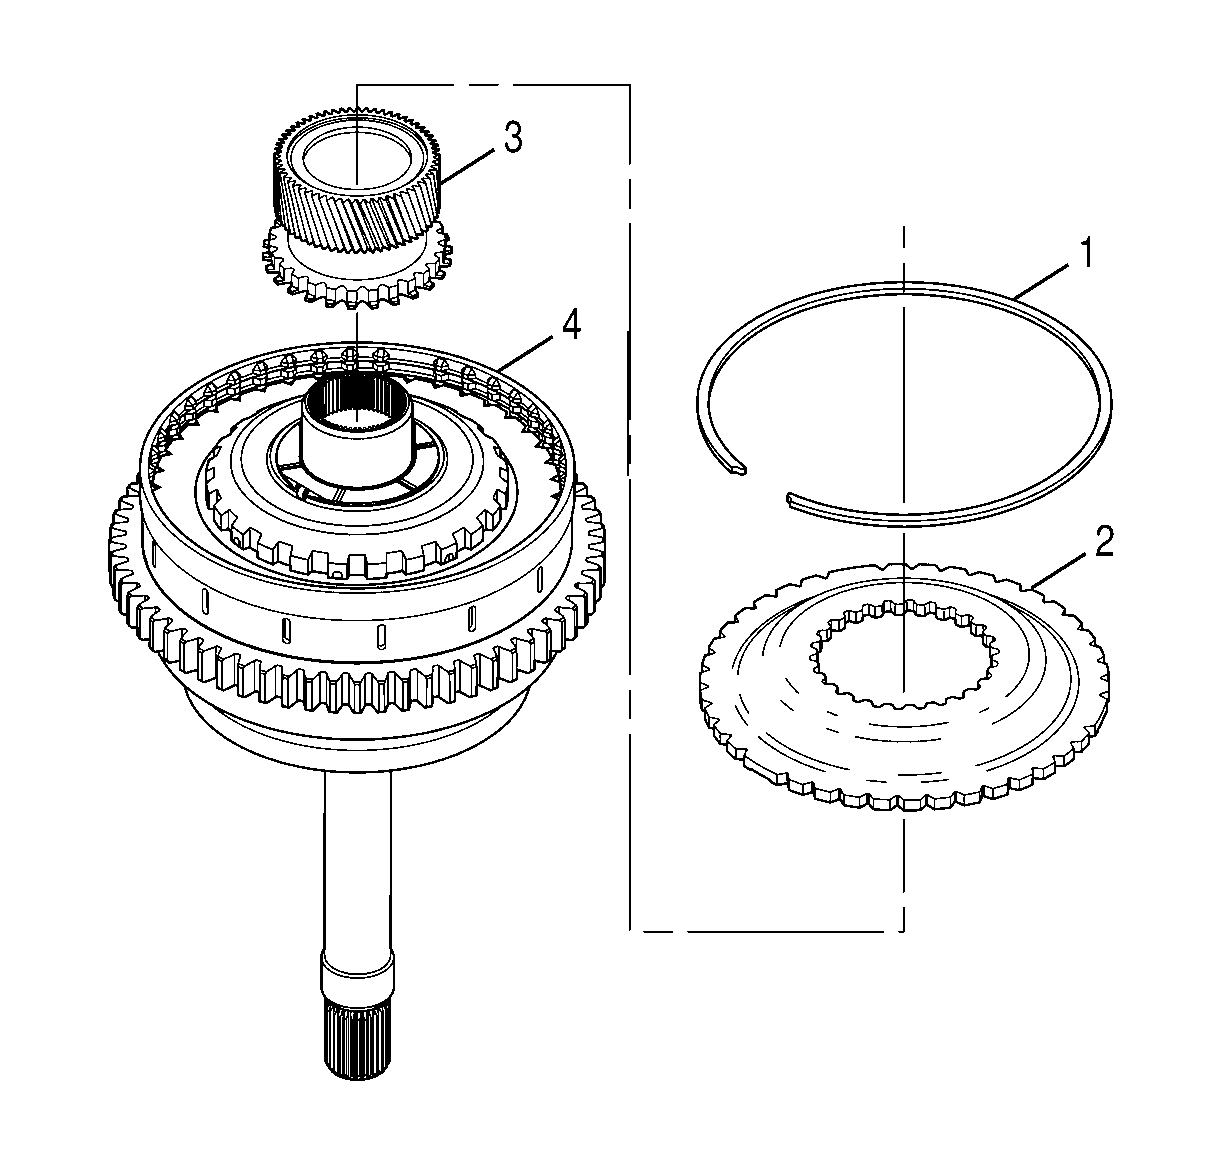
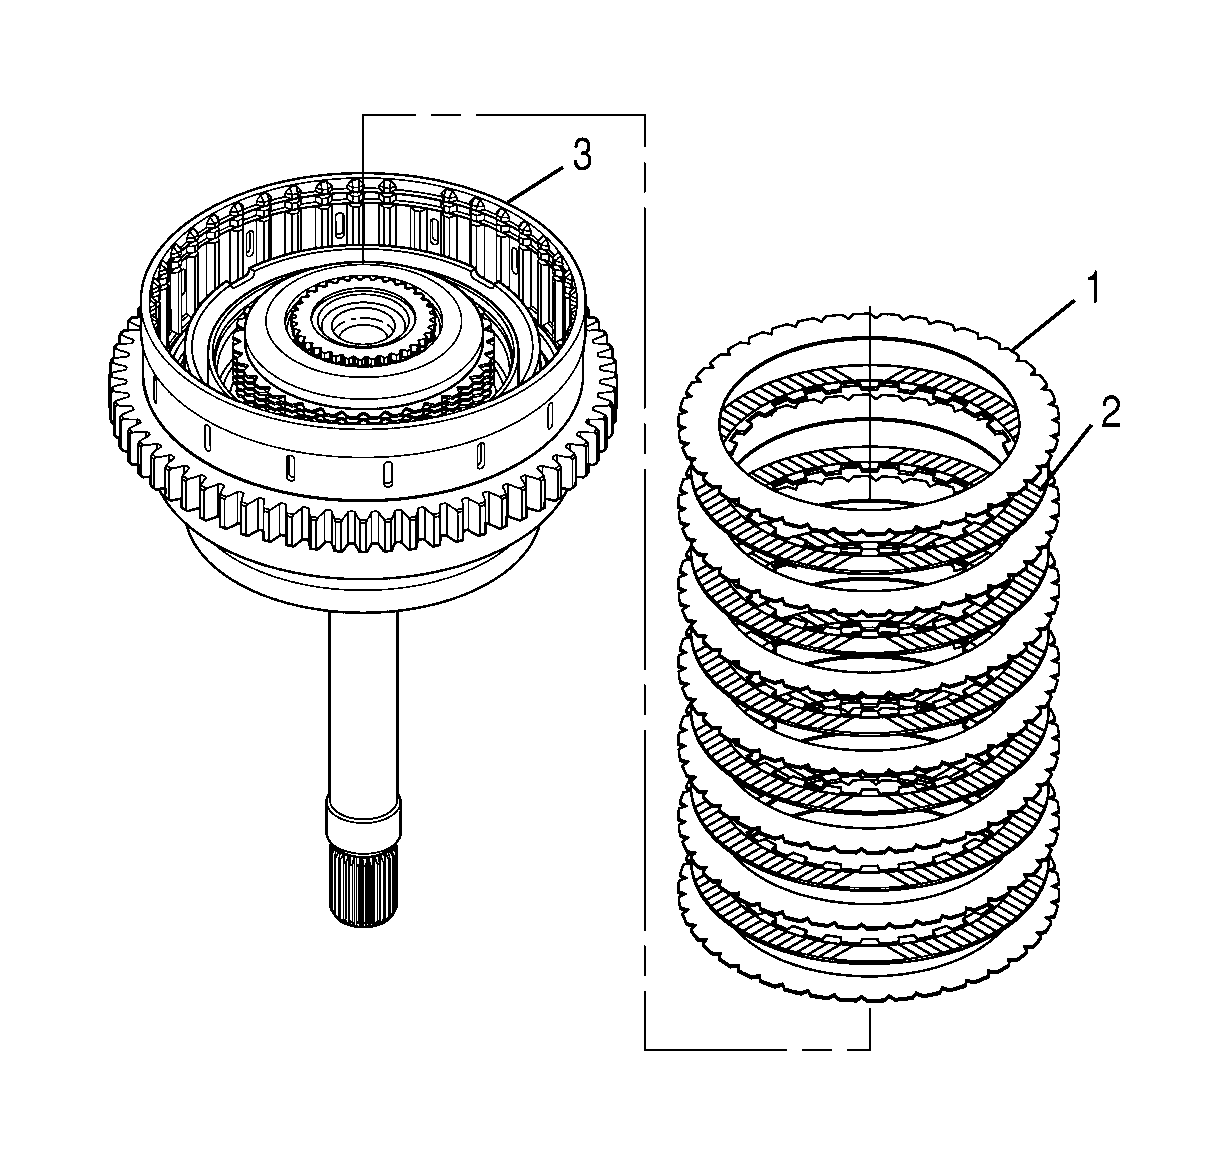
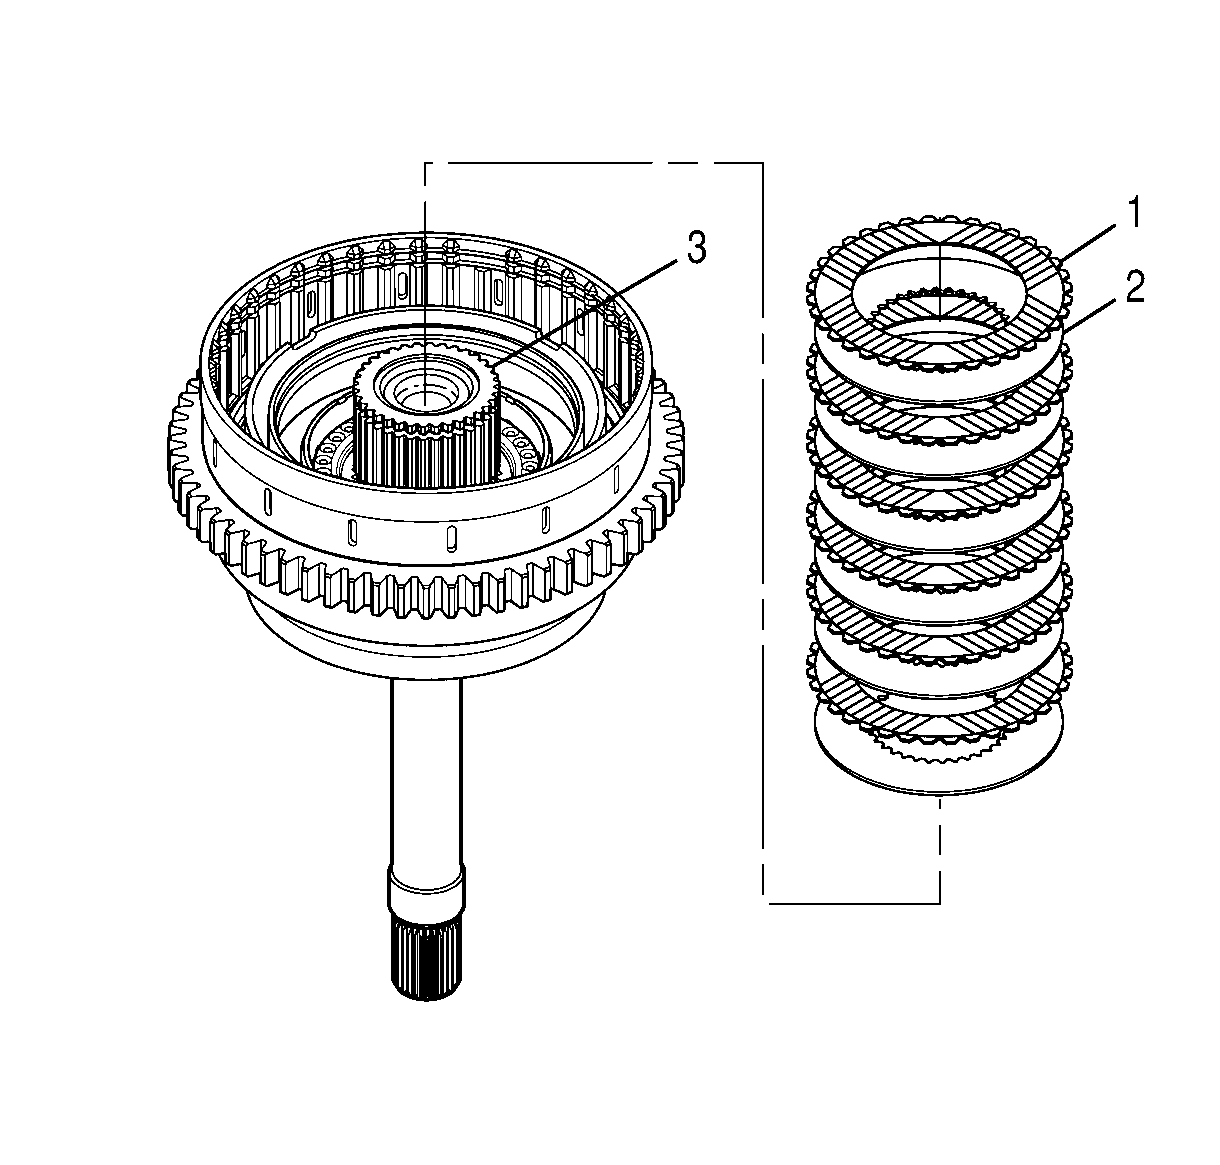
- Remove seven 4-5-6 clutch steel plates (1) and six 4-5-6 clutch fiber plates (2) from the 1-2-3-4, 4-5-6 clutch housing (3).
- Remove the internal spiral retaining ring (1) from the 1-2-3-4 clutch backing plate (3).
- Remove the retaining ring (2) from the turbine shaft (4).
- Remove the 1-2-3-4 clutch backing plate (3) from the turbine shaft (4).
- Remove six 1-2-3-4 clutch fiber plates (1) and six 1-2-3-4 clutch steel plates (2) from the turbine shaft (3).
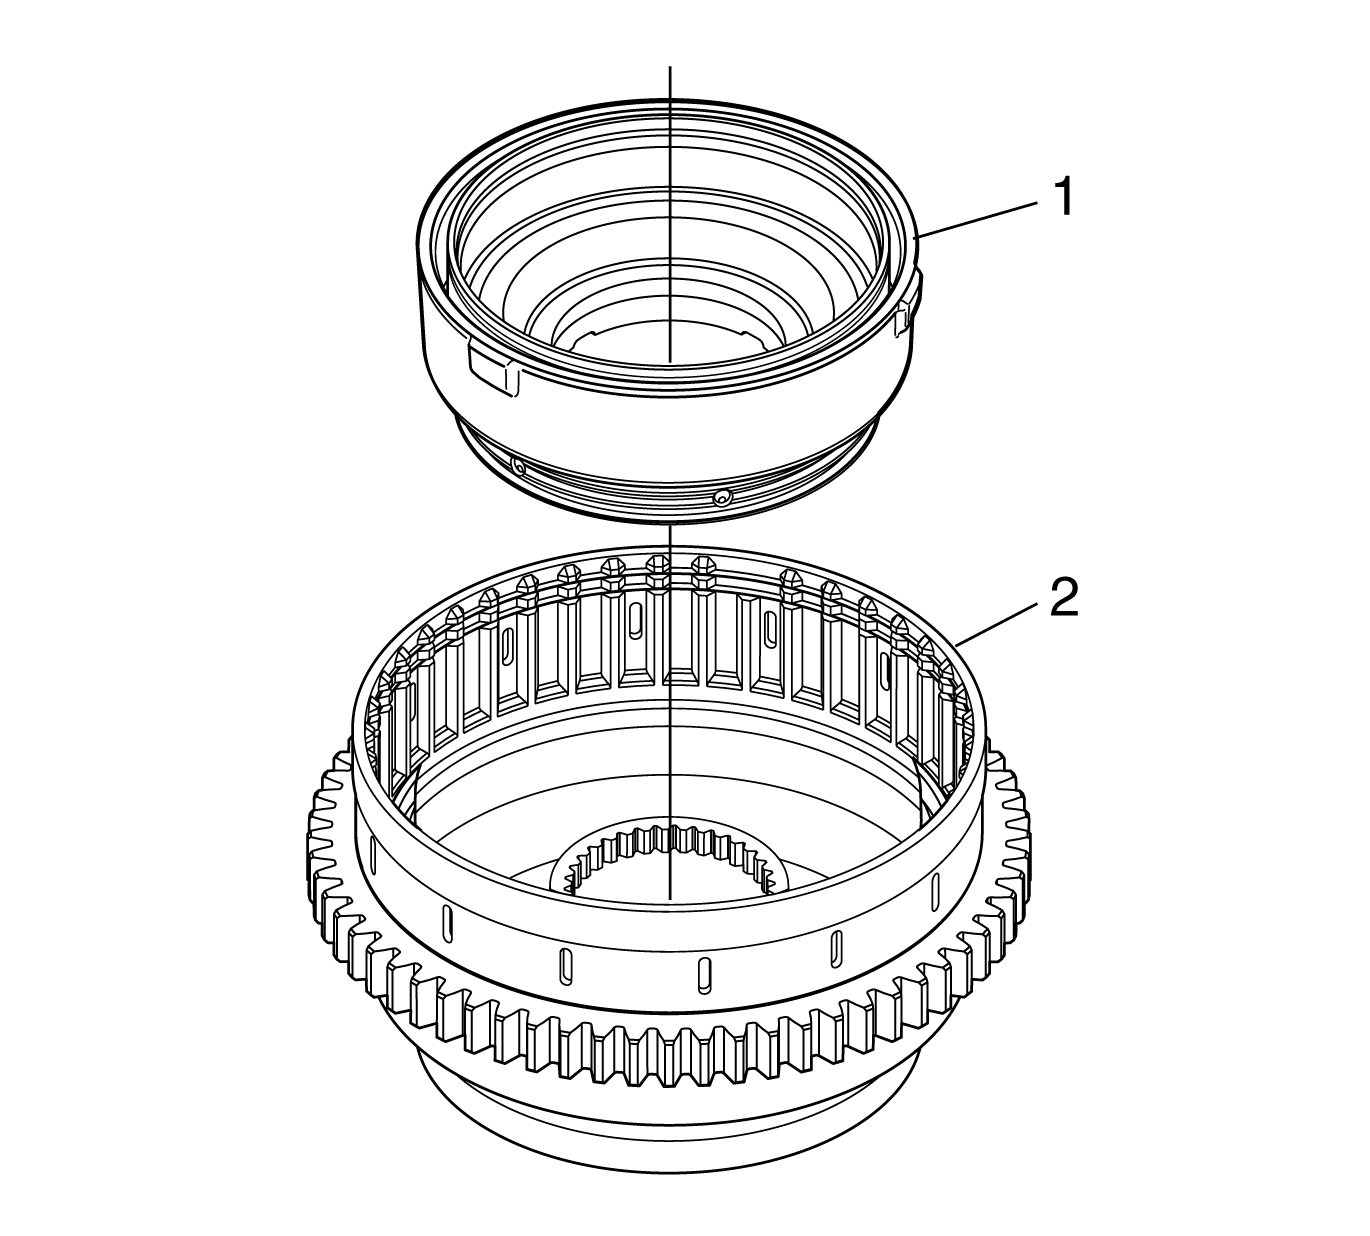
- Remove the retaining ring (1) from the turbine shaft (3).
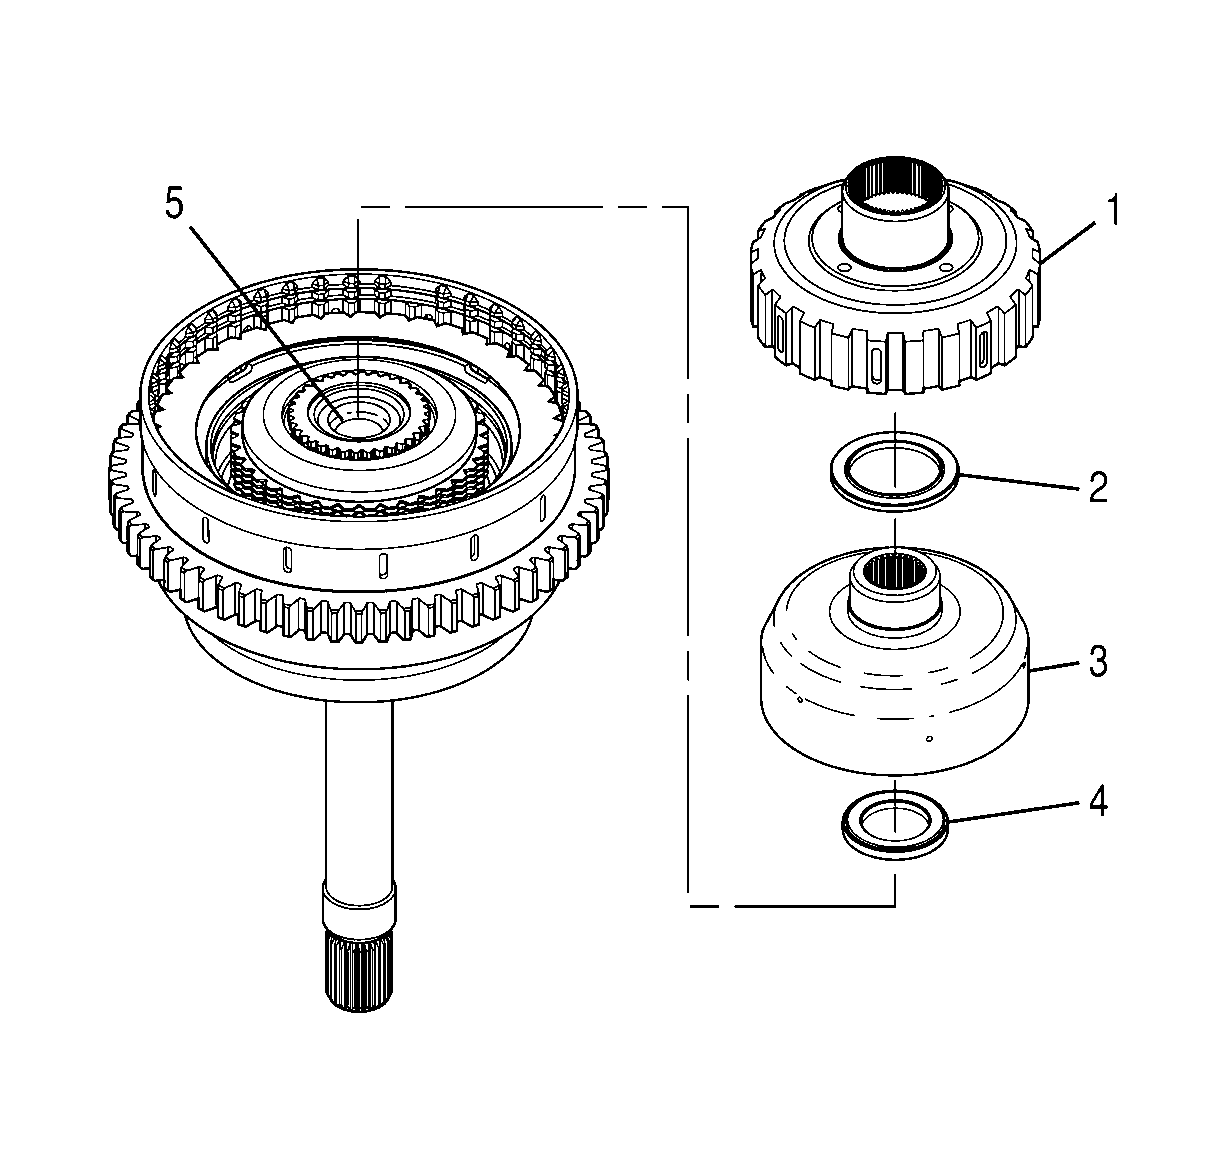
- Remove the 1-2-3-4, 4-5-6 clutch housing (2) from the rear of the turbine shaft.
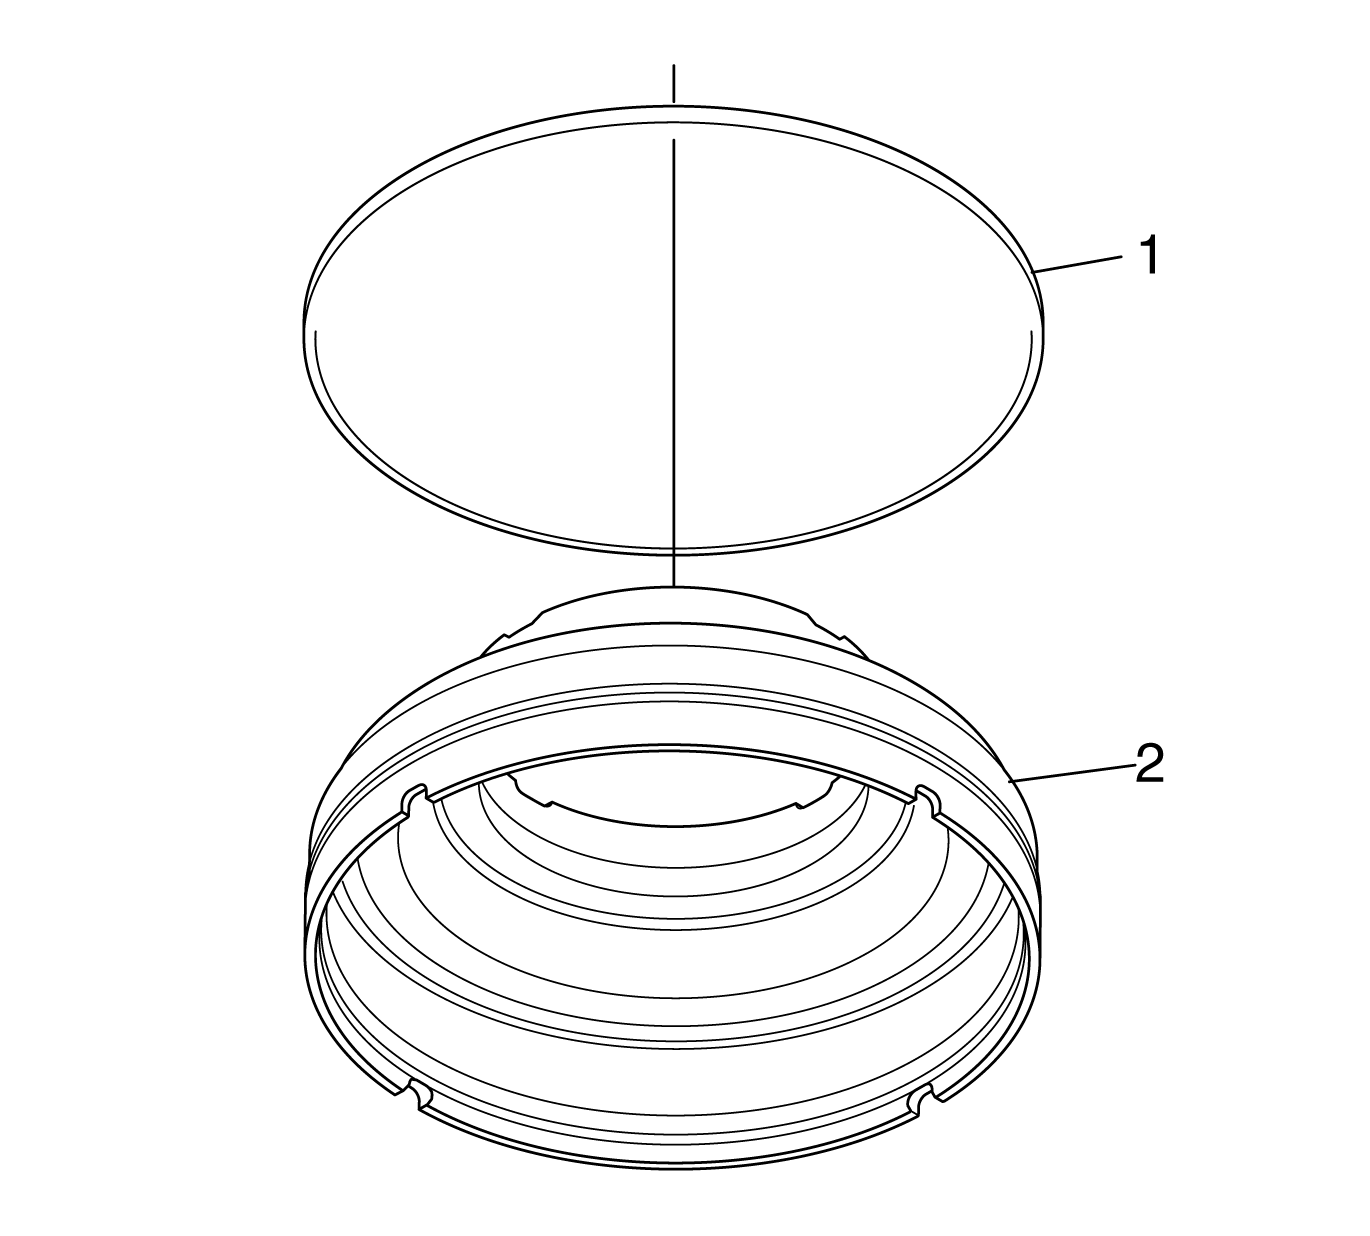
- Remove 2 overlap seal rings (4) from the turbine shaft.
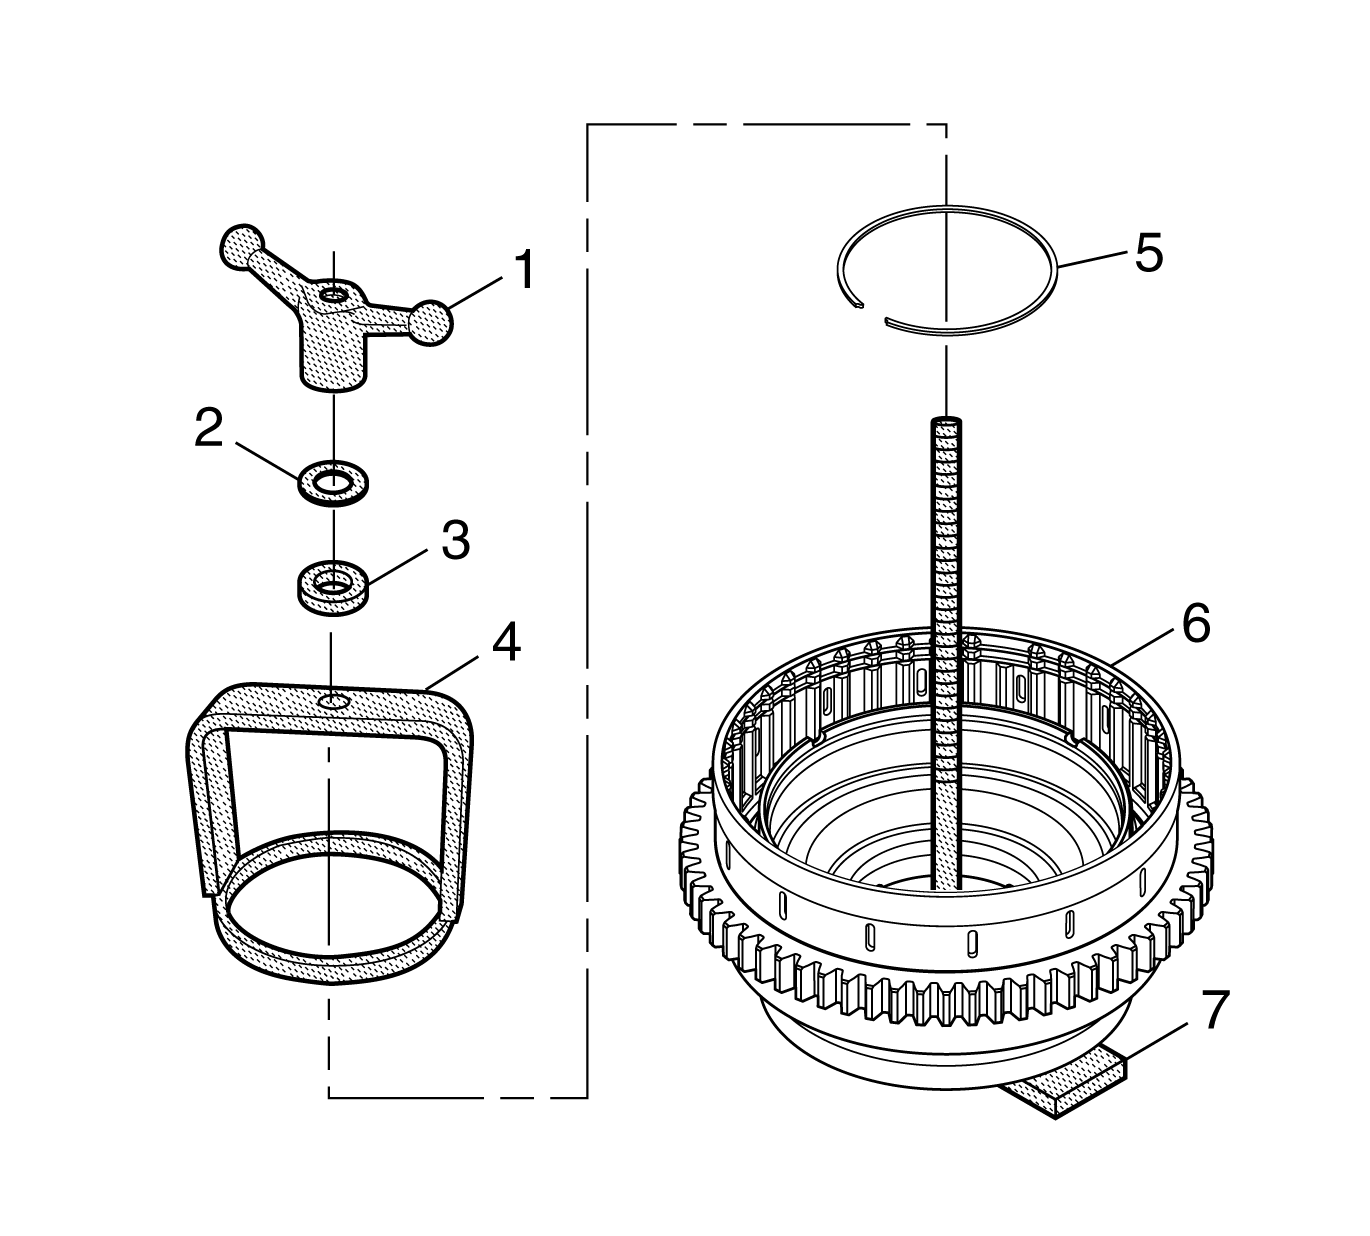
- Position the 1-2-3-4, 4-5-6 clutch housing (5) on the base of J 24204-2 (6) so that the rear of the housing is facing up.
- Install J-47339-1 (4) onto the 1-2-3-4 clutch balance piston.
- Install the J 24204-2 ball bearing (3) and washer (2) onto the shaft of J 24204-2 .
- Install the J 24204-2 wing nut (1) onto the shaft of J 24204-2 (6).
- Compress the 1-2-3-4 clutch balance piston return spring assembly until the retaining ring (5) can be removed.
- Remove the retaining ring (5) from the groove in the 1-2-3-4 clutch housing.
- Remove the retaining ring (5).
- Remove all J tools.
- Remove the 1-2-3-4 clutch balance piston (1) from the 1-2-3-4 clutch housing (4).
- Remove the 1-2-3-4 clutch piston return spring assembly (2) from the 1-2-3-4 clutch housing (4).
- Remove the 1-2-3-4 clutch piston (3) from the 1-2-3-4 clutch housing (4).
- Remove the seal rings (1 and 2) from the 1-2-3-4 clutch piston (3).
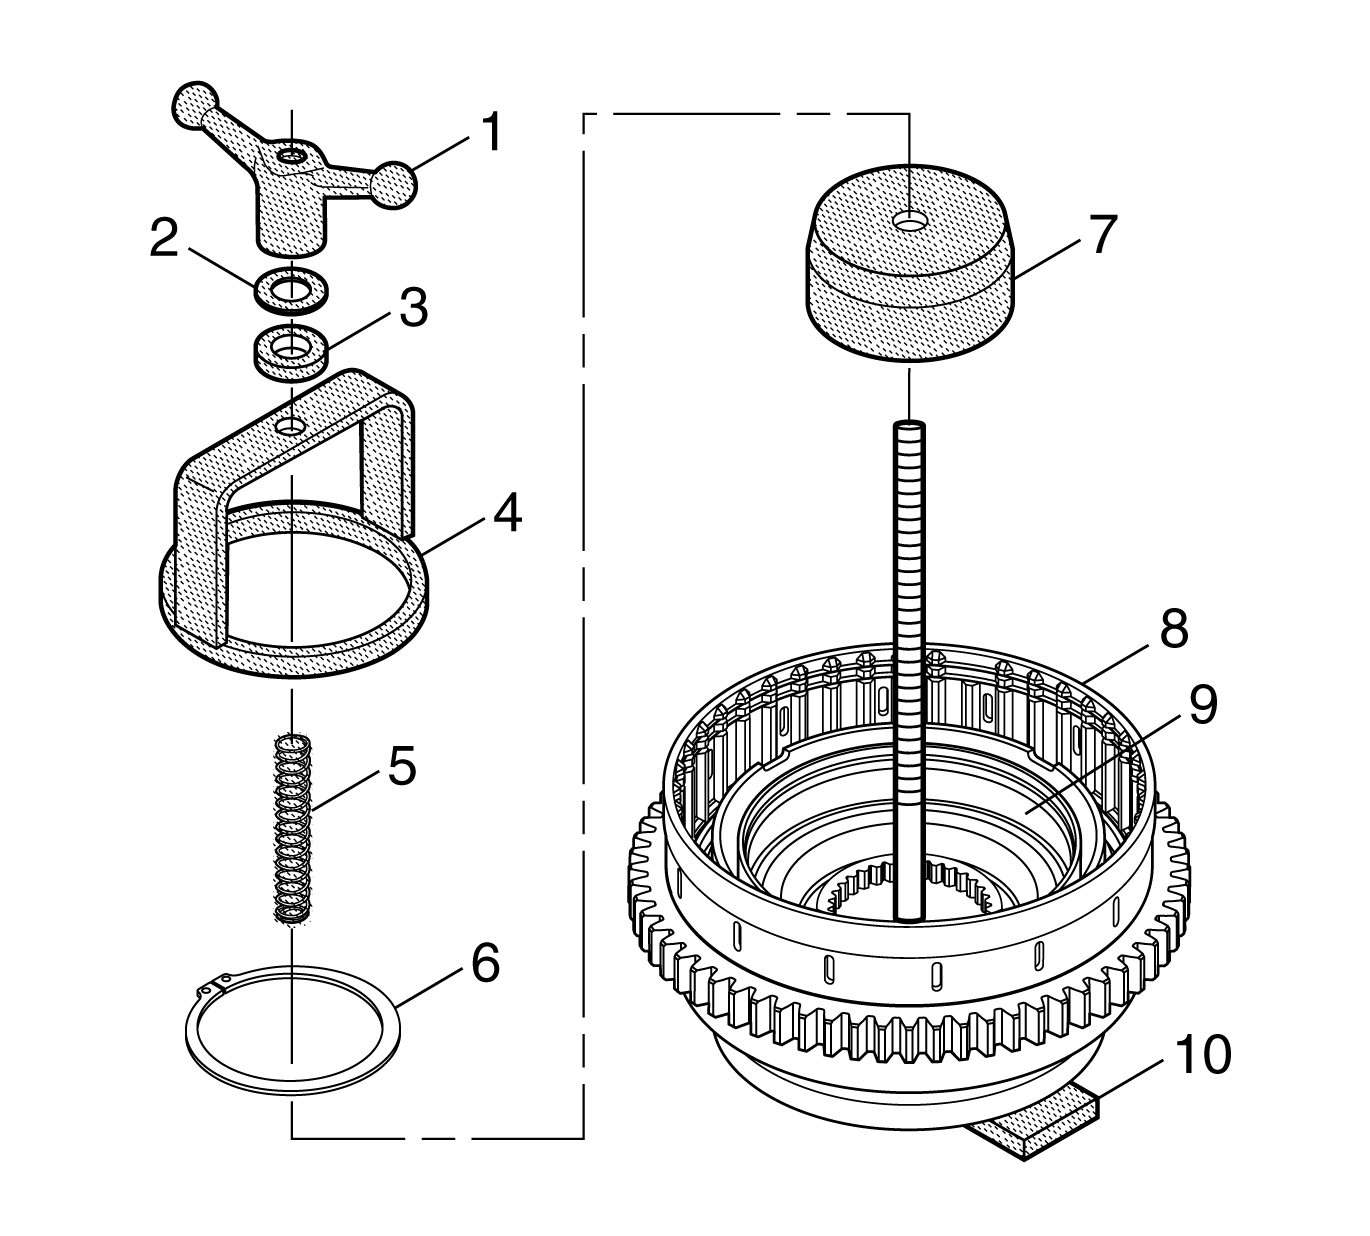
- Position the 1-2-3-4, 4-5-6 clutch housing (8) on the base of J 24204-2 (10) so that the rear of the housing is facing up.
- Align J-47339-2 (7) so that the bowl is facing down.
- Install J-47339-2 (7) onto the shaft of J 24204-2 and onto the inner hub of the 1-2-3-4, 4-5-6 clutch housing (9). Make sure the rim of J-47339-2 (7) almost touches the retaining ring.
- Install the spring (5) of J-47339-1 onto the shaft of J 24204-2 .
- Install J-47339-1 (4) onto the shaft of J 24204-2 .
- Install the J 24204-2 ball bearing (3) and washer (2) onto the shaft of J 24204-2 .
- Install the J 24204-2 wing nut (1) onto the shaft of J 24204-2 .
- Compress the 4-5-6 clutch piston return spring assembly until the retaining ring (6) can be removed.
- Remove the retaining ring (6) from the groove in the 1-2-3-4, 4-5-6 clutch housing inner hub and move the retaining ring over the top of J-47339-2 (7).
- Remove all J tools from the 1-2-3-4, 4-5-6 clutch housing.
- Remove the retaining ring (6) from the 1-2-3-4, 4-5-6 clutch housing.
- Remove the 1-2-3-4 clutch piston housing, the 4-5-6 piston return spring assembly, and the 4-5-6 clutch piston, as an assembly (1), from the 1-2-3-4, 4-5-6 clutch housing (2).
- Position the 4-5-6 piston and 1-2-3-4 clutch housing horizontally on a work table.
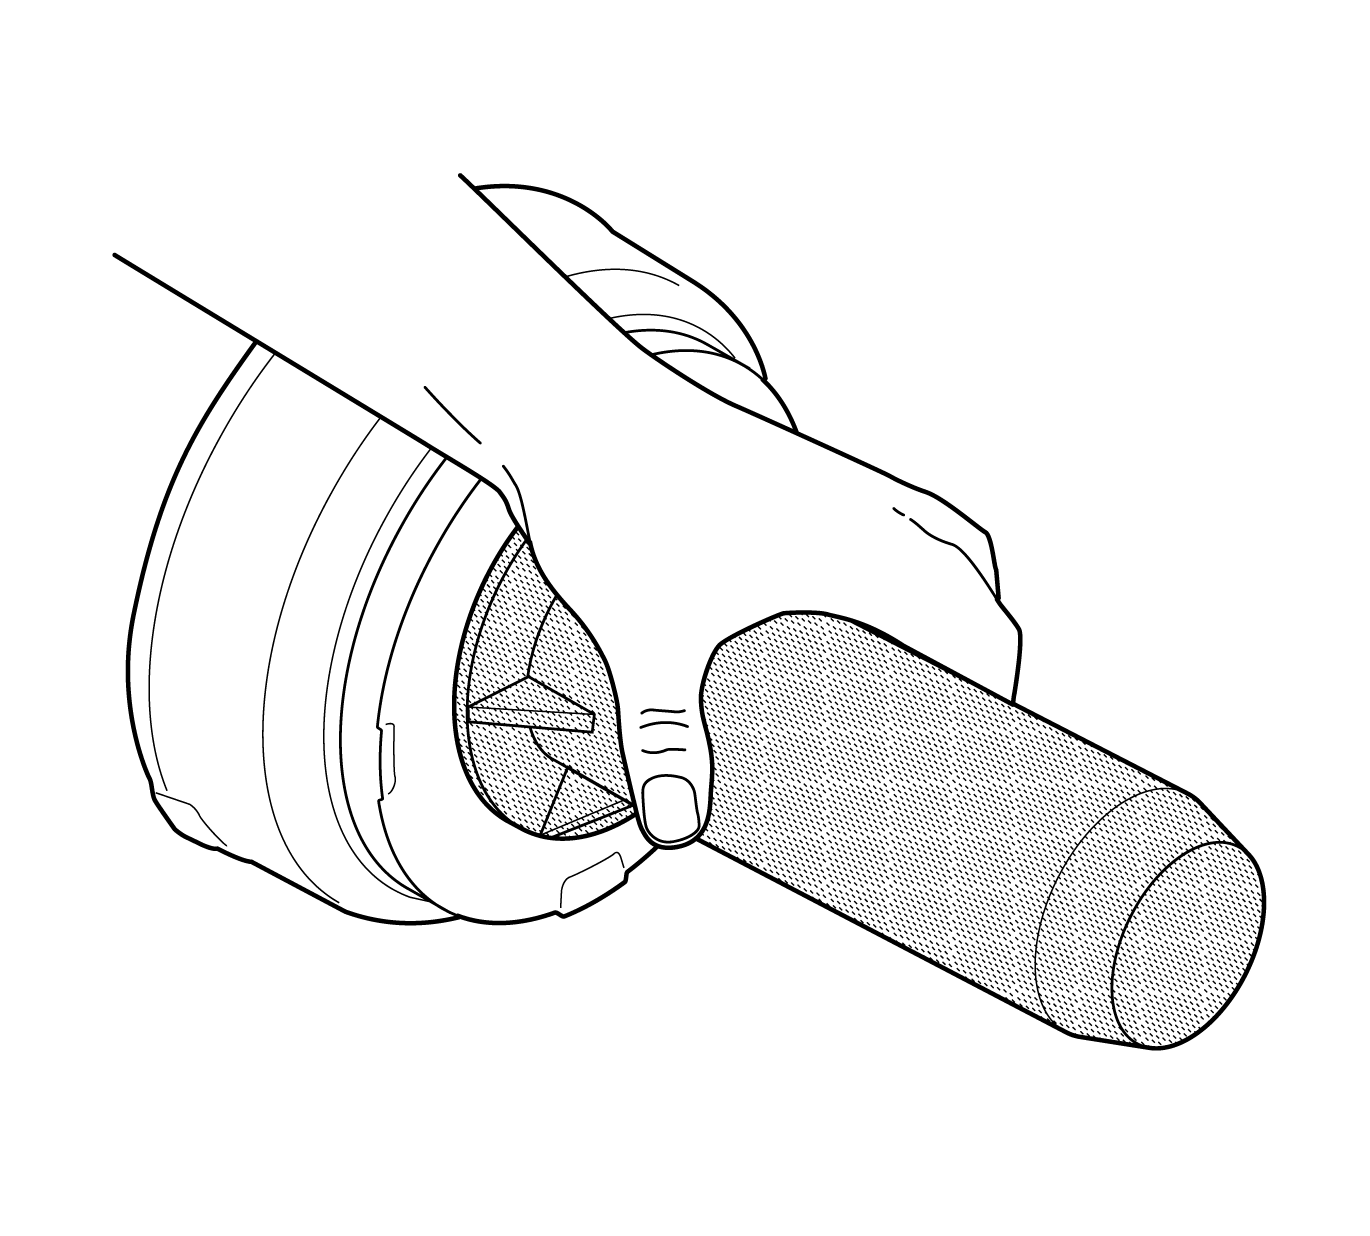
- Hold the 4-5-6 piston and 1-2-3-4 clutch housing, and place J 43772 against the 1-2-3-4 clutch housing.
- Using a rubber mallet, gently tap on J 43772 to remove the 1-2-3-4 clutch housing from the 4-5-6 clutch piston.
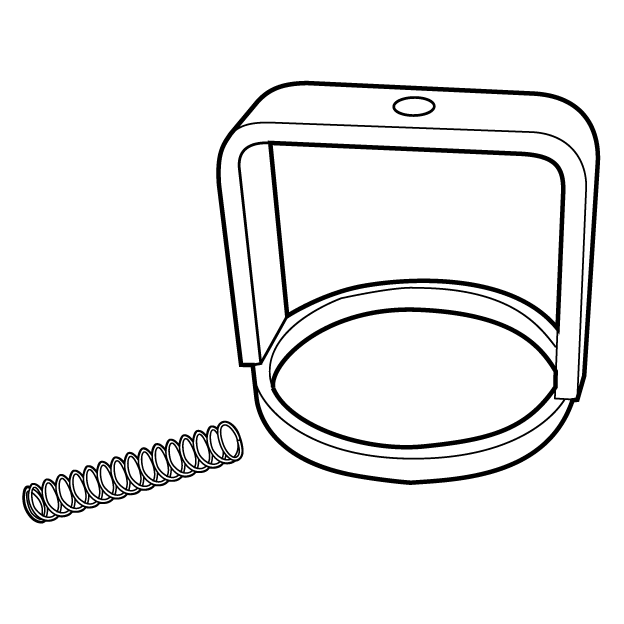
- Remove the 4-5-6 clutch piston return springs (2) from the 4-5-6 clutch piston (3).
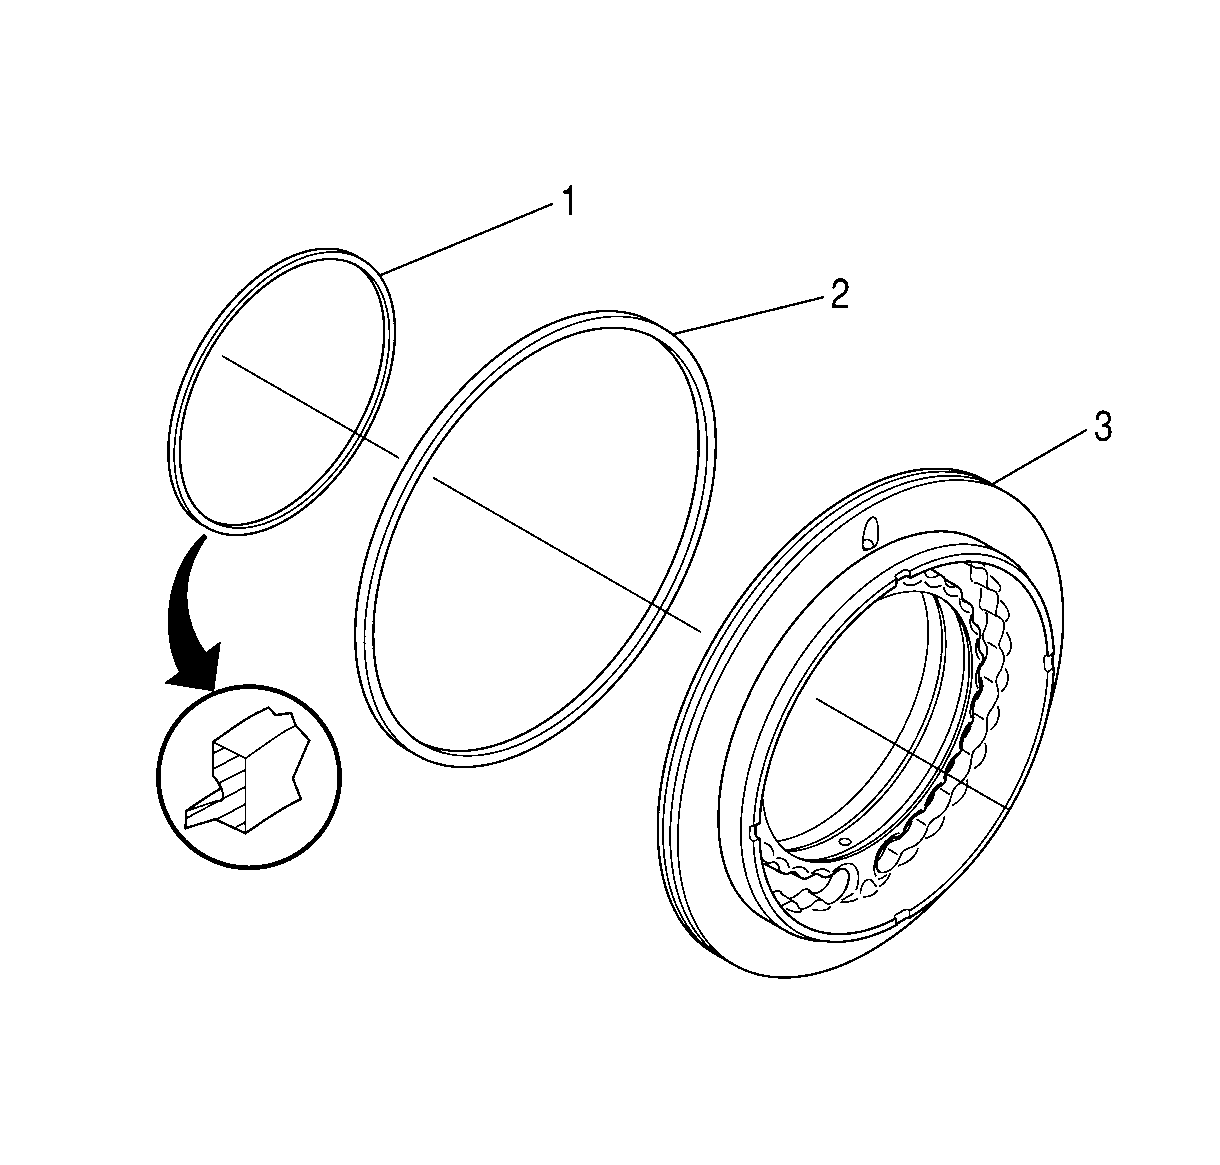
- Remove the O-ring (1) from the inner hub of the 1-2-3-4, 4-5-6 clutch housing (2).
- Remove the seal ring (1) from the 1-2-3-4 clutch housing (2).
- Remove the piston seal rings (1 and 2) from the 4-5-6 clutch piston (3).
Important: The thrust bearing assembly may stick to the 1-2-3-4 clutch drive hub or the 4-5-6 clutch drive hub.
Important: The thrust bearing assembly may stick to the rear of the turbine shaft or the front of the 1-2-3-4 clutch drive hub.
Caution: Personal injury and/or property damage may result from the movement of the 1-2-3-4, 4-5-6 clutch housing or the turbine shaft. The 1-2-3-4, 4-5-6 clutch housing and turbine shaft are held together by a retaining ring. Removing the retaining ring allows the turbine shaft and the 1-2-3-4, 4-5-6 clutch housing to move freely. When removing the retaining ring, make sure the 1-2-3-4, 4-5-6 clutch housing and the turbine shaft are restrained from moving .