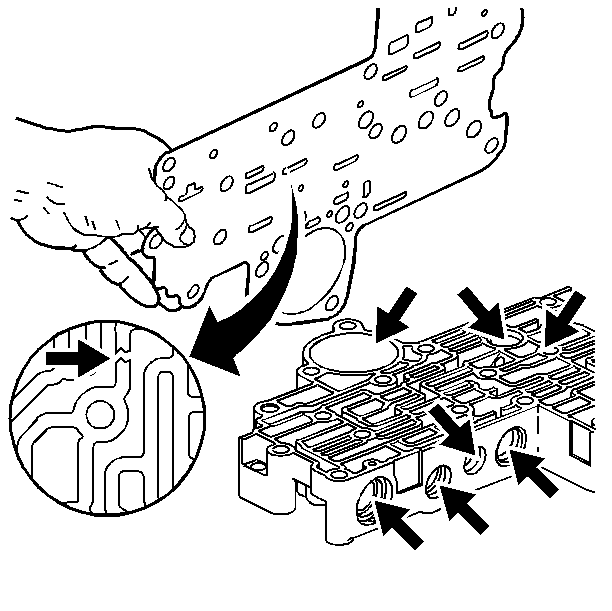
- Inspect all valve body passages for debris, and then inspect the gasket for damage.
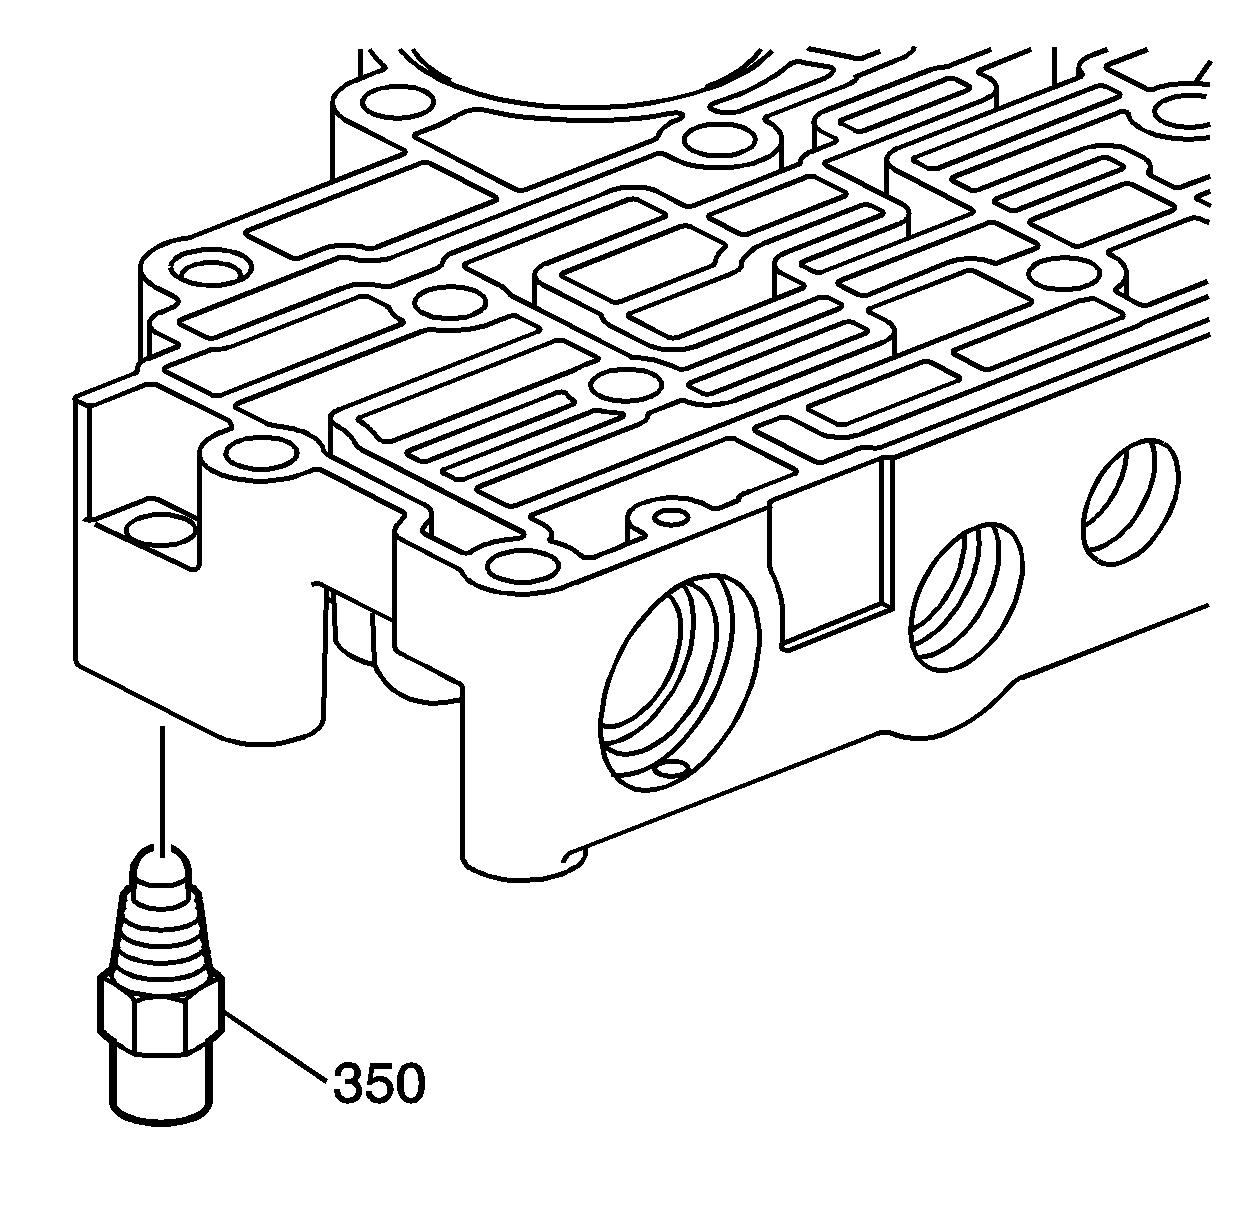
- Install the automatic transmission fluid temperature sensor (350).
- Install the following parts:
- Install the following parts:
- Install the following parts:
- Install the following parts:
- Install the following parts:
- Install the following parts:
- Install the following parts:
- Install the following parts:
- Install the clamp bolt (15).
- Install the following parts:
Notice: Use the correct fastener in the correct location. Replacement fasteners must be the correct part number for that application. Fasteners requiring replacement or fasteners requiring the use of thread locking compound or sealant are identified in the service procedure. Do not use paints, lubricants, or corrosion inhibitors on fasteners or fastener joint surfaces unless specified. These coatings affect fastener torque and joint clamping force and may damage the fastener. Use the correct tightening sequence and specifications when installing fasteners in order to avoid damage to parts and systems.
Tighten
Tighten the automatic transmission fluid temperature
sensor to 3.4 N·m (30 lb in).
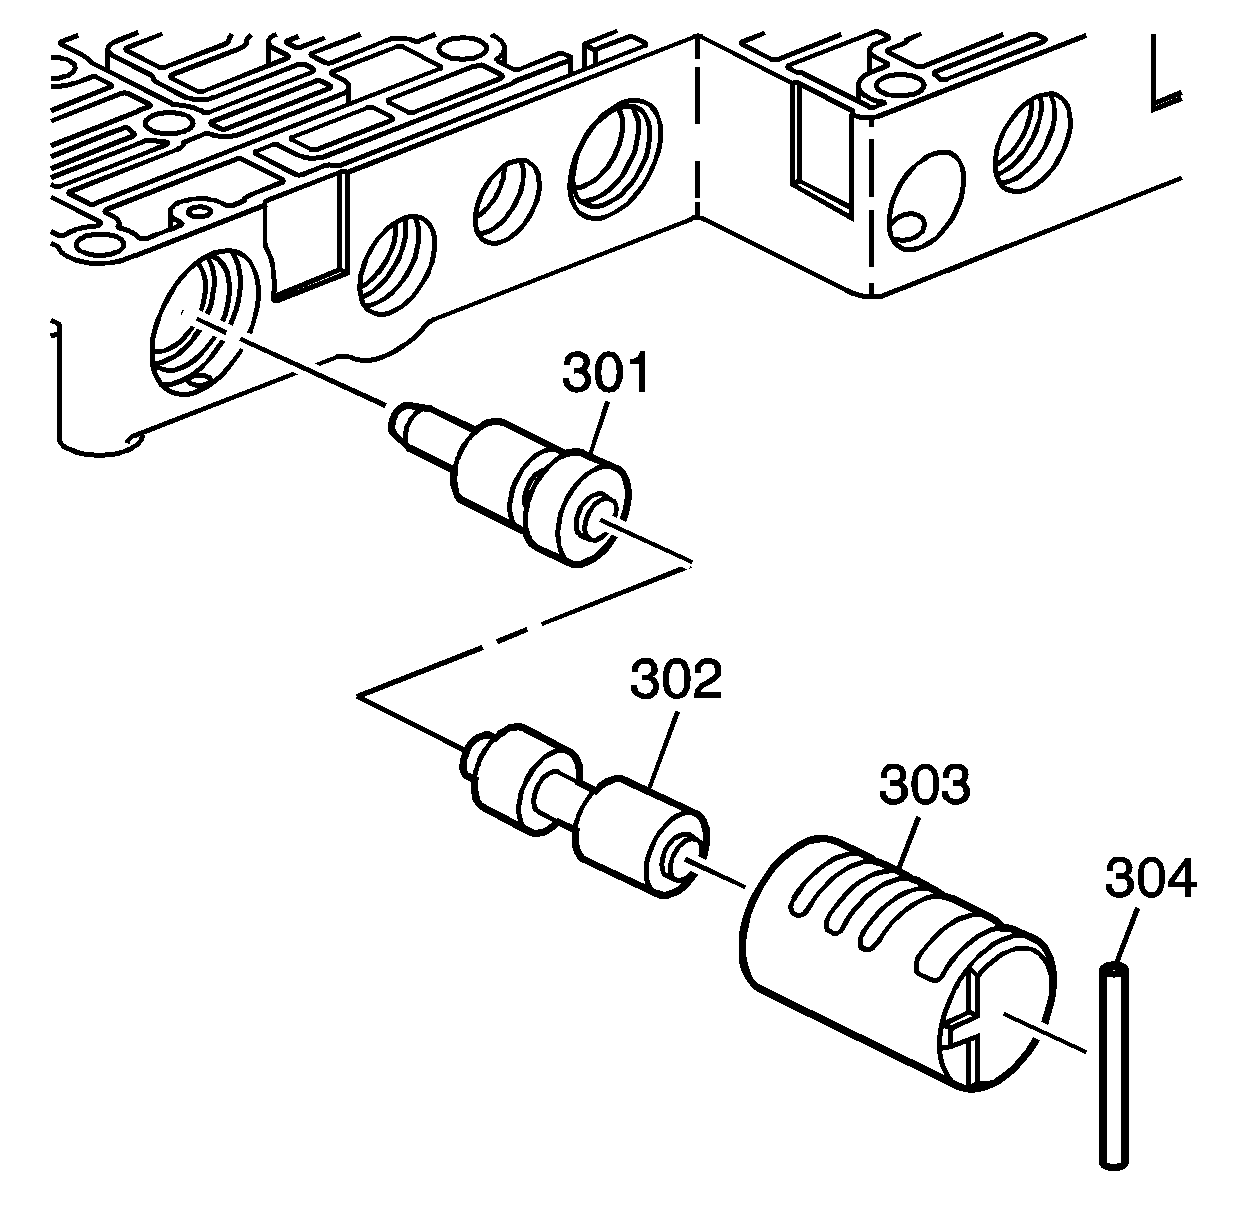
| • | The 1-2, 3-4 accumulator valves (301, 302) |
| • | The bushing (303) |
| • | The coiled spring pin (304) |
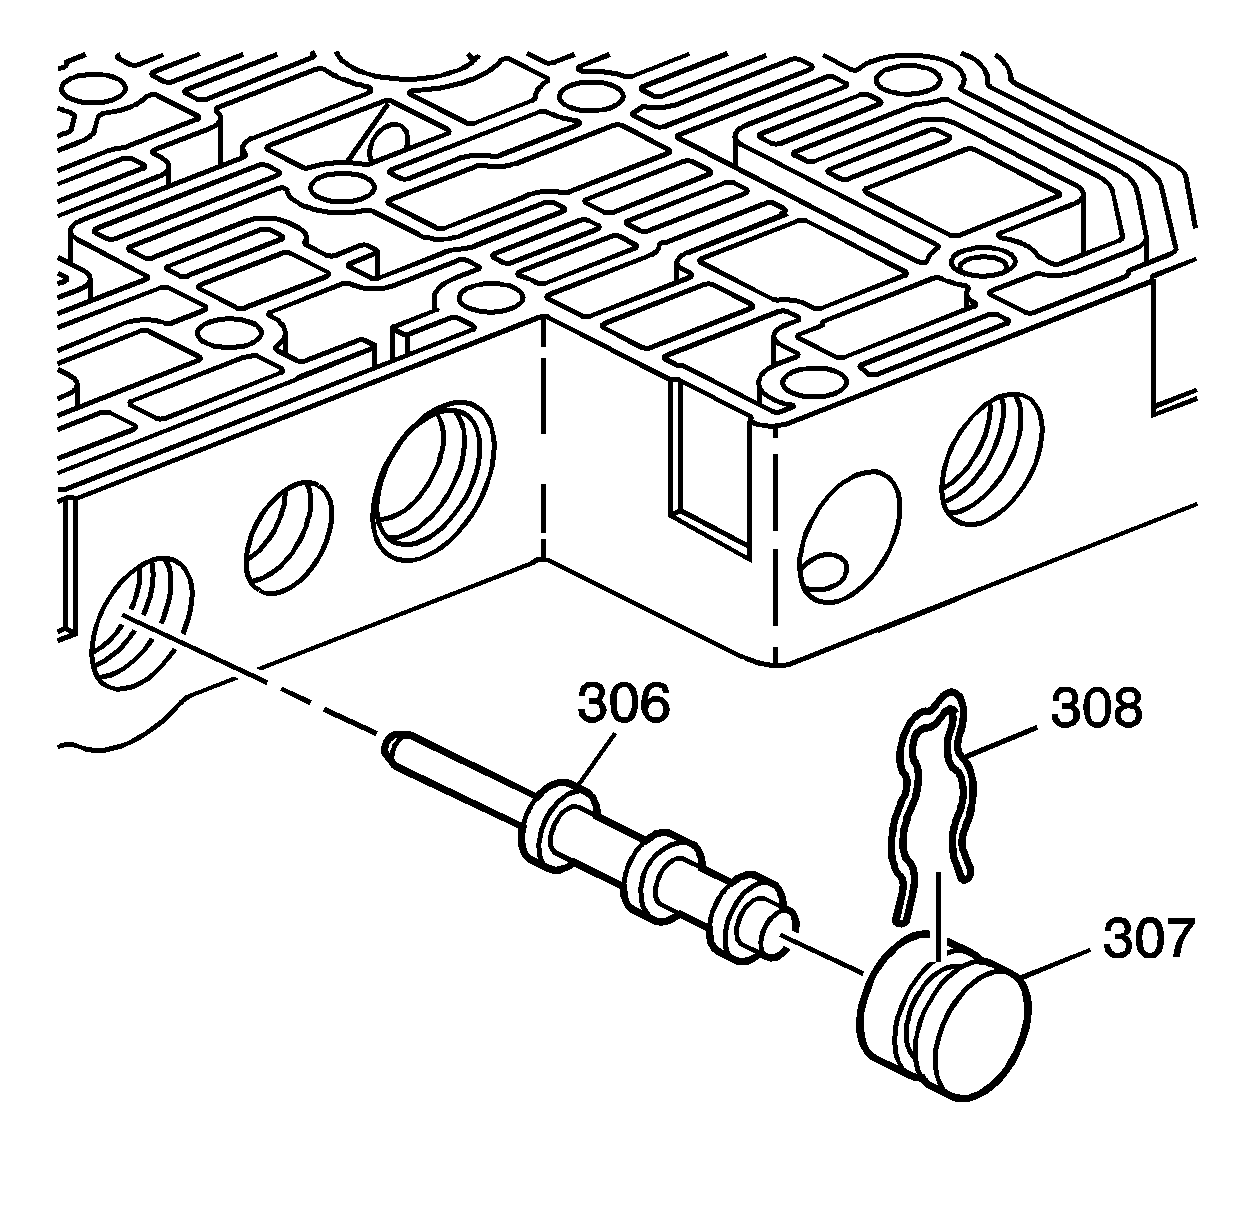
| • | The 2-3 accumulator valve (306) |
| • | The bore plug (307) |
| • | The retainer clip (308) |
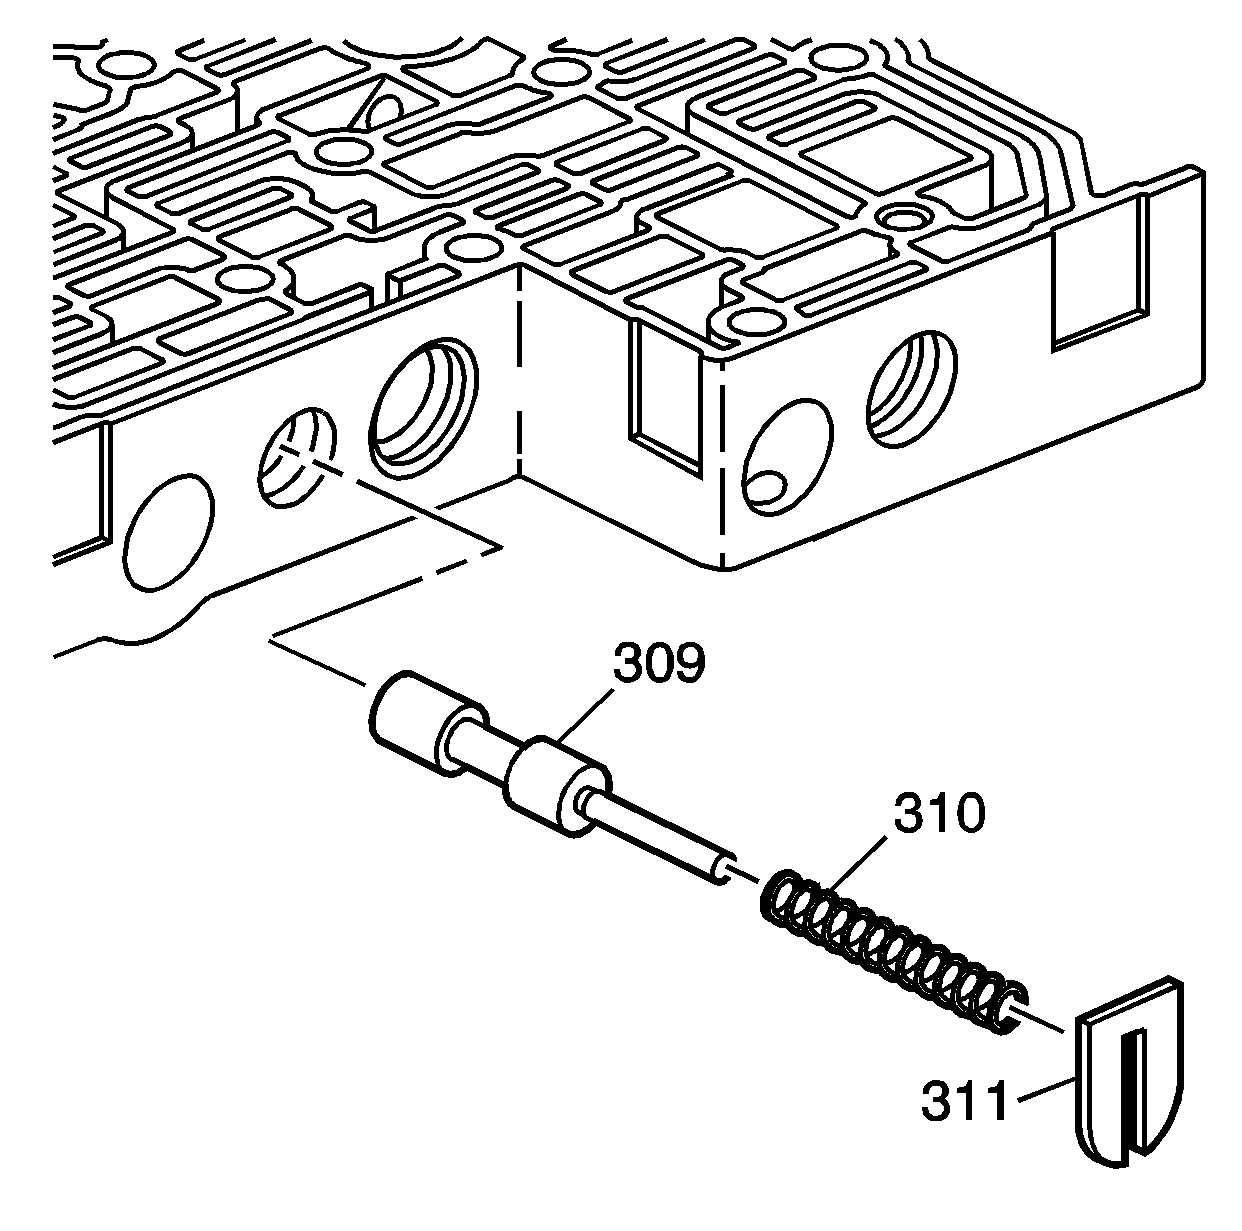
| • | The actuator feed limit valve (309) |
| • | The actuator feed limit valve spring (310) |
| • | The spring retaining plate (311) |
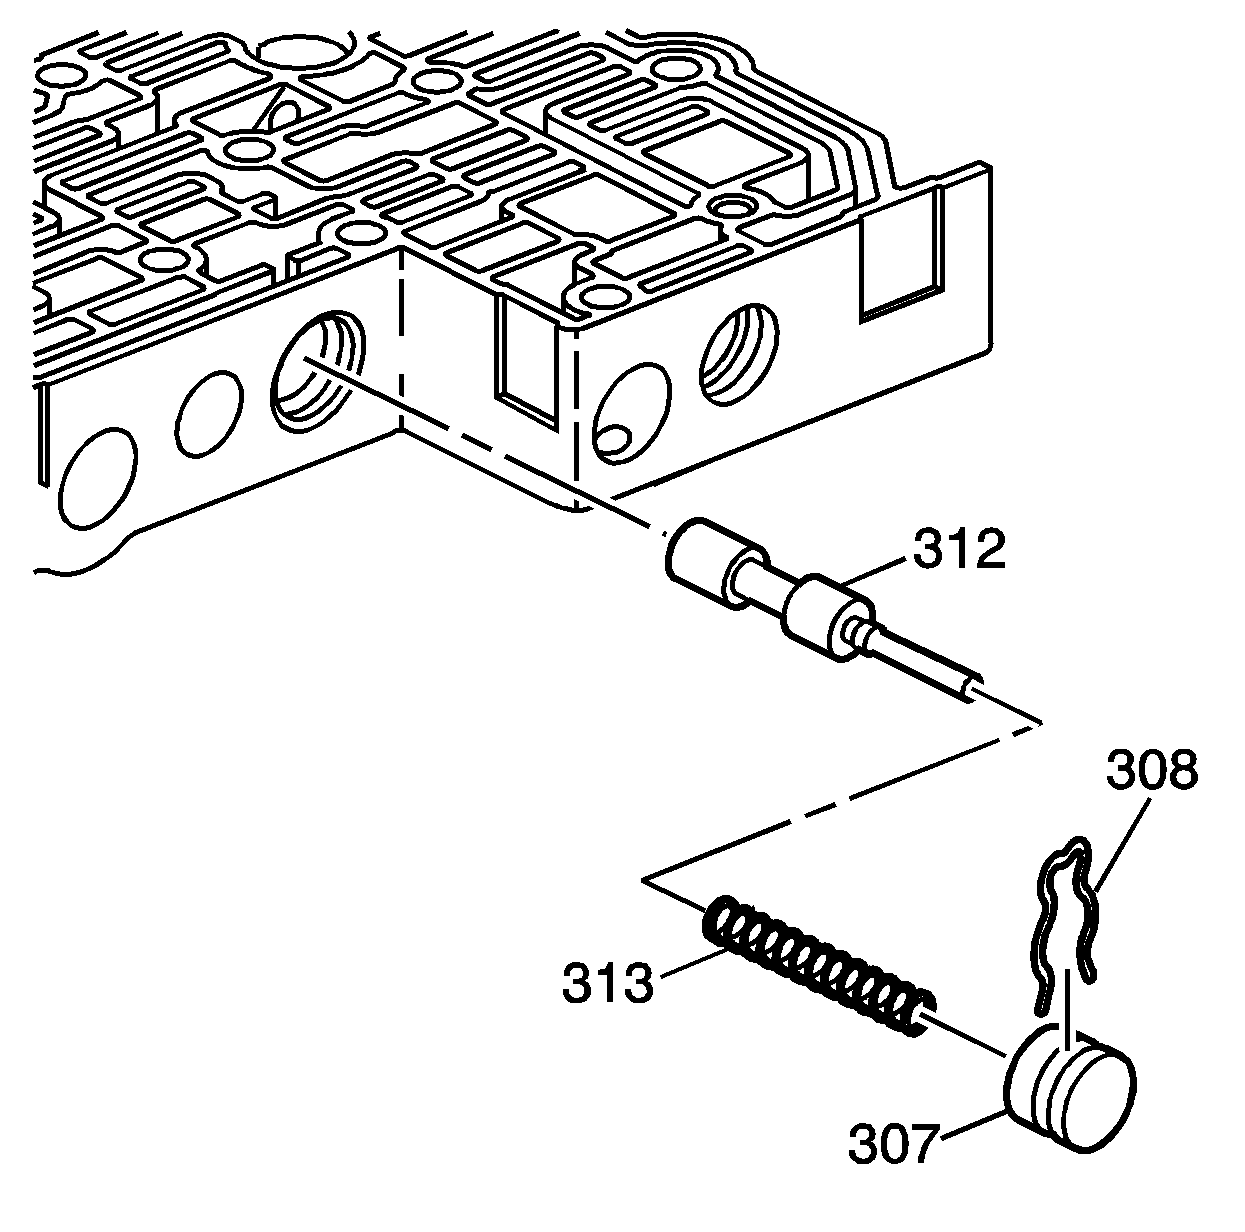
| • | The converter feed limit valve (312) |
| • | The converter feed limit valve spring (313) |
| • | The bore plug (307) |
| • | The retaining clip (308) |

| • | The torque converter clutch enable valve (322) |
| • | The torque converter clutch enable valve spring (323) |
| • | The bore plug (307) |
| • | The retainer clip (308) |
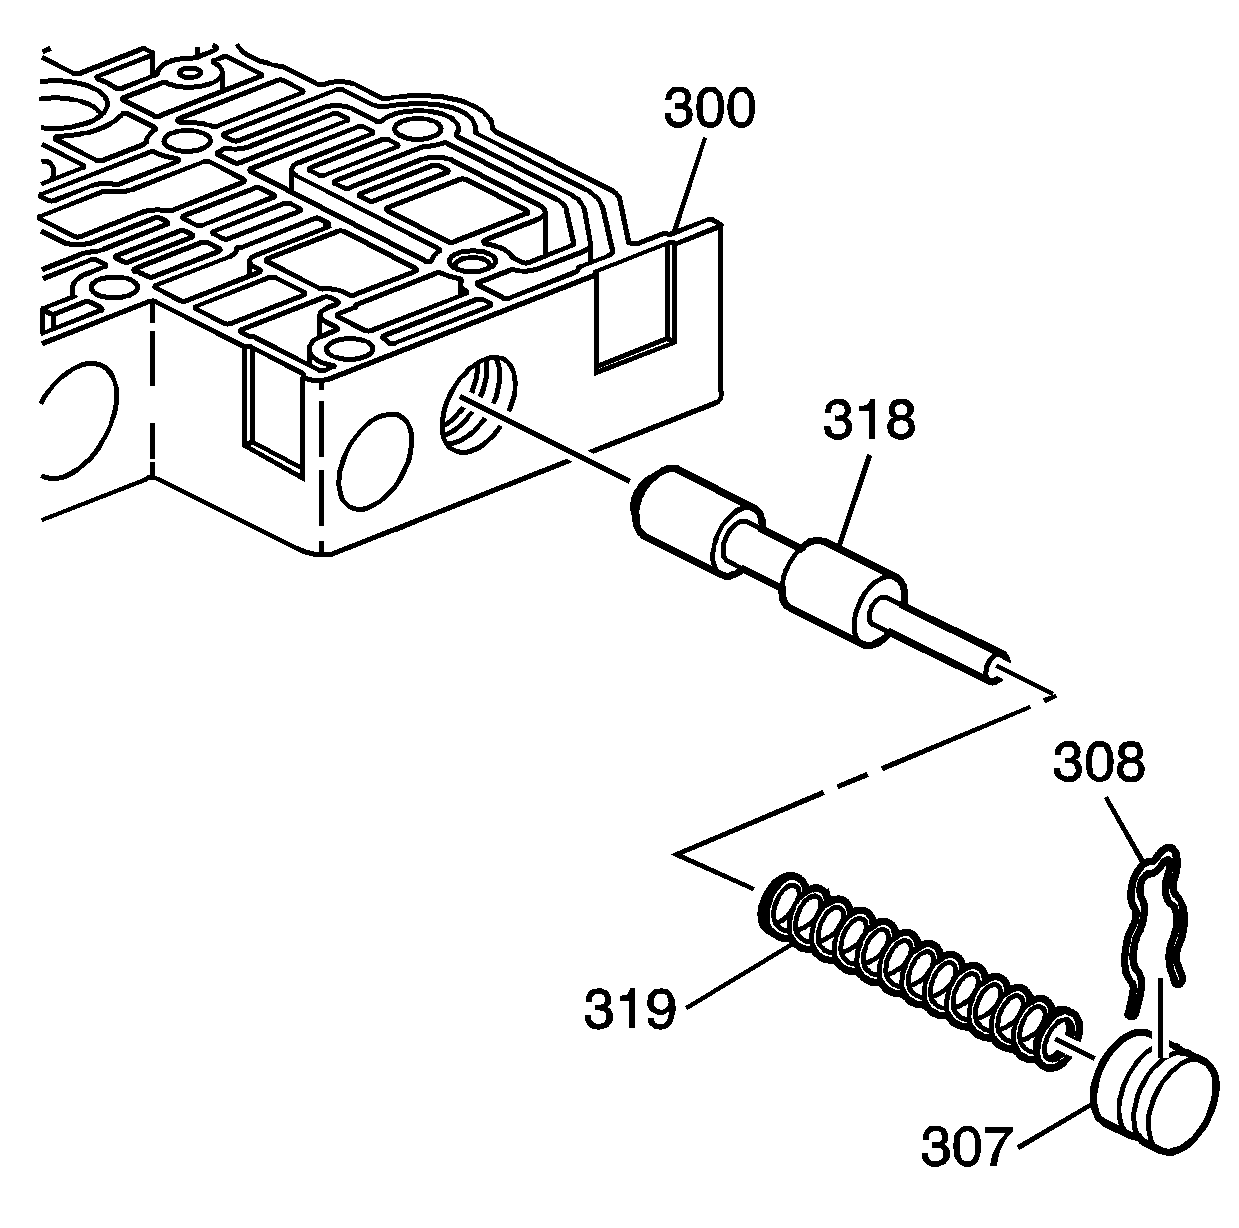
| • | The converter regulator valve (318) |
| • | The converter regulator valve spring (319) |
| • | The bore plug (307) |
| • | The retainer clip (308) |
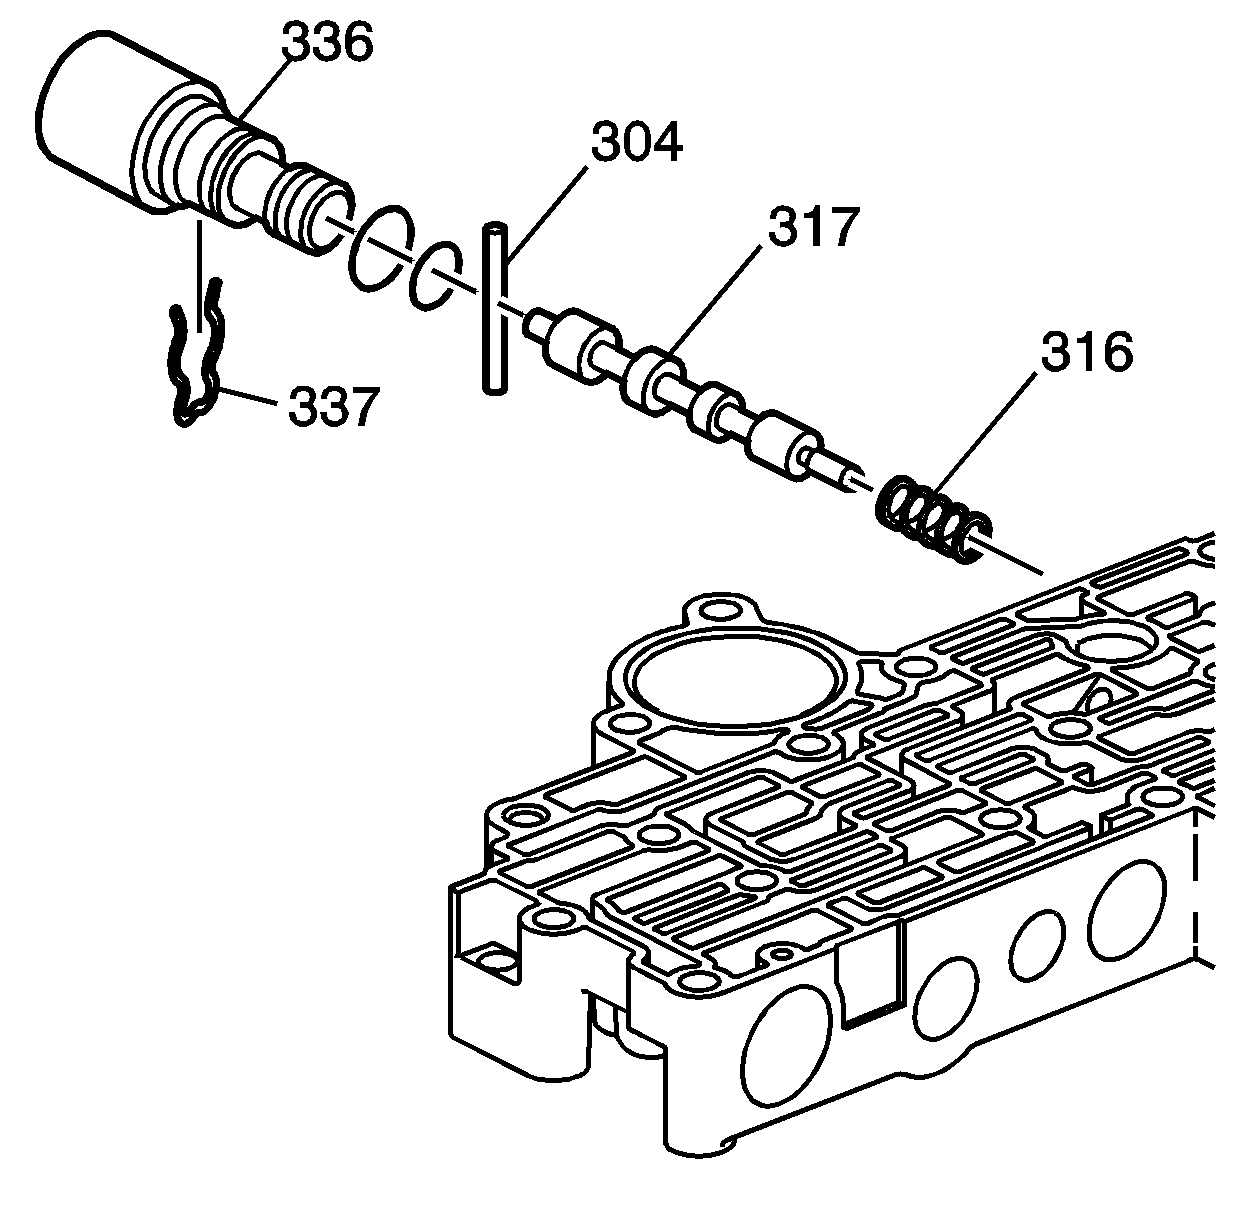
| • | The converter clutch control spring (316) |
| • | The converter clutch control valve (317) |
| • | The coiled spring pin (304) |
| • | The torque converter clutch solenoid valve (336) |
| • | The spring retainer clip from the torque converter clutch solenoid valve (337) |
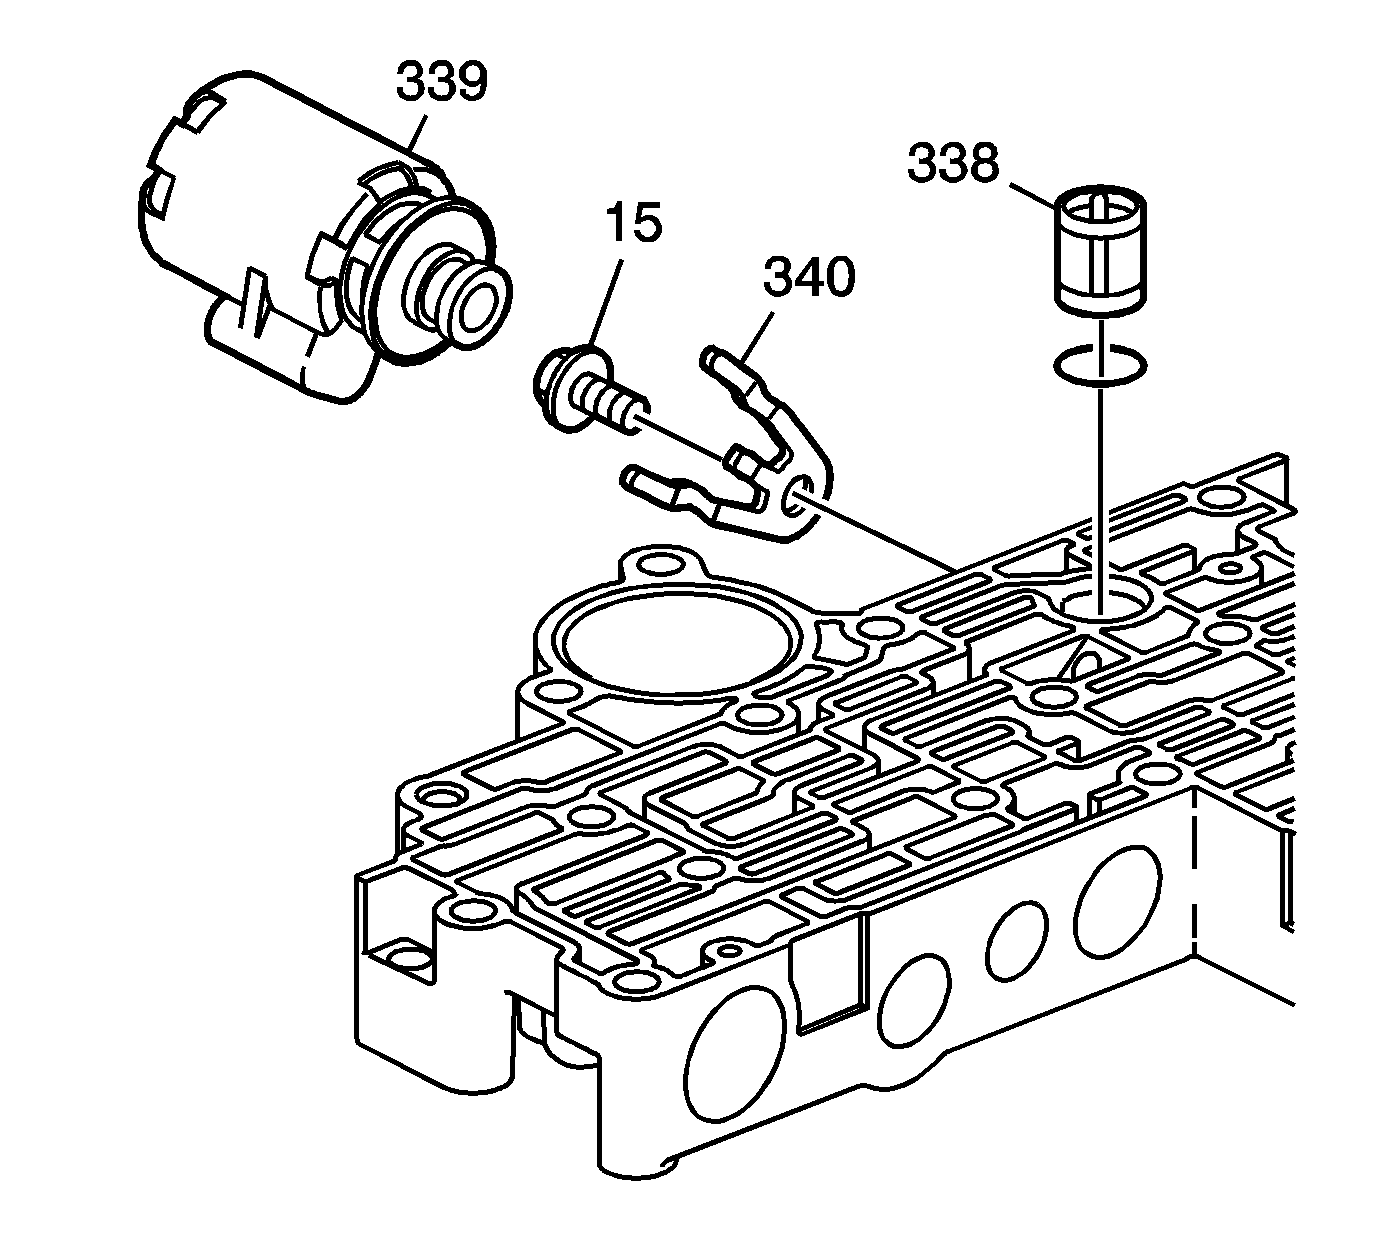
| • | The pressure control solenoid filter and seal (338) |
| • | The pressure control solenoid valve (339) |
| • | The pressure control solenoid clamp (340) |
Tighten
Tighten the bolt to 11-13 N·m
(8.0-9.5 lb ft).
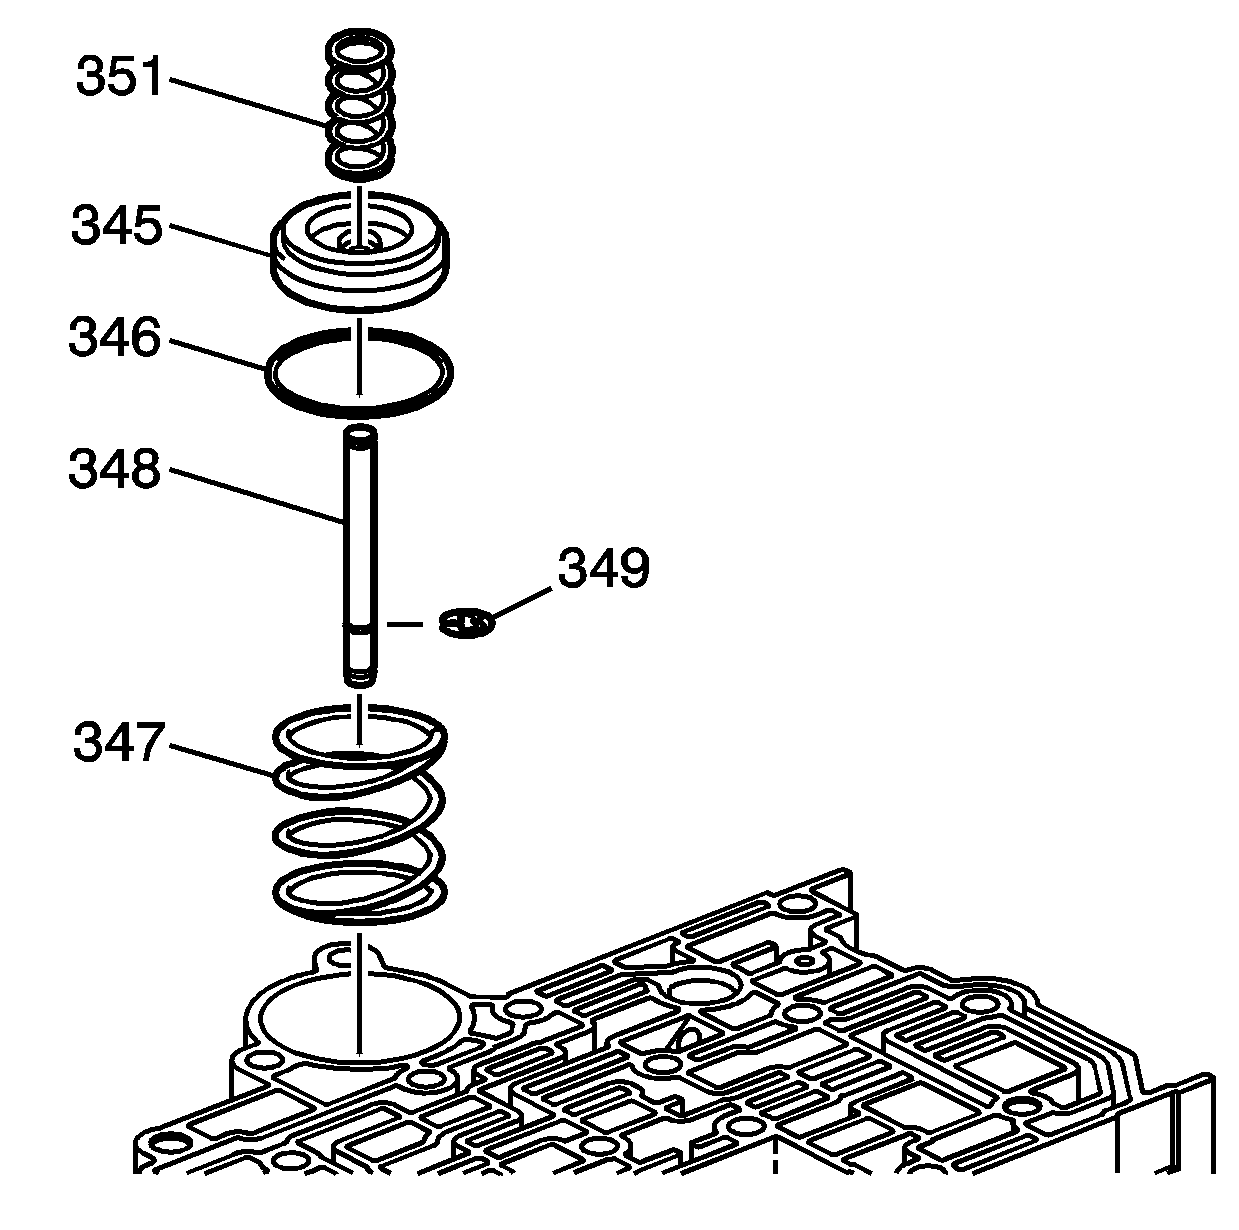
| • | The 2-3 accumulator pin (348) |
| • | The snap ring (349) |
| • | The 2-3 accumulator piston spring (347) |
| • | The accumulator piston and seal (345, 346) |
| • | The 2-3 piston cushion spring (351) |
