- If the injector sleeve is pulled from the cylinder head when removing the injector,
the injector sleeve installation procedure is as follows:
| | Important:
| • | An injector sleeve with scoring or other damage must be replaced. |
| • | The stamped letter R or L must face up. R is the right bank and L is the left bank. |
|
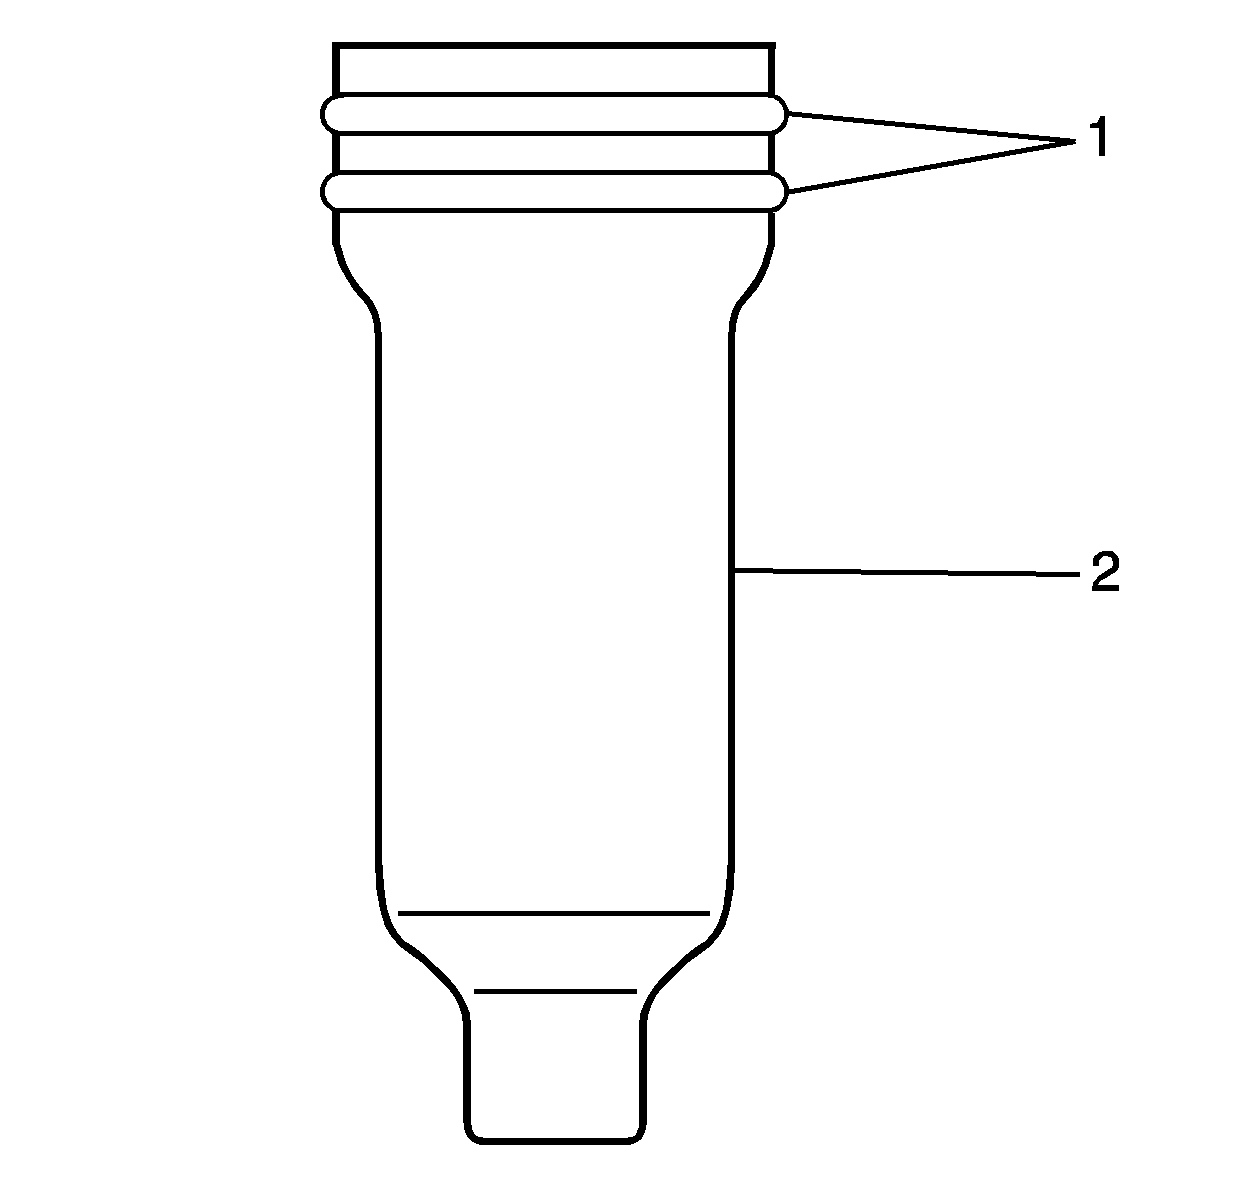
| 1.1. | Set the new injector sleeve gaskets (1) to the injector sleeve (2). |
| 1.2. | Apply sealant LOCTITE 272,or equivalent to the lower sealing area of injector sleeve. |
Notice: The left and right cylinder head gaskets are not interchangeable. Improper
placement of the cylinder head gasket will block coolant and oil passages.
Blocked coolant and oil passages will cause severe engine damage.
Important: The stamped letter R or L, must face up. R is the right bank, L is the left bank.
- Install the right cylinder head gasket of the correct grade. Refer to
Cylinder Head Gasket Selection Specifications
.
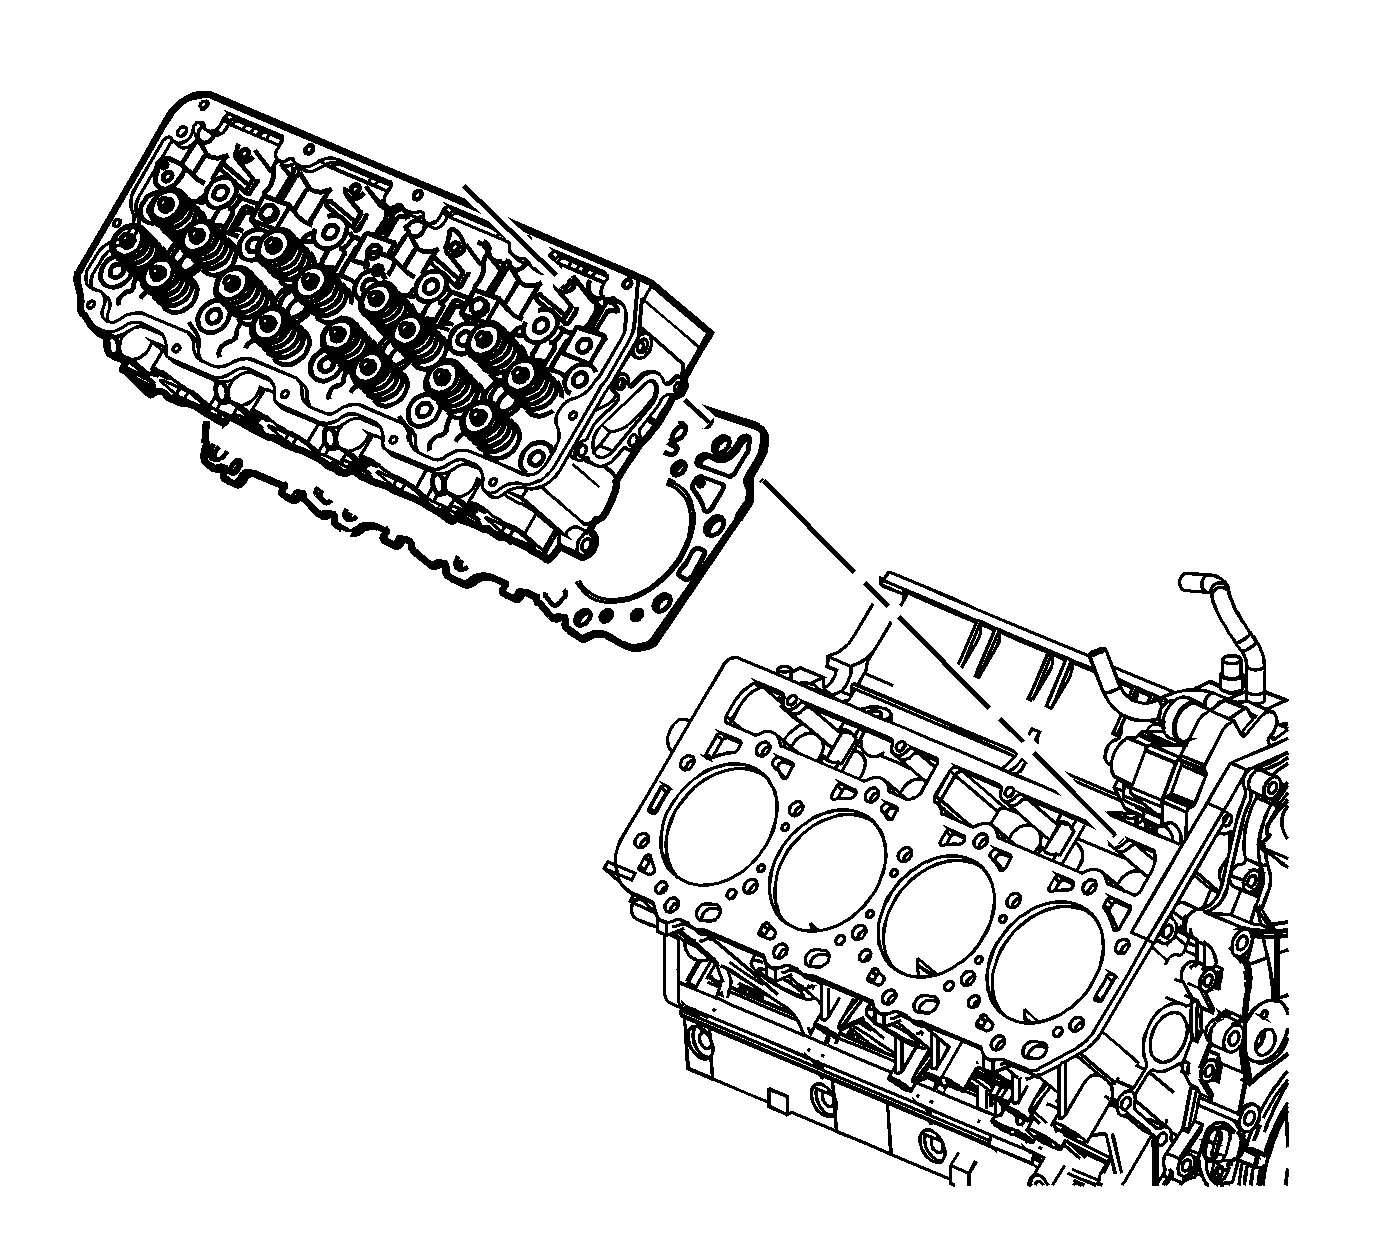
- Install the right cylinder head.
Notice: Refer to Fastener Notice in the Preface section.
Notice: This component uses bolts with a preapplied molybdenum disulfide coating
for thread lubrication. Do not remove the coating or use any additional
lubricant. Improperly lubricated threads will adversely affect the bolt torque
and clamp load. Improper bolt torque and clamp load can lead to engine damage.
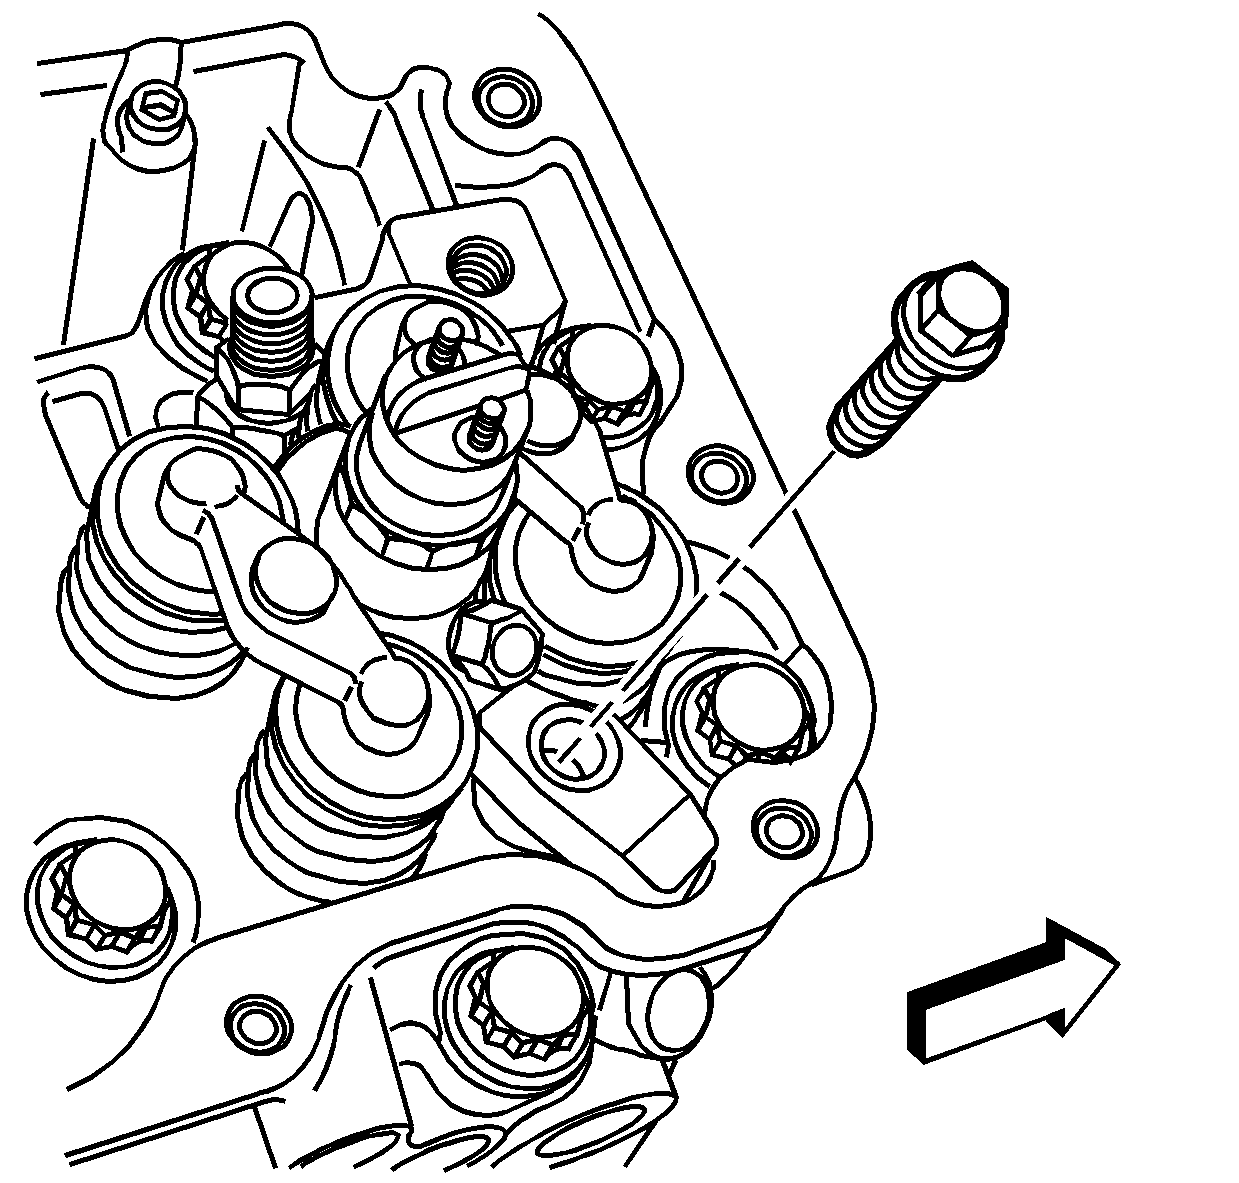
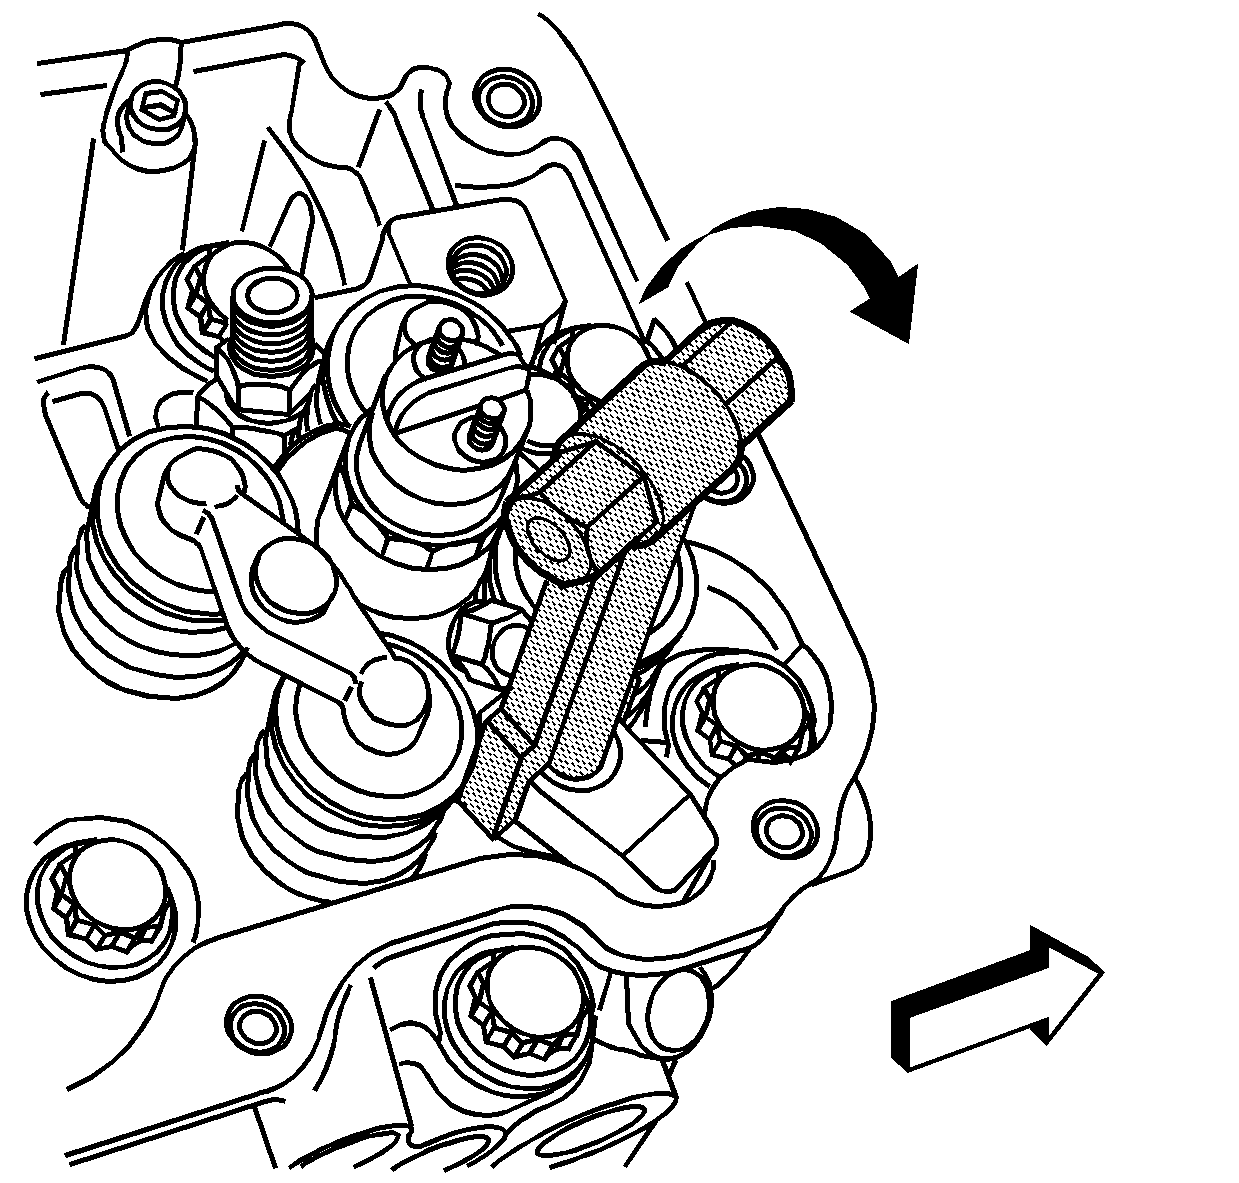
- Install the NEW cylinder head bolts.
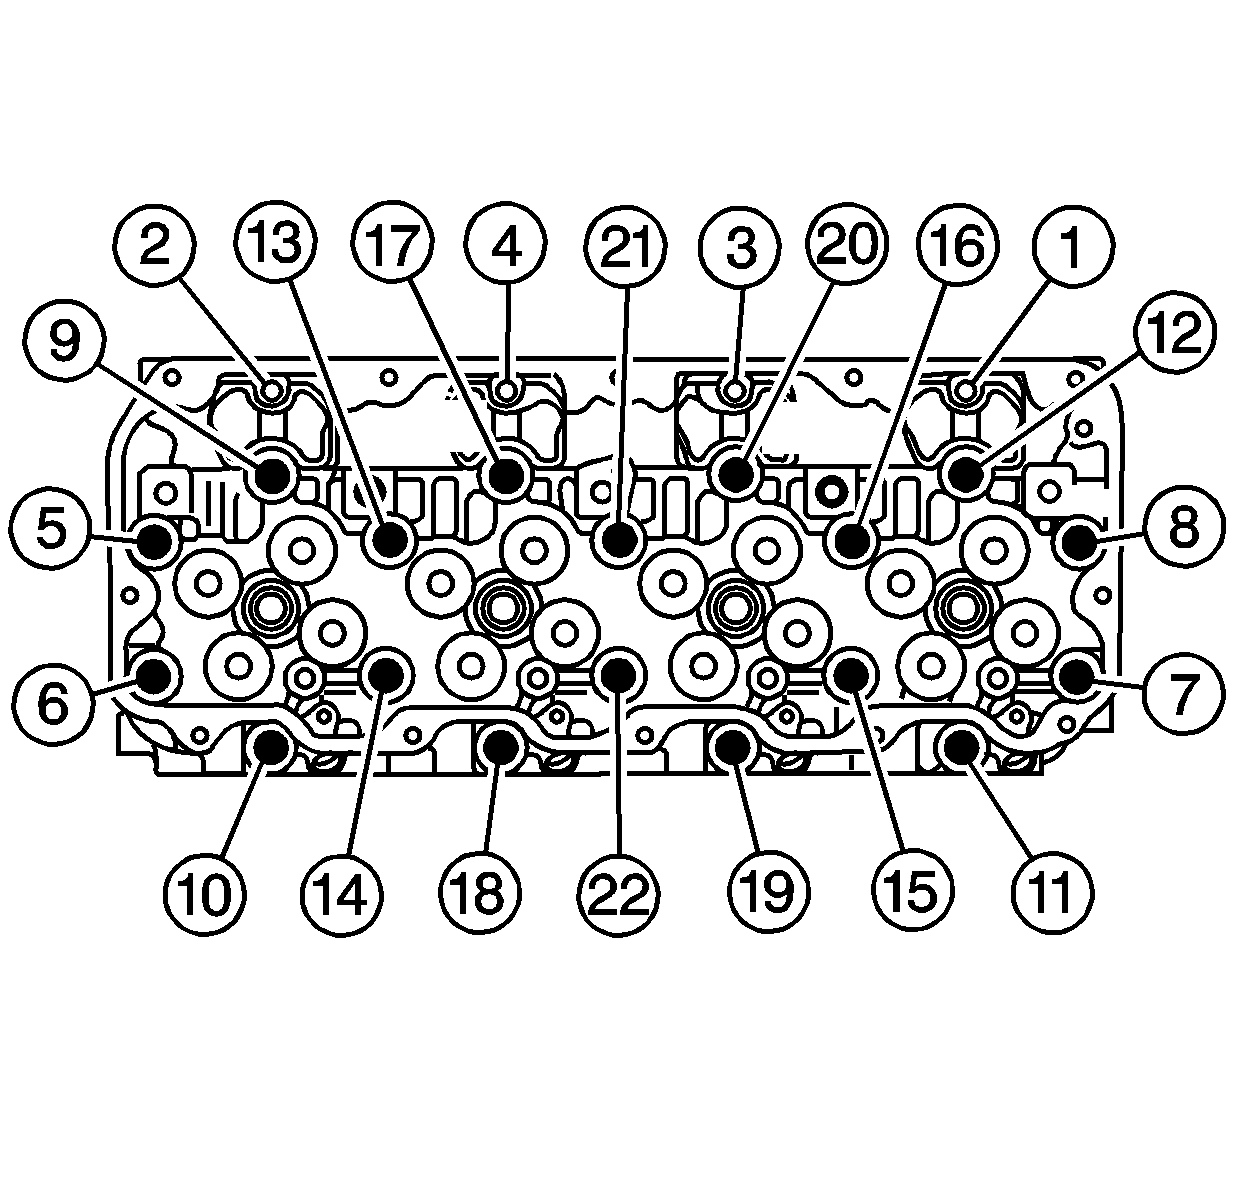
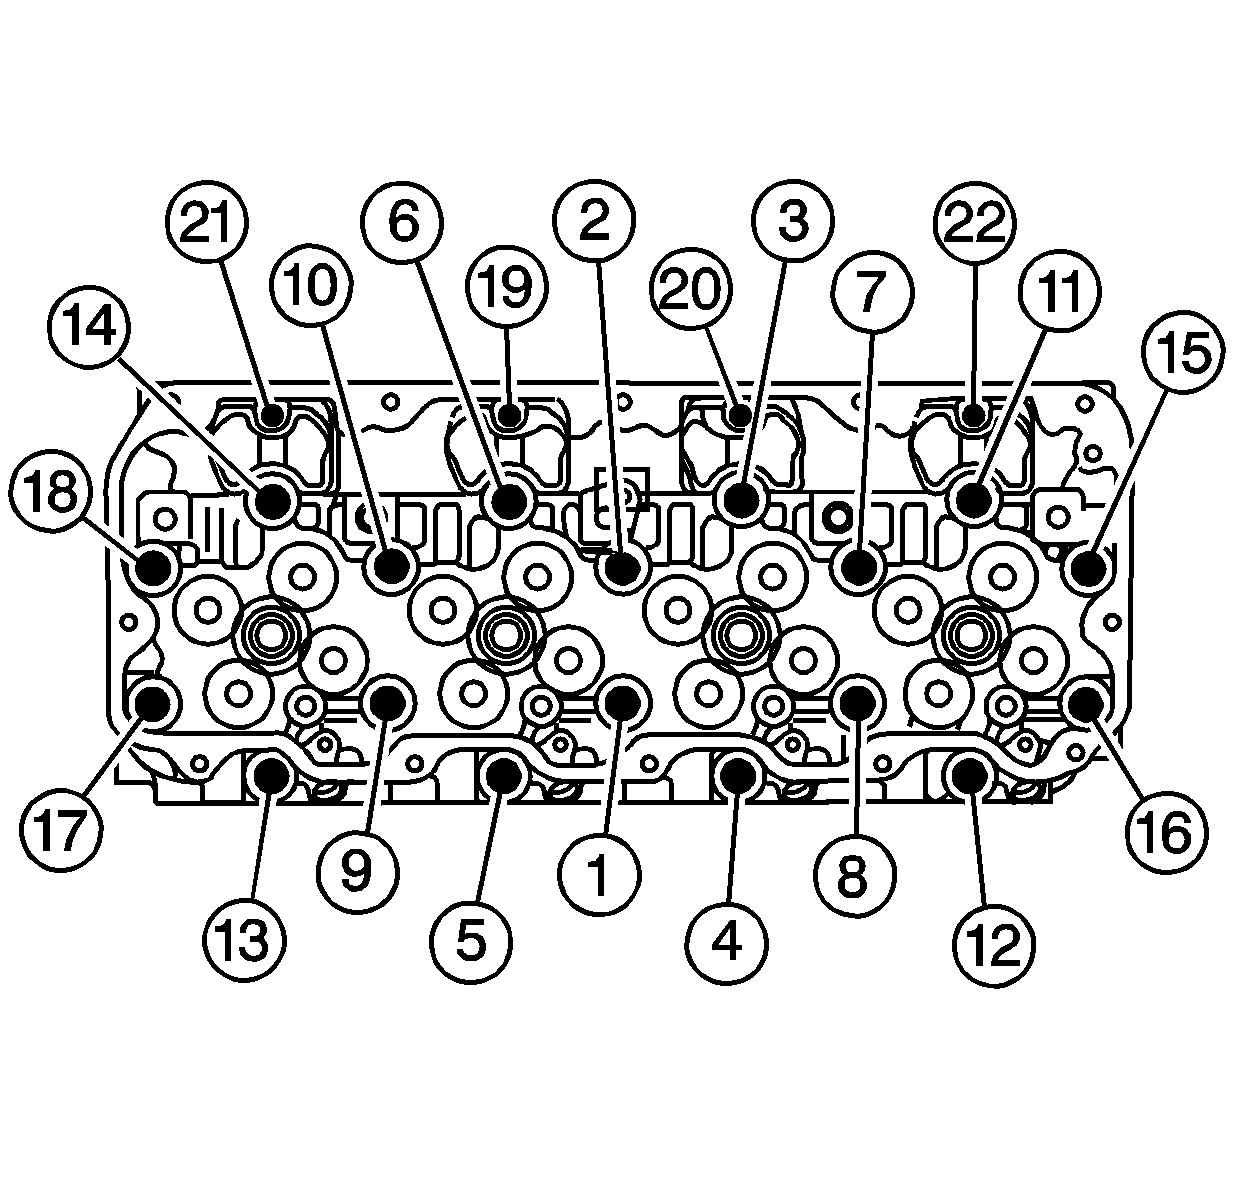
- Tighten the cylinder head bolts in the following steps using the sequence shown.
Tighten
- Tighten the M12 bolts a first pass to 50 N·m (37 lb ft).
- Tighten the M12 bolts a second pass to 80 N·m (59 lb ft).
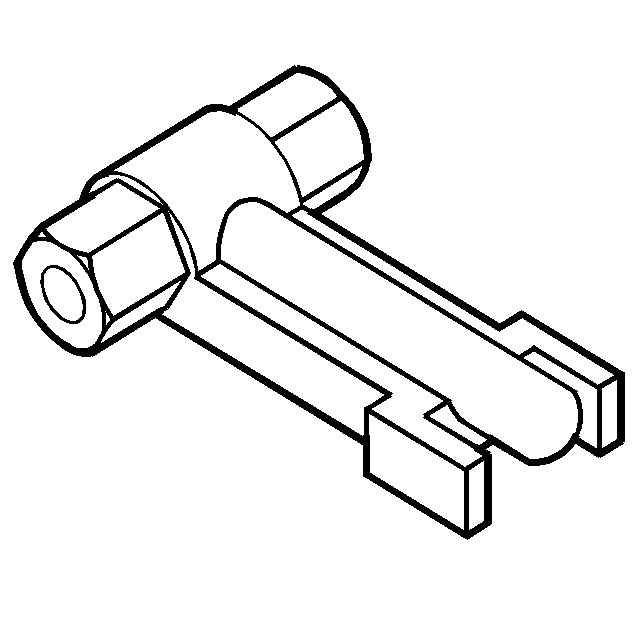
- Tighten the M12 bolts a third pass to 60 degrees, using
J 45059
.
- Tighten the M12 bolts a final pass to 60 degrees, using
J 45059
.
- Tighten the M8 bolts to 25 N·m (18 lb ft).
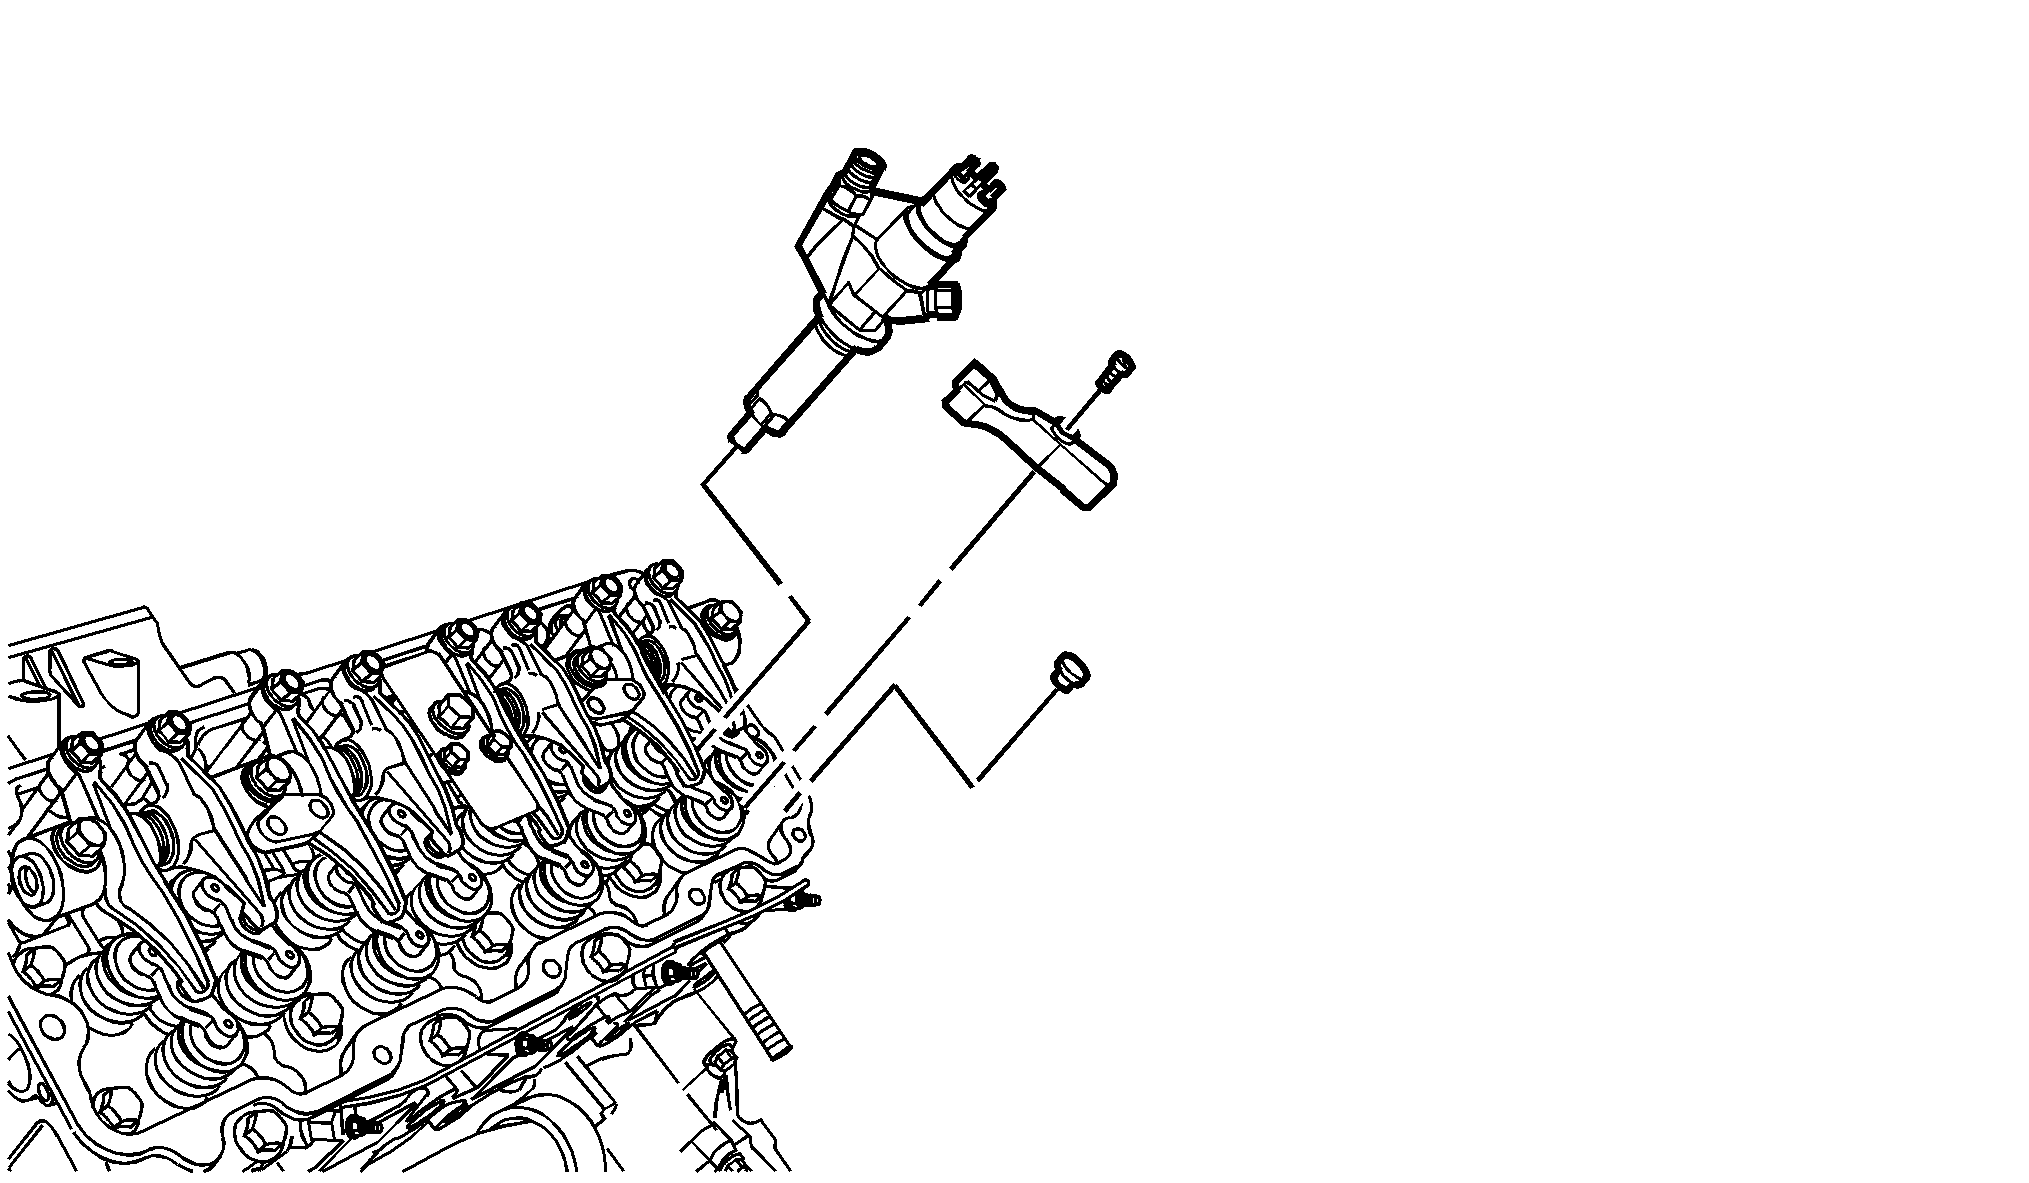
- Install a NEW O-ring onto the fuel injector.
- Lubricate the O-ring with clean engine oil.
- Ensure the injector bore is clean and free from carbon.
- Install a new copper washer into the fuel injector bore in the cylinder head.
- Install the fuel injector locating pin.
- If reusing the injectors, clean the injector tip of carbon. Do not clean with a wire brush.
- Install the fuel injector with fuel injector retainer.
- Install the fuel injector retainer bolt.
Tighten
Tighten the bolt to 50 N·m (37 lb ft).
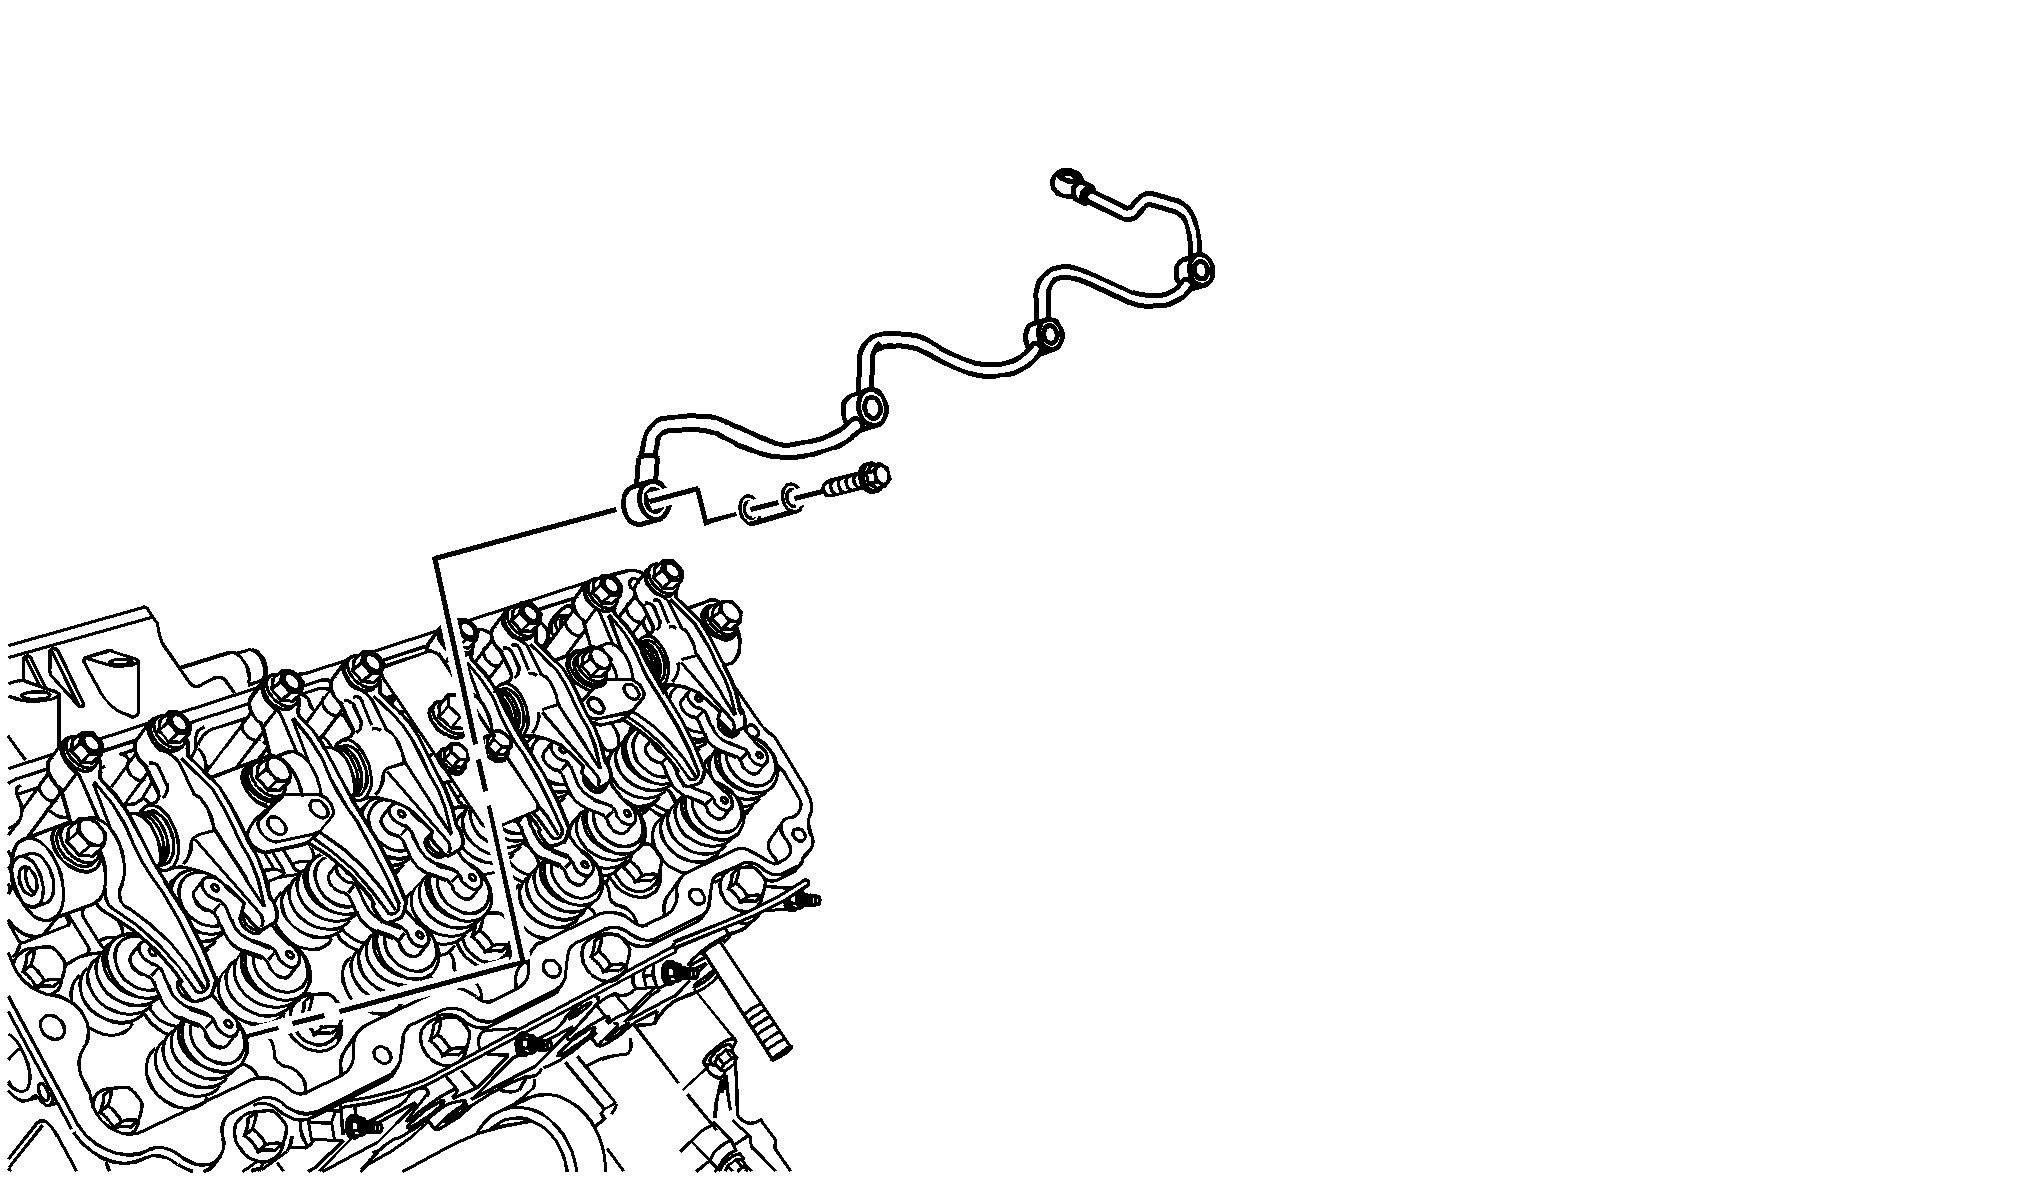
- Install the fuel injector return pipe.
- Install the fuel injector return pipe to injector bolts and washers.
Tighten
Tighten the bolts to 16 N·m (12 lb ft).
- Install the fuel injector return pipe to cylinder head bolts and washers.
Tighten
Tighten the bolts to 17 N·m (13 lb ft).
- Install the valve rocker arm shaft, pushrods, and valve bridges. Refer to
Valve Rocker Arm, Shaft, and Push Rod Replacement
.
- Install the glow plugs. Refer to
Glow Plug Replacement - Bank 2
.
- Install the right exhaust manifold. Refer to
Exhaust Manifold Replacement - Right Side
.
- Install the right fuel rail. Refer to
Fuel Injection Fuel Rail Assembly Replacement - Bank 1
.
- Install the right intake manifold. Refer to
Intake Manifold Replacement - Right Side
.
- Install the thermostat housing crossover. Refer to
Thermostat Housing Crossover Replacement
.
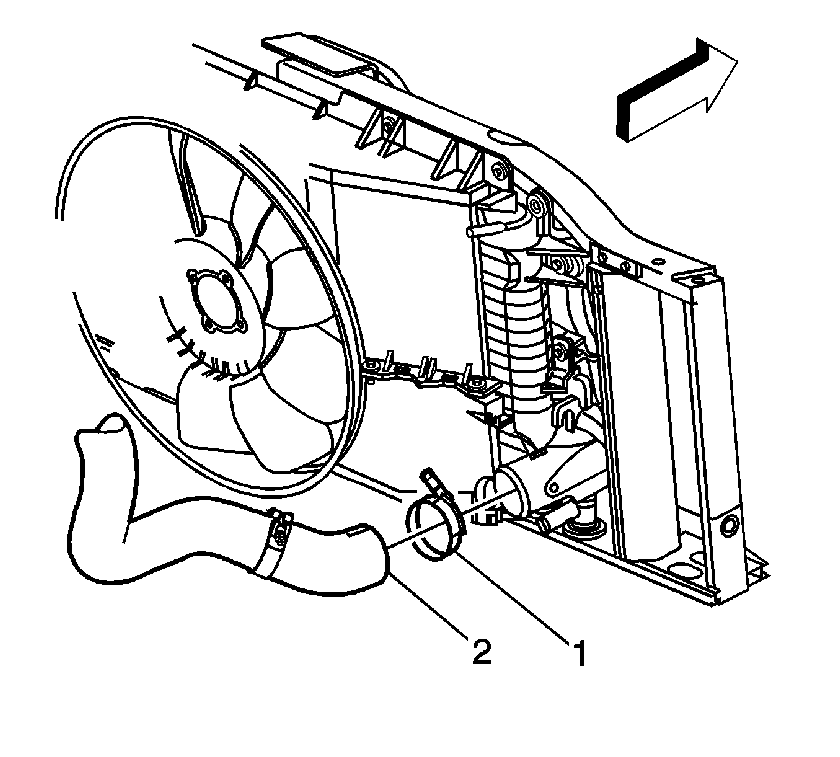
- Install the charged air cooler duct (2).
- Tighten the charged air cooler outlet duct clamp at the charged air cooler.
Tighten
Tighten the clamp to 6 N·m (53 lb in).
- Install the turbocharger. Refer to
Turbocharger Replacement
.
- Install the right wheelhouse inner panel. Refer to
Wheelhouse Panel Replacement
.
- Road test the vehicle for normal operation.
- Inspect for coolant, oil, or exhaust leaks.