Range Selector Lever Cable Replacement Front/Column End
Important: The range selector cable is a two piece cable assembly.
The front half (column end) or rear half (transmission end) of the range selector cable can be removed without removing the other end/half of the range selector cable assembly.Removal Procedure
- Position the steering column shift lever to the park position.
- Raise the vehicle. Refer to Lifting and Jacking the Vehicle in General Information.
- Ensure the transmission manual shaft is positioned to mechanical park.
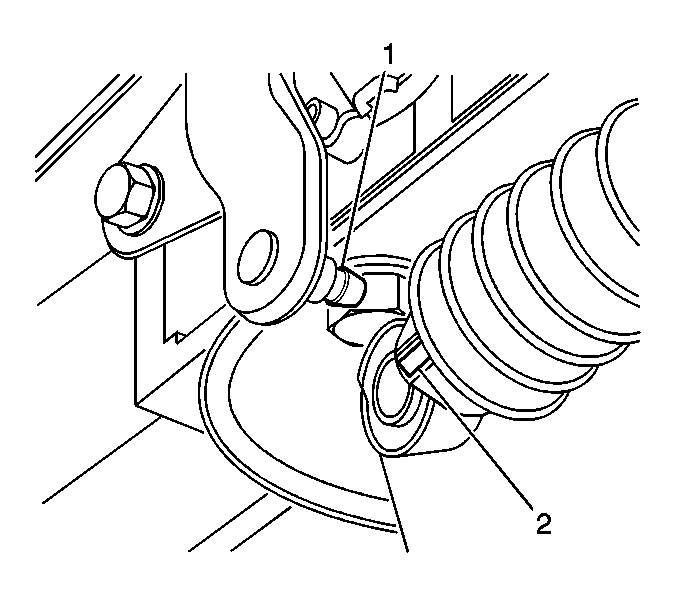
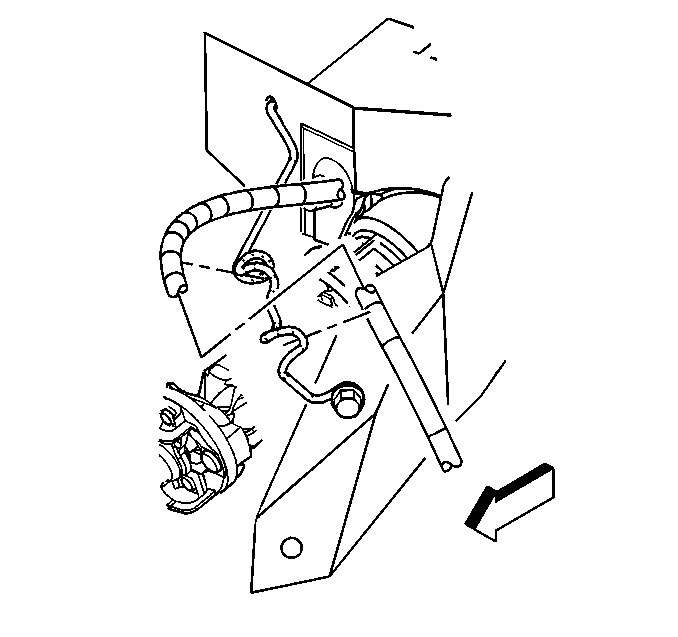
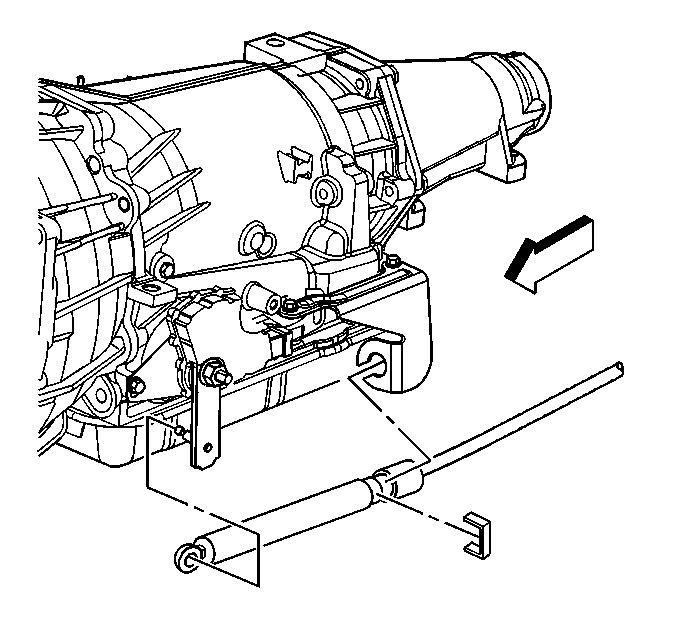
- Remove the range selector cable end (2) from the transmission range selector lever ball stud (1).
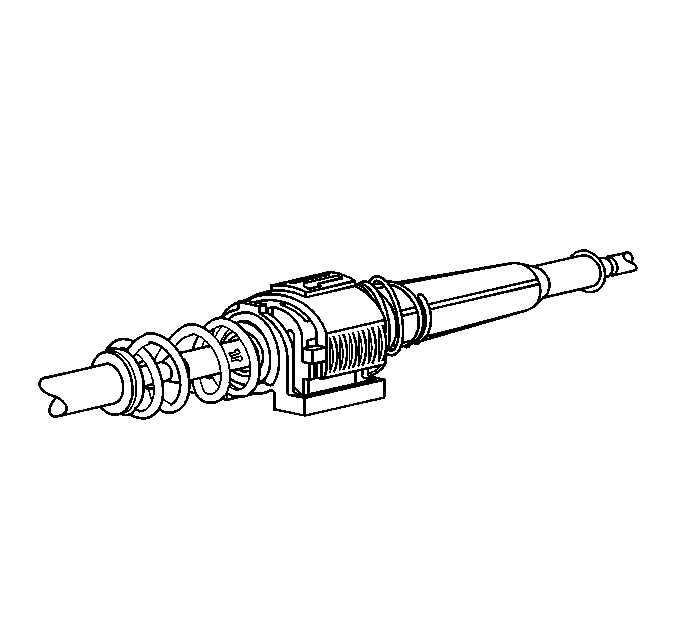
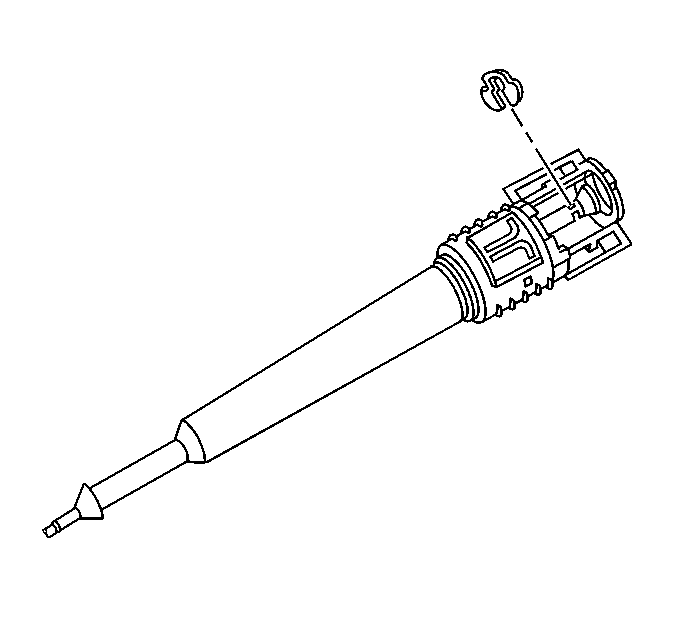
- Locate the center connector on the transmission range selector cable.
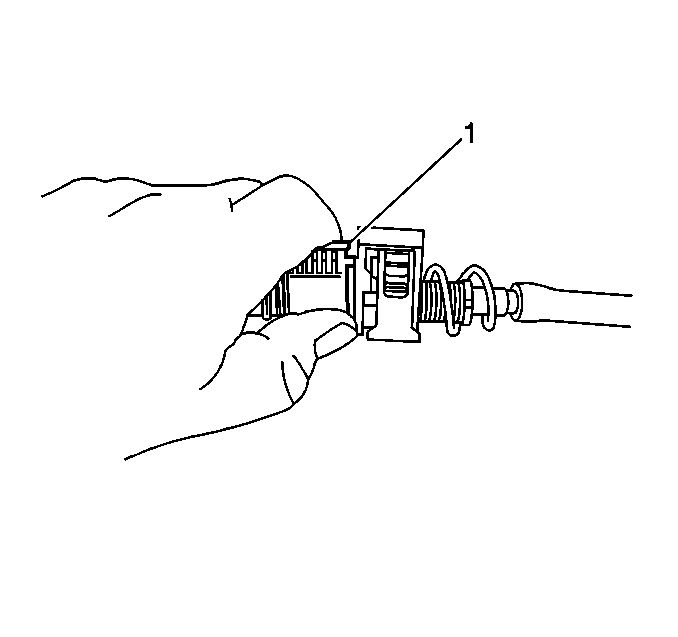
- Pull back the white plastic cover (1) on the center connector.
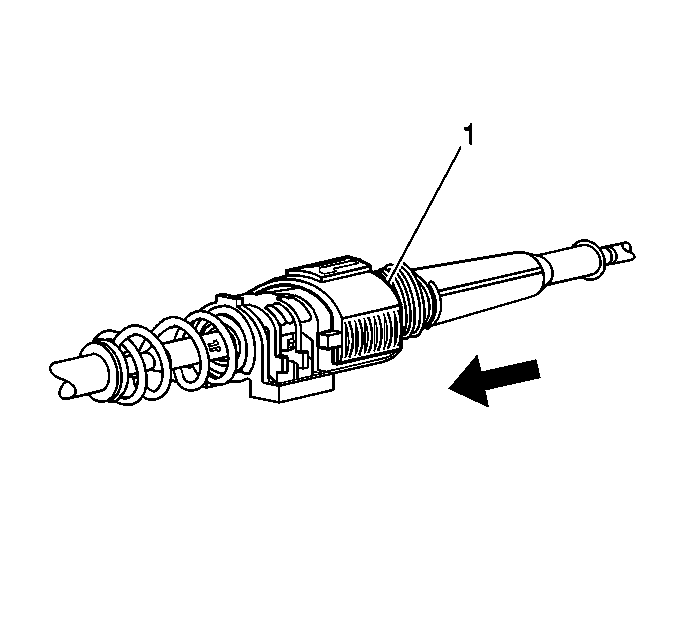
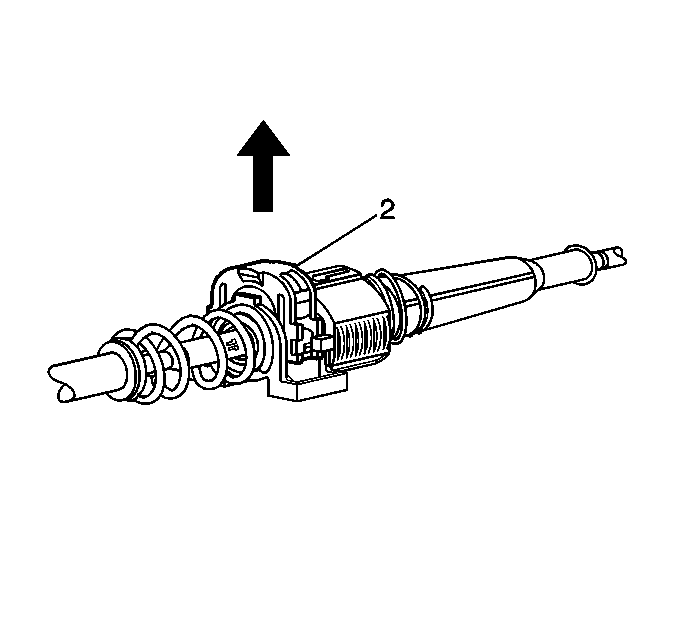
- Pull up on the center tabs of the lock button (2).
- Ensure that the steering column shift lever remained in the park position for the best possible access to the E-clip. Remove the E-clip by pulling radially on the center section of the E-clip.
- Pull the range selector cable center connector ends apart.
- Lower the vehicle and ensure that the steering column shift lever is still in the park position.
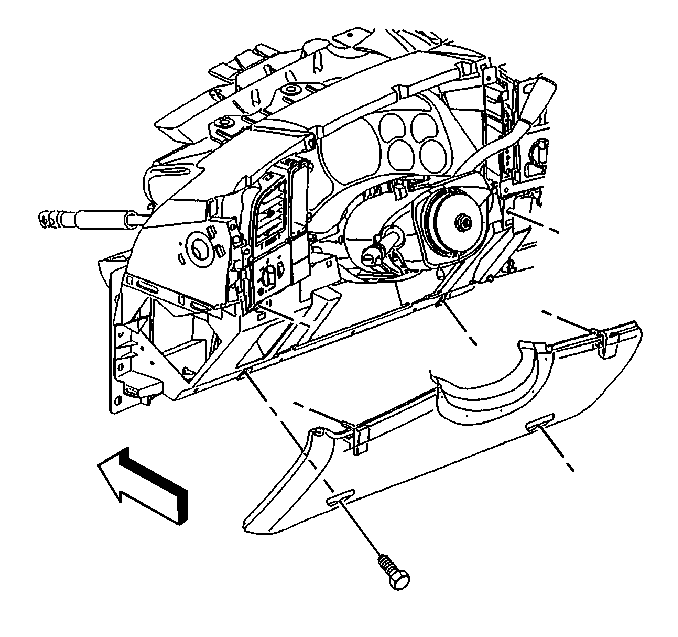
- Remove the instrument panel knee bolster. Refer to Knee Bolster Replacement in Instrument Panel, Gages, and Console.
- Pull back the carpet and insulation around the driver's area. Refer to Front Floor Panel Carpet Replacement in Interior Trim.
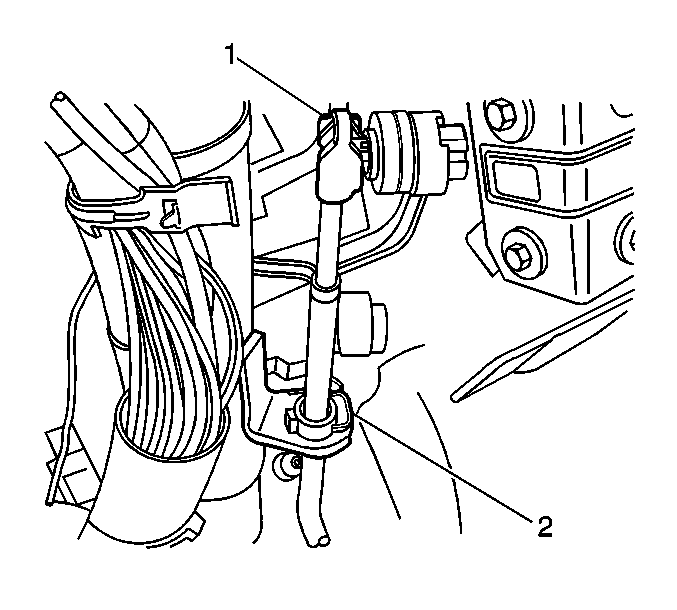
- Remove the cable end (1) from the steering column ball stud.
- Remove the retainer (2) securing the cable to the steering column.
- Depress the tangs and remove the cable from the steering column bracket.
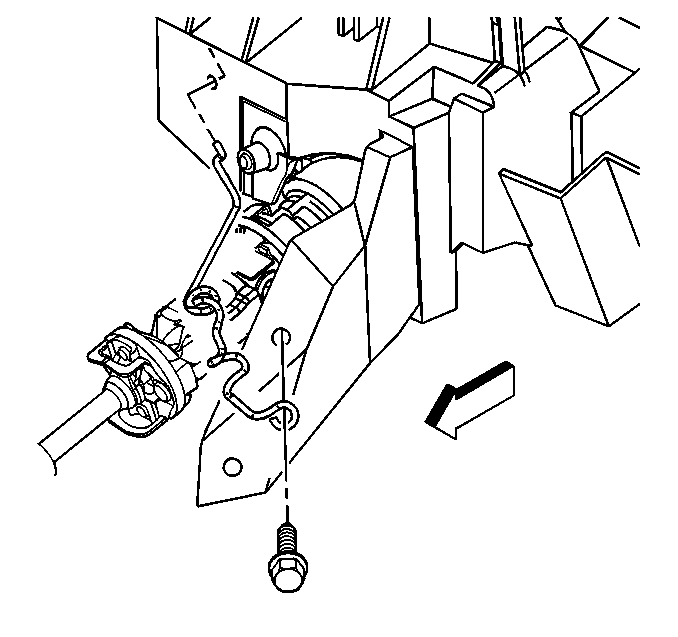
- Remove the bolt securing the cable support to the brace.
- Remove the range selector cable from the support.
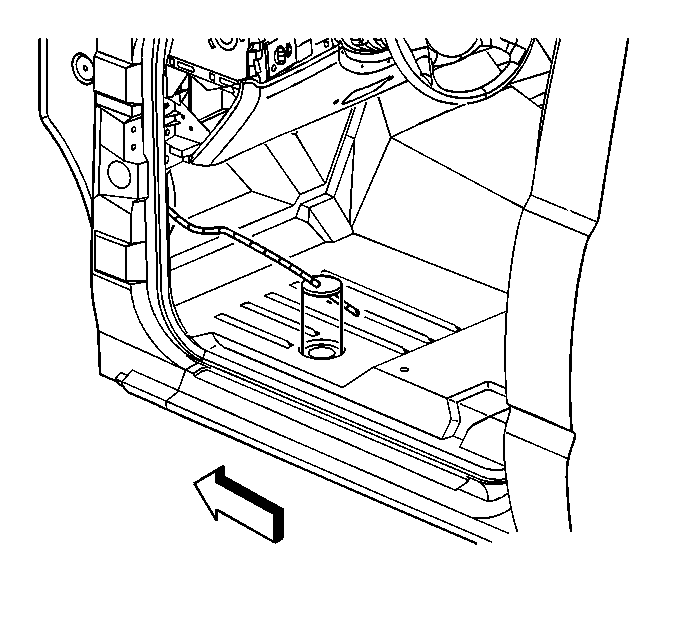
- Remove the cable grommet from the floor panel.
- Raise the vehicle. Refer to Lifting and Jacking the Vehicle in General Information.
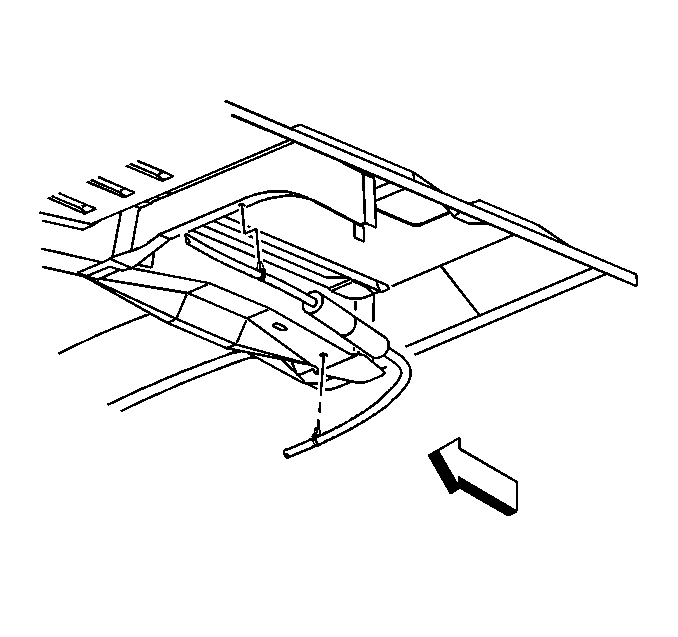
- Remove the two clips on the cable from the floor panel reinforcement.
- Remove the cable from the clips on the transfer case, if equipped.
- Remove the front half (column end) of the range selector cable assembly from the vehicle.
Important: Do not reuse the existing E-clip. Discard the removed E-clip.
Important: Avoid unnecessary twisting/bending of the range selector cable when removing the cable from the support.
Installation Procedure
- Route the cable through the hole in the floor panel.
- Install the cable to the clips on the transfer case, if equipped.
- Install the two clips on the cable to the floor panel reinforcement.
- Lower the vehicle.
- Ensure that the steering column shift lever is in the park position.
- Install the cable grommet to the floor panel.
- Install the cable to the steering column bracket.
- Install the retainer (2) securing the cable to the steering column.
- Install the cable end (1) to the steering column ball stud.
- Install the cable to the support.
- Install the bolt securing the cable support to the brace.
- Install the carpet and insulation around the driver's area. Refer to Front Floor Panel Carpet Replacement in Interior Trim.
- Install the instrument panel knee bolster. Refer to Knee Bolster Replacement in Instrument Panel, Gages, and Console.
- Raise the vehicle. Refer to Lifting and Jacking the Vehicle in General Information.
- Ensure that the transmission manual shaft lever is in the mechanical park position.
- Install the range selector cable end (2) to the transmission range selector lever ball stud (1).
- The new front half (steering column end) of the cable will contain a new pre-installed E-clip.
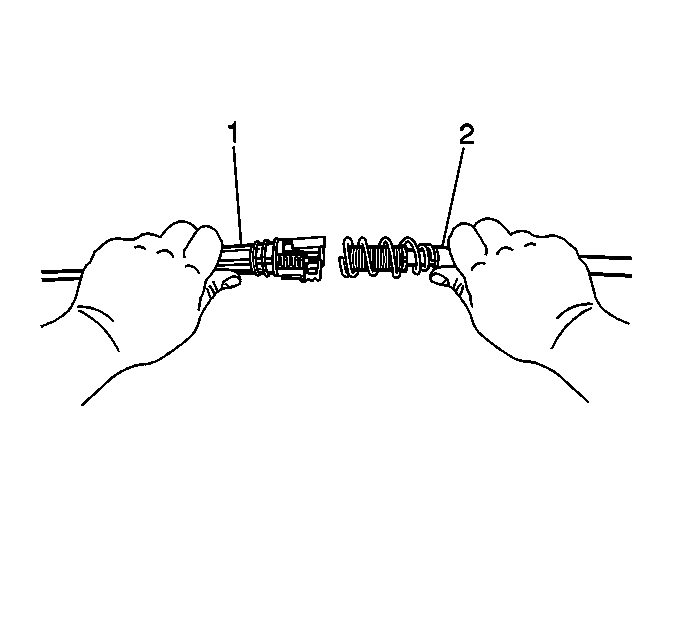
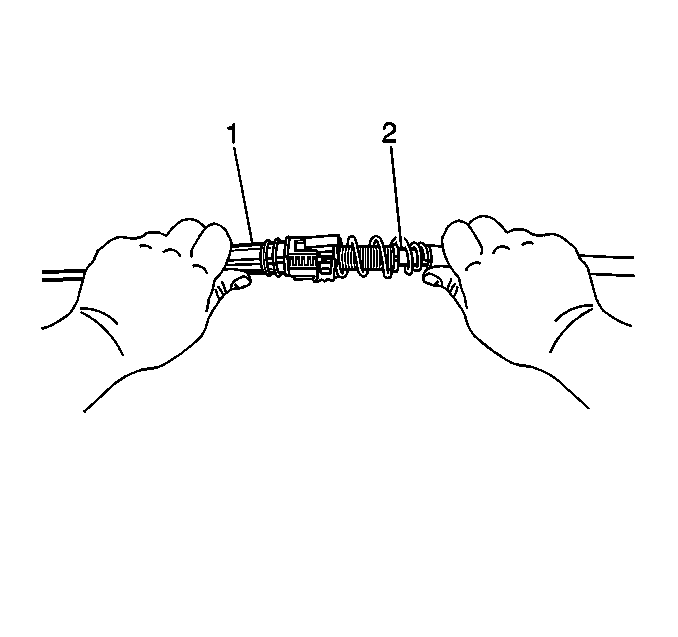
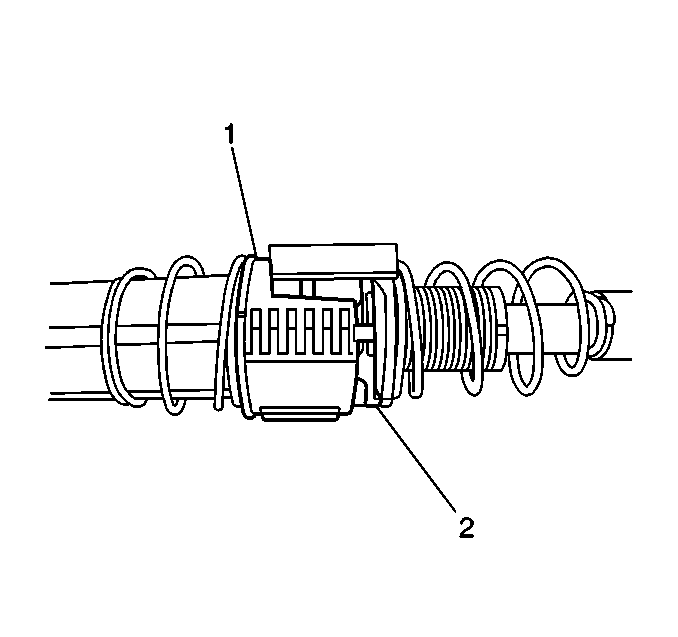
- Grasp the front half (cab end) of the transmission cable (1) in the left hand and the rear half (transmission end) of the transmission cable (2) in the right hand.
- Align the outside diameter of cable (2) with the inside of the diameter of cable (1).
- Push the end of the cable (2) inside the end of cable (1) until the blue spring on cable (2) is fully compressed.
- Release the cable end (2) and allow the blue spring to tension/adjust the cable system.
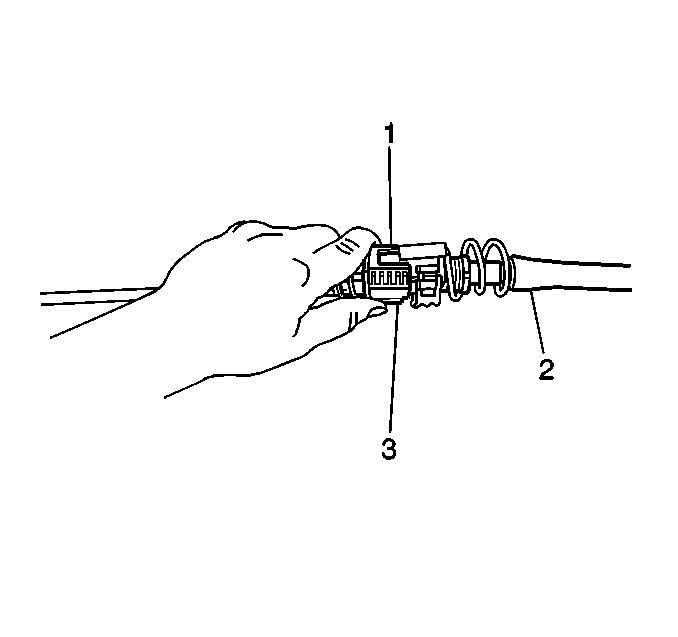
- Pull the white cover (3) on the cable end (1) back.
- Push the natural colored lock button (2) down to engage the locking teeth on the cable end (1).
- Release the white cover (1).
- Verify the white cover (1) conceals the natural colored lock (2).
- If the white cover (1) does not conceal the natural colored lock (2), repeat the cable adjustment procedure.
- Lower the vehicle and test the transmission for proper shift operation.
- If all of the gear positions cannot be achieved, repeat the cable adjustment procedure. Refer to Range Selector Lever Cable Adjustment .
Ensure the tangs fully seat (snap) into the steering column bracket.
Notice: Use the correct fastener in the correct location. Replacement fasteners must be the correct part number for that application. Fasteners requiring replacement or fasteners requiring the use of thread locking compound or sealant are identified in the service procedure. Do not use paints, lubricants, or corrosion inhibitors on fasteners or fastener joint surfaces unless specified. These coatings affect fastener torque and joint clamping force and may damage the fastener. Use the correct tightening sequence and specifications when installing fasteners in order to avoid damage to parts and systems.
Tighten
Tighten the bolts to 10 N·m (89 lb in).
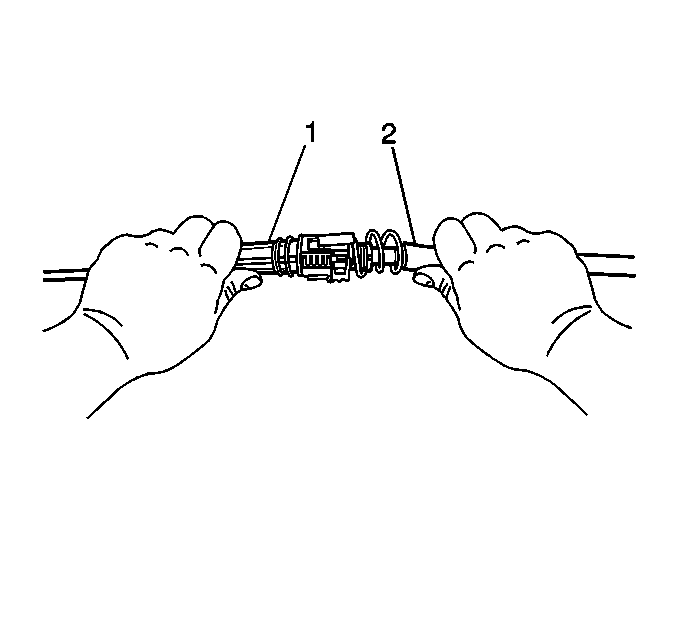
Pushing together the two ends of the cable will engage the inner wire and lock both cable wires together.
Important: This step must be performed correctly to avoid a misadjusted cable.
Do not grasp the cable end (2) during this procedure.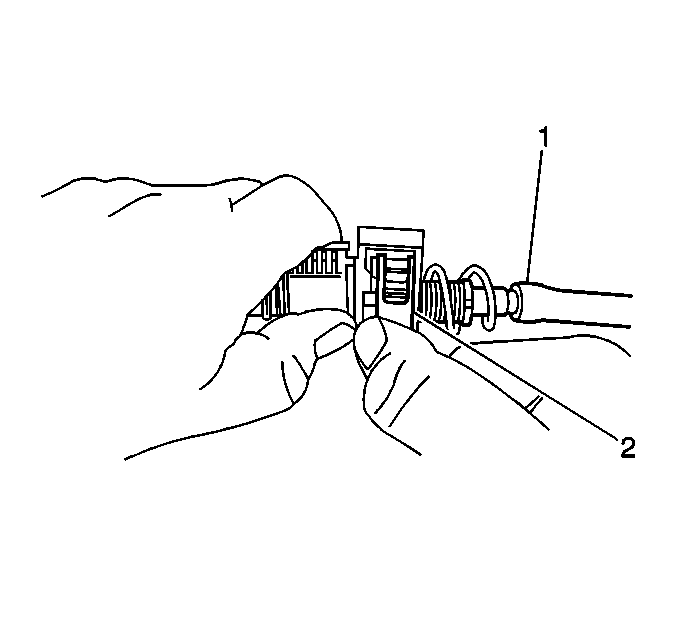
Range Selector Lever Cable Replacement Rear/Transmission End
Important: The range selector cable is a two piece cable assembly.
The front half (column end) or rear half (transmission end) of the range selector cable can be removed without removing the other end/half of the range selector cable assembly.Removal Procedure
- Position the steering column shift lever to the park position.
- Raise the vehicle. Refer to Lifting and Jacking the Vehicle in General Information.
- Ensure the transmission manual shaft is positioned to mechanical park.
- Remove the range selector cable end (2) from the transmission range selector lever ball stud (1).
- Locate the center connector on the transmission range selector cable.
- Pull back the white plastic cover (1) on the center connector.
- Pull up on the center tabs of the lock button (2).
- Ensure that the steering column shift lever remained in the park position for the best possible access to the E-clip. Remove the E-clip by pulling radially on the center section of the E-clip.
- Pull the range selector cable center connector ends apart.
- Remove the retainer that secures the cable to the bracket.
- Depress the tangs and remove the cable from the bracket.
- Remove the cable to from the clips on the transfer case, if equipped.
- Remove the rear half (transmission end) of the range selector cable from the vehicle.
Important: Do not reuse the existing E-clip. Discard the removed E-clip.
Installation Procedure
- Install the rear half transmission end of the range selector cable to the vehicle.
- Install the cable to the clips on the transfer case, if equipped.
- Align and install the cable to the bracket.
- Install the retainer that secures the cable to the bracket.
- Install a new E-clip to the front half (steering column end) of the cable.
- Ensure that the transmission manual shaft lever is in the mechanical park position.
- Install the range selector cable end (2) to the transmission range selector lever ball stud (1).
- Grasp the front half (steering column end) of the transmission cable (1) in the left hand and the rear half (transmission end) of the transmission cable (2) in the right hand.
- Align the outside diameter of cable (2) with the inside of the diameter of cable (1).
- Push the end of the cable (2) inside the end of cable (1) until the blue spring on cable (2) is fully compressed.
- Release the cable end (2) and allow the blue spring to tension/adjust the cable system.
- Pull the white cover (3) on the cable end (1) back.
- Push the natural colored lock button (2) down to engage the locking teeth on the cable end (1).
- Release the white cover (1).
- Verify the white cover (1) conceals the natural colored lock (2).
- If the white cover (1) does not conceal the natural colored lock (2), repeat the cable adjustment procedure.
- Lower the vehicle and test the transmission for proper shift operation.
- If all of the gear positions cannot be achieved, repeat the cable adjustment procedure. Refer to Range Selector Lever Cable Adjustment .
Pushing together the two ends of the cable will engage the inner wire and lock both cable wires together.
Important: This step must be performed correctly to avoid a misadjusted cable.
Do not grasp the cable end (2) during this procedure.
