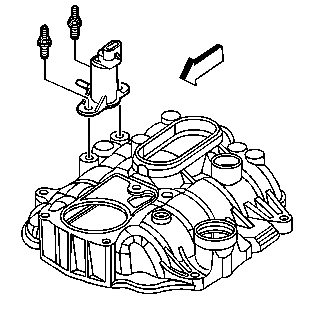
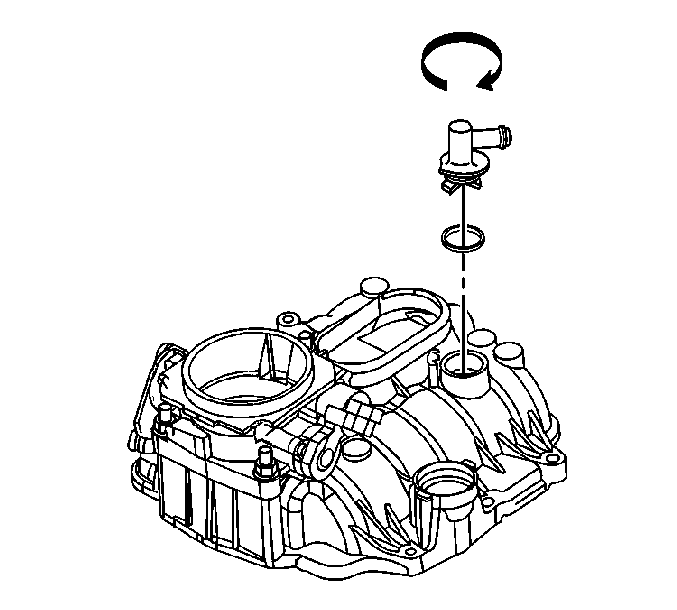
- If required, install the
purge solenoid valve.
Notice: Use the correct fastener in the correct location. Replacement fasteners
must be the correct part number for that application. Fasteners requiring
replacement or fasteners requiring the use of thread locking compound or sealant
are identified in the service procedure. Do not use paints, lubricants, or
corrosion inhibitors on fasteners or fastener joint surfaces unless specified.
These coatings affect fastener torque and joint clamping force and may damage
the fastener. Use the correct tightening sequence and specifications when
installing fasteners in order to avoid damage to parts and systems.
- Install the EVAP canister purge solenoid valve studs. If reusing
the old studs, apply threadlock GM U.S. P/N 12345382,
Canada P/N 10953489, or equivalent to the threads.
Tighten
Tighten the EVAP canister purge solenoid valve studs to 10 N·m
(89 lb in).
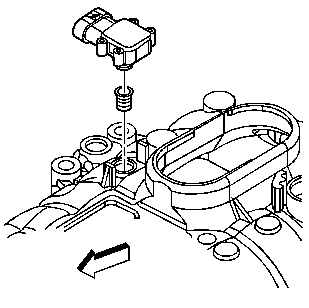
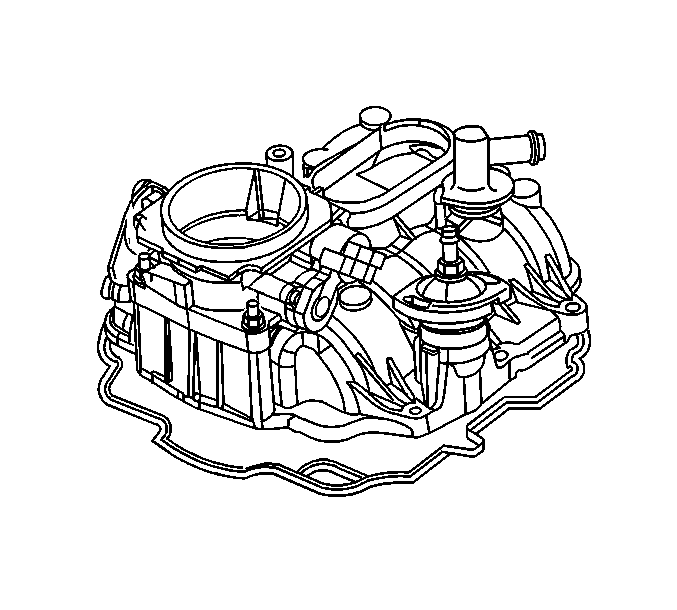
- If required, install a
NEW MAP sensor seal. Apply a small drop of clean engine oil to the seal.
- Install the MAP sensor.
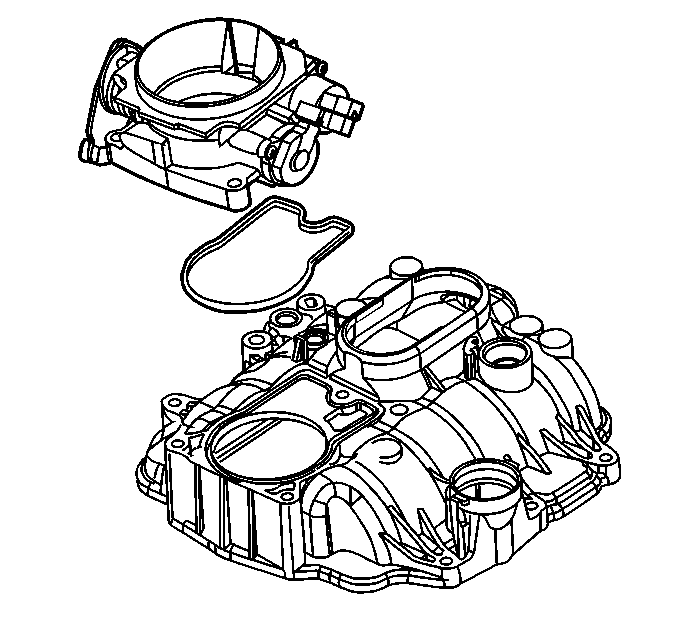
- If required, install a
NEW throttle body gasket.
- Install the throttle body.
- Install the rear throttle body stud. If reusing the old studs,
apply threadlock GM U.S. P/N 12345382, Canada P/N 10953489,
or equivalent to the threads.
Tighten
Tighten the throttle body stud to 9 N·m (80 lb in).
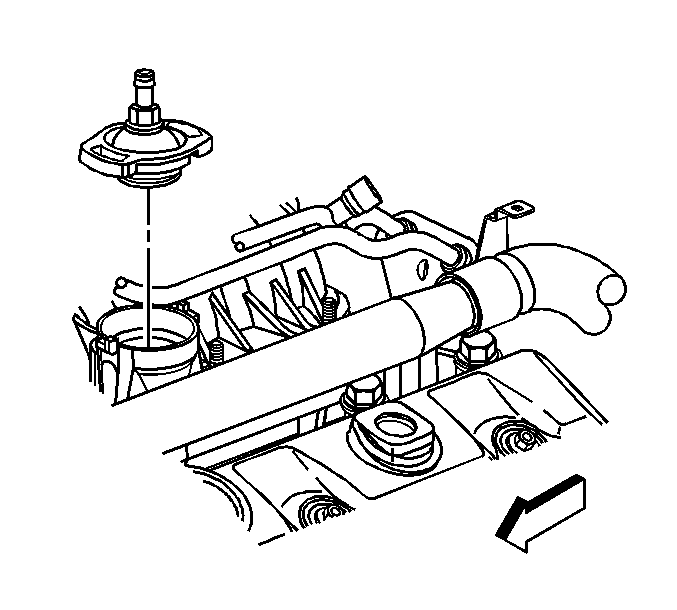
- If required, install a
NEW O-ring seal to the PCV cover. Apply clean engine oil to the seal.
- Install the PCV valve cover.
- If required, install a
NEW O-ring seal. Apply clean engine oil to the seal.
- Install the power brake booster vacuum fitting.
- Install a NEW O-ring seal
to the fuel meter body.
- Install a NEW upper intake
manifold gasket.
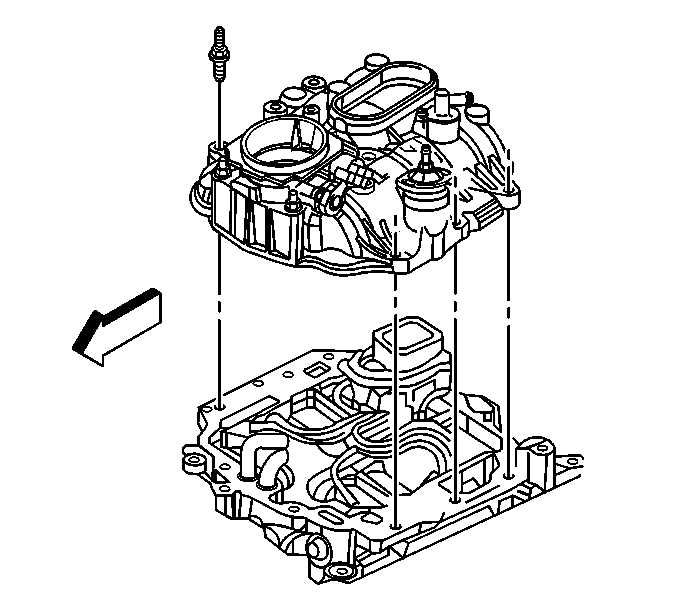
- Install the intake manifold
- upper.
- If reusing the old throttle body/intake manifold studs,
apply threadlock GM U.S. P/N 12345382, Canada P/N 10953489,
or equivalent to the threads.
- Install the front two throttle body studs.
- Install the intake manifold - upper studs.
Tighten
Tighten the intake manifold - upper studs to 9 N·m (80 lb in).
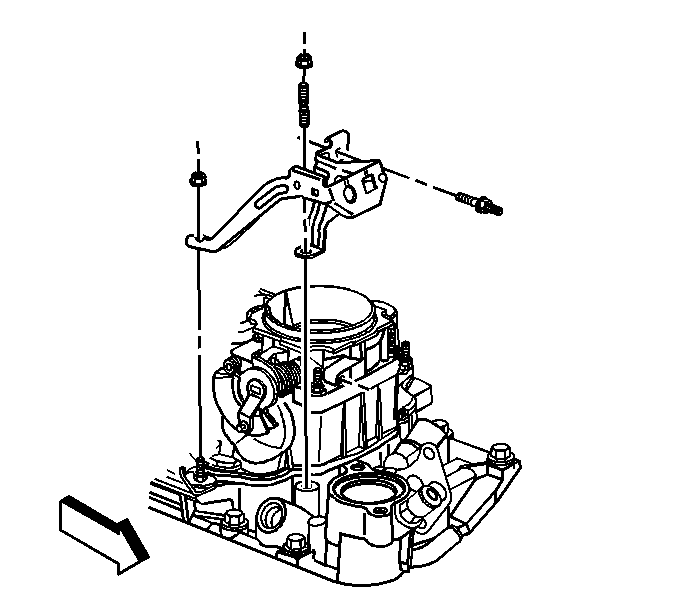
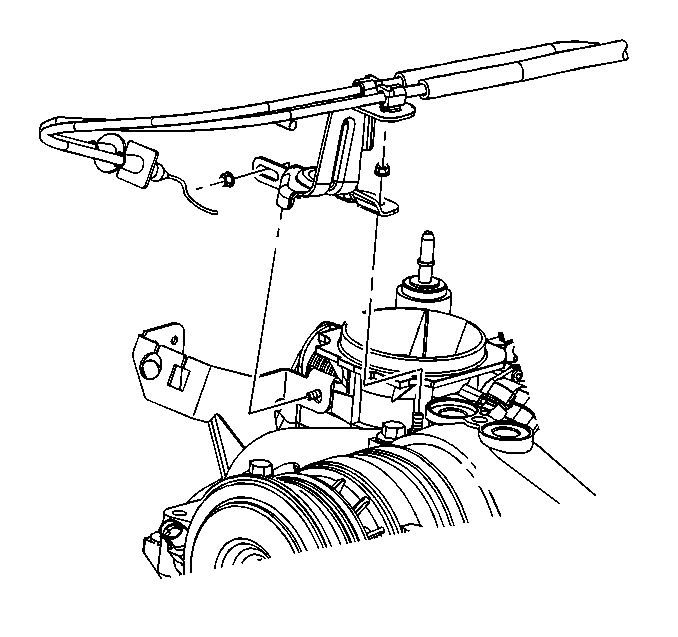
- Install the accelerator
cable bracket.
- Install the accelerator cable bracket nuts.
Tighten
Tighten the accelerator cable bracket nuts to 12 N·m (106 lb in).
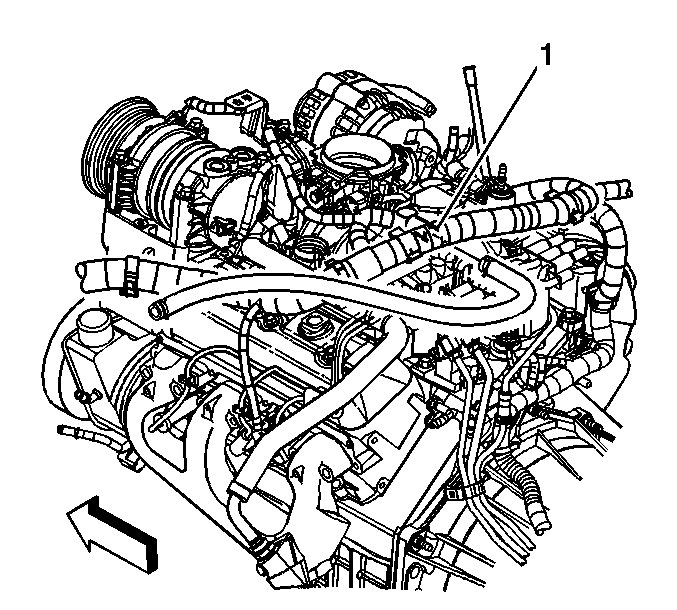
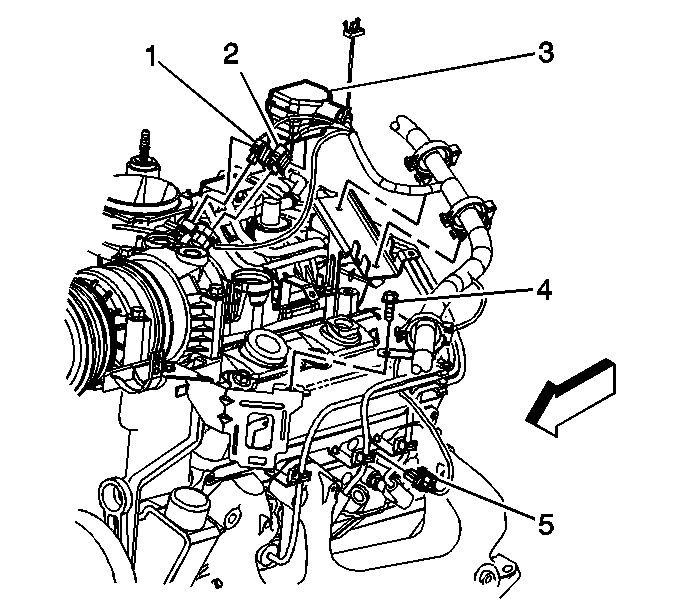
- Connect the power brake
booster vacuum hose to the vacuum fitting (1).
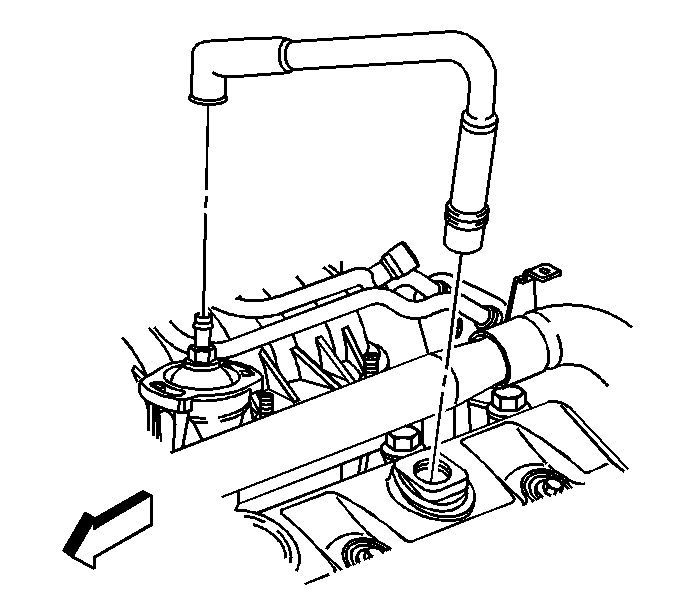
- Install the PCV valve
hose to the PCV valve cover and the rocker arm cover.
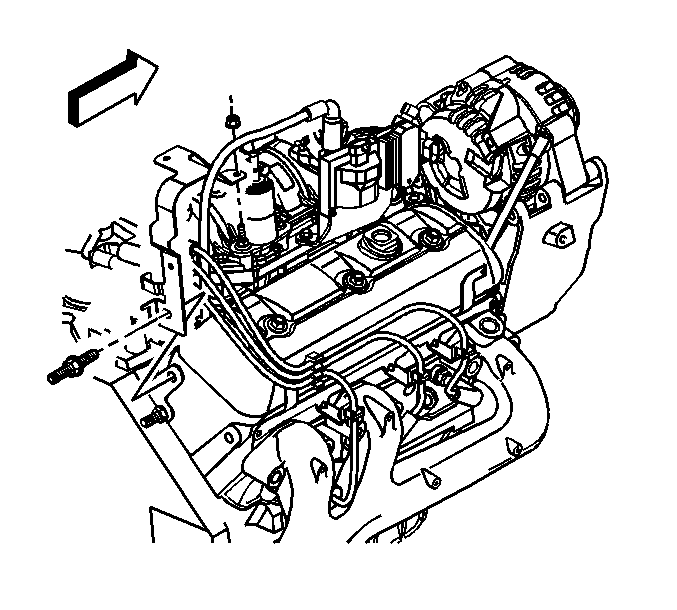
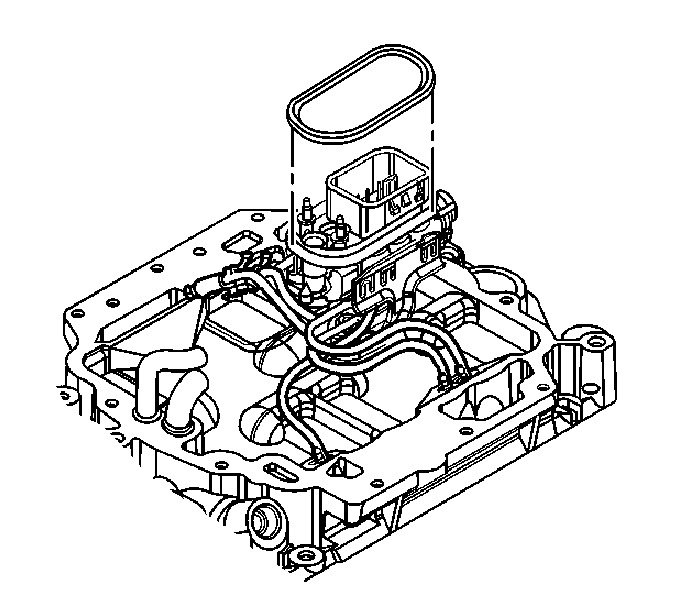
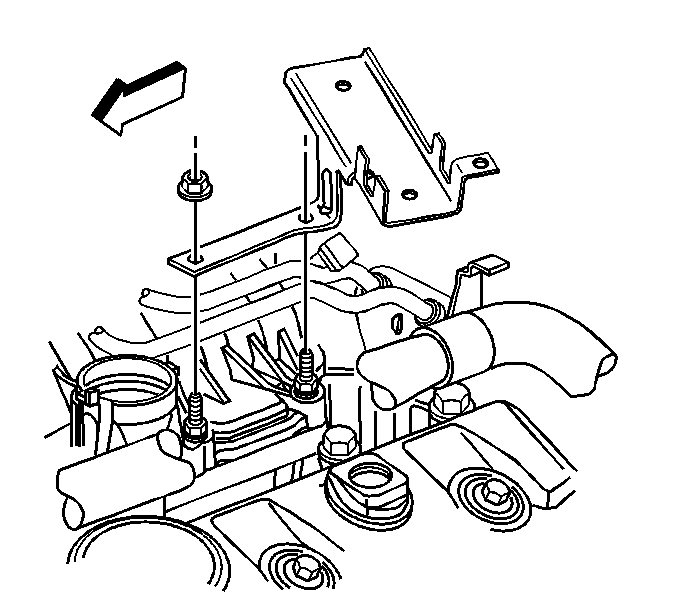
- Position the engine wiring
harness and bracket.
- Install the engine wiring harness bracket stud.
Tighten
Tighten the engine wiring harness rear bracket stud to 25 N·m
(18 lb ft).
- Install the engine wiring harness rear bracket nut at the EVAP
canister purge solenoid valve.
Tighten
Tighten the engine wring harness rear bracket nut to 9 N·m
(80 lb in).
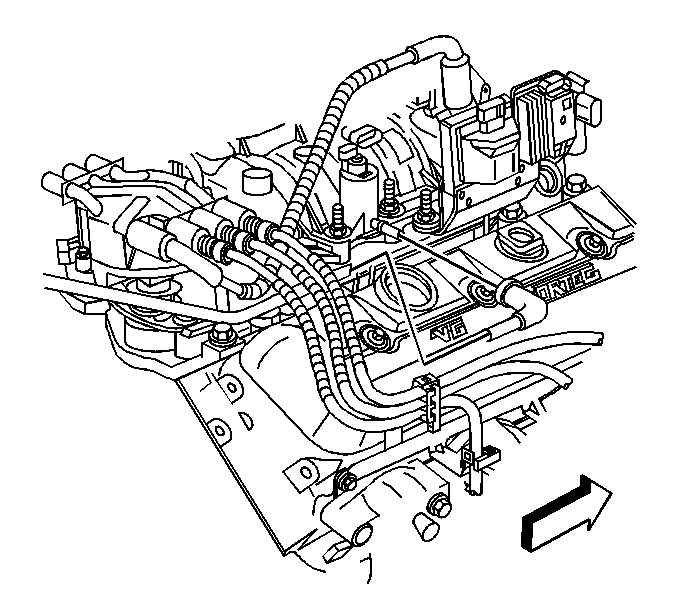
- Install the engine wiring
harness ground nut and ground wire (4) to the rear of the right cylinder head.
Tighten
Tighten the engine wiring harness ground nut to 16 N·m
(12 lb ft).
- Install the engine wiring
harness bracket to the studs.
- Install the engine wiring harness bracket nuts.
Tighten
Tighten the engine wiring harness bracket nuts to 12 N·m
(106 lb in).
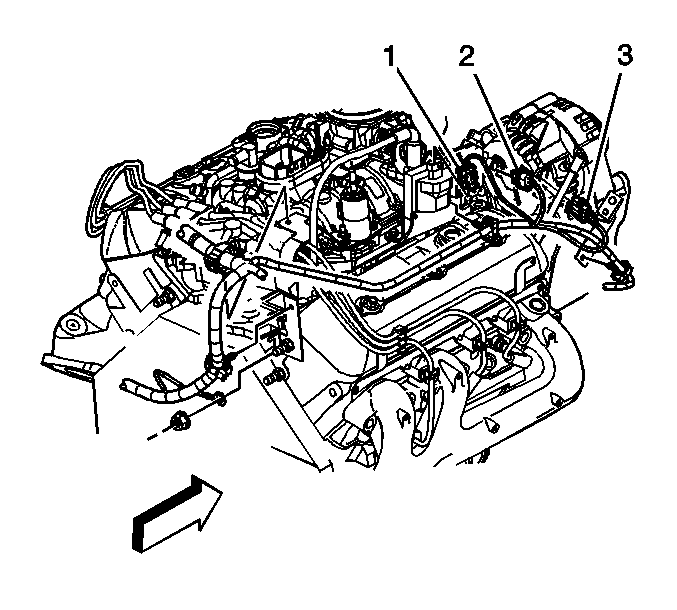
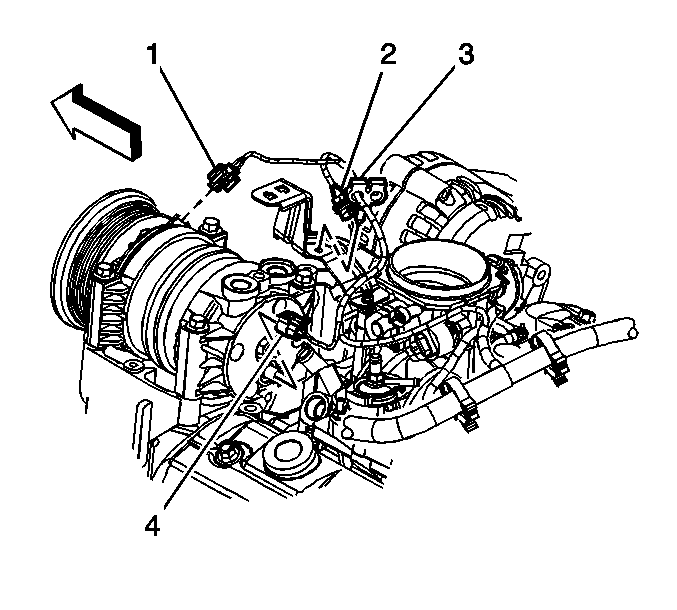
- Connect the EVAP canister
harness to the purge solenoid valve.
- Connect the following
electrical connectors:
| • | The EVAP canister purge solenoid valve (1) |
- Connect the following
electrical connectors:
| • | The control port injector module (3) |
- Install the engine wiring harness clip bolt (4).
Tighten
Tighten the engine wiring harness clip bolt to 9 N·m (80 lb in).
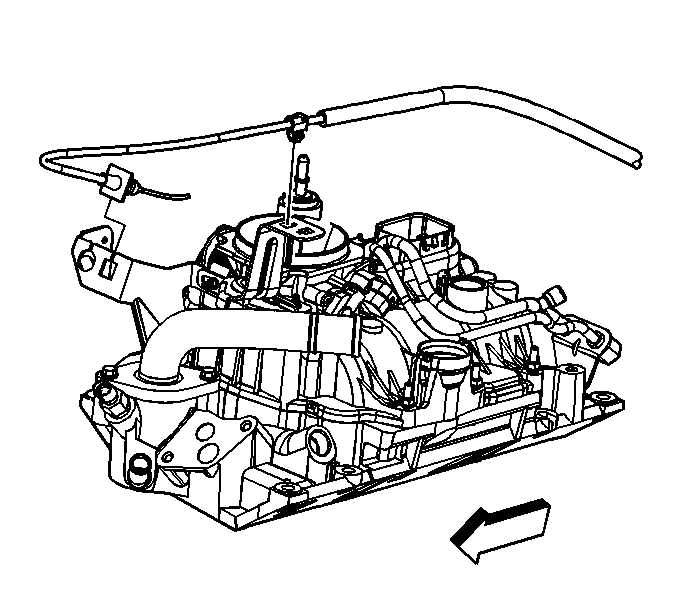
- Position the bracket and
cables.
- Install the accelerator control cable bracket with the cables
attached, to the throttle body.
- Install the accelerator control cable bracket nuts.
Tighten
Tighten the accelerator control cable bracket nuts to 9 N·m
(80 lb in).
- Connect the following
electrical connectors:
| • | The A/C compressor clutch (1), if equipped |
| • | The A/C pressure switch (4), if equipped |
- Install the engine wiring harness clip (3) to the accelerator
control cable bracket.
- Install the accelerator
cable to the accelerator control cable bracket.

- Install the accelerator
cable to the throttle body lever.

- Install the cruise control
cable to the accelerator control cable bracket, if equipped.
- Connect the cruise control cable to the throttle lever, if equipped.
- Install the fuel pipes/hoses. Refer to
Fuel Hose/Pipes Replacement - Engine Compartment
in Engine Controls
- 4.3L.
