Throttle Body Assembly Replacement Central SFI
Cleaning Procedure
The throttle body assembly repair procedures cover component replacement with the unit on the vehicle. However, the throttle body replacement requires that the complete unit be removed from the engine.
An 8 digit part identification number is stamped on the bottom of the throttle body casting. Refer to this number if servicing, or part replacement is required.
While on-vehicle or off, clean the throttle bore and valve deposits using the carburetor cleaner and a parts cleaning brush. Follow the instructions on container.
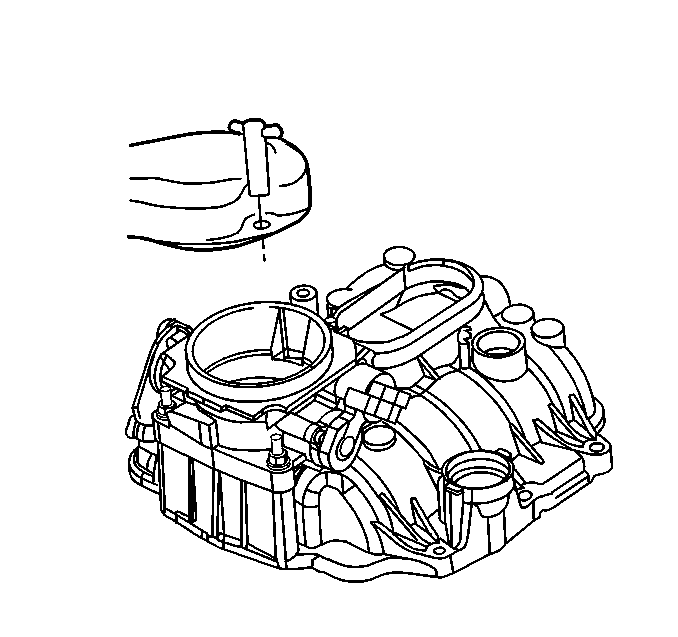
Thread-locking Compound
Notice: Do not use a higher strength locking compound than recommended when precoating the screws. Doing so could make removing the screw extremely difficult or result in damaging the screw head.
The service repair kits are supplied with a small vial of thread-locking compound with directions for use. If the material is not available, use Loctite 262 or the equivalent.
Notice: Do not immerse the TP sensor and IAC valve in any type of cleaner. This cleaning method may damage these electronic components.
Do not use a cleaner that contains methyl ethyl ketone, an extremely strong solvent, and not necessary for this type of deposit.
The throttle body metal parts may be cleaned following the disassembly in a cold immersion-type cleaner such as GM X-55 or the equivalent.
Removal Procedure
- Disconnect the negative battery cable.
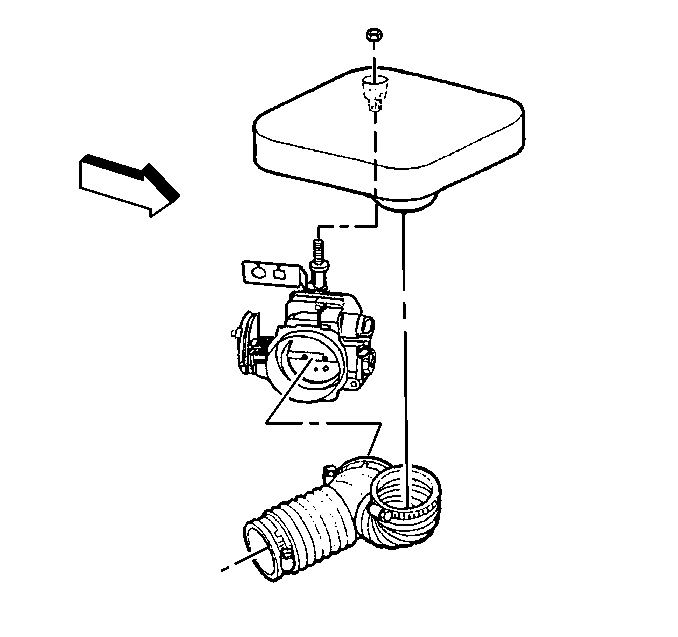
- Remove the air inlet duct fastener and the duct.
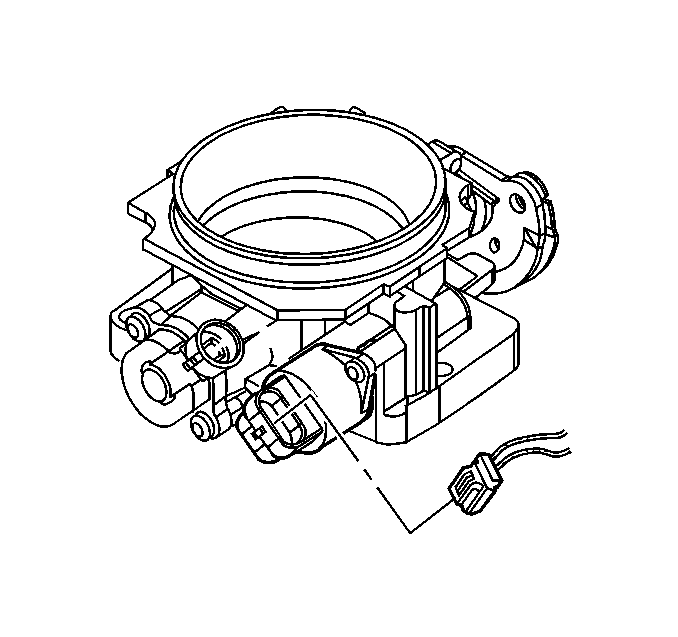
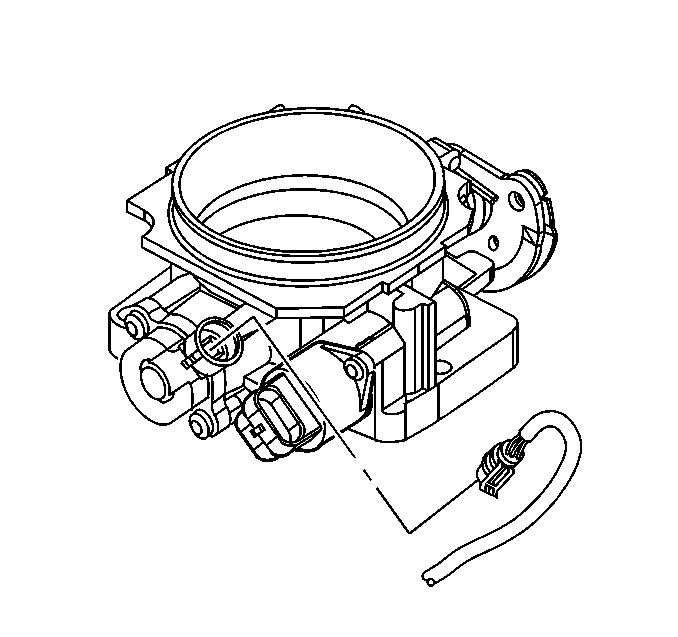
- Remove the IAC valve and the TP sensor electrical connectors.
- Remove the throttle and cruise control cables.
- Remove the accelerator cable bracket nuts and the bracket.
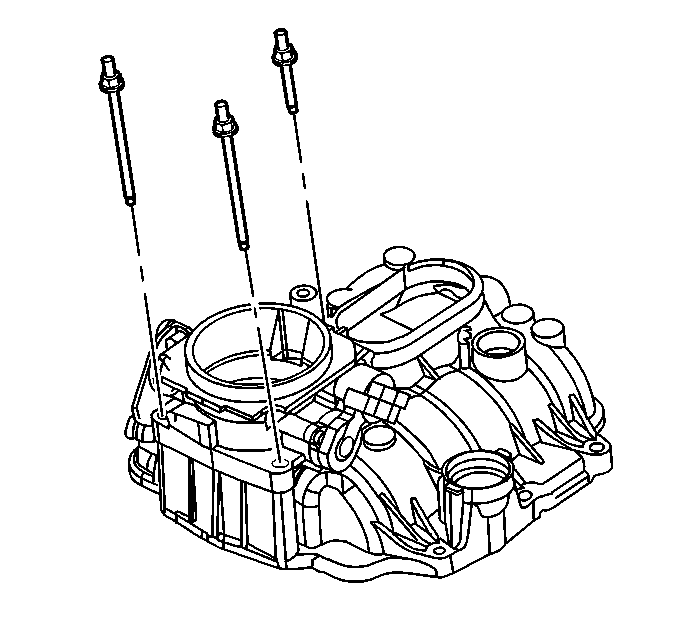
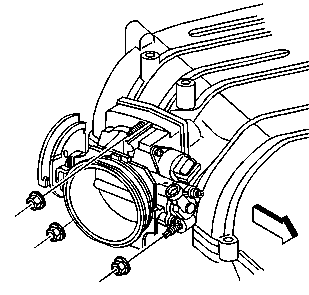
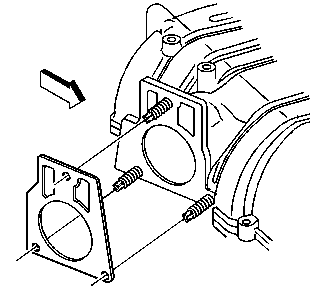
- Remove the throttle body retaining bolts or studs.
- Remove the throttle body assembly.
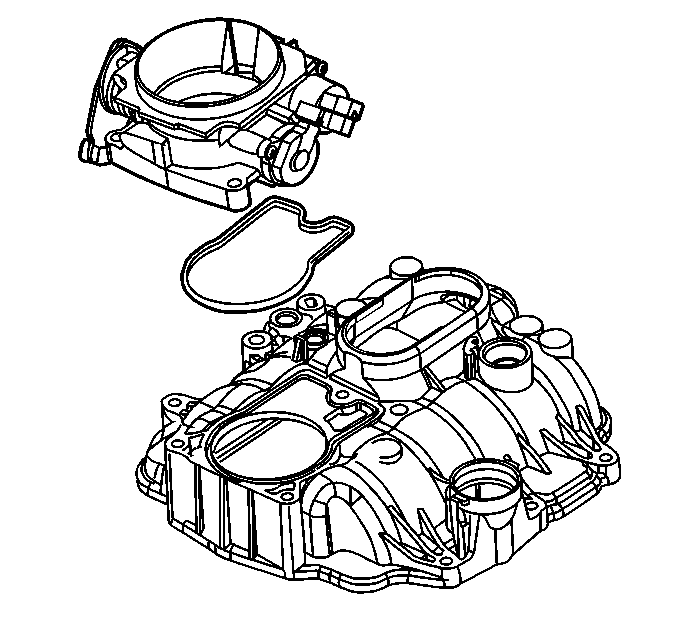
- Remove the flange gasket.
- Discard the flange gasket.
Caution: Unless directed otherwise, the ignition and start switch must be in the OFF or LOCK position, and all electrical loads must be OFF before servicing any electrical component. Disconnect the negative battery cable to prevent an electrical spark should a tool or equipment come in contact with an exposed electrical terminal. Failure to follow these precautions may result in personal injury and/or damage to the vehicle or its components.
Installation Procedure
- Clean the gasket surface on the intake manifold.
- Install a new flange gasket.
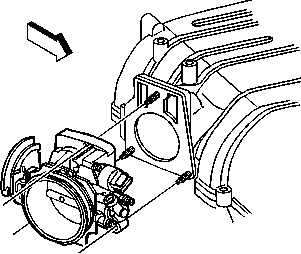
- Install the throttle body assembly.
- Install the throttle body assembly retaining bolt or stud.
- Install the throttle and the cruise control cables.
- Install the accelerator cable bracket.
- Install the accelerator cable bracket nuts.
- Connect the IAC valve electrical connector.
- Install the TP sensor electrical connector.
- Install the air inlet duct and retaining nut.
- Connect the negative battery cable.
- With the engine off, check to see that the accelerator pedal is free.
Notice: Use care when cleaning the old gasket from the aluminum surfaces in order to prevent damage to the sealing surfaces.
Tighten
Tighten the throttle body attaching bolt or stud to 25 N·m
(18 lb in).
Notice: Use the correct fastener in the correct location. Replacement fasteners must be the correct part number for that application. Fasteners requiring replacement or fasteners requiring the use of thread locking compound or sealant are identified in the service procedure. Do not use paints, lubricants, or corrosion inhibitors on fasteners or fastener joint surfaces unless specified. These coatings affect fastener torque and joint clamping force and may damage the fastener. Use the correct tightening sequence and specifications when installing fasteners in order to avoid damage to parts and systems.
Important: Make sure the throttle and the cruise control linkage does not hold the throttle open. Refer to Accelerator Controls (Accelerator Control Cable) .
Tighten
Tighten the nut to 2.5 N·m (22 lb in).
Notice: Use the correct fastener in the correct location. Replacement fasteners must be the correct part number for that application. Fasteners requiring replacement or fasteners requiring the use of thread locking compound or sealant are identified in the service procedure. Do not use paints, lubricants, or corrosion inhibitors on fasteners or fastener joint surfaces unless specified. These coatings affect fastener torque and joint clamping force and may damage the fastener. Use the correct tightening sequence and specifications when installing fasteners in order to avoid damage to parts and systems.
| 12.1. | Depress the pedal to the floor. |
| 12.2. | Release the accelerator pedal. |
Throttle Body Assembly Replacement SFI
Thread-locking Compound
Notice: Do not use a higher strength locking compound than recommended when precoating the screws. Doing so could make removing the screw extremely difficult or result in damaging the screw head.
The service repair kits are supplied with a small vial of thread-locking compound with directions for use. If the material is not available, use Loctite 262 or the equivalent.
Notice: Do not immerse the TP sensor and IAC valve in any type of cleaner. This cleaning method may damage these electronic components.
Do not use a cleaner that contains methyl ethyl ketone, an extremely strong solvent, and not necessary for this type of deposit.
The throttle body metal parts may be cleaned following the disassembly in a cold immersion-type cleaner such as GM X-55 or the equivalent.
Cleaning Procedure
The throttle body assembly repair procedures cover component replacement with the unit on the vehicle. However, the throttle body replacement requires that the complete unit be removed from the engine.
An 8 digit part identification number is stamped on the bottom of the throttle body casting. Refer to this number if servicing, or part replacement is required.
While on-vehicle or off, clean the throttle bore and valve deposits using the carburetor cleaner and a parts cleaning brush. Follow the instructions on container.
The throttle body metal parts may be cleaned following disassembly in a cold immersion-type cleaner such as GM X-55 or equivalent.
Removal Procedure
- Disconnect the negative battery cable.
- Remove the air inlet duct fastener and duct.
- Disconnect the IAC valve and TP sensor electrical connectors.
- Disconnect the throttle, and cruise control cables.
- Remove the accelerator cable bracket bolts and bracket.
- Remove the wiring harness fastener nut and throttle body retaining studs
- Remove the throttle body assembly.
- Remove the flange gasket and discard.
- Clean the gasket surface of the intake manifold.
Installation Procedure
- Install the new flange gasket.
- Install the throttle body assembly.
- Install the throttle body retaining studs and wiring harness fastener and nuts.
- Connect the throttle and cruise control cables.
- Install the accelerator cable bracket and bolts.
- Connect the IAC valve and TP sensor electrical connectors.
- Install the air inlet duct and retaining nut.
- Connect the negative battery cable.
- With the engine OFF, check to see that the accelerator pedal is free. Depress the pedal to the floor and release.
Tighten
Tighten to 25 N·m (18 lb ft).
Notice: Use the correct fastener in the correct location. Replacement fasteners must be the correct part number for that application. Fasteners requiring replacement or fasteners requiring the use of thread locking compound or sealant are identified in the service procedure. Do not use paints, lubricants, or corrosion inhibitors on fasteners or fastener joint surfaces unless specified. These coatings affect fastener torque and joint clamping force and may damage the fastener. Use the correct tightening sequence and specifications when installing fasteners in order to avoid damage to parts and systems.
Tighten
Tighten the nut to 2 N·m (18 lb in).
