For 1990-2009 cars only
Radiator Replacement 4.3, 4.8, 5.3, and 6.0L
Removal Procedure
- Remove the cooling fan and shroud. Refer to Cooling Fan and Shroud Replacement .
- Remove the radiator outlet hose for the 4.3L engine, or the 4.8L, 5.3L and 6.0L engines. Refer to Radiator Outlet Hose Replacement .
- Disconnect the engine oil cooler lines from the radiator, If Equipped . Refer to Engine Oil Cooler Pipe/Hose Quick Connect Fitting .
- Disconnect the transmission oil cooler lines from the radiator, If Equipped. Refer to Transmission Fluid Cooler Hose/Pipe Quick-Connect Fitting Disconnection and Connection .
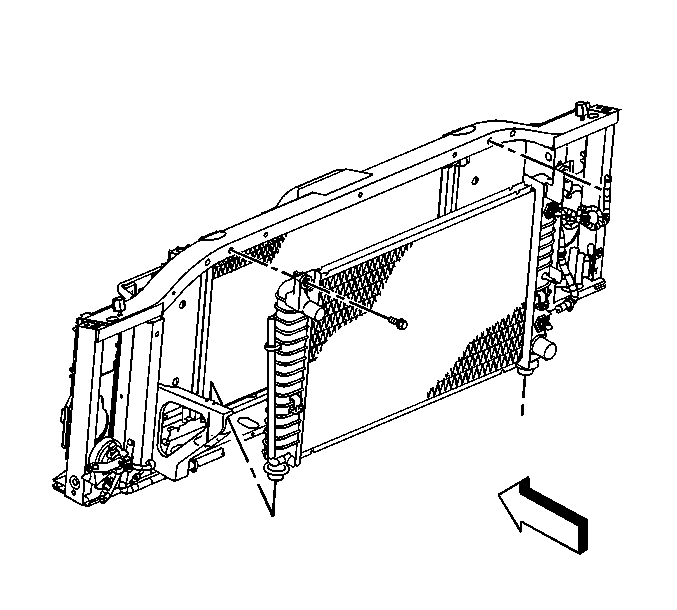
- Remove the radiator bolts.
- Remove the radiator.

Installation Procedure
- Install the radiator.
- Install the radiator bolts.
- Connect the transmission oil cooler lines to the radiator, If Equipped. Refer to Transmission Fluid Cooler Hose/Pipe Quick-Connect Fitting Disconnection and Connection .
- Connect the engine oil cooler lines to the radiator, If Equipped. Refer to Engine Oil Cooler Pipe/Hose Quick Connect Fitting .
- Install the radiator outlet hose for the 4.3L engine, or the 4.8L, 5.3L and 6.0L engines. Refer to Radiator Outlet Hose Replacement .
- Install the cooling fan and shroud. Refer to Cooling Fan and Shroud Replacement .

Notice: Refer to Fastener Notice in the Preface section.
Tighten
Tighten the bolts to 25 N·m (18 lb ft).
Radiator Replacement 6.6L
Removal Procedure
- Remove the radiator inlet hose for the 6.6L engine. Refer to Radiator Inlet Hose Replacement .
- Remove the radiator outlet hose for the 6.6L engine. Refer to Radiator Outlet Hose Replacement .
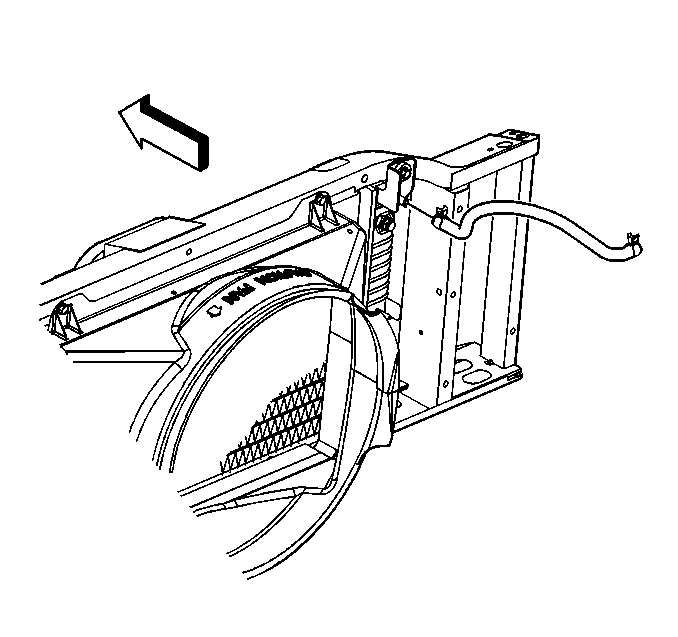
- Remove the lower fan shroud. Refer to Engine Coolant Fan Lower Shroud Replacement .
- If necessary, disconnect the automatic transmission oil cooler lines from the radiator. Refer to Transmission Fluid Cooler Hose/Pipe Replacement in Automatic Transmission - Allison.
- Remove the radiator bolts.
- Remove the radiator.

Installation Procedure
- Install the radiator.
- Install the radiator bolts.
- If necessary, connect the automatic transmission oil cooler lines to the radiator. Refer to Transmission Fluid Cooler Hose/Pipe Replacement in Automatic Transmission - Allison.
- Install the lower fan shroud. Refer to Engine Coolant Fan Lower Shroud Replacement .
- Install the radiator outlet hose for the 6.6L engine. Refer to Radiator Outlet Hose Replacement .
- Install the radiator inlet hose for the 6.6L engine. Refer to Radiator Inlet Hose Replacement .

Notice: Refer to Fastener Notice in the Preface section.
Tighten
Tighten the bolts to 25 N·m (18 lb ft).
Radiator Replacement 8.1L
Removal Procedure
- Remove the radiator inlet hose for the 8.1L engine. Refer to Radiator Inlet Hose Replacement .
- Remove the radiator outlet hose for the 8.1L engine. Refer to Radiator Outlet Hose Replacement .
- Remove the lower fan shroud. Refer to Engine Coolant Fan Lower Shroud Replacement .
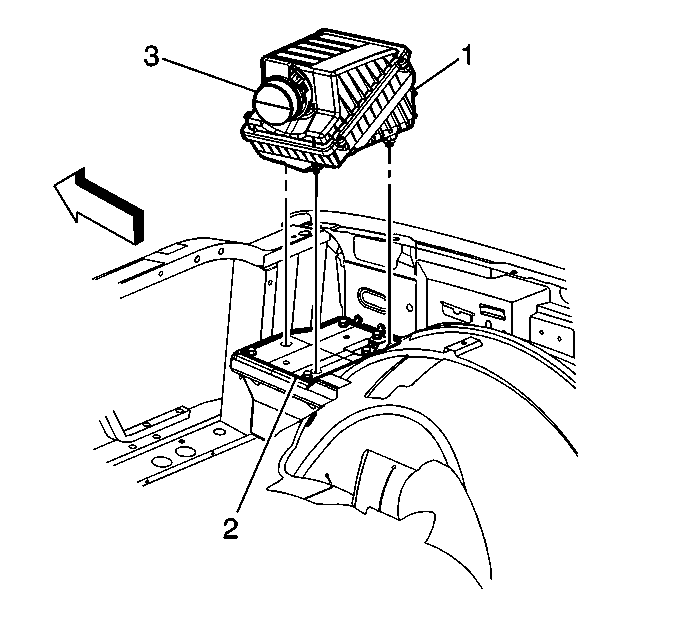
- Remove the air cleaner assembly. Refer to Air Cleaner Assembly Replacement .
- Remove the push pin from the air cleaner adapter (2).
- Remove the bolts from the air cleaner adapter (2).
- Remove the air cleaner adapter (2) from the vehicle.
- Reposition the surge tank inlet hose clamp at the radiator.
- Remove the surge tank inlet hose from the radiator.
- Disconnect the engine oil cooler lines from the radiator, if necessary. Refer to Engine Oil Cooler Pipe/Hose Quick Connect Fitting .
- Disconnect the transmission oil cooler lines from the radiator, if necessary . Refer to Transmission Fluid Cooler Hose/Pipe Quick-Connect Fitting Disconnection and Connection for the 4L80-E/4L65-E transmission, or Transmission Fluid Cooler Hose/Pipe Replacement for the Allison transmission.
- Remove the radiator bolts.
- Remove the radiator.


Installation Procedure
- Install the radiator.
- Install the radiator bolts.
- Connect the transmission oil cooler lines to the radiator, if necessary . Refer to Transmission Fluid Cooler Hose/Pipe Quick-Connect Fitting Disconnection and Connection for the 4L80-E/4L85-E transmission, or Transmission Fluid Cooler Hose/Pipe Replacement for the Allison transmission.
- Connect the engine oil cooler lines to the radiator, if necessary. Refer to Engine Oil Cooler Pipe/Hose Quick Connect Fitting .
- Install the surge tank inlet hose to the radiator.
- Reposition the surge tank inlet hose clamp at the radiator.
- Install the air cleaner adapter (2) to the vehicle.
- Install the bolts to the air cleaner adapter (2).
- Install the push pin to the air cleaner adapter (2).
- Install the air cleaner assembly. Refer to Air Cleaner Assembly Replacement .
- Install the lower fan shroud. Refer to Engine Coolant Fan Lower Shroud Replacement .
- Install the radiator outlet hose for the 8.1L engine. Refer to Radiator Outlet Hose Replacement .
- Install the radiator inlet hose for the 8.1L engine. Refer to Radiator Inlet Hose Replacement .

Notice: Refer to Fastener Notice in the Preface section.
Tighten
Tighten the bolts to 25 N·m (18 lb ft).


Tighten
Tighten the bolts to 9 N·m (80 lb in).
