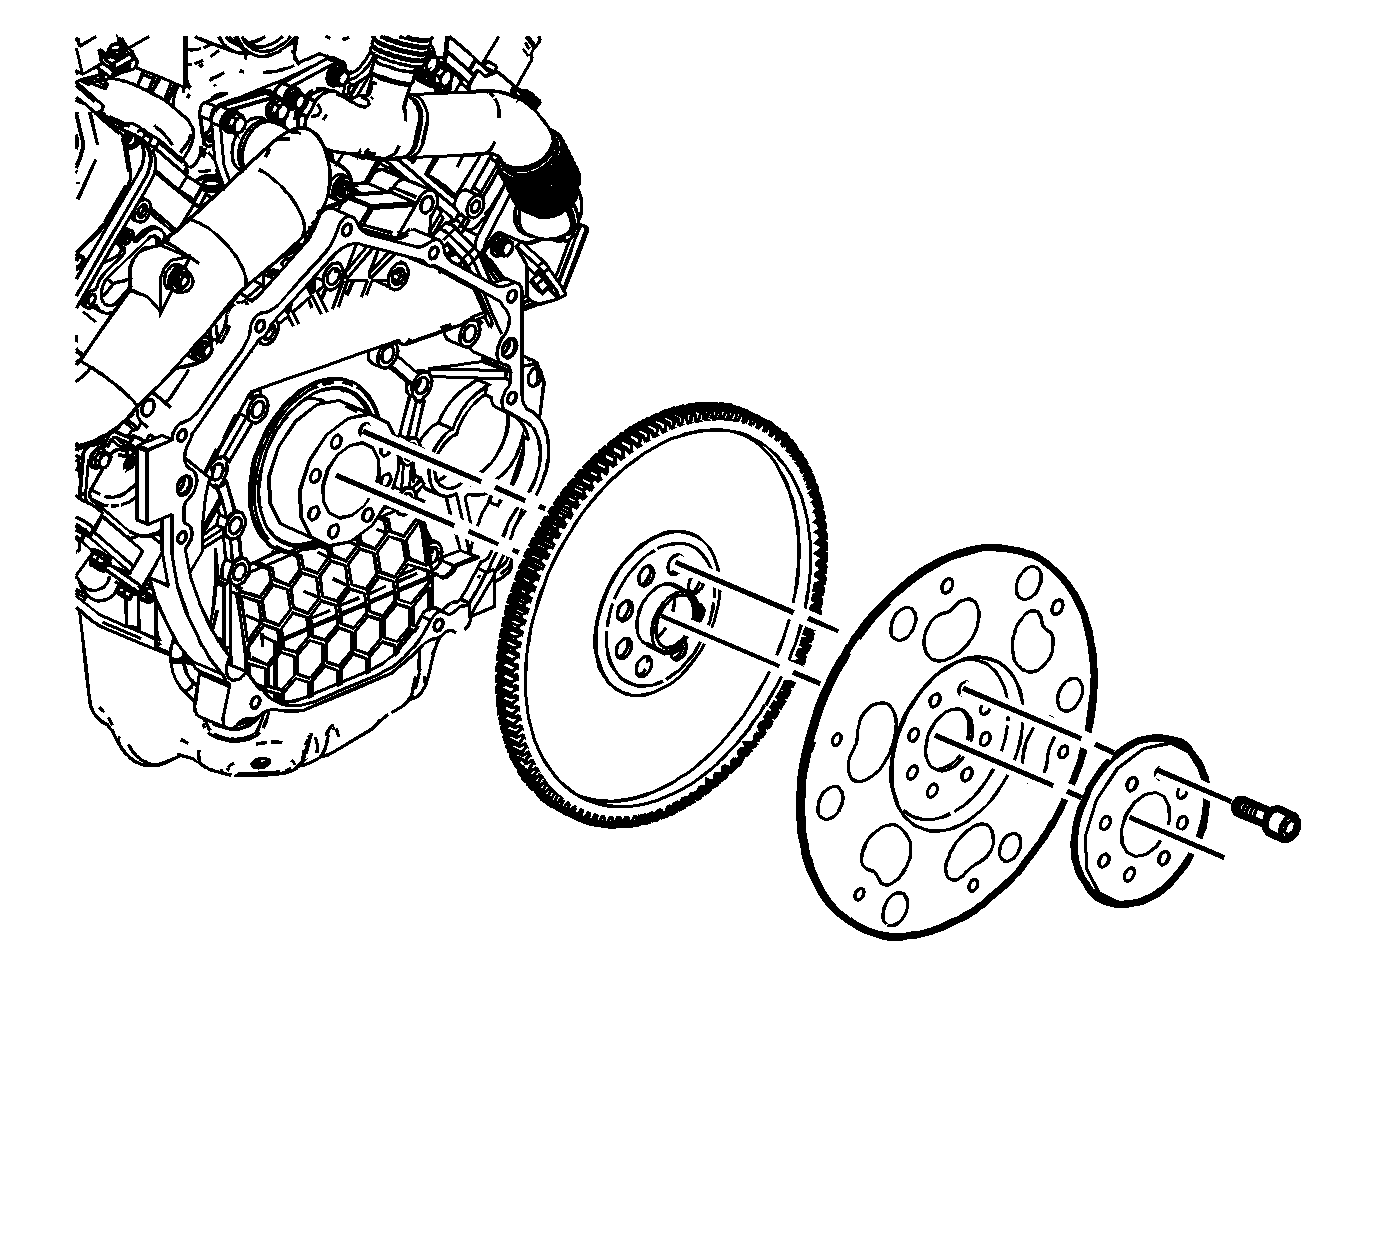
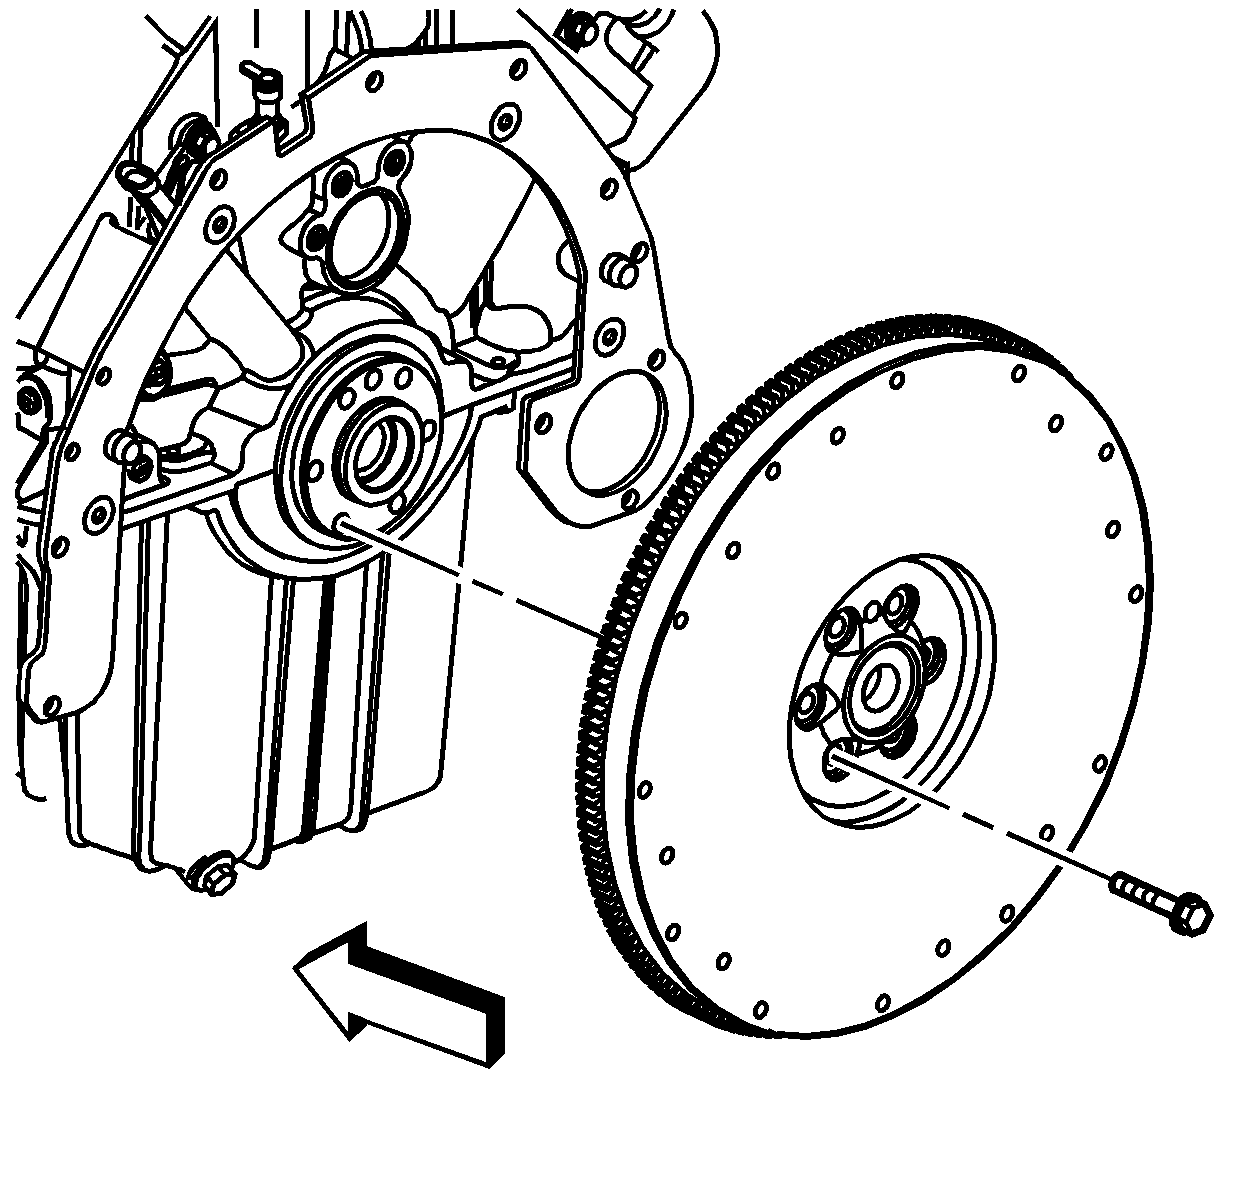
Engine Flywheel Installation Automatic Transmission
Tools Required
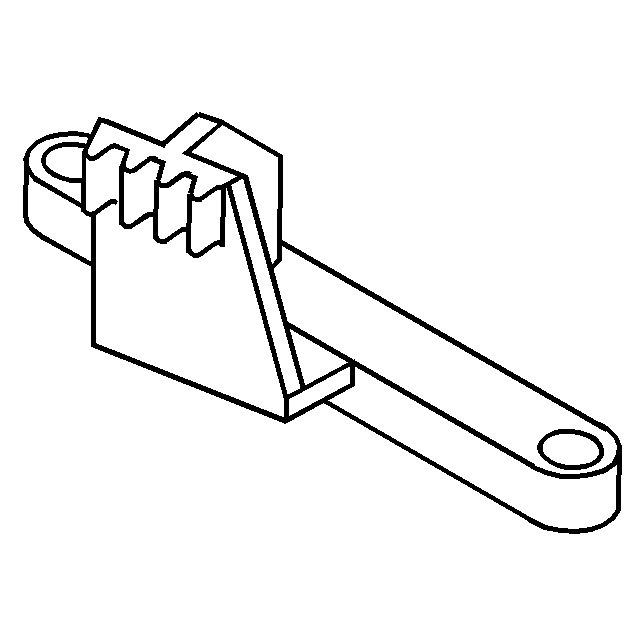
| • | J 44643 Flywheel Hold Tool |
| • | J 45059 Angle Meter |
- Install the flywheel to the crankshaft.
- Install the flywheel washer to the flywheel with the beveled side facing the engine.
- Install NEW flywheel bolts.
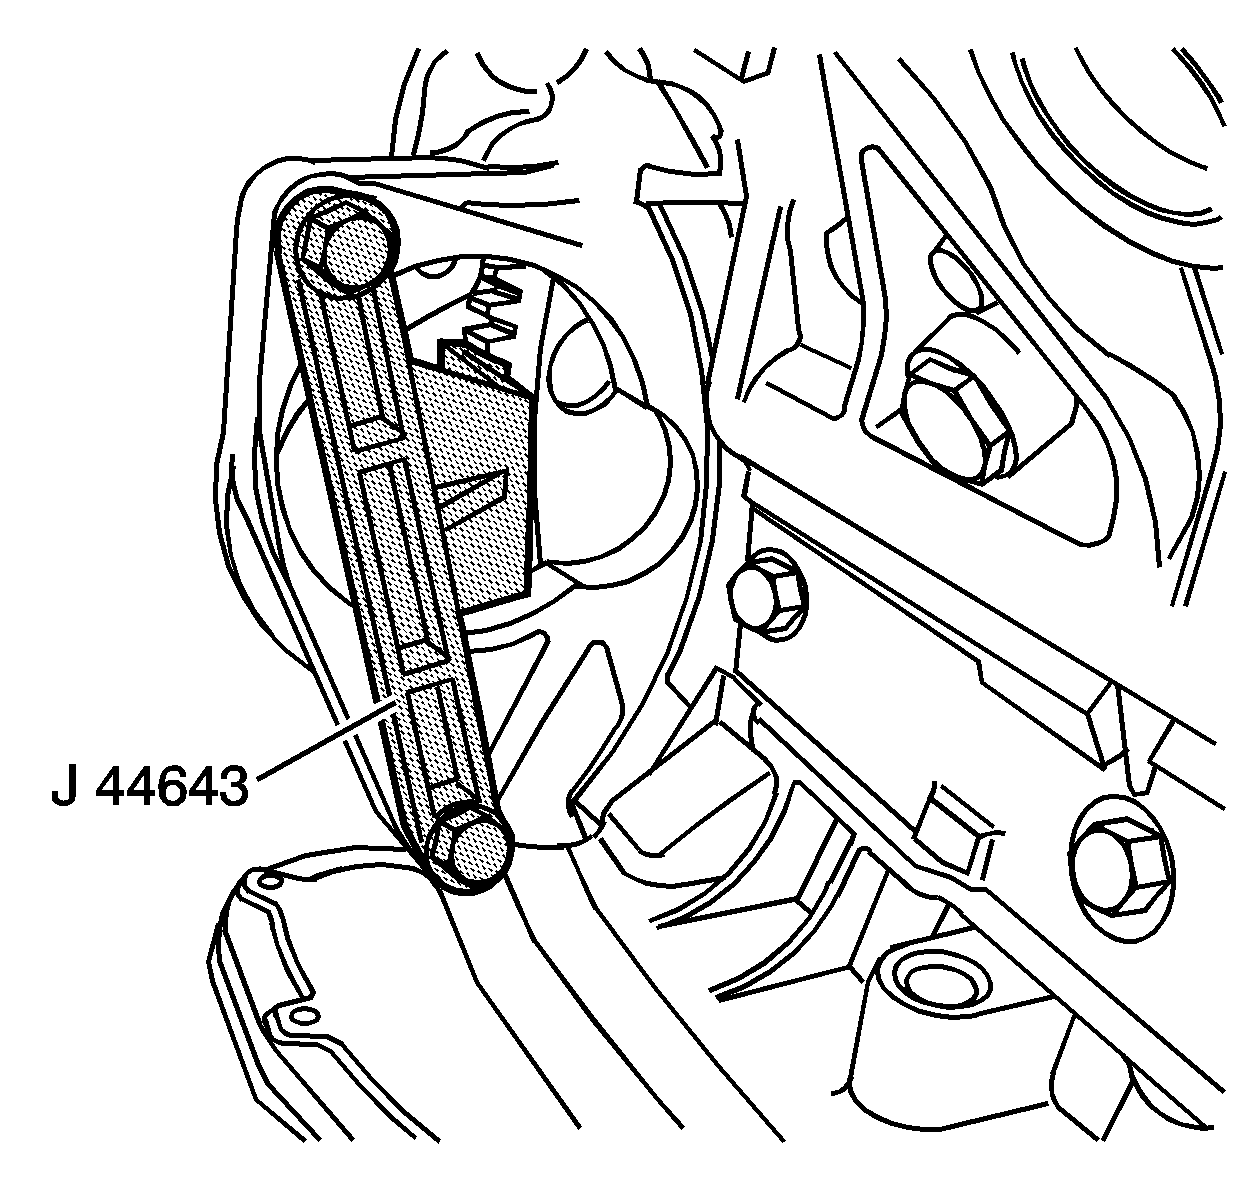
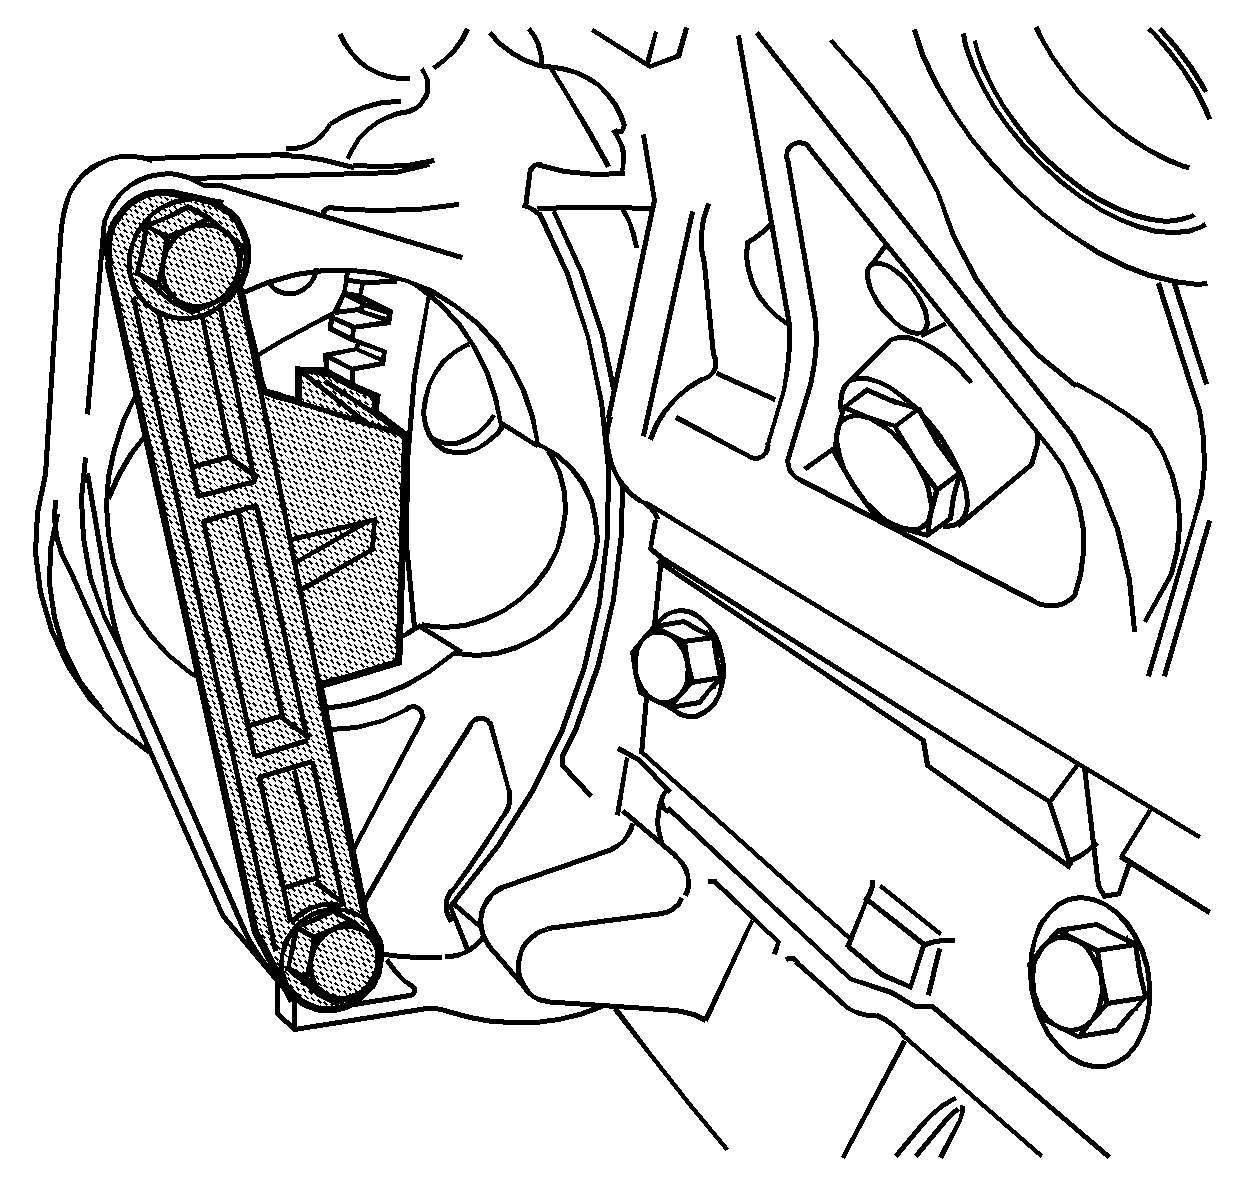
- Install the J 44643 to lock the flywheel.
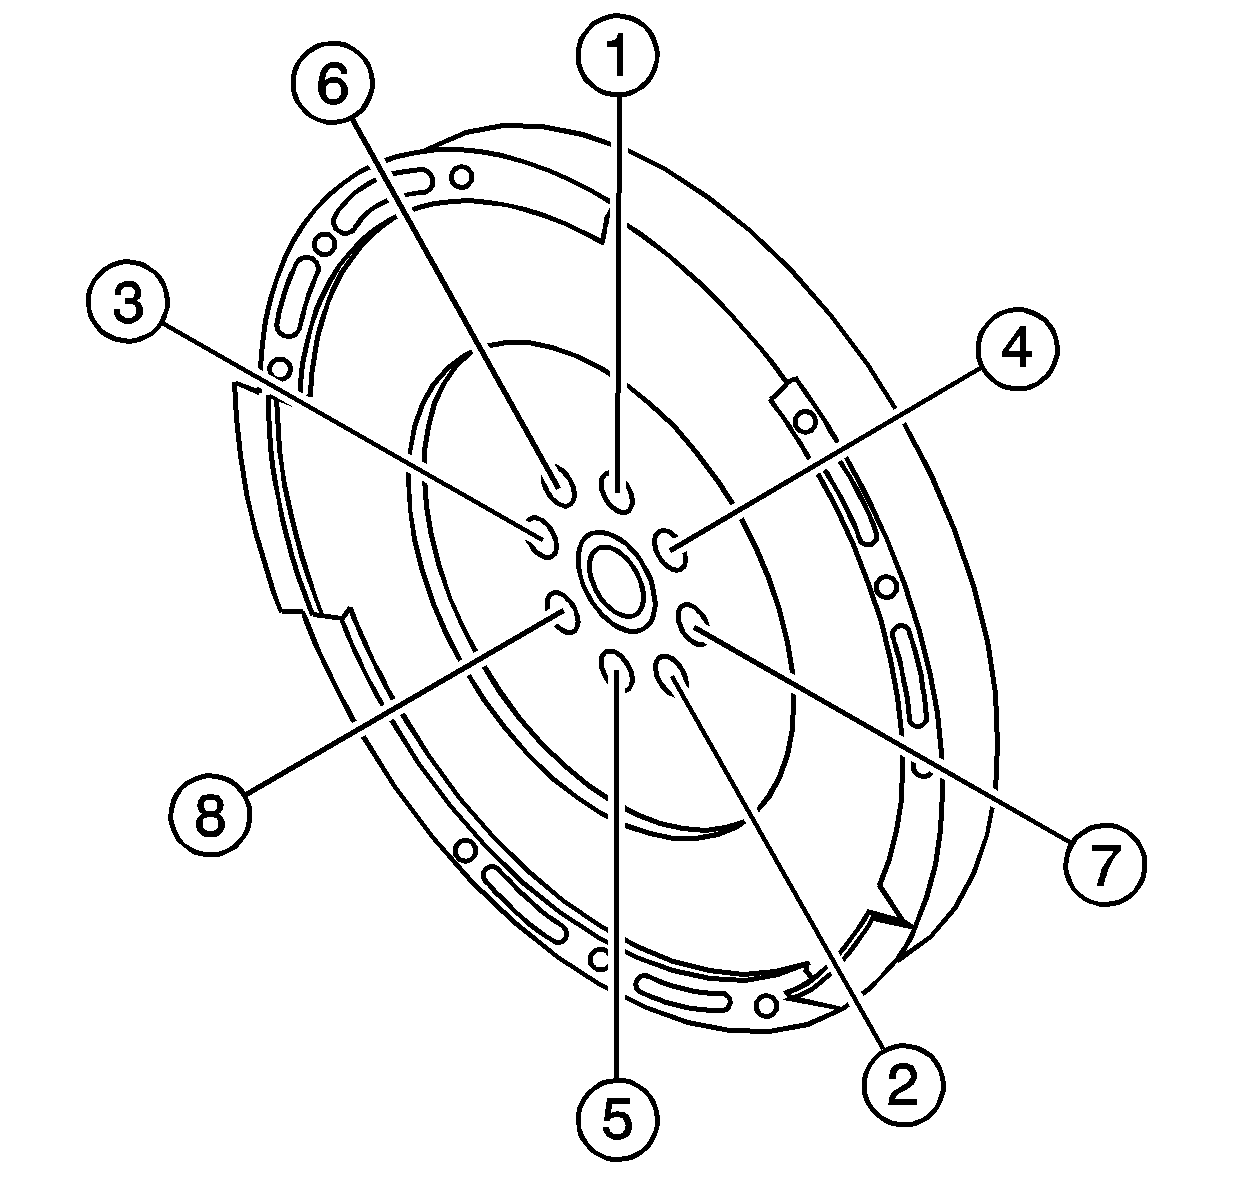
- Tighten the flywheel bolts in the proper sequence.
Notice: This component uses bolts with a preapplied molybdenum disulfide coating for thread lubrication. Do not remove the coating or use any additional lubricant. Improperly lubricated threads will adversely affect the bolt torque and clamp load. Improper bolt torque and clamp load can lead to engine damage.
Notice: Use the correct fastener in the correct location. Replacement fasteners must be the correct part number for that application. Fasteners requiring replacement or fasteners requiring the use of thread locking compound or sealant are identified in the service procedure. Do not use paints, lubricants, or corrosion inhibitors on fasteners or fastener joint surfaces unless specified. These coatings affect fastener torque and joint clamping force and may damage the fastener. Use the correct tightening sequence and specifications when installing fasteners in order to avoid damage to parts and systems.
Tighten
| • | 1st step 79 N·m (59 lb ft). |
| • | 2nd step 60 degrees using J 45059 . |
| • | 3rd step 60 degrees using J 45059 . |
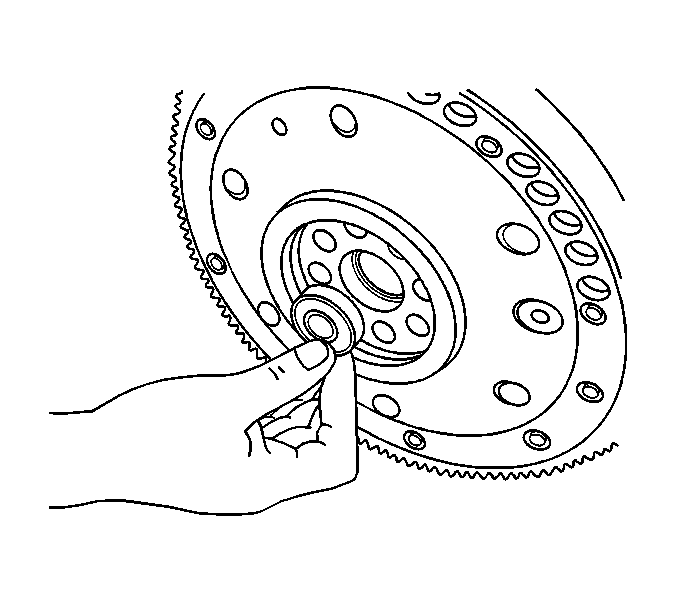
Engine Flywheel Installation Manual Transmission
Tools Required
| • | J 44643 Flywheel Hold Tool |
| • | J 45059 Angle Meter |
- Install the pilot bearing.
- Install the flywheel.
- Loosely install NEW flywheel bolts.
- Install J 44643 to hold the flywheel from rotating.
- Use the following steps and the proper sequence to tighten the flywheel bolts:
- Tighten the flywheel bolts to 79 N·m (59 lb ft).
- Tighten the flywheel bolts to 60 degrees using the J 45059 .
- Tighten the flywheel bolts again to 60 degrees using the J 45059 .
- Remove J 44643 .
Caution: When removing, handling or installing this component wear protective gloves. The sharp edges on the component may be very sharp and may cause injury.
Notice: This component uses bolts with a preapplied molybdenum disulfide coating for thread lubrication. Do not remove the coating or use any additional lubricant. Improperly lubricated threads will adversely affect the bolt torque and clamp load. Improper bolt torque and clamp load can lead to engine damage.
Notice: Use the correct fastener in the correct location. Replacement fasteners must be the correct part number for that application. Fasteners requiring replacement or fasteners requiring the use of thread locking compound or sealant are identified in the service procedure. Do not use paints, lubricants, or corrosion inhibitors on fasteners or fastener joint surfaces unless specified. These coatings affect fastener torque and joint clamping force and may damage the fastener. Use the correct tightening sequence and specifications when installing fasteners in order to avoid damage to parts and systems.
Tighten
