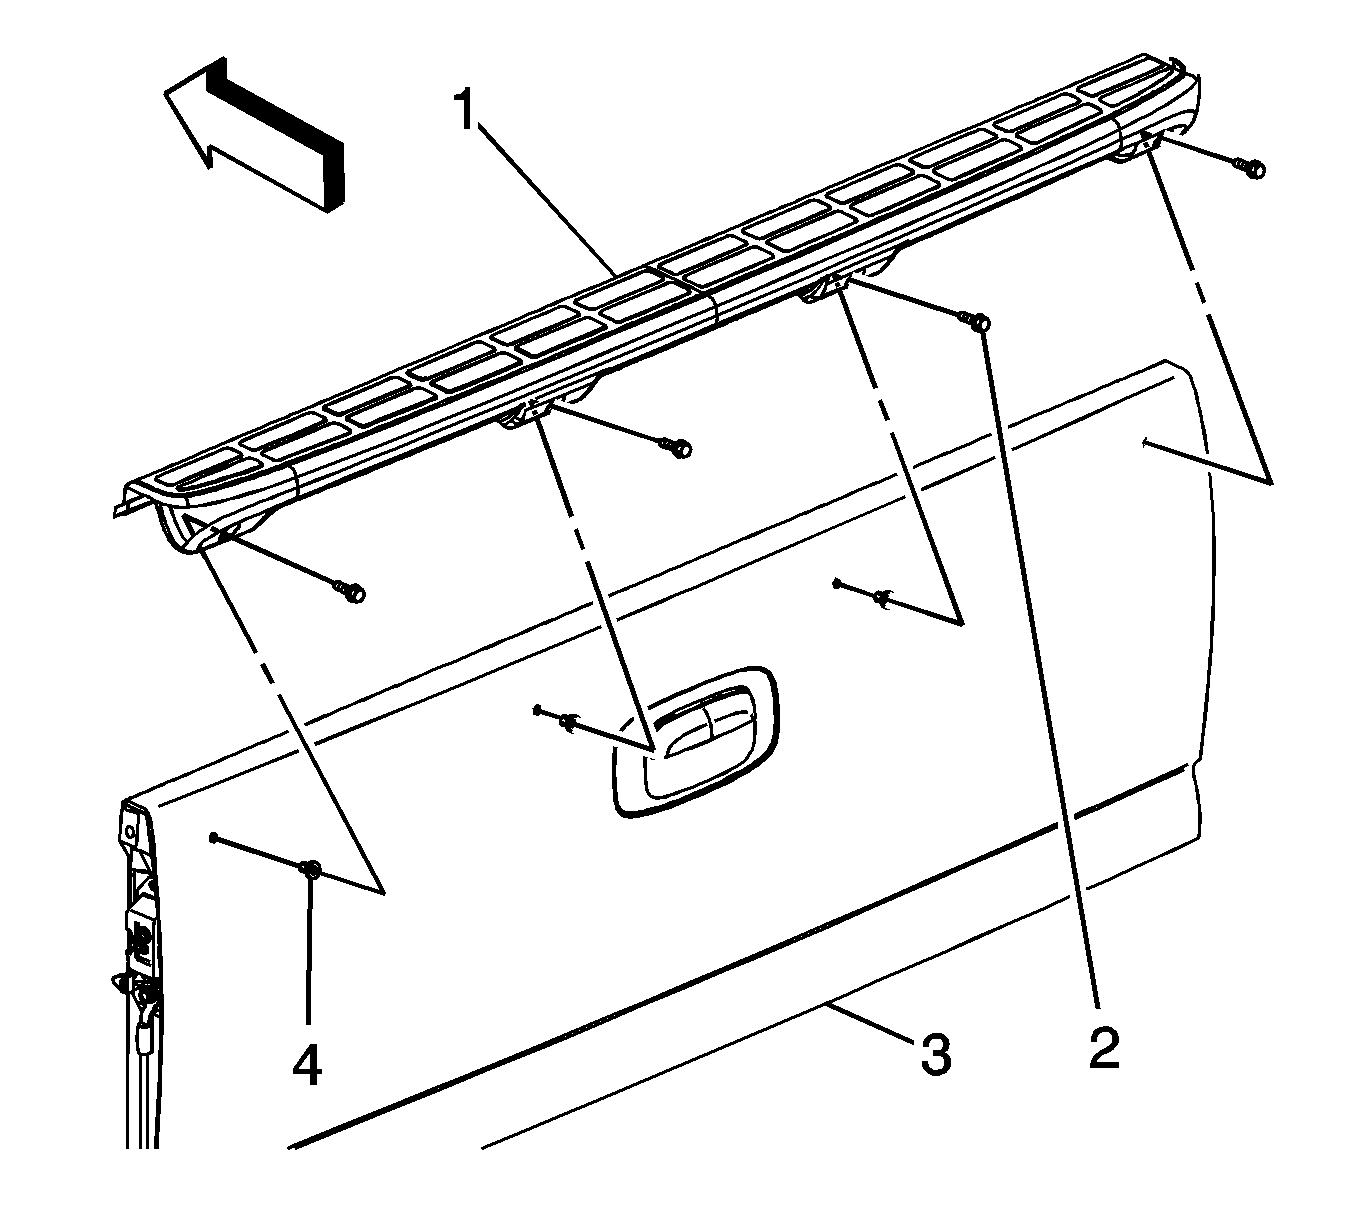
For 1990-2009 cars only
Removal Procedure
- Remove the fasteners (2) securing the rear end spoiler (1) from the endgate (3).
- Heat the inside of the rear end spoiler using a heat gun. Hold the heat gun approximately 152 mm (6 in) from the surface. Apply heat using a circular motion for approximately 30 seconds.
- Peel the rear end spoiler from the inner surface of the end gate using a flat-bladed tool.
- Remove the rear end spoiler (1).
- Remove all adhesive from the end gate and rear end spoiler using a 3M Scotch Brite molding adhesive remover disk 3M P/N 0751 or equivalent.
- Clean the end gate using varnish makers and painters (VMP) naptha.

Important: Be careful not to scratch or chip the paint.
Installation Procedure
- Ensure that the painted surface of the end gate in the tape contact area is clean and dry.
- Ensure all rear end spoiler nuts (4) are in place. If necessary, replace the rear end spoiler nut.
- Peel the backing from the adhesive on the rear end spoiler.
- Lower the front edge of the rear end spoiler (1) against the endgate (3) surface approximately 2 mm (0.08 in) above the endgate offset.
- Rotate the rear end spoiler (1) down over the top of the endgate (3).
- Press the rear end spoiler (1) to the endgate (3).
- Hand roll the rear end spoiler to the endgate in order to ensure proper adhesion.
- Install the fasteners (2) securing the rear end spoiler (1) to the endgate (3).

Important: Do not let the tape surface contact the endgate surface until after part rotation.
Notice: Refer to Fastener Notice in the Preface section.
Tighten
Tighten the bolt to 2.0 N·m (17 lb in).
