Removal Procedure
- Remove the instrument panel (I/P) trim panel. Refer to Instrument Panel Upper Trim Panel Replacement .
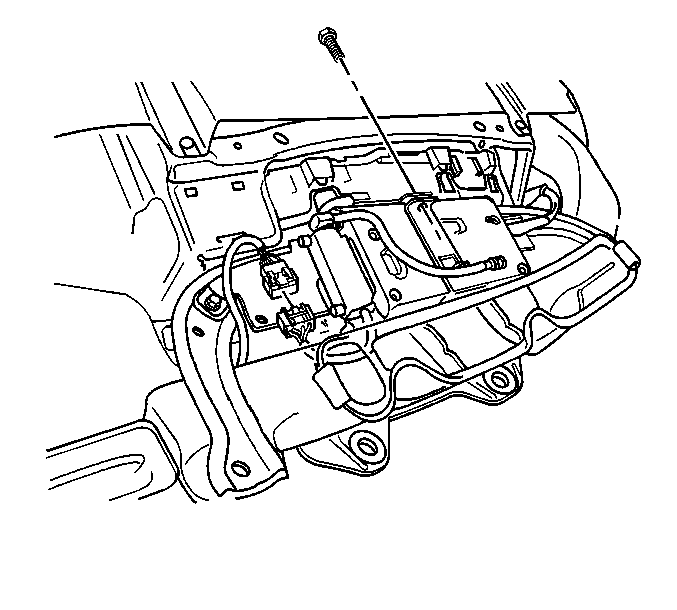
- Remove the I/P cluster harness in order to gain access to the VCU bracket screw.
- Remove the screw securing the VCU to the bracket.
- Disconnect the electrical connectors.
- Remove the VCU from the bracket.
- The old VCU must be returned for core credit.
Important: The vehicle communication unit (VCU) has a specific set of unique numbers that tie the module to each vehicle. These numbers, the 10-digit station identification and the 11-digit electronic serial number, are used by the National Cellular Network and OnStar® to identify the specific vehicle. Because these numbers are tied to the vehicle identification number of the vehicle, you must never exchange these parts with those of another vehicle.
Installation Procedure
- Record the 11-digit ESN from the label on the new VCU module.
- Install the VCU to the bracket.
- Connect the electrical connectors to the VCU.
- Install the screw.
- Install the I/P cluster harness.
- Install the I/P trim panel. Refer to Instrument Panel Upper Trim Panel Replacement .
- Reconfigure the OnStar® system. Refer to OnStar Reconfiguration .
- Return the old VCU for core credit.
Notice: In order to avoid damage to the circuit board, do NOT over-tighten the thumb screws. Using your fingers, apply only a light pressure.
Notice: Refer to Fastener Notice in the Preface section.
Tighten
Tighten the screw to 9 N·m (80 lb in).
Important: After replacing the VCU, you must reconfigure the OnStar® system. Failure to reconfigure the system will result in an additional customer visit for repair.
