Removal Procedure
- Shift the transmission into 3rd or 4th gear.
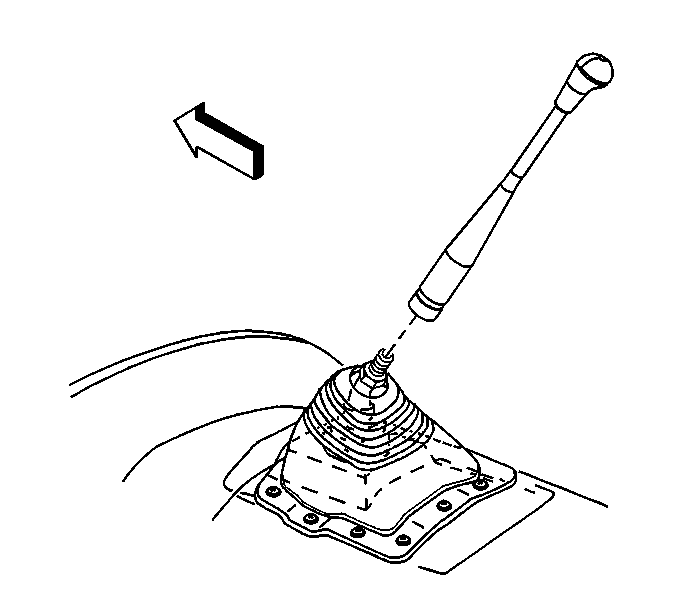
- Remove the shift lever from the shift tower.
- Do not remove the shift lever adjusting nut.
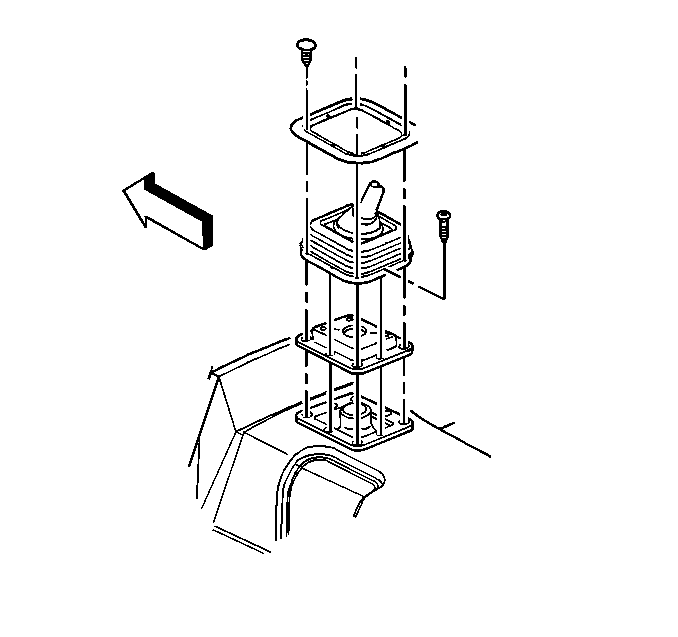
- Remove 4 plastic retainer plugs securing the shift boot retainer to the shift boot.
- Remove the 4 screws securing the shift boot and insulator to the floor panel.
- Remove the retainer and shift boot from the shift lever.
- Remove the shift lever.
- With a flat tool pull back the insulator to access the shift tower bolts.
- Remove the 4 shift tower bolts securing the shift housing to the transmission.
- Turn and release the shift tower and pull through the insulator.
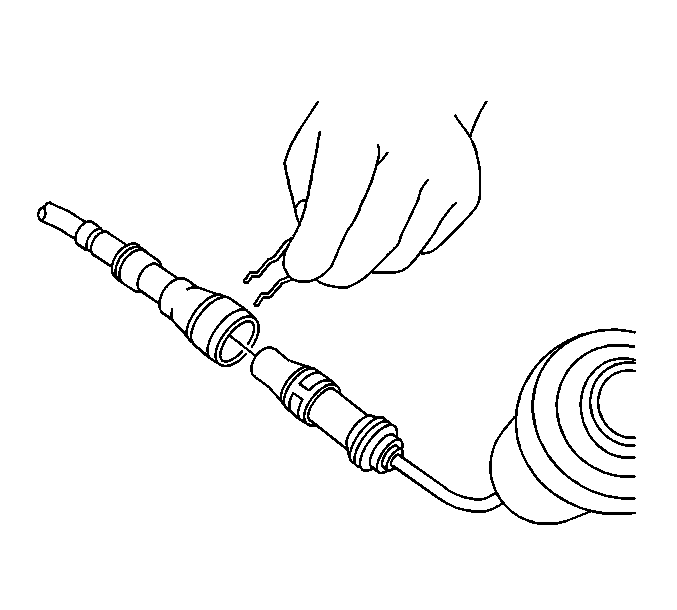
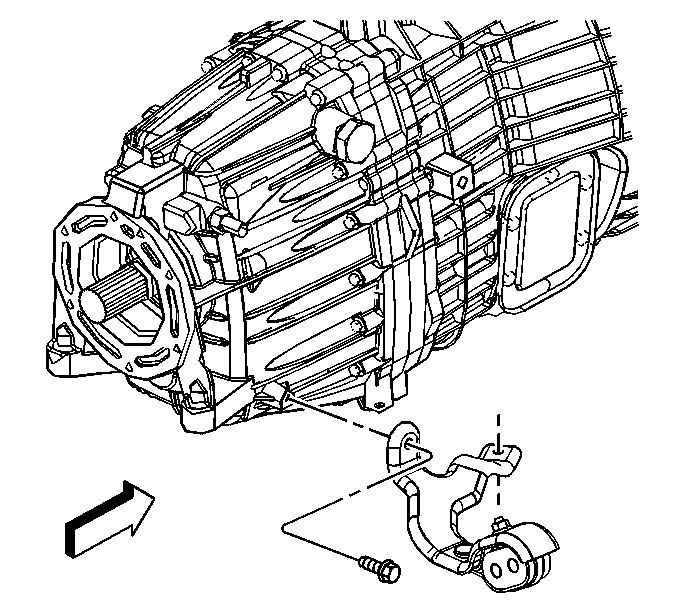
- Disconnect the hydraulic hose at the quick disconnect from the master cylinder.
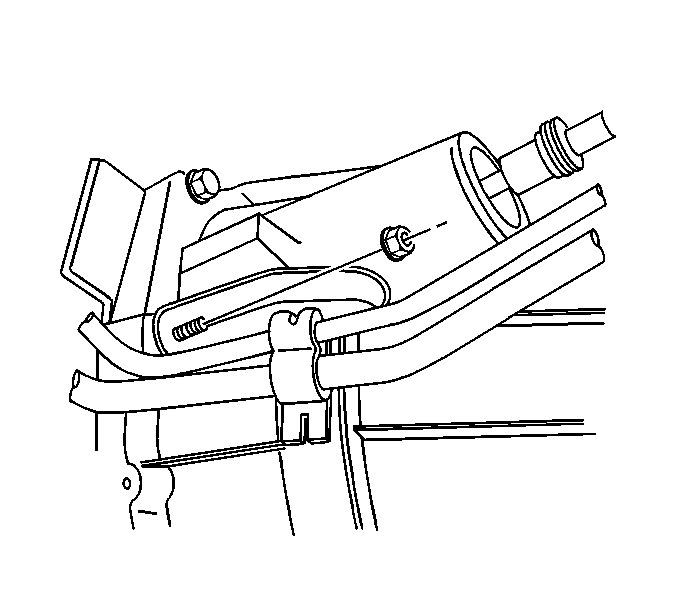
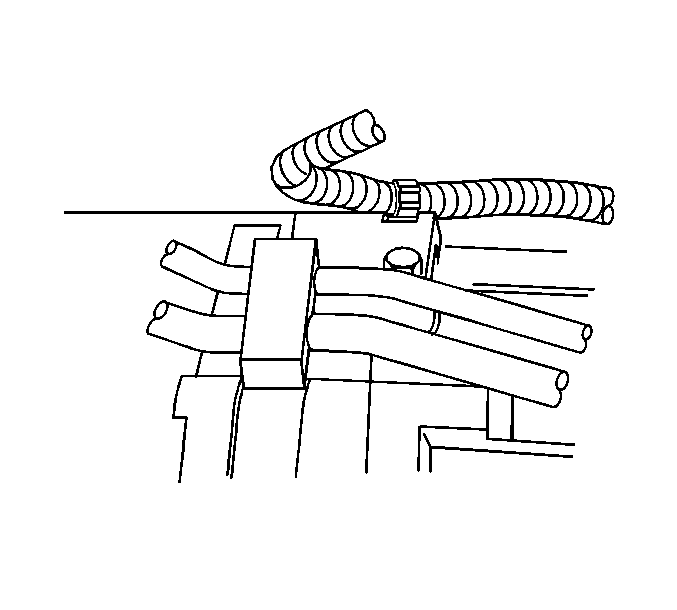
- Remove the retainers that support the hydraulic line.
- Raise and suitably support the vehicle. Refer to Lifting and Jacking the Vehicle in General Information.
- Drain the transmission oil. Refer to Fluid Replacement .
- Remove the rear propeller shaft. Refer to One-Piece Propeller Shaft Replacement or Two-Piece Propeller Shaft Replacement in Propeller Shaft.
- Remove the transfer case, if equipped. Refer to Transfer Case Assembly Replacement or Transfer Case Assembly Replacement Driveline/Axle-Transfer Case.
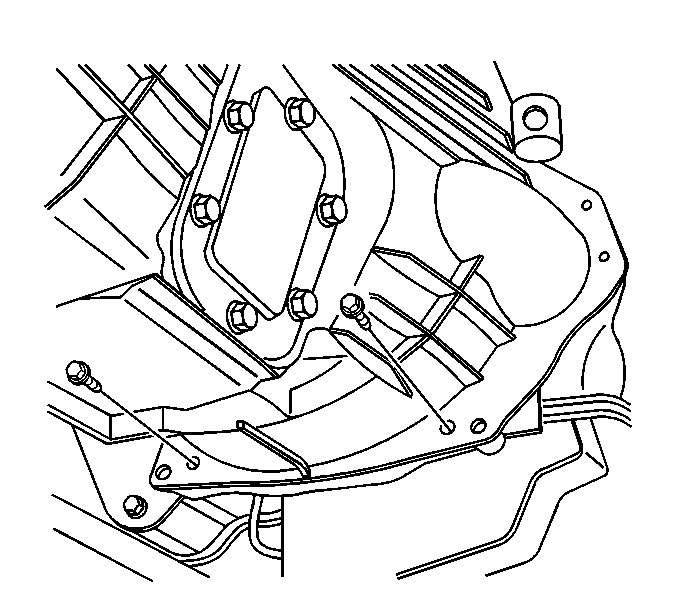
- Remove the exhaust support bracket and the 2 bolts from the transmission.
- Remove the front fuel line nut and bracket from the manual transmission.
- Remove the rear fuel line bolt and bracket from the manual transmission.
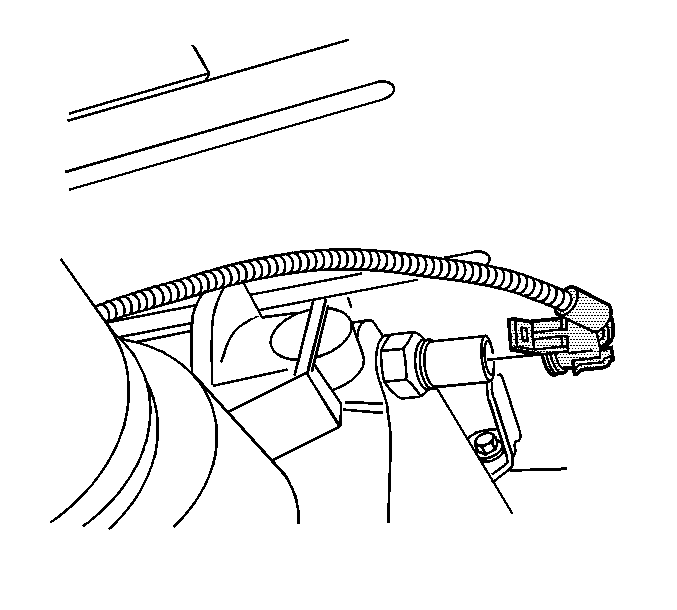
- Disconnect the following electrical connectors:
- Remove the transmission wiring harness from the retainers.
- Support the manual transmission with a suitable transmission jack.
- Remove the crossmember. Refer to Transmission Support Replacement in Body and Accessories-Frame and Underbody.
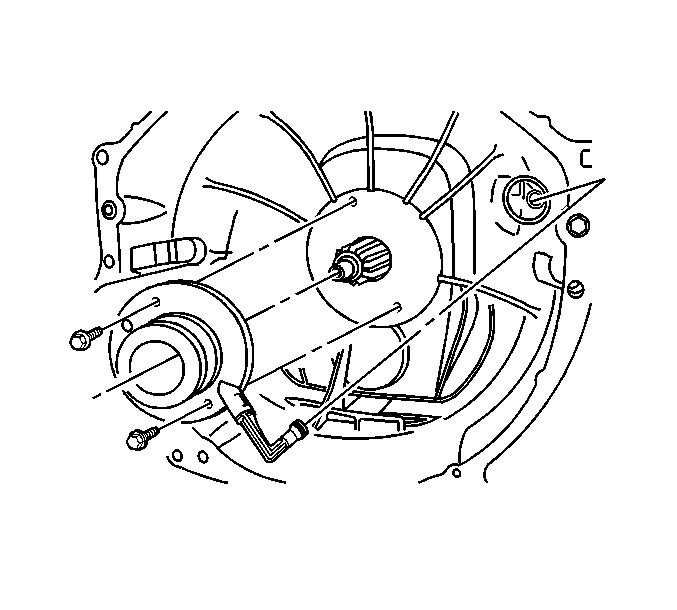
- Remove the bolts and studs securing the transmission to the engine. Note the location of the studs and the bolts.
- Pull the transmission straight back on the clutch hub splines. Do not let the transmission hang from the clutch plate and the clutch cover.
- Remove the transmission from the vehicle with the clutch hydraulic hose attached to the clutch actuator.
- Remove the insulator from the top of the transmission.
- Remove the 2 bolts or nuts holding the clutch actuator.
- Remove the clutch actuator from the transmission with the clutch hrydraulic line attached.
- Remove the clutch plate and the clutch cover from the engine flywheel if required. Refer to Clutch Assembly Replacement in Clutch.
Important:
• Ensure that the shift lever is positioned into the mechanical
third or fourth gear prior to removal of the shift housing from the transmission.
The transmission must remain in this state when the shift housing
is removed. • When removing the shift housing from the transmission, use the
exposed bolts on the base of the housing.

Important: The clutch hydraulic hose can remain attached to the clutch actuator. Disconnecting the hose from the clutch actuator will cause the fluid to drain from the hydraulic system.
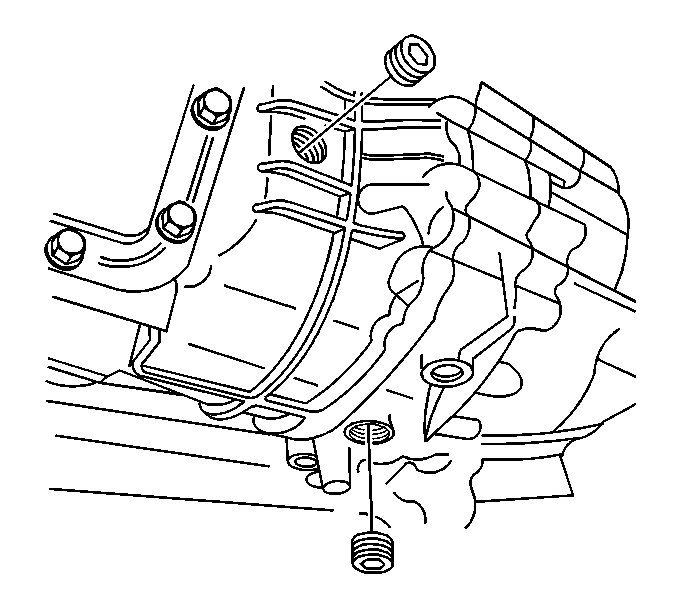
| • | Vehicle speed sensor |
| • | Backup lamp switch |
Important: Leave the clutch actuator hose attached to the clutch actuator. Disconnecting the hose from the clutch actuator will let the hydraulic fluid drain from the clutch hydraulic system.
Installation Procedure
- If removed, install the clutch plate and the clutch cover to the engine flywheel if removed. Refer to Clutch Assembly Replacement in Clutch.
- Install the clutch actuator to the transmission with the clutch hrydraulic line attached.
- Shift the transmission in 3rd or 4th speed gear.
- Install the insulator to the top of the transmission.
- Use the following steps to install the transmission.
- Install the bolt and the studs securing the transmission to the engine. Ensure the bolts and studs are installed in the correct locations.
- Install the crossmember. Refer to Transmission Support Replacement in Body and Accessories-Frame and Underbody.
- Install the rear fuel line bracket and bolt.
- Install the front fuel line bracket and nut.
- Install the wiring harness retainers.
- Install the wire harness.
- Connect the backup switch and the vehicle speed sensor.
- Install the 2 bolts securing the right side support bracket to the manual transmission.
- If equipped with a 4WD install the front propeller shaft. Refer to Transfer Case Assembly Replacement .
- If Rear Wheel Drive (RWD) Install the rear propeller shaft. Refer to One-Piece Propeller Shaft Replacement or Two-Piece Propeller Shaft Replacement .
- Fill the transmission with fluid. Refer to Fluid Replacement .
- Lower the vehicle.
- Push the shift tower back through the insulator, position and turn the shift tower back into place.
- Position the retainer and shift boot onto the shift lever.
- Install the 4 screws securing the shift boot and insulator to the floor panel.
- Install 4 plastic retainer plugs securing the shift boot retainer to the shift boot.
- Install the shift lever to the shift tower.
- Quick connect the hydraulic line to the master cylinder.
- Install new retainers to support the hydraulic line.
Notice: Use the correct fastener in the correct location. Replacement fasteners must be the correct part number for that application. Fasteners requiring replacement or fasteners requiring the use of thread locking compound or sealant are identified in the service procedure. Do not use paints, lubricants, or corrosion inhibitors on fasteners or fastener joint surfaces unless specified. These coatings affect fastener torque and joint clamping force and may damage the fastener. Use the correct tightening sequence and specifications when installing fasteners in order to avoid damage to parts and systems.
Tighten
Tighten the clutch actuator bolts or nuts to 8 N·m (71 lb in).
| 5.1. | Slowly feed the clutch hydraulic hose towards the clutch master cylinder. |
| 5.2. | Rotate the transmission clockwise onto the clutch hub splines. |
| 5.3. | Position the transmission to the engine. Do not use the transmission bolts to draw up the transmission. |
Tighten
Tighten the transmission bolts and studs to 50 N·m (37 lb ft).
Tighten
Tighten the rear fuel line bolt to 30 N·m (22 lb ft).
Tighten
Tighten the nut to 30 N·m (22 lb ft).
Tighten
Tighten the bolts to 50 N·m (37 lb ft).
With a flat tool pull back the insulator to install the shift tower bolts.
Install the 4 bolts securing the shift housing to the transmission.
Tighten
Tighten the shift housing bolts to 23 N·m (17 lb ft).
Tighten
Tighten the screws to 2 N·m (18 lb in).
If required, use the shift lever adjusting nut to center the shift lever.
Tighten
Tighten the shift lever nut to 47 N·m (35 lb ft).
Important: Improper connection may cause the quick connect from locking properly. Before pushing in the clutch pedal fully, check with light pressure. If pedal is hard recheck connection.
