Removal Procedure
- Remove the IP top trim panel. Refer to Instrument Panel Center Trim Panel Replacement in Instrument Panel, Gauges and Console.
- Remove the windshield pillar moldings. Refer to Windshield Pillar Garnish Molding Replacement .
- Remove the drivers side accessory housing (1) from the IP.
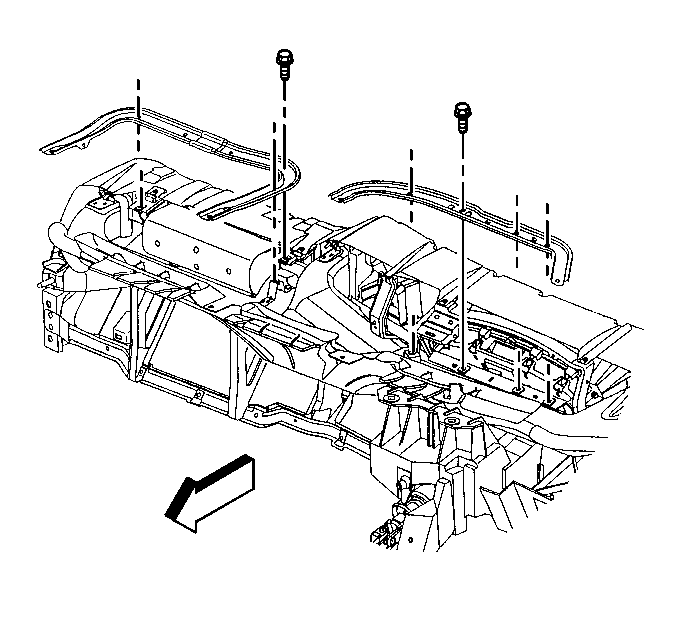
- Remove the IP upper brackets.
- Remove the transfer case control module, if equipped. Refer to Transfer Case Shift Control Module Replacement in Transfer Case.
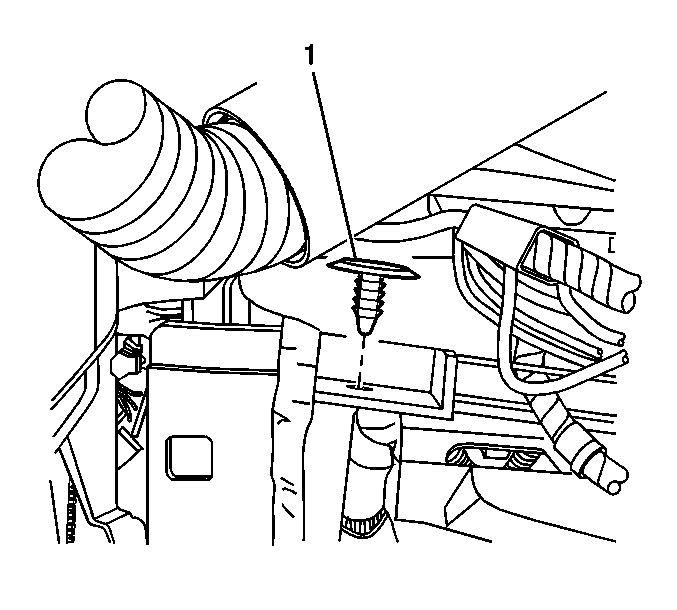
- Release the pressure on the headliner wire harness by removing the wire harness retainer (1) from the IP support beam.
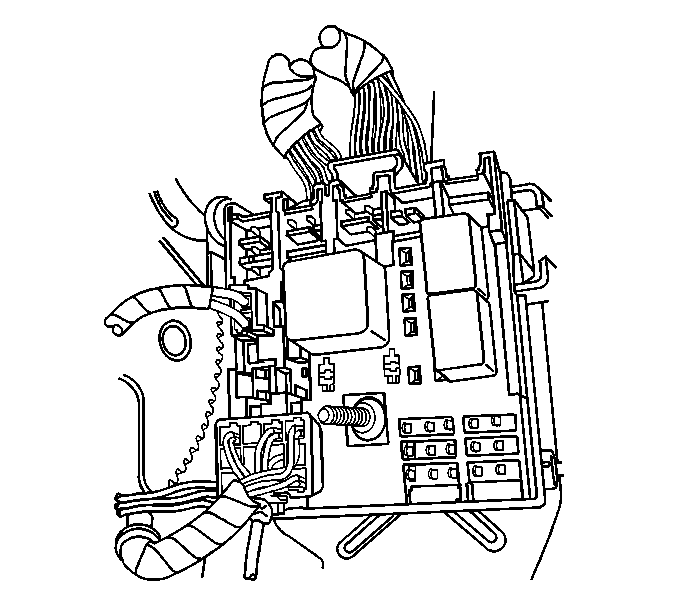
- Disconnect the headliner wire connectors from the junction block located next to the clutch or brake pedal.
- Remove the wire harness retainers along the windshield pillar.
- Follow the routing of the wire harness through the IP and release any wire harness retainers.
- Carefully pull out the wire harness from the windshield pillar ensuring that the wire harness does not get caught on any part.
- Remove the rear quarter trim panels, if necessary. Refer to Rear Quarter Trim Panel Replacement .
- Remove the overhead console, if equipped. Refer to Roof Console Replacement .
- Remove both front sunshades. Refer to Sunshade Replacement .
- Remove the rear coat hook, if equipped. Refer to Coat Hook Replacement .
- Remove the interior dome lamp. Refer to Dome Lamp Replacement in Lighting Systems.
- Remove the assist handles, if equipped. Refer to Assist Handle Replacement .
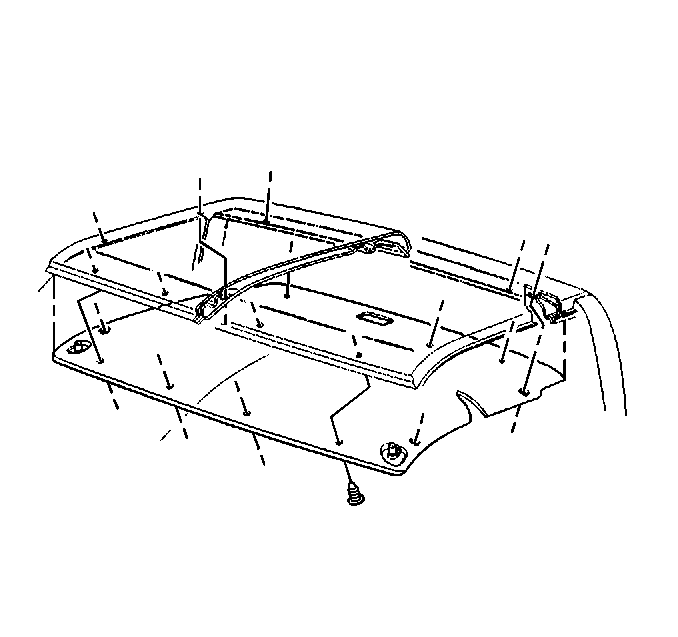
- Disengaging the front of the headliner from the roof.
- Remove the headliner from the vehicle by grasping the headliner on the left and the right sides near the front of the cab

Installation Procedure
- With the aid of an assistant install the headliner to the vehicle.
- Install the assist handles, if equipped. Refer to Assist Handle Replacement .
- Install the interior dome lamp. Refer to Dome Lamp Replacement in Lighting Systems.
- Install the rear coat hook, if equipped. Refer to Coat Hook Replacement .
- Install both front sunshades. Refer to Sunshade Replacement .
- Install the overhead console, if equipped. Refer to Roof Console Replacement .
- Install the rear quarter trim panels, if needed. Refer to Rear Quarter Trim Panel Replacement .
- Carefully route the wire harness through the IP in order to connect the wire to the junction block located next to the clutch or brake pedal.
- Install the transfer case control module, if equipped. Refer to Transfer Case Shift Control Module Replacement in Transfer Case.
- Press in the wire harness retainer (1) in order to secure the harness.
- Connect the headliner electrical connector to the junction block located next to the clutch or brake pedal.
- Install the IP upper brackets.
- Connect the electrical connectors to the drivers side accessory housing (1) .
- Install the drivers side accessory housing (1) to the IP.
- Install the windshield pillar moldings. Refer to Windshield Pillar Garnish Molding Replacement .
- Install the IP top trim panel. Refer to Instrument Panel Center Trim Panel Replacement in Instrument Panel, Gauges, and Console.
Important: Ensure that all of the wire harness retainers in the IP and the windshield pillar are all pressed into place in order to prevent rattling during driving.
Notice: Use the correct fastener in the correct location. Replacement fasteners must be the correct part number for that application. Fasteners requiring replacement or fasteners requiring the use of thread locking compound or sealant are identified in the service procedure. Do not use paints, lubricants, or corrosion inhibitors on fasteners or fastener joint surfaces unless specified. These coatings affect fastener torque and joint clamping force and may damage the fastener. Use the correct tightening sequence and specifications when installing fasteners in order to avoid damage to parts and systems.
Tighten
Tighten the IP upper brackets bolts to 9 N·m (80 lb in).
