Front Floor Console Replacement Base Console
Removal Procedure
- Remove the front seats if you are removing the floor console bracket. Refer to Front Seat Replacement - Bucket in Seats.
- Open the console door.
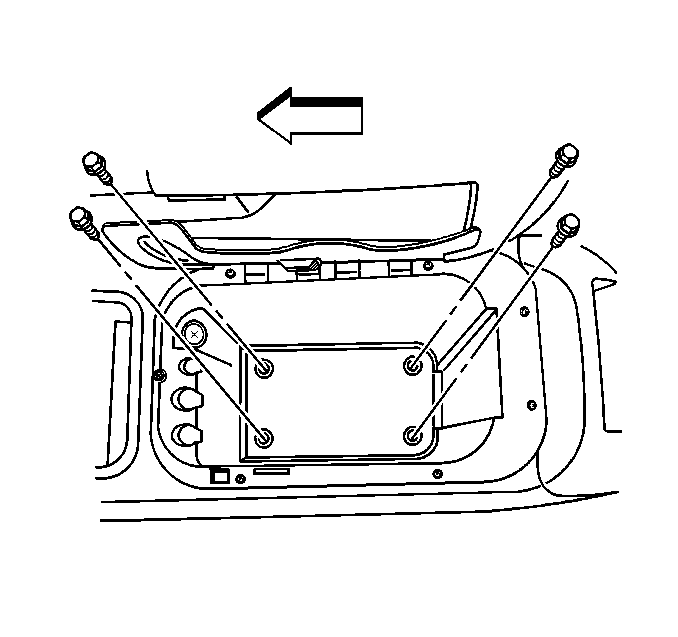
- Remove the screws connecting the floor console to the floor console bracket.
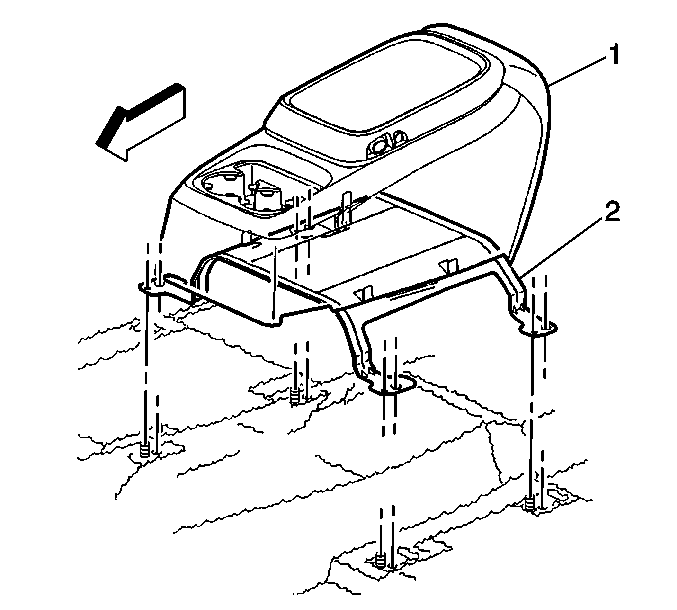
- Remove the floor console (1).
- Remove the floor console bracket (2).
Installation Procedure
- Position the floor console bracket (2) on the floor panel studs.
- Install the screws inside the center console storage compartment connecting the floor console to the floor console bracket.
- Close the console door.
- Install the front seats if necessary. Refer to Front Seat Replacement - Bucket in Seats.

Notice: Use the correct fastener in the correct location. Replacement fasteners must be the correct part number for that application. Fasteners requiring replacement or fasteners requiring the use of thread locking compound or sealant are identified in the service procedure. Do not use paints, lubricants, or corrosion inhibitors on fasteners or fastener joint surfaces unless specified. These coatings affect fastener torque and joint clamping force and may damage the fastener. Use the correct tightening sequence and specifications when installing fasteners in order to avoid damage to parts and systems.

Tighten
Tighten the screws to 2 N·m (18 lb in).
Front Floor Console Replacement Console with Extension
Removal Procedure
- Remove the front seats, if removing the floor console bracket. Refer to Front Seat Replacement - Bucket in Seats.
- Open the console door.
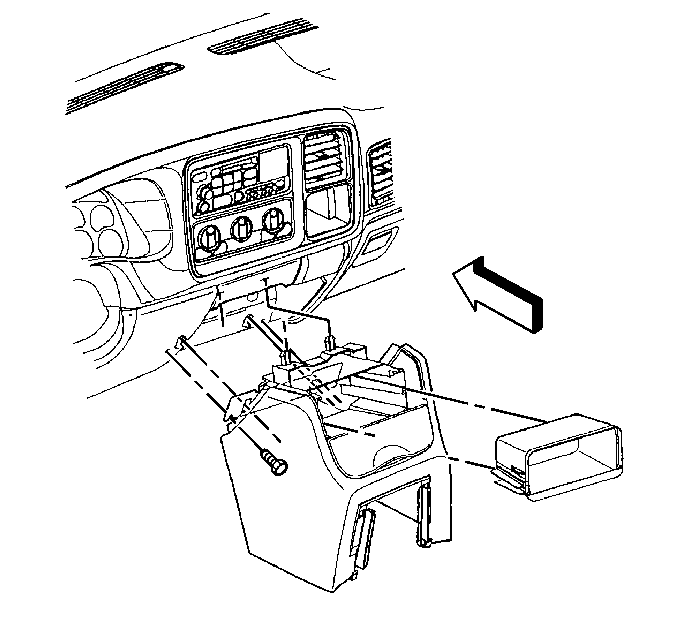
- Remove the screws connecting the floor console to the floor console bracket.
- Remove the console cupholder.
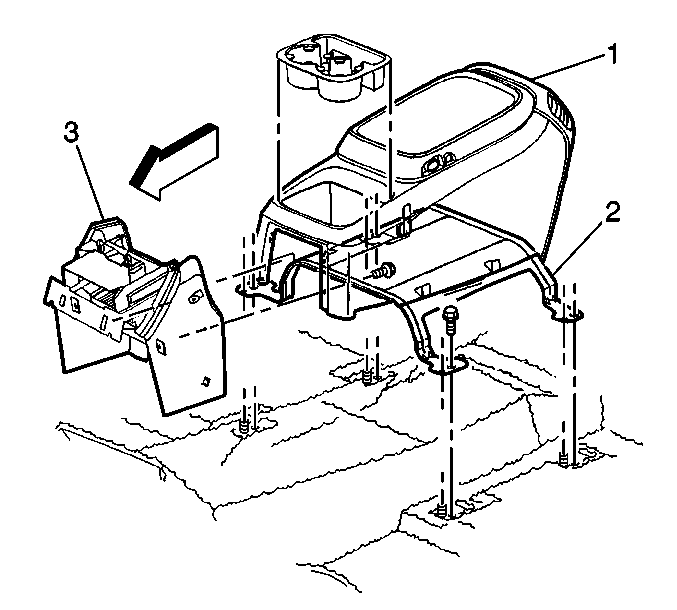
- Remove the screws connecting the floor console (1) to the console extension (3).
- Remove the floor console.
- Remove the floor console bracket (2).
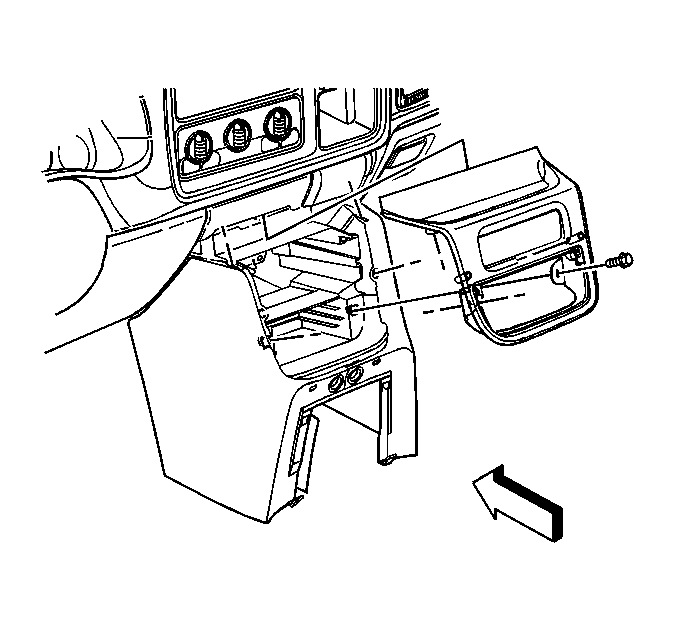
- Remove the screws securing the trim bezel to the console extension.
- Protect the console extension from damage then carefully use a small prying device to push in the tabs underneath the trim bezel securing the top of the trim bezel.
- Remove the trim bezel.
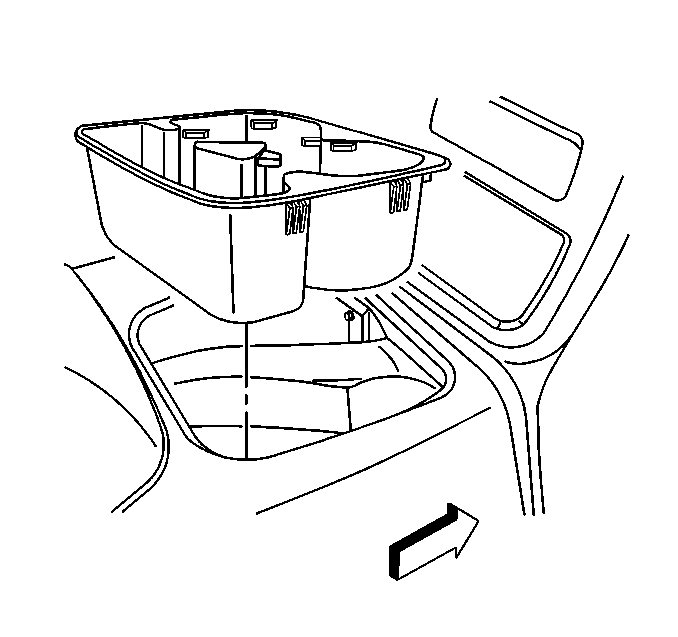
- Remove the console extension upper compartment insert.
- Remove the remote CD player, if equipped. Refer to Remote Compact Disc Player Replacement in Entertainment.
- Remove the screws connecting the console extension to the instrument panel (IP).
- Slide the extension rearward and unsnap the extension from the upper fasteners.

Important: Do not grab or pull on the CD storage door when removing the trim bezel
Installation Procedure
- Slide the extension forward and onto the upper fasteners.
- Install the screws connecting the console extension to the IP.
- Install the console extension upper compartment insert.
- Install the remote CD player, if equipped. Refer to Remote Compact Disc Player Replacement in Entertainment.
- Install the trim bezel
- Position the floor console bracket (2) on the floor panel studs.
- Position the console to the floor console (1) bracket.
- Install the screws connecting the floor console to the console extension.
- Install the cupholder.
- Install the screws inside of the floor console compartment connecting the floor console to the floor console bracket.
- Close the console door.
- Install the front seats, if necessary. Refer to Front Seat Replacement - Bucket in Seats.

Notice: Use the correct fastener in the correct location. Replacement fasteners must be the correct part number for that application. Fasteners requiring replacement or fasteners requiring the use of thread locking compound or sealant are identified in the service procedure. Do not use paints, lubricants, or corrosion inhibitors on fasteners or fastener joint surfaces unless specified. These coatings affect fastener torque and joint clamping force and may damage the fastener. Use the correct tightening sequence and specifications when installing fasteners in order to avoid damage to parts and systems.
Tighten
Tighten the screws to 2 N·m (18 lb in).
Tighten
Tighten the screws to 2 N·m (18 lb in).

Tighten
Tighten the screws to 2 N·m (18 lb in).


Tighten
Tighten the floor console storage compartment screws to 2 N·m
(18 lb in).
