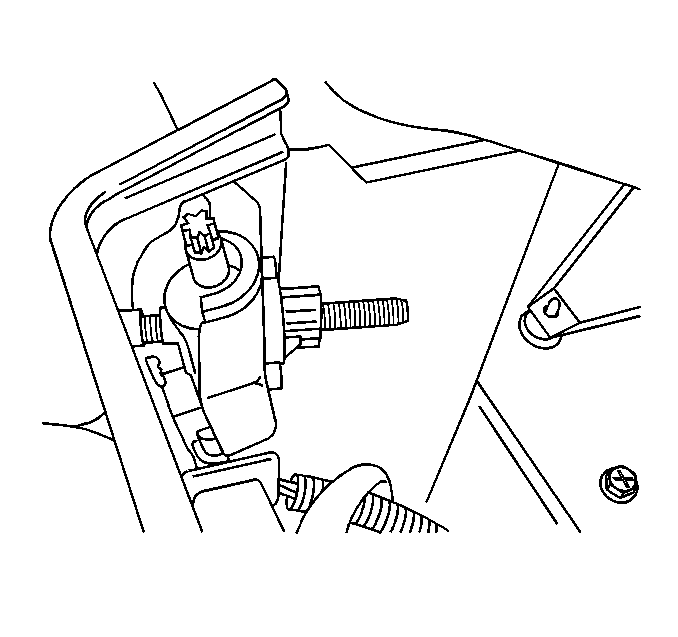
The adjusting screws control the horizontal and the vertical aiming of each headlamp assembly.
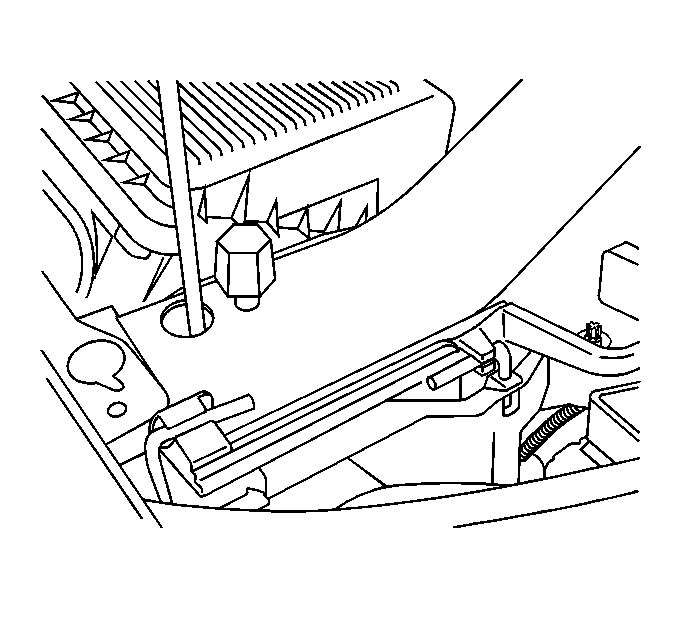
Both adjusting screws are in the radiator support. The location is not readily visible.
The 2 holes in the radiator support for each headlamp assembly provide access to the recessed adjusting screws. Using a T15 TORX® head bit, turn the screws.
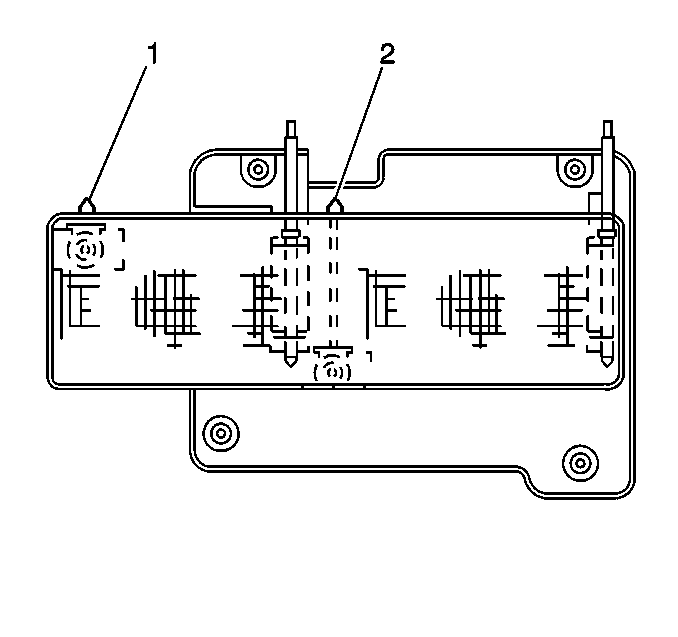
The Chevrolet headlamp adjustment numbers can be located on the lens at the bottom corner of the headlamp where the amber turn signal meets the headlamp.
The GMC headlamp adjustment numbers can be located at the upper corner of the headlamp where the amber turn signal meets the headlamp.
Verify these specifications with those required by the state and/or the local authorities.
Below are 3 methods for aiming the headlamps.
Visual Headlamp Aiming Procedure
All equipment for testing the headlamps must comply with the SAE Recommended Practice for Headlamp Inspection Equipment.
If you use a headlamp testing machine, ensure the machine gives results equivalent to the those obtained using the screen procedure described below. Ensure the machine is in good repair. Verify the machine is in adjustment. Use the machine in accordance with the manufacturer's instructions. The machine using a photoelectric cell or cells in determining aim should also include a visual screen. Project the beam pattern upon the screen in proportion to the pattern's appearance and aim at 7.62 m (25 ft). The screen should be visible to the technician adjusting the headlamps. The screen should have horizontal and vertical reference lines that permit visual appraisal of the headlamp beam.
Headlamp Aiming Using the Screen Method
Location
The area should be darkened and large enough for the vehicle and an additional 7.63 m (25 ft) measured from the face of the headlamps to the front of the screen. The floor on which the vehicle rests must be even with the bottom of the screen. Compensate for an uneven floor, if necessary.
Aiming Screen
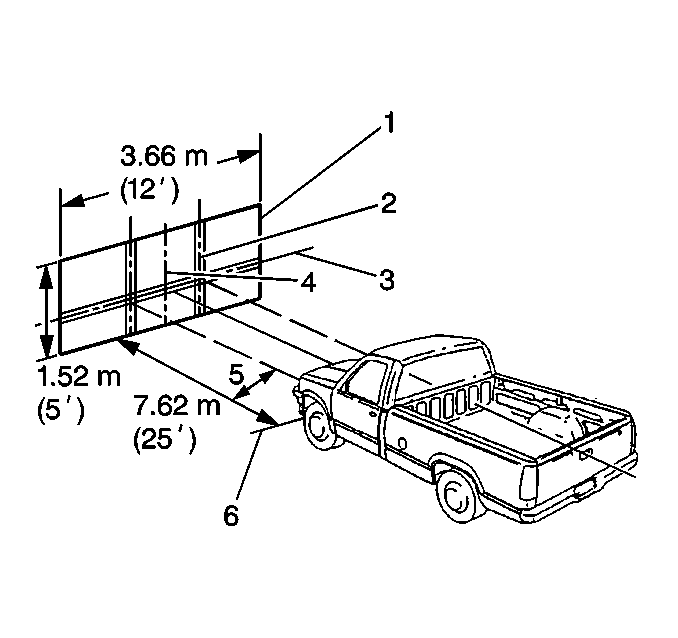
If in use, the screen should be at least 1.52 m (5 ft) in height by 3.66 m (12 ft) in width. The finish should be matte white. Keep the surface well shaded from extraneous light. Keep the screen in proper adjustment with the floor. The screen should be moveable in order to keep the screen in alignment parallel with the rear axle of the vehicle. Position the screen so that a horizontal line (3) drawn perpendicular to the centerline of the screen passes an equal distance midway between the headlamps. Provide the screen with a vertical centerline (4), 2 laterally adjustable vertical tapes (2), and one vertically adjustable horizontal tape (3). Provide the screen with a vertical centerline (4), 2 laterally adjustable vertical tapes (2), and one vertically adjustable horizontal tape (3). If a regular, commercial aiming screen is not available, the screen may consist of a wall having a clear, uninterrupted area of at least 1.83 m (6 ft) height by 3.66 m (25 ft) width. The surface should be finished with a washable, no-gloss white paint. After establishing the aiming screen, paint or tape a reference line (6) on the floor 7.62 m (25 ft) from the screen. Park the vehicle with the front of the headlamps directly over this reference line.
Headlamp Aiming Procedure
- Park the vehicle square with the screen (1).
- Ensure all of the components are in place, if work has been completed on the vehicle.
- Ensure the vehicle is on a level surface.
- Stop all of the other work on the vehicle.
- Ensure the vehicle has ½ tank of fuel or less.
- Close the vehicle's doors.
- Rock the sideways vehicle.
- Align the centerline of the vehicle with the centerline (4) of the aiming screen by completing the following steps:
- Adjust the vertical tapes (2) on the screen in order to match the vertical centerline of each low beam lamp.
- Measure the distance from the centerline of the vehicle to the centerline of a low beam lamp.
- Adjust the horizontal tapes (3) on the screen in order to match the horizontal centerline of each low beam lamp.
- Measure the height (5) from the floor to the center of a low beam.
- Illuminate the low beam lamps.
- Observe the left and top edges of the high intensity zone on the screen.
- Adjust the headlamps in order to accomplish the following results:
Park the vehicle with the headlamps directly over the reference line (6).
| 8.1. | Mark the vertical center of the rear and the front windows with tape. |
| 8.2. | Use these lines as sight lines in order to match the centerline of the vehicle with the screen. |
| • | The top edge of the center of intensity on the screen for the low beam is less than 101.6 mm (4 in) above or below the cross section of the headlamp centerlines. |
| • | The left edge of the center of intensity on the screen for the low beam is less than 101.6 mm (4 in) to the left or to the right of the cross section of the headlamp centerlines. |
Headlamp Aiming Alternative Procedure
Tools Required
J 25300-A Headlamp Aimer
- Prepare the vehicle.
- Ensure all of the components are in place, if other work has been completed on the vehicle.
- Park the vehicle on a level surface.
- Stop all of the other work on the vehicle.
- Ensure the vehicle has 1/2 tank of fuel or less.
- Close the doors.
- Rock the sideways vehicle.
- Ensure the headlamps are not illuminated.
- Using the J 25300-A , adjust the headlamps to the specifications required by the state and/or local authorities.
| • | Follow the instructions accompanying the tool for the use of the tool. |
| • | The kit contains special adapters for use with the composite lenses. |
