Important:
| • | Install the input gear seal after the transfer case is assembled. |
| • | Do not cock the bearing when installing. Ensure the bearing is being installed square to the bore. |
- Using a suitable bearing installer, install the rear output shaft bearing. Ensure the bearing installer is used against the outer race of the bearing.
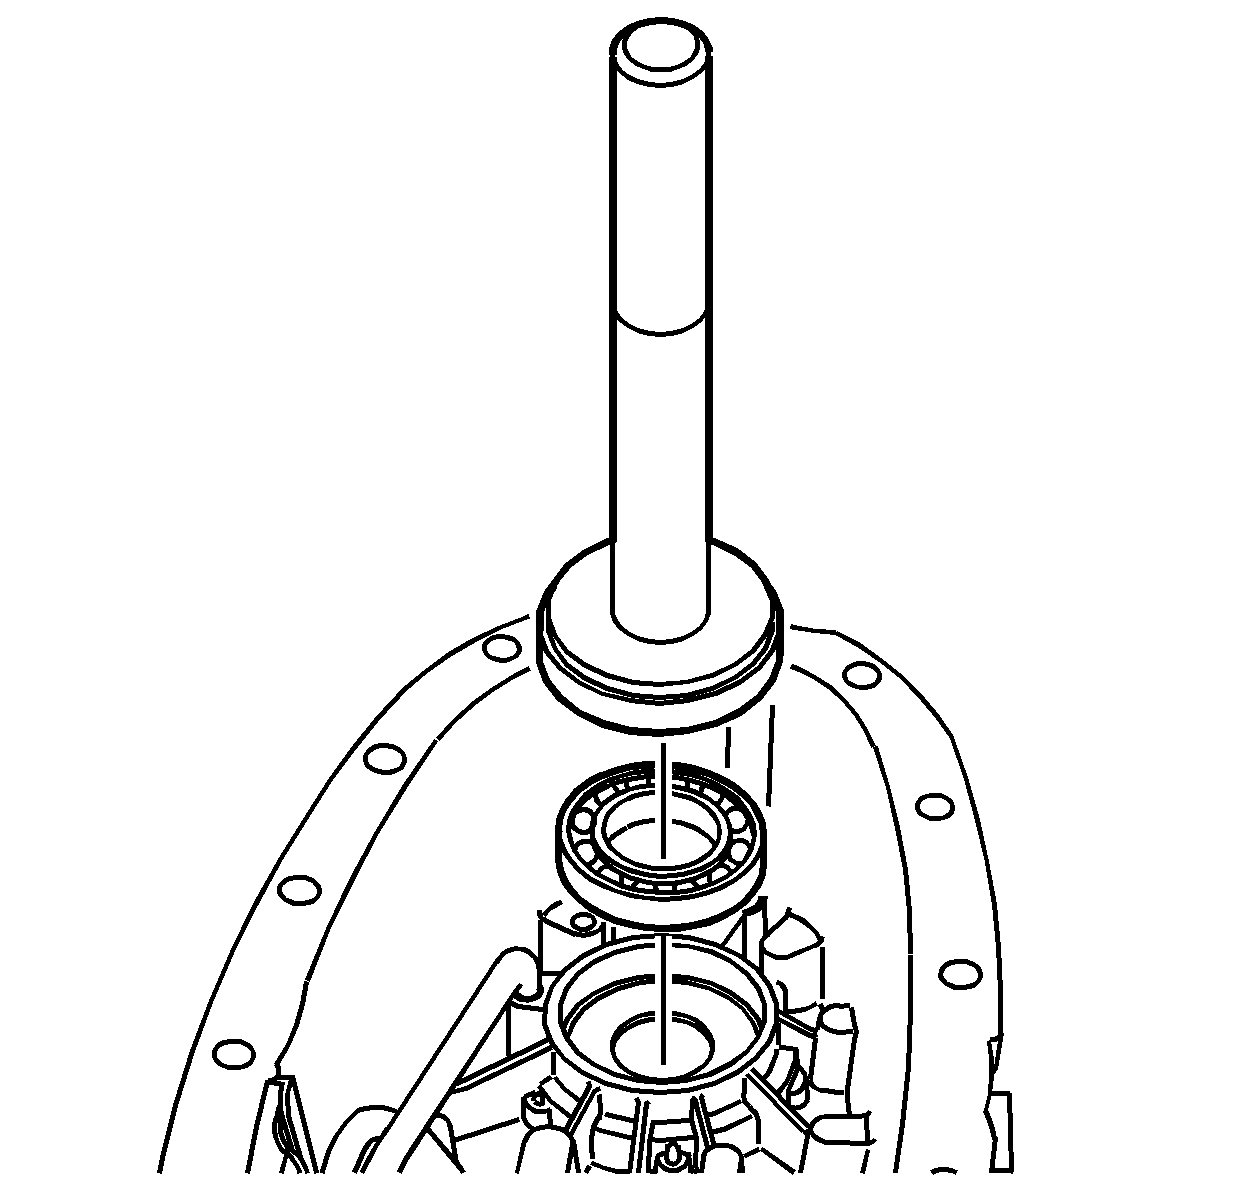
- Using the
J 36371
, install the front output shaft rear bearing into the rear case half.
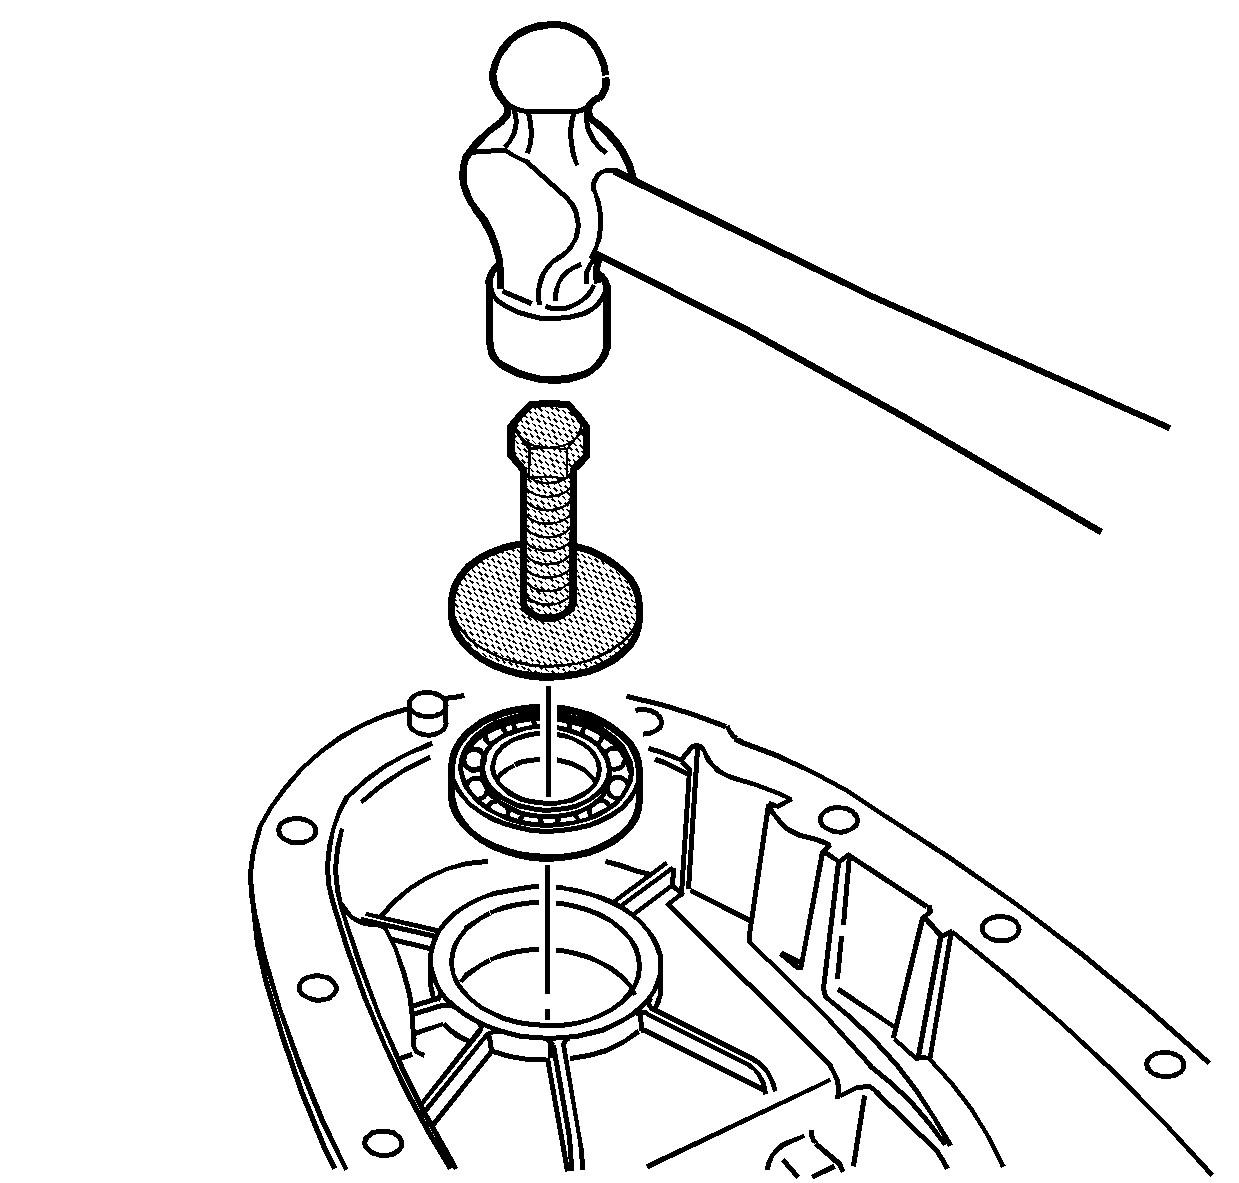
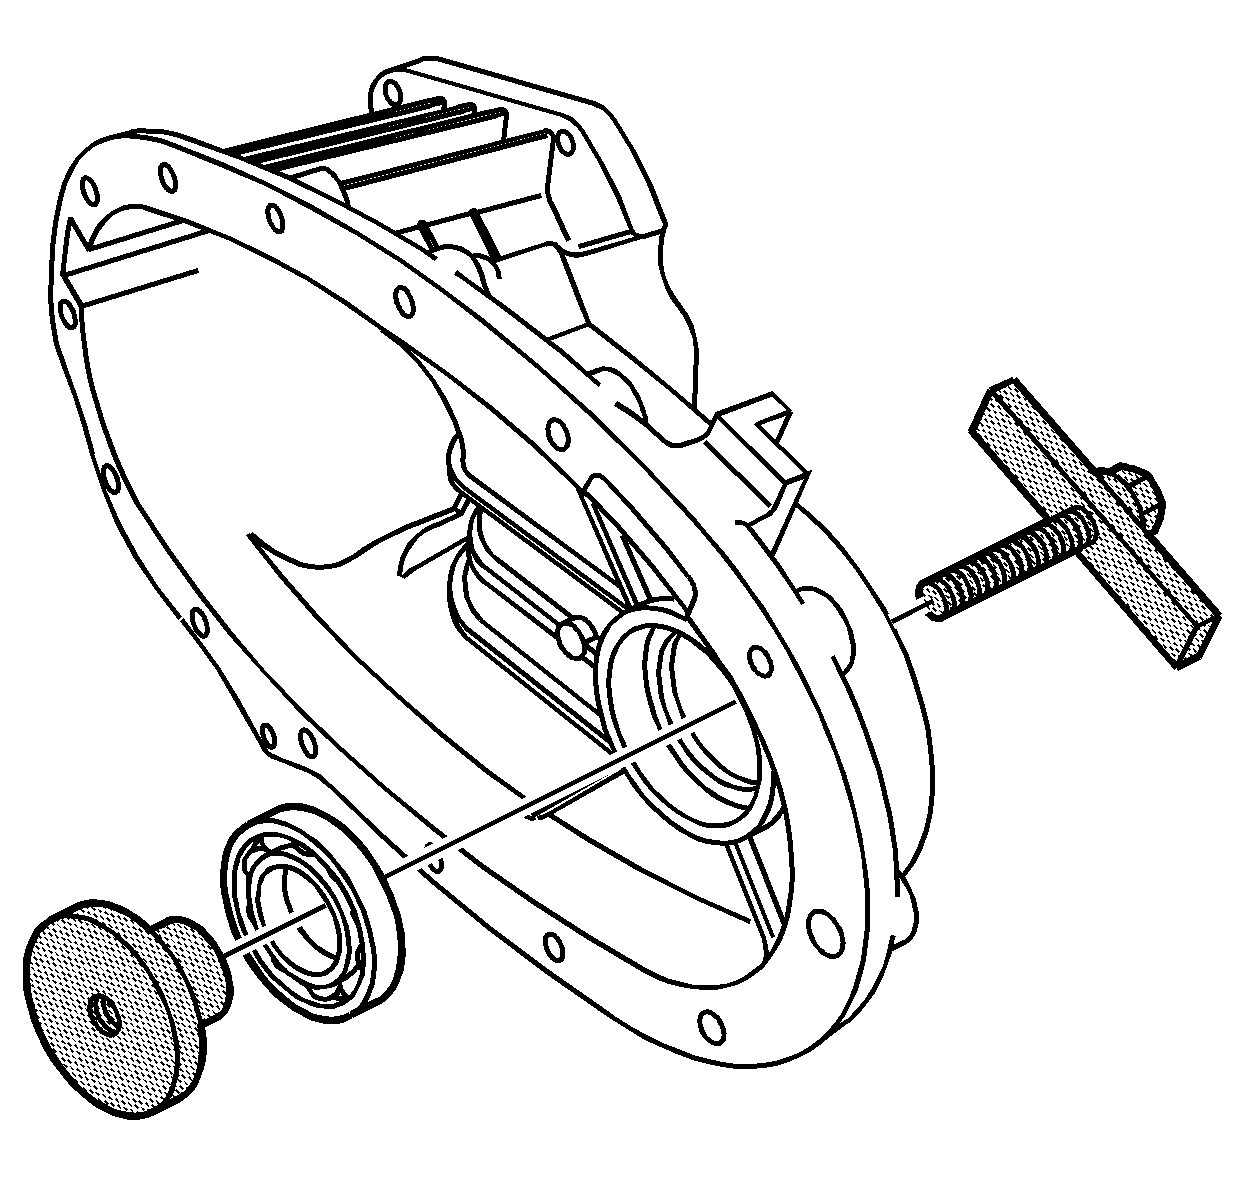
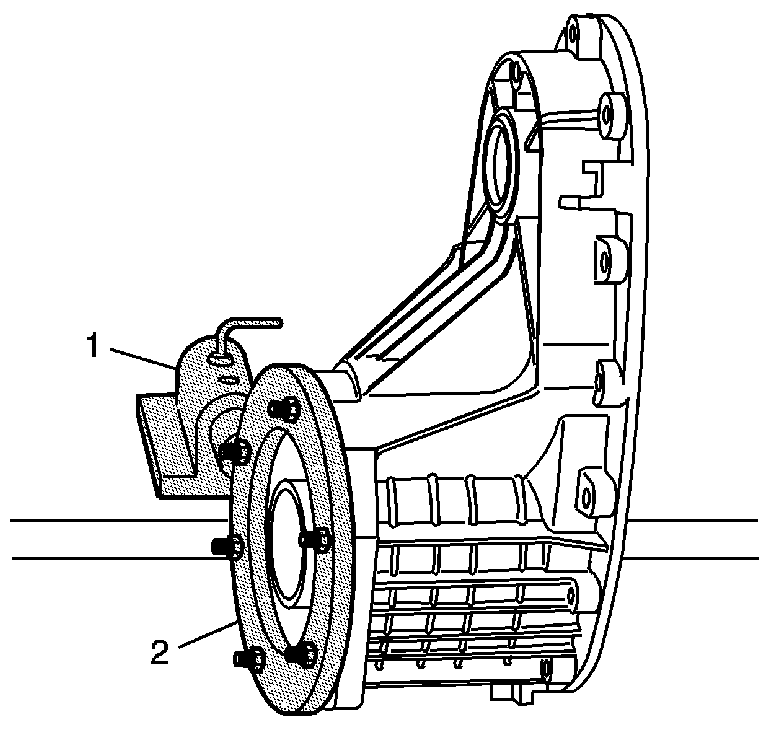
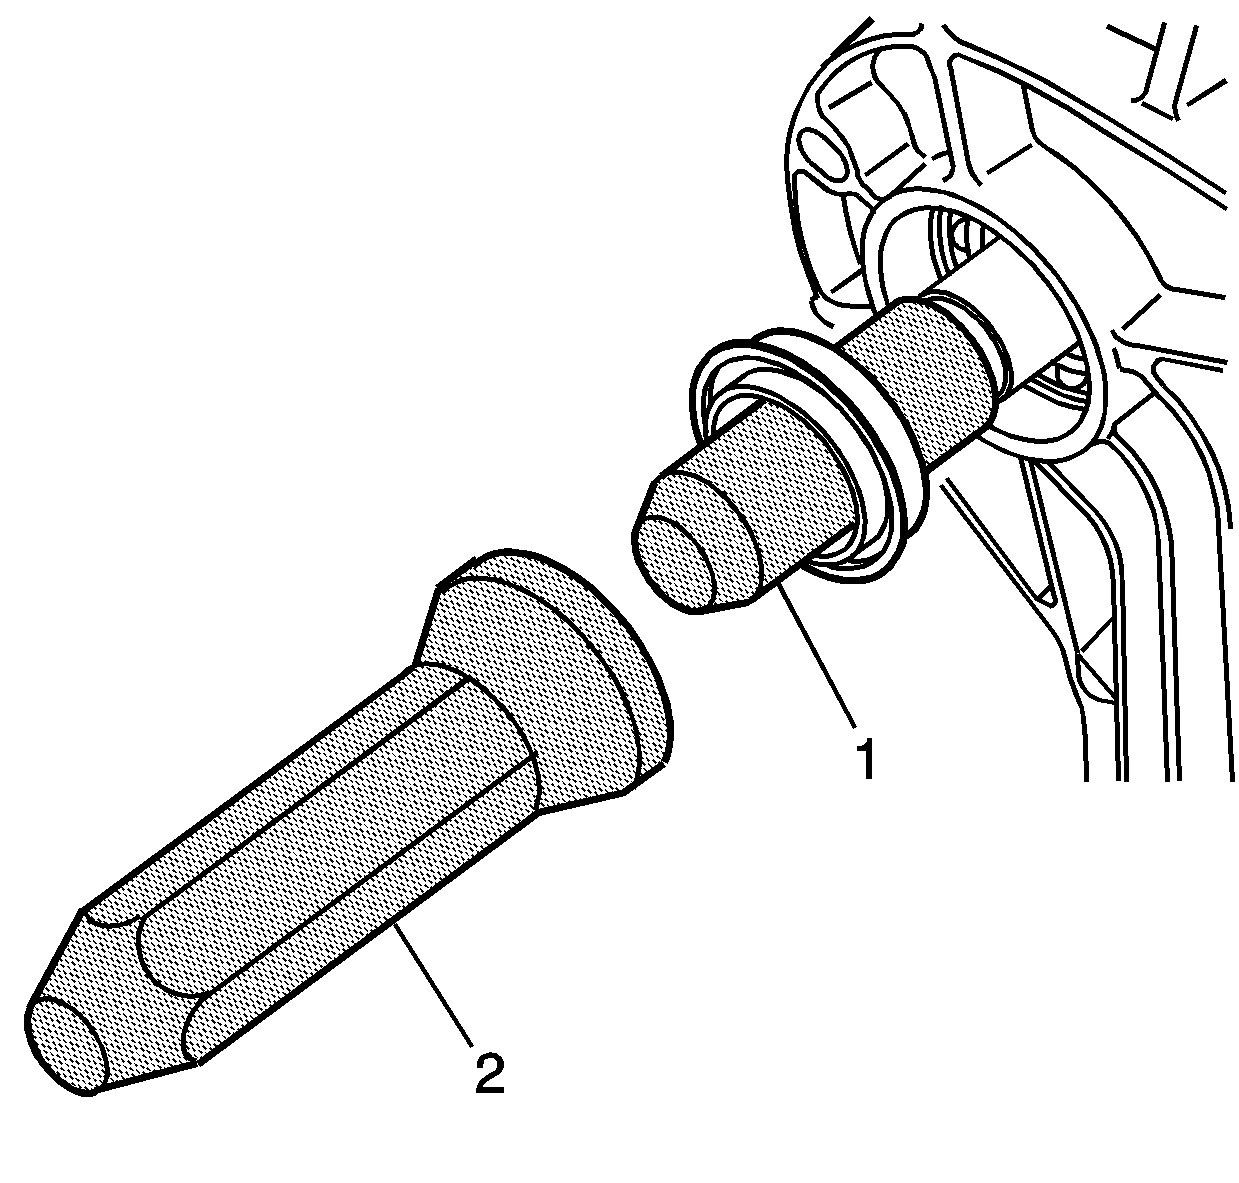
- Using the
J 8092
(1) and the
J 45239
(2), install the control actuator lever shaft bearing until it bottoms in the bore. The seal side of the bearing faces the encoder motor.
- Install the control actuator lever shaft in the rear
case half.
- Install a new control actuator lever
shaft retaining ring.

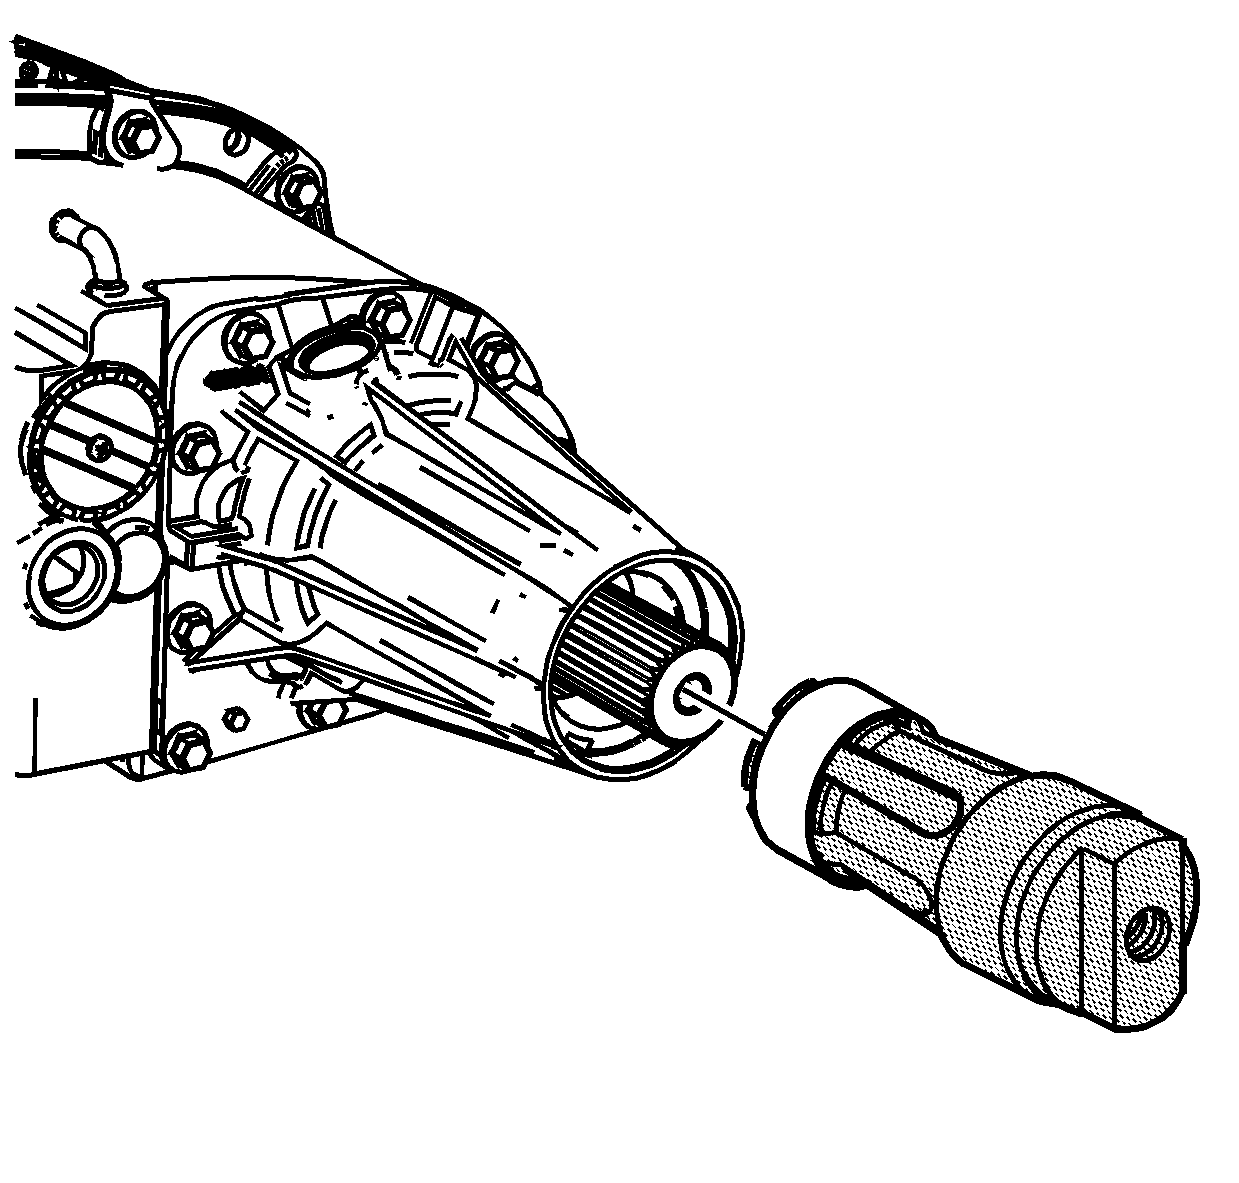
- Install the oil pump screen and oil pump hose to the oil pump suction pipe.
- Install a new O-ring seal onto the oil pump suction pipe.
- Lightly lubricate the O-ring seal with transfer case oil.
- Install the oil pump suction pipe assembly in the rear case half. Ensure the oil pump suction pipe is fully seated.
- Install the chip collector magnet in the rear case half.
- Apply a thin layer of retaining compound GM P/N 12377901 (Canadian P/N 10953504)
or equivalent to the vent, if removed.
- Tap the vent into the case. Ensure the vent is aligned in the direction shown.
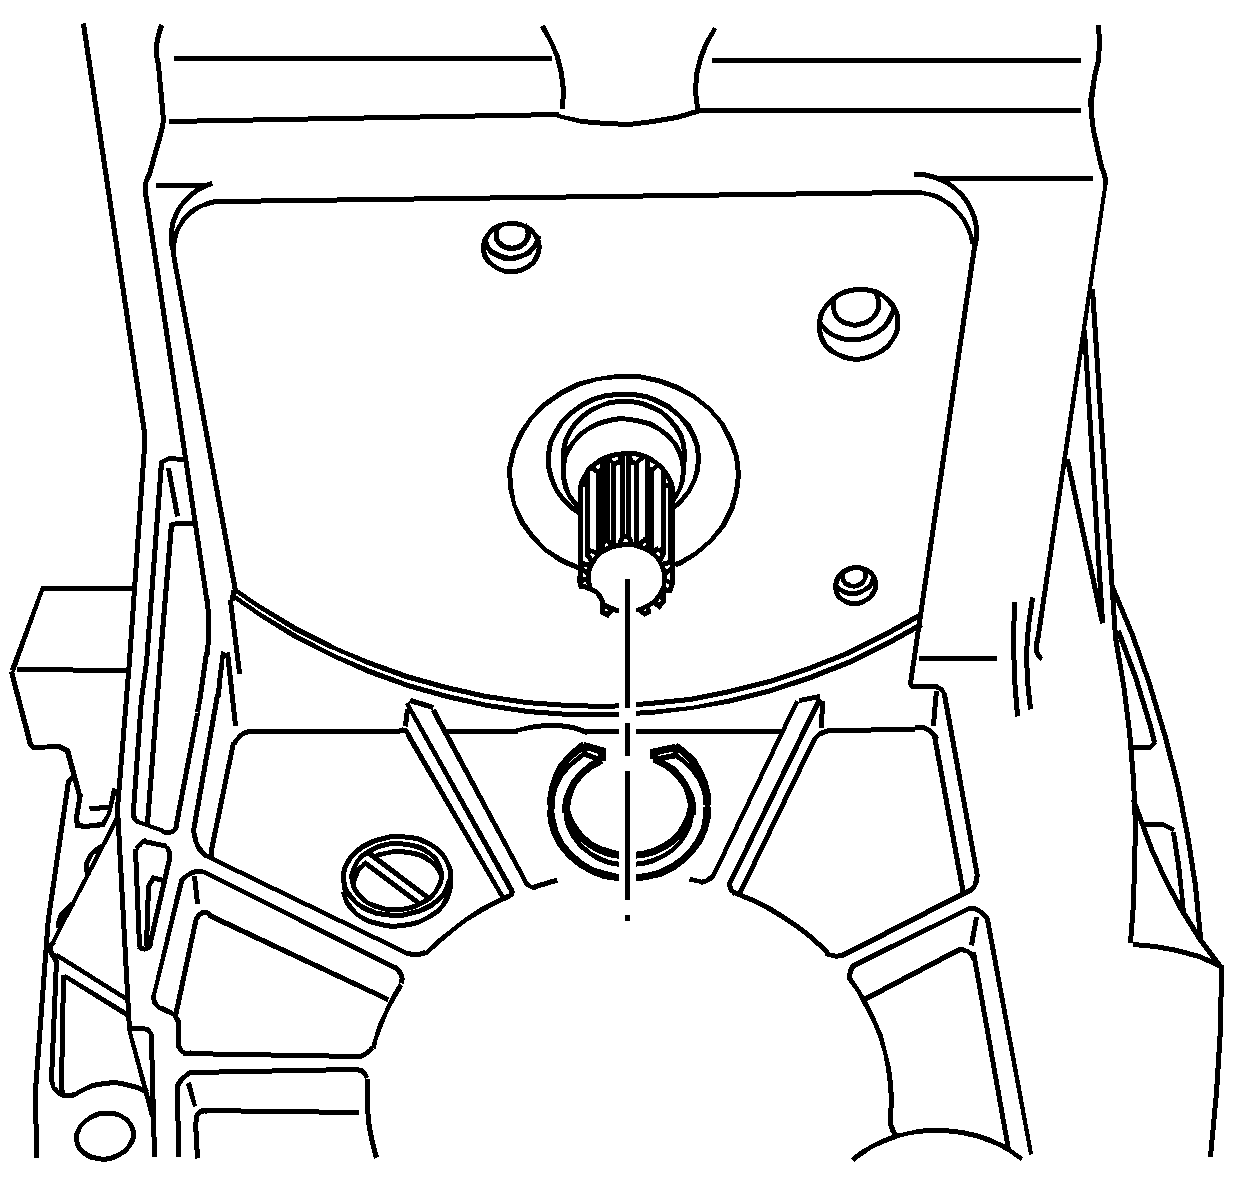
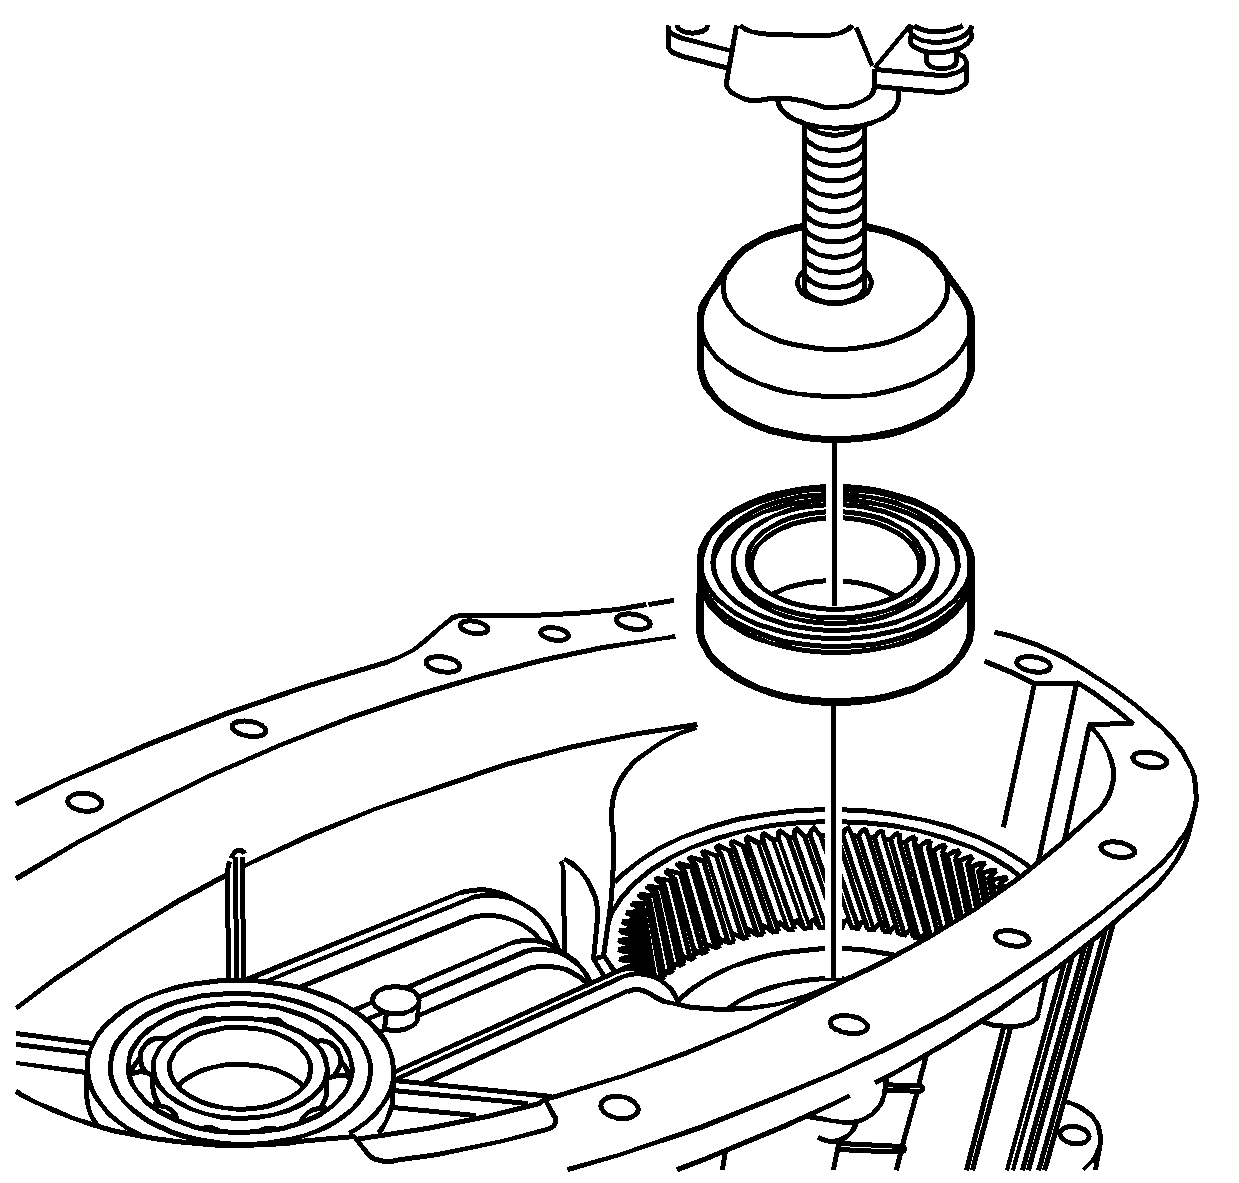
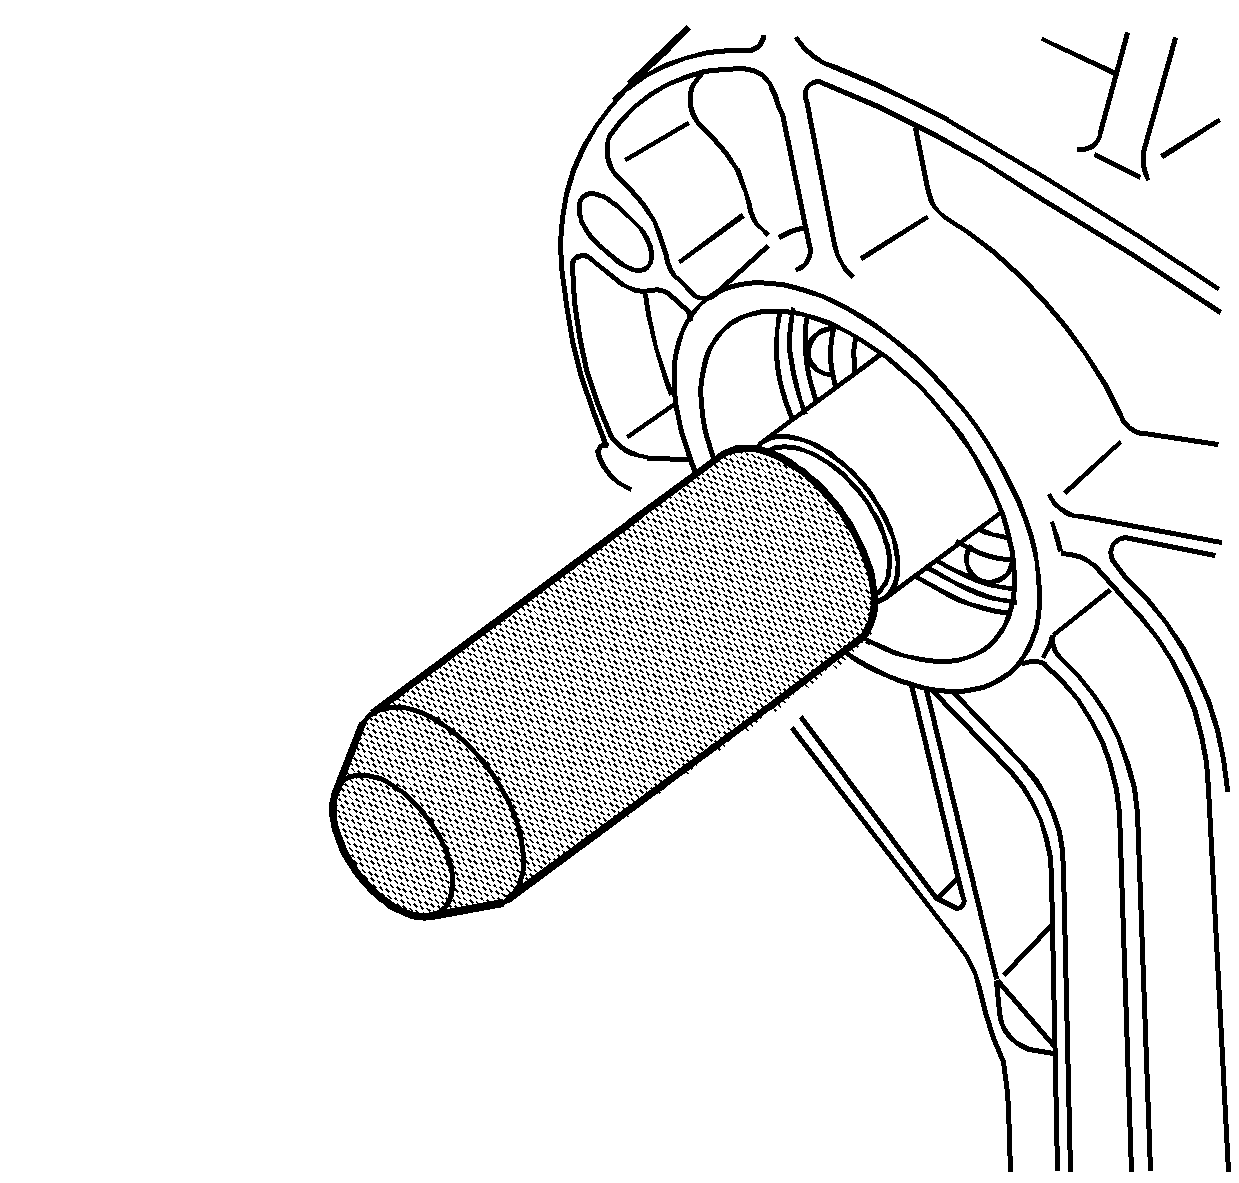
Important: Install the front output shaft seal after the transfer case is assembled.
- Using the
J 36371
, install the front output shaft front bearing into the front case.
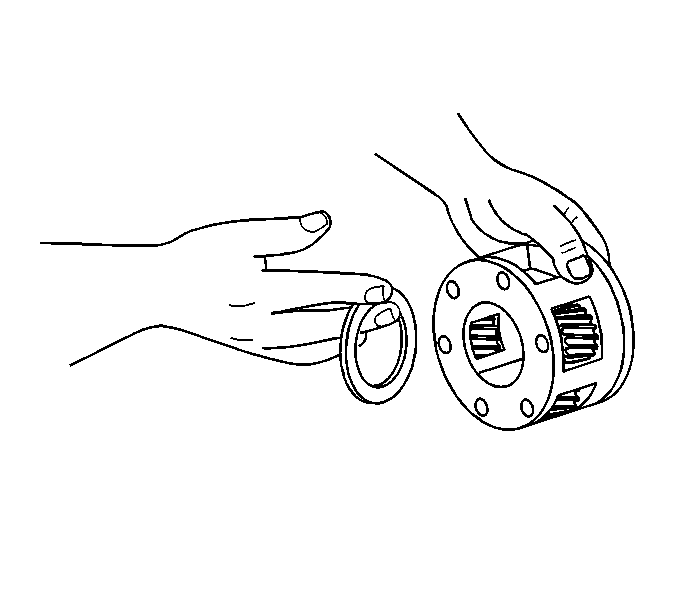
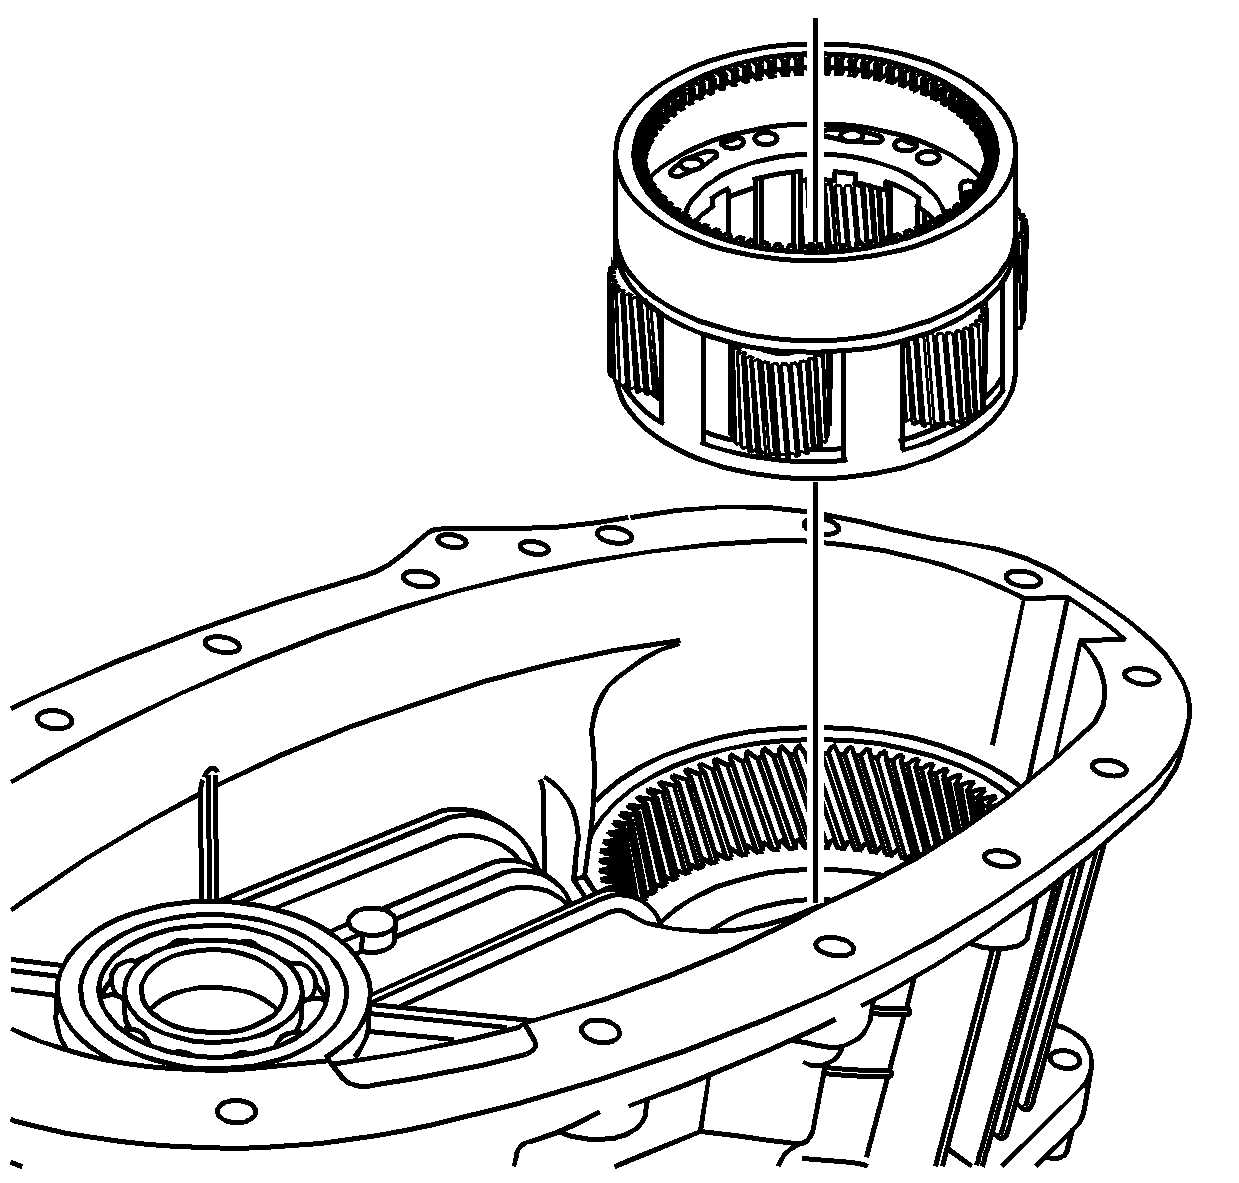
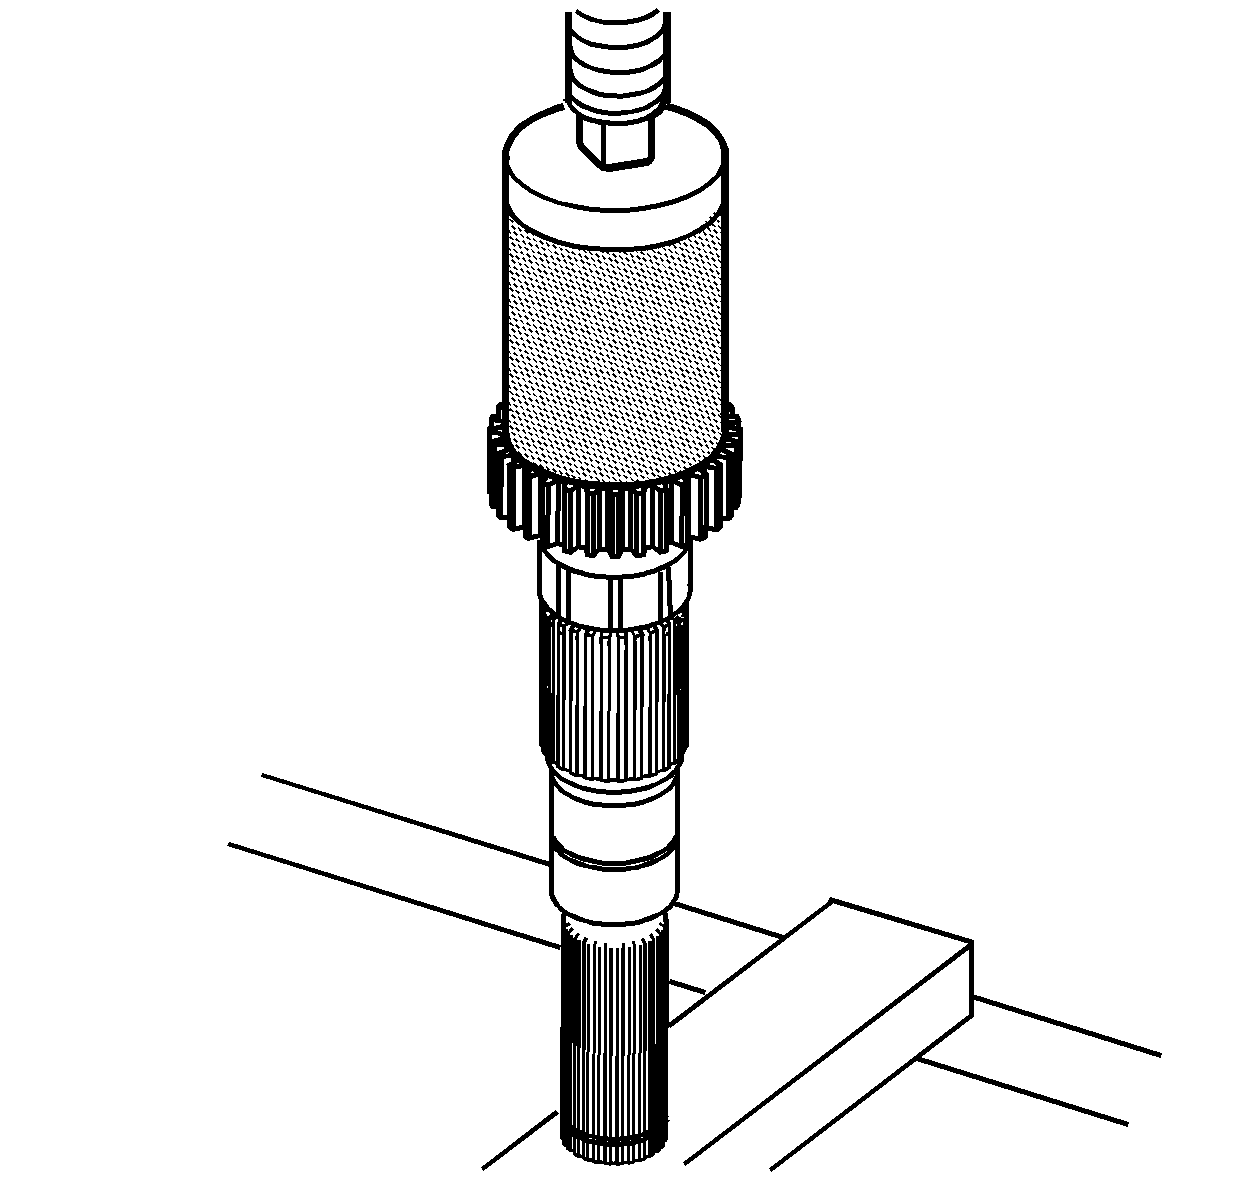
- Using a press, install the input gear bearing into the front case.
| • | Ensure the press plates fit properly on the case. |
| • | Use a suitable press tool that fits to the bearing outer race. |
Important: Apply
J 36850
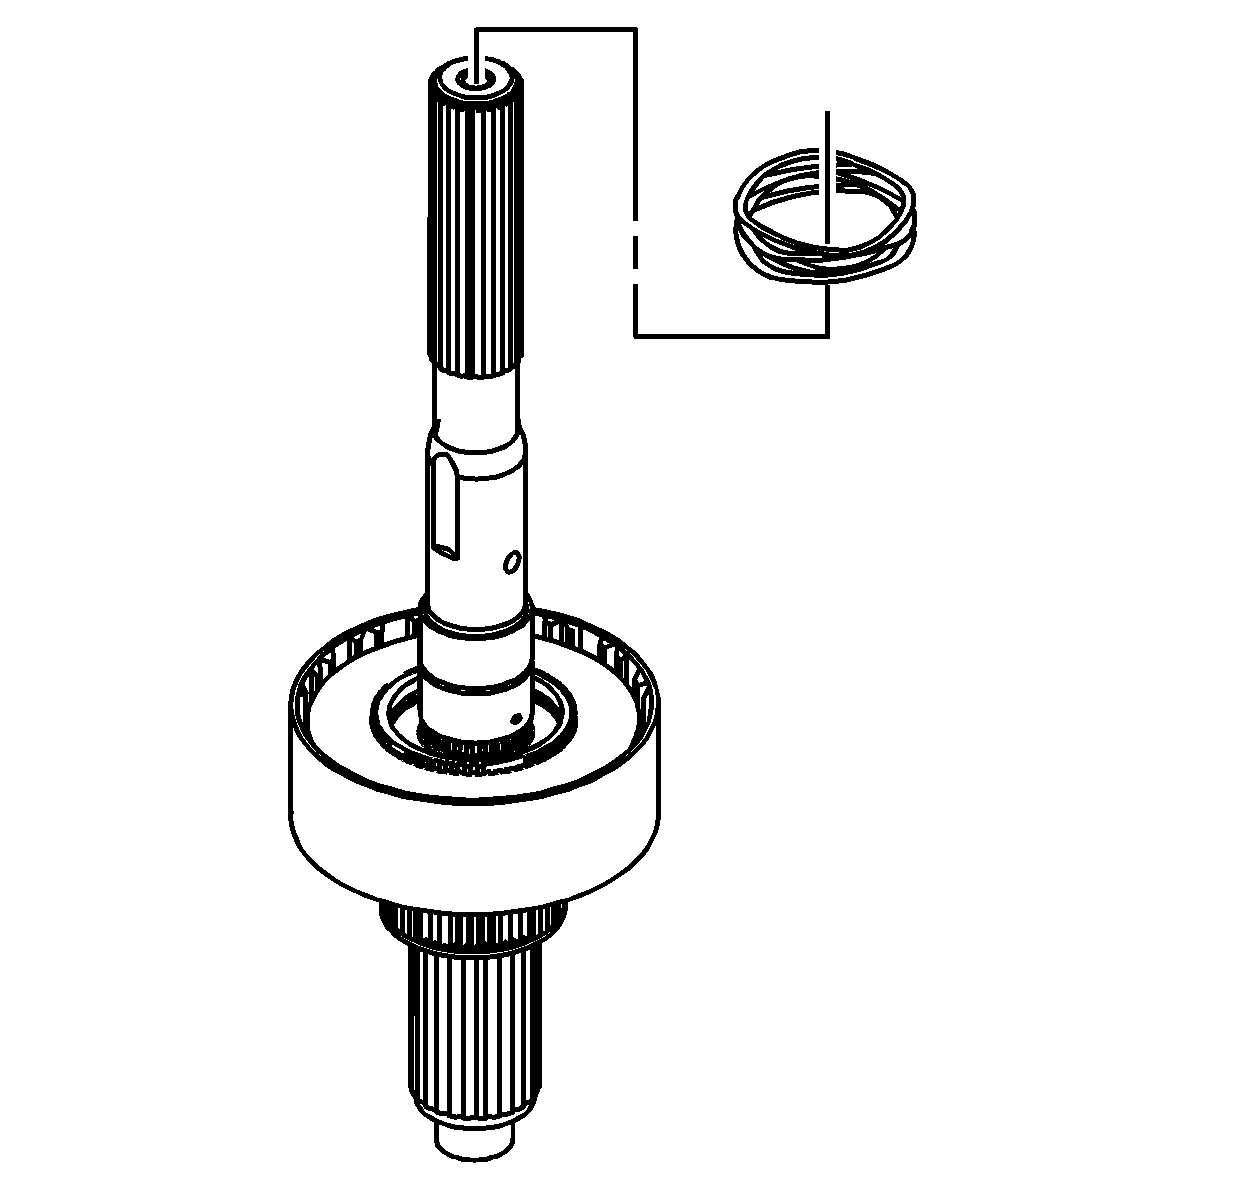
to the thrust washer in order to hold the thrust washer on the planetary gear assembly.
- Apply a layer of the
J 36850
on the large diameter thrust washer.
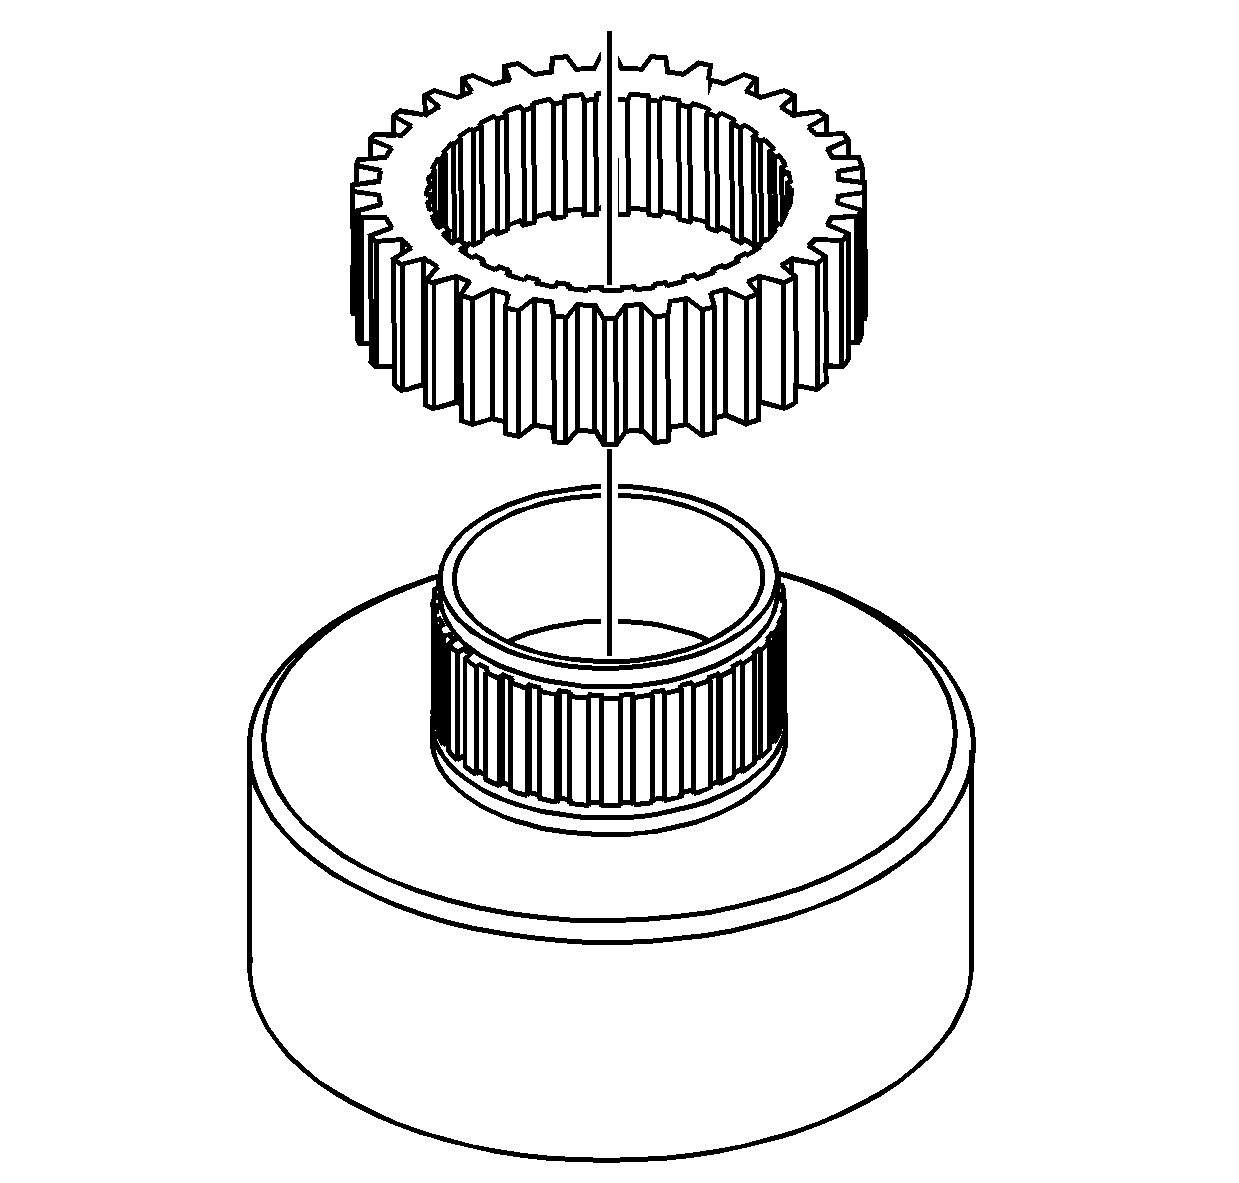
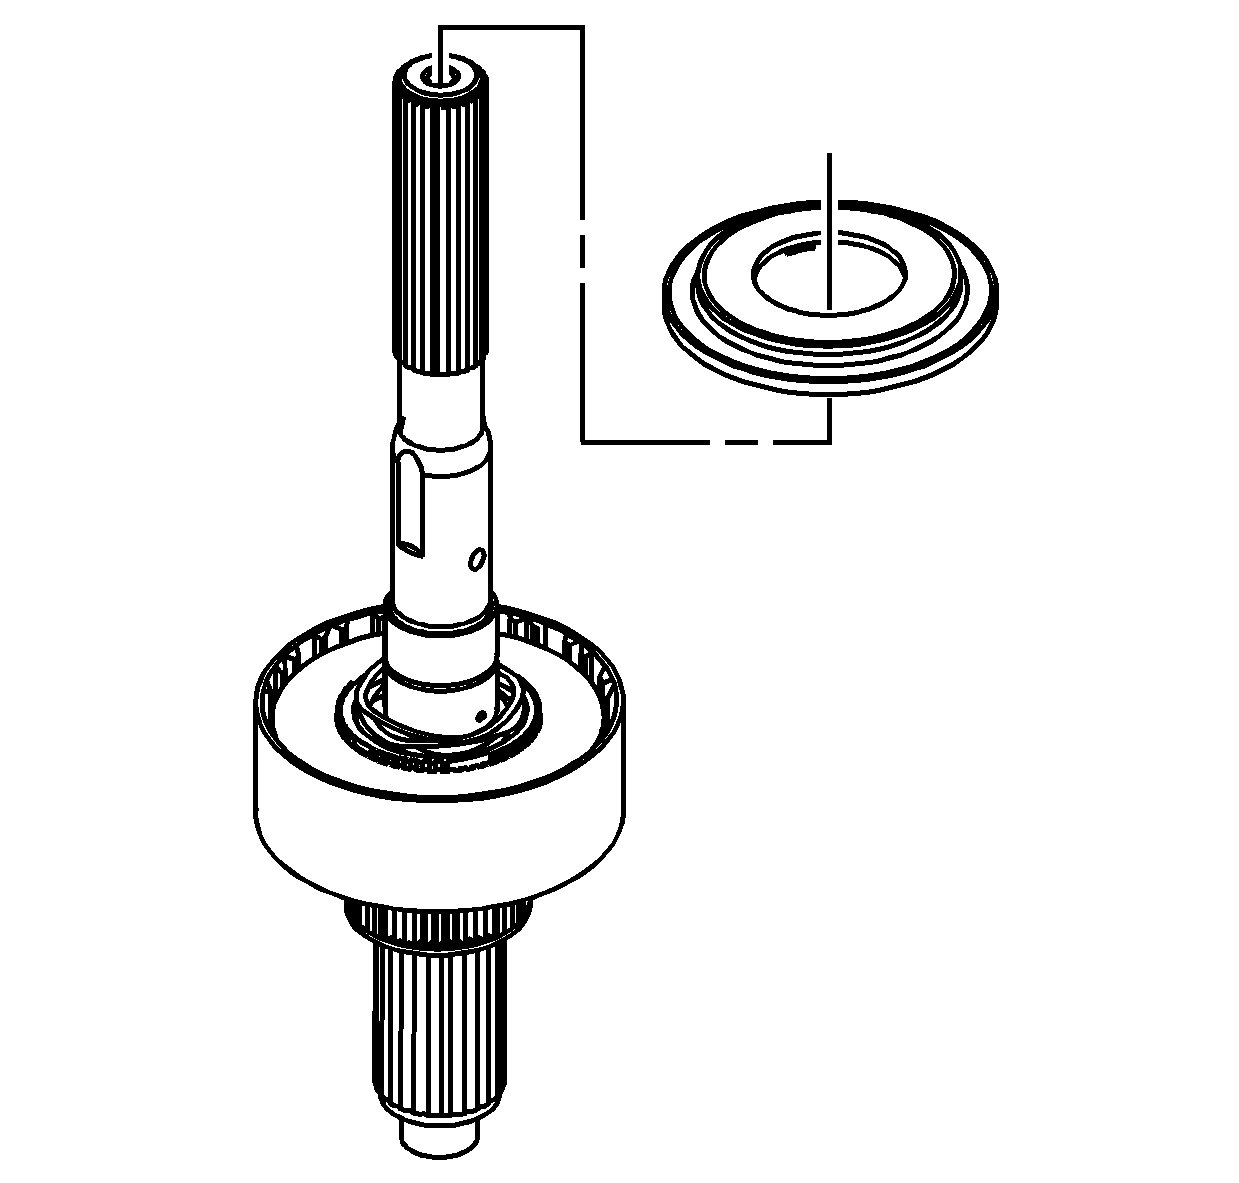
- Install the large diameter thrust washer on the planetary gear assembly.
- Install the planetary gear assembly into the front case. Rotate the planetary
gears to align with the annulus gear.
- Ensure the large diameter thrust washer is aligned to the input gear bearing race.
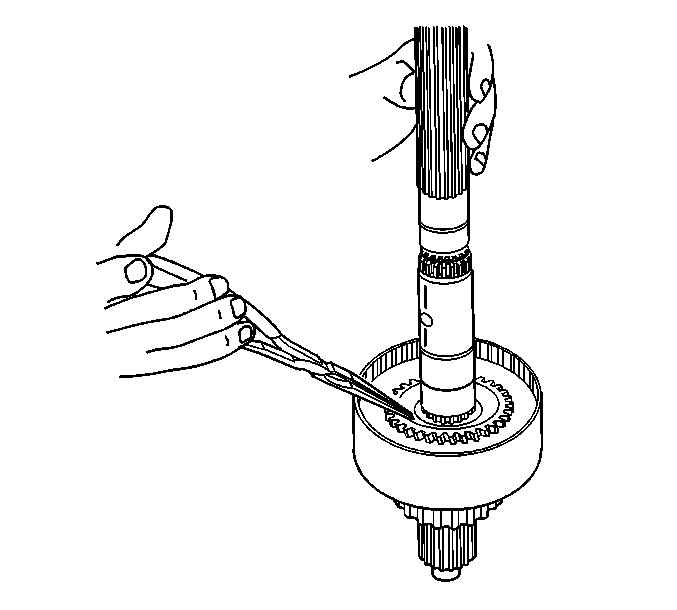
- If removed, lightly lubricate the input gear bore seal with transfer case fluid.
Important: The bore seal installation depth should not block the oil gallery hole in the input gear. If installed too far, the transmission output shaft may contact the bore seal.
- Install a new input gear bore seal into the input gear. Push the bore seal into place by hand until the seal is just past the oil gallery hole in the input gear. Ensure the bore seal is square in the bore.

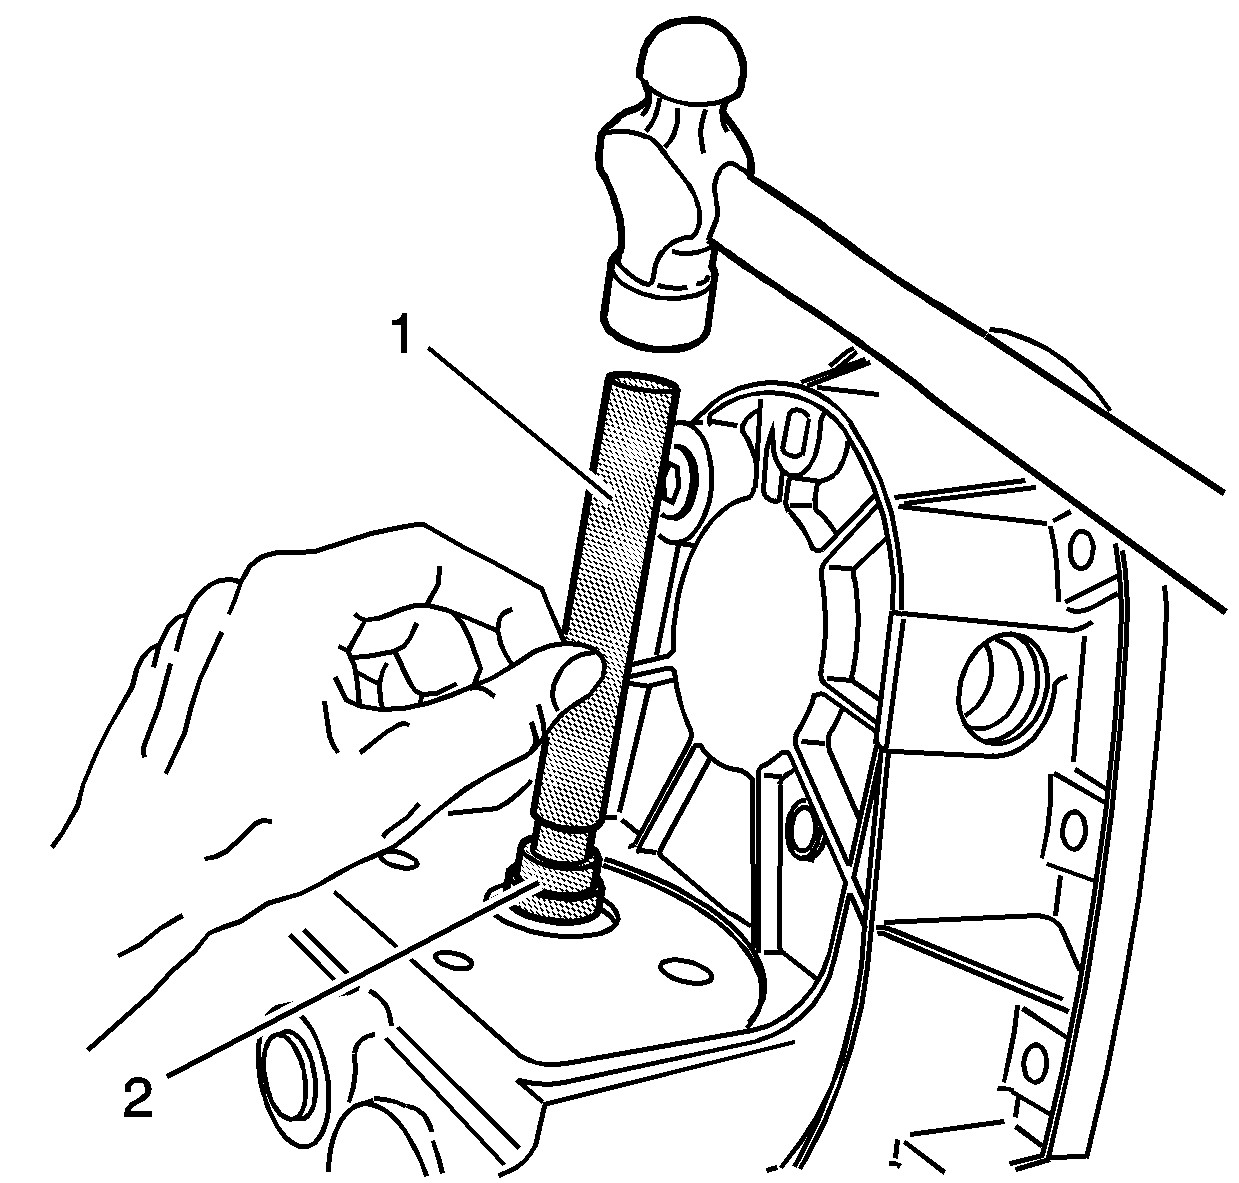
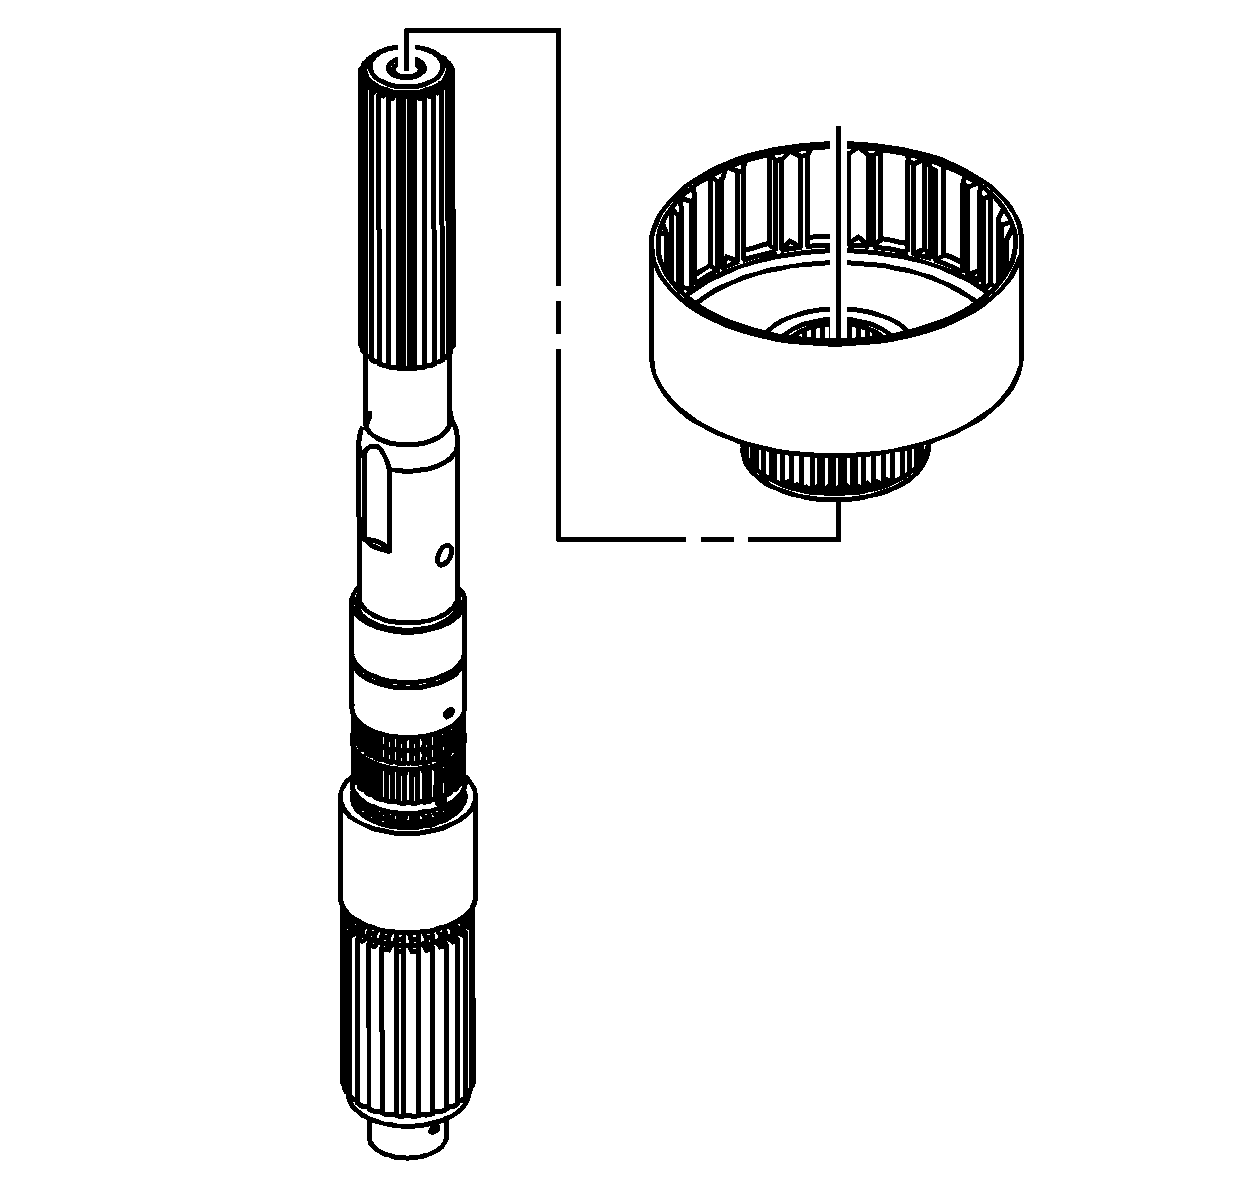
- If removed, install the input gear thrust bearing into
the input gear using the
J 8092
(1) and the
J 45238
(2).
Important: Apply
J 36850
to the thrust washer in order to hold the thrust washer on the input gear.
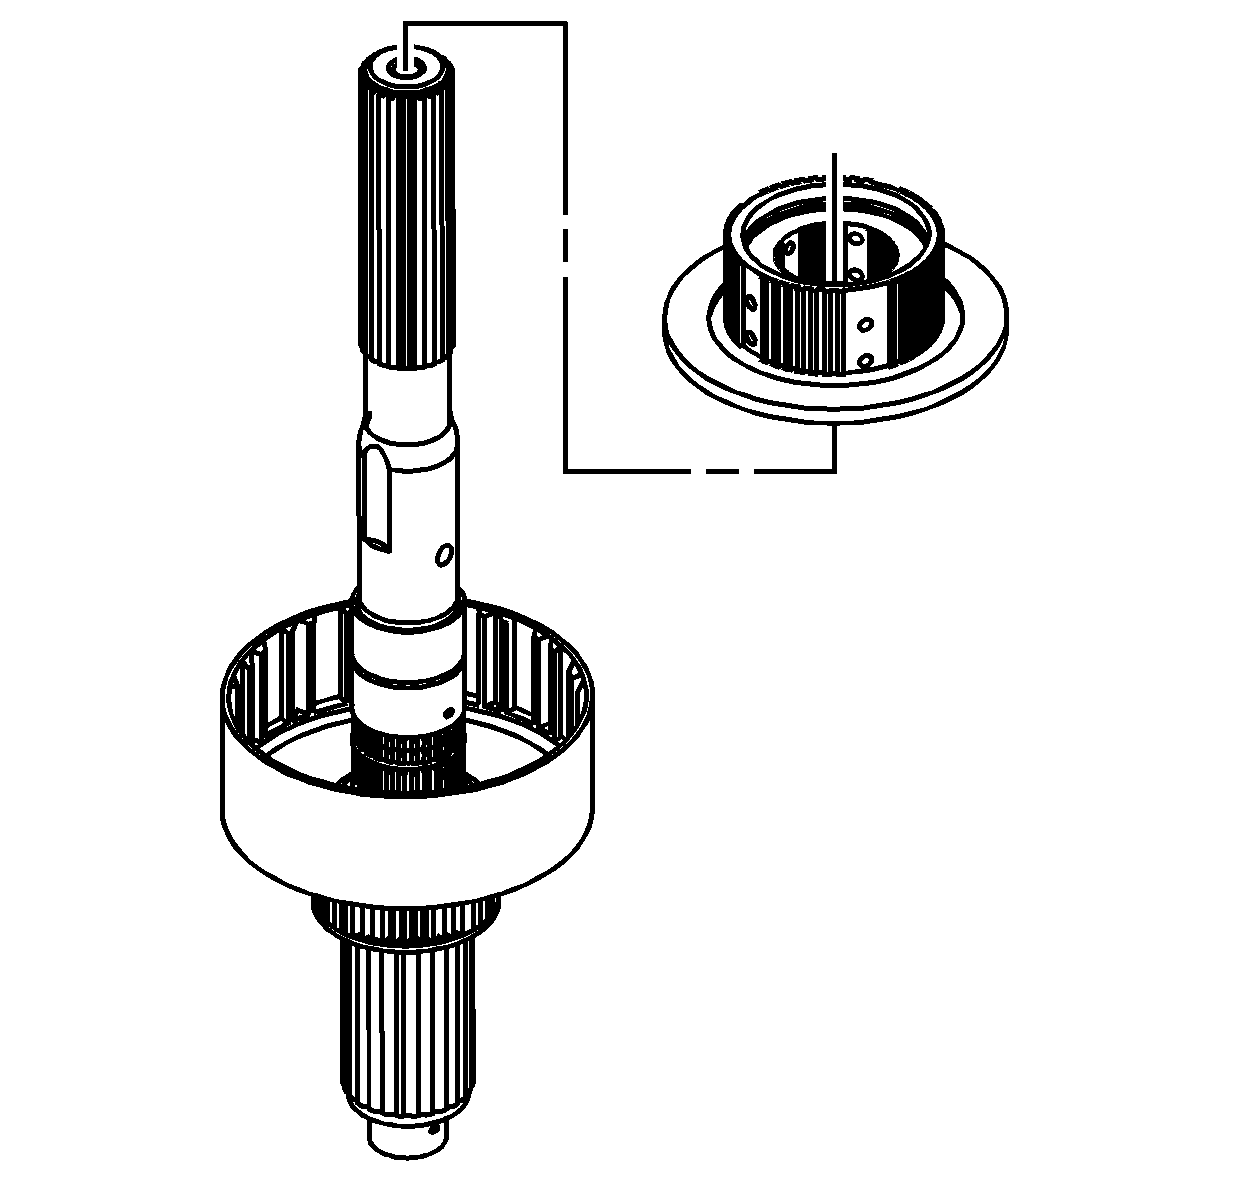
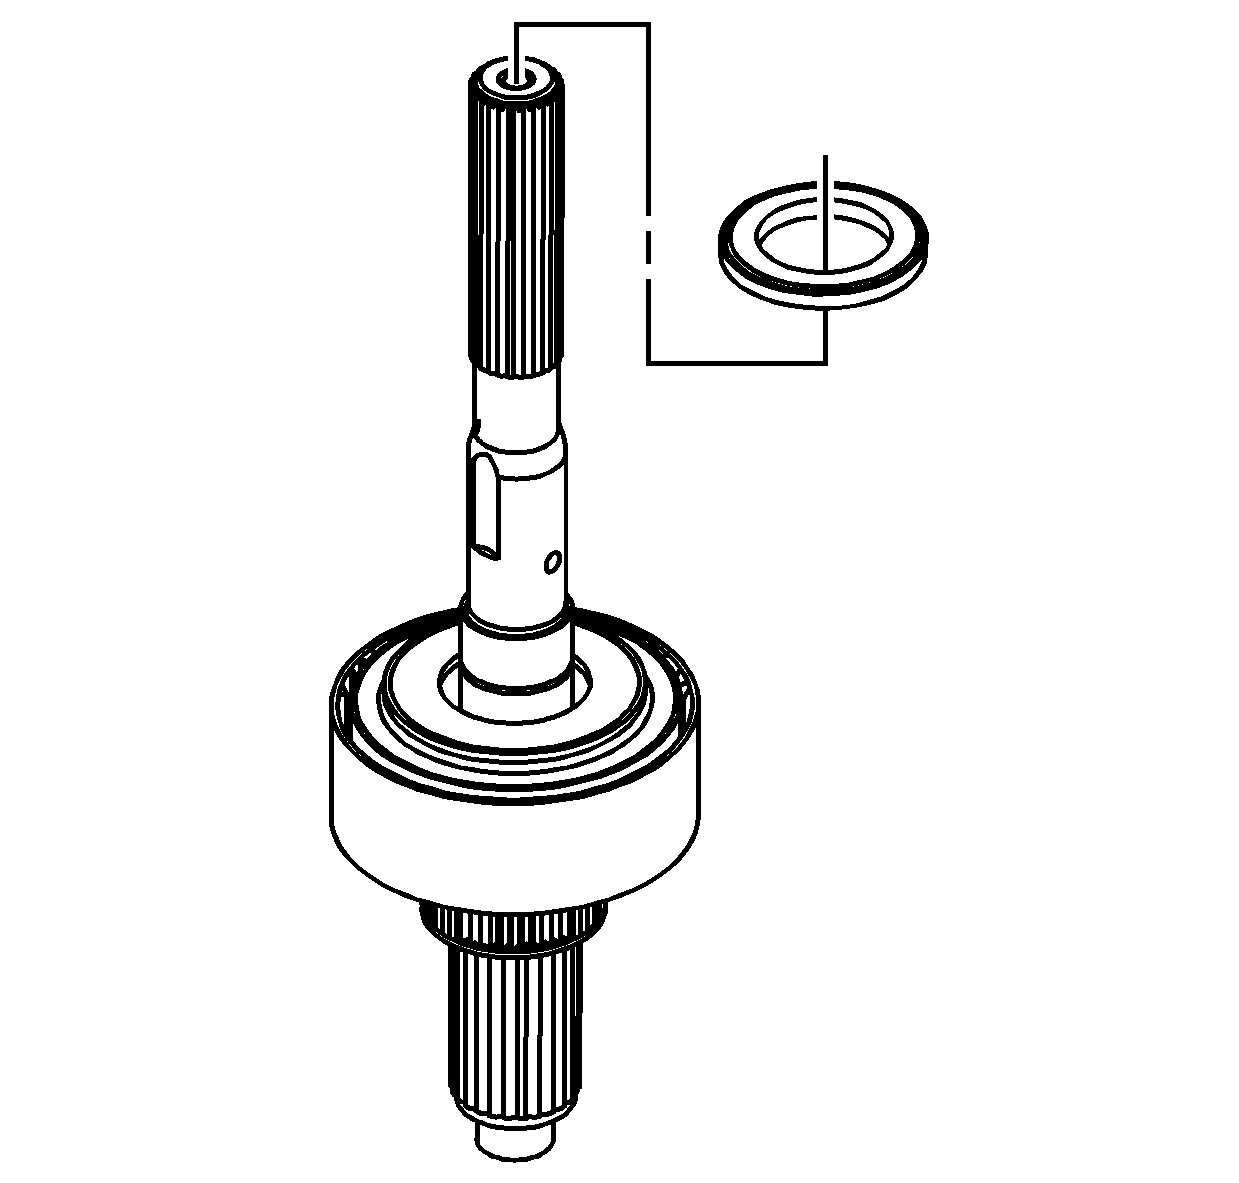
- Apply a layer of
J 36850
onto the small diameter thrust washer.
- Install the small diameter thrust washer onto the input gear.

- Position the input gear in the planetary gear assembly.
| • | Ensure the thrust washers are in the correct position. |
| • | Ensure the input gear and the planetary gears are correctly meshed. |

- Using a press, press the input gear assembly into the input gear bearing.
| 25.1. | Support the front case half on press plates to allow the input gear to protrude. |
| 25.2. | Support the inner race of the input gear bearing. |
| 25.3. | Use a suitable press plate on the end of the input gear. |
| 25.4. | Press on the input gear until it is fully seated against the input gear bearing. |
- Inspect for proper assembly by turning the input gear. The input gear and planetary gears should turn without roughness or binding. If binding or roughness is present, inspect for debris in the planetary gears or for improper assembly.
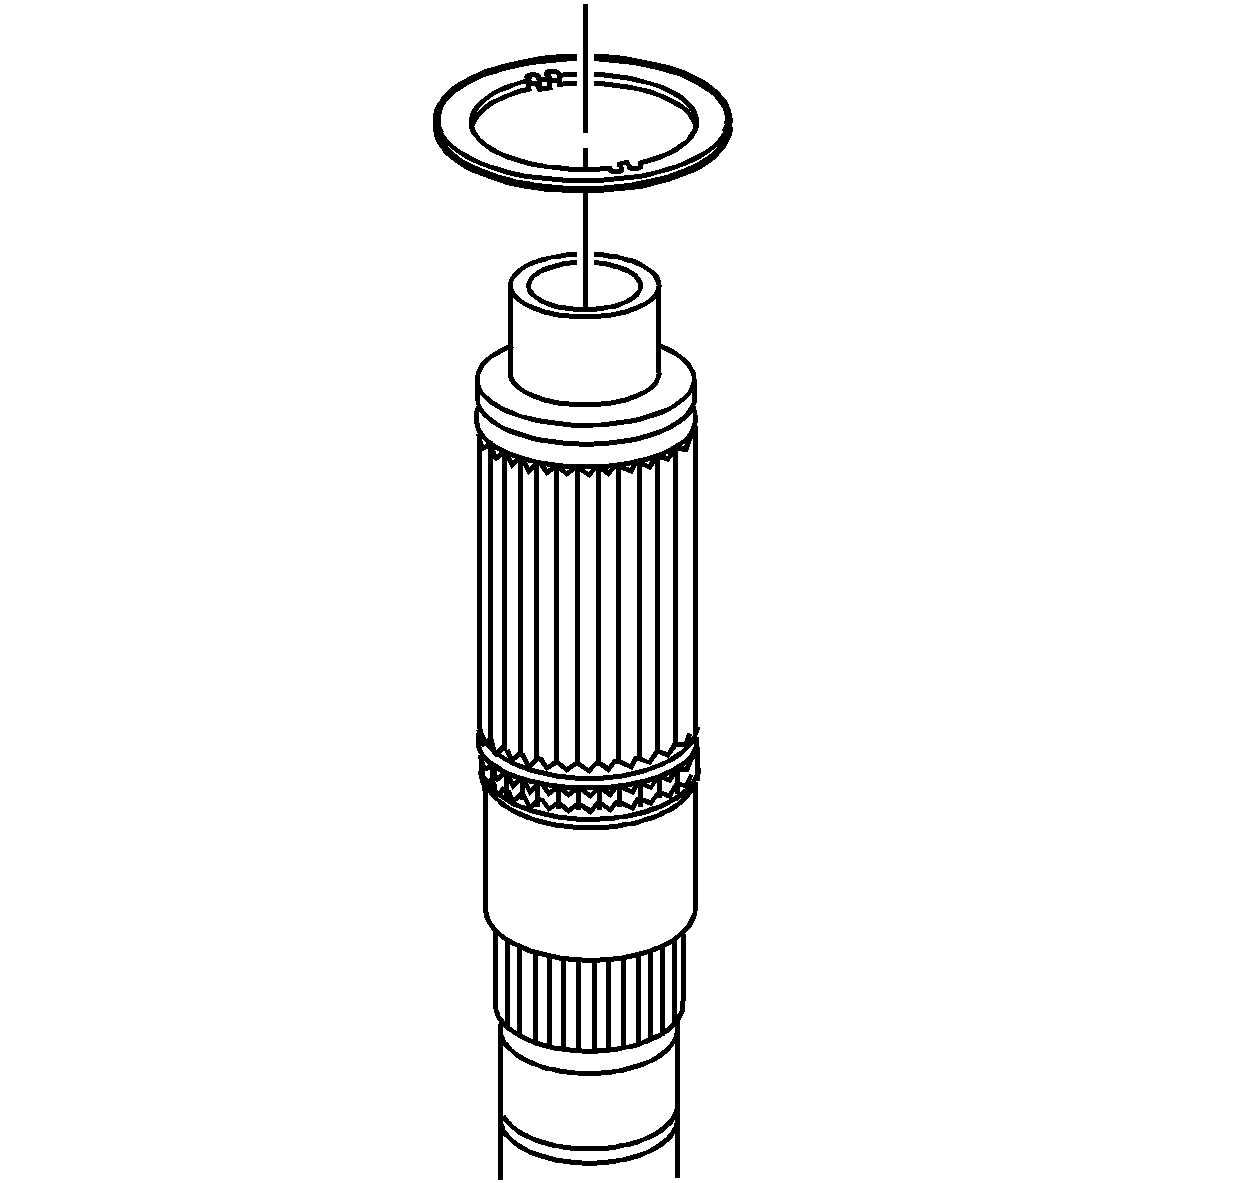
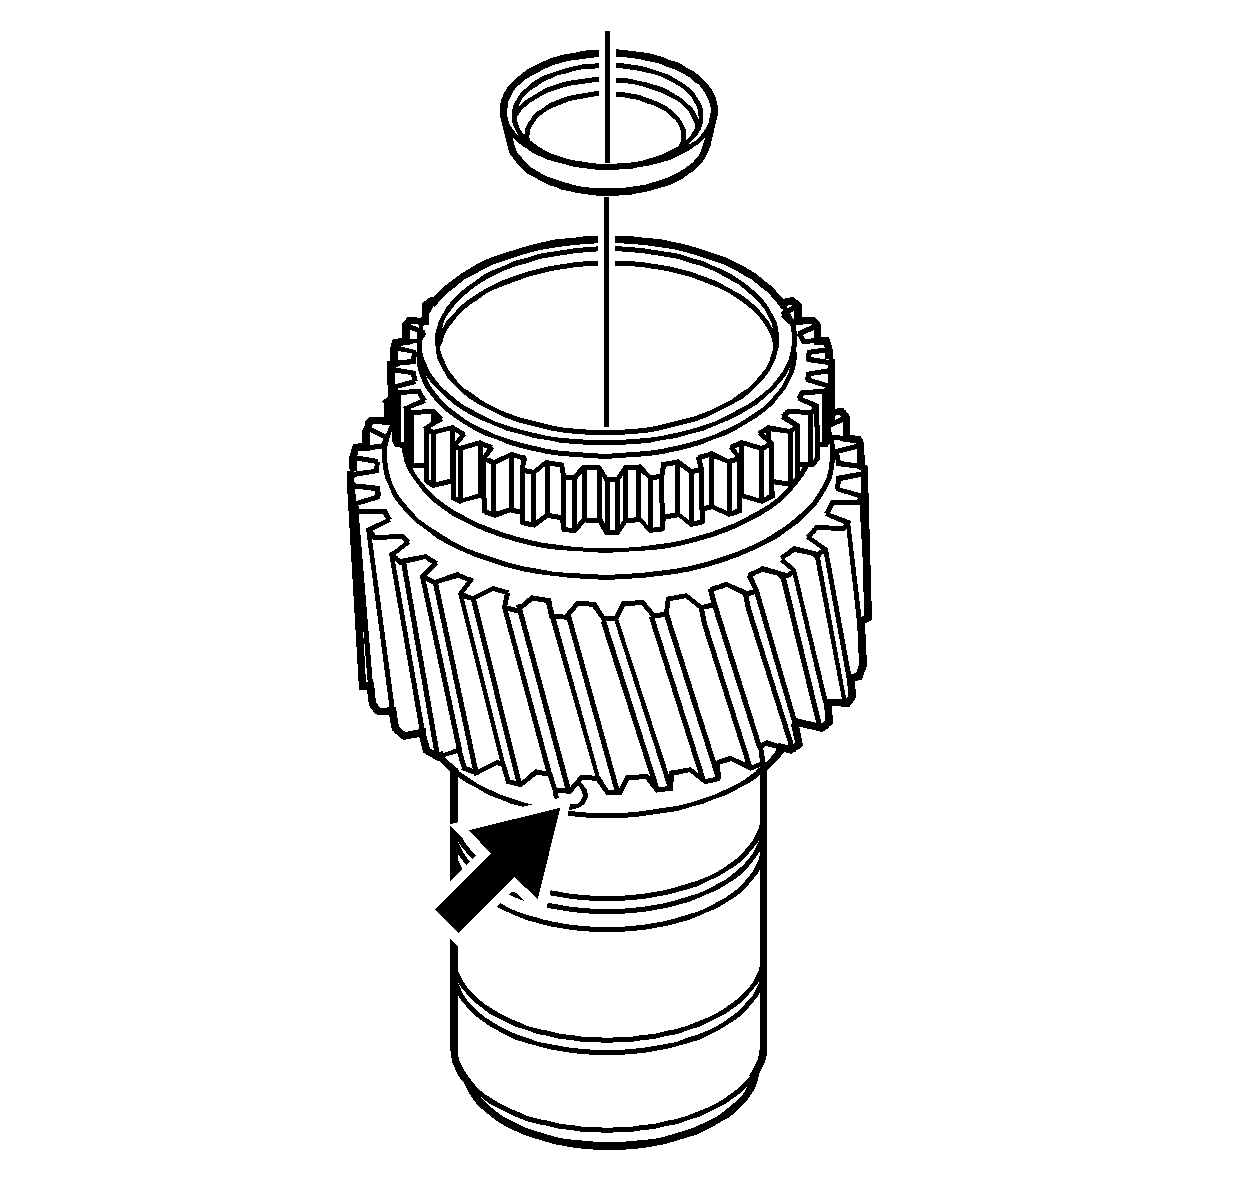
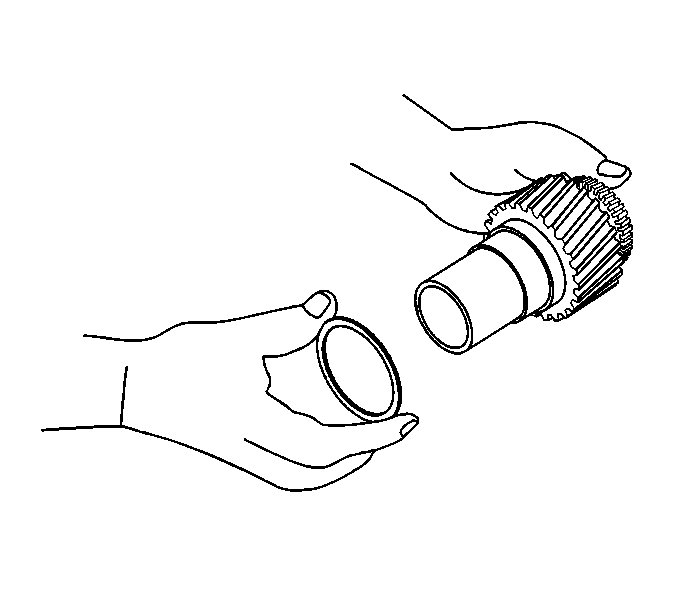
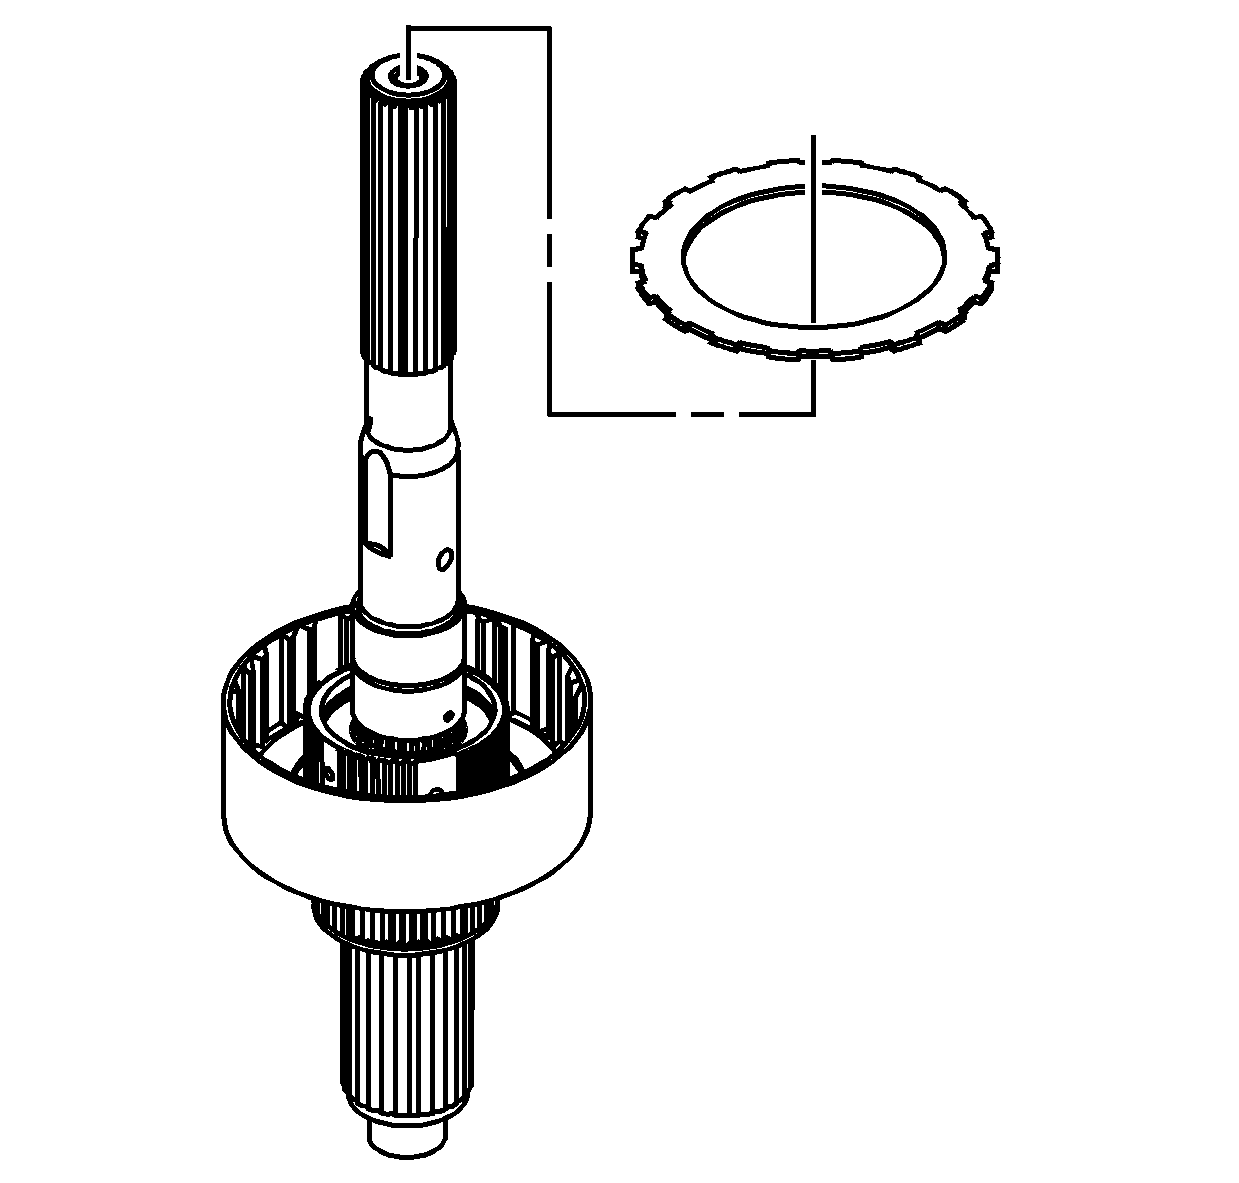
- Install the rear output shaft thrust washer. Align the tabs with the shaft splines.
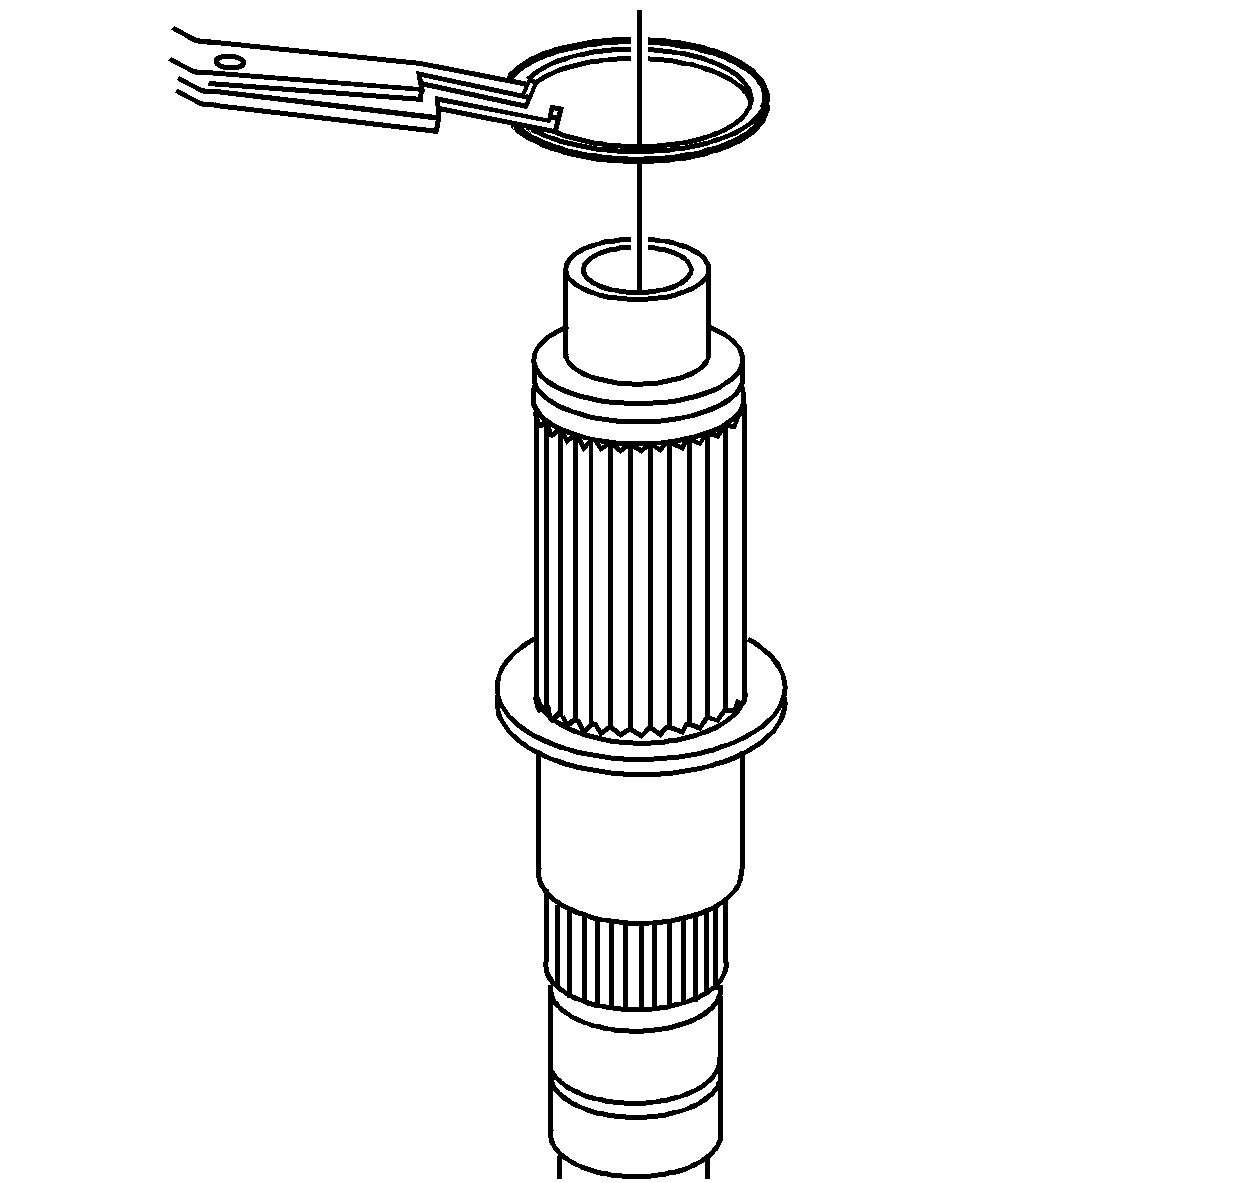
- Install a new retaining ring for the clutch housing on the rear output shaft. Ensure the retaining ring is properly installed in
the groove.
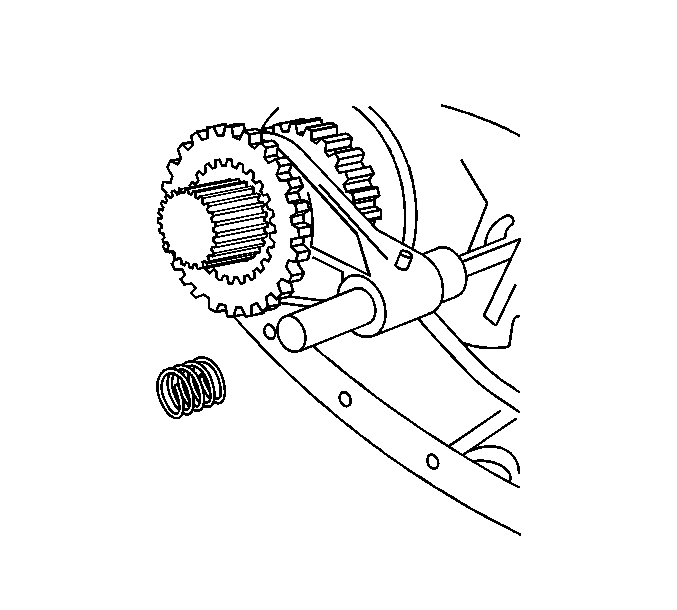
- Install the drive sprocket on to the clutch housing.

- Install a new retaining ring for the drive sprocket
on the clutch housing.
- Lightly lubricate the clutch housing inner bearing with transfer case fluid.
- Install the clutch housing onto the rear output shaft.
- Install the clutch hub into the clutch housing.
- With the friction material facing down, install an outer clutch disc into the
clutch housing.

- With the friction material facing down, install an inner clutch disc into the
clutch housing.
- Continue to install the outer clutch disc and inner clutch disc, alternating until 9 of each are installed.
- Install a new clutch hub retaining ring on to the rear output shaft.
- Install the clutch spring.
- Install the clutch apply plate.
| • | Ensure the clutch apply plate tabs are aligned with the clutch hub. |
| • | Ensure the clutch spring is seated properly in the underside groove of the clutch apply plate. |
- Install the clutch pressure plate bearing. The bearing will only install in one direction. The bearing will
fit flush to the inner plate when properly installed.
- Install the clutch inner plate.
Important: The marks on the clutch pressure plate bearing must be aligned before installing the clutch apply plate retaining ring.
- Align the markings on the clutch pressure plate bearing.
- While pushing down on the clutch apply plate, install the clutch apply plate retaining ring.
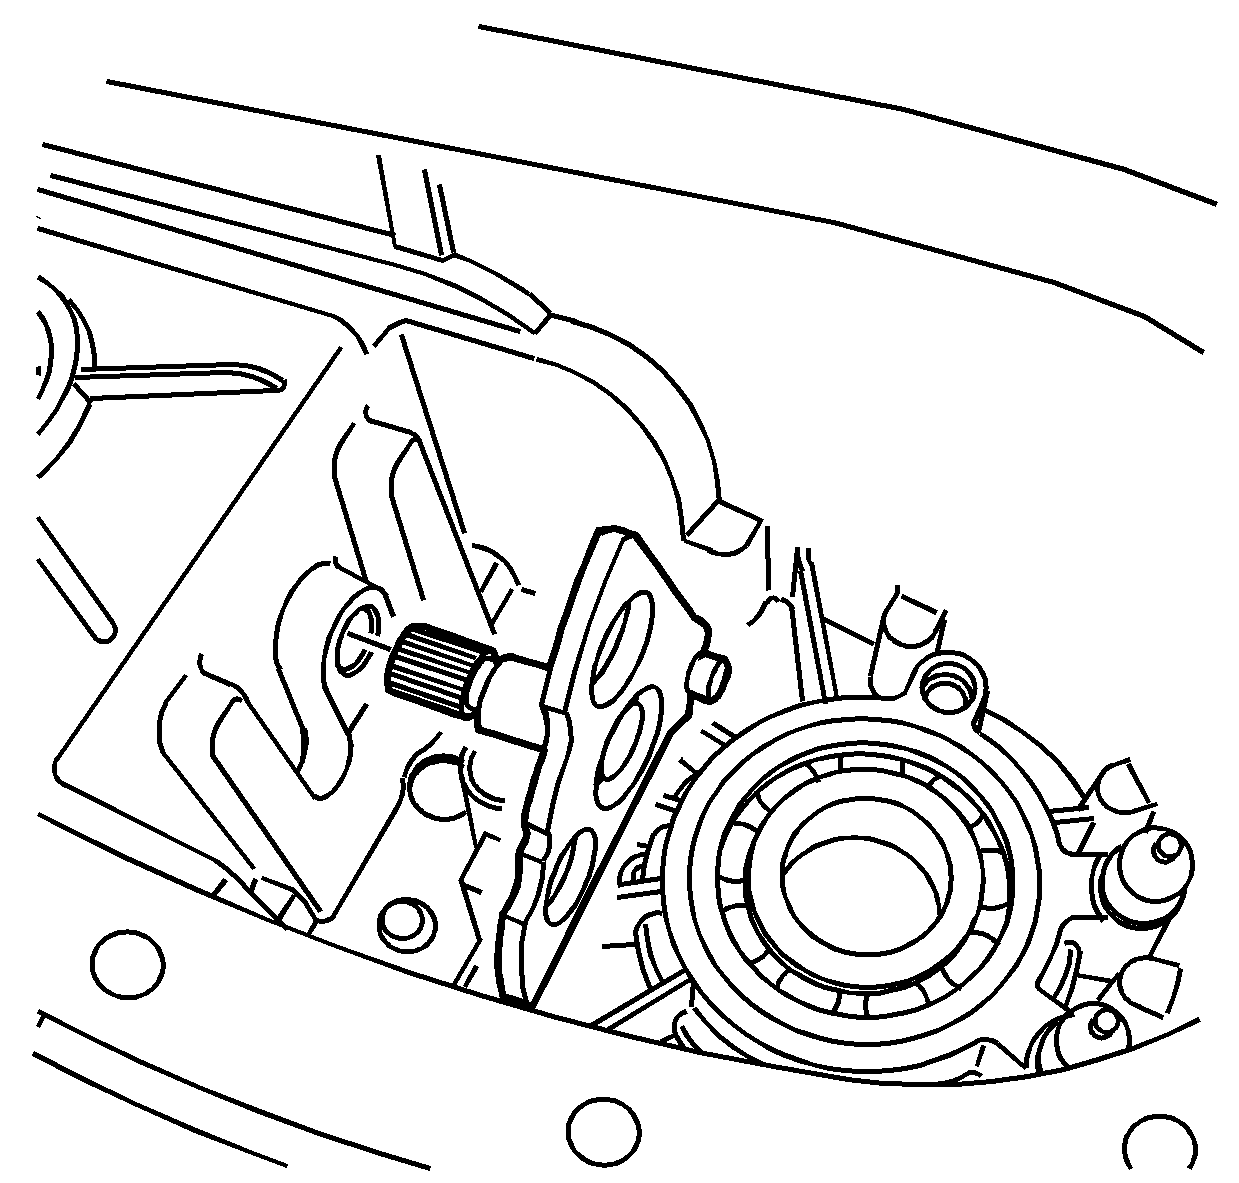
- Install the shift fork shaft with the shift detent lever.
| 44.1. | Rotate the control actuator lever shaft while installing to the shift detent lever. |
| 44.2. | Ensure the shift detent lever is installed on the roller of the control actuator lever shaft. |
- Install the clutch lever to the rear case half.
| • | Install the clutch lever over the shift fork shaft. |
| • | Position the clutch lever on to the 2 pivot pins. |
| • | Shift the control actuator lever shaft to the neutral position. |
- Install the rear output shaft assembly.
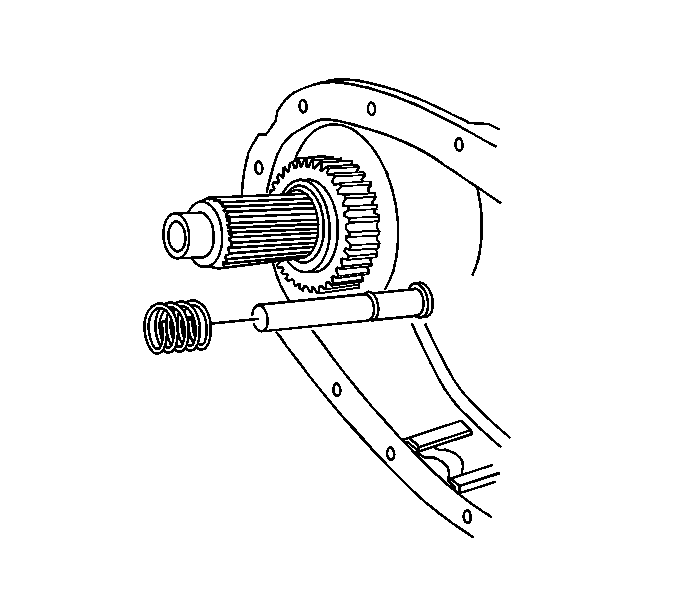
- Install the bottom retaining ring on to the shift fork shaft.
- Install the bottom spring on to the shift fork shaft.
- Install the range sleeve on the input gear while installing the shift fork on the shift fork shaft.
- Install the top shift fork spring.
- Install the top retaining ring for the shift fork. Ensure the retaining ring is properly installed in the groove.
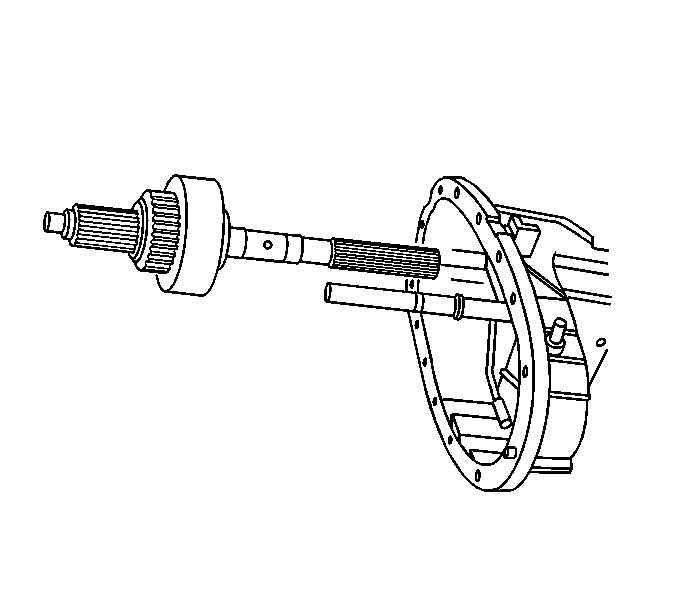
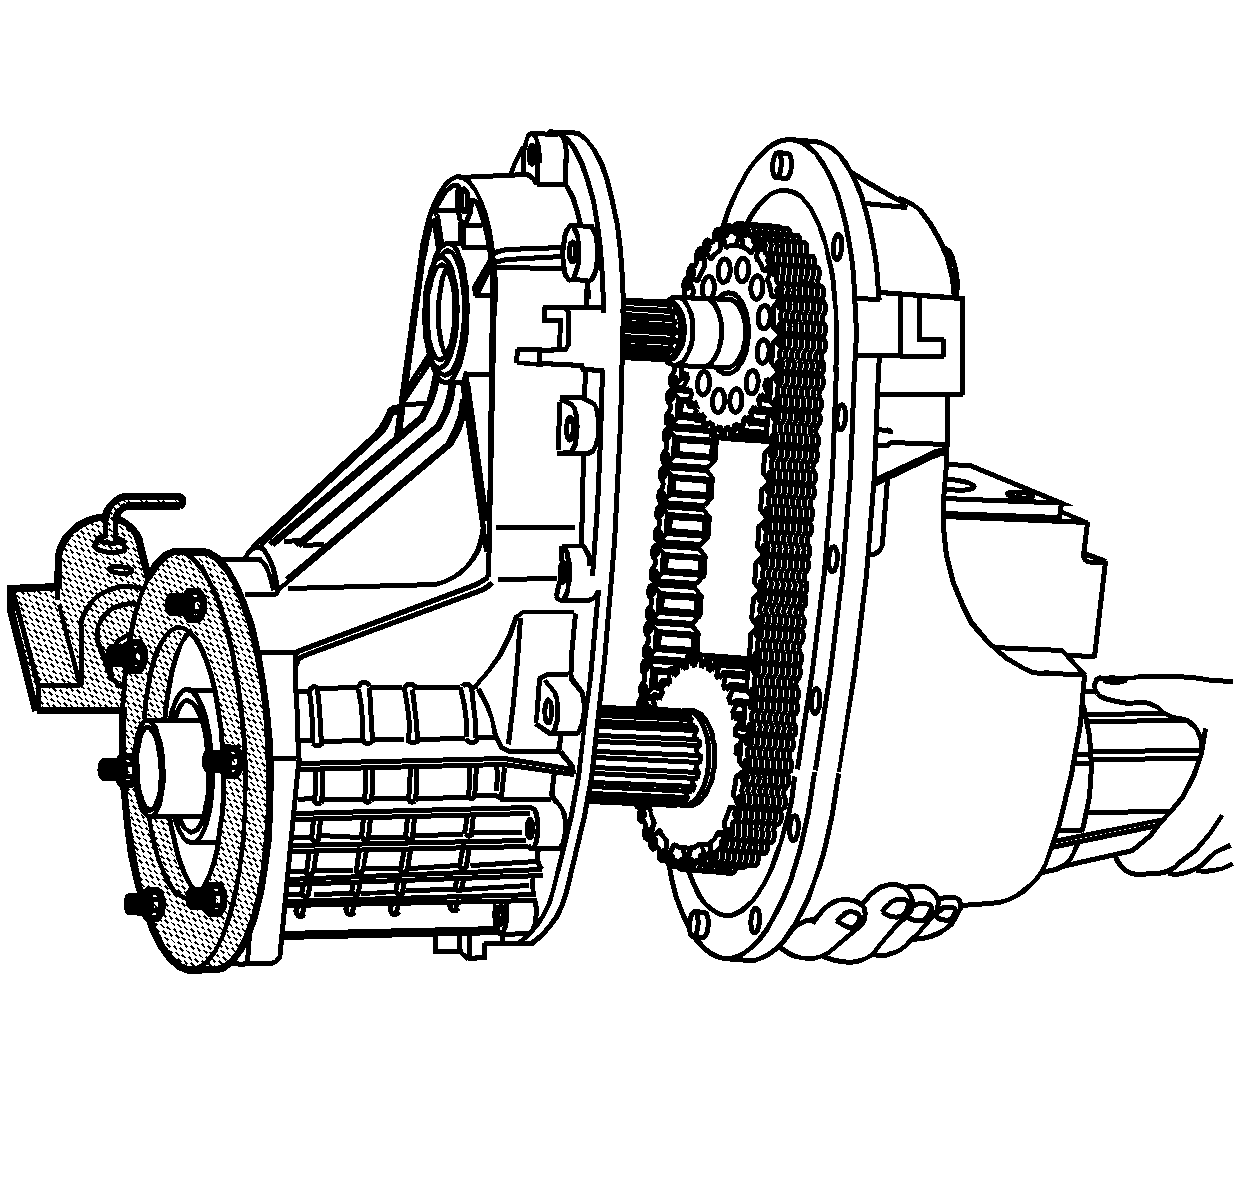
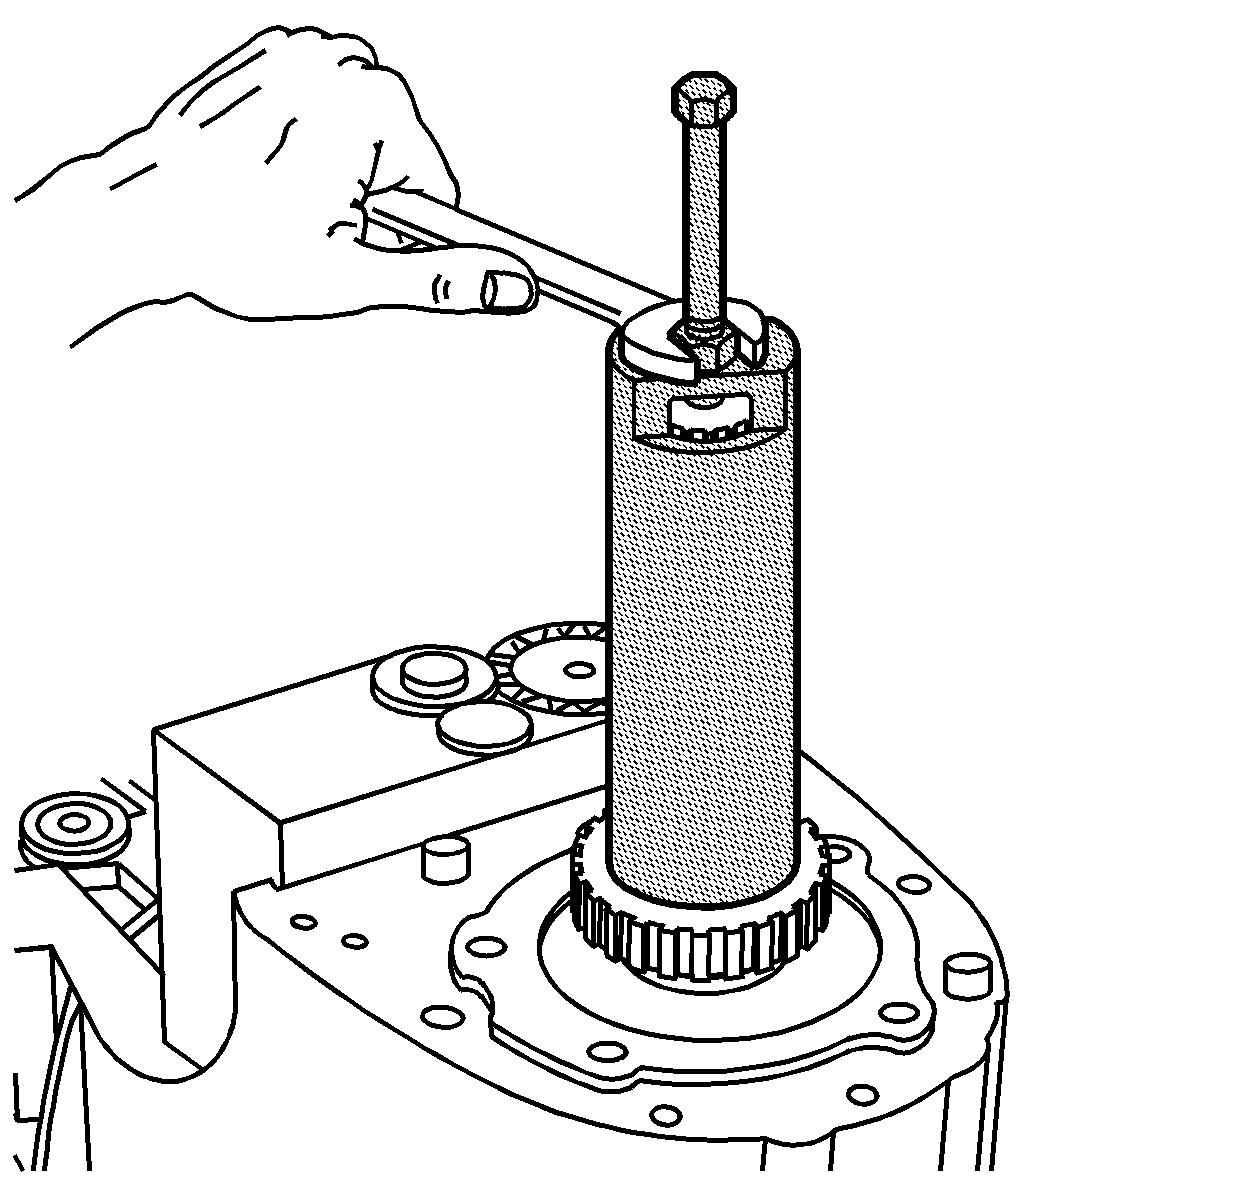
- Using a hydraulic press and the
J 36373
, install a new front speed sensor reluctor wheel onto the front output shaft.
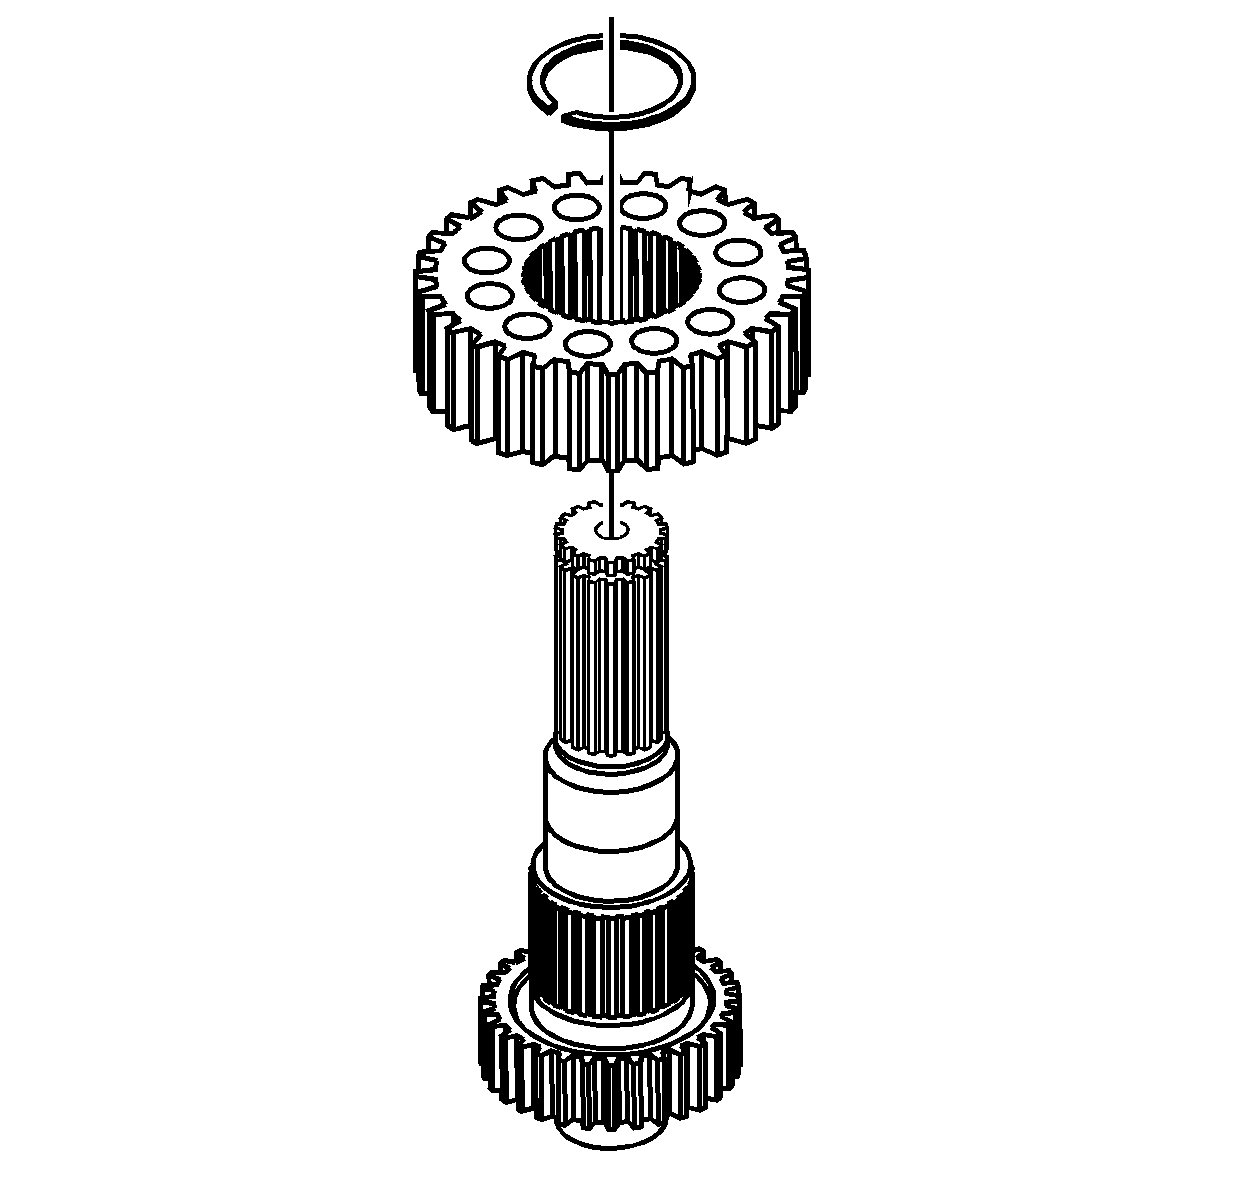
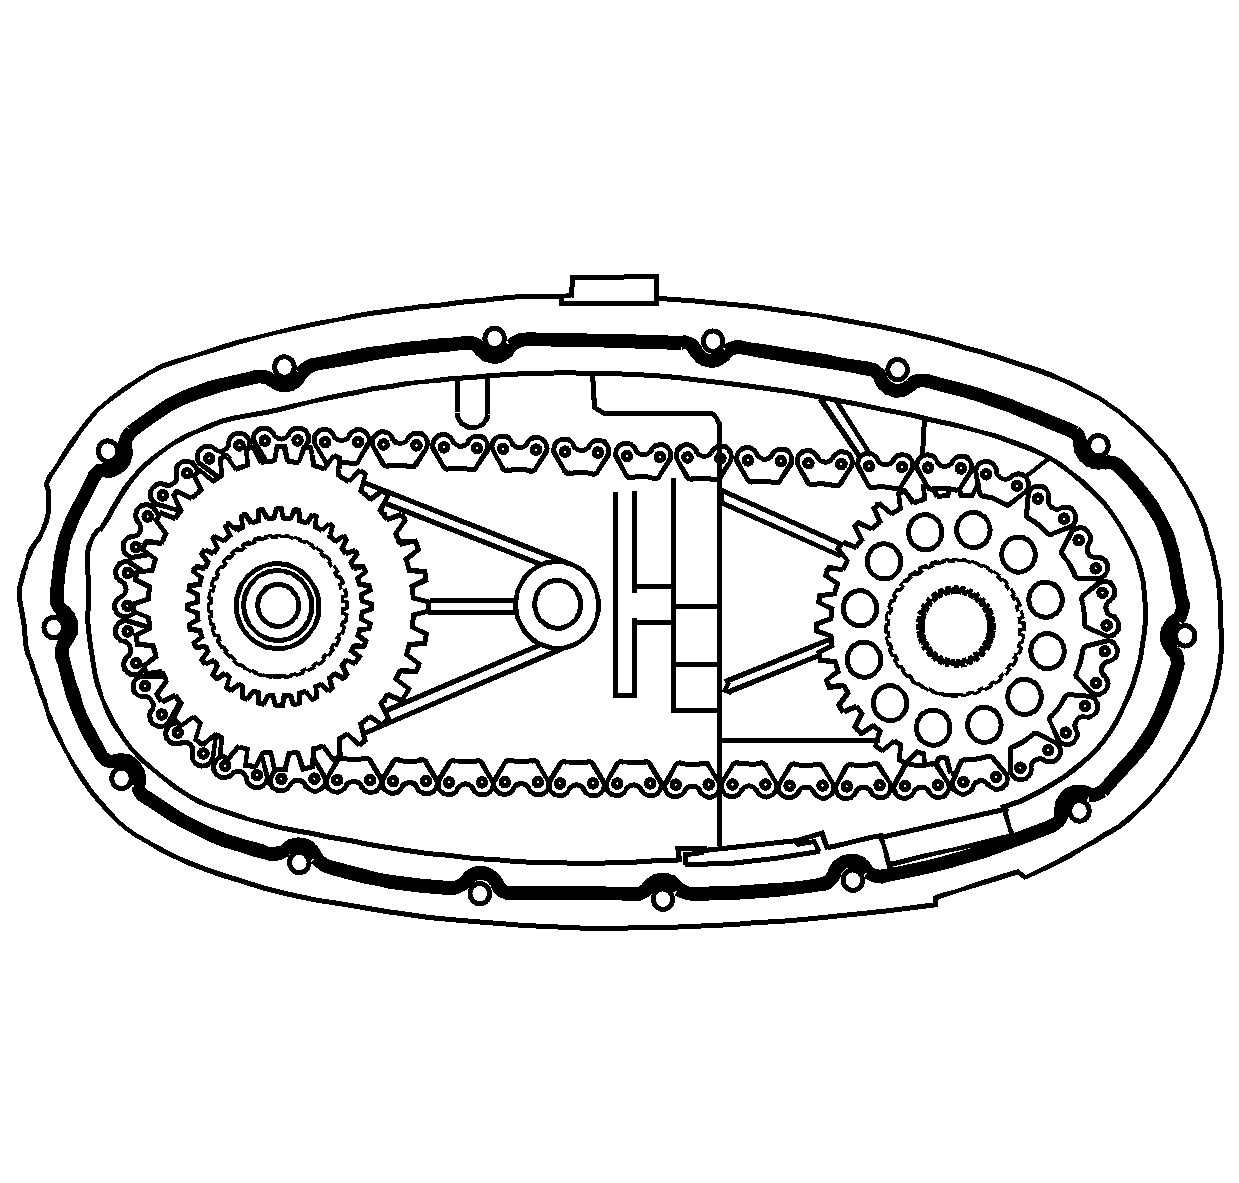
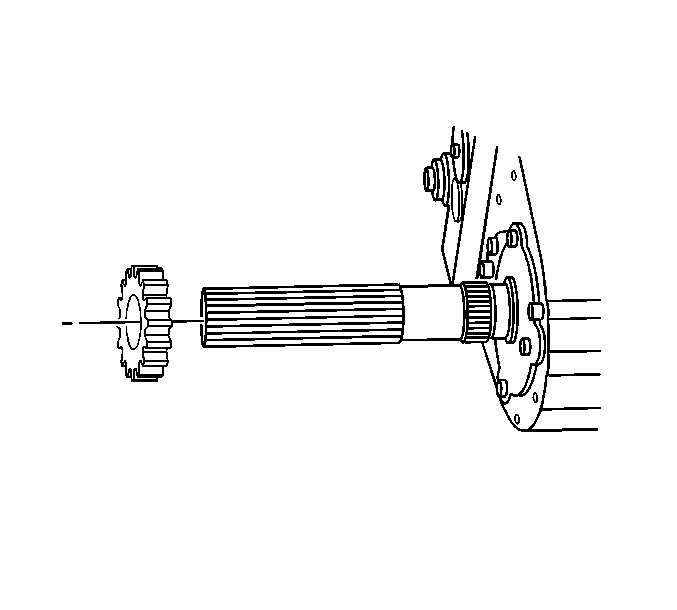
- Install the driven sprocket onto the front output shaft.
- Install a new driven sprocket retaining ring onto the front output shaft.
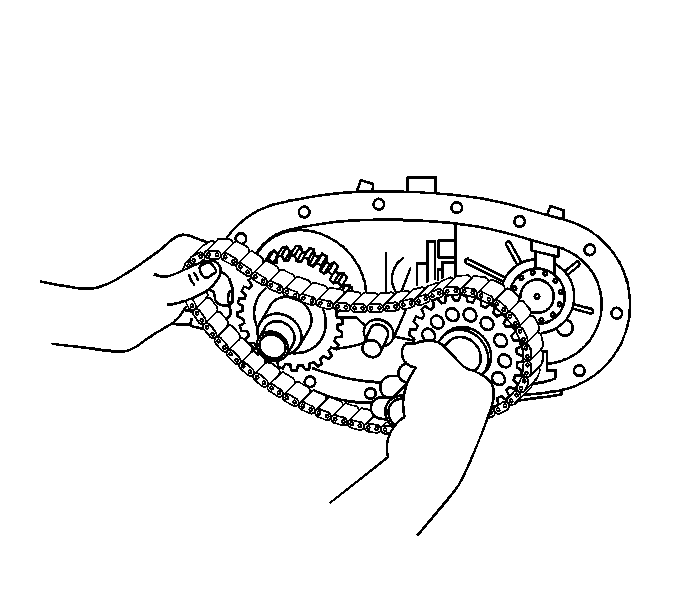
Important: If using the drive chain again, align the marks made during disassembly for proper wear patterns realignment.
- Install the drive chain assembly.
| 55.1. | Position the drive chain on the driven sprocket onto the front output shaft. |
| 55.2. | Position the drive chain on the drive sprocket onto the rear output shaft. |
| 55.3. | Install the front output shaft into the front output shaft rear bearing. |
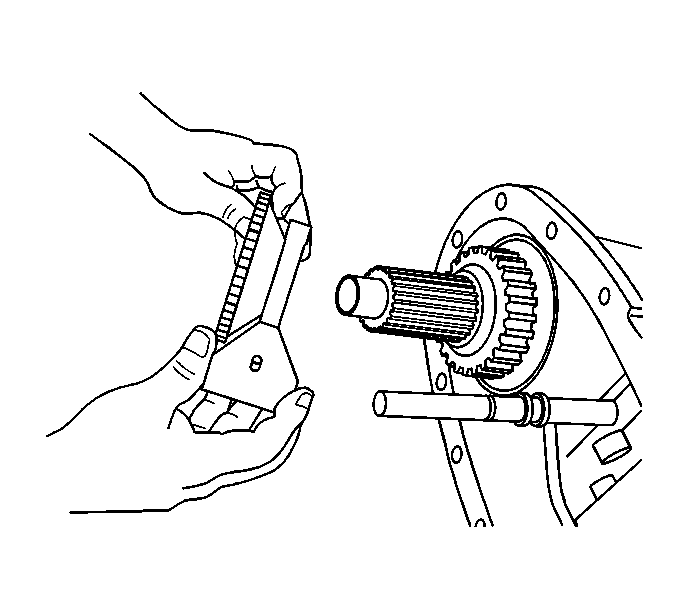
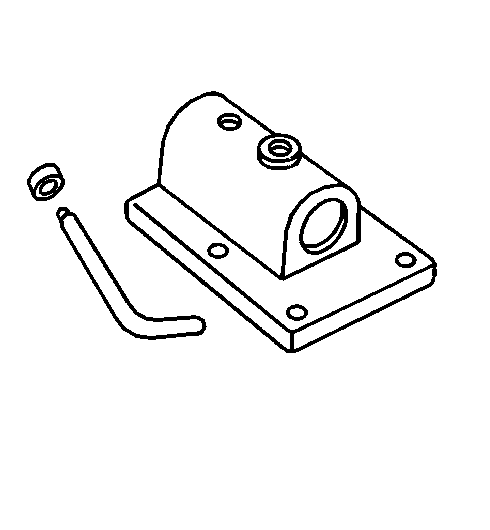
- Attach the
J 45759
(2) to the transfer case front half.
- Install the
J 45759
(2) into the
J 3289-20
(1) and secure with the pivot pin.
Notice: Apply the proper amount of sealant to the flange when assembling the transfer case. Excessive amounts of sealant can plug the oil pump screen, resulting in internal component failure.
Important: Ensure both sealing surfaces of the front and rear case halves are free of dirt, oil, and cleaning solvent.
- Apply a 3 mm (1/8 in) bead of sealant GM P/N 12345739 (Canadian P/N 10953541) or equivalent onto the rear case half.
- Inspect to ensure the location pins
are installed in the front case half.
- Install any missing location pins in the front case half.
- Install the front case half to the rear case half.
| • | Rotating the output shaft will align the splines with the input gear. |
| • | The case halves should come together without any resistance. |
| • | The rear case half should align on the front case half location pins. |
Notice: Refer to Fastener Notice in the Preface section.
- Install the front case half to rear case half bolts.
Tighten
Tighten the case half bolts to 22 N·m (16 lb ft).
- Install the oil pump driven gear, the outer rotor.
- Install the oil pump drive gear, the inner rotor. The flat on the inner rotor aligns to the flat area on the rear output shaft.
Important: DO NOT use sealer on the oil pump cover.
- Install the oil pump cover.
- Install the oil pump cover mounting bolts.
Tighten
Tighten the oil pump cover mounting bolts to 11 N·m (9 lb ft).
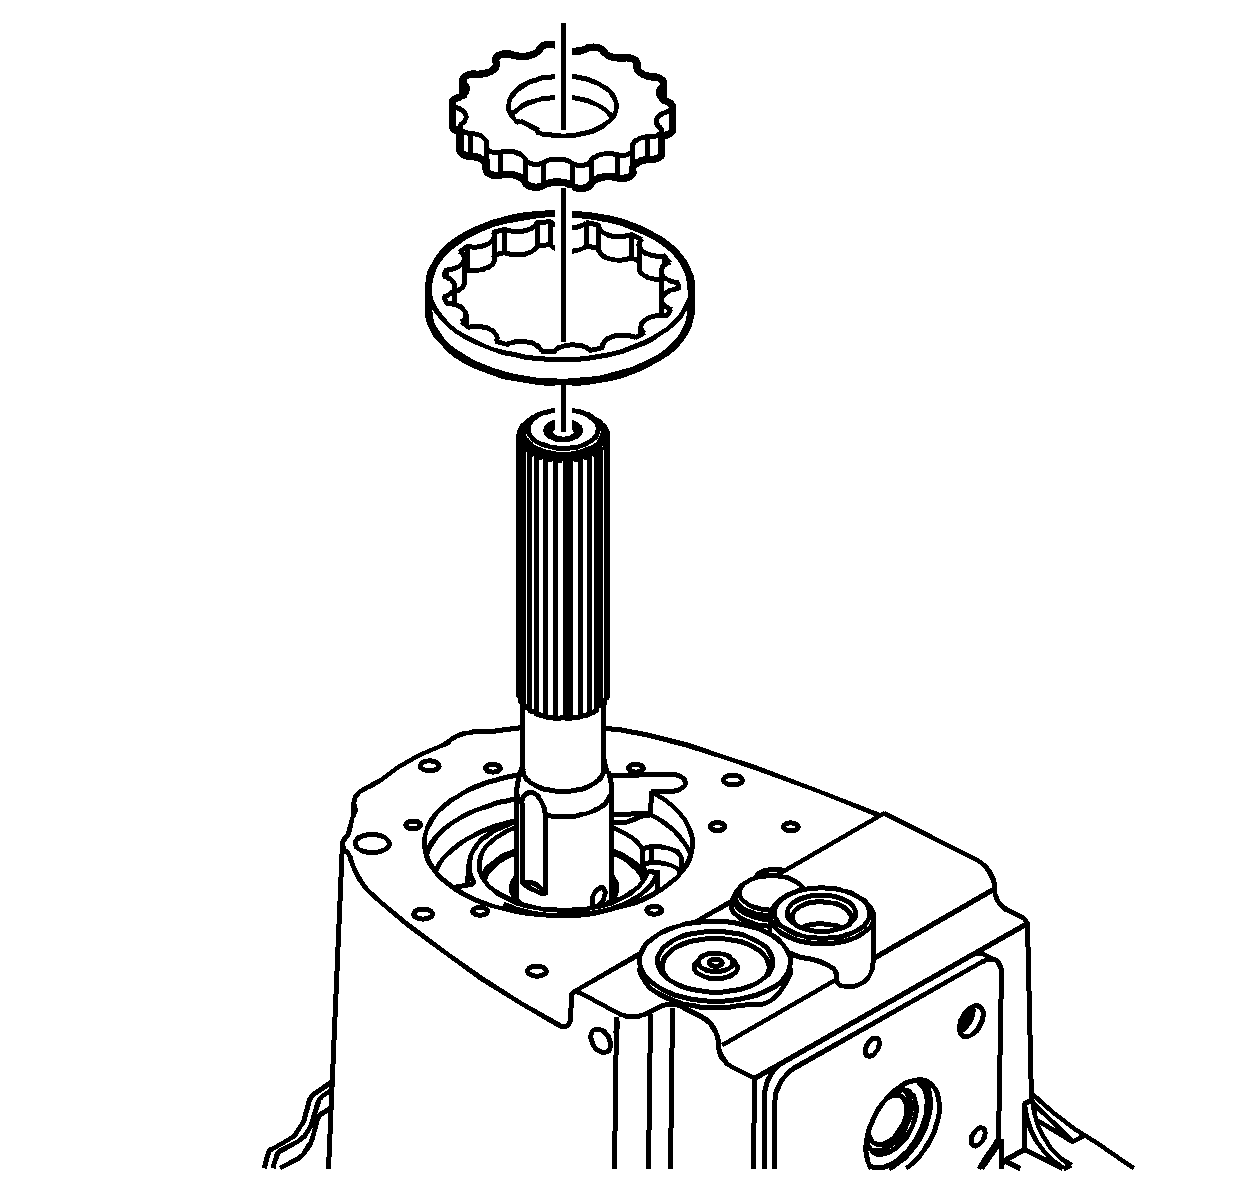
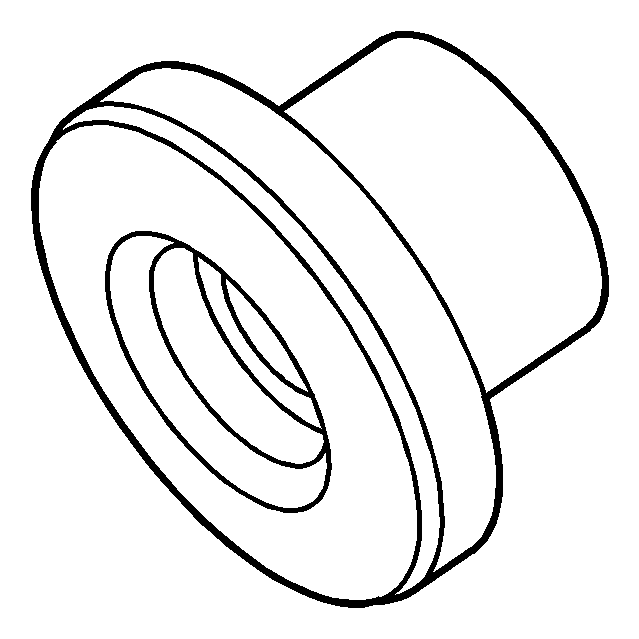
- Position the NEW speed sensor reluctor wheel on to the rear output shaft.
Important: Use the
J 45235
to install the rear speed sensor reluctor wheel to the proper specifications.
- Using the
J 45235
on the rear output shaft, install the rear speed sensor reluctor wheel.
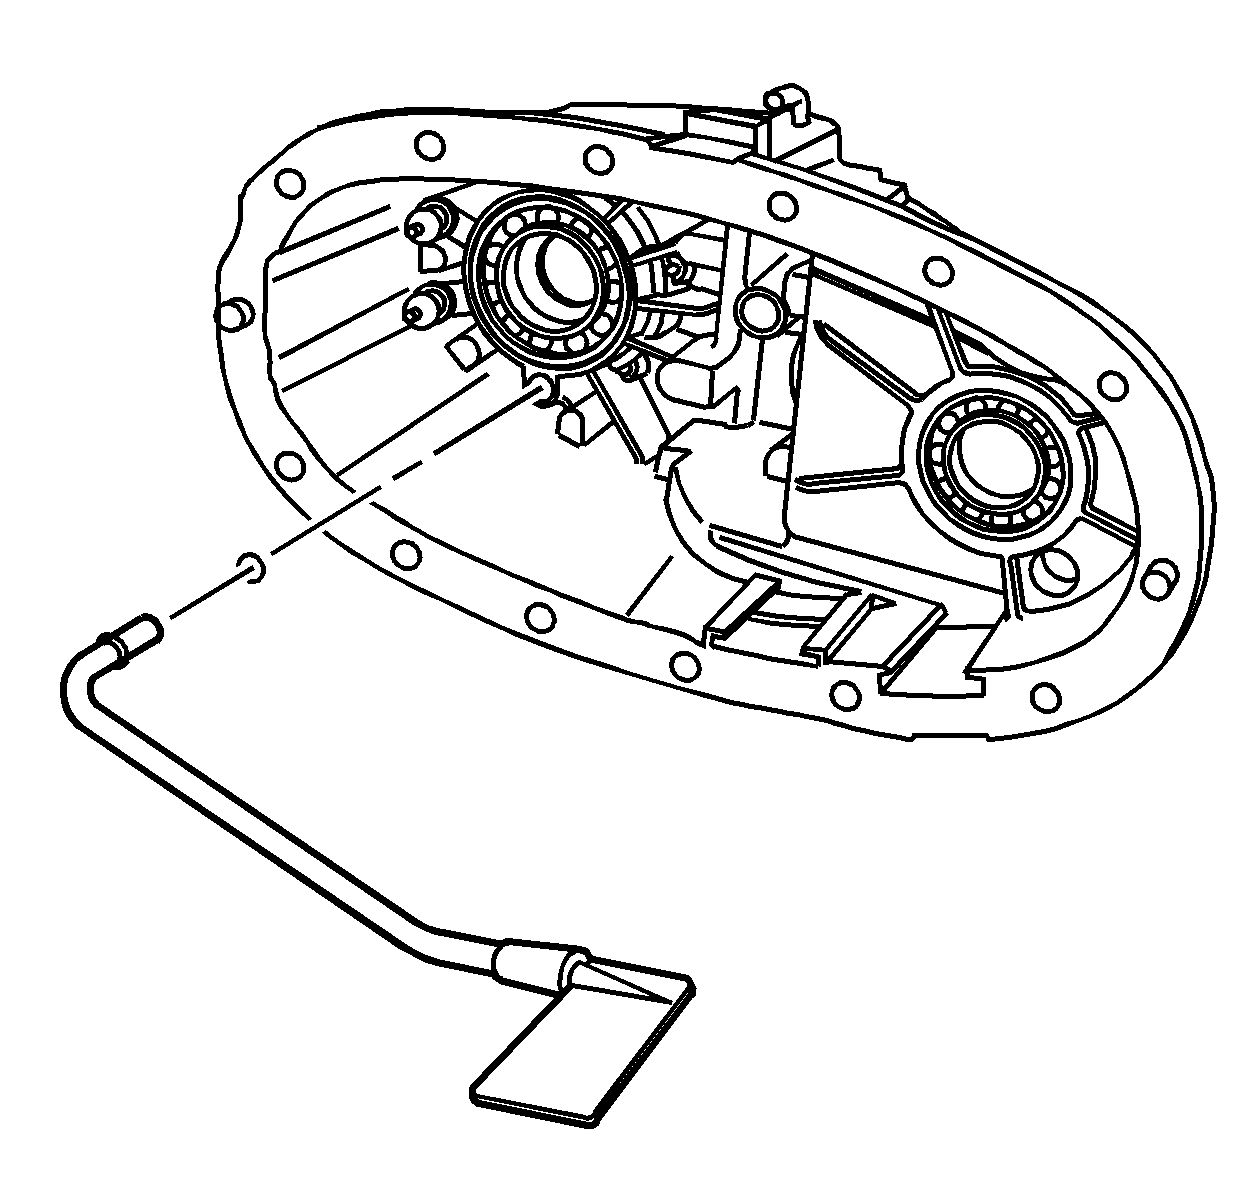
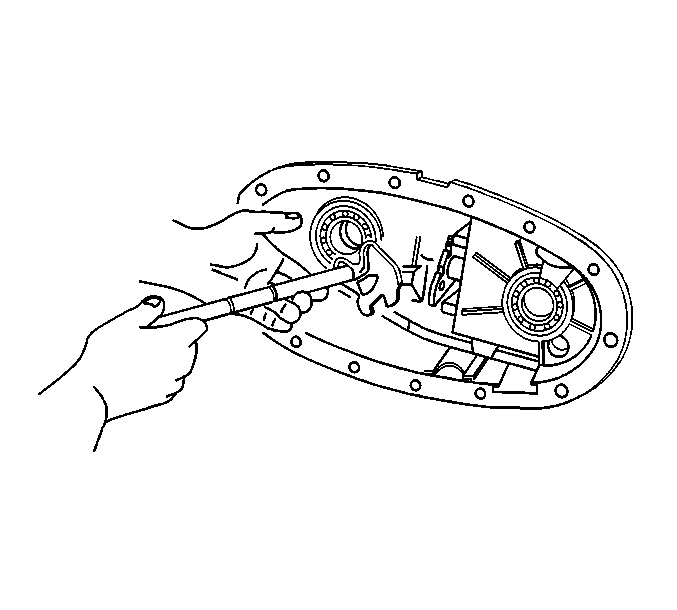
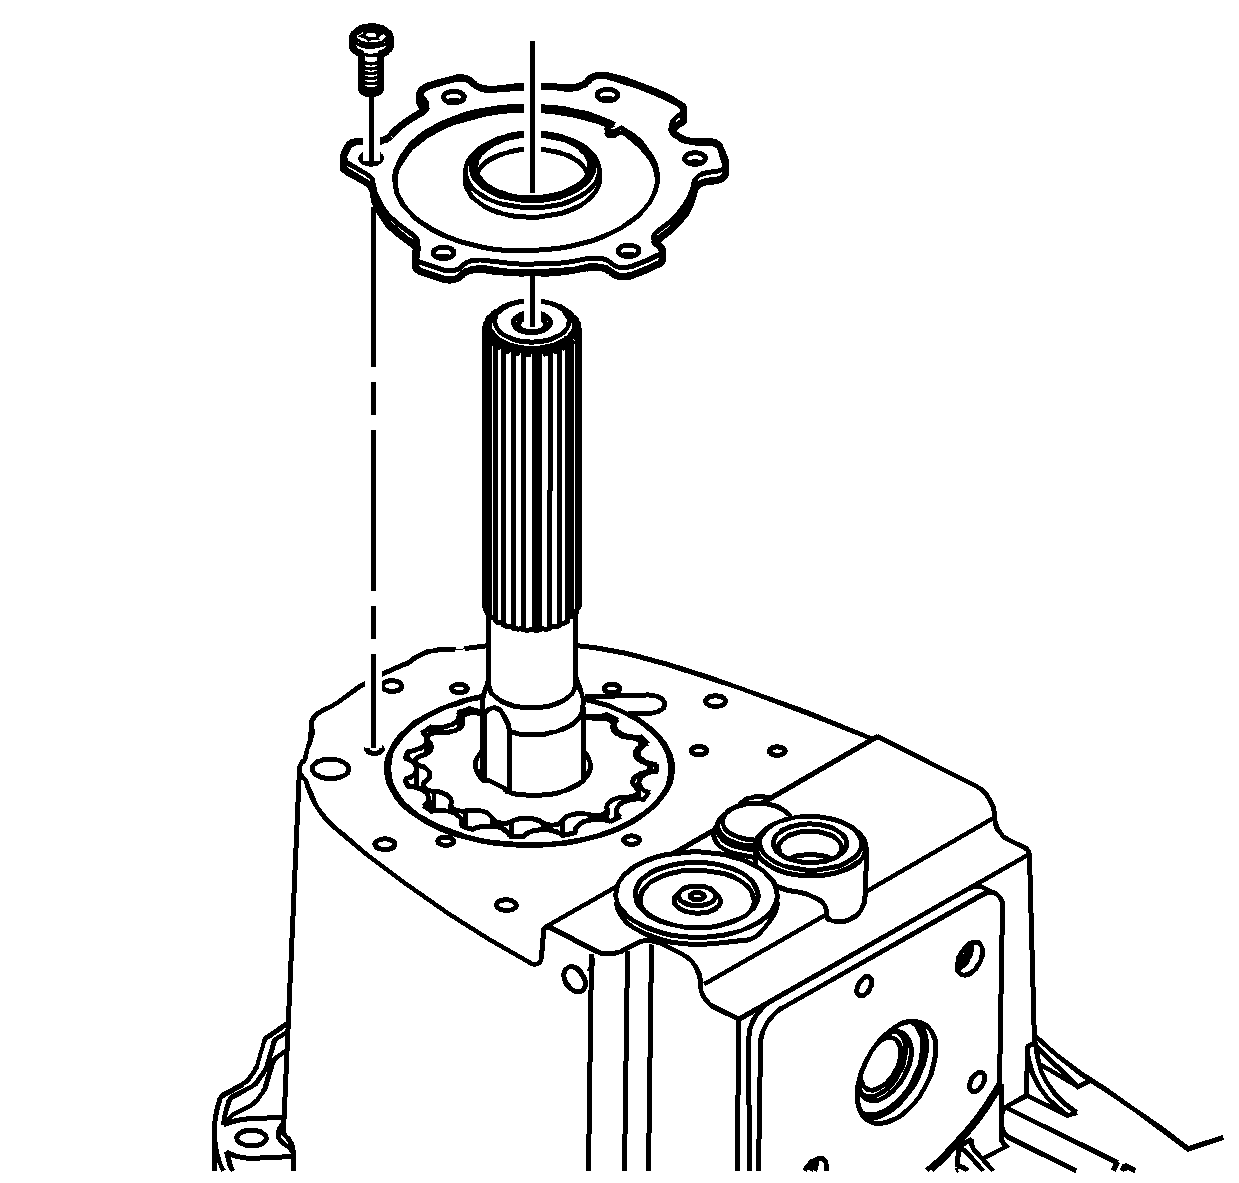
- Inspect to ensure the rear extension location pins are installed in the rear case half.
- Install any missing location pins in the rear case half.
Notice: Apply the proper amount of sealant to the flange when assembling the transfer case. Excessive amounts of sealant can plug the oil pump screen, resulting in internal component failure.
Important: Ensure both sealing surfaces of the rear extension and rear case half are free of dirt, oil, and cleaning solvent.
- Apply a 3 mm (1/8 in) bead of sealant GM P/N 12345739 (Canadian P/N 10953541) or equivalent onto the rear extension.
- Install the rear extension to the rear case half. Align on the location pins.
- Install the rear extension bolts.
Tighten
Tighten the rear extension bolts to 22 N·m (16 lb ft).
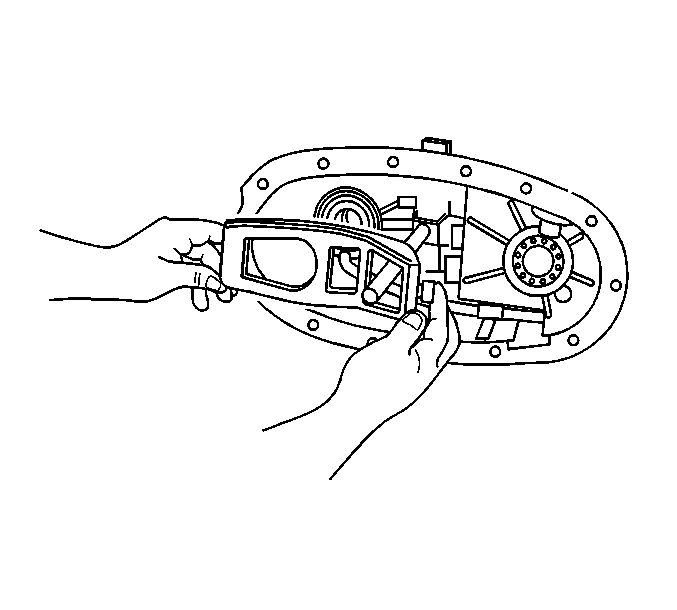
Important: The shift control detent must be in the neutral position when installing the motor/encoder.
- Shift the shift control detent into the neutral position.
Important: A new motor/encoder will not have location pins.
- Inspect to ensure the location pins are installed in the motor/encoder.
- Install any missing location pins in the motor/encoder.
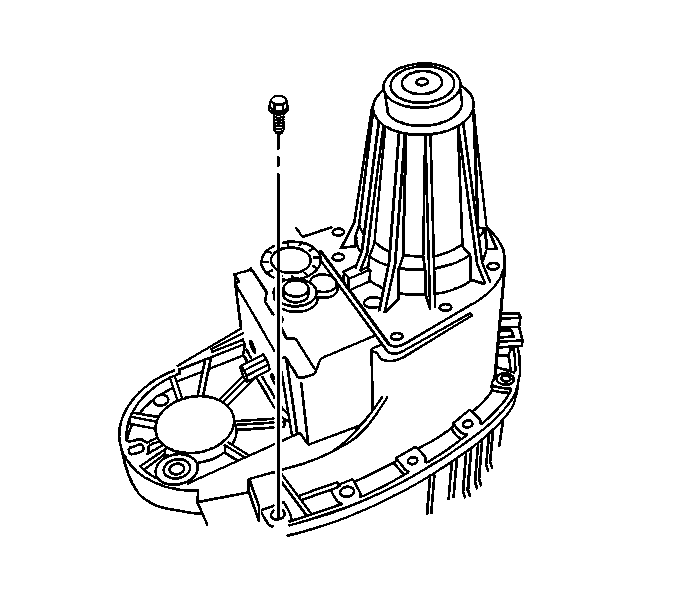
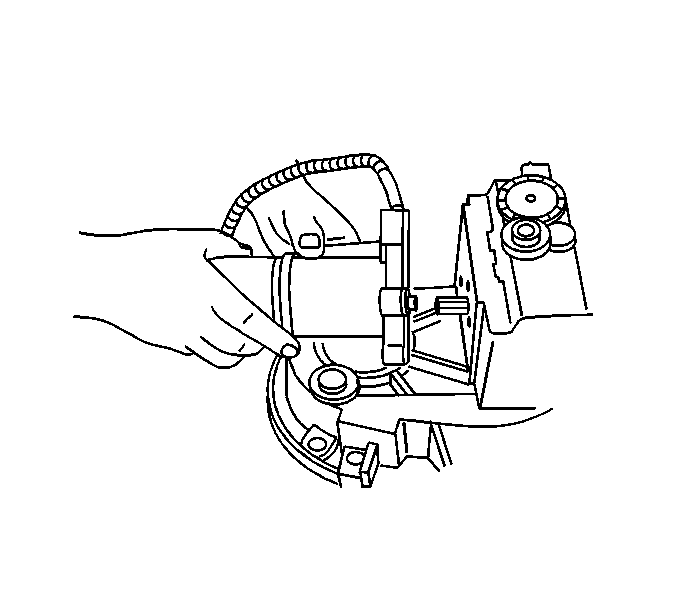
- Install the motor/encoder assembly.
- Install the motor/encoder mounting bolts.
Tighten
Tighten the motor/encoder mounting bolts to 16 N·m (12 lb ft).
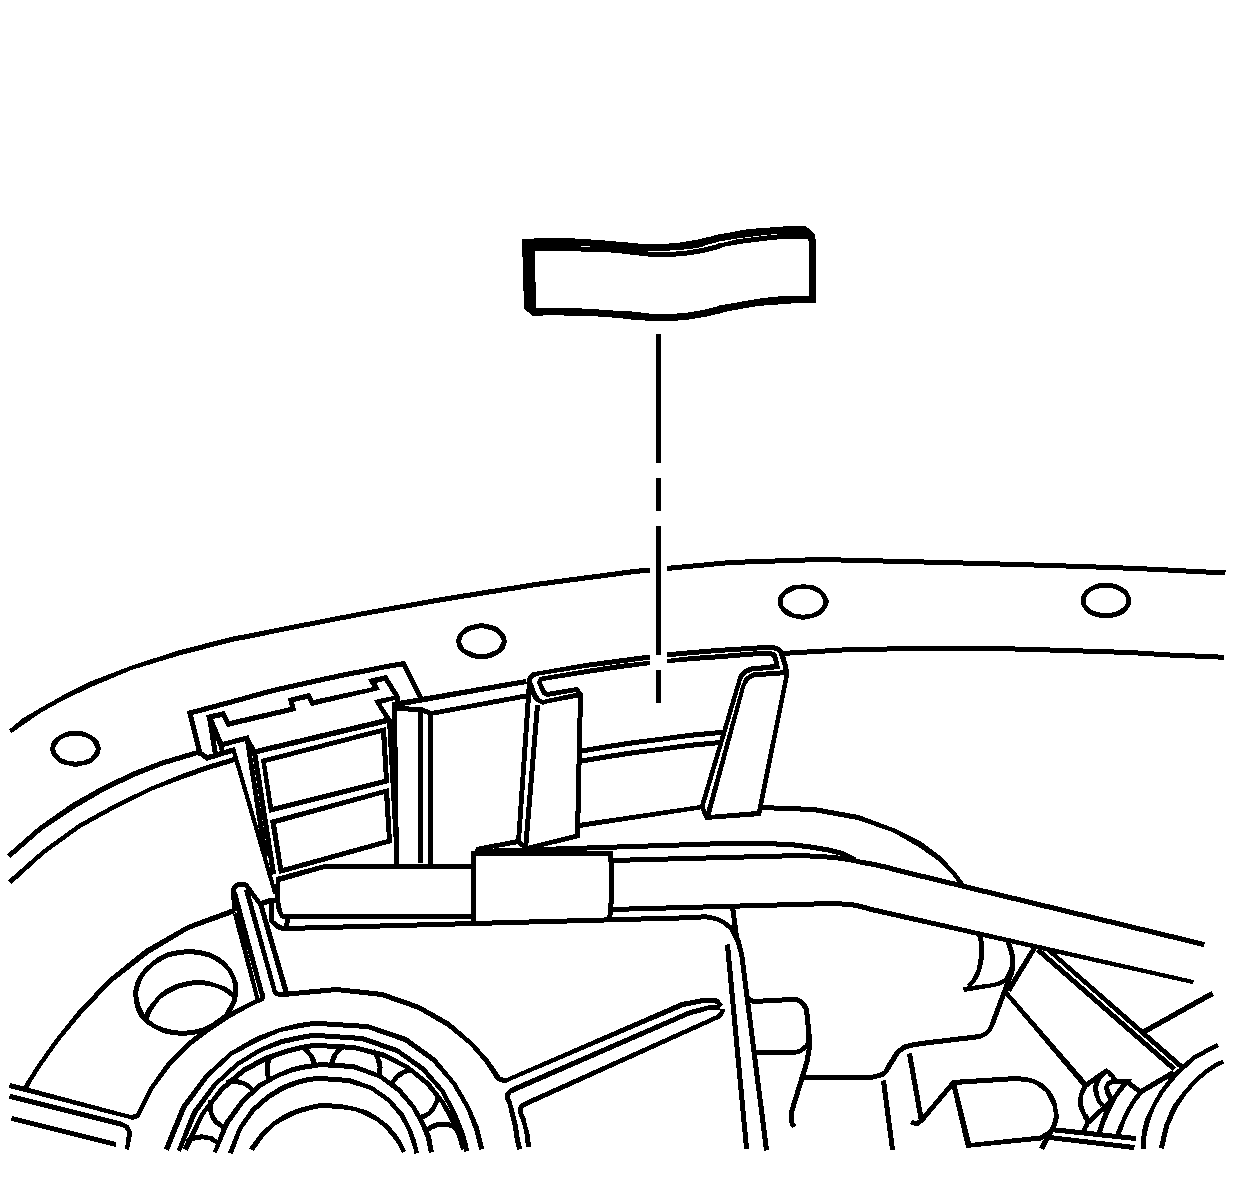
- Install the motor/encoder wiring harness bracket and case half bolt.
Tighten
Tighten the case half bolt to 22 N·m (16 lb ft).
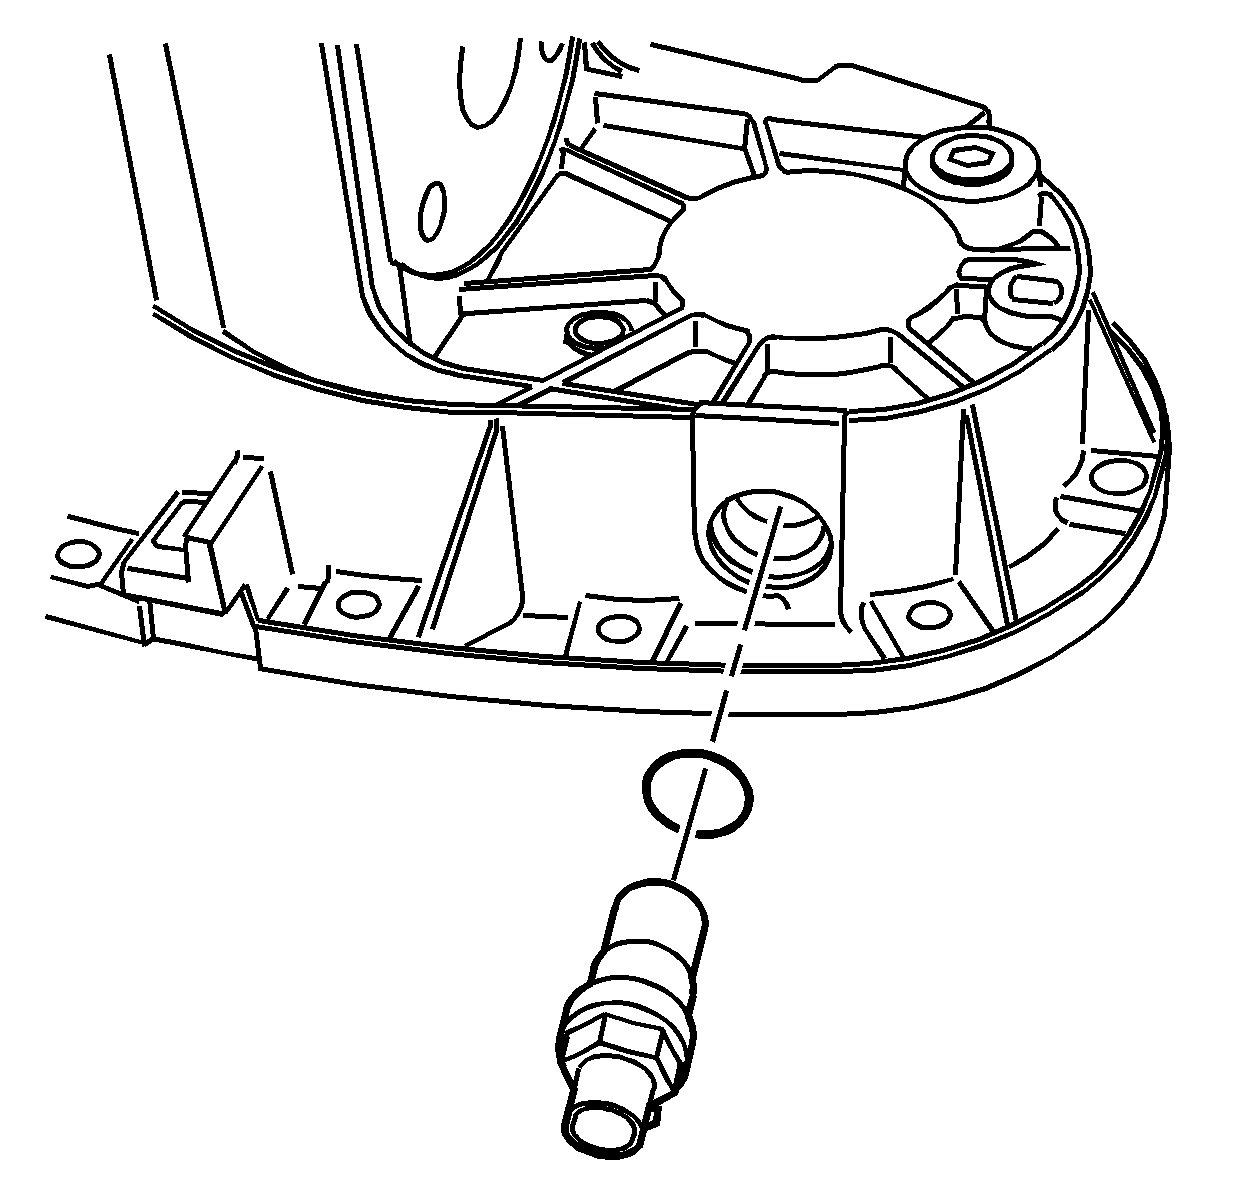
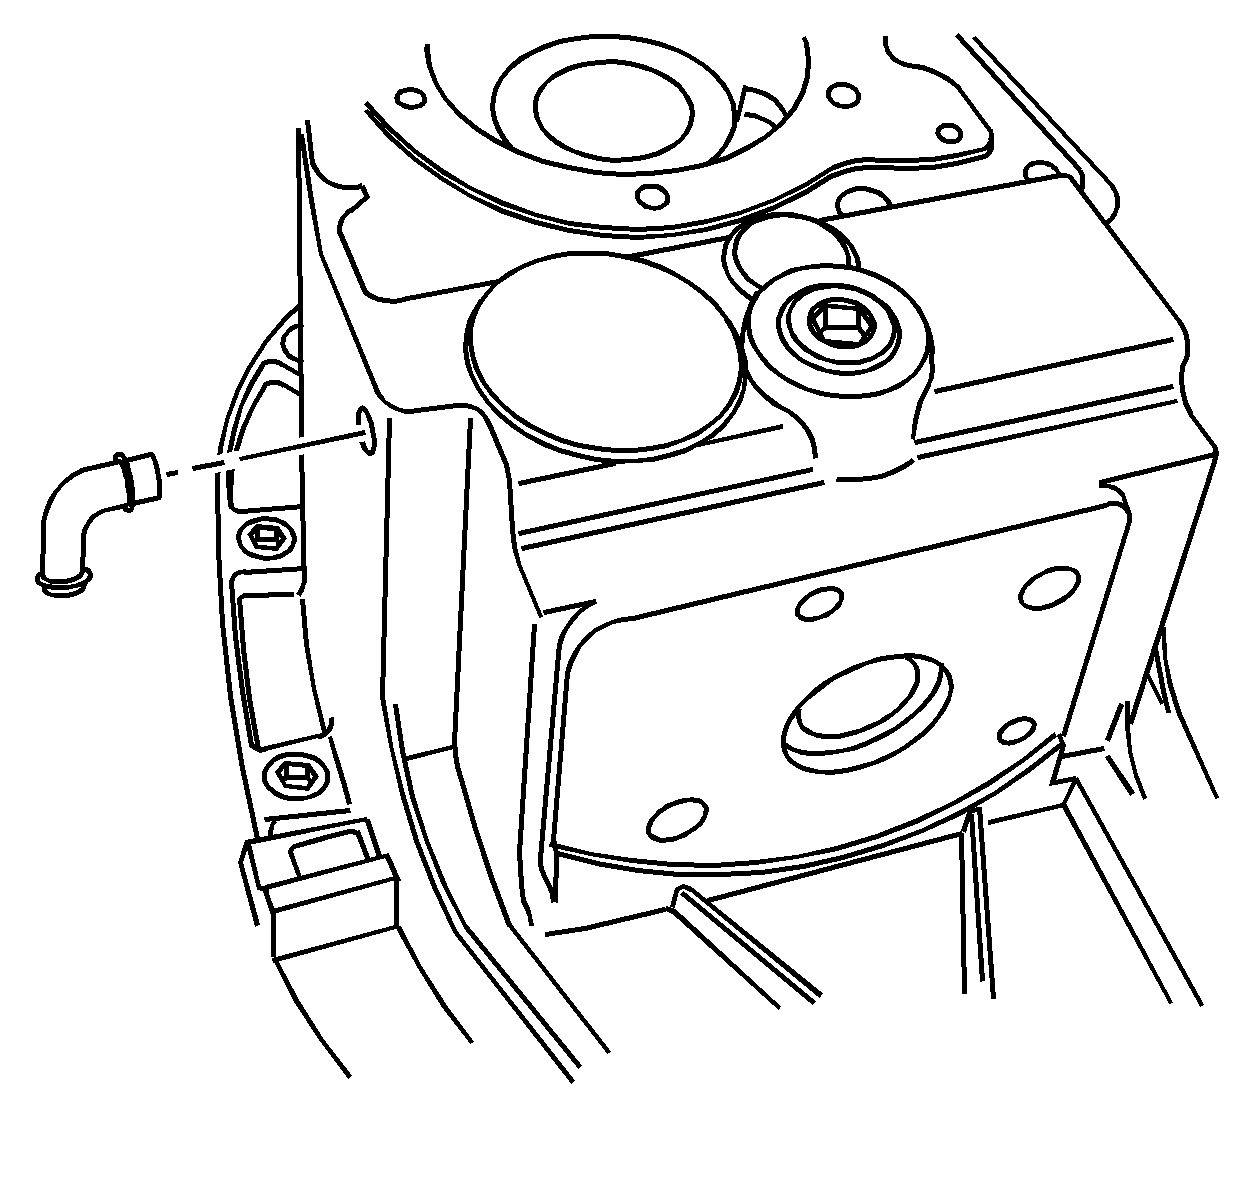
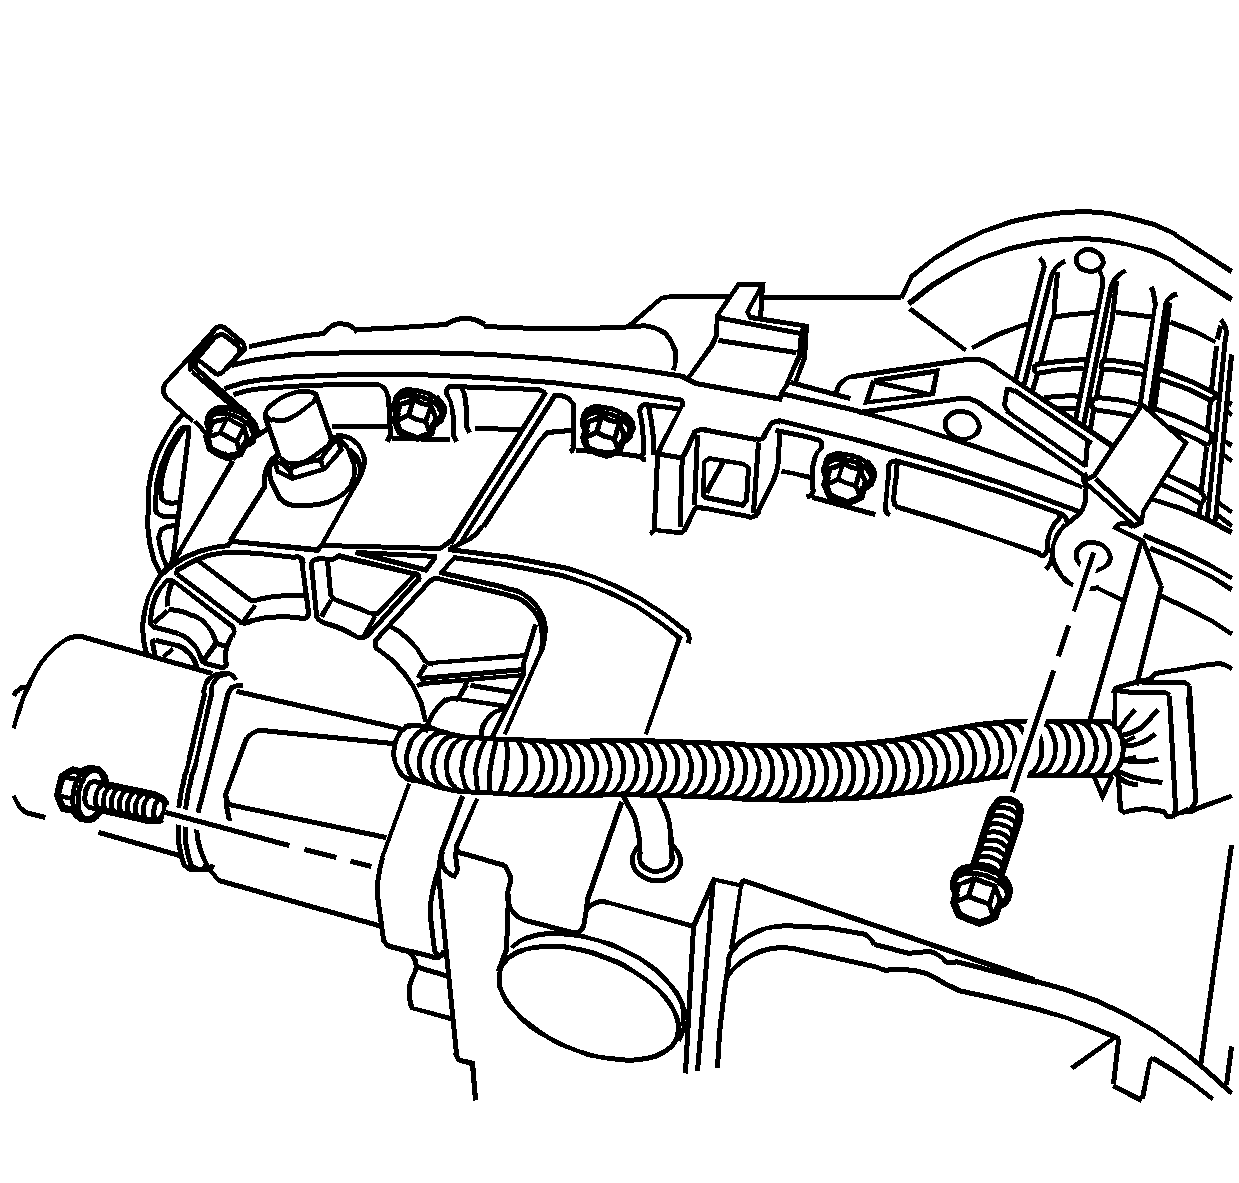
- Install the front vehicle speed sensor (VSS).
Tighten
Tighten the front VSS to 17 N·m (13 lb ft).

- Install the right rear VSS.
Tighten
Tighten the right rear VSS to 17 N·m (13 lb ft).
- Install the left rear VSS.
Tighten
Tighten the left rear VSS to 17 N·m (13 lb ft).
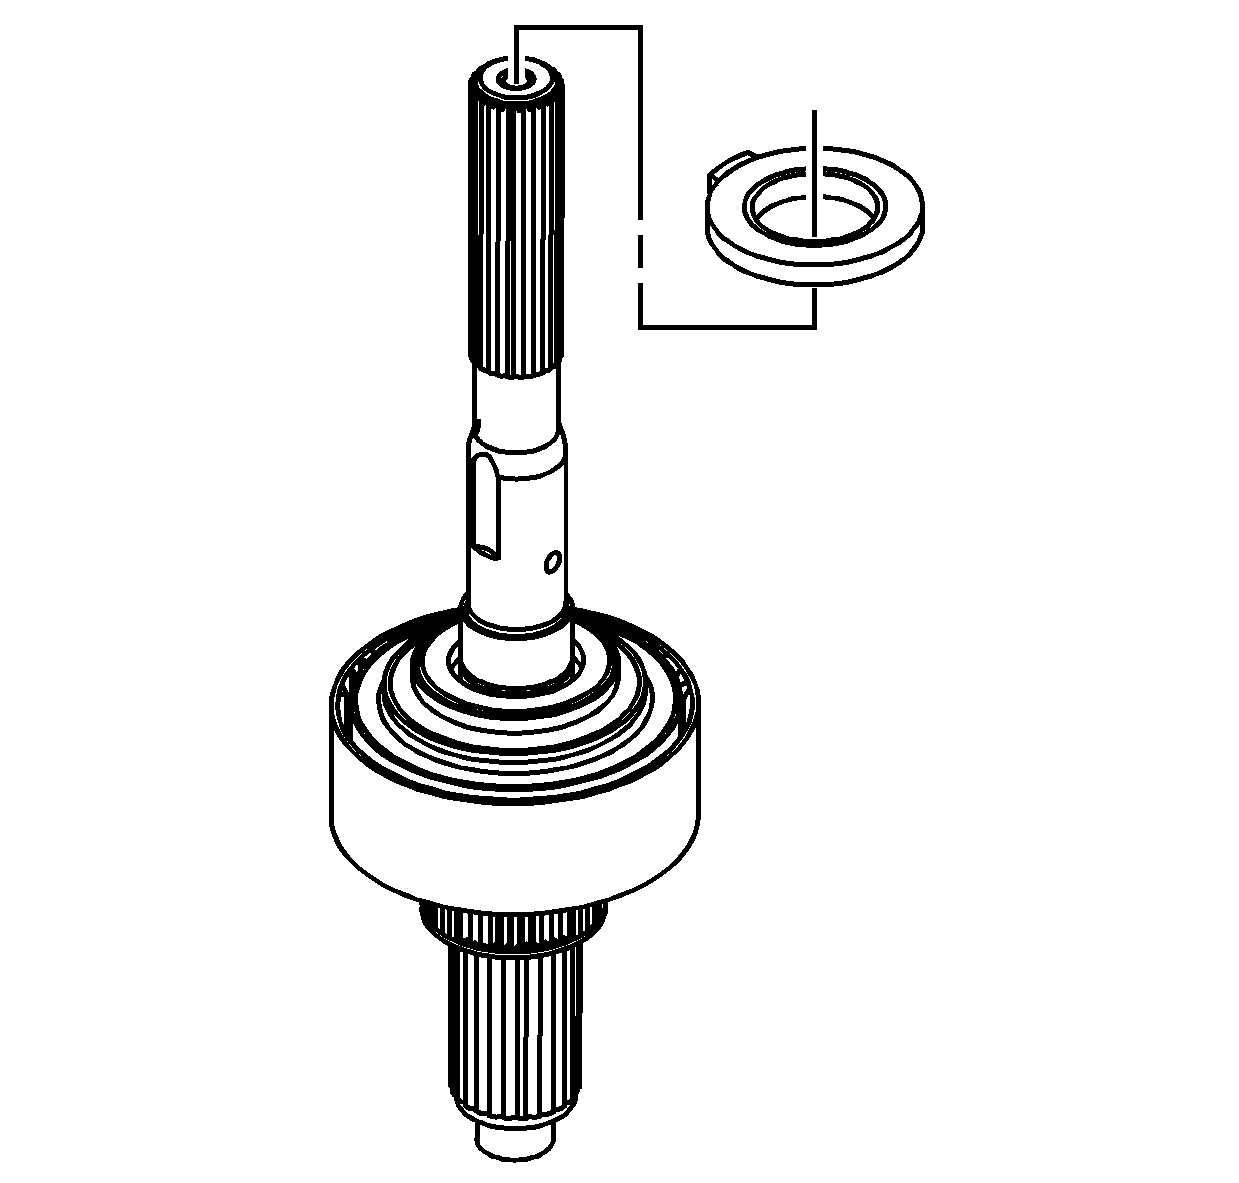
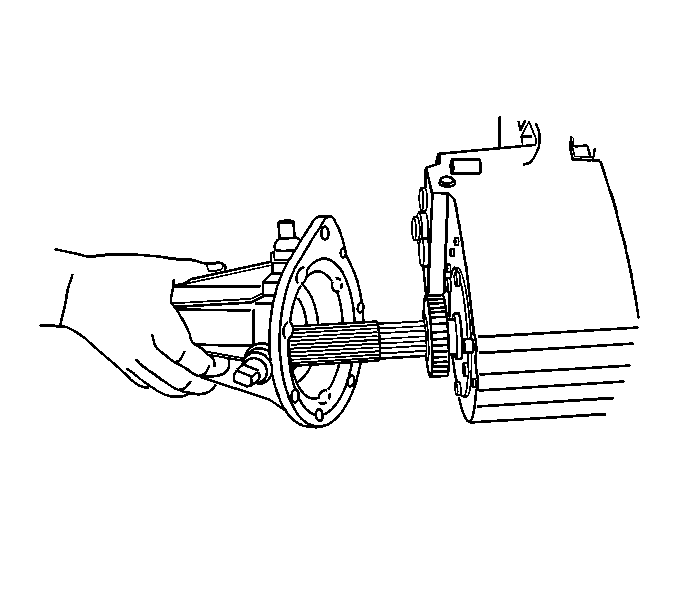
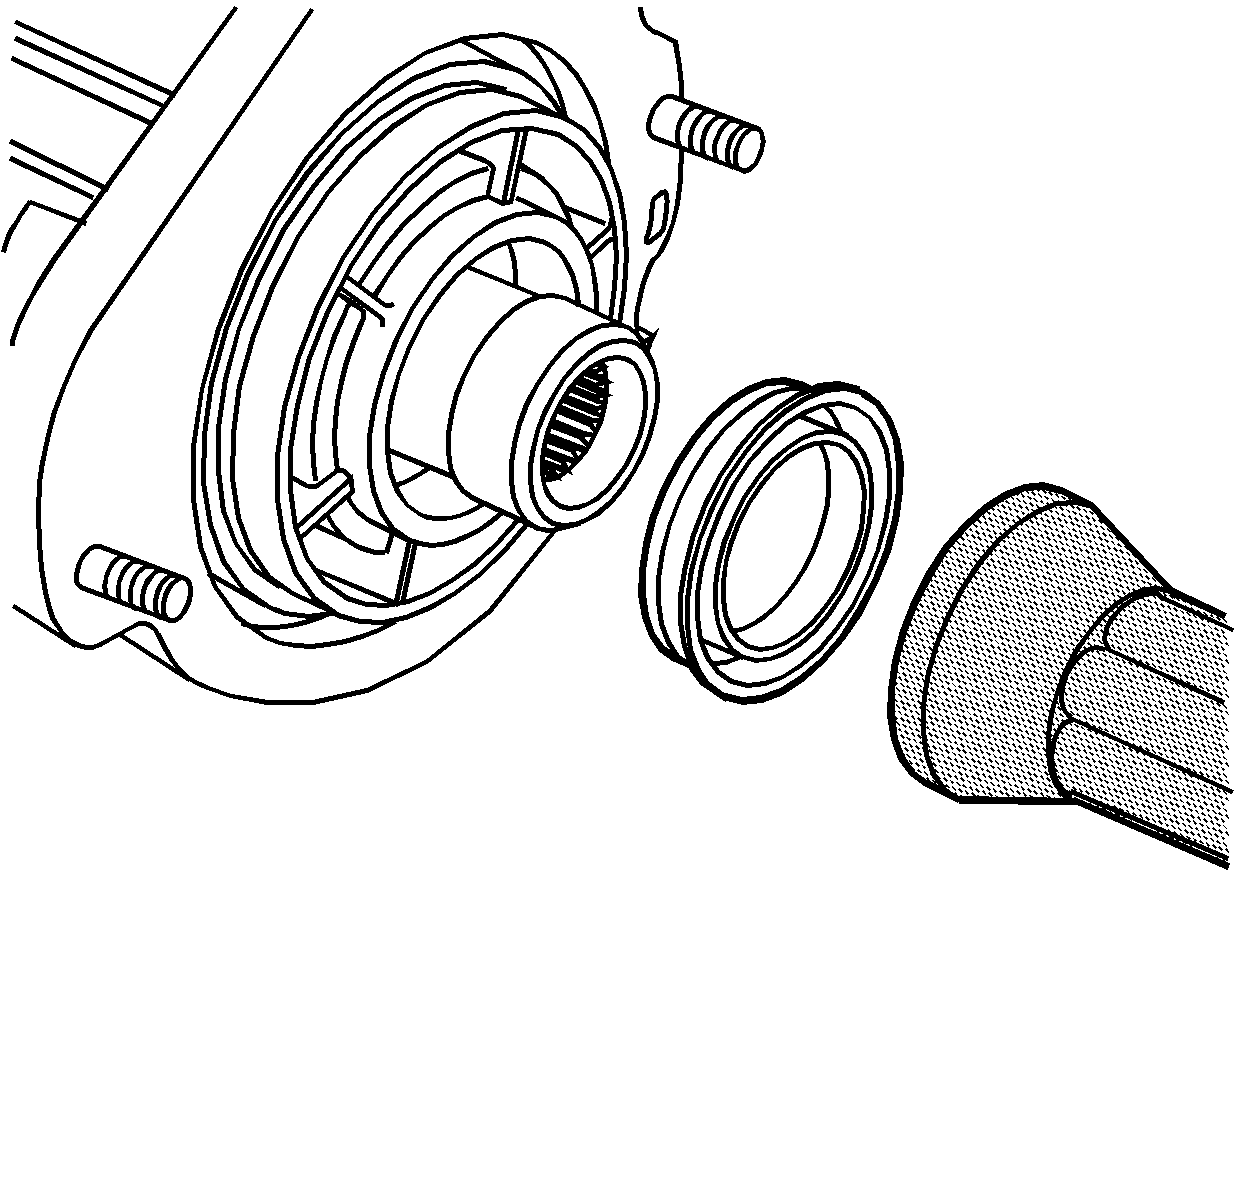
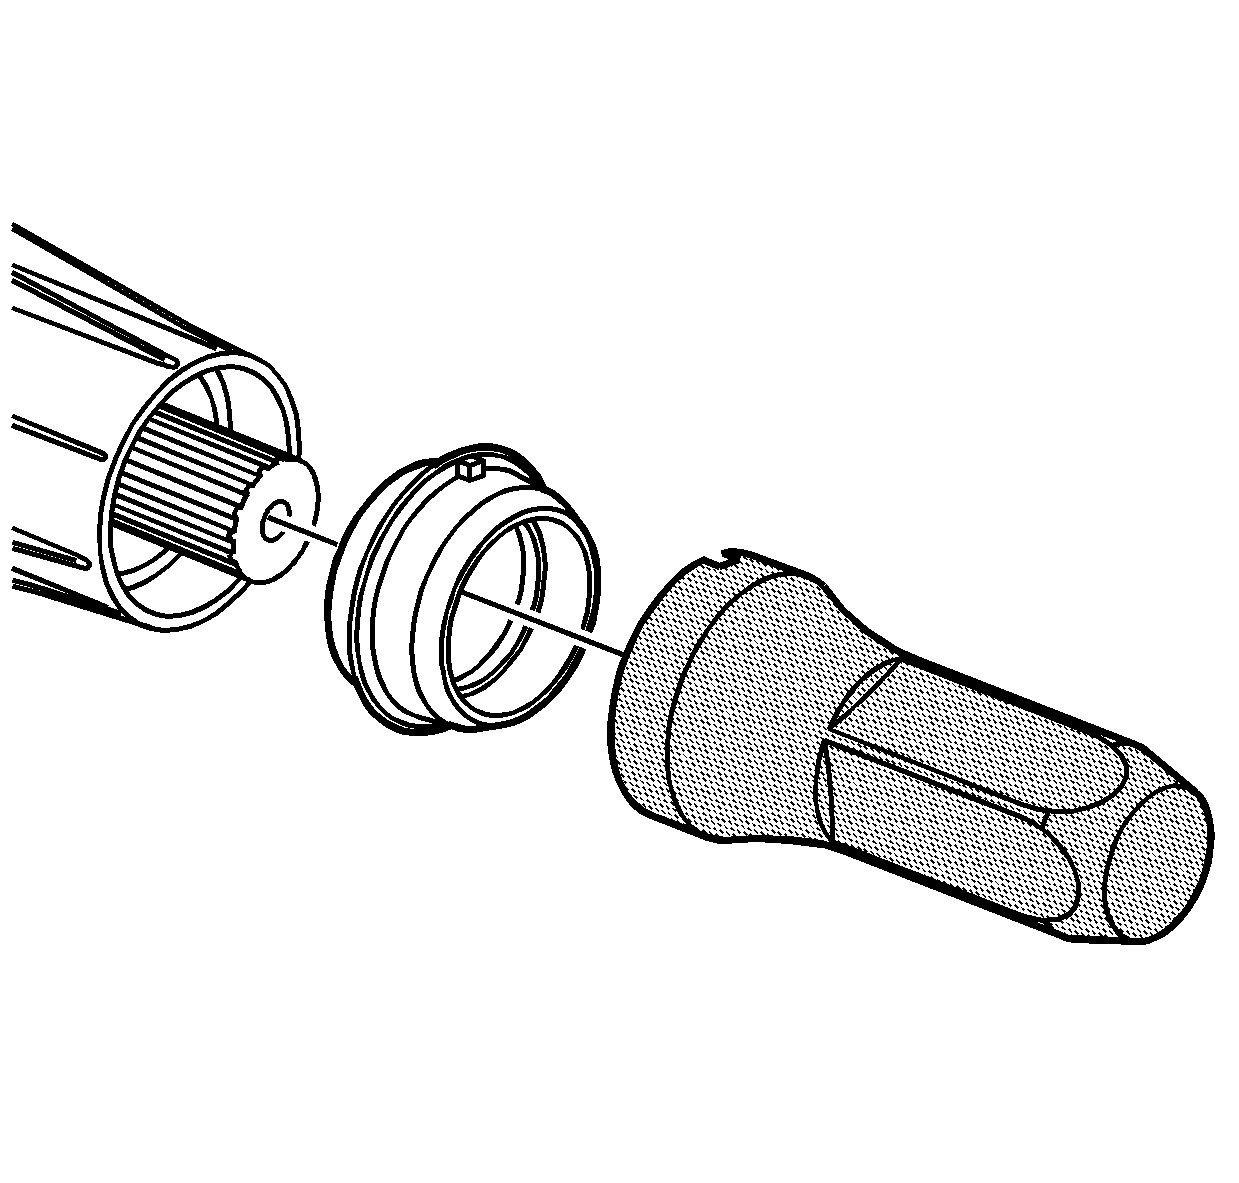
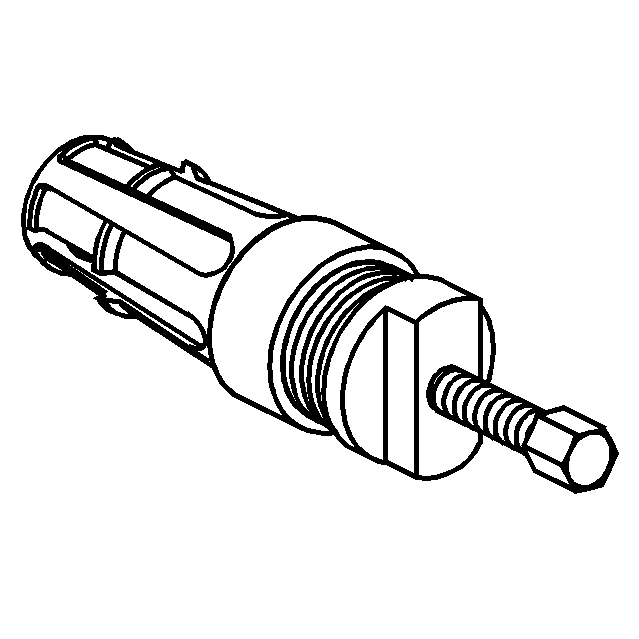
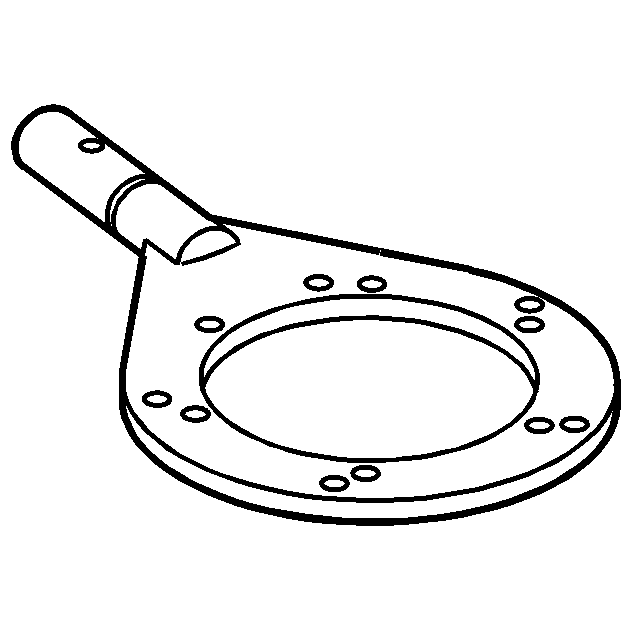
- Install the J 45236-2 onto the front output shaft.
- Install the seal onto the J 45236-2 (1).
- Using the J 45326-1 (2), install the front output shaft seal.
- Using the
J 42738
, install
the front input shaft seal.
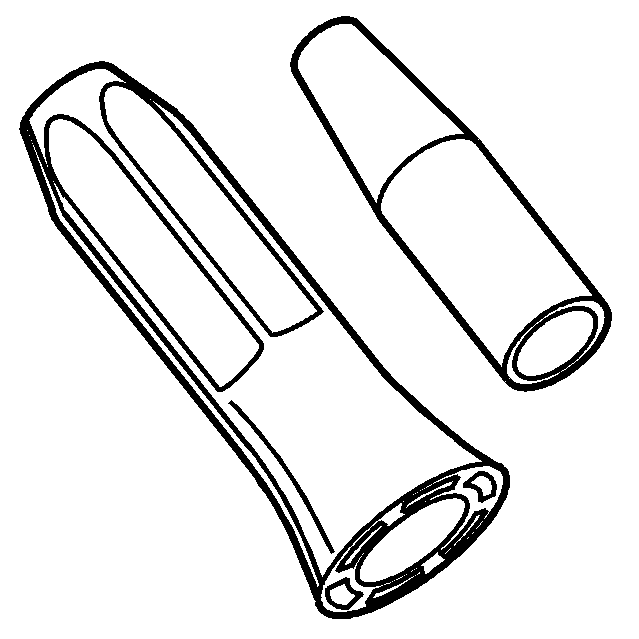
- Using the
J 45380
, install a new rear output shaft bushing.
| 87.1. | Install the bushing on the finger section of the
J 45380
. |
| 87.2. | Install the finger section to the main body of the
J 45380
. |
| 87.3. | Position the bushing and tool to the case. |
| 87.4. | Using a hammer and the
J 45380
, install the bushing. |
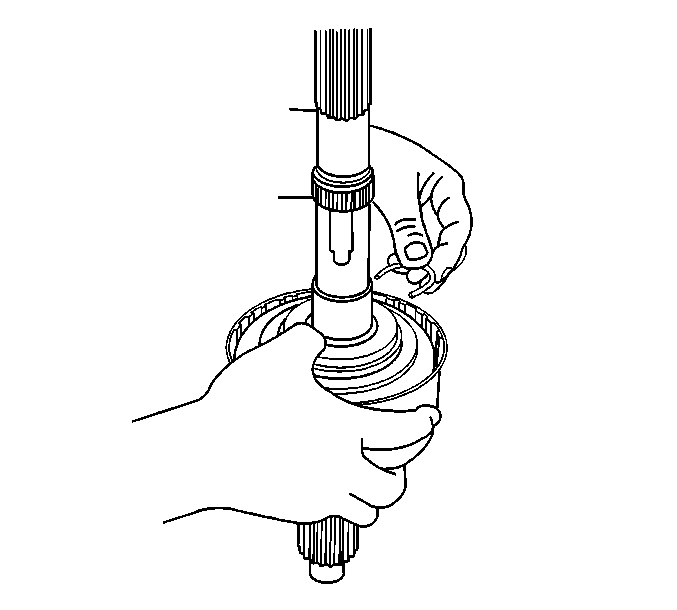
- Using the
J 37668-A
, install
the rear output shaft seal.
| 88.1. | Align the notch on the
J 37668-A
with the tab on the seal. |
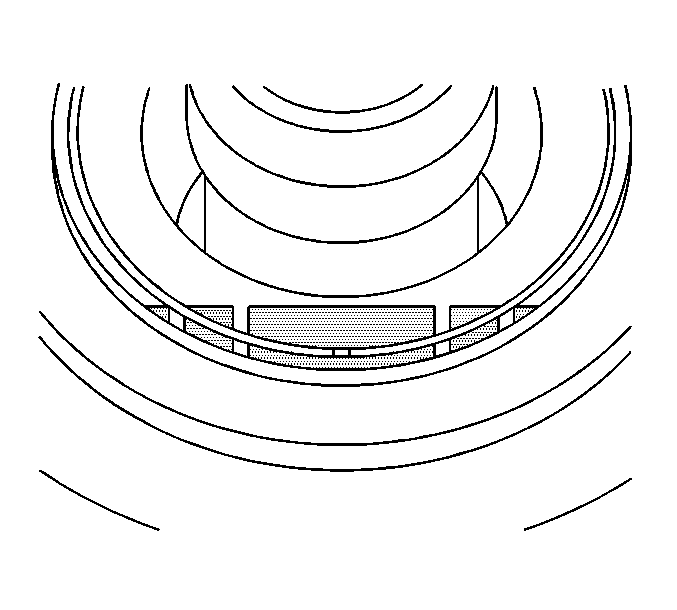
| 88.2. | Install the seal, with the tab, at the top and the weep hole at the bottom. |
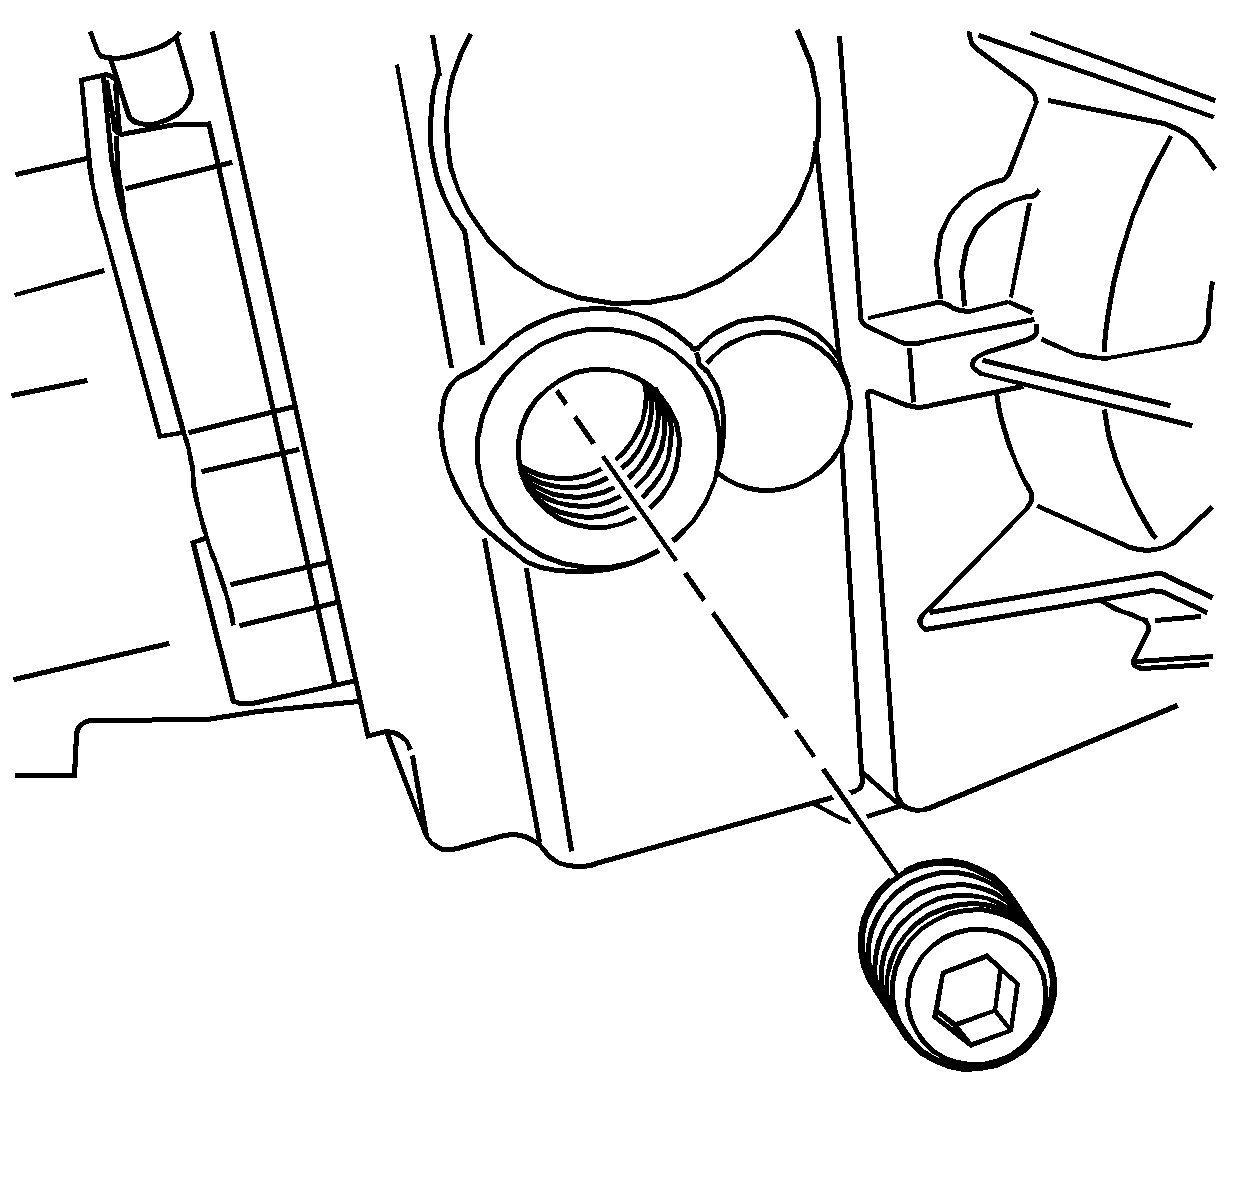
- Apply pipe sealant GM P/N 12346004 (Canadian P/N 10953480) or equivalent to the
fill plug threads.
- Install the fill plug.
Tighten
Tighten the fill plug to 27 N·m (20 lb ft).
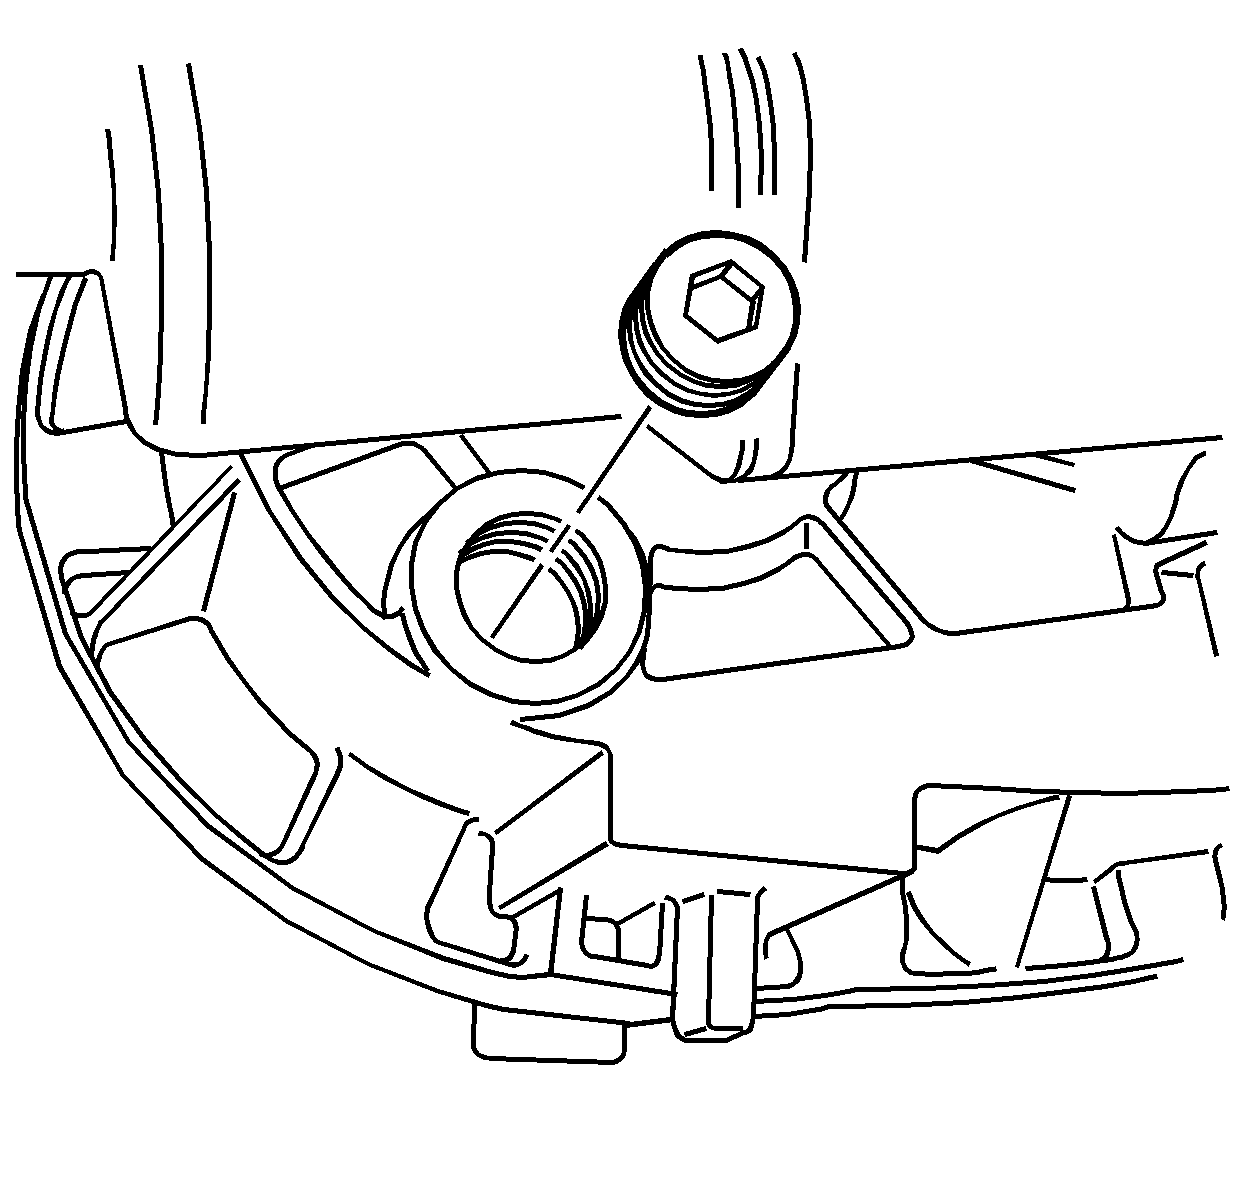
- Apply pipe sealant GM P/N 12346004 (Canadian P/N 10953480) or equivalent to the
drain plug threads.
- Install the drain plug.
Tighten
Tighten the drain plug to 27 N·m (20 lb ft).
