For 1990-2009 cars only
Removal Procedure
- Remove the air conditioning (A/C) compressor hose. Refer to Compressor Hose Assembly Replacement .
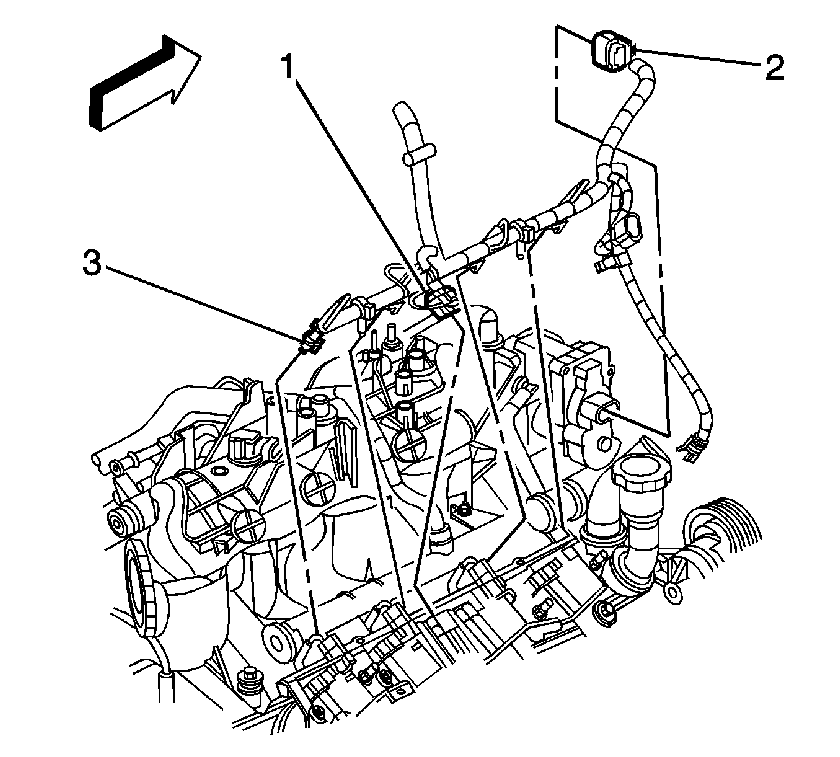
- Remove the connector position assurance (CPA) lock.
- Disconnect the main electrical connector (1) to the ignition coil wire harness.
- Remove the harness clips.
- Reposition the engine harness, if necessary.
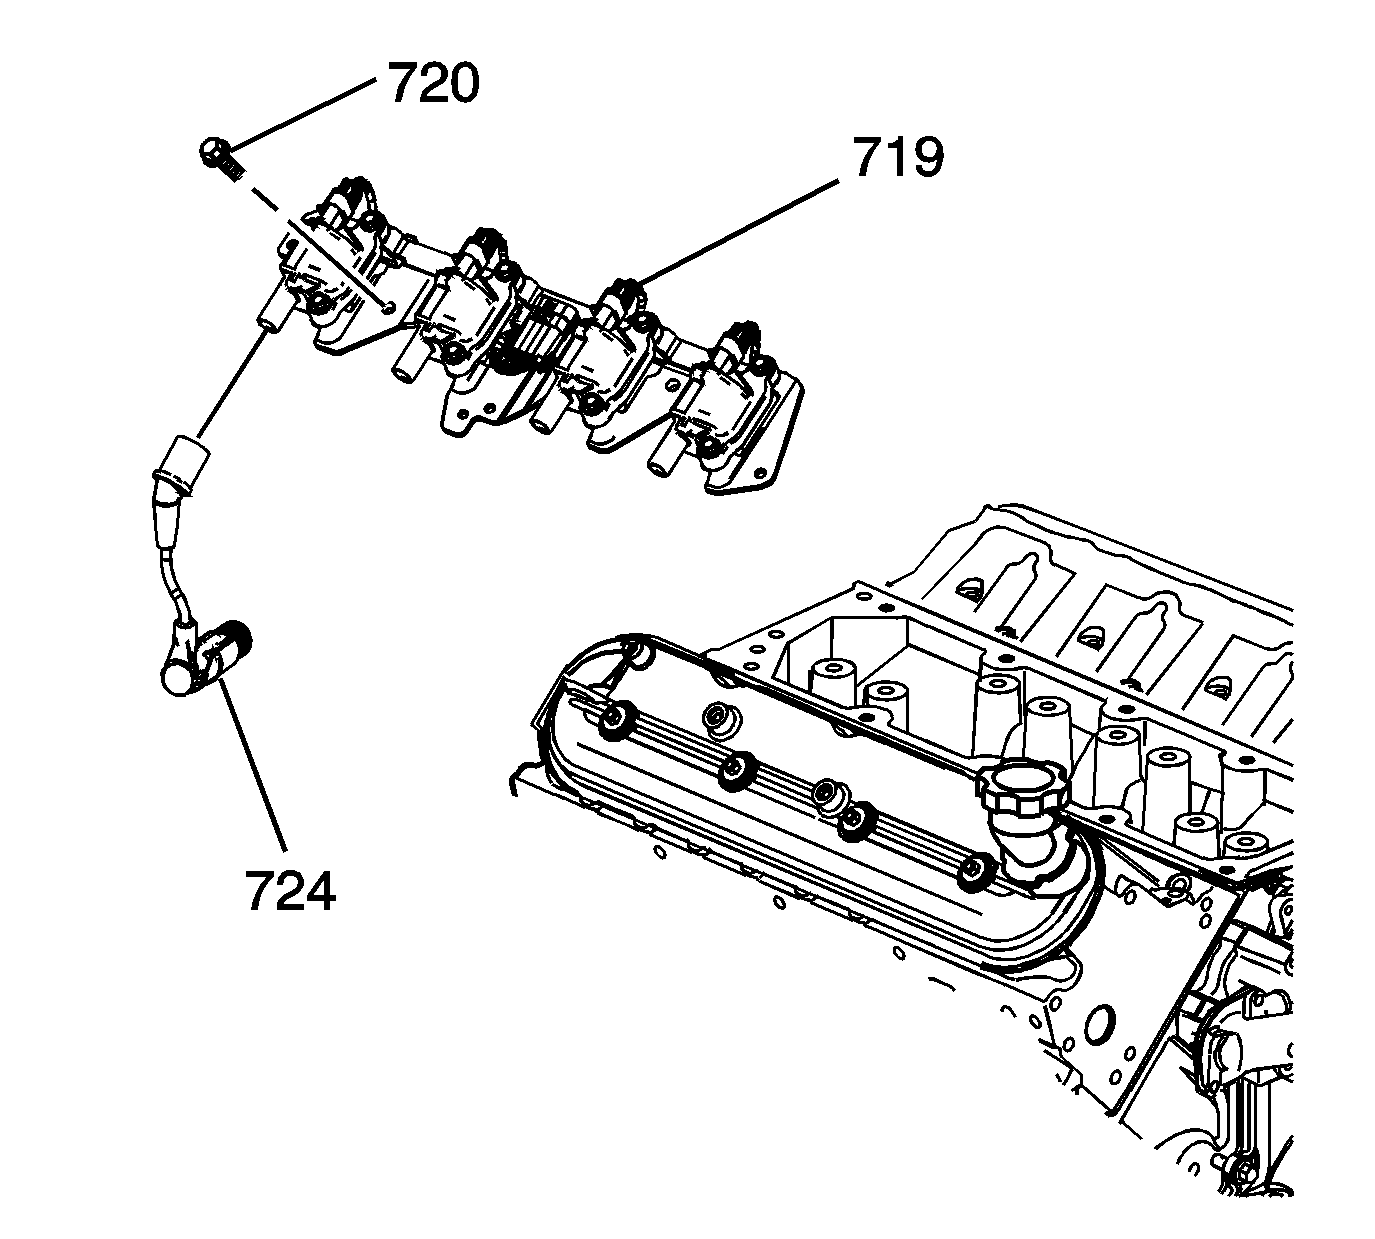
- Remove the spark plug wires from the ignition coils.
- If necessary, remove the ignition coil bracket studs from the rocker arm cover.
- If necessary, remove the ignition coils and bracket from the rocker cover.
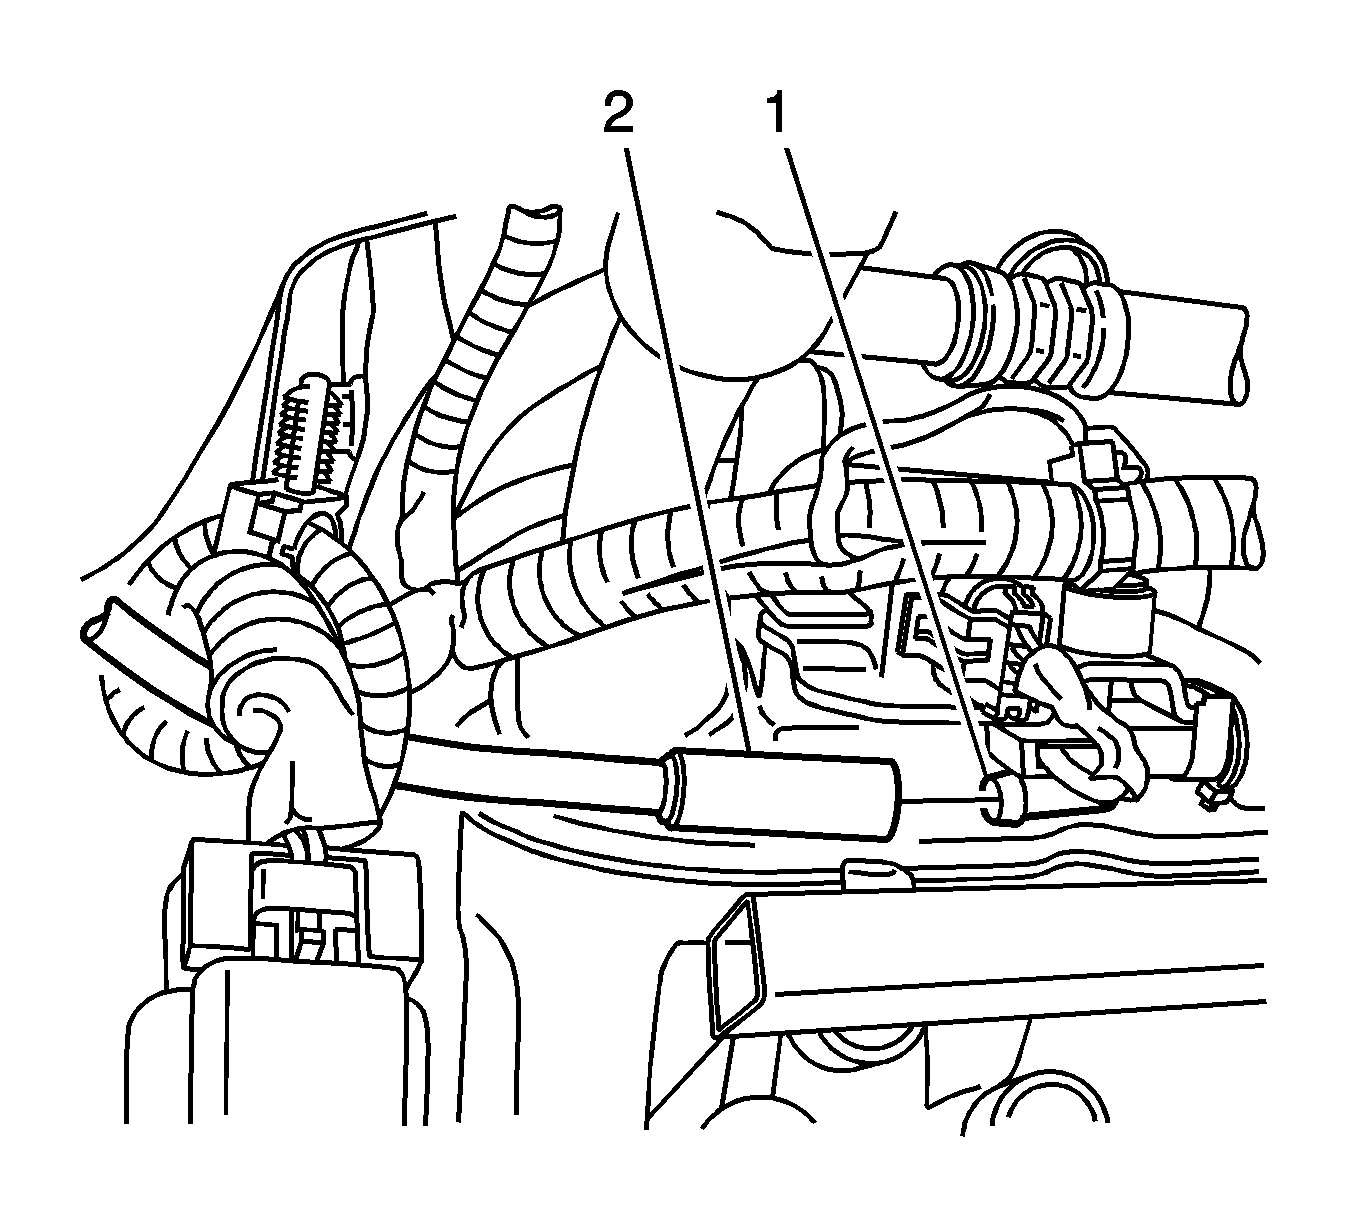
- Remove the vent hose (2) from the valve rocker arm cover (1).
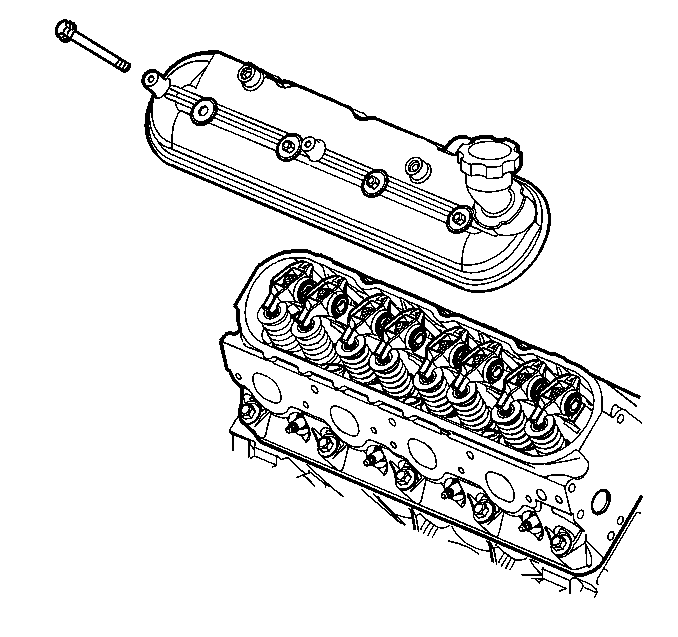
- Remove the valve rocker arm cover bolts.
- Remove the valve rocker arm cover.
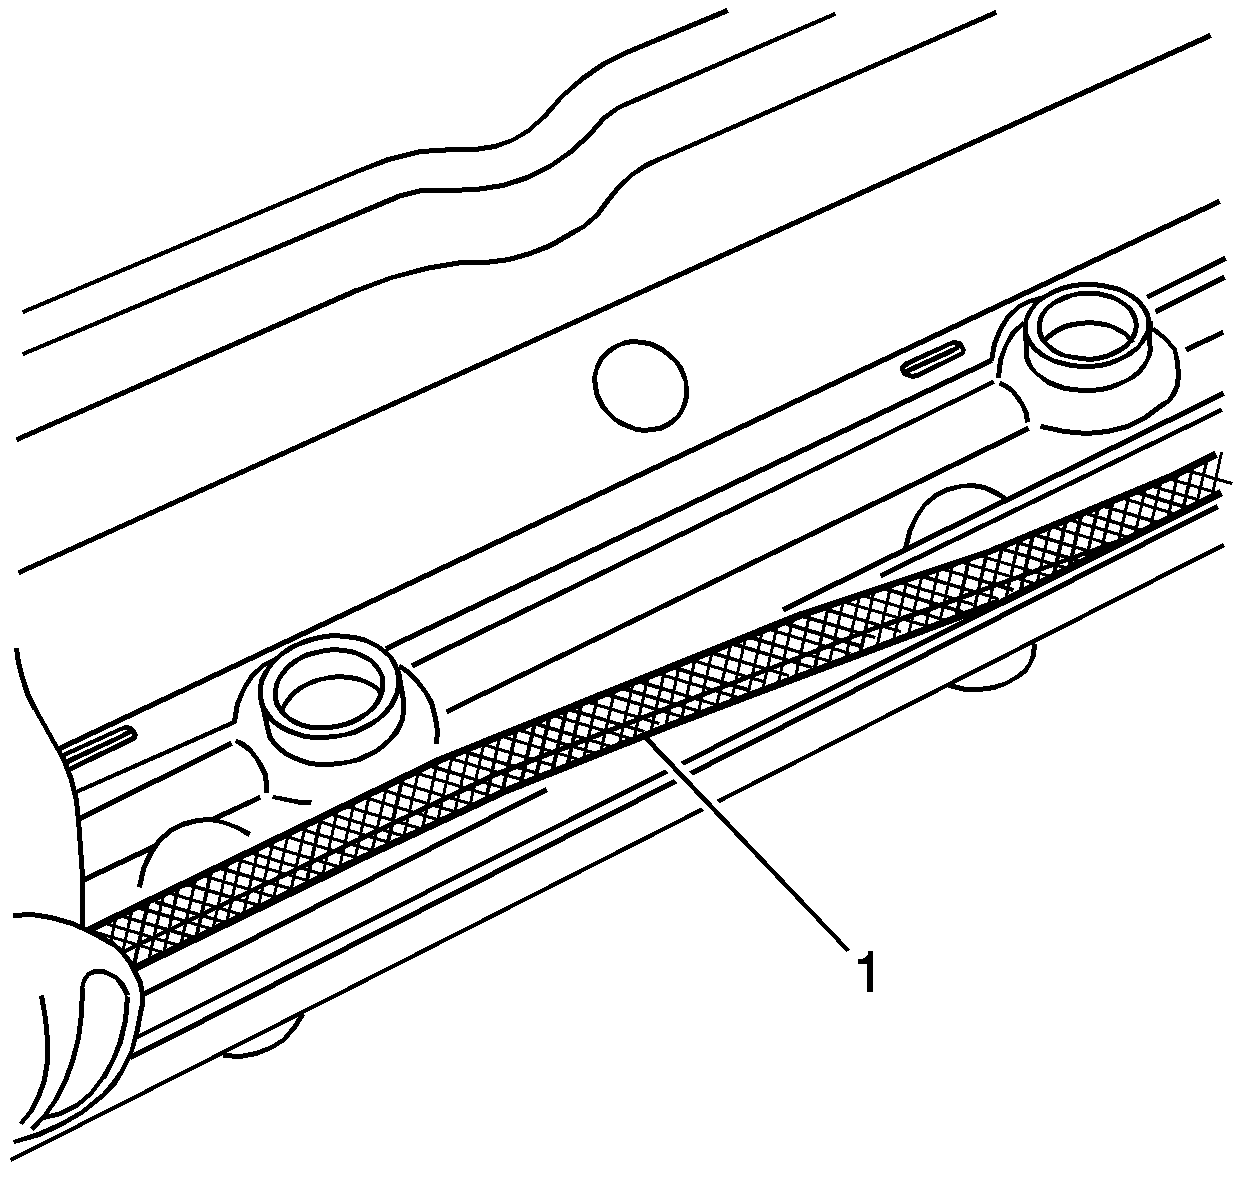
- Remove the gasket (1) from the rocker cover.
- Discard the OLD gasket.
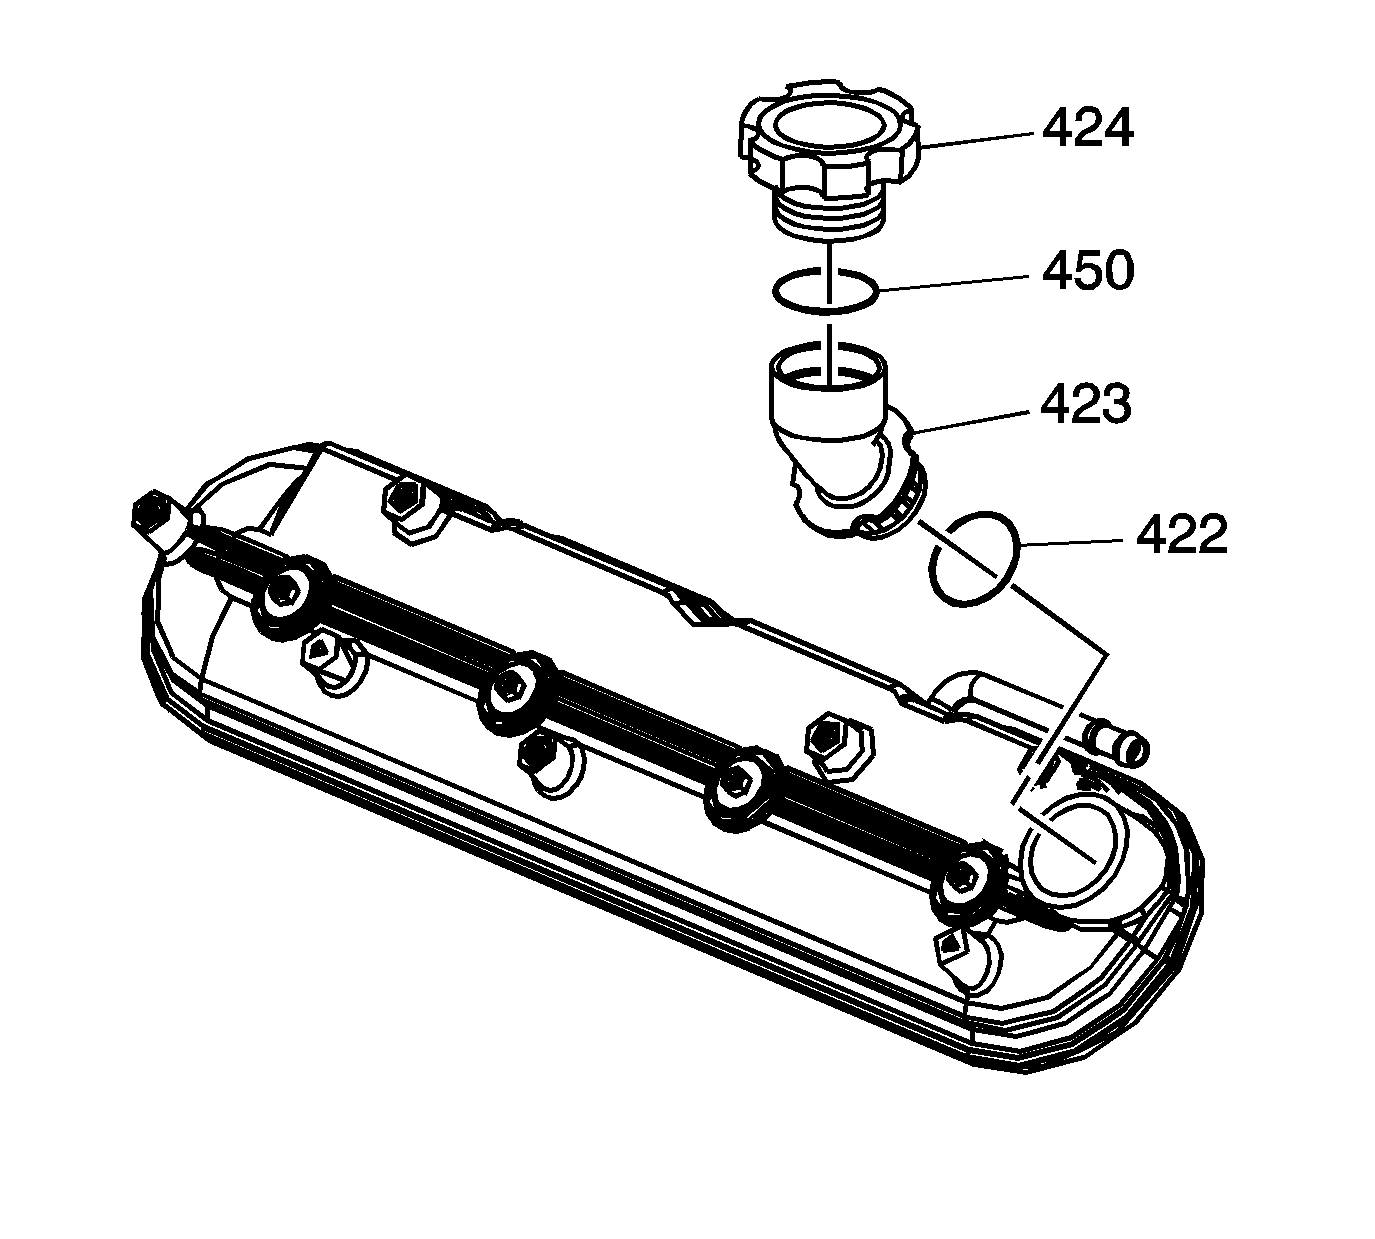
- Remove the oil fill cap from the oil fill tube.
- Remove the oil fill tube from the rocker cover, if required.
- Discard the oil fill tube.
| • | Twist each plug wire ½ turn. |
| • | Pull only on the boot in order to remove the wire from the ignition coil. |
Installation Procedure
- Lubricate the O-ring seal of the NEW oil fill tube with clean engine oil.
- Insert the NEW oil fill tube into the rocker arm cover.
- Install the oil fill cap into the tube.
- Install a NEW rocker cover gasket (1) into the valve rocker arm cover.
- Install the valve rocker arm cover onto the cylinder head.
- Install new rocker arm cover grommets, if necessary.
- Install the rocker arm cover bolts and grommets.
- Install the vent hose (2) to the valve rocker arm cover (1).
- Apply threadlock to the threads of the bracket bolts. Refer to Adhesives, Fluids, Lubricants, and Sealers for the correct part number.
- If necessary, install the ignition coils and bracket to the rocker arm cover.
- If necessary, install the ignition coil bracket studs to the rocker cover.
- Install the spark plug wires to the ignition coils.
- Position the engine harness, if necessary.
- Install the harness clips.
- Connect the main electrical connector (1) feeding the ignition coils.
- Install the CPA lock.
- Install the A/C compressor hose. Refer to Compressor Hose Assembly Replacement .
Important:
• All gasket surfaces should be free of oil or other foreign material during assembly. • DO NOT reuse the valve rocker arm cover gasket. • The valve rocker arm cover bolt grommets may be reused. • If the oil fill tube has been removed from the rocker arm cover, install a NEW fill tube during assembly.
Rotate the tube clockwise until locked in the proper position.
Rotate the cap clockwise until locked in the proper position.
Notice: Refer to Fastener Notice in the Preface section.
Tighten
Tighten the bolts to 12 N·m (106 lb in).
Tighten
Tighten the studs to 12 N·m (106 lb in).
