For 1990-2009 cars only
Starter Replacement 4.2L Engine
Removal Procedure
- Disconnect the battery negative cable. Refer to Battery Negative Cable Disconnection and Connection .
- Remove the vacuum brake booster hose. Refer to Vacuum Brake Booster Check Valve and/or Hose Replacement .
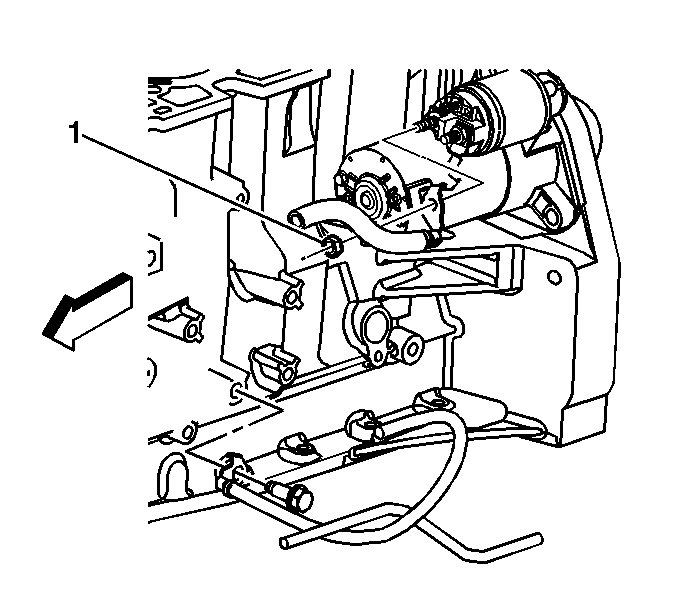
- Remove the battery positive lead from the solenoid (1).
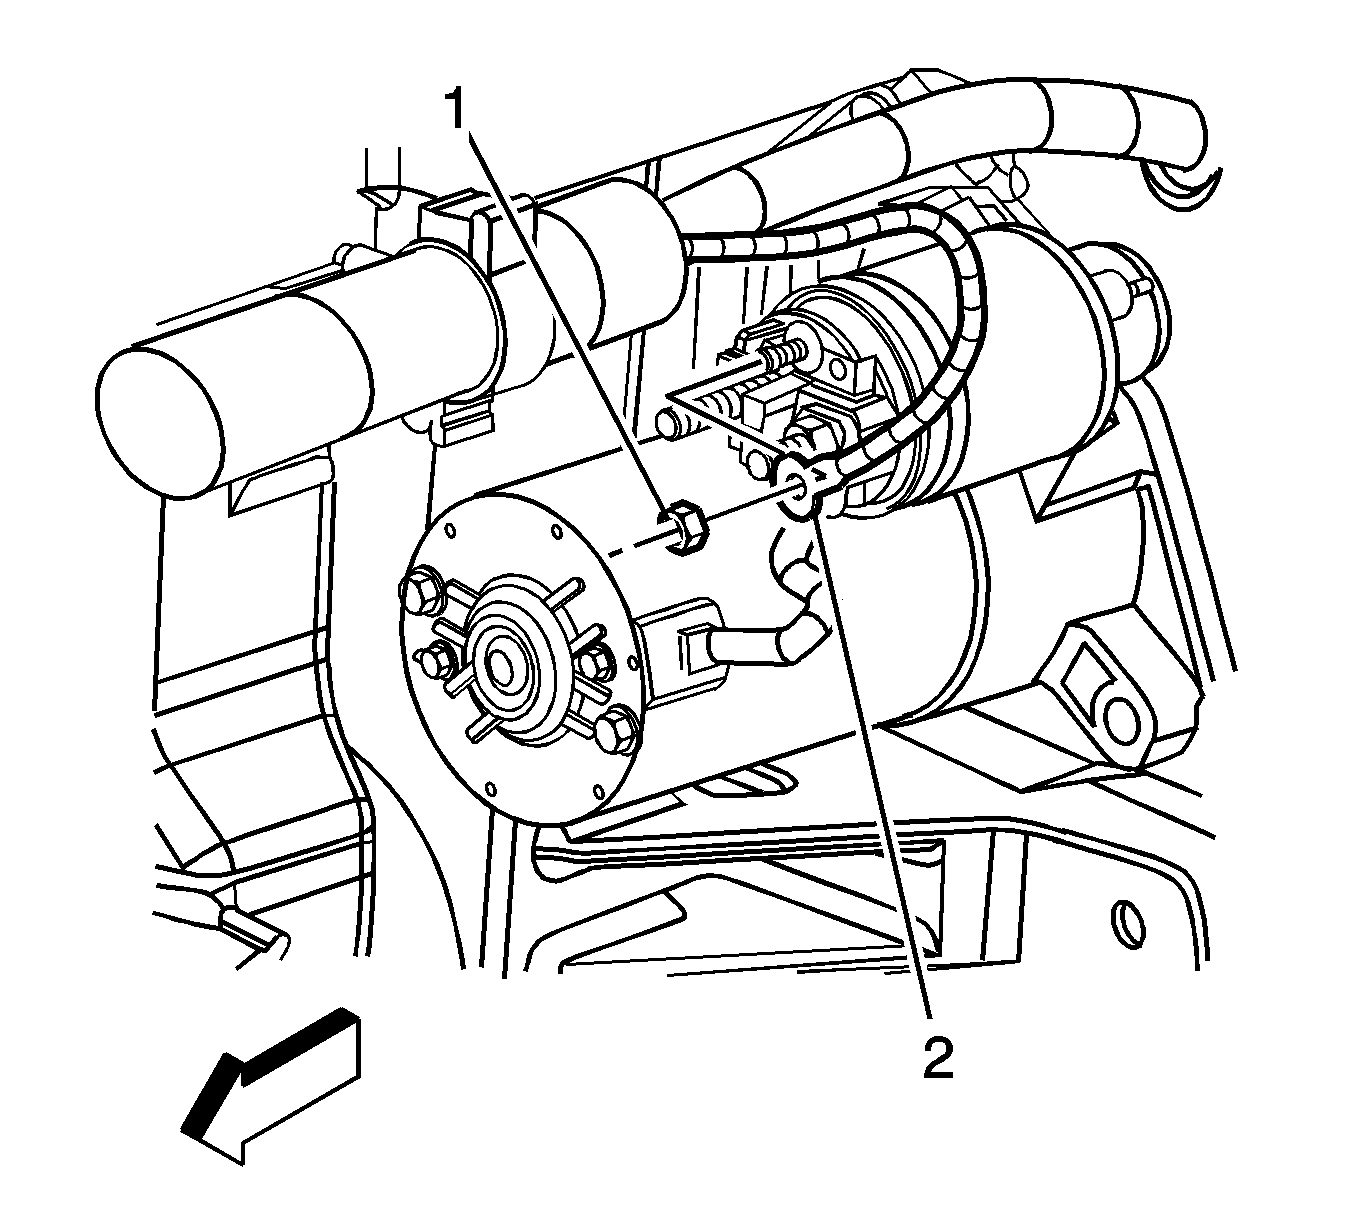
- Remove the starter solenoid S-terminal lead nut (1) from the solenoid.
- Remove the starter solenoid S-terminal lead (2) from the solenoid.
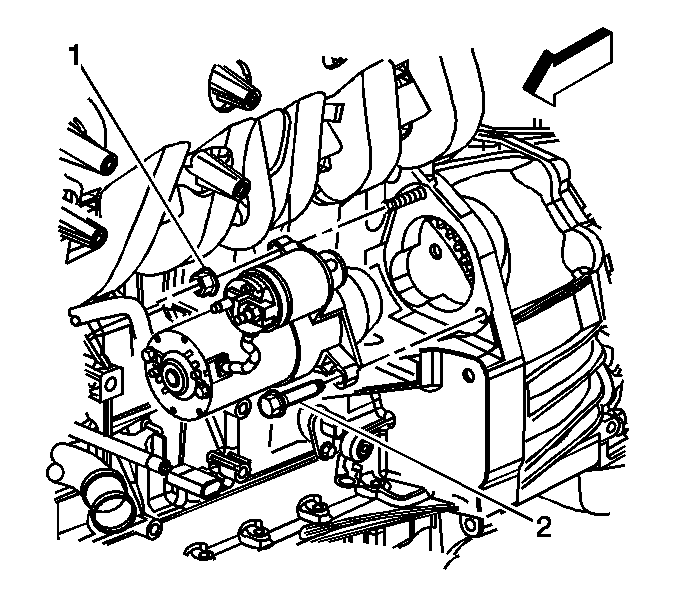
- Remove the starter mount bolt and nut (1, 2).
- Remove the starter motor.
Installation Procedure
- Install the starter motor.
- Install the starter motor mount bolt (2) and nut (1).
- Connect the positive battery cable to the starter solenoid and secure the cable with a nut (1).
- Install the starter solenoid S-terminal lead (2) to the solenoid and secure the lead with a nut (1).
- Install the vacuum brake booster hose. Refer to Vacuum Brake Booster Check Valve and/or Hose Replacement .
- Connect the battery negative cable. Refer to Battery Negative Cable Disconnection and Connection .

Notice: Refer to Fastener Notice in the Preface section.
Tighten
Tighten the starter mount bolt and nut to 50 N·m (37 lb ft).

Tighten
Tighten the positive cable nut to 9 N·m (80 lb in).

Tighten
Tighten the S-terminal nut to 2.3 N·m (20 lb in).
Starter Replacement 5.3L Engine
Removal Procedure
- Disconnect the negative battery cable. Refer to Battery Negative Cable Disconnection and Connection .
- Raise and suitably support the vehicle. Refer to Lifting and Jacking the Vehicle .
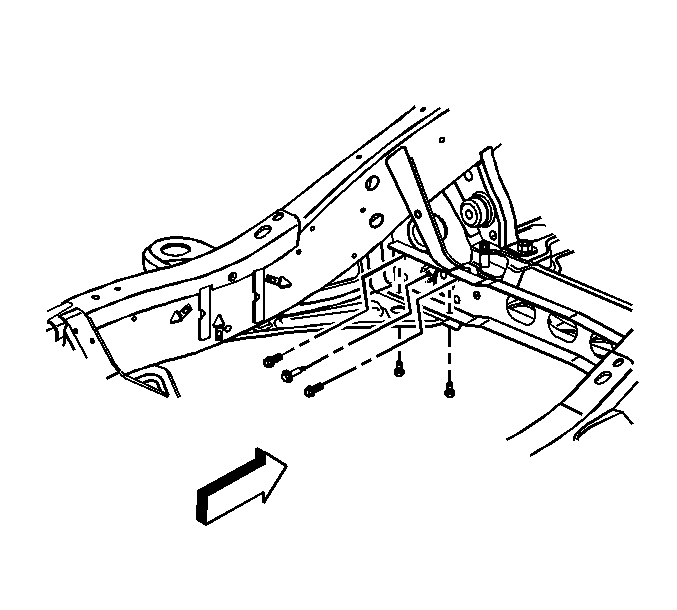
- Remove the rear steering gear crossmember. Refer to Rear Steering Gear Crossmember Replacement .
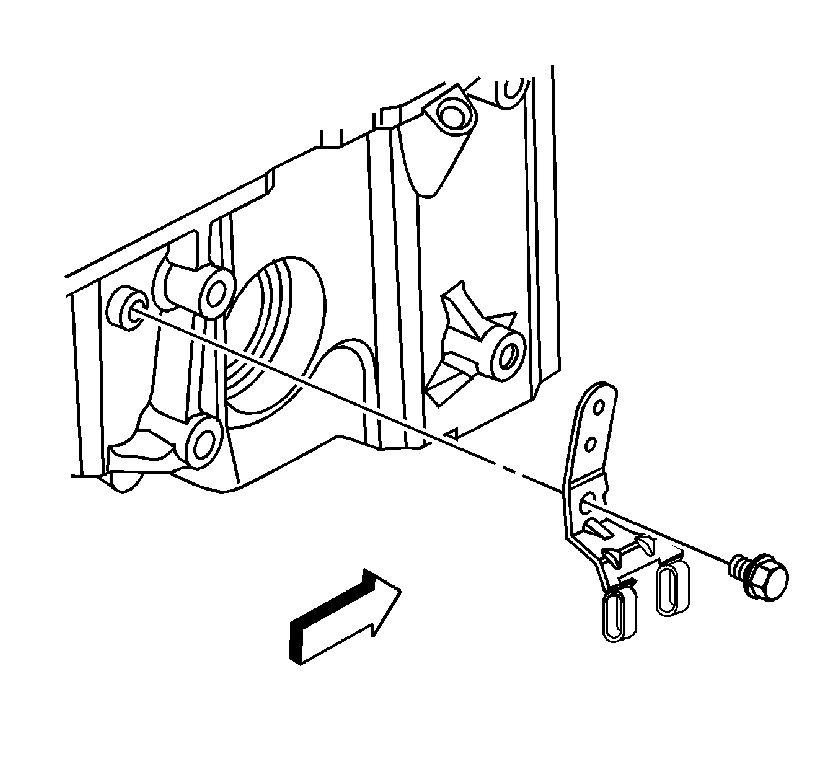
- Remove the wire harness from the wire harness retaining clips on the transmission oil cooler line bracket.
- Remove the transmission oil cooler line bracket bolt.
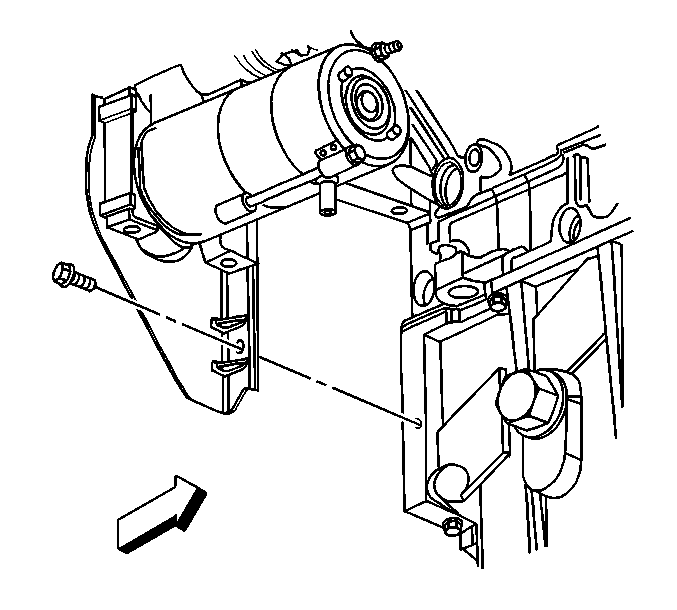
- Remove the right transmission cover bolt.
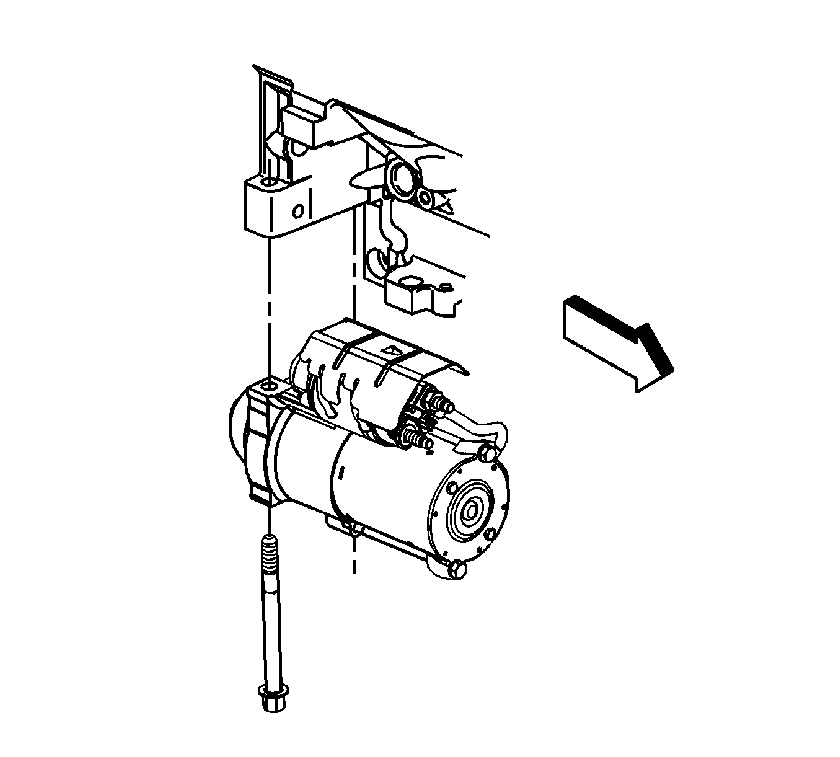
- Remove the starter bolts.
- Move the starter toward the front of the vehicle, and remove the transmission cover.
- Remove the starter solenoid heat shield.
- Tilt and rotate the starter in order to pass the starter between the transmission oil cooler lines and the engine oil pan.
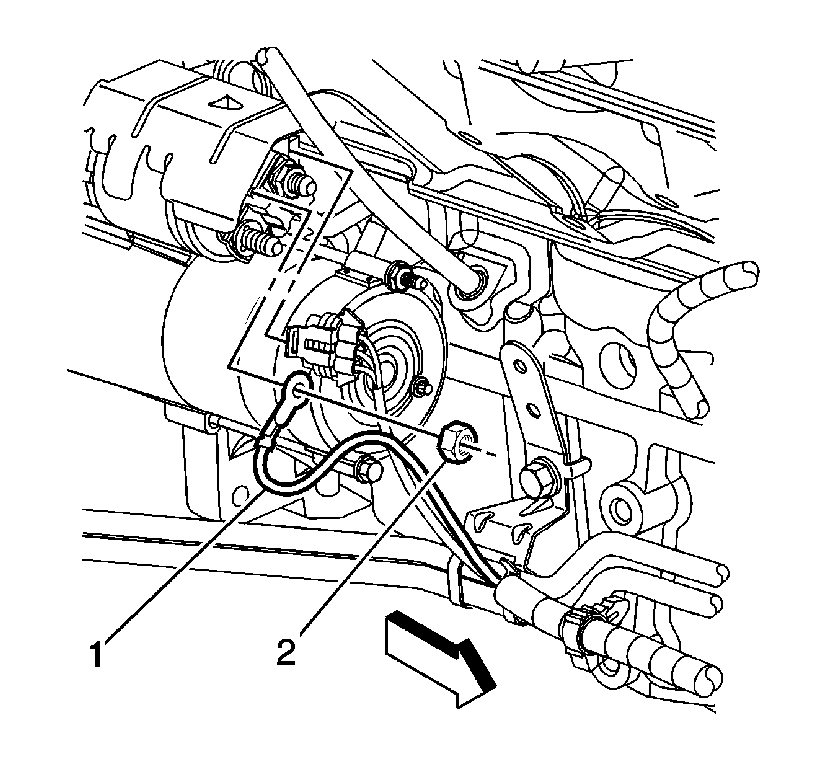
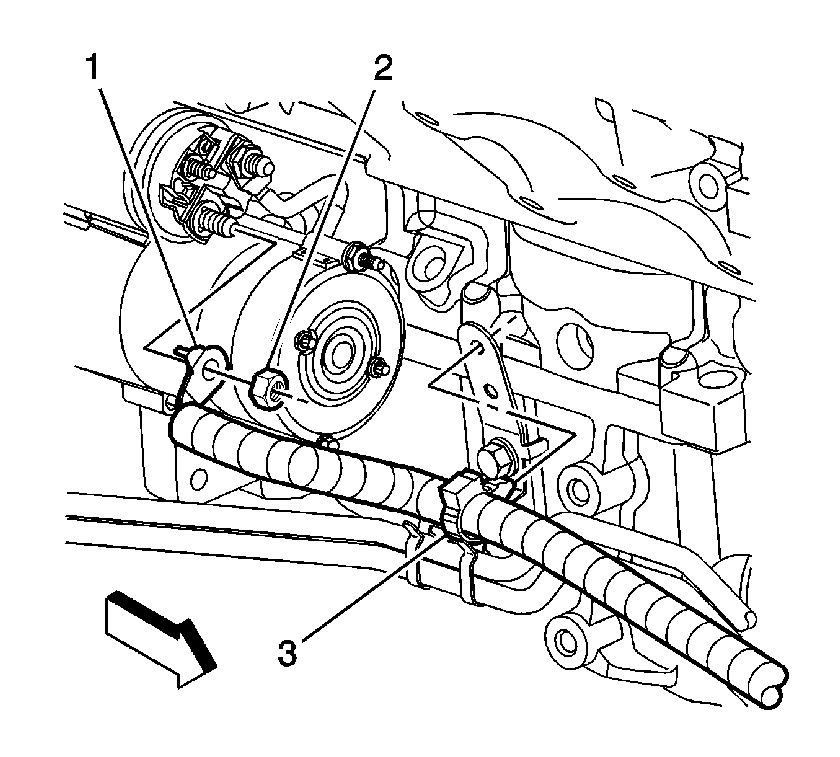
- Remove the starter solenoid nut (2).
- Remove the starter lead (1) from the solenoid stud.
- Remove the battery positive cable nut (2).
- Remove the battery positive cable (1) from the starter solenoid.
- Finish removing the starter from the vehicle.
Installation Procedure
- Begin installing the starter between the transmission oil cooler lines and the engine oil pan.
- Install the battery positive cable (1) to the starter stud.
- Install the battery positive cable nut (2).
- Install the starter solenoid lead (1) to the solenoid stud.
- Install the starter solenoid nut (2).
- Install the starter solenoid heat shield.
- Slide the starter toward the front of the vehicle.
- Position the starter to the engine.
- Install the starter bolts.
- Install the right transmission cover bolt.
- Install the transmission oil cooler line bracket bolt.
- Attach the wire harness to the wire harness retaining clips on the transmission oil cooler line bracket.
- Install the rear steering gear crossmember. Refer to Rear Steering Gear Crossmember Replacement .
- Lower the vehicle.
- Connect the negative battery cable. Refer to Battery Negative Cable Disconnection and Connection .

Notice: Refer to Fastener Notice in the Preface section.
Tighten
Tighten the nut to 9 N·m (80 lb in).

Tighten
Tighten the nut to 3.4 N·m (30 lb in).

Position the transmission cover to the transmission.
Tighten
Tighten the bolts to 50 N·m (37 lb ft).

Tighten
Tighten the bolt to 9 N·m (80 lb in).

Tighten
Tighten the bolt to 9 N·m (80 lb in).

