Removal Procedure
- Recover the refrigerant. Refer to Refrigerant Recovery and Recharging .
- Drain the cooling system. Refer to Cooling System Draining and Filling in Engine Cooling.
- Raise and support the vehicle. Refer to Lifting and Jacking the Vehicle in General Information.
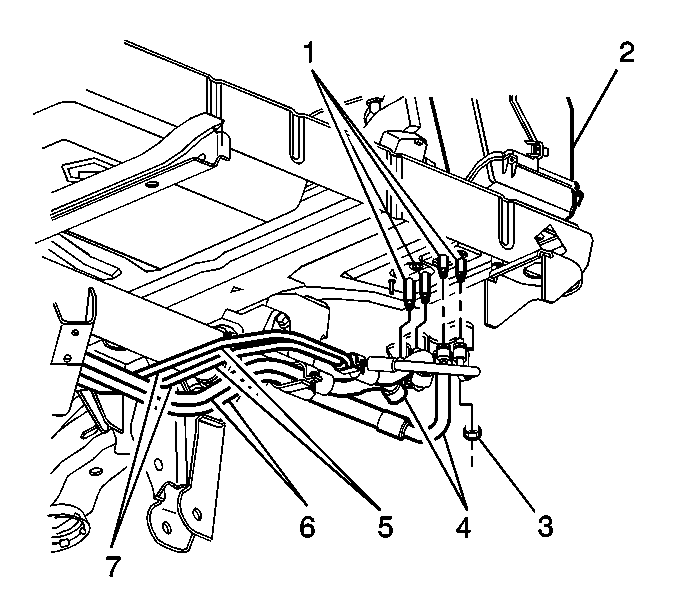
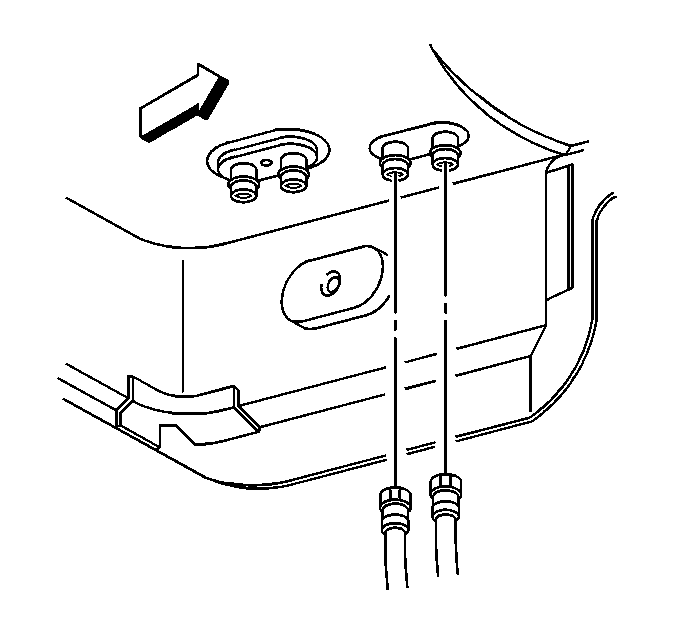
- Remove the nuts (3) from rear A/C line block fittings.
- Remove the A/C line block fittings and discard the O-ring seals.
- Remove the nuts from the heater hoses block fittings.
- Remove the heater hoses block fittings from the HVAC module-auxiliary.
- Remove the nuts from the HVAC module studs.
- Lower the vehicle.
- Remove the right side rear quarter trim. Refer to Rear Quarter Trim Panel Replacement - Right Side in Interior Trim.
- Disconnect the electrical connectors from the HVAC module.
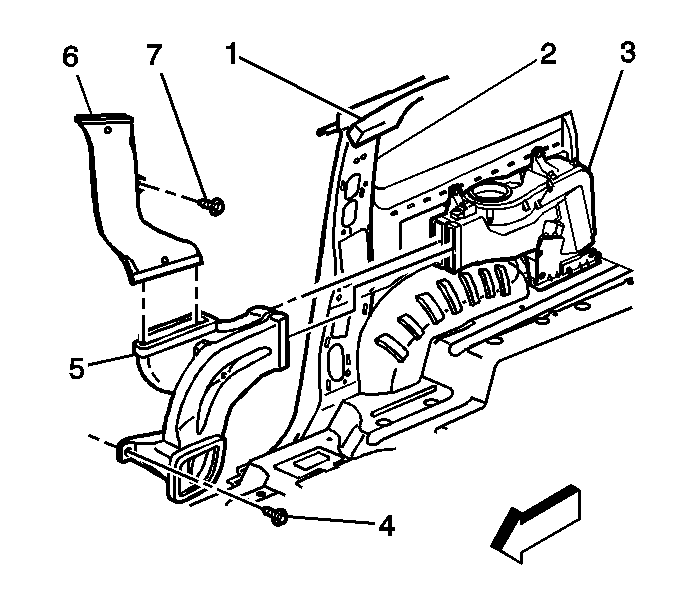
- Disconnect the rear compartment air outlet ducts (5) from the HVAC module (3).
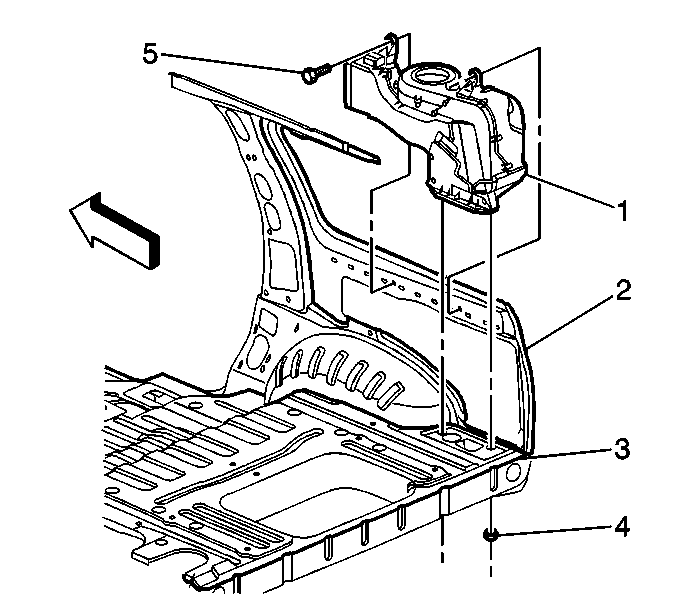
- Remove the mounting bolts (5) from the HVAC module.
- Remove the HVAC module (1).
- Remove and discard the HVAC module pass through seal.
Important: Cap or tape the open A/C refrigerant lines immediately.
Installation Procedure
- Install new HVAC module pass through seal. Refer to Auxiliary HVAC Module Pass Thru Seal Replacement .
- Install the HVAC module (1).
- Install the HVAC module mounting bolts (5).
- Install the air outlet ducts (5).
- Connect the electrical connectors.
- Install the right side rear quarter trim panel. Refer to Rear Quarter Upper Trim Panel Replacement in Interior Trim.
- Raise and support the vehicle.
- Connect the heater hoses to the heater core.
- Install the nuts to the HVAC module studs.
- Remove the cap or tape from the A/C lines.
- Install the new O-ring seals. Refer to O-Ring Replacement .
- Install the nuts (3) to the evaporator core studs.
- Lower the vehicle.
- Fill the cooling system. Refer to Cooling System Draining and Filling in Engine Cooling.
- Evacuate and charge the system. Refer to Refrigerant Recovery and Recharging .
- Leak test the fitting of the component using the J 39400-A .
Notice: Use the correct fastener in the correct location. Replacement fasteners must be the correct part number for that application. Fasteners requiring replacement or fasteners requiring the use of thread locking compound or sealant are identified in the service procedure. Do not use paints, lubricants, or corrosion inhibitors on fasteners or fastener joint surfaces unless specified. These coatings affect fastener torque and joint clamping force and may damage the fastener. Use the correct tightening sequence and specifications when installing fasteners in order to avoid damage to parts and systems.
Tighten
Tighten the bolts to 10 N·m (89 lb in).
Tighten
Tighten the nuts to 10 N·m (89 lb in).
Tighten
Tighten the nuts to 20 N·m (15 lb ft).
