For 1990-2009 cars only
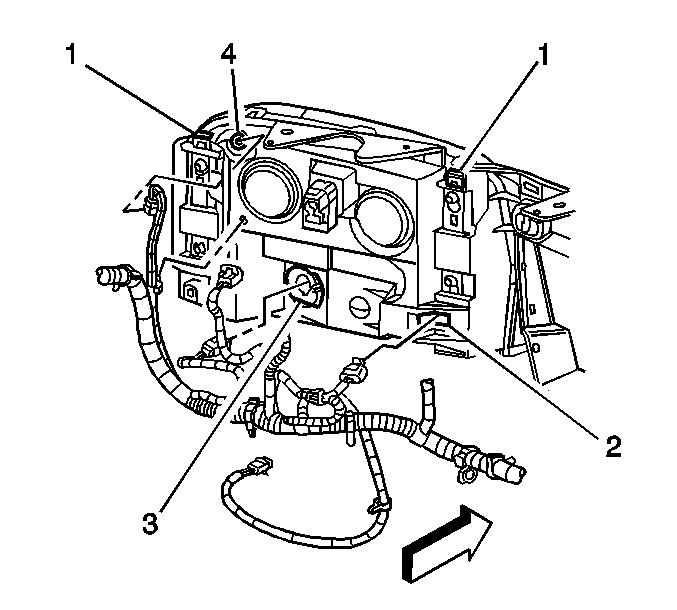
Headlamp Replacement TrailBlazer
Removal Procedure
- Open and support the hood.
- Remove the grille. Refer to Grille Replacement .
- Pull up on the retaining tabs (1) in order to remove the headlamp assembly from the headlamp panel.
- Disconnect the headlamp leveling electrical connector from the motor/actuator if equipped.
- Disconnect the headlamp electrical connector (2) from the headlamp assembly.
- Remove the side marker socket (4) from the headlamp assembly.
- Remove the park/turn socket (3) from the headlamp assembly.
- Remove the headlamp assembly from the headlamp panel.
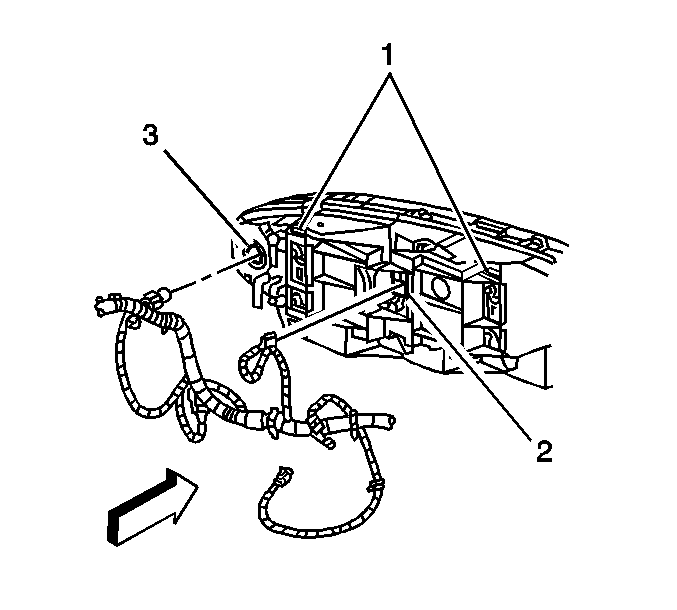
Installation Procedure
- Position the headlamp assembly to the headlamp panel.
- Index and seat the tabs on the park/turn socket (3) to the headlamp assembly.
- Index and seat the tabs on the side marker socket (4) to the headlamp assembly.
- Connect the headlamp electrical connector (2).
- Connect the headlamp leveling electrical connector to the motor/actuator if equipped.
- Align and install the 4 locator pins on the back of the headlamp assembly into the retaining tab holes.
- Push down on the retaining tabs (1) in order to lock the headlamp assembly into the headlamp panel.
- Install the grille. Refer to Grille Replacement .
- Close the hood.
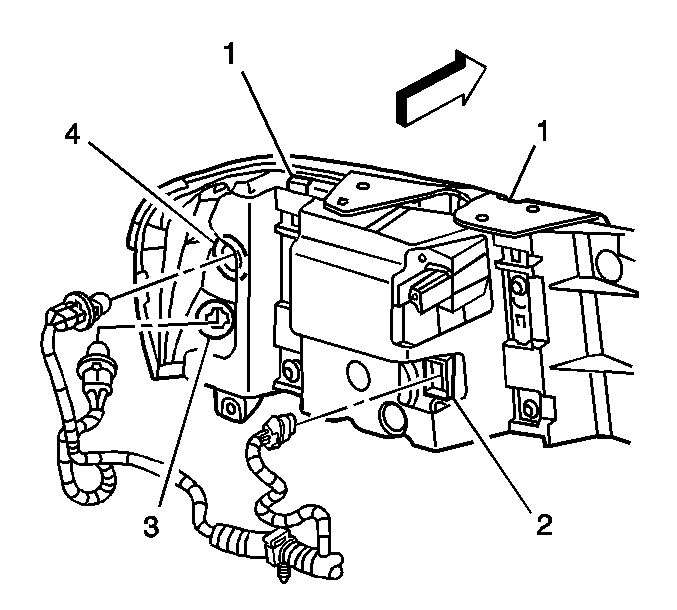
Headlamp Replacement Bravada
Removal Procedure
- Open and support the hood.
- Pull up on the retaining tabs (1) in order to remove the headlamp assembly from the headlamp panel.
- Disconnect the headlamp electrical connector (2) from the headlamp assembly.
- Remove the park/turn socket (3) from the headlamp assembly.
- Remove the headlamp assembly from the headlamp panel.
Installation Procedure
- Position the headlamp assembly to the headlamp panel.
- Index and seat the tabs on the park/turn socket (3) to the headlamp assembly.
- Connect the headlamp electrical connector (2).
- Align and install the 4 locator pins on the back of the headlamp assembly into the retaining tab holes.
- Push down on the retaining tabs (1) in order to lock the headlamp assembly into the headlamp panel.
- Close the hood.
Headlamp Replacement Envoy, Envoy XUV
Removal Procedure
- Open and support the hood.
- Pull up on the retaining tabs (1) in order to remove the headlamp assembly from the headlamp panel.
- Disconnect the headlamp electrical connector (2) from the headlamp assembly.
- Remove the side marker socket (3) from the headlamp assembly.
- Remove the park/turn socket (4) from the headlamp assembly.
- Remove the headlamp assembly from the headlamp panel.
Installation Procedure
- Position the headlamp assembly to the headlamp panel.
- Index and seat the tabs on the park/turn socket (4) to the headlamp assembly.
- Index and seat the tabs on the side marker socket (3) to the headlamp assembly.
- Connect the headlamp electrical connector (2).
- Align and install the 4 locator pins on the back of the headlamp assembly into the retaining tab holes.
- Push down on the retaining tabs (1) in order to lock the headlamp assembly into the headlamp panel.
- Close the hood.
