If a tire goes flat, avoid further tire and wheel damage by driving slowly to a level place. Turn on your hazard warning flashers.
Caution: Changing
a tire can be dangerous. The vehicle can slip off the jack and roll over or fall on
you or other people. You and they could be badly injured or even killed. Find a level
place to change your tire. To help prevent the vehicle from moving:
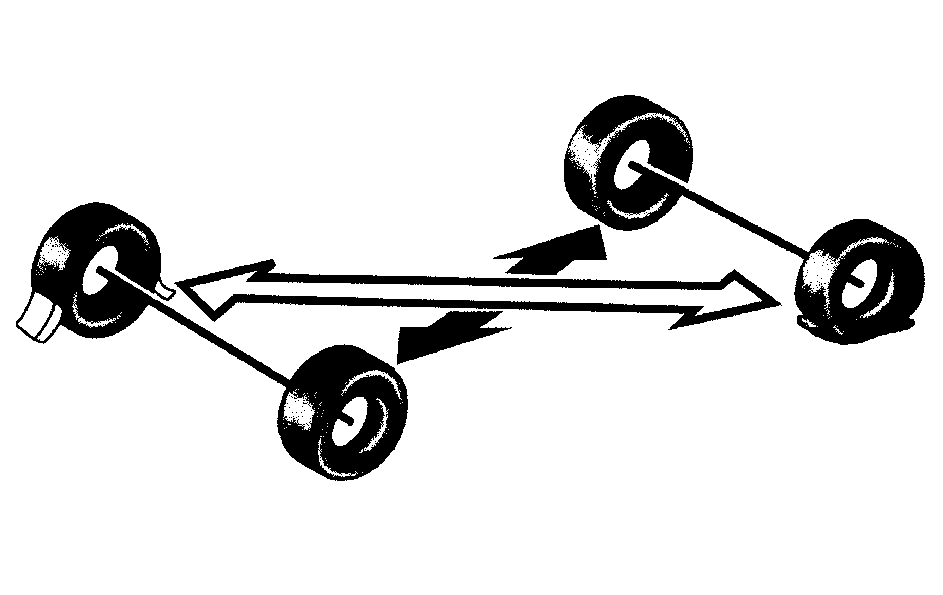
The following steps will tell you how to use the jack and change a tire.
Removing the Spare Tire and Tools
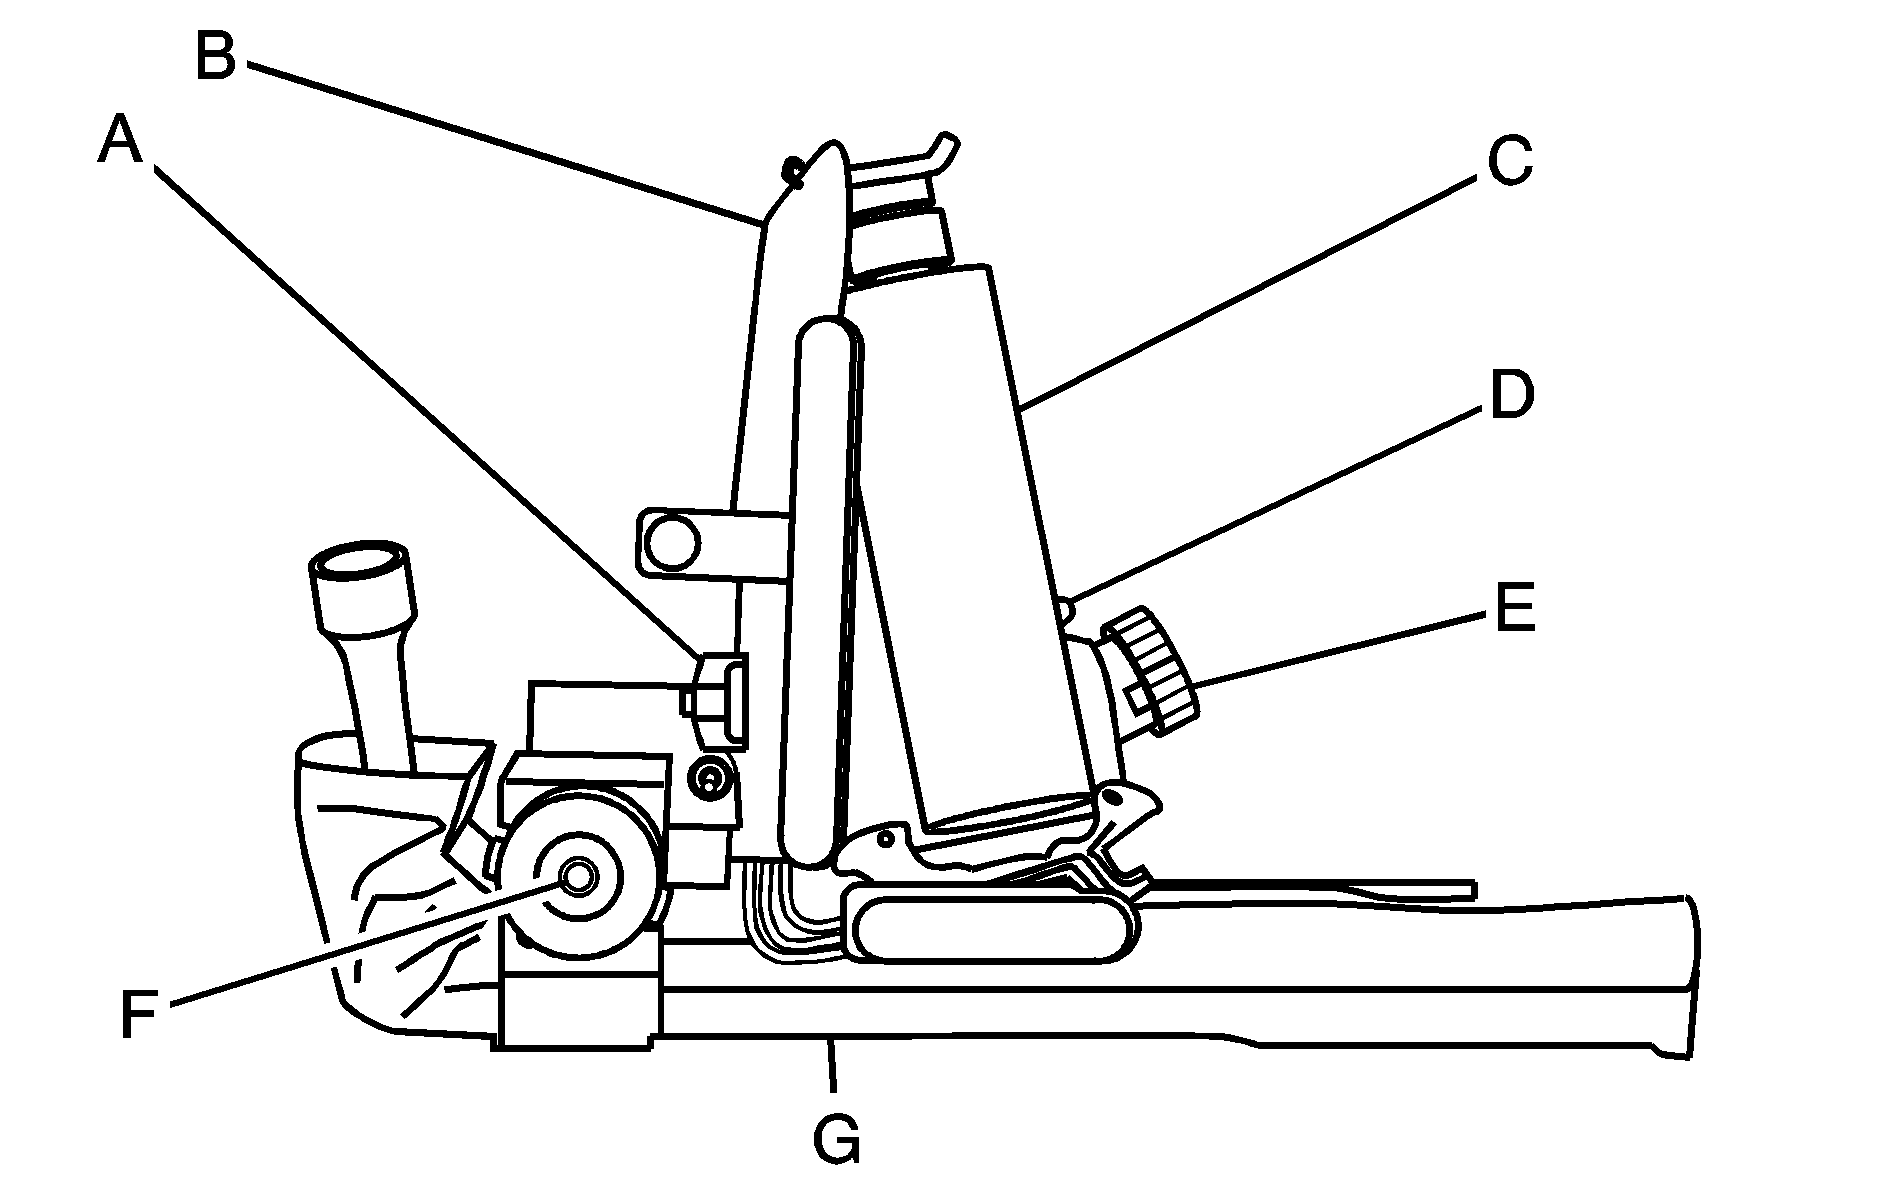
Wing Nut
Jack Bracket
Jack and Wheel Blocks
Retainer
Thumbwheel
Tool Kit Wing Nut
Tool Kit
The jacking equipment you will need is stored under the rear seat on the passenger's side of the vehicle. See Rear Seat Operation for more information on accessing the jacking equipment. To remove the tool kit, turn the tool kit wing nut (F) counterclockwise and remove the jack bracket. To release the jack from the bracket, remove wing nut (A). Turn the thumbwheel counterclockwise to lower the jack head. Remove the retainer and wheel blocks.
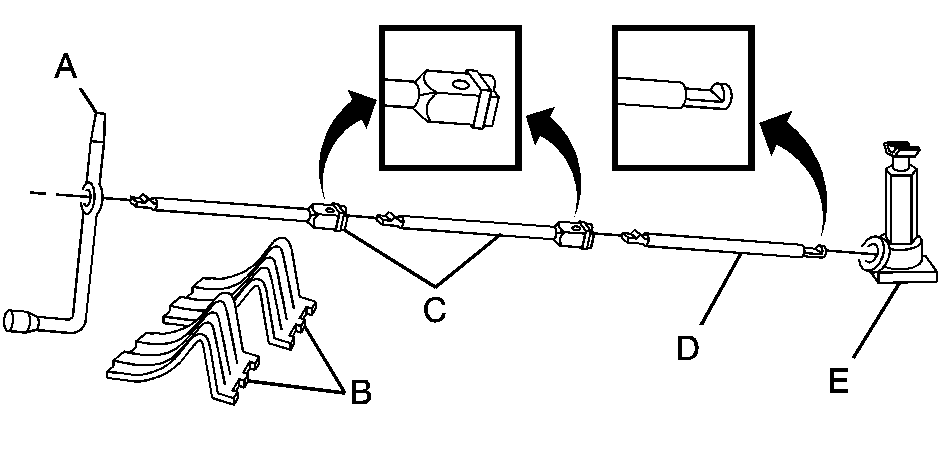
The tools you'll be using include the wheel wrench (A), wheel blocks (B), extensions (socket end) (C), handle (jack end) (D), and jack (E).
The following instructions explain how to remove the spare tire mounted underneath your vehicle.
Notice: If you remove or restow a tire from/to the storage position under the vehicle while it is supported by a jack, you could damage the tire and/or your vehicle. Always remove or restow a tire when the vehicle is on the ground.
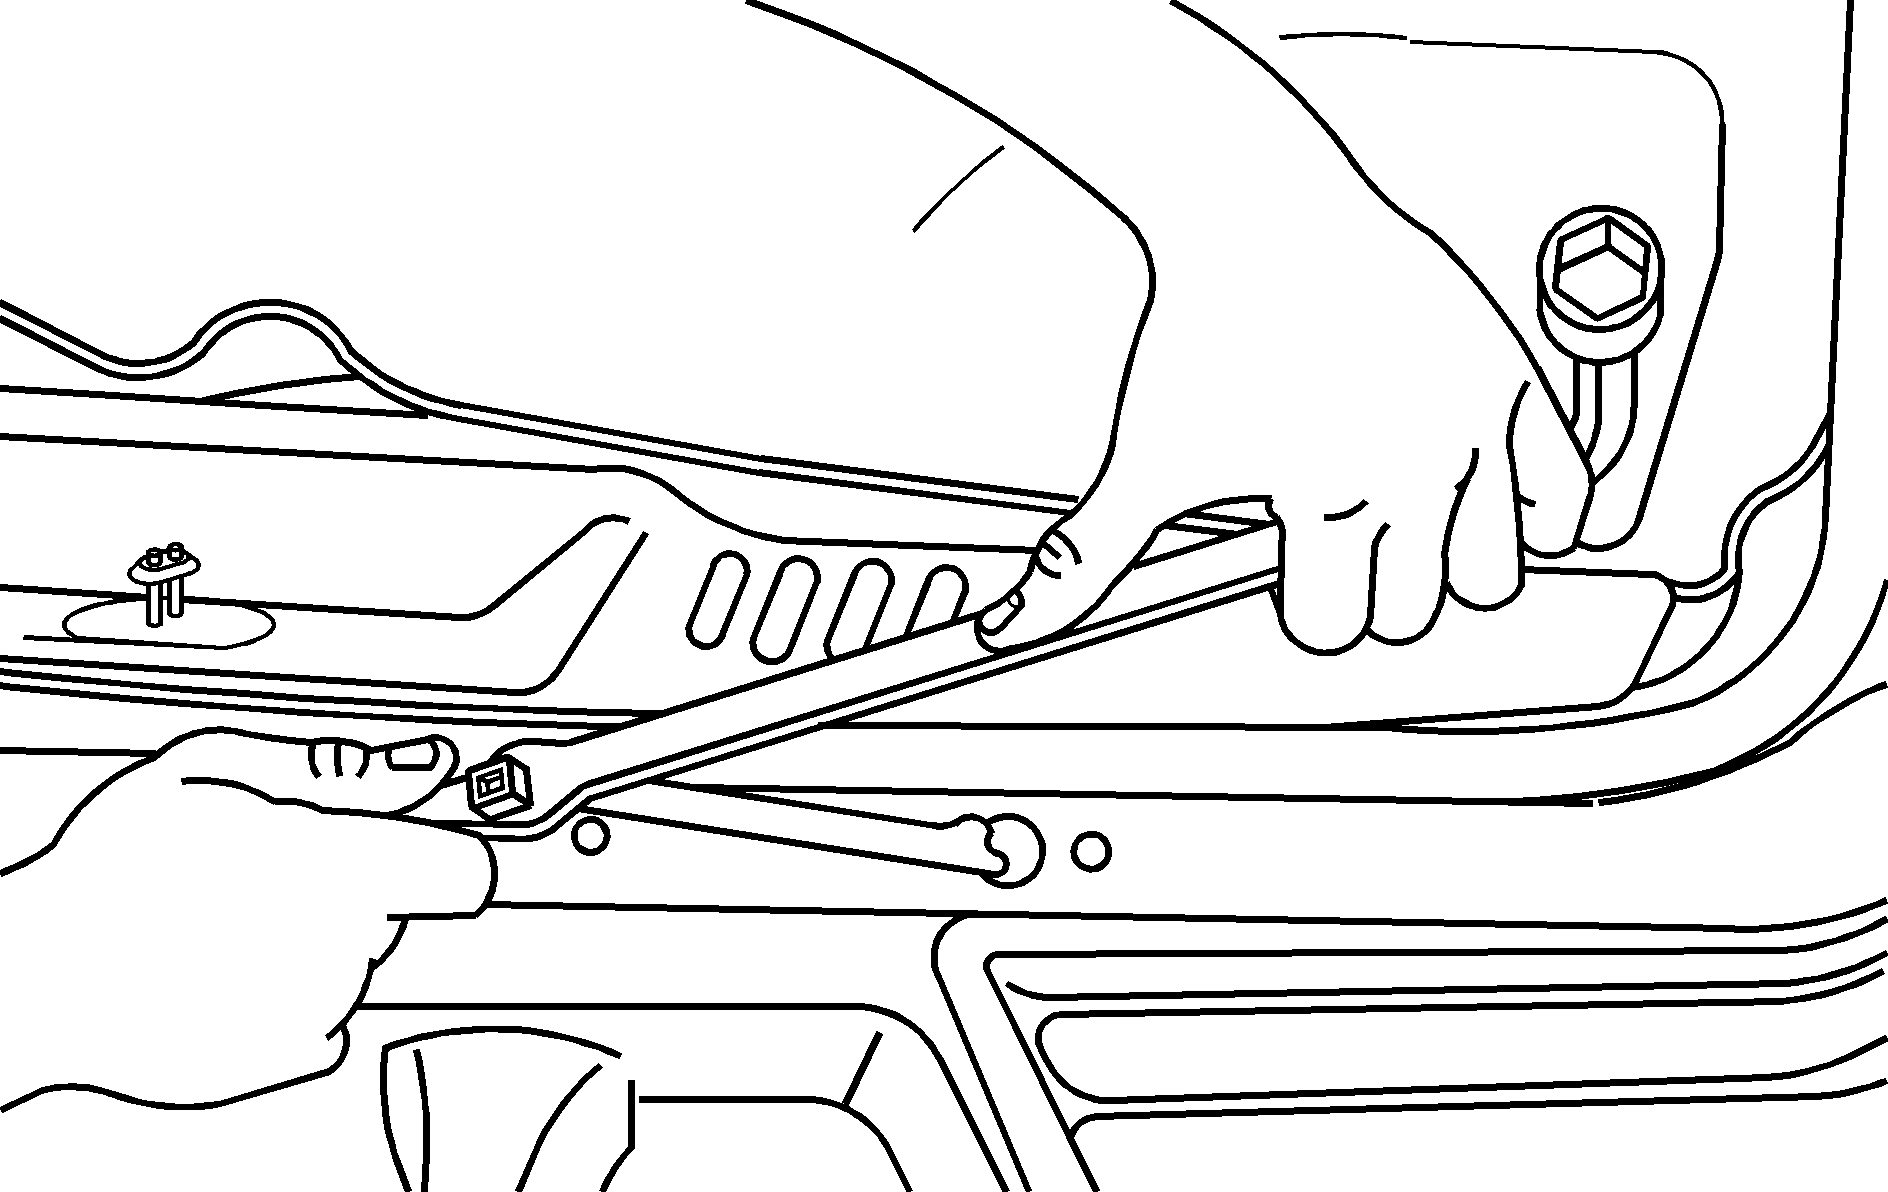
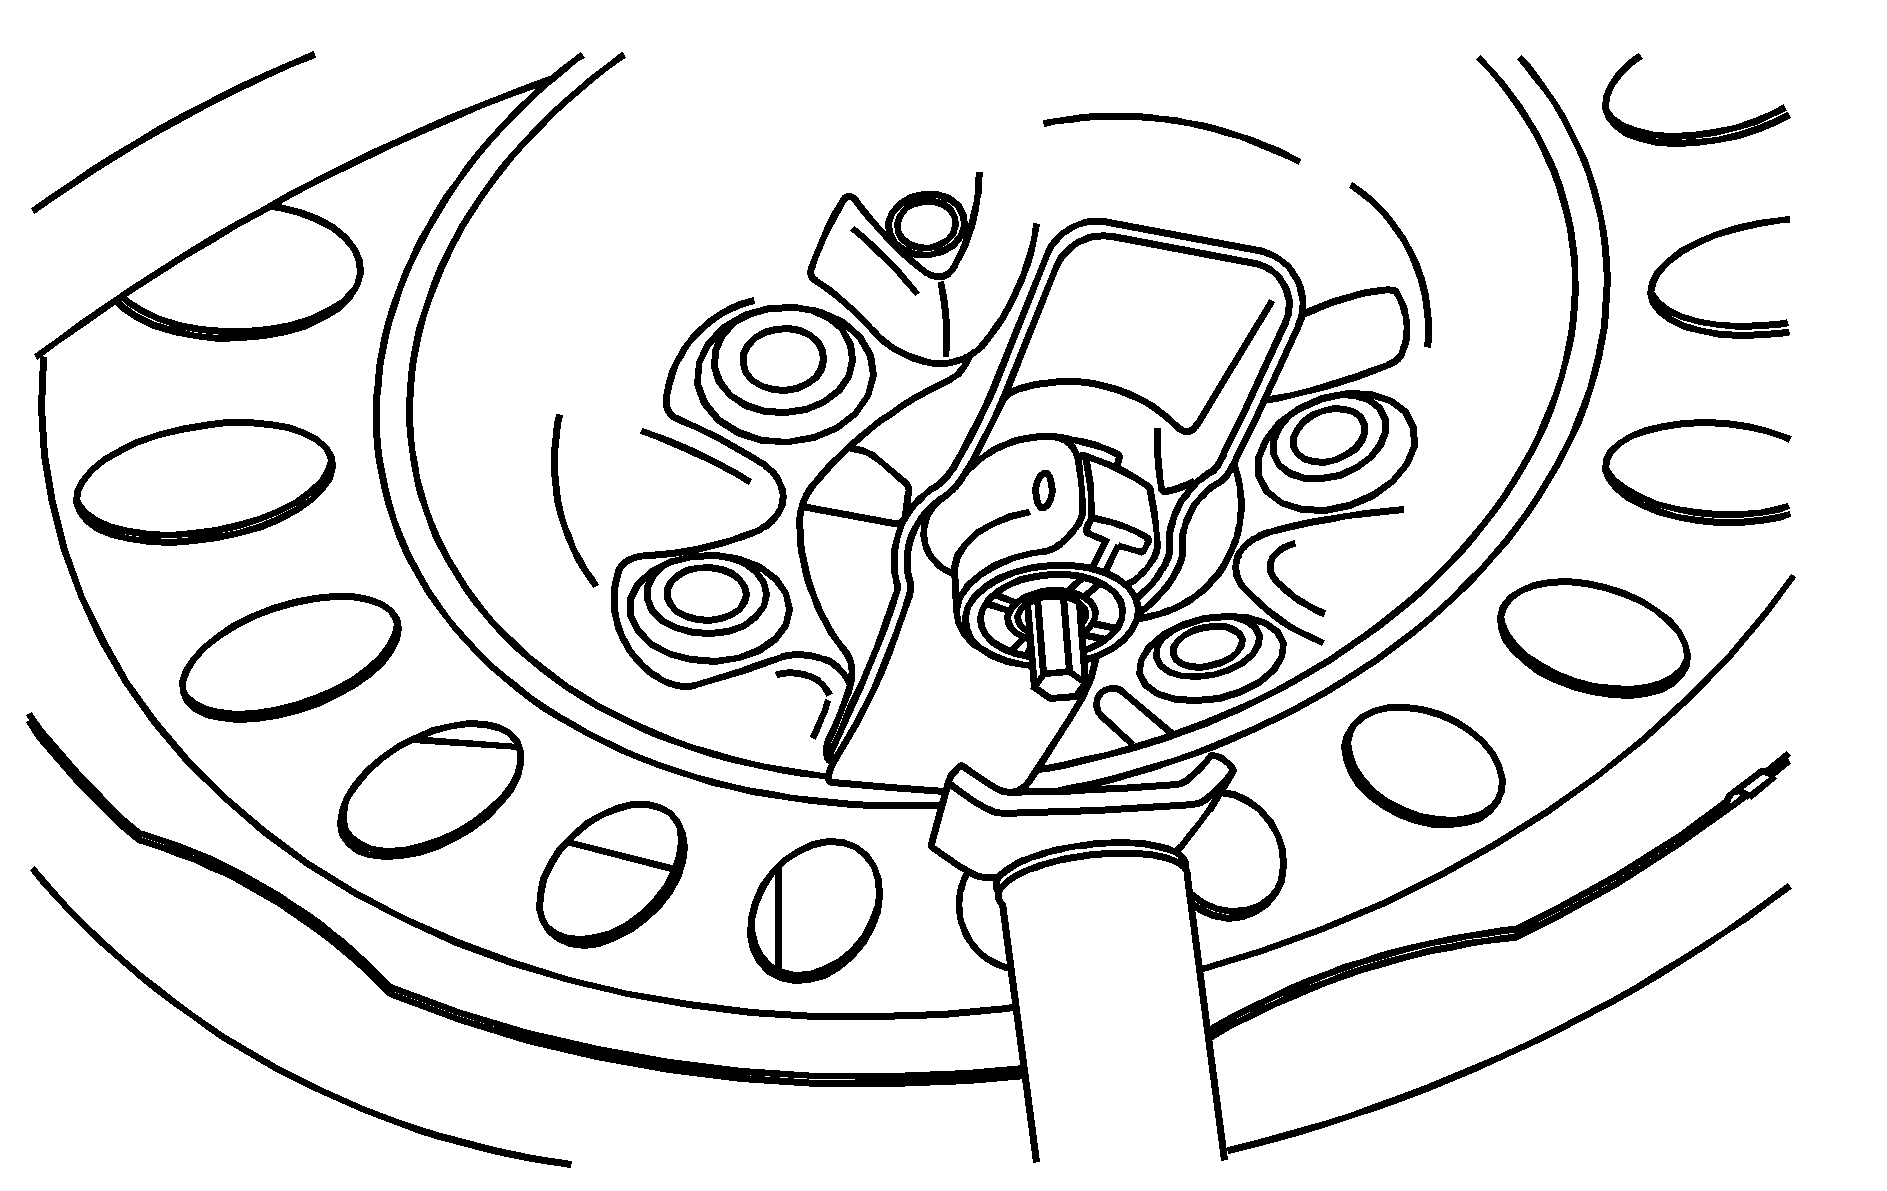
- To remove the underbody-mounted spare, insert the socket end of the extension on a 45 degree angle downward into the hoist drive shaft hole. It is exposed when the rear gate is open and is just above the rear bumper. Be sure the socket end of the extension connects to the hoist shaft.
- Turn the wheel wrench counterclockwise to lower the spare tire. Keep turning the wheel wrench until the spare tire can be pulled out from under the vehicle.
- Put the spare tire near the flat tire.
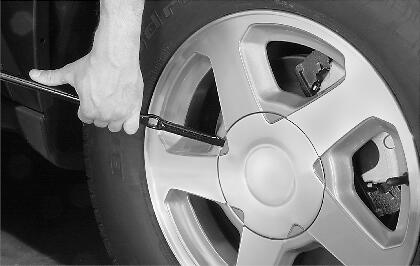
- Position the chisel end of the wheel wrench in the notch of the center cap and pry off the center cap.
If the spare tire does not lower to the ground, the secondary latch is engaged causing the tire not to lower. See "Secondary Latch System" later in this section.
When the tire has been completely lowered, tilt the retainer at the end of the cable and pull it through the wheel opening. Pull the tire out from under the vehicle.
Notice: If you drive away before the spare tire or secondary latch system cable has been reinstalled, you could damage your vehicle. Always reinstall this cable before driving your vehicle.
See "Removing the Flat Tire and Installing the Spare Tire" later in this section to continue changing the flat tire.
Secondary Latch System
Your vehicle has an underbody mounted tire hoist assembly equipped with a secondary latch system. It's designed to stop the spare or flat road tire from suddenly falling off your vehicle if the cable holding the spare tire is damaged. For the secondary latch to work, the tire must be stored with the valve stem pointing up. See "Storing a Flat Tire and Tools" for instructions on storing the spare or flat tire correctly.
Caution: Before beginning this procedure read all the instructions. Failure to read and follow the instructions could damage the hoist assembly and you and others could get hurt. Read and follow the instructions listed next.
Caution: Someone standing too close during the procedure could be injured by the jack. If the spare tire does not slide off the jack completely, make sure no one is behind you or on either side of you as you pull the jack out from under the spare.
To release the spare tire from the secondary latch, do the following:
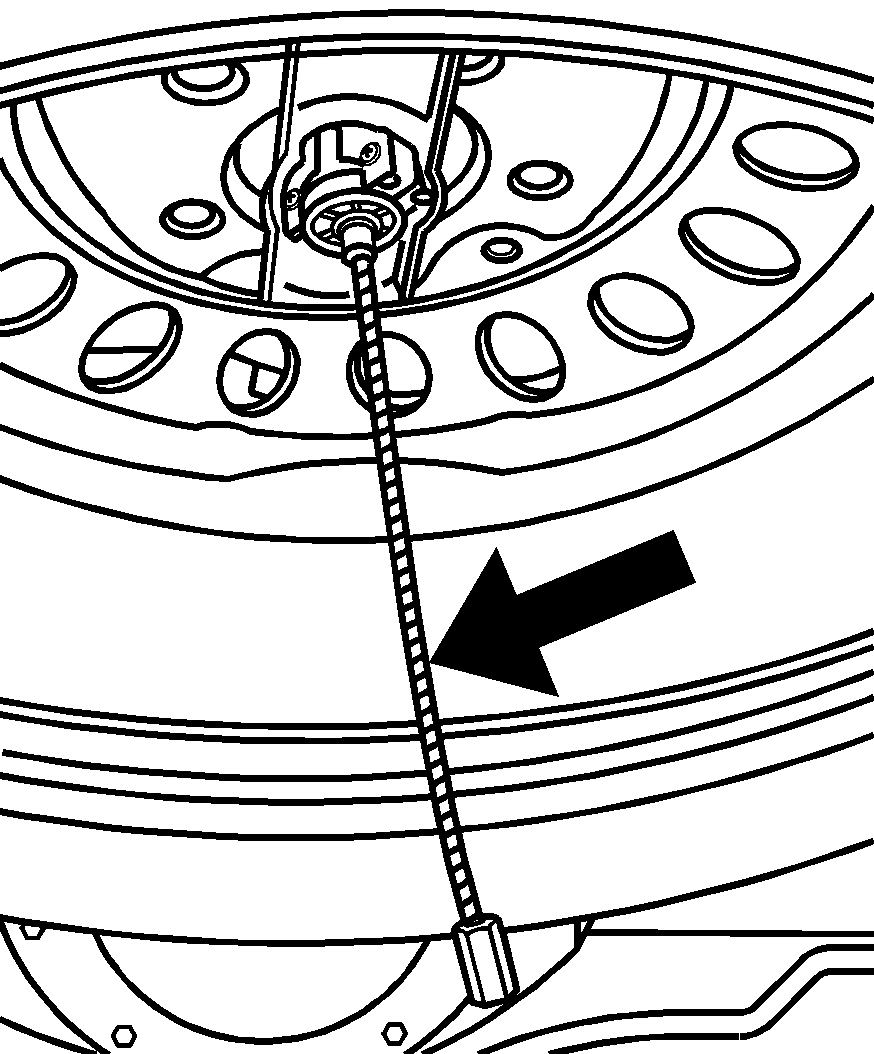
- Check under the vehicle to see if the cable is visible.
- If it is not visible, proceed to Step 6.
- Loosen the cable by turning the wheel wrench counterclockwise three or four turns.
- Repeat this procedure at least two times.
- Turn the wrench counterclockwise until about 6 inches (15 cm) of cable is exposed.
- Attach the jack handle, extensions and the wheel wrench to the jack and place it under the vehicle towards the front of the rear bumper. Position the center lift point of the jack under the center of the spare tire.
- Turn the wrench clockwise to raise the jack until it lifts the end fitting.
- Continue raising the jack until the spare tire stops moving upward and is held firmly in place. The secondary latch has released and the spare tire is balancing on the jack.
- Lower the jack by turning the wheel wrench counterclockwise. Keep lowering the jack until the spare tire slides off the jack or is hanging by the cable.
- Disconnect the jack handle from the jack and carefully remove the jack. Use one hand to push against the spare while firmly pulling the jack out from under the spare tire with the other hand.
- If the spare tire is hanging from the cable, insert the socket end of the extension connected to the wheel wrench into the hoist shaft hole in the bumper on an angle. Turn the wheel wrench counterclockwise to lower the spare the rest of the way.
- Tilt the retainer at the end of the cable and pull it through the wheel opening. Pull the tire out from under the vehicle.
- If the cable is hanging under the vehicle, turn the wheel wrench clockwise to raise the cable back up.
If visible, first try to tighten the cable by turning the wheel wrench clockwise until you hear two clicks or feel it skip twice. You cannot overtighten the cable.
If the spare tire lowers to the ground, continue with Step 2 of "Removing the Spare Tire and Tools" earlier in this section.

Have the hoist assembly inspected as soon as you can. You will not be able to store a spare or flat tire using the hoist assembly until it has been repaired or replaced.
Removing the Flat Tire and Installing the Spare Tire
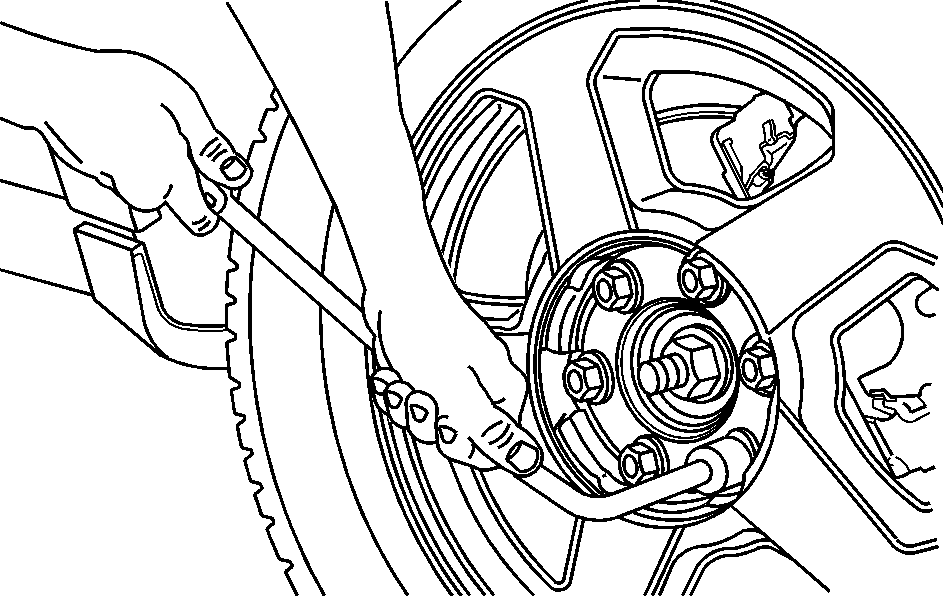
- Using the wheel wrench, loosen all the wheel nuts. Don't remove them yet.
- Turn the jack adjusting knob clockwise by hand to raise the jack lift head.
- Place the handle, extensions and wheel wrench onto the jack.
- Place the jack in the appropriate position nearest the flat tire.
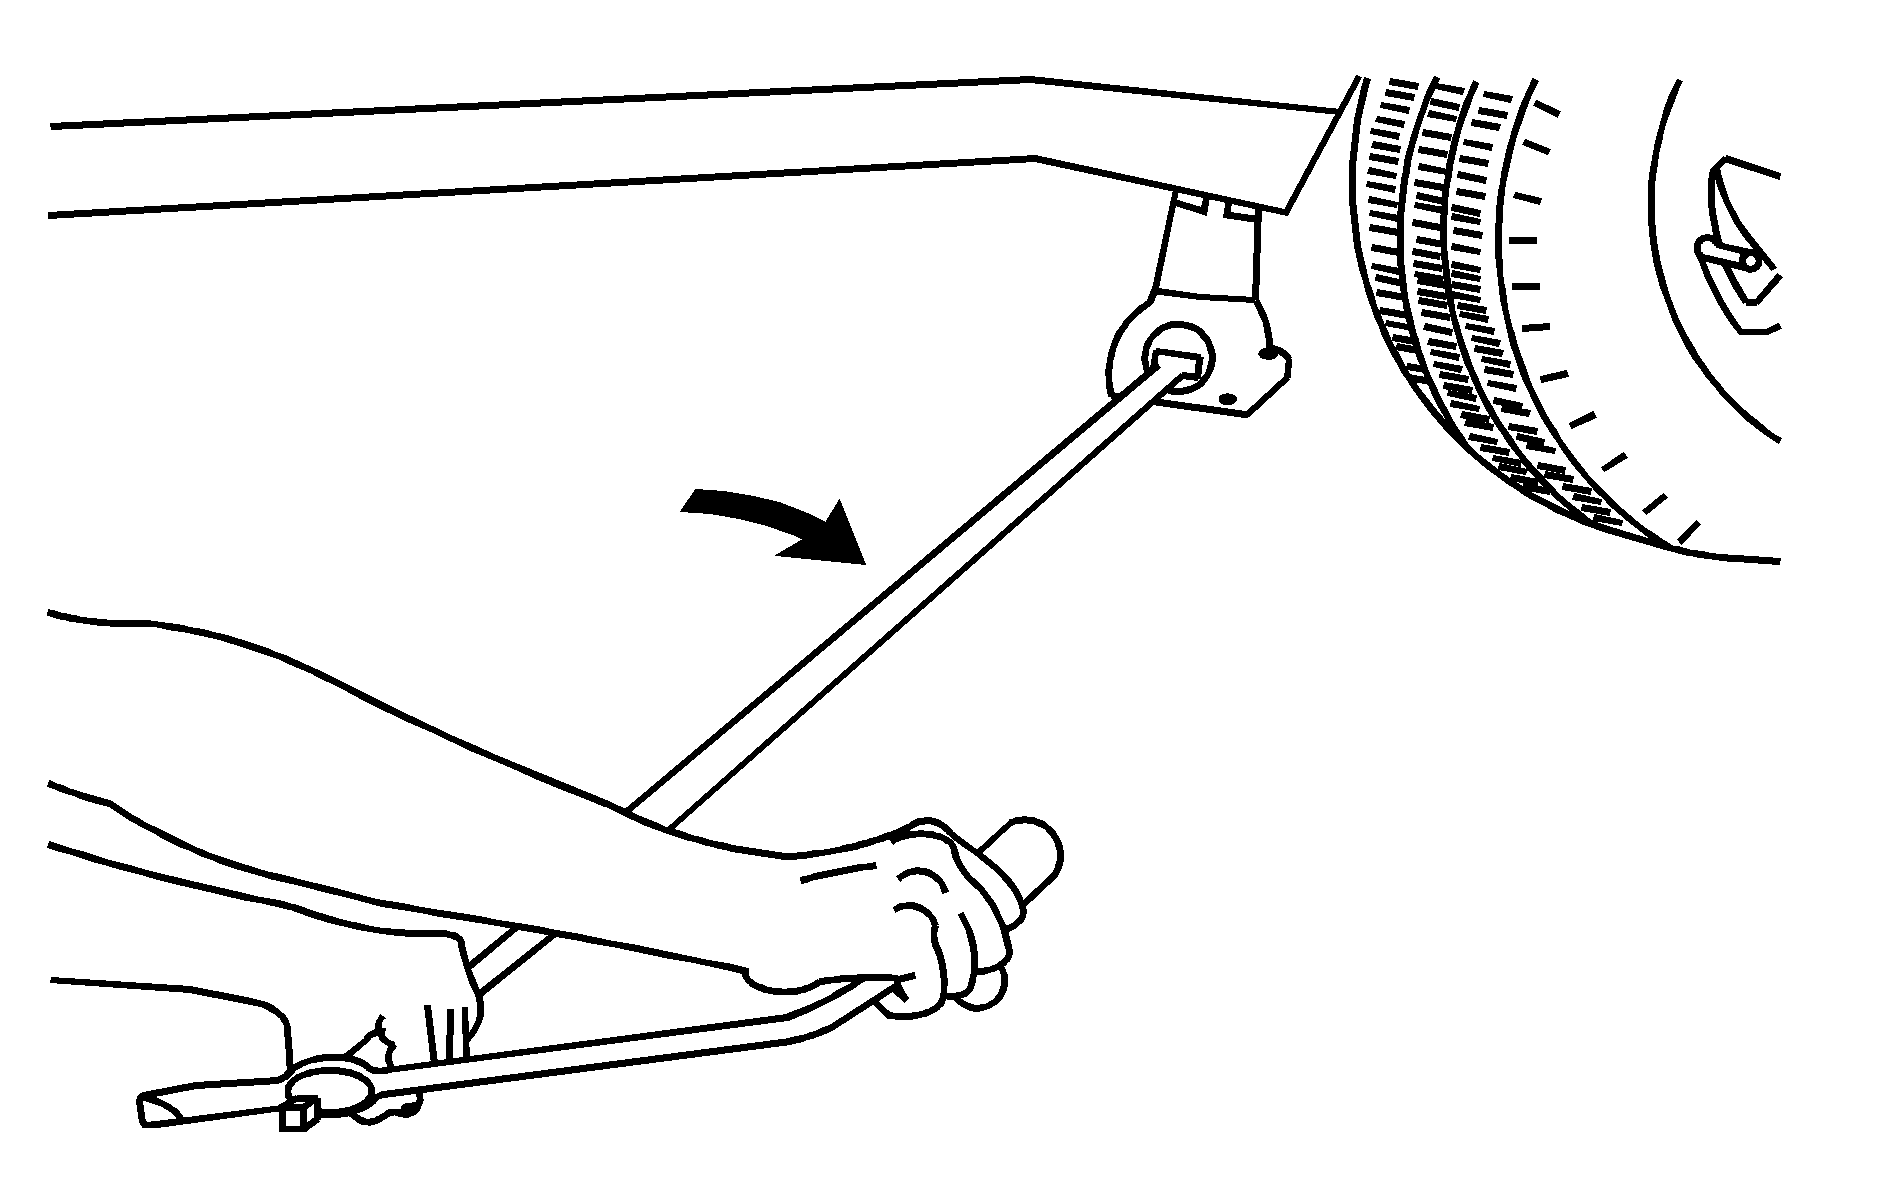
- Raise the vehicle by turning the jack handle clockwise. Raise the vehicle far enough off the ground so there is enough room for the spare tire to fit.
- Remove all the wheel nuts and take off the flat tire.
- Place the spare on the wheel mounting surface.
- Tighten each nut by hand until the wheel is held against the hub. If a nut can't be turned by hand, use the wheel wrench and see your dealer as soon as possible.
- Lower the vehicle by turning the jack handle counterclockwise. Lower the jack completely.
Front
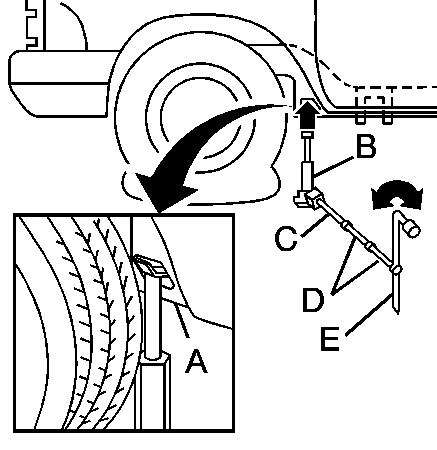
Rear
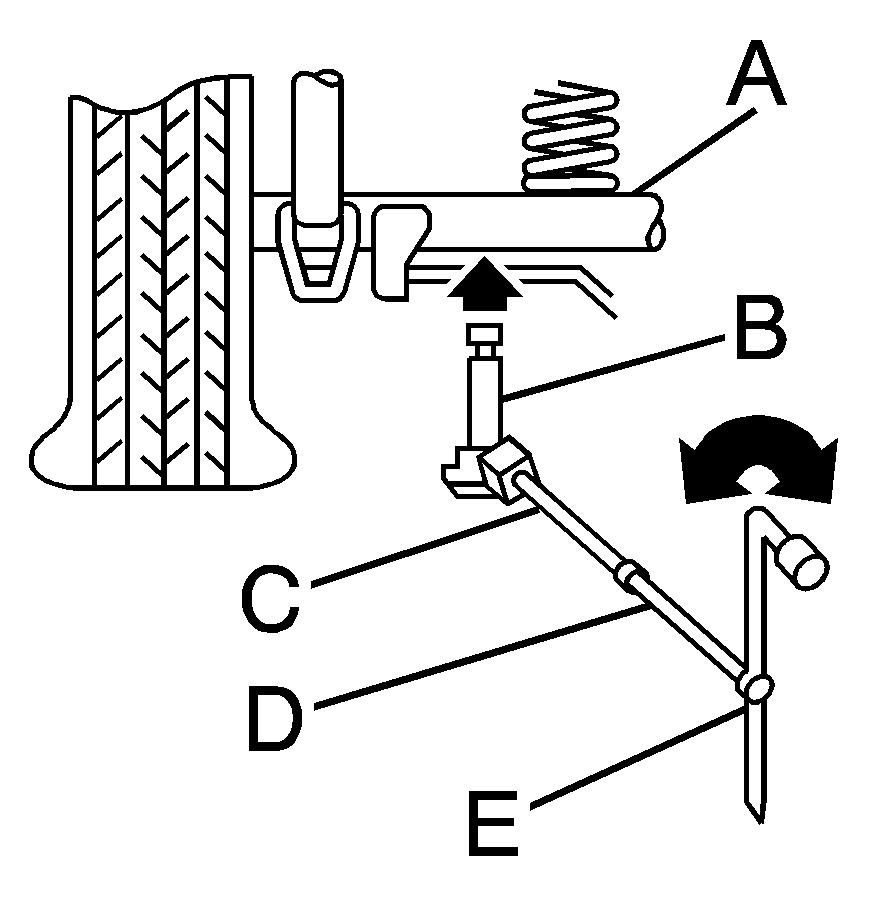
Front Frame/ Rear Axle
Jack
Handle
Extensions
Wheel Wrench
Caution: Getting under a vehicle when it is jacked up is dangerous. If the vehicle slips off the jack you could be badly injured or killed. Never get under a vehicle when it is supported only by a jack.
Caution: Raising your vehicle with the jack improperly positioned can damage the vehicle and even make the vehicle fall. To help avoid personal injury and vehicle damage, be sure to fit the jack lift head into the proper location before raising the vehicle.
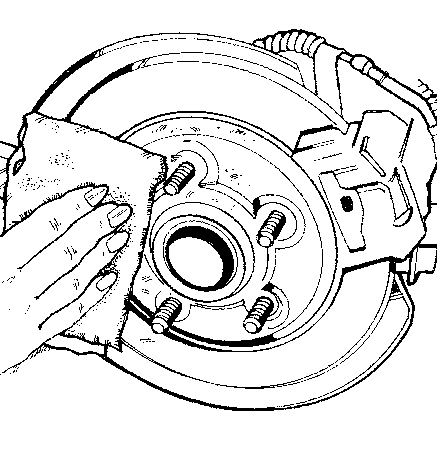
Remove any rust or dirt from the wheel bolts, mounting surfaces and spare wheel.
Caution: Rust or dirt on a wheel or other parts to which it is fastened, can make the wheel nuts become loose and eventually the wheel could come off and cause a crash. Always remove all rust and dirt from wheels and other parts.
Caution: Never use oil or grease on bolts or nuts because the nuts might come loose. The vehicle's wheel could fall off, causing a crash.
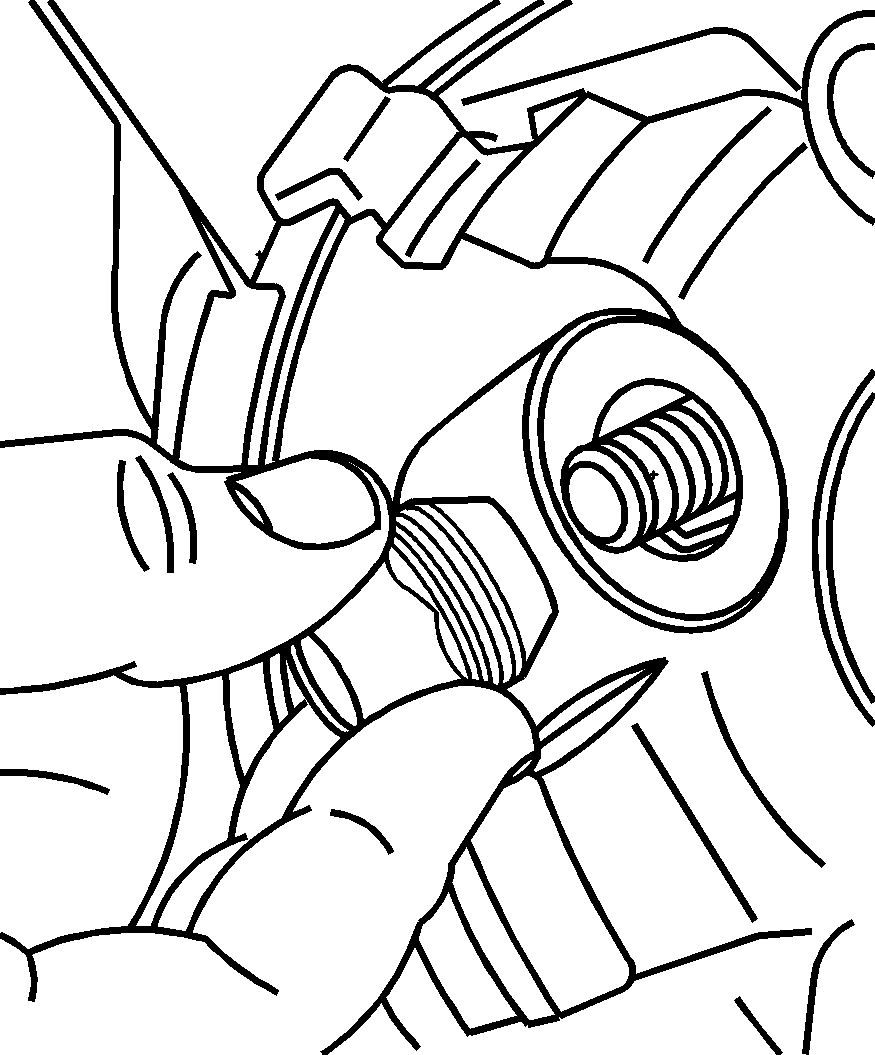
Put the nuts on by hand. Make sure the rounded end is toward the wheel.
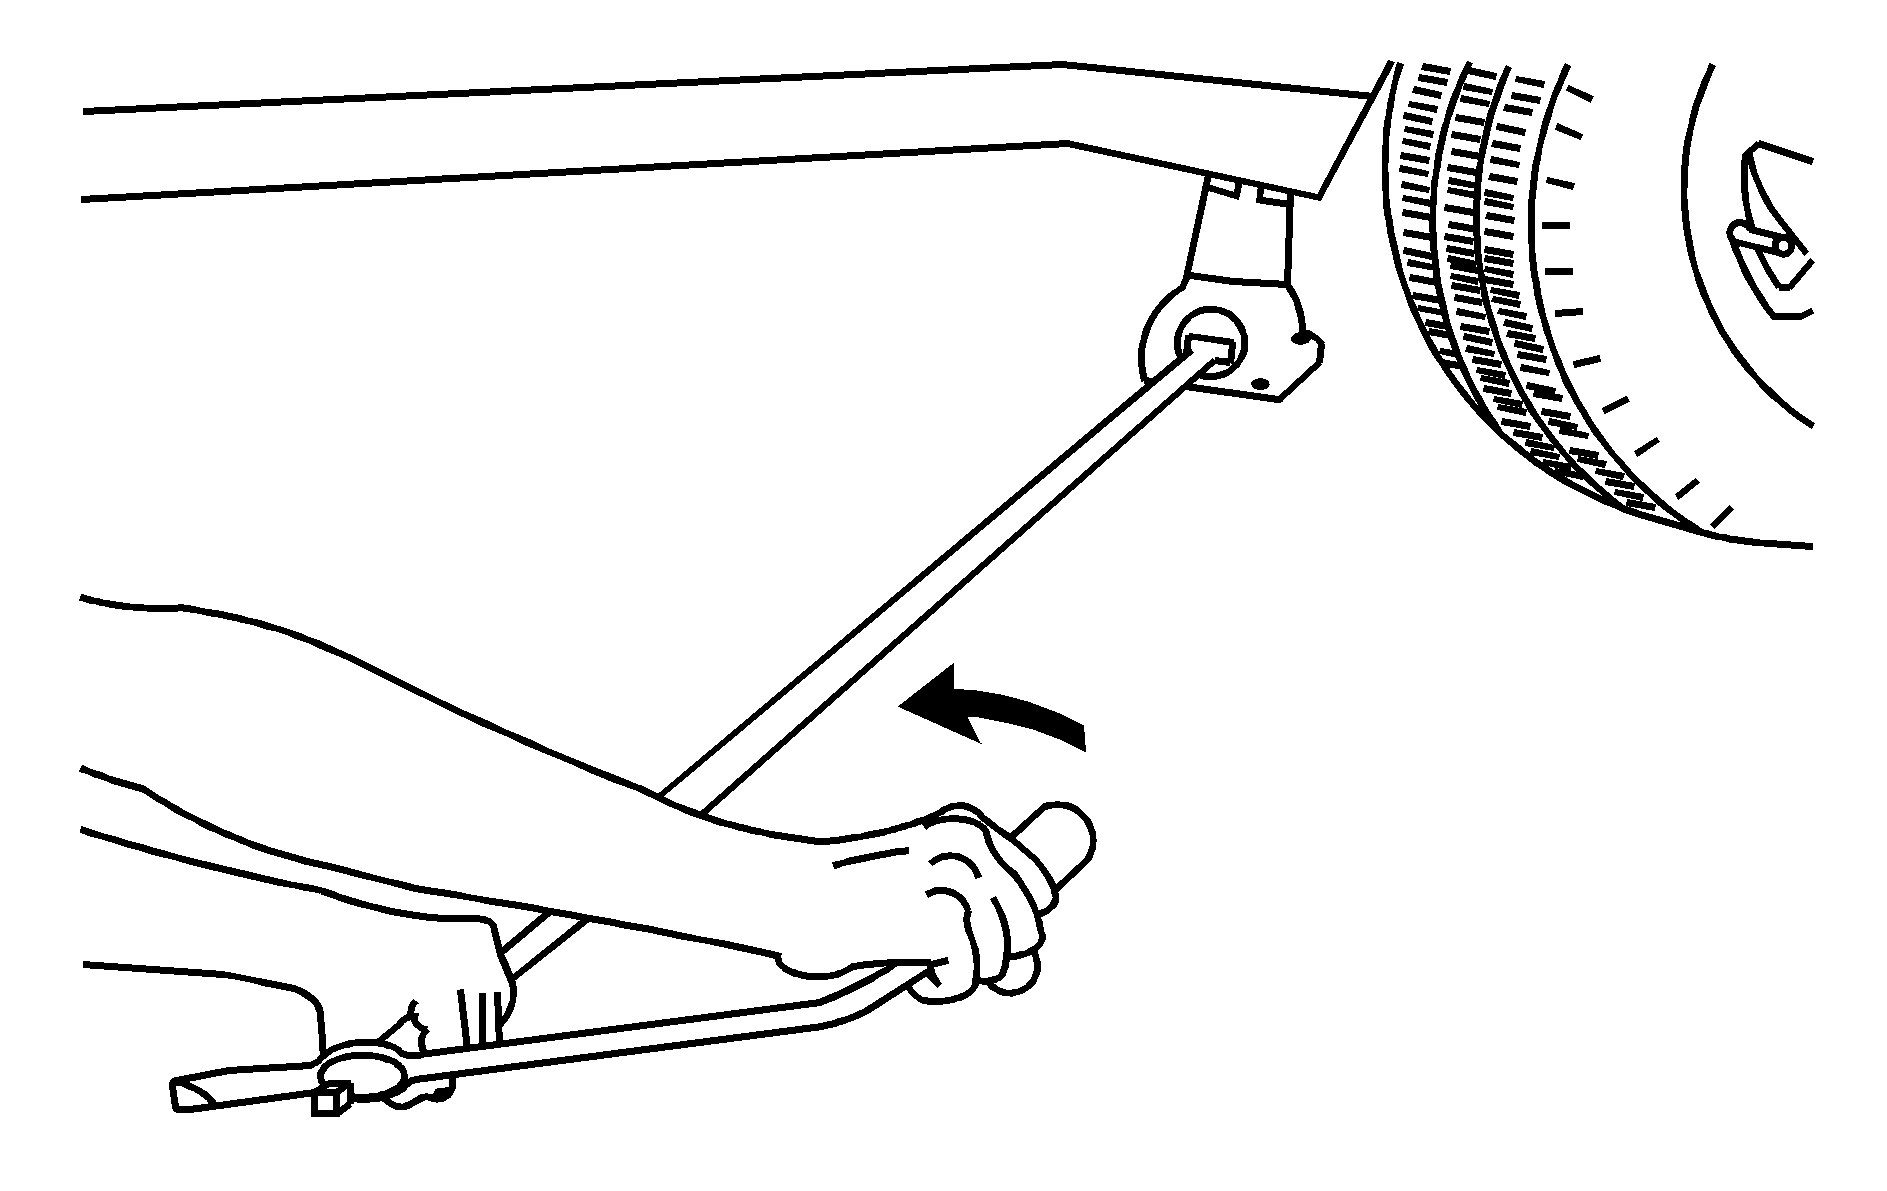
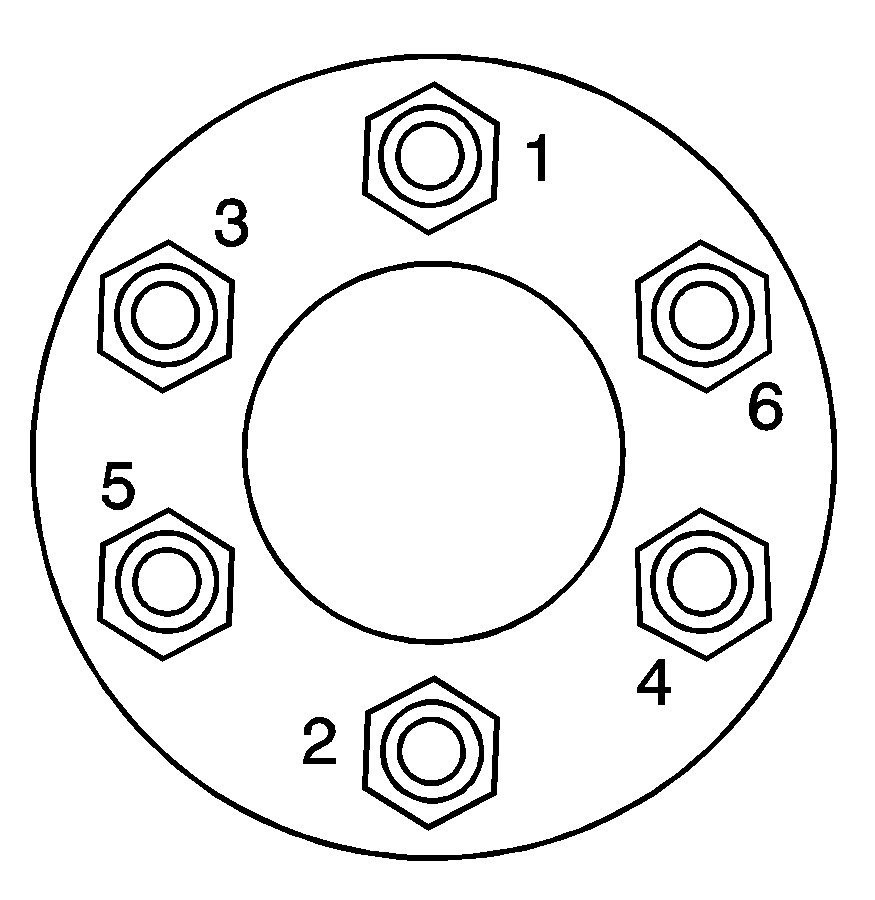
Use the wrench to tighten the wheel nuts firmly in a crisscross sequence as shown.
Caution: Incorrect wheel nuts or improperly tightened wheel nuts can cause the wheel to come loose and even come off. This could lead to an accident. Be sure to use the correct wheel nuts. If you have to replace them, be sure to get new original equipment wheel nuts. Stop somewhere as soon as you can and have the nuts tightened with a torque wrench to the proper torque specification. See "Capacities and Specifications" in the Index for wheel nut torque specification.
Notice: Improperly tightened wheel nuts can lead to brake pulsation and rotor damage. To avoid expensive brake repairs, evenly tighten the wheel nuts in the proper sequence and to the proper torque specification. See Capacities and Specifications for the wheel nut torque specification.
Storing a Flat or Spare Tire and Tools
Caution: Storing a jack, a tire, or other equipment in the passenger compartment of the vehicle could cause injury. In a sudden stop or collision, loose equipment could strike someone. Store all these in the proper place.
Caution: The underbody-mounted spare tire needs to be stored with the valve stem pointing up. If the spare tire is stored with the valve stem pointing downward, its secondary latch will not work properly and the spare tire could loosen and suddenly fall from your vehicle. If this happened when your vehicle was being driven, the tire might contact a person or another vehicle, causing injury and, of course, damage to itself as well. Be sure the underbody-mounted spare tire is stored with its valve stem pointing up.
Notice: An aluminum wheel with a flat tire should always be stored under the vehicle with the hoist. However, storing it that way for an extended period could damage the wheel. To avoid this, always stow the wheel properly with the valve stem pointing up and have the wheel repaired as soon as possible.
Follow this diagram to store the underbody-mounted spare.
Wheel Wrench
Hoist Shaft
Extensions
Retainer
Spare or Flat Tire (Valve Stem Pointed Up)
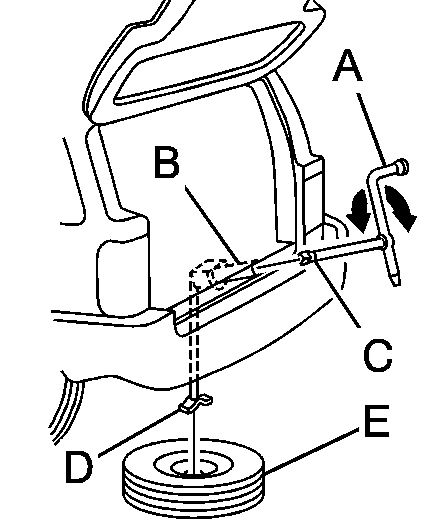
- Put the tire on the ground at the rear of the vehicle, with the valve stem pointed up and to the rear.
- Pull the retainer through the wheel.
- Put the socket end of the extension, on an angle, through the hole in the rear bumper and into the hoist shaft.
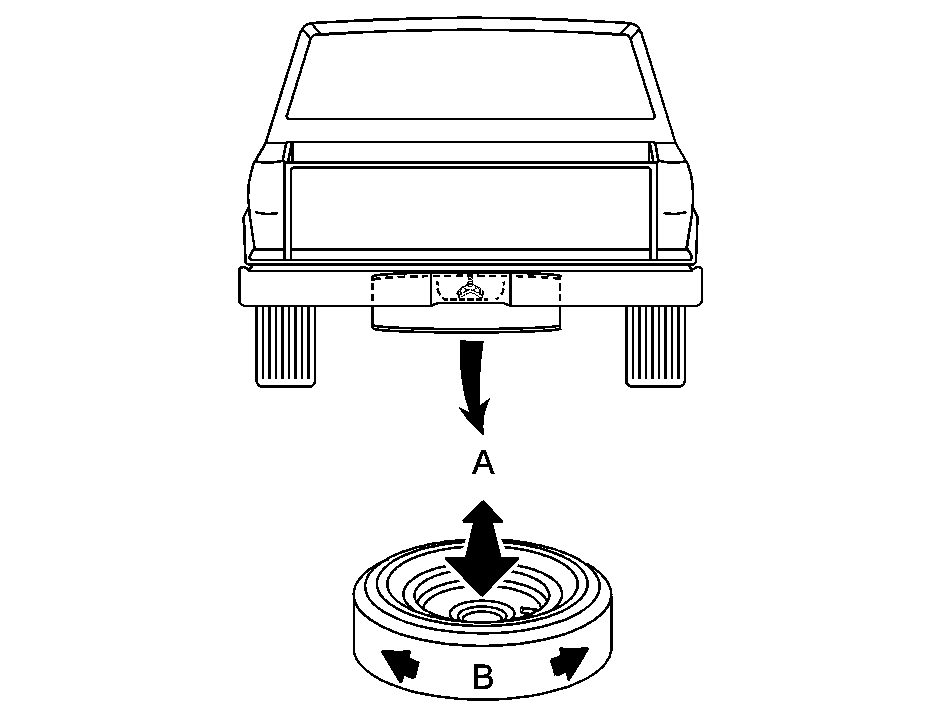
- Raise the tire fully against the underside of the vehicle. Continue turning the wheel wrench clockwise until you hear two clicks or feel it skip twice. This indicates that the tire is secure and the cable is tight. The spare tire hoist cannot be overtightened.
- Make sure the tire is stored securely. Push, pull, and then try to turn the tire. If the tire moves, use the wheel wrench and socket end of the extension to tighten the cable.
- Return the jack, wheel blocks and tools to the proper location in the vehicle.
(A) Push and Pull, (B) Rotate or Turn
Wing Nut
Jack Bracket
Jack and Wheel Blocks
Retainer
Thumbwheel
Tool Kit Wing Nut
Tool Kit

- Assemble the wheel blocks and retainer to the jack
- Place the jack in the bracket.
- Install the wing nut (A) to the retainer.
- Rotate the thumbwheel (E) clockwise to tighten the jack in the bracket.
- Tighten wing nut (A).
- Install the tool kit (G) to the jack bracket.
- Rotate the tool kit wing nut (F) clockwise to tighten.
