For 1990-2009 cars only
Removal Procedure
- Remove the right windshield garnish molding. Refer to Windshield Pillar Garnish Molding Replacement in Interior Trim.
- Remove the instrument panel (I/P) trim pad. Refer to Instrument Panel Upper Trim Pad Replacement in Instrument Panel, Gages and Console.
- Remove the right sunshade and inboard retaining clip. Refer to Sunshade Replacement in Interior Trim.
- Lower the front portion of the headliner. Refer to Headlining Trim Panel Replacement in Interior Trim.
- Disconnect the electrical connectors from the digital radio antenna assembly. Refer to Digital Radio Antenna Replacement .
- Remove the right front door sill plate. Refer to Front Side Door Sill Plate Replacement in Interior Trim.
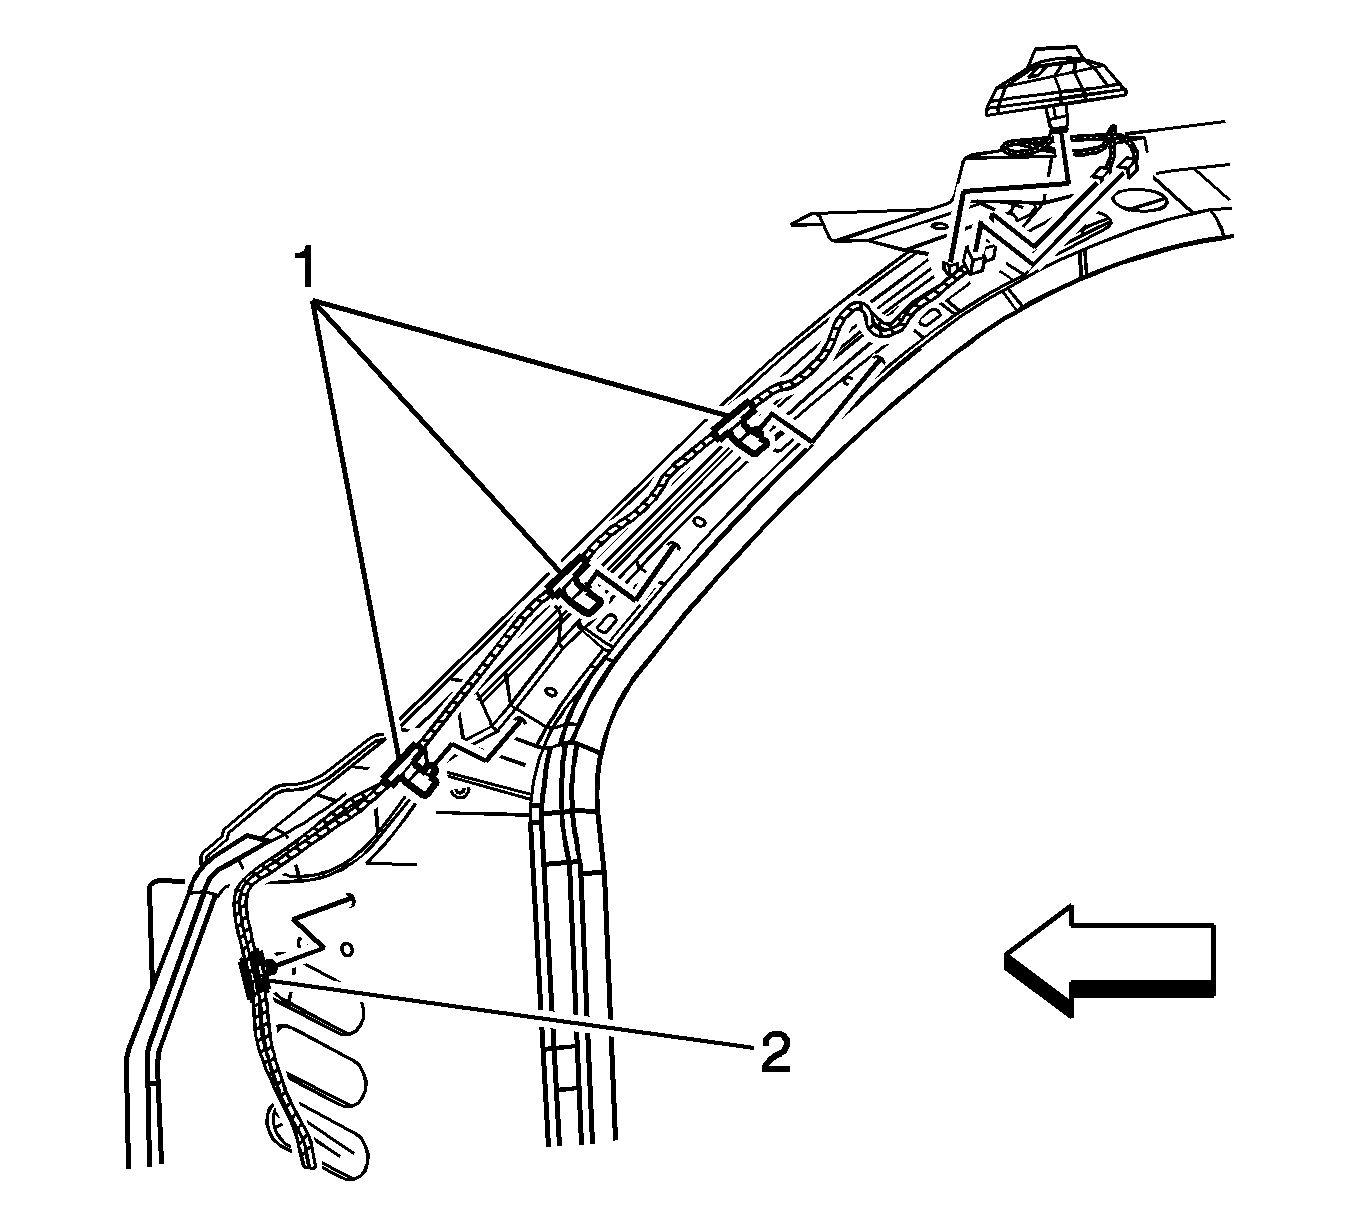
- Remove the coaxial cable from the right windshield pillar (1).
- Lower the right closeout insulator panel. Refer to Instrument Panel Insulator Panel Replacement - Right Side in Instrument Panel, Gages and Console.
- Disconnect the coaxial cable from the digital radio receiver.
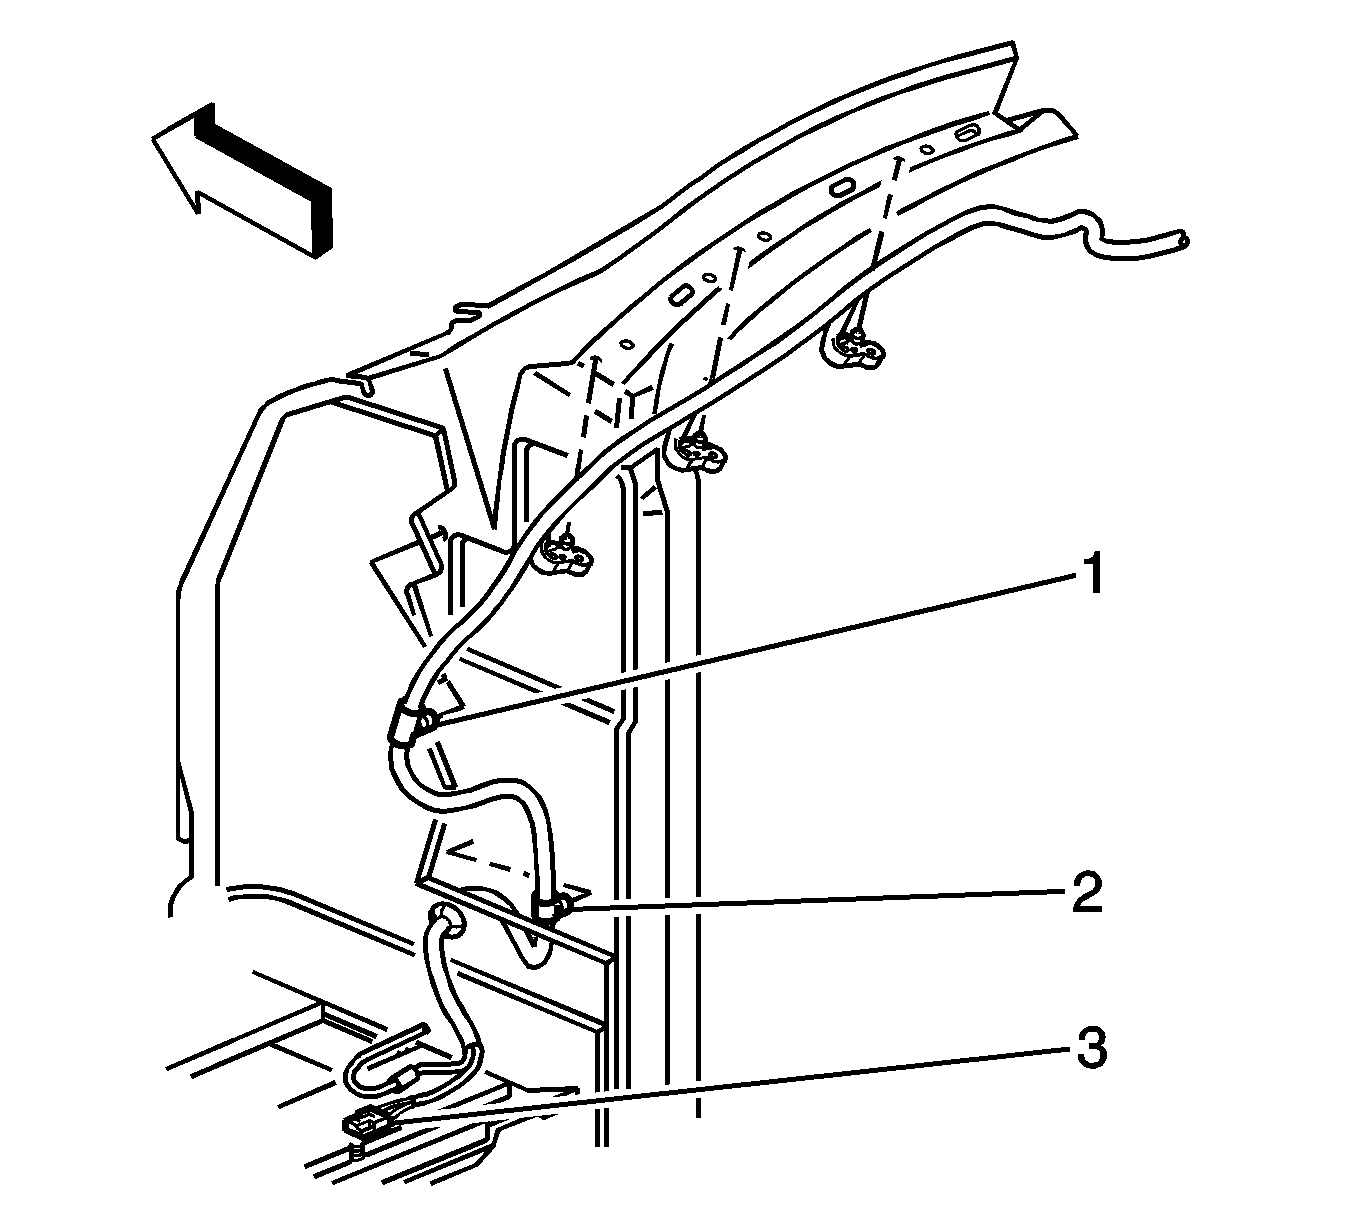
- Remove the lower rose bud (2) from the cowl.
- Securely attach a mechanics wire to the end of the coaxial cable (3).
- The coaxial cable is routed through the cowl insulator access hole and positioned between the cowl and the I/P. In order to release the upper rose bud (1), grasp the coaxial cable near the bottom of the windshield and carefully pull upward.
- Leaving the mechanics wire routed behind the I/P, remove the mechanics wire from the coaxial cable.
- Remove the coaxial cable from the vehicle.


Installation Procedure
- Securely attach the mechanics wire already routed behind the I/P to the end of the coaxial cable (3).
- If equipped, carefully remove the rose bud (1) from the coaxial cable.
- Grasp and gently pull the mechanics wire through the cowl insulator, routing the coaxial cable behind the I/P.
- Attach the lower rose bud (2) to the cowl.
- Connect the coaxial cable to the digital radio receiver.
- Attach the coaxial cable to the right windshield pillar (1).
- Install the right front door sill plate. Refer to Front Side Door Sill Plate Replacement in Interior Trim.
- Install the right closeout insulator panel. Refer to Instrument Panel Insulator Panel Replacement - Right Side Instrument Panel, Gages and Console.
- Connect the electrical connectors to the digital radio antenna assembly. Refer to Digital Radio Antenna Replacement .
- Install the headliner. Refer to Headlining Trim Panel Replacement in Interior Trim.
- Install the right sunshade and inboard retaining clip. Refer to Sunshade Replacement in Interior Trim.
- Install the I/P trim pad. Refer to Instrument Panel Upper Trim Pad Replacement in Instrument Panel, Gages and Console.
- Install the right windshield garnish molding. Refer to Windshield Pillar Garnish Molding Replacement in Interior Trim.


