For 1990-2009 cars only
Removal Procedure
- Raise and support the vehicle. Refer to Lifting and Jacking the Vehicle .
- Disconnect the following from the encoder motor (7):
- Remove the encoder motor mounting bolts.
- Remove the encoder motor (3) and O-ring seal (2) from the transfer case.
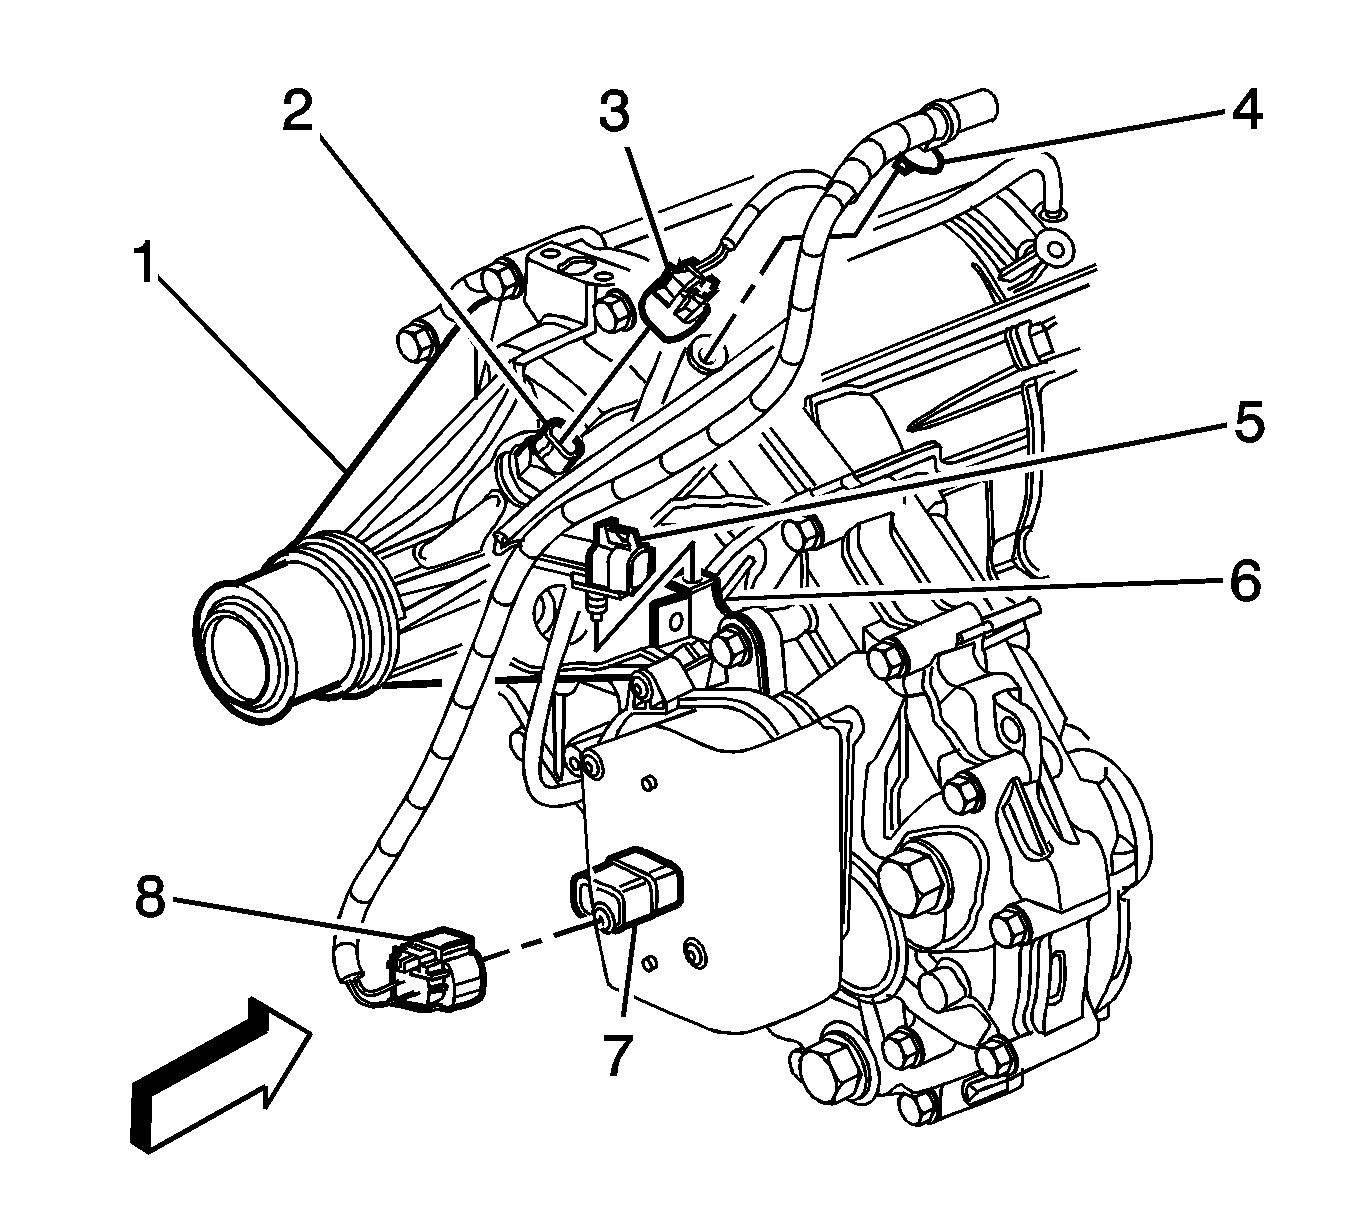
| • | The electrical connector (8) |
| • | The vent hose |

Discard the O-ring seal (2).
Installation Procedure
Important:
• The actuator shaft in the transfer case may require rotating to the neutral position prior to installing the encoder motor. • Do not rotate the actuator shaft using the encoder motor.
- Lightly lubricate the NEW O-ring seal (2) with clean transfer case fluid.
- Insert the O-ring seal (2) into the transfer case.
- Position the encoder motor (3) to the transfer case , aligning the actuator shaft.
- Install the encoder motor mounting bolts, with the heated oxygen sensor bracket (1).
- Connect the following to the encoder motor (7):
- Lower the vehicle.
Important: Ensure the encoder motor is seated flat against the transfer case.
Notice: Refer to Fastener Notice in the Preface section.
Tighten
Tighten the encoder motor mounting bolts to 22 N·m (16 lb ft).
| • | The electrical connector (8) |
| • | The vent hose |
