- Lubricate the balance shaft bearing journals with clean engine oil.
- Install NEW balance shaft assemblies with the counterweight down to prevent damage to the balance shaft bearings.
- Install NEW left balance shaft assembly retaining bolts.
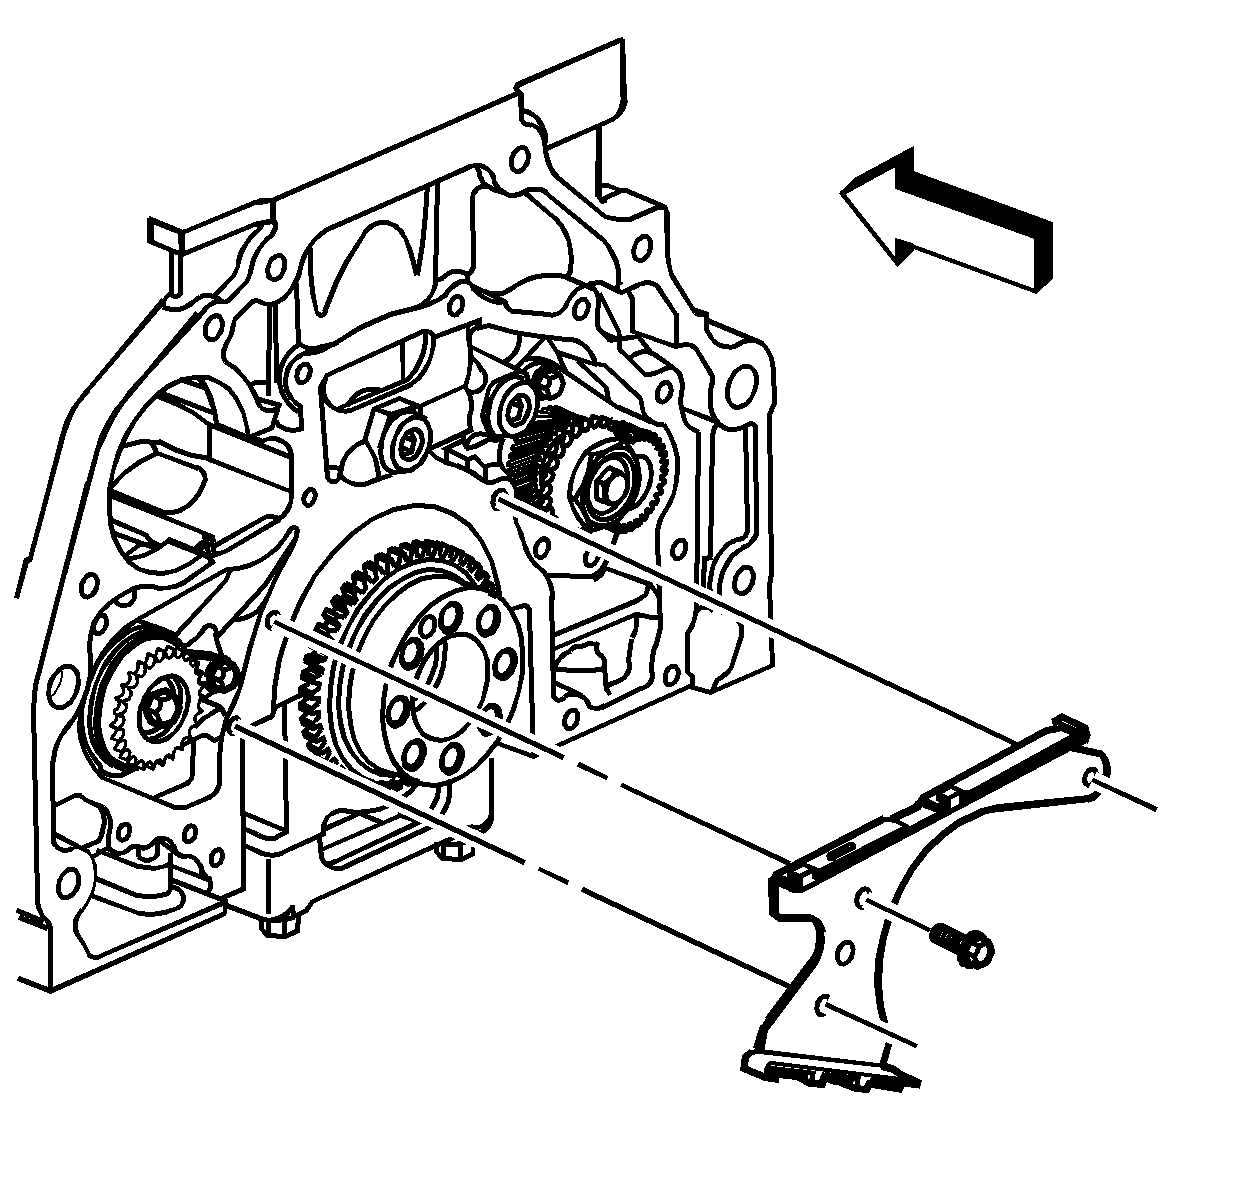
- Install the balance shaft chain guide.
- Install the balance shaft chain guide bolts.
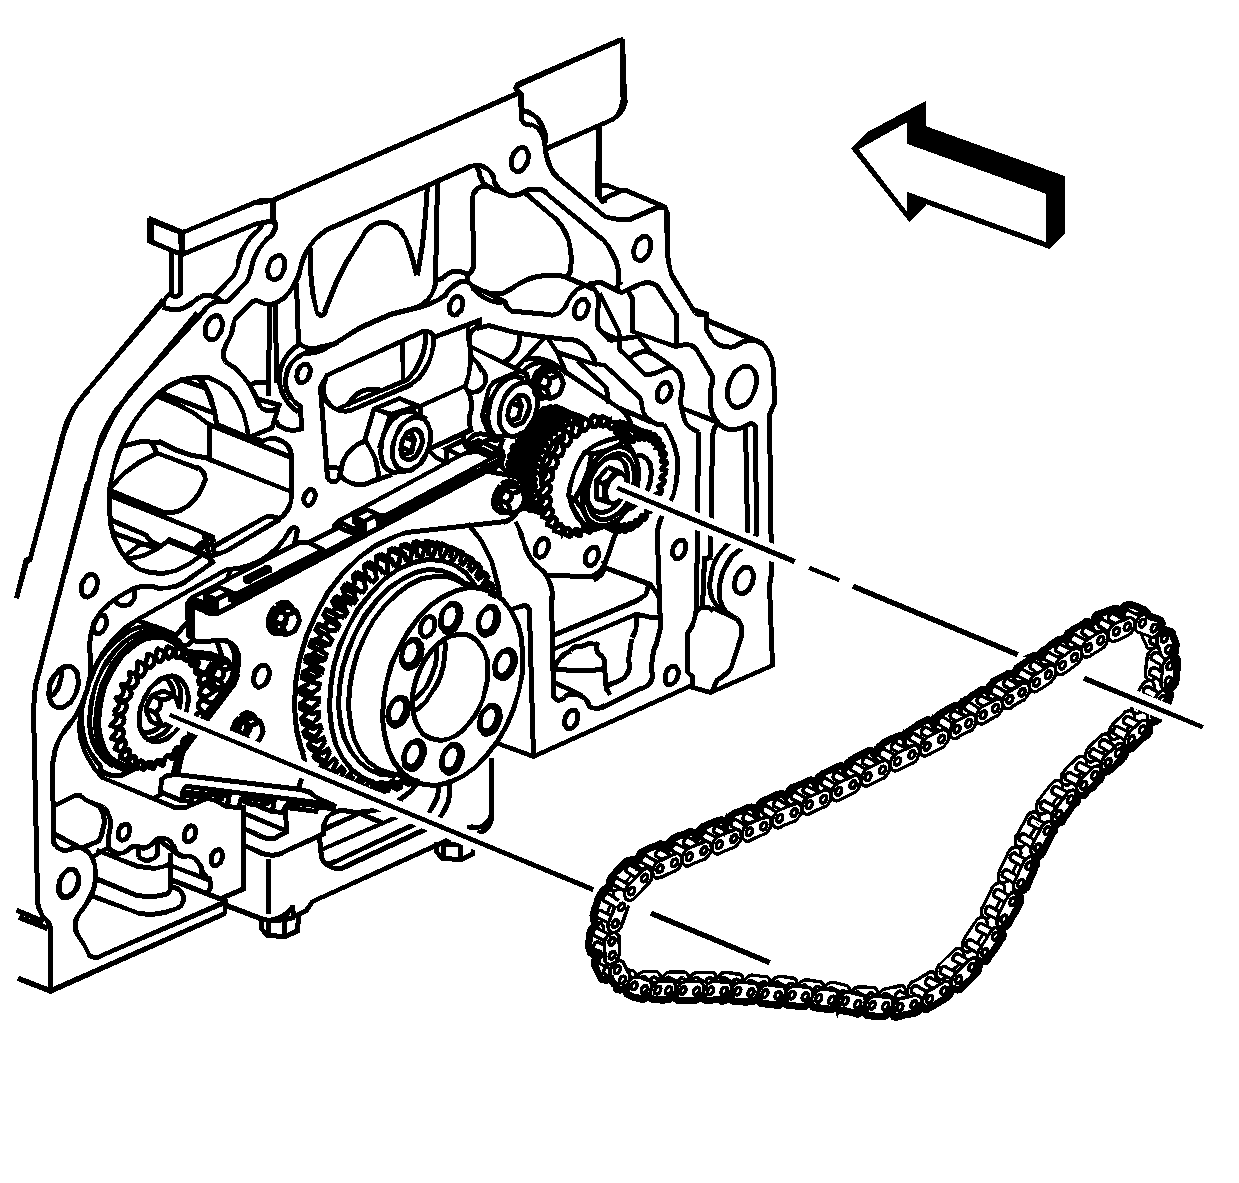
- Install the balance shaft chain onto the balancer sprockets and crankshaft sprocket.
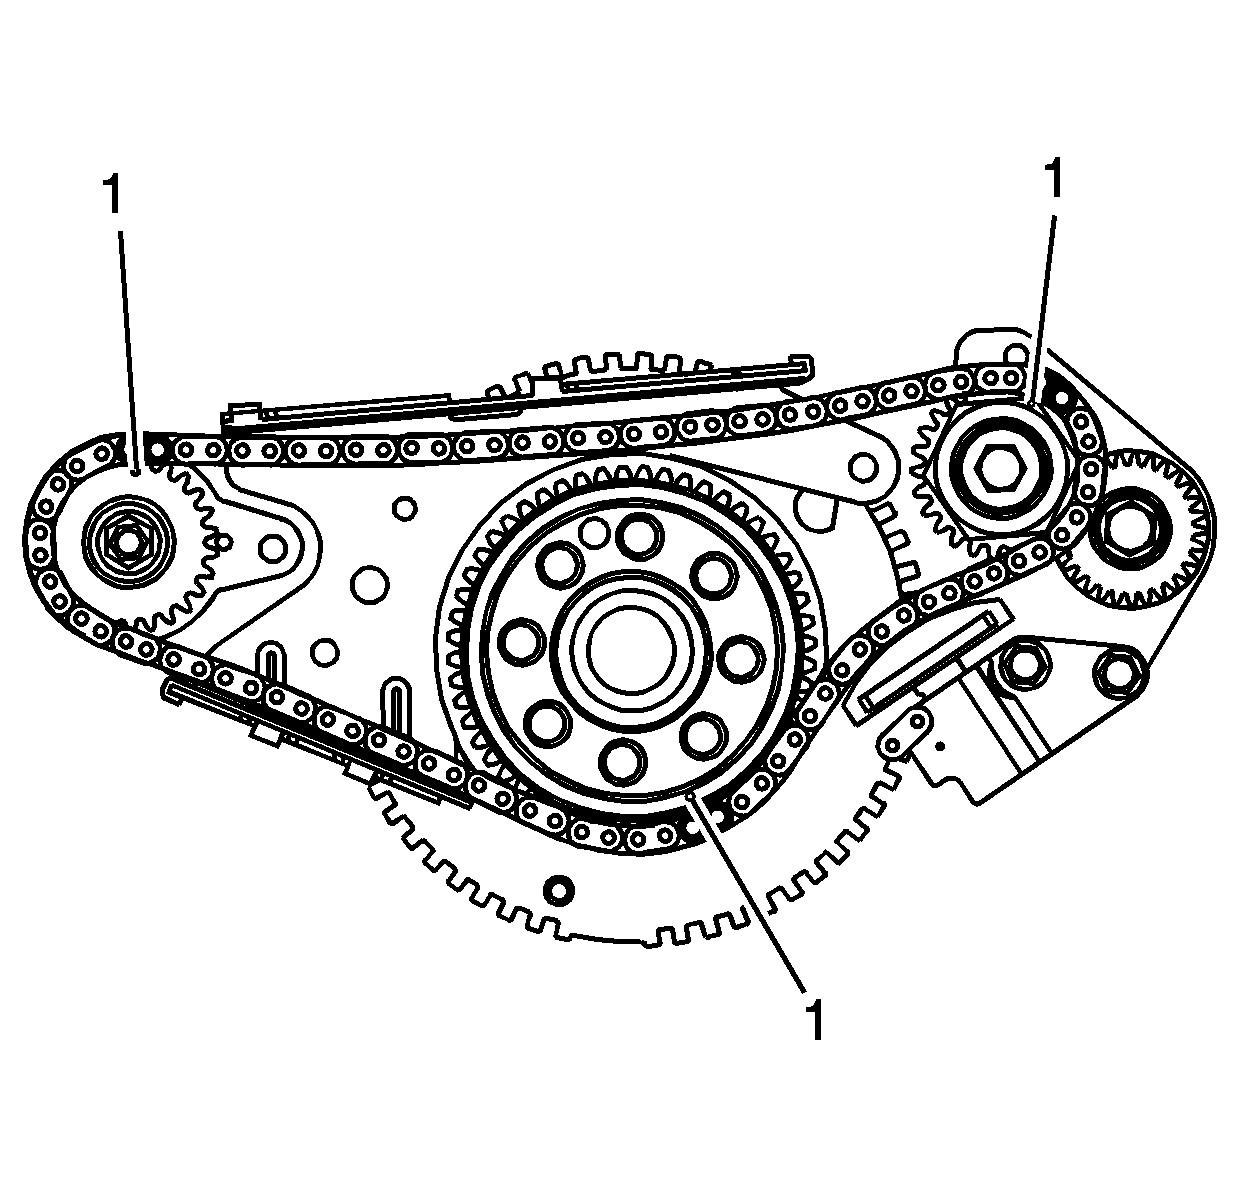
- Rotate the crankshaft until the left hand balance shaft sprocket timing mark is at 12:00. The right hand balance shaft sprocket timing mark should be at 2:30. The crankshaft sprocket mark should be at 4:30. Make sure the 3 timing marks on the sprockets line up with a dark link on the chain. Every 11 crankshaft rotations, 3 of the 5 dark links on the chain will line up with the timing marks.
- Rotate the retainer plate clockwise while holding the chain onto the crankshaft sprocket.
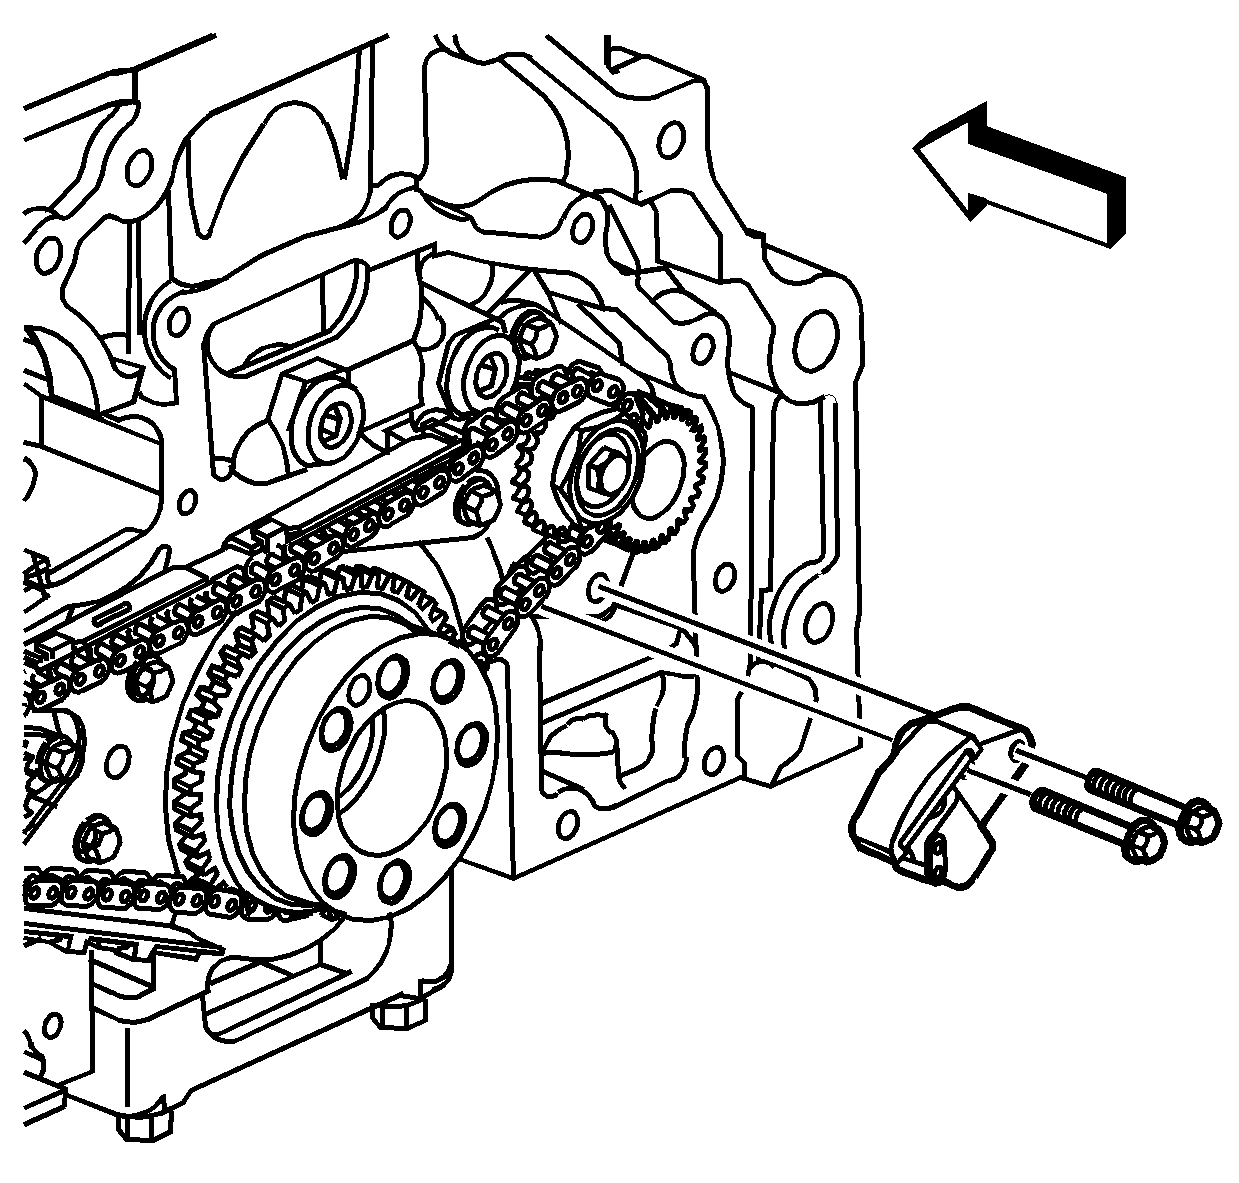
- Install the balance shaft chain tensioner and bolts.
- Install NEW right balance shaft assembly retaining bolts.
- Remove the small tool from the link plate hole in order to regain chain tension.
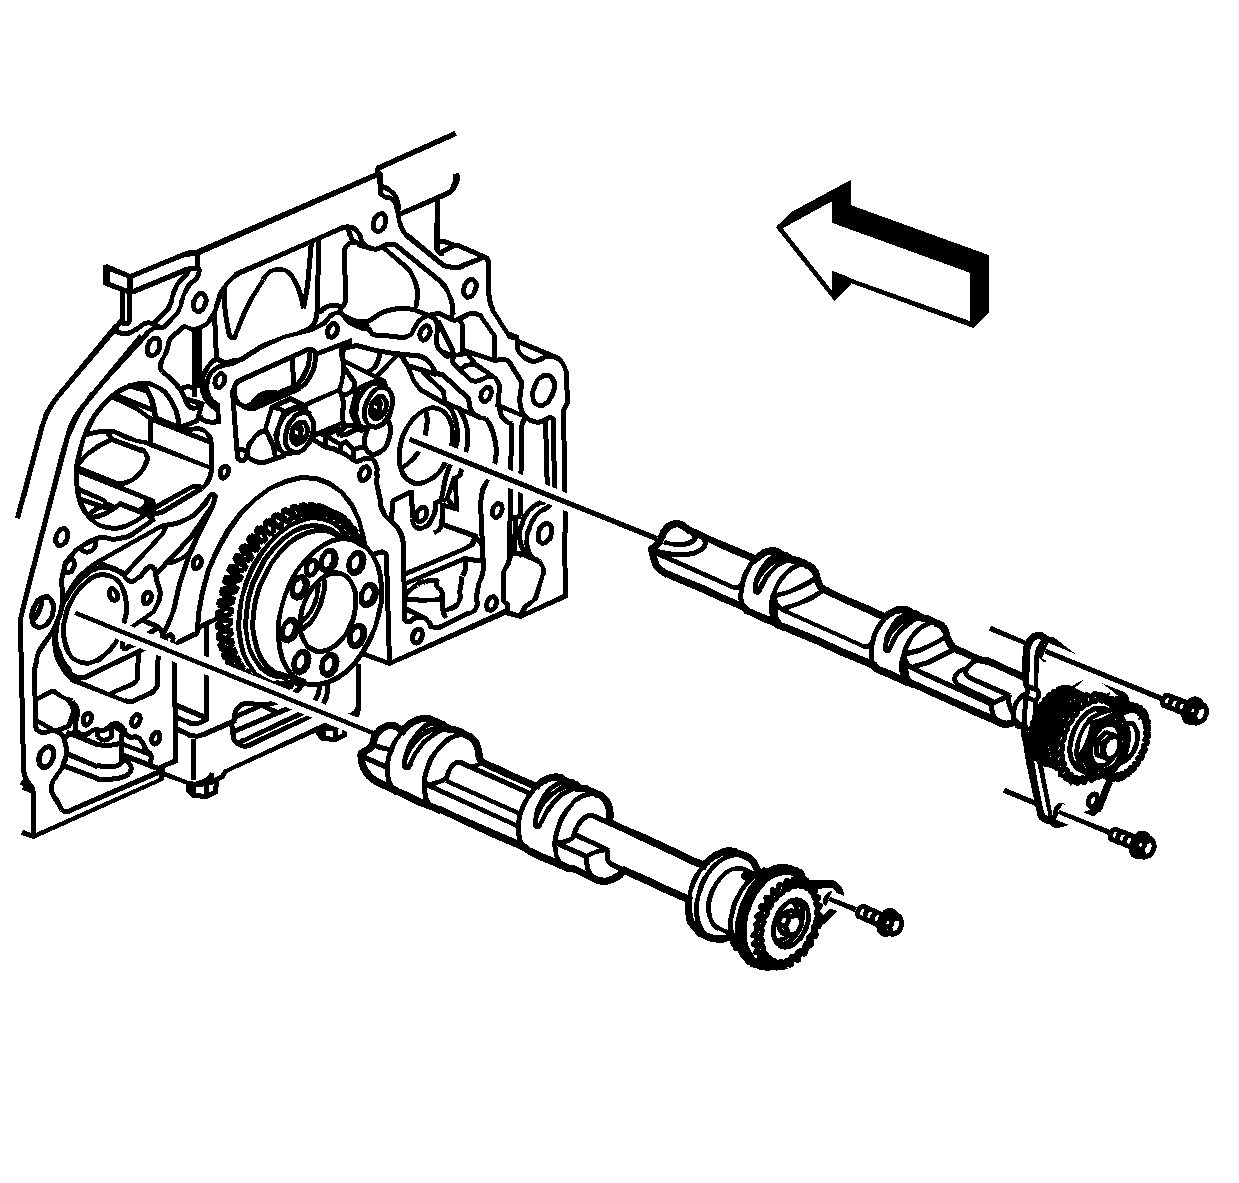
Important: Do not disassemble the balance shaft assemblies. Remove and install the balance shafts as complete assemblies.
Notice: Use the correct fastener in the correct location. Replacement fasteners must be the correct part number for that application. Fasteners requiring replacement or fasteners requiring the use of thread locking compound or sealant are identified in the service procedure. Do not use paints, lubricants, or corrosion inhibitors on fasteners or fastener joint surfaces unless specified. These coatings affect fastener torque and joint clamping force and may damage the fastener. Use the correct tightening sequence and specifications when installing fasteners in order to avoid damage to parts and systems.
Tighten
Tighten the NEW left balance shaft assembly retaining bolts to 10 N·m (89 lb in).
Tighten
Tighten the balance shaft chain guide bolts to 10 N·m (89 lb in).
Important: Rotate the right balance shaft retainer plate counter-clockwise to allow chain installation over all 3 sprockets.
Tighten
Tighten the balance shaft chain tensioner bolts to 10 N·m (89 lb in).
Tighten
Tighten the NEW right balance shaft assembly bolts to 12 N·m (106 lb in).
Important: Do not force the tensioner to the next notch by pushing up on the tensioner shoe. This will over-tension the chain and may result in a whine noise.
