For 1990-2009 cars only
Exhaust Manifold Heat Shield Replacement LLV
Removal Procedure
Caution: Refer to Exhaust Service Caution in the Preface section.
Caution: Refer to Protective Goggles and Glove Caution in the Preface section.
- Remove the air cleaner outlet duct. Refer to Air Cleaner Outlet Duct Replacement .
- Remove the air cleaner assembly. Refer to Air Cleaner Assembly Replacement .
- If equipped with M30, remove the transmission filler tube bracket nut from the A.I.R. adapter, and position aside.
- Remove the heated oxygen sensor (HO2S) from the exhaust manifold. Refer to Heated Oxygen Sensor 1 Replacement .
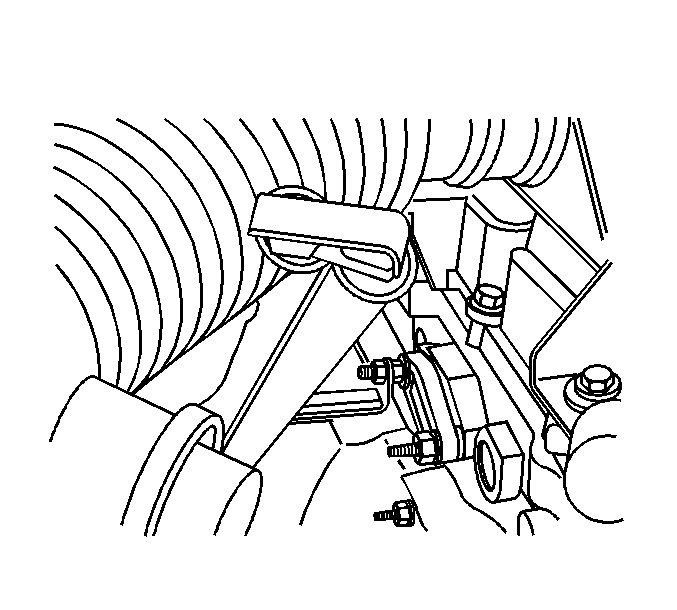
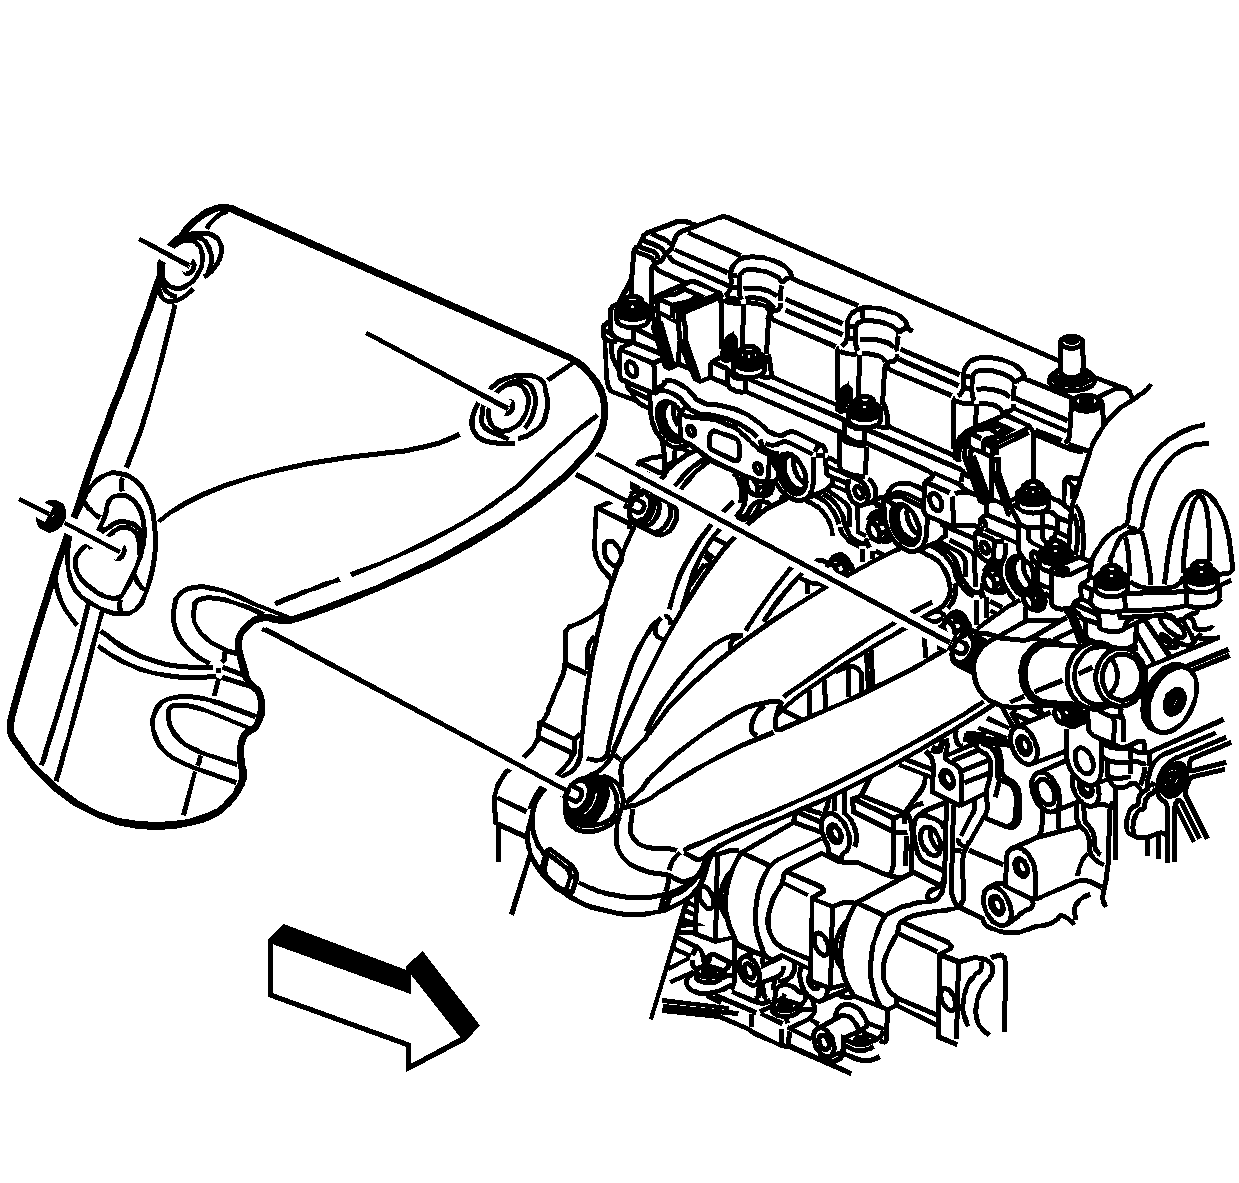
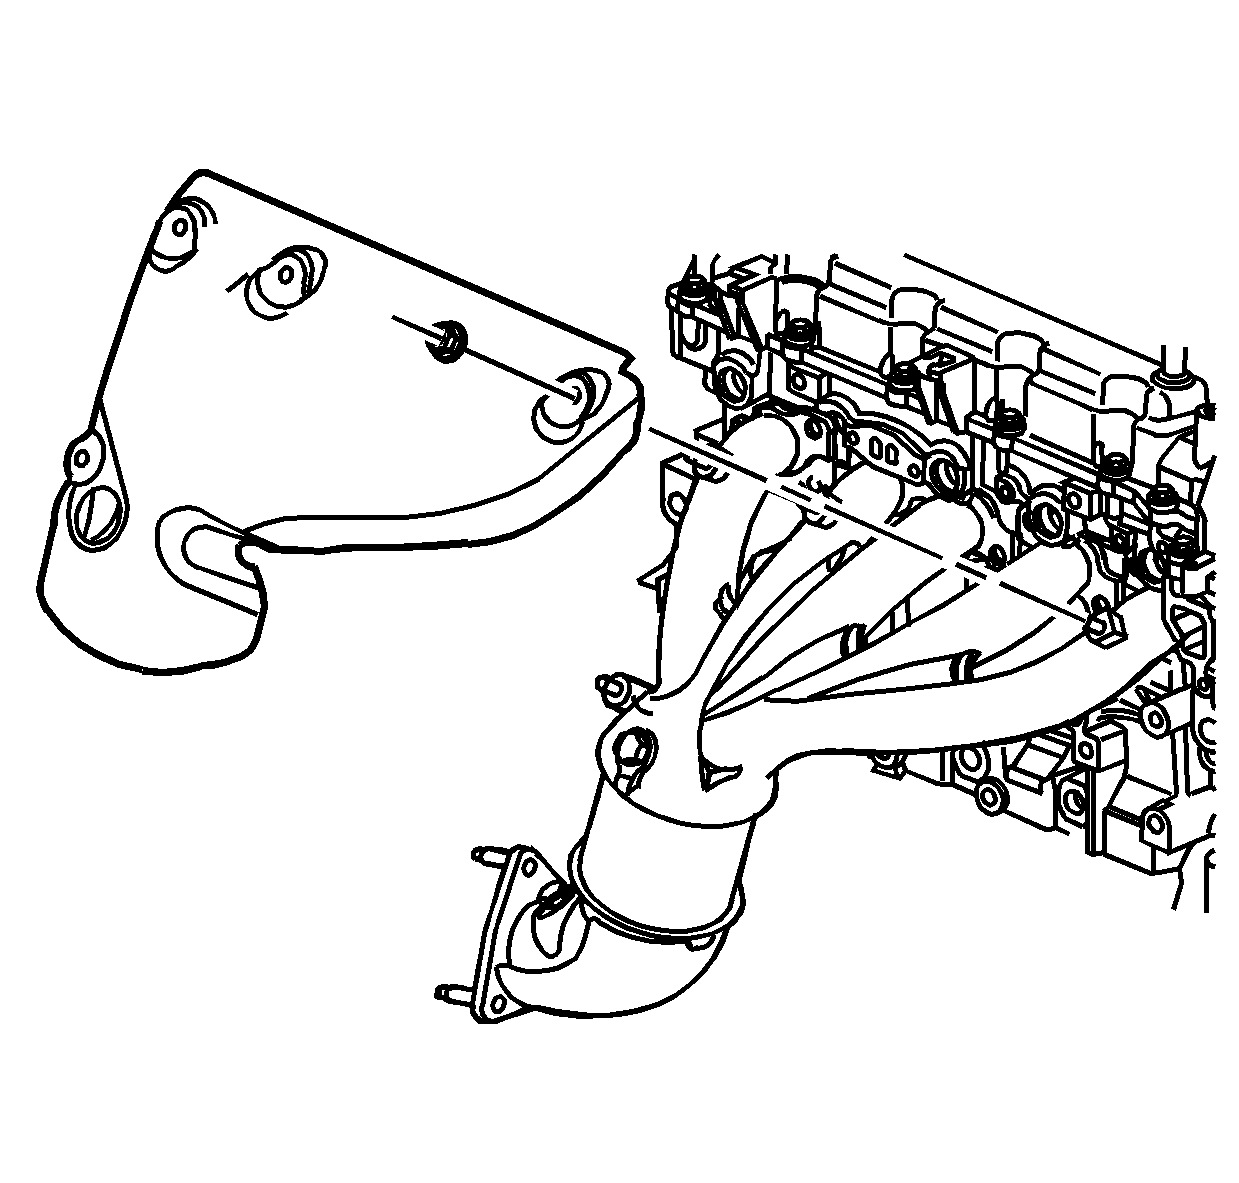
- Remove the 3 nuts securing the heat shield to the exhaust manifold.
- Remove the exhaust manifold heat shield from the exhaust manifold.
Installation Procedure
- Position the exhaust manifold heat shield to the exhaust manifold.
- Apply anti-seize GM P/N 12371386 (Canadian P/N 993128) to the exhaust manifold heat shield nuts.
- Install the exhaust manifold heat shield nuts.
- Install the HO2S to the exhaust manifold. Refer to Heated Oxygen Sensor 1 Replacement .
- Position the transmission filler tube to the A.I.R. adapter if previously removed.
- Install the transmission filler tube bracket nut.
- Install the air cleaner assembly. Refer to Air Cleaner Assembly Replacement .
- Install the air cleaner outlet duct. Refer to Air Cleaner Outlet Duct Replacement .
Notice: Refer to Fastener Notice in the Preface section.
Tighten
Tighten the nuts to 10 N·m (89 lb in).
Tighten
Tighten the nut to 12.5 N·m (111 lb in).
Exhaust Manifold Heat Shield Replacement LLR
Removal Procedure
Caution: Refer to Exhaust Service Caution in the Preface section.
Caution: Refer to Protective Goggles and Glove Caution in the Preface section.
- Remove the air cleaner outlet duct. Refer to Air Cleaner Outlet Duct Replacement .
- Remove the air cleaner assembly. Refer to Air Cleaner Assembly Replacement .
- If equipped with M30, remove the transmission filler tube bracket nut from the A.I.R. adapter, and position aside.
- Remove the heated oxygen sensor (HO2S) from the exhaust manifold. Refer to Heated Oxygen Sensor 1 Replacement .
- Remove the 4 nuts securing the heat shield to the exhaust manifold.
- Remove the exhaust manifold heat shield from the exhaust manifold.
Installation Procedure
- Position the exhaust manifold heat shield to the exhaust manifold.
- Apply anti-seize GM P/N 12371386 (Canadian P/N 993128) to the exhaust manifold heat shield nuts.
- Install the exhaust manifold heat shield nuts.
- Install the HO2S to the exhaust manifold. Refer to Heated Oxygen Sensor 1 Replacement .
- Position the transmission filler tube to the A.I.R. adapter if previously removed.
- Install the transmission filler tube bracket nut.
- Install the air cleaner assembly. Refer to Air Cleaner Assembly Replacement .
- Install the air cleaner outlet duct. Refer to Air Cleaner Outlet Duct Replacement .
Notice: Refer to Fastener Notice in the Preface section.
Tighten
Tighten the nuts to 10 N·m (89 lb in).
Tighten
Tighten the nut to 12.5 N·m (111 lb in).
