For 1990-2009 cars only
Removal Procedure
- Raise and support the vehicle. Refer to Lifting and Jacking the Vehicle .
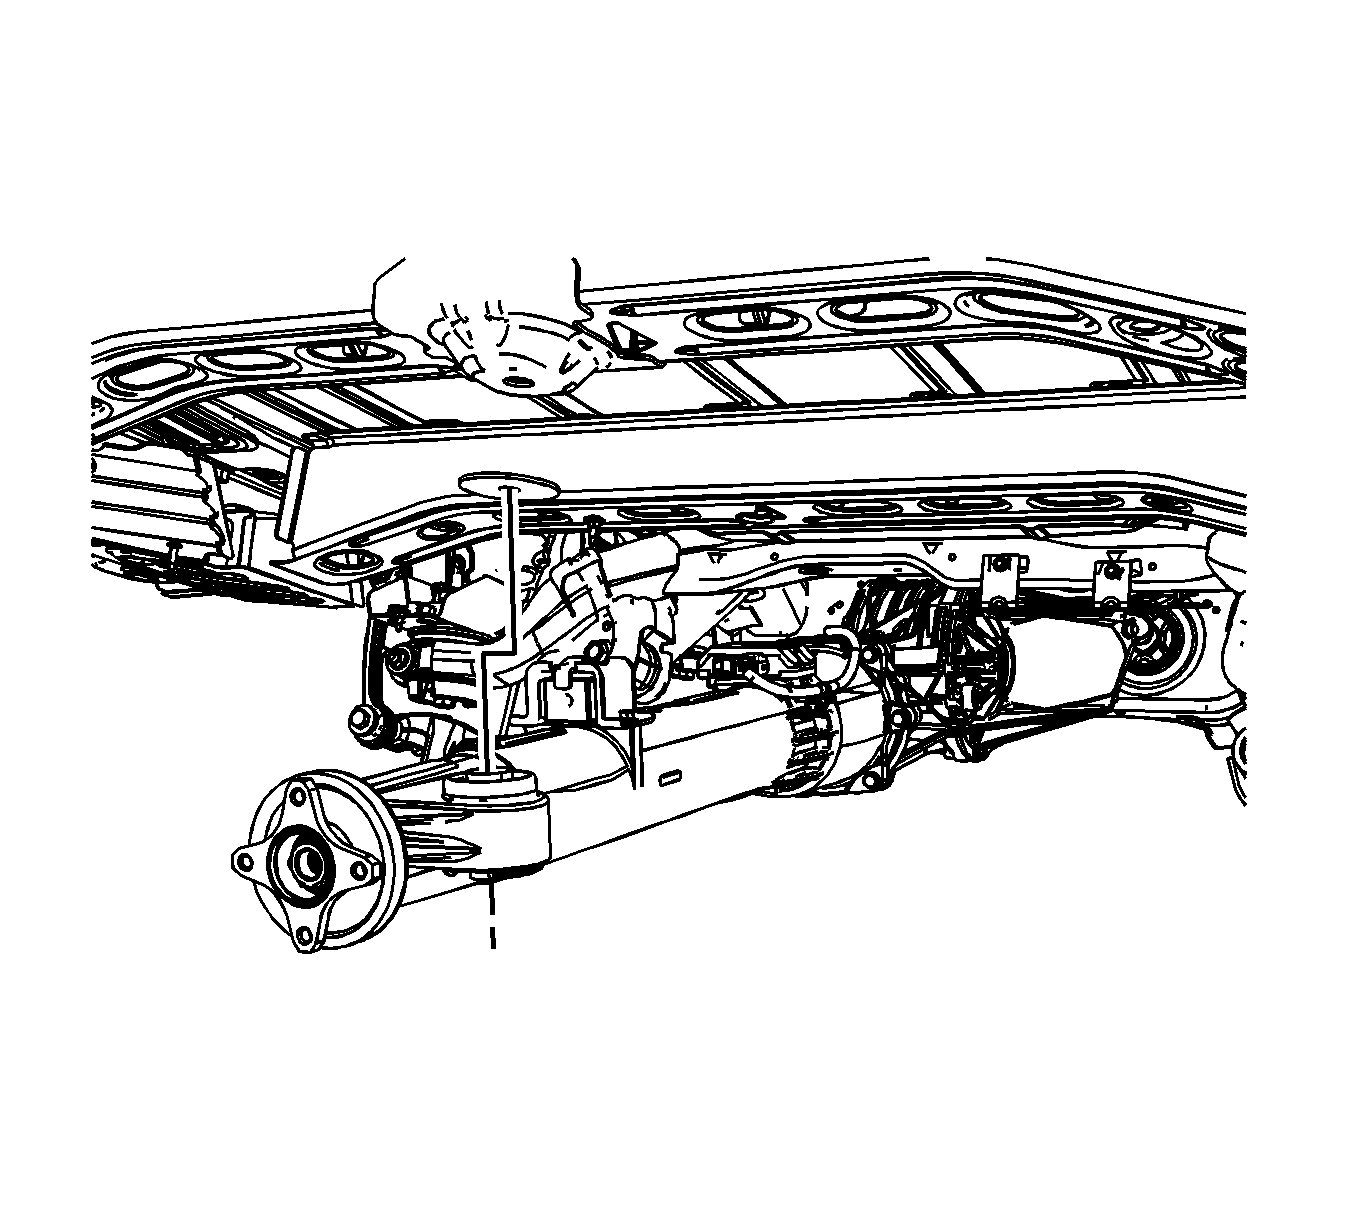
- Remove the propeller shaft assembly. Refer to Propeller Shaft Replacement .
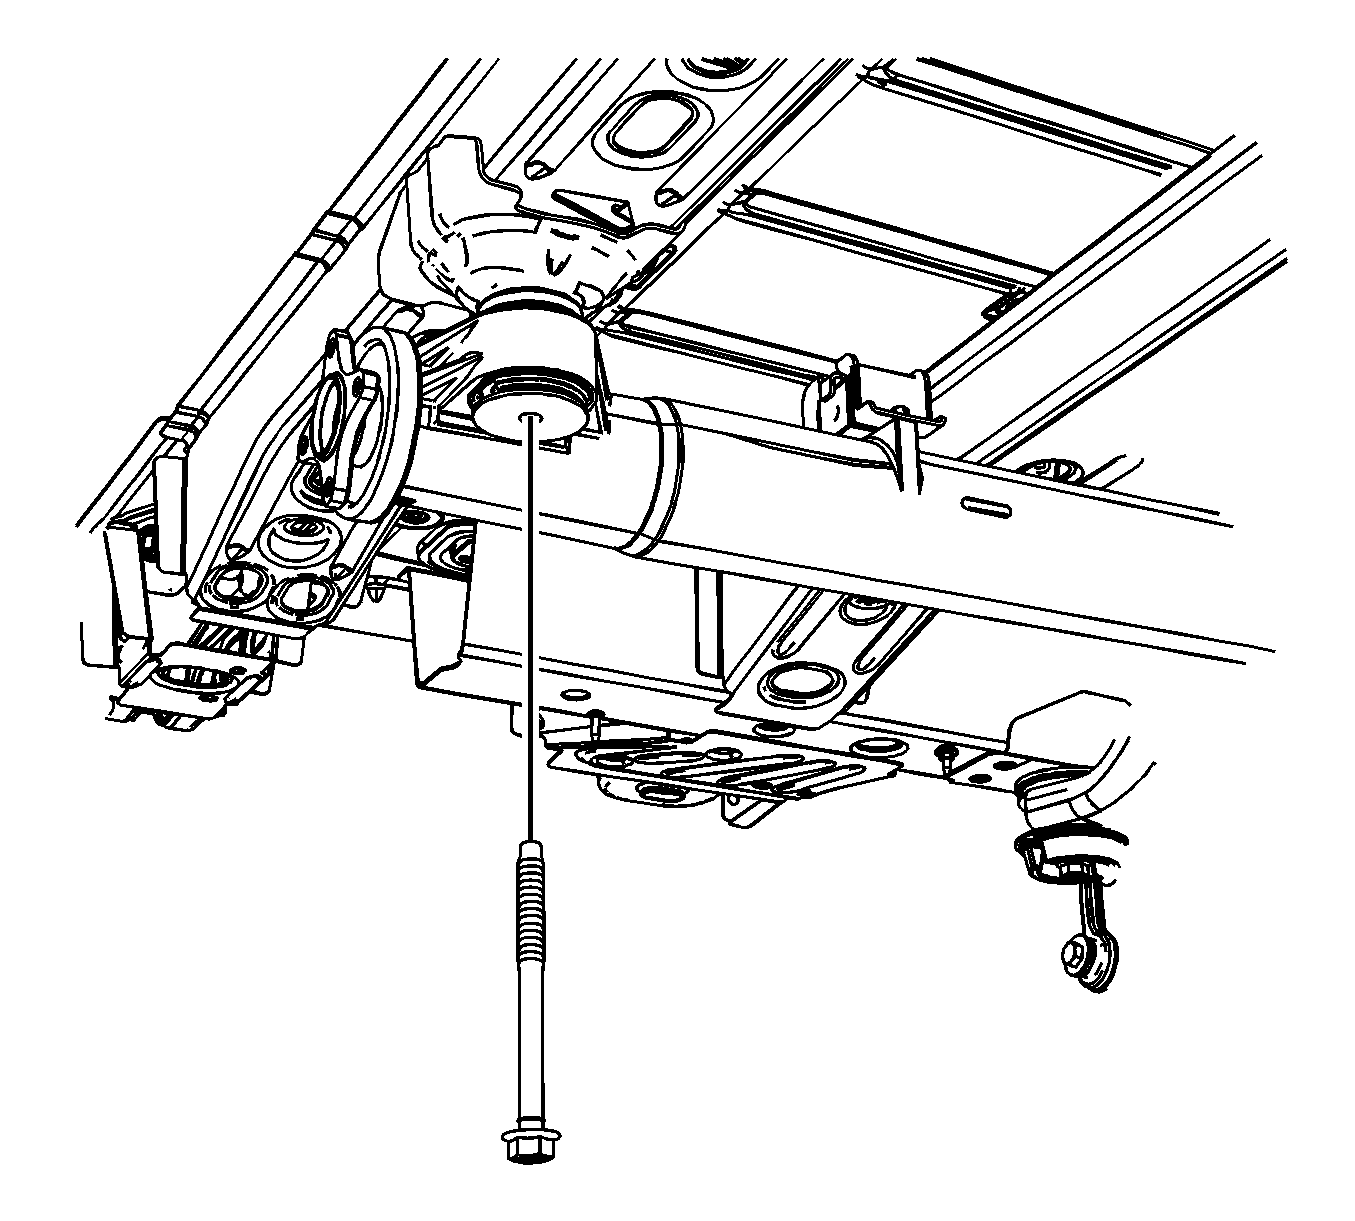
- Remove the torque tube mounting bolt.
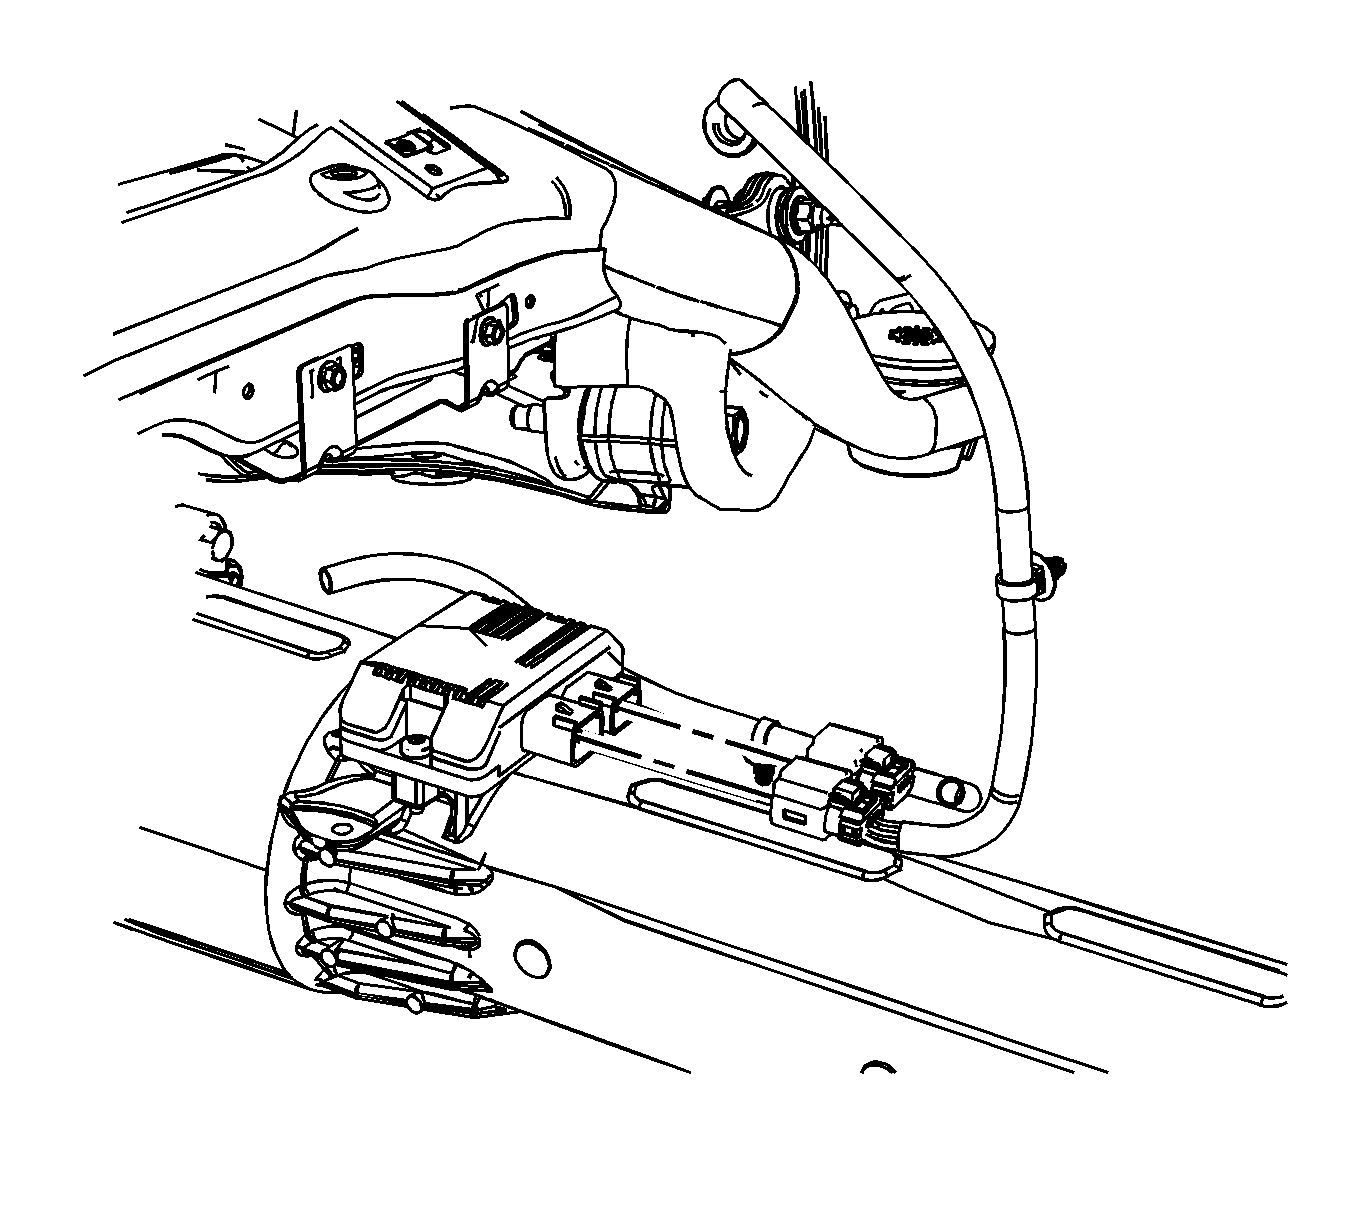
- Lower the torque tube to gain access to the clutch control module.
- Disconnect the electrical connectors from the clutch control module.
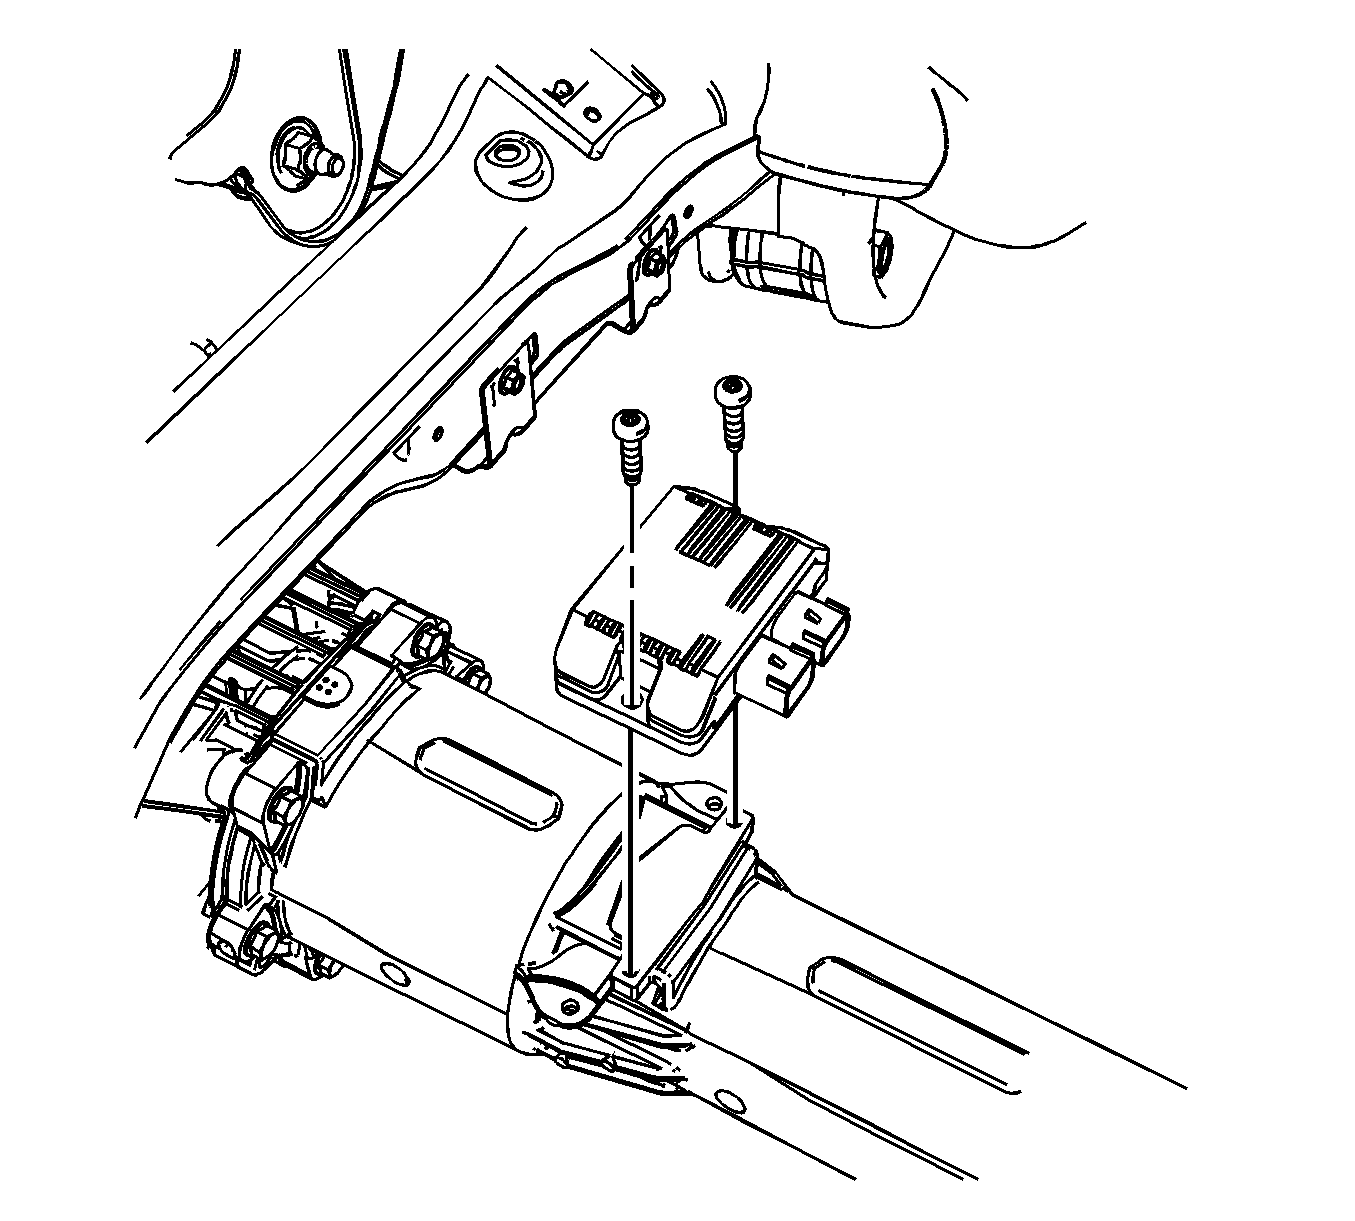
- Remove the screws for the clutch control module.
- Remove the clutch control module from the torque tube.
Important: DO NOT allow the torque tube to hang, support with a suit stand.
Installation Procedure
- Position the clutch control module on the torque tube.
- Install the mounting screws for the clutch control module.
- Reconnect the electrical connectors for the clutch control module.
- Lift the torque back into position.
- Install the torque tube mounting bolt.
- Install the propeller shaft. Refer to Propeller Shaft Replacement
- Remove the support and lower the vehicle.
- Reprogram the clutch control module. Refer to Control Module References .
Notice: Refer to Fastener Notice in the Preface section.
Tighten
Tighten the screws to 8 N·m (71 lb in).
Tighten
Tighten the bolt to 185 N·m (137 lb ft).
