For 1990-2009 cars only
Tools Required
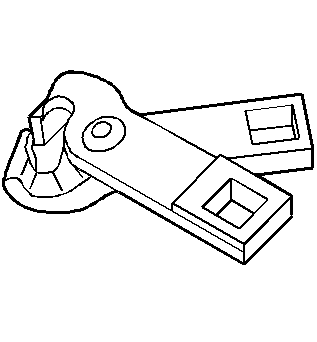
| • | J 35910 Drive Axle Seal Clamp Pliers |
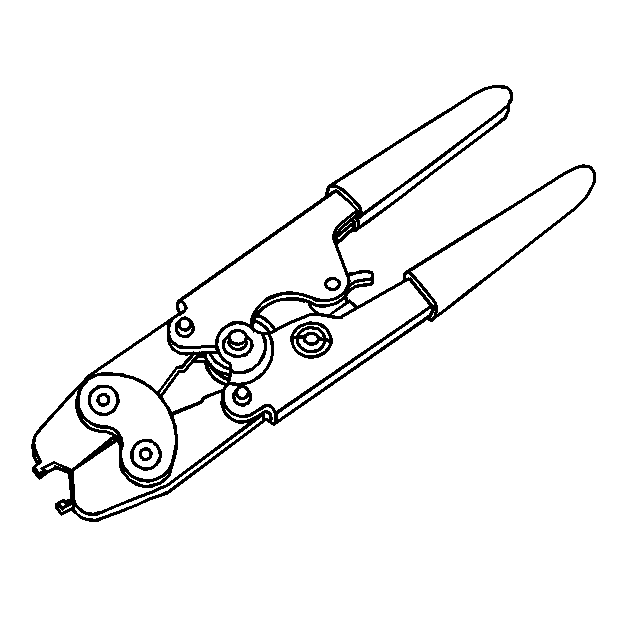
| • | CH-48894 Wheel Drive Shaft Boot Clamp Pliers |
Disassembly Procedure
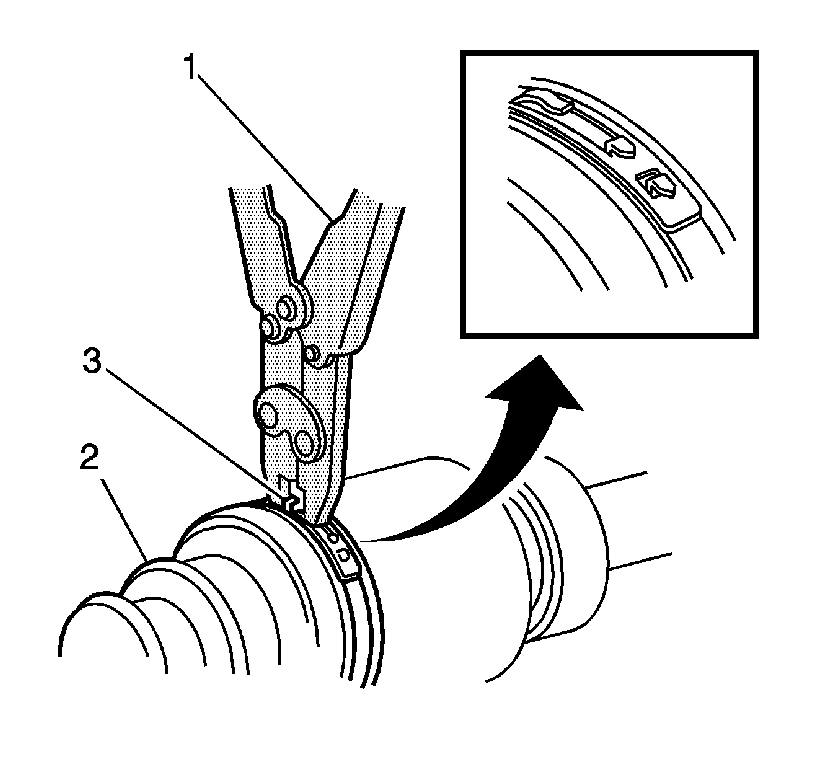
- Clamp the drive axle shaft in a soft jawed vice.
- Use a flat-bladed tool and disengage the retaining tabs of the large seal clamp.
- Discard the clamp.
- Remove the small seal clamp using side cutters and discard the clamp.
- Separate the constant velocity (CV) joint boot from the CV joint race at the large diameter.
- Slide the boot away from the joint along the wheel drive shaft bar.
- Wipe the excess grease from the face of the CV inner race.
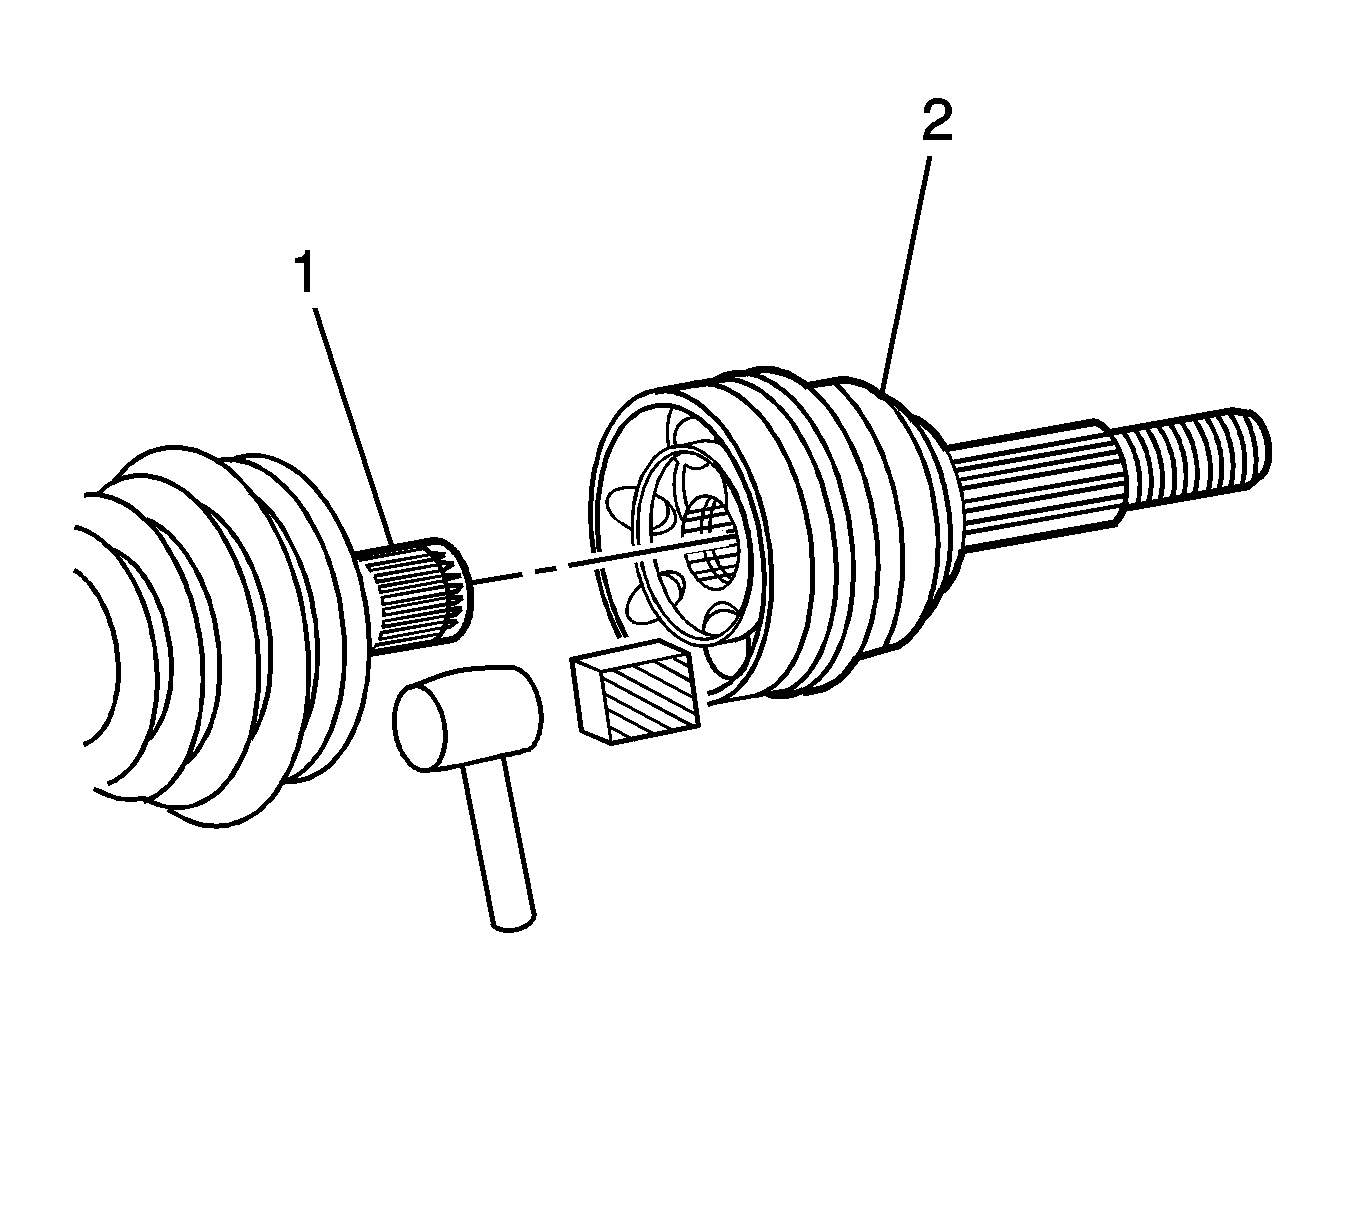
- Place a block of wood against the CV joint outer race and carefully tap on the CV joint to remove it from the wheel drive shaft bar.
- Remove the seal from the wheel drive shaft bar.
- Remove the CV joint retaining ring from the wheel drive shaft bar.
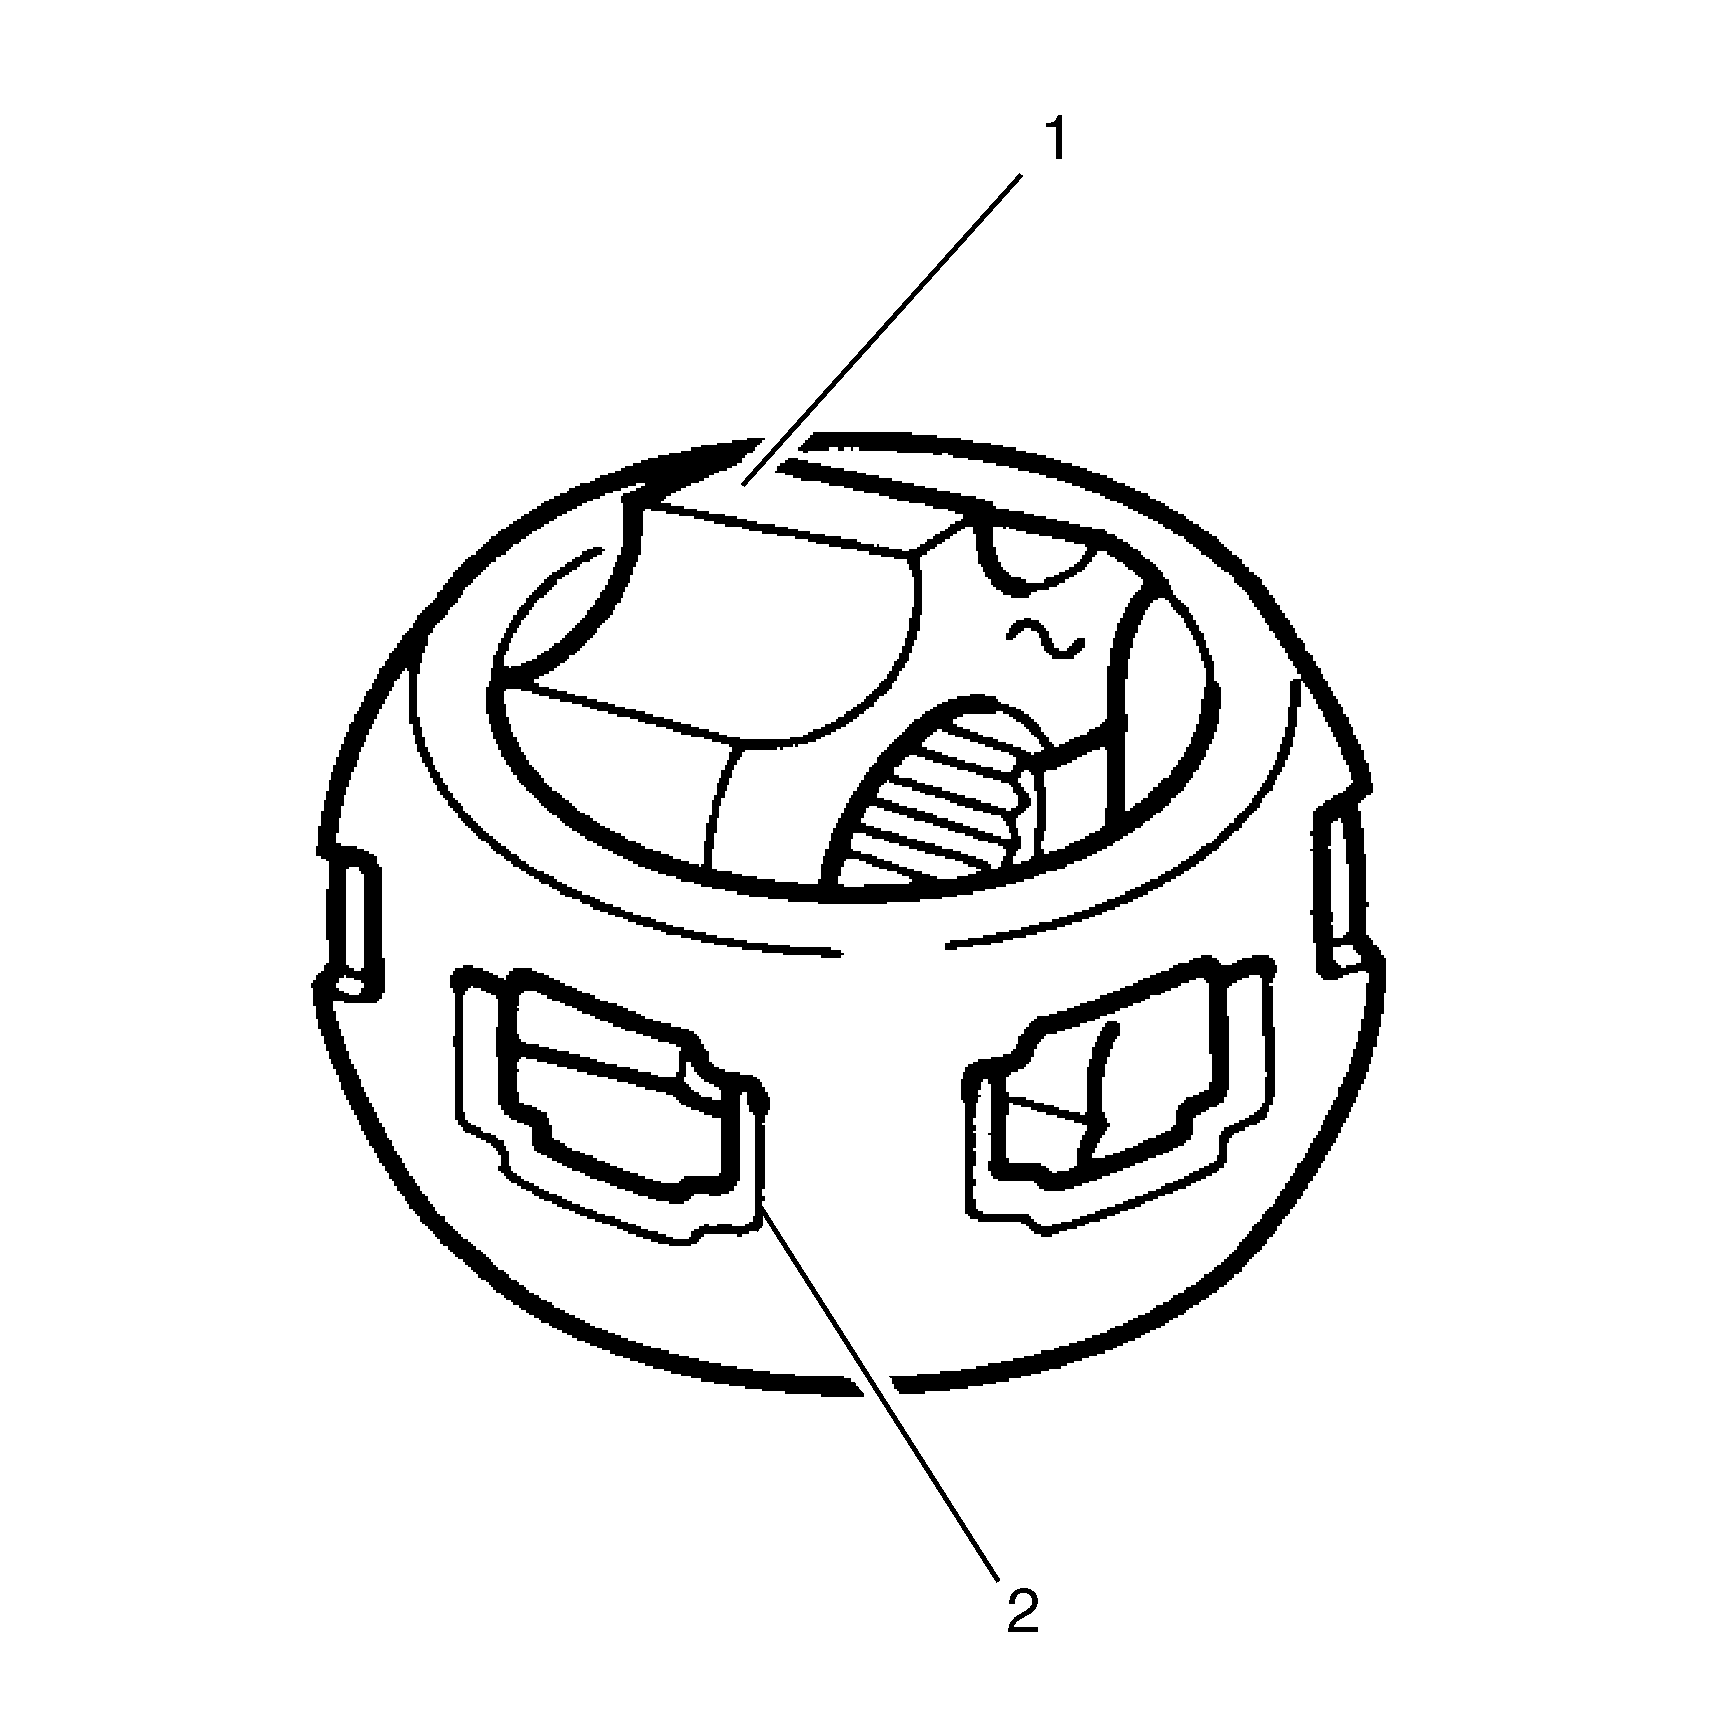
- Place a brass drift against the CV joint inner race (1).
- Tap gently on the brass drift with a hammer in order to tilt the joint race.
- Remove the first bearing roller (2) when the CV race tilts.
- Tilt the CV joint inner race in the opposite direction to remove the opposing bearing roller.
- Repeat the process to remove all 6 of the bearing rollers.
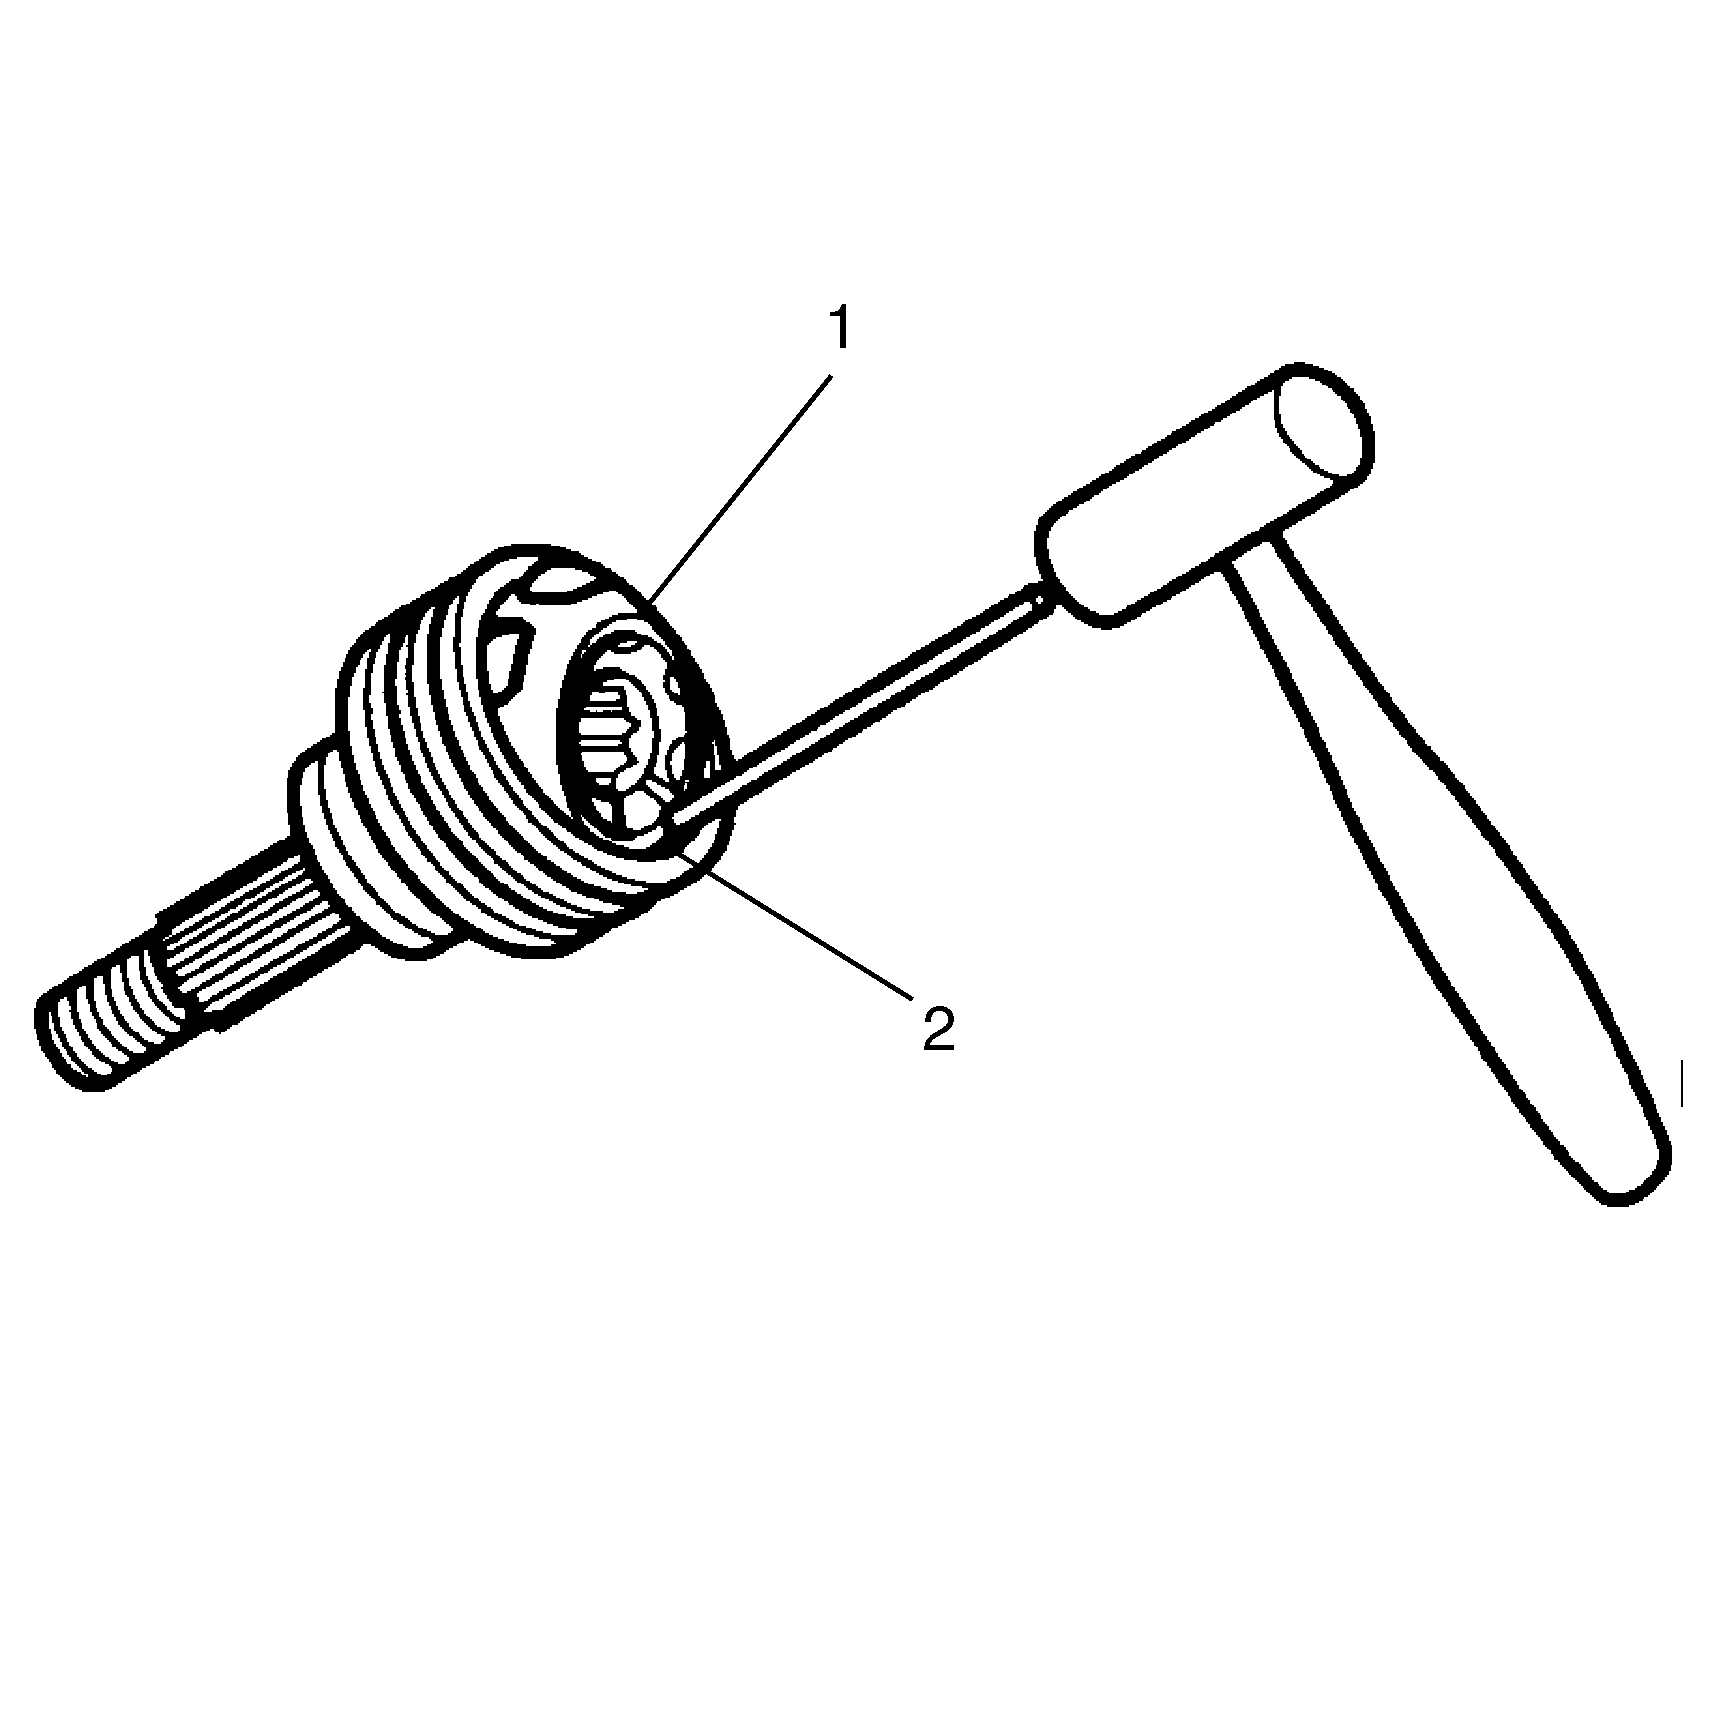
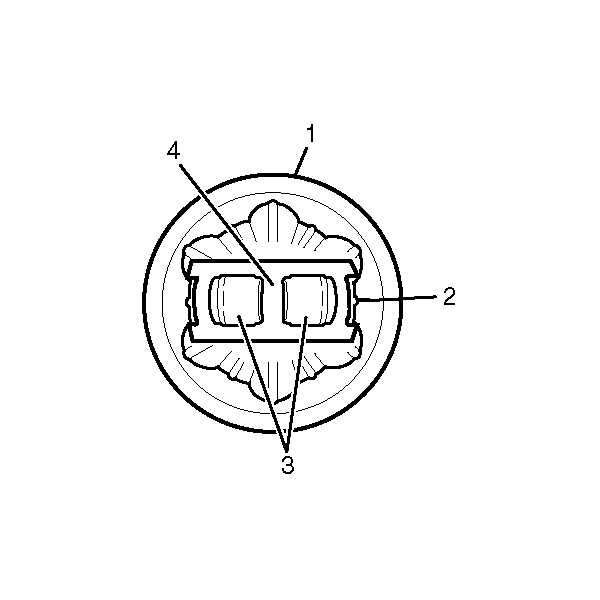
- Pivot the CV joint cage (4) and the inner race 90 degrees to the centerline of the outer race (2). At the same time, align the cage windows (3) with the lands of the outer race.
- Lift out the cage (4) and the inner race.
- Remove the inner race (1) from the cage (2) by rotating the inner race upward.
- Clean the following items thoroughly with a suitable solvent. Remove all traces of grease and contaminants.
- Dry all the parts with compressed air.
- Inspect the CV joint assembly for the following:
- Replace any damaged parts.
- Clean the wheel drive shaft bar. Use a wire brush to remove any rust in the seal mounting grooves.
| • | The inner and outer race assemblies. |
| • | The CV joint cage. |
| • | The bearing rollers. |
| • | Unusual wear |
| • | Cracks |
| • | Damage |
Installation Procedure
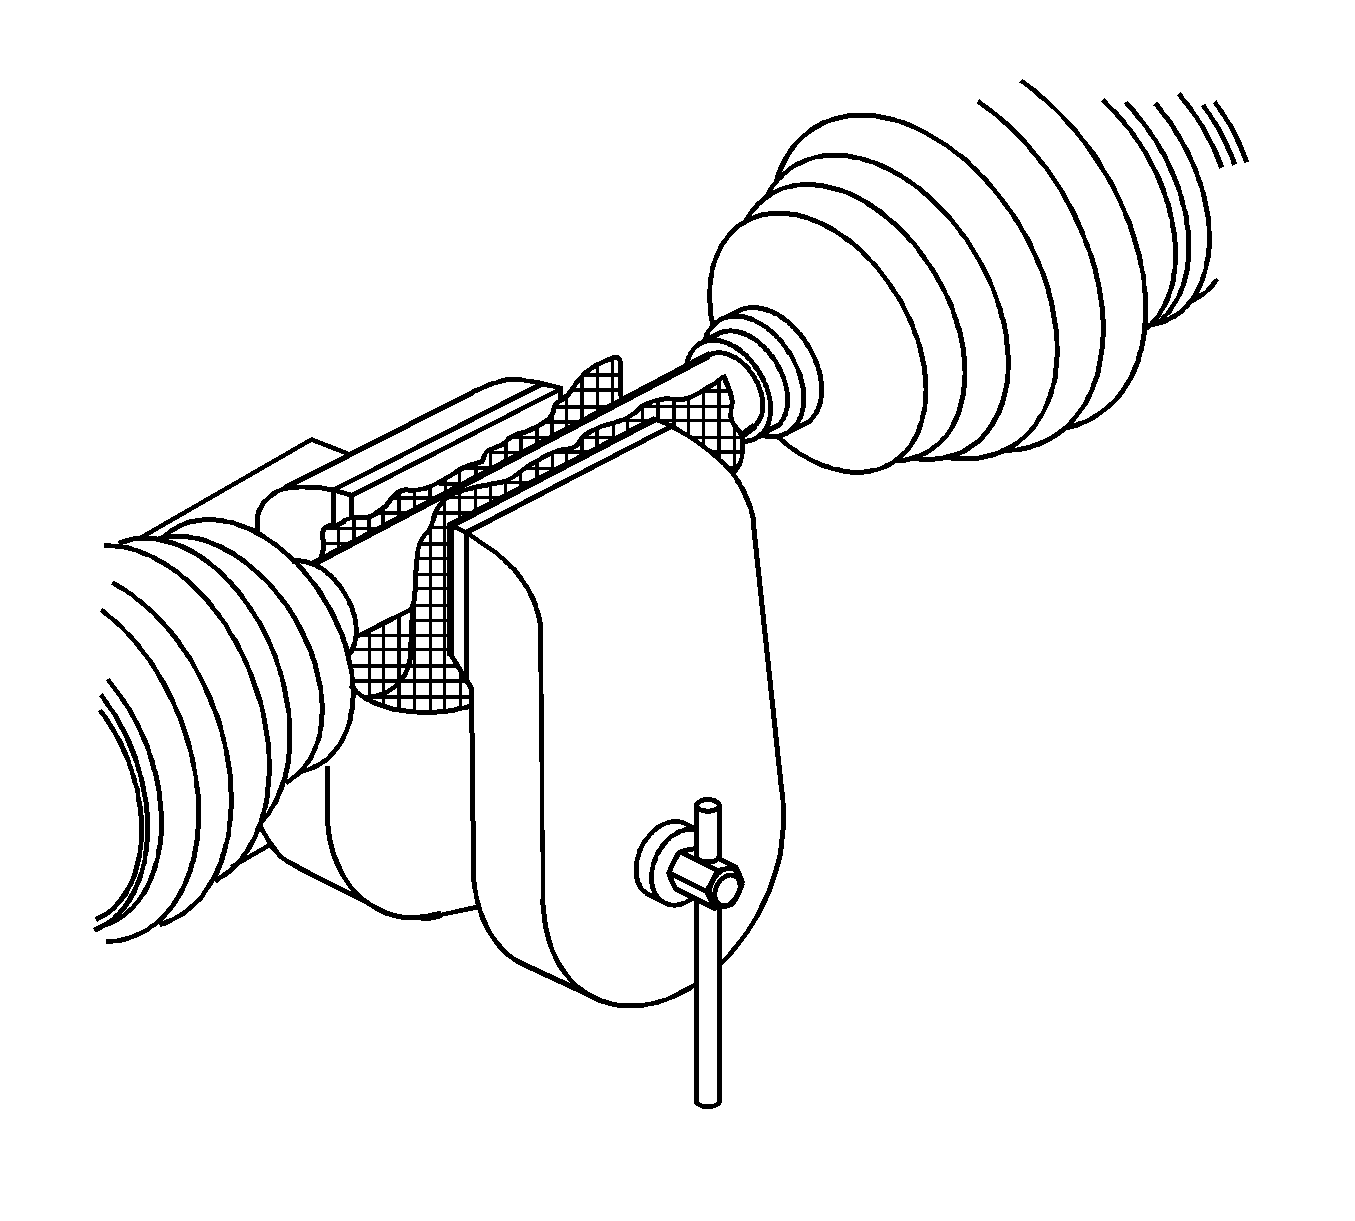
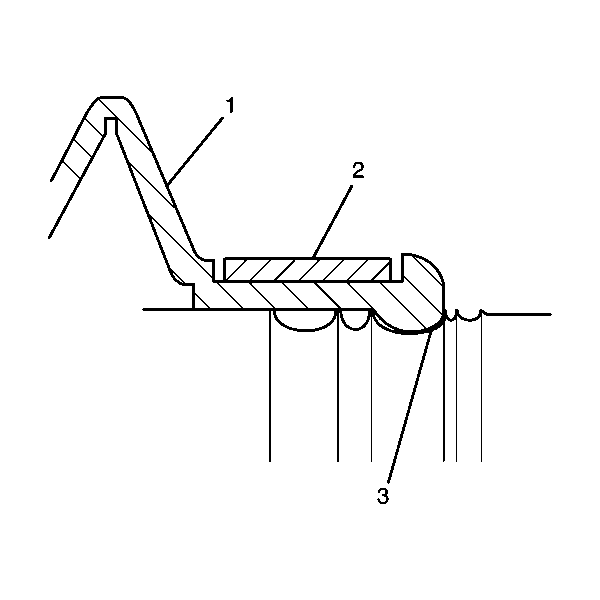
- Install the new small seal clamp (2) on the neck of the outboard seal (1). Do not clamp.
- Slide the outboard seal onto the wheel drive shaft bar and position the neck of the outboard seal in the seal groove on the bar. The largest groove below the sight groove on the wheel drive shaft bar is the seal groove seal (3).
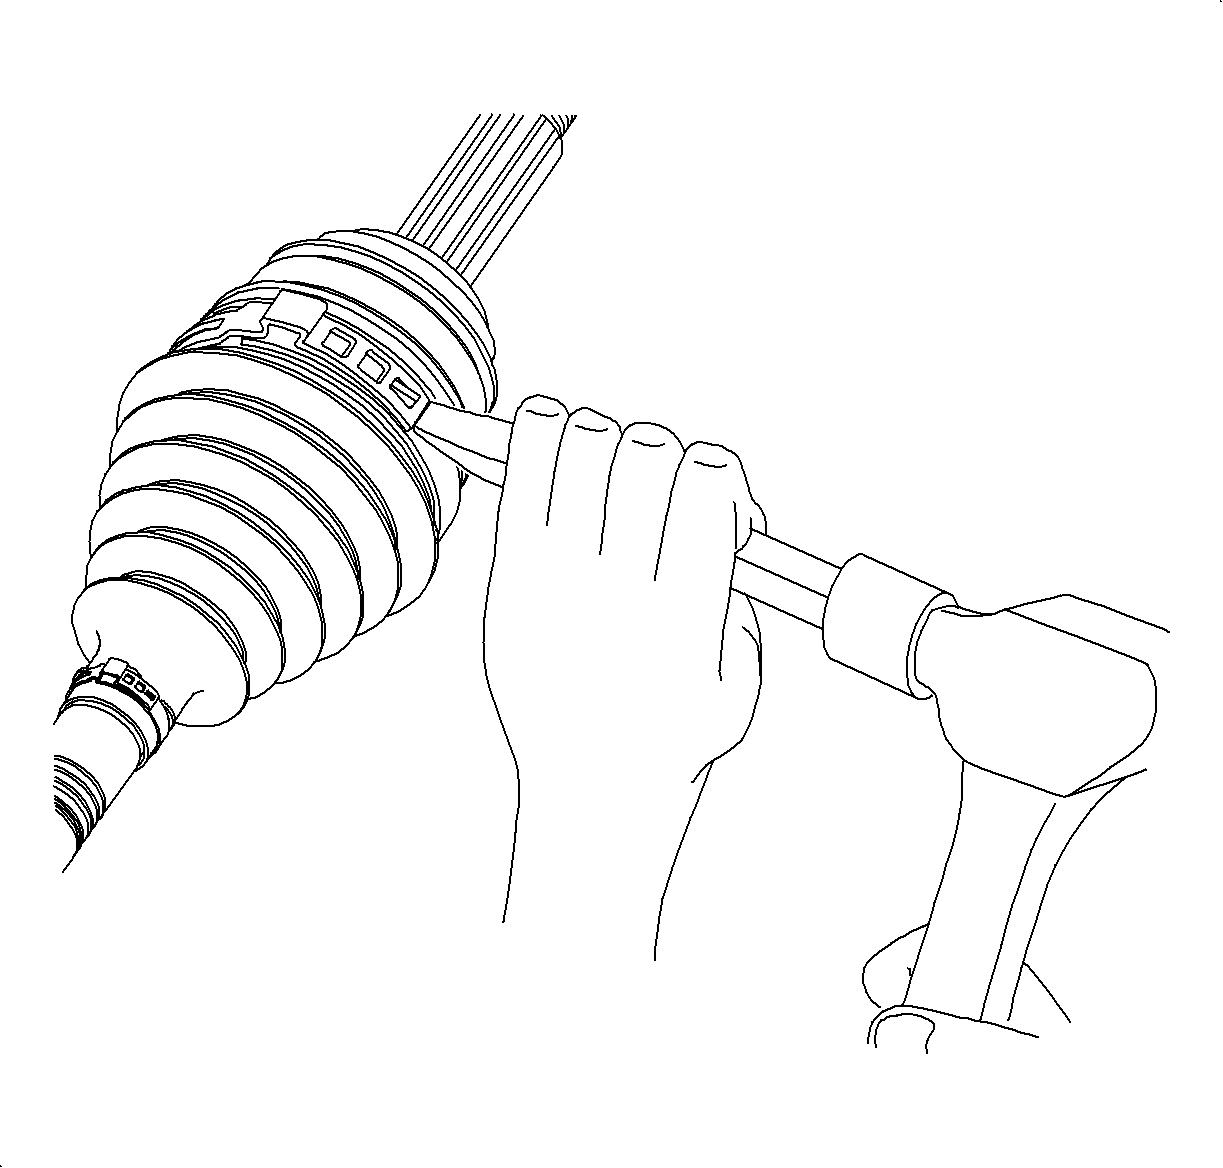
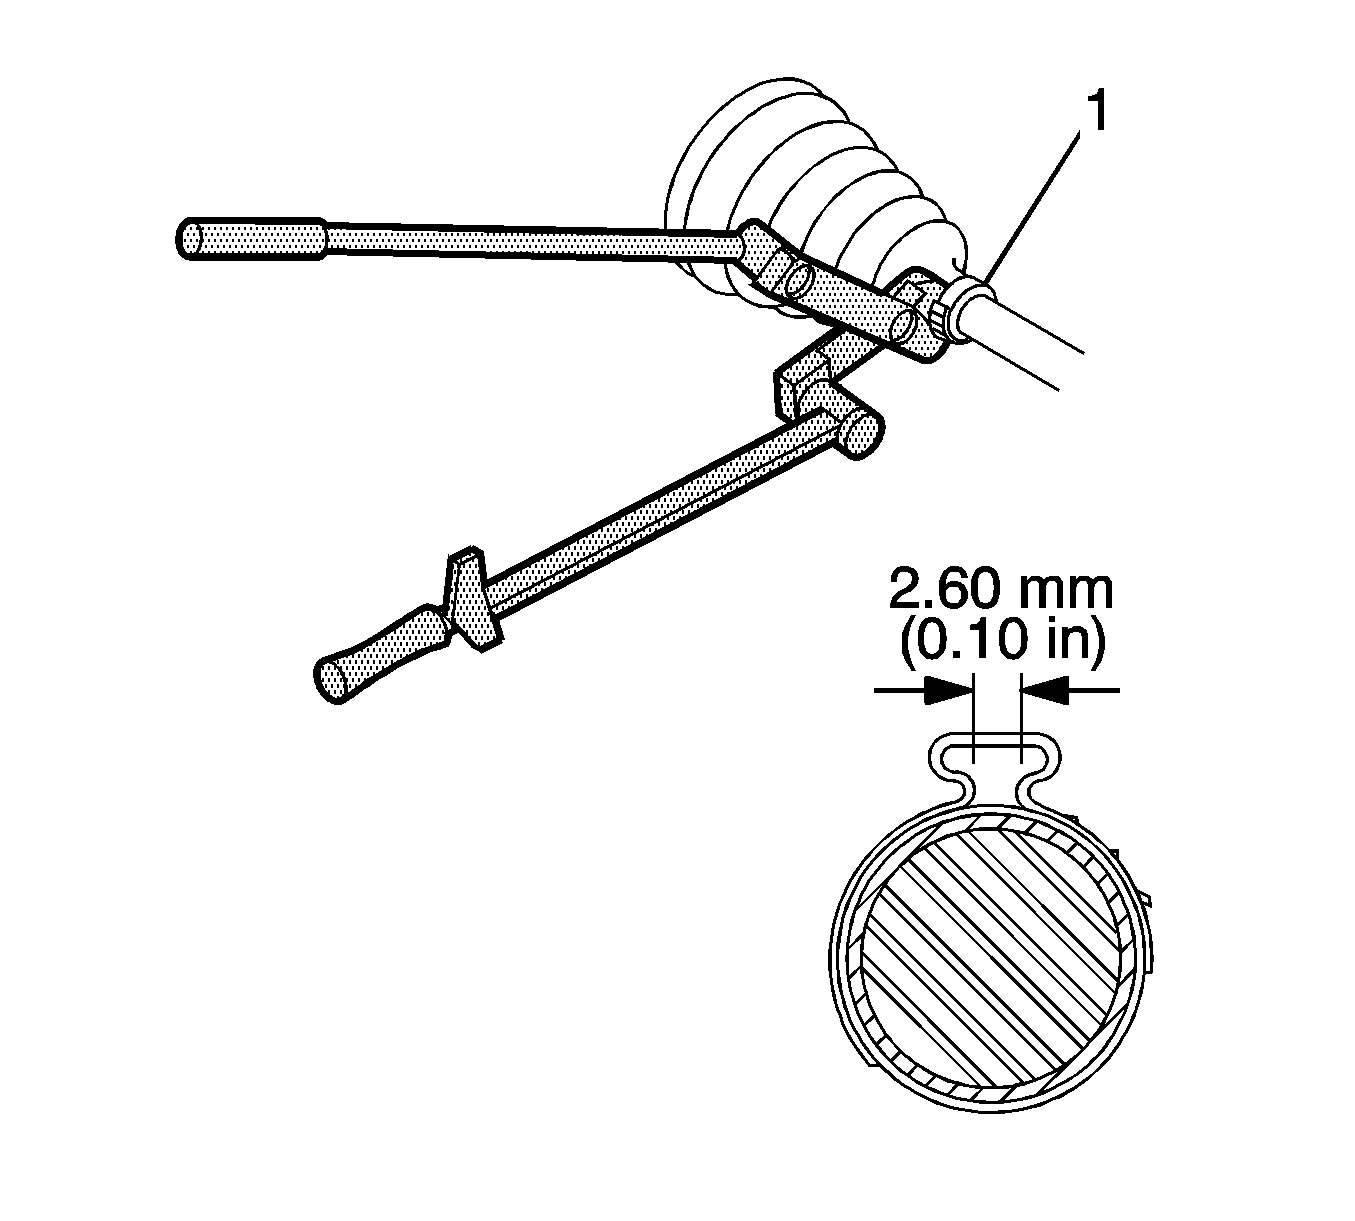
- Crimp the seal clamp (1) using the J 35910 .
- Measure the clamp end gap dimension. The gap should not exceed 2.60 mm (0.10 in).
- Put a light coat of grease from the service kit on the bearing roller grooves of the inner race and outer race.
- Hold the inner race 90 degrees to centerline of cage with the lands of the inner race (1) aligned with the windows of the cage (2) and insert the inner race into the cage.
- Hold the cage and inner race 90 degrees to the center line of the outer race (1) and align the cage windows (3) with the lands of the outer race.
- Place the cage and the inner race into the outer race.
- Insert the first bearing roller, then tilt the cage in the opposite direction to insert the opposing bearing roller.
- Repeat this process until all 6 bearing rollers are in place.
- Install the CV joint retaining ring to the wheel drive shaft bar.
- Place approximately half the grease from the service kit inside the outboard seal and pack the CV joint with the remaining grease.
- Place a block of wood against the CV joint spindle and tap on the block of wood until the CV joint inner race engages the retaining ring.
- Slide the large diameter of the seal over the outside of the CV race and locate the lip of the seal in the housing groove.
- Using the CH-48894 (2-3, install the boot clamp (1).
- Remove the wheel drive shaft from the bench vise.
- Distribute the grease within the outer CV joint by rotating the joint in a circular motion four to five times.
Important: Ensure that the seal clamp is properly positioned around the entire circumference of the seal.
Specification
The gap should not exceed 2.60 mm (0.10 in).
Important: Be sure that the retaining ring side of the inner race faces the wheel drive shaft bar.