Removal Procedure
Caution: Do not allow smoking or the use of open flames in the area where work on the fuel or EVAP system is taking place. Anytime work is being done on the fuel system, disconnect the negative battery cable, except for those tests where battery voltage is required.
Caution: Fuel supply lines will remain pressurized for long periods of time after the engine is shutdown. This pressure must be relieved before servicing the fuel system.
- Relieve the fuel system pressure. Refer to Fuel Pressure Relief .
- Drain the fuel tank. Refer to Fuel Tank Draining .
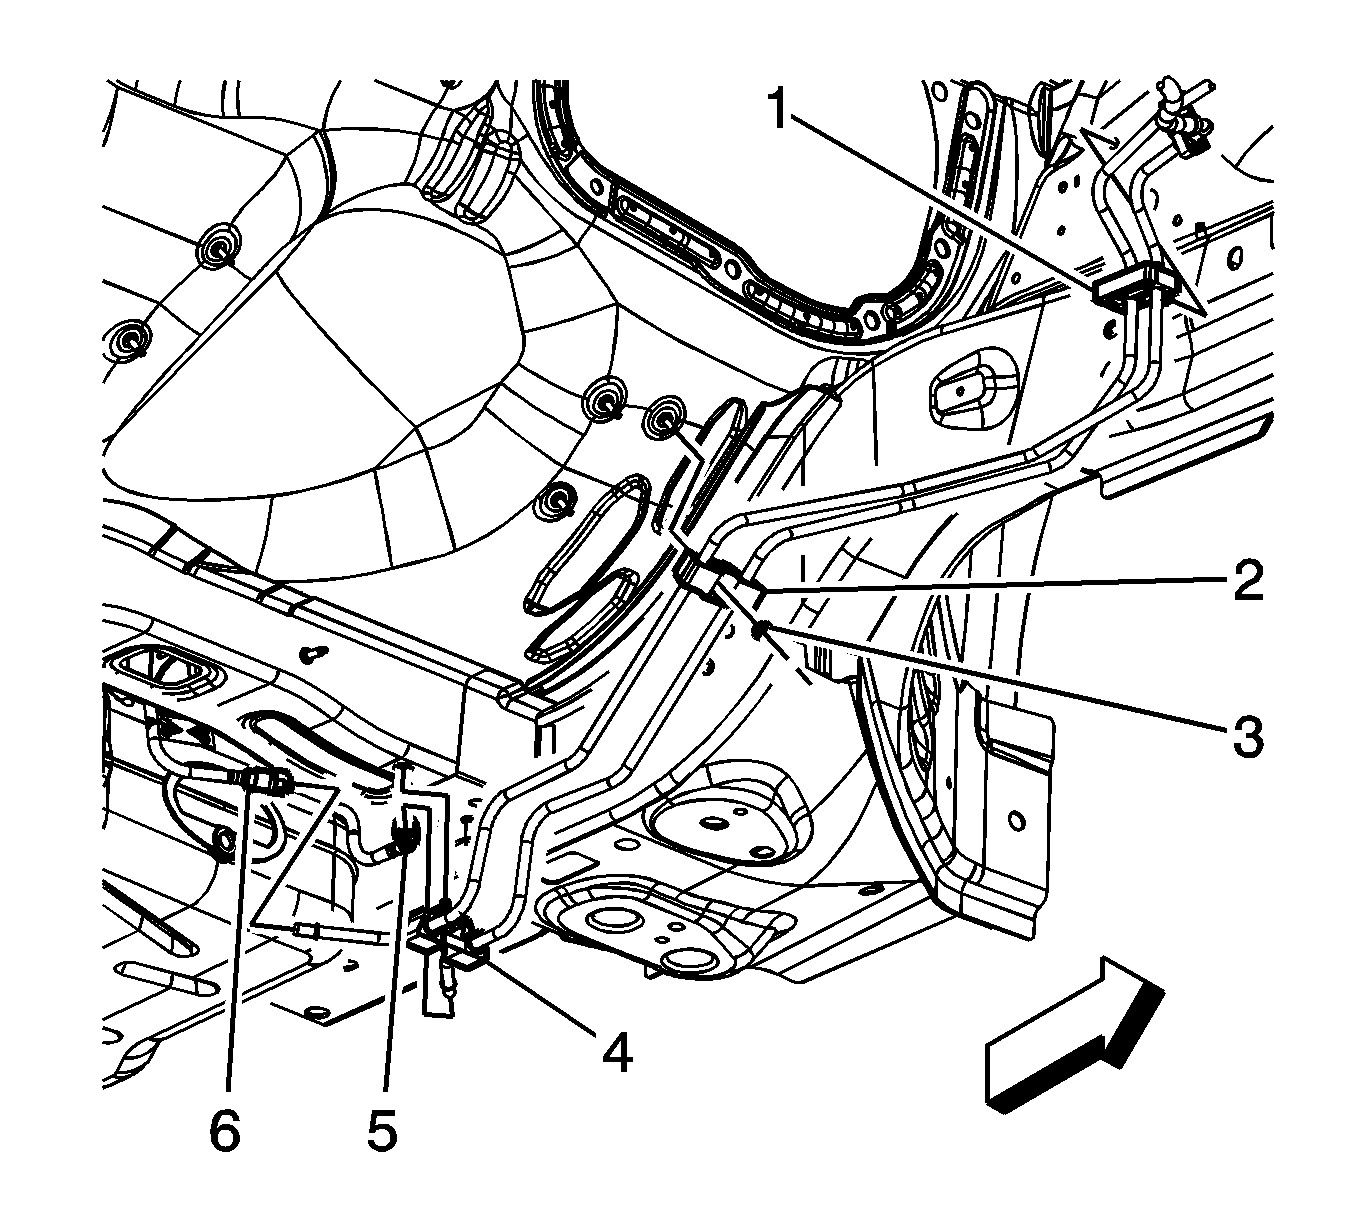
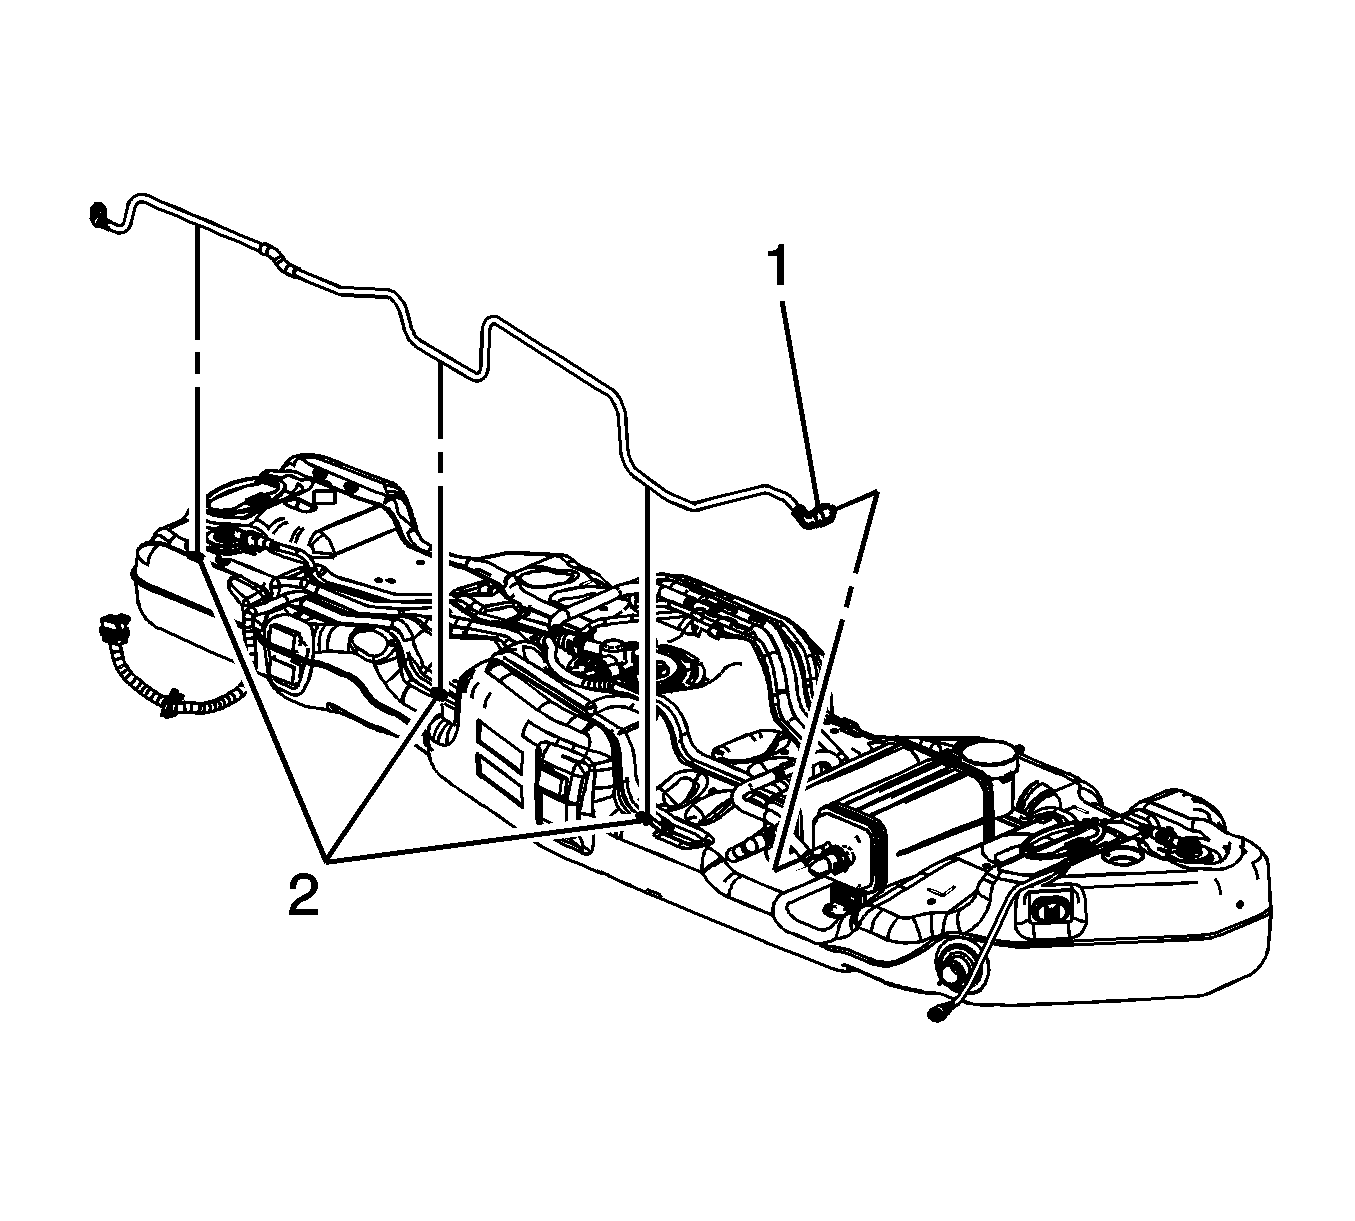
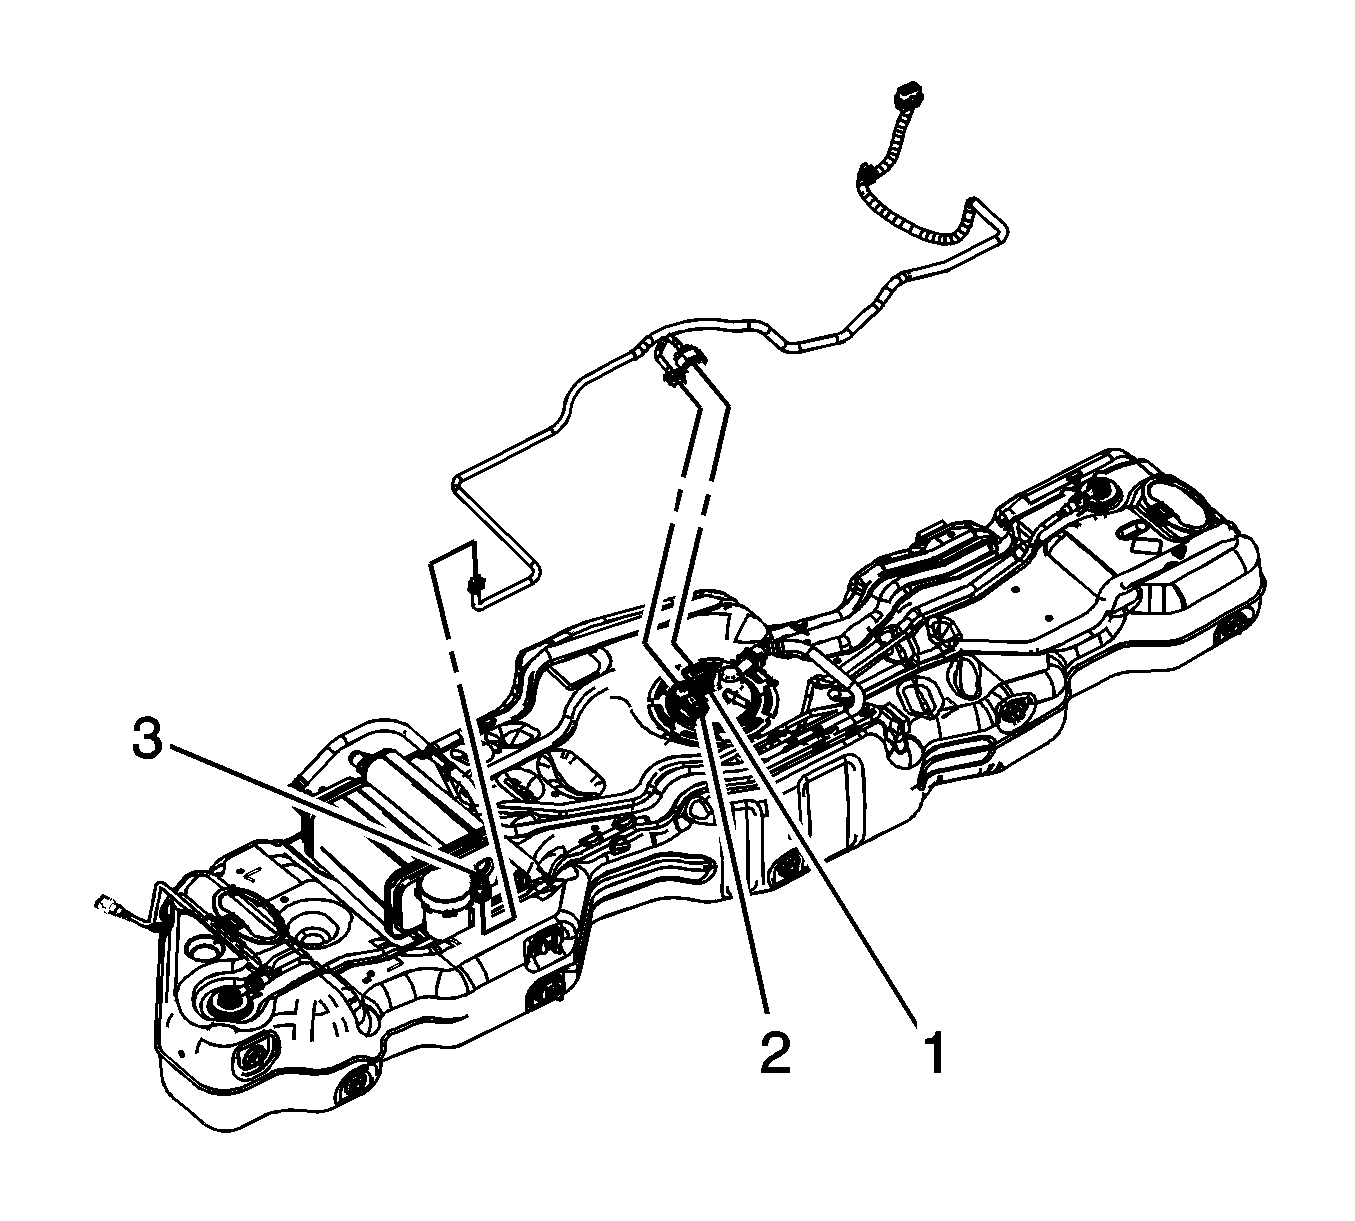
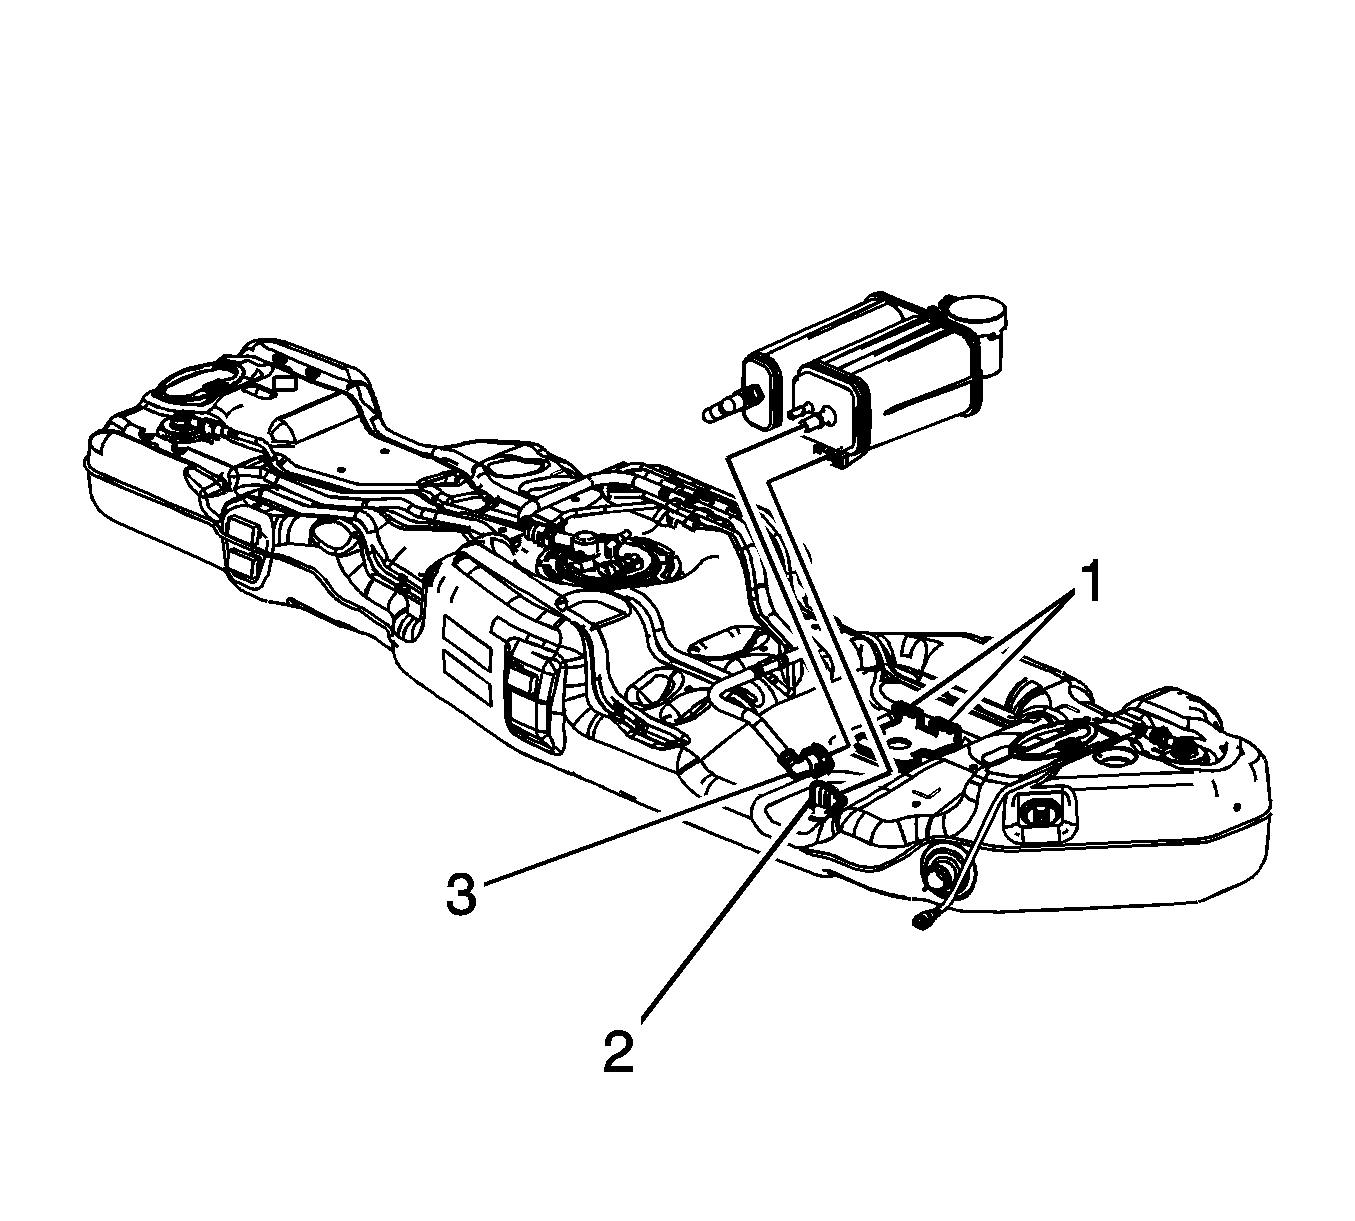
- Disconnect the fuel pump fuel feed line quick connect fitting (6) from the chassis fuel line. Refer to Plastic Collar Quick Connect Fitting Service .
- Disconnect the fuel tank evaporative emission (EVAP) canister vent front pipe quick connect fitting (5) from the chassis EVAP line. Refer to Plastic Collar Quick Connect Fitting Service .
- Disconnect the vent hose from the left rear of the fuel tank.
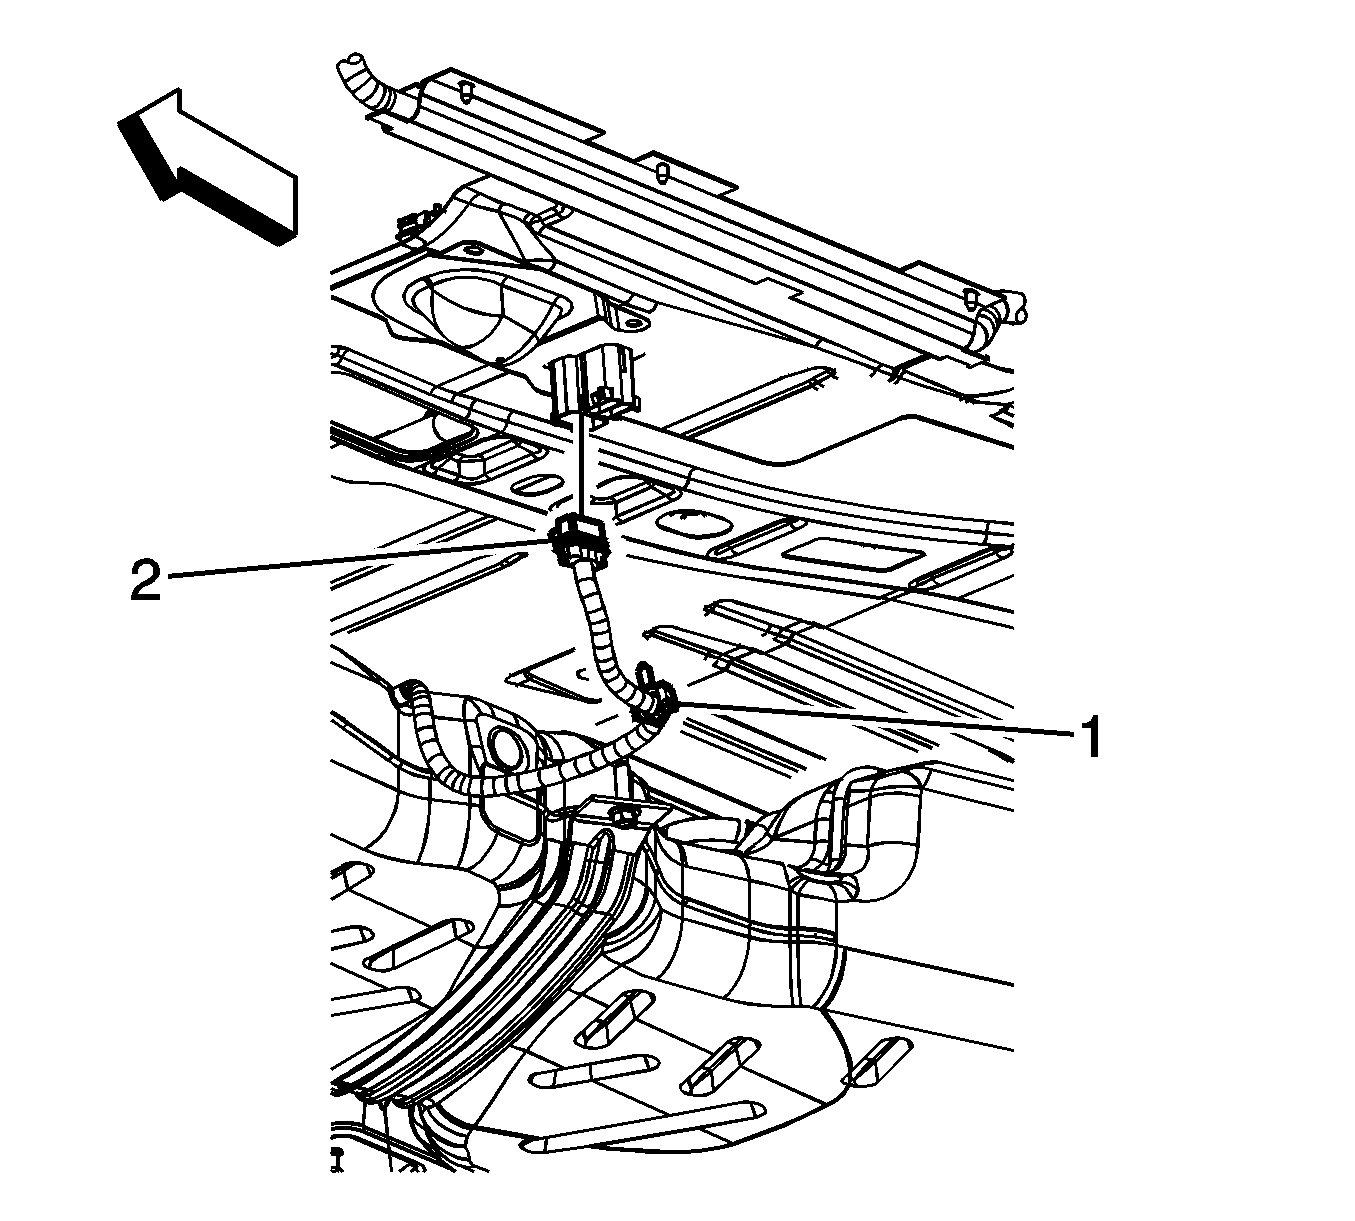
- Disconnect the fuel sender wiring harness electrical connector (2) from the body wiring harness electrical connector.
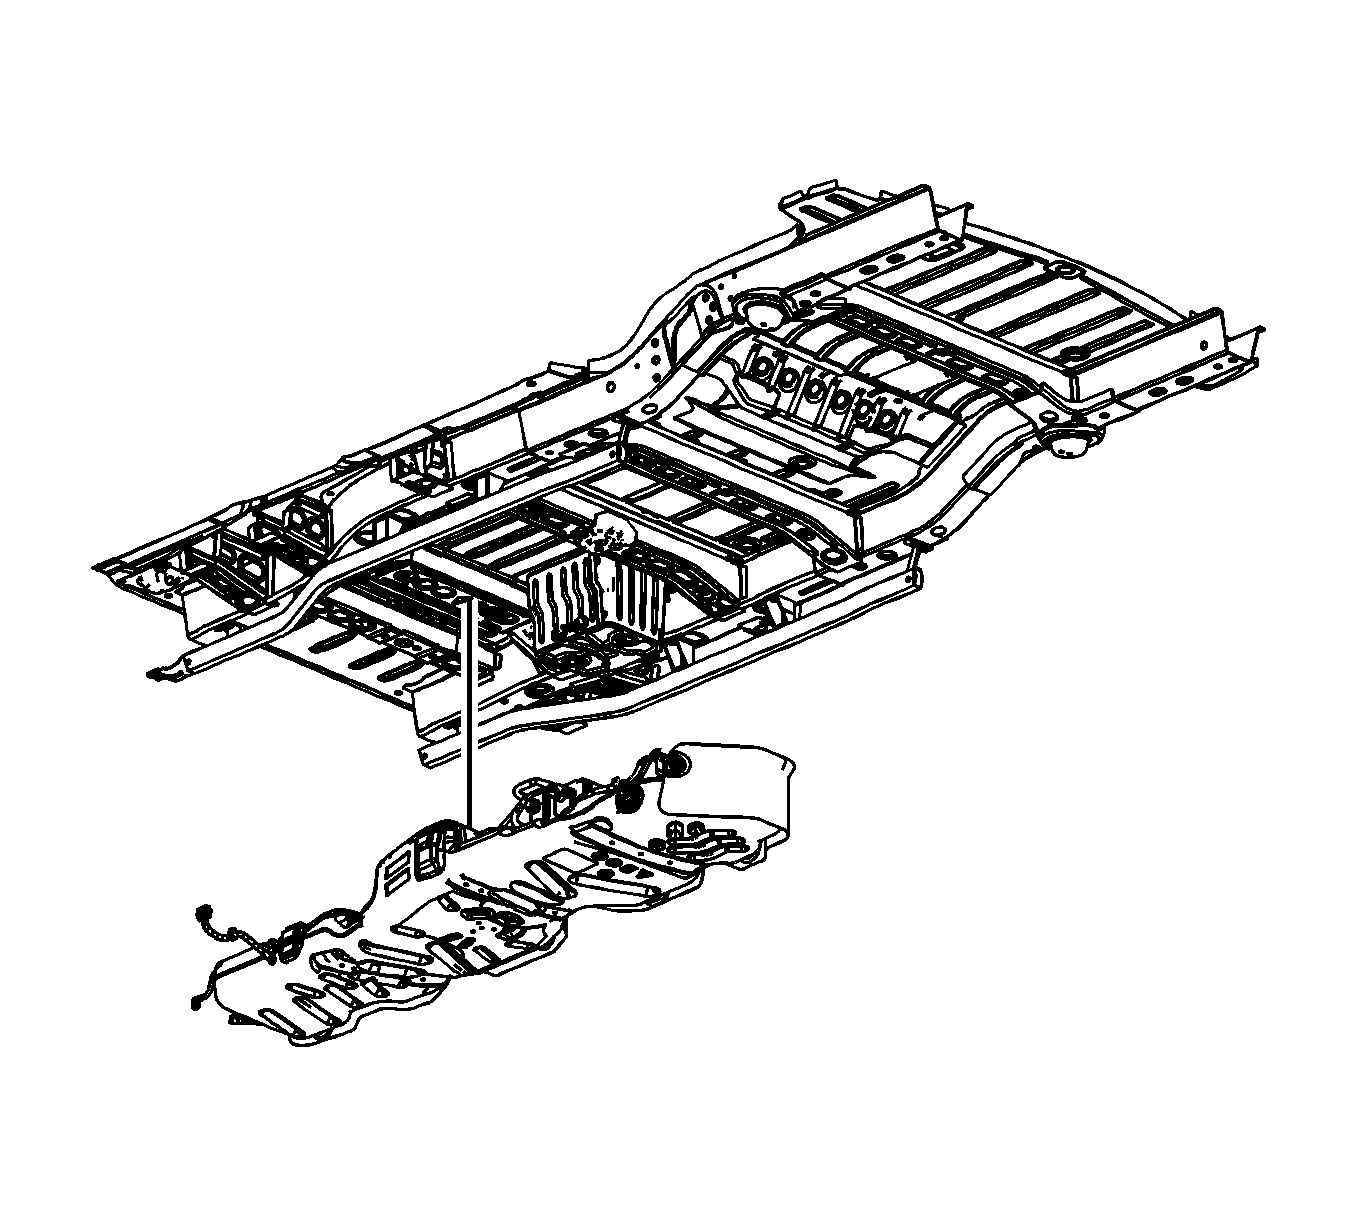
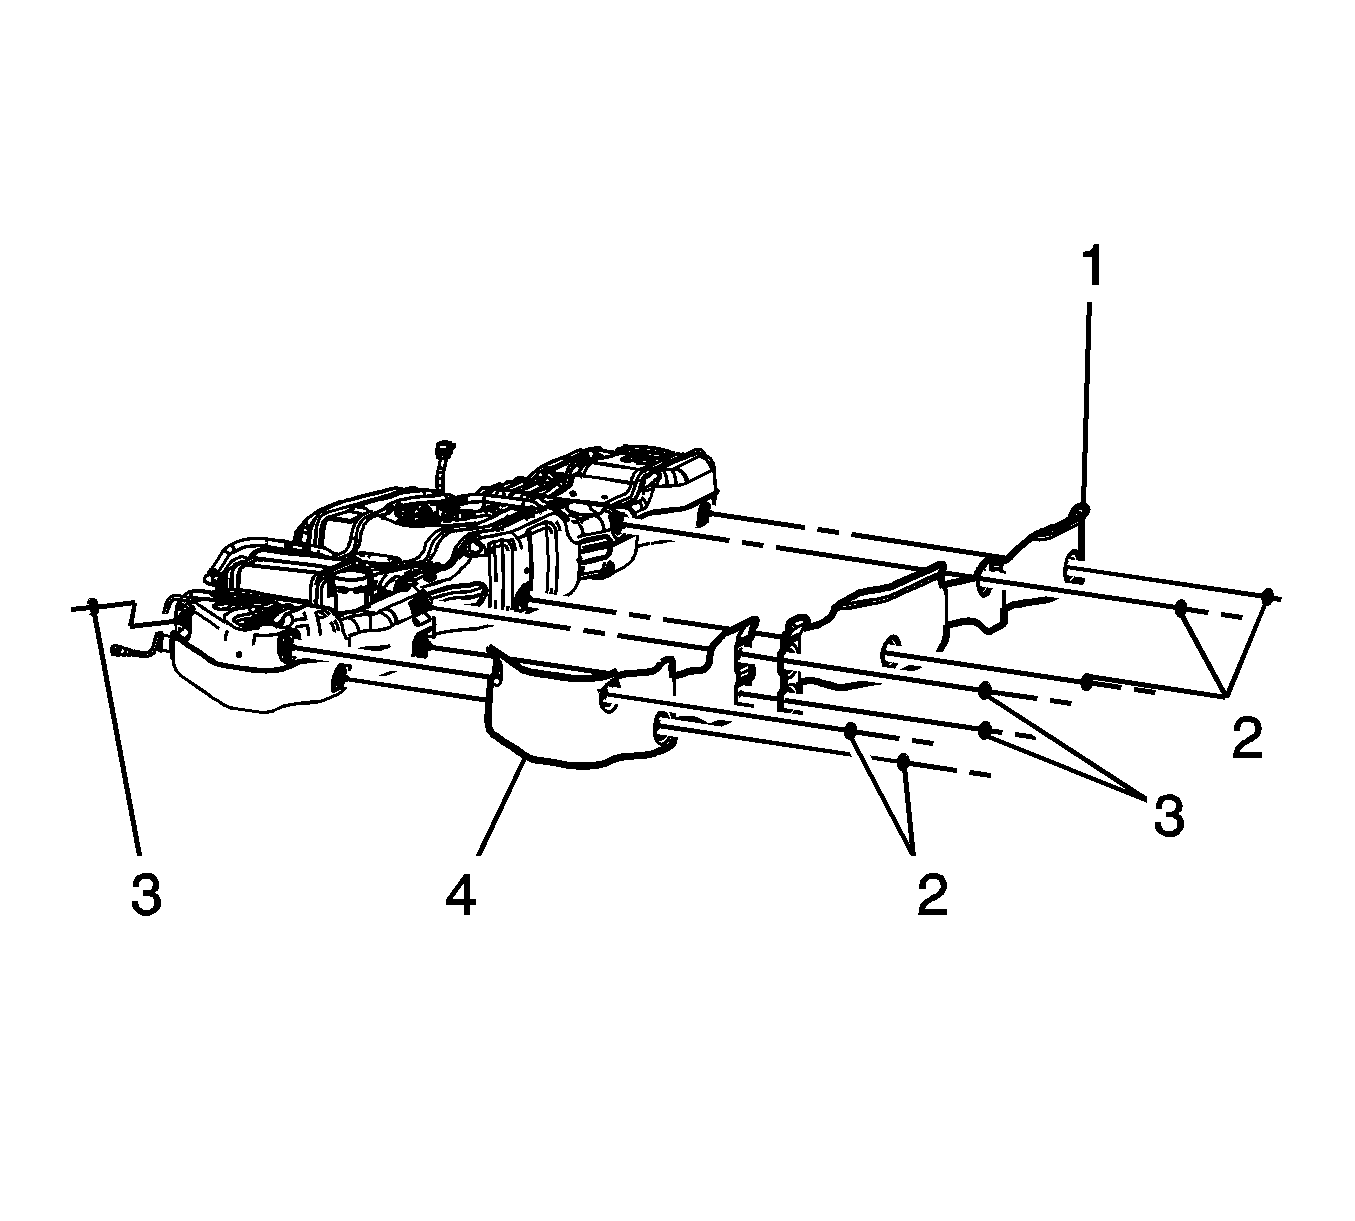
- Remove the fuel sender wiring harness clip (1) from the underbody side rail extension.
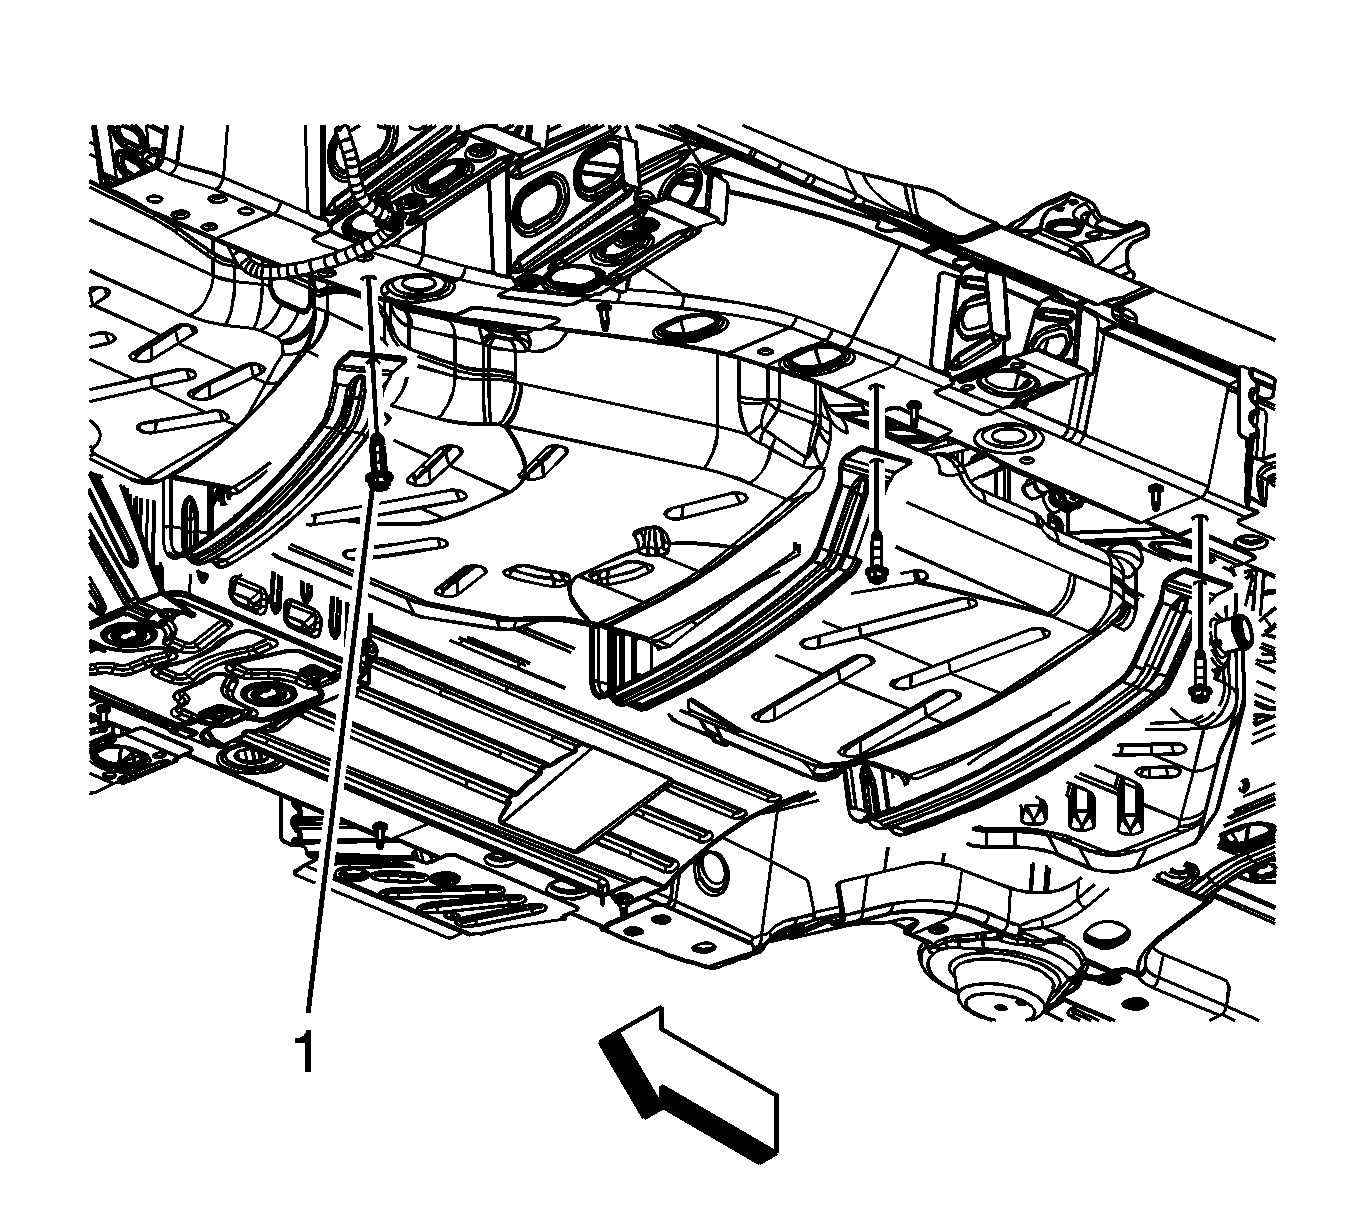
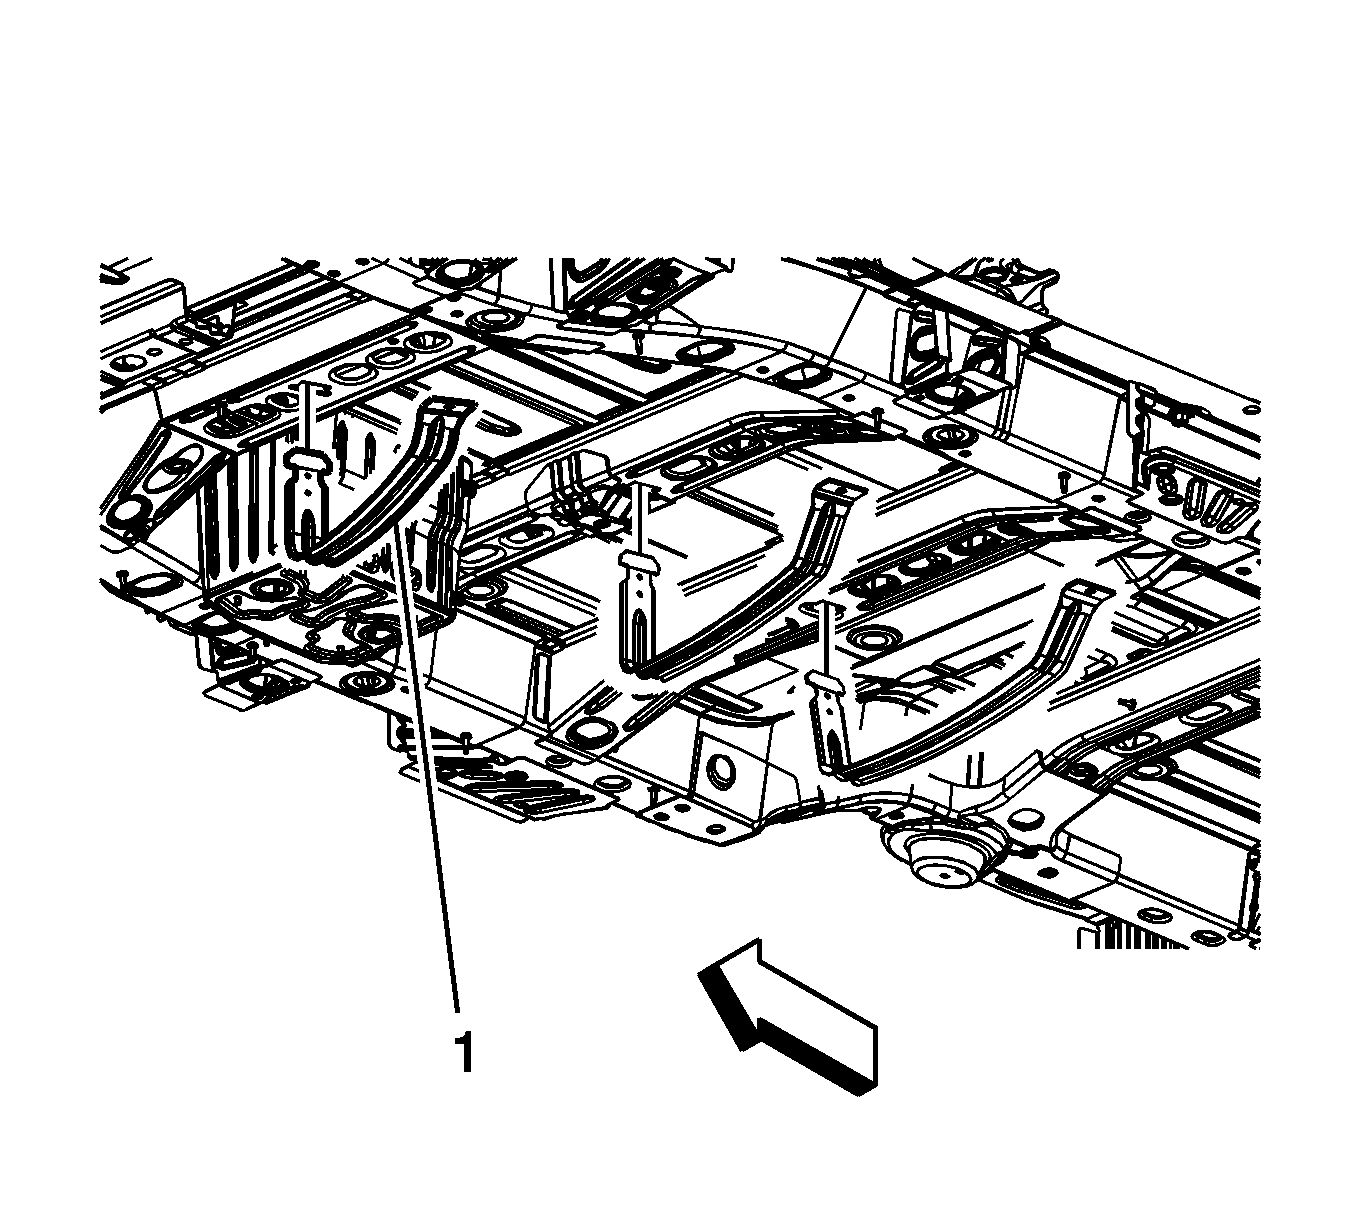
- Remove the left underbody side rail. Refer to Underbody Rear Side Rail Replacement .
- Support the fuel tank with a suitable adjustable jack.
- Remove the fuel tank strap bolts (1). Allow the fuel tank straps to hang.
- Push up on the rear of the strap slightly and rotate the strap towards the rear of the vehicle, in order the remove the fuel tank straps (1).
- Using the adjustable jack and the aid of an assistant, lower the fuel tank from the underbody of the vehicle.
- With the aid of the assistant, remove the fuel tank from the adjustable jack, and place on a flat work surface.
- If replacing the fuel tank, perform the following steps, otherwise proceed to step 21 in the installation procedure.
- Remove the fuel tank front and rear shield push on nuts (2).
- Remove the fuel tank front and rear shield nuts (3).
- Remove the fuel tank front (1) and rear (4) shields.
- Remove the foam pad insulators (1) from the top of the fuel tank.
- Disconnect the fuel pump fuel feed line quick connect fitting (1) from the fuel tank module. Refer to Plastic Collar Quick Connect Fitting Service .
- Remove the fuel pump fuel feed line from the retaining features (2) built into the fuel tank and out from under the EVAP canister vent rear pipe.
- Disconnect the EVAP canister vent front pipe quick connect fitting (1) from the EVAP canister. Refer to Plastic Collar Quick Connect Fitting Service .
- Remove the EVAP canister vent front pipe from the retaining features (2) built into the fuel tank.
- Disconnect the fuel sender wiring harness electrical connectors from the fuel tank module (1), fuel tank pressure sensor 2), and EVAP canister vent solenoid (3).
- Remove the fuel sender wiring harness.
- Disconnect the EVAP canister vent rear pipe quick connect fitting (1) from the EVAP canister. Refer to Plastic Collar Quick Connect Fitting Service .
- Squeeze the retainer (2) into order to disengage the retainer from the EVAP canister, and remove the EVAP canister assembly from the EVAP canister bracket retainers (1).
- Disconnect the EVAP canister vent rear pipe quick connect fittings (1) from the fuel tank rollover valves. Refer to Plastic Collar Quick Connect Fitting Service .
- Disconnect the EVAP canister vent rear pipe quick connect fitting (2) from the fuel tank module. Refer to Plastic Collar Quick Connect Fitting Service .
- Remove the EVAP canister vent rear pipe from the retaining features (3) built into the fuel tank.
- Remove the fuel tank module. Refer to Fuel Tank Module Replacement .
Caution: Whenever fuel lines are removed, catch fuel in an approved container. Container opening must be a minimum of 300 mm (12 in) diameter to adequately catch the fluid.
Notice: Clean all fuel pipe connections and surrounding areas before disconnecting the fuel pipes to avoid contamination of the fuel system.
Notice: Do not bend the fuel tank straps. Bending the fuel tank straps may cause damage to the straps.

Installation Procedure
- If the fuel tank was replaced, perform the following steps, otherwise proceed the step 21.
- Install the fuel tank module. Refer to Fuel Tank Module Replacement .
- Lay the EVAP canister vent rear pipe into position on the fuel tank.
- Connect the EVAP canister vent rear pipe quick connect fittings (1) to the fuel tank rollover valves. Refer to Plastic Collar Quick Connect Fitting Service .
- Connect the EVAP canister vent rear pipe quick connect fitting (2) to the fuel tank module. Refer to Plastic Collar Quick Connect Fitting Service .
- Install the EVAP canister vent rear pipe to the retaining features (3) built into the fuel tank.
- Insert the rear of the EVAP canister into the EVAP canister bracket retainers (1), squeeze the retainer (2), and set the EVAP canister assembly into place.
- Connect the EVAP canister vent rear pipe quick connect fitting (1) to the EVAP canister. Refer to Plastic Collar Quick Connect Fitting Service .
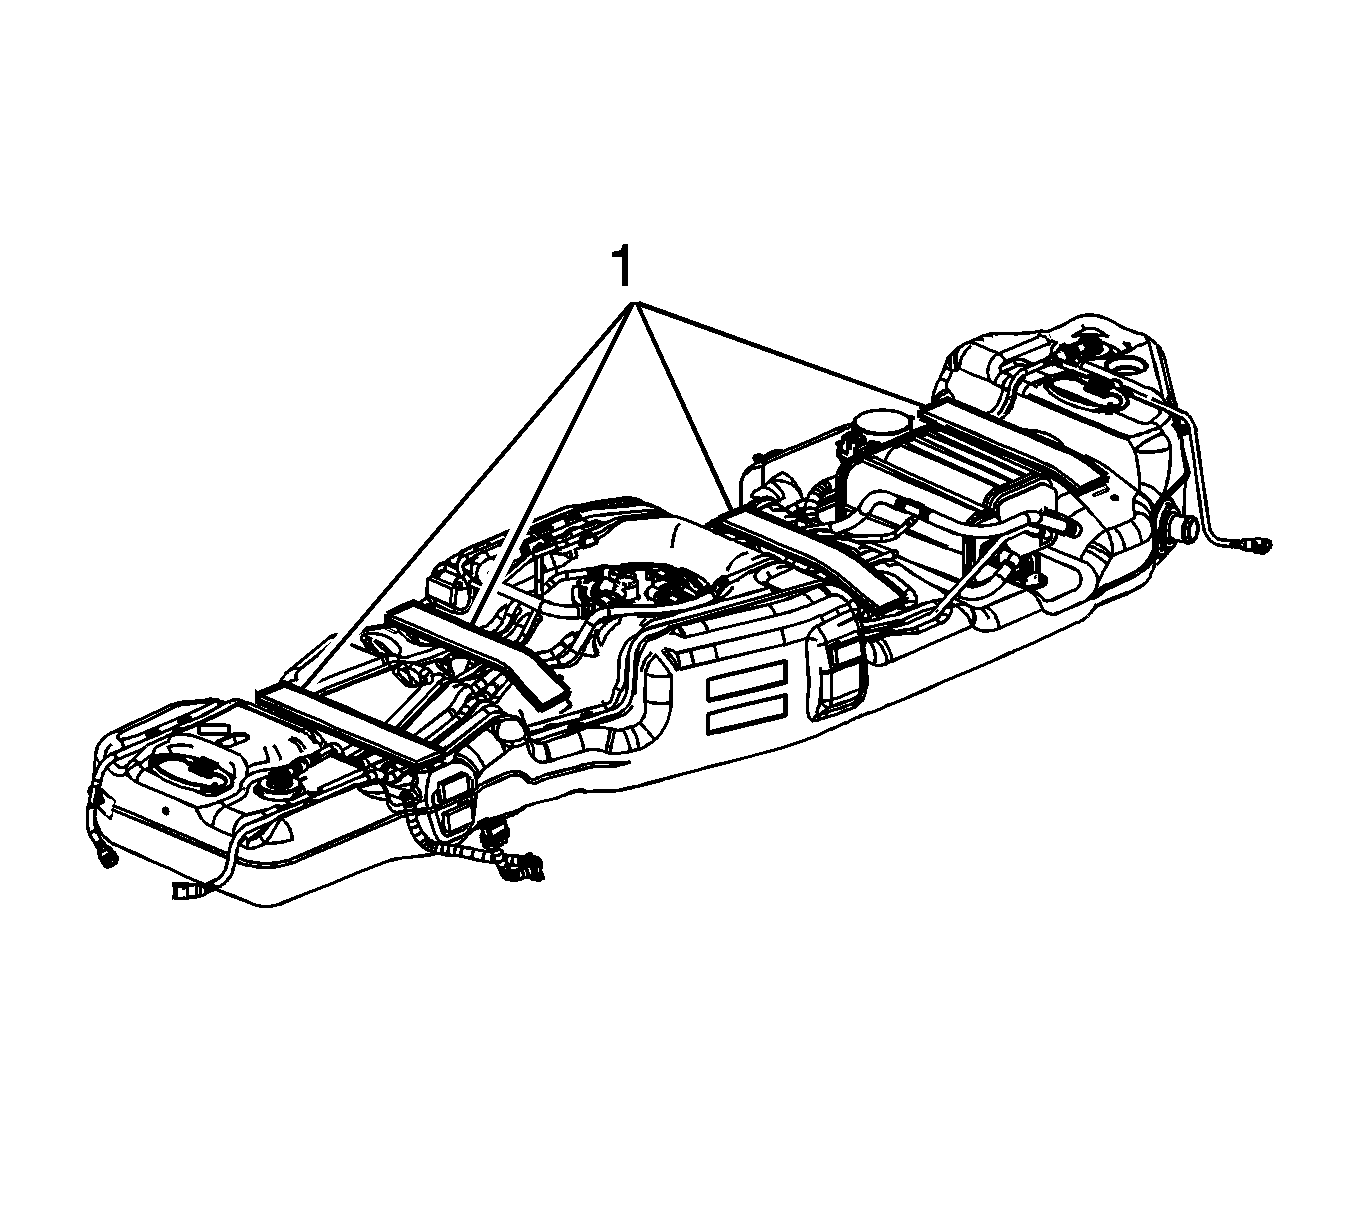
- Place the fuel sender wiring harness into the channel in the fuel tank.
- Connect the fuel sender wiring harness electrical connectors to the fuel tank module (1), fuel tank pressure sensor (2), and EVAP canister vent solenoid (3).
- Lay the EVAP canister vent front pipe into position on the fuel tank.
- Connect the EVAP canister vent rear pipe quick connect fitting (1) to the EVAP canister. Refer to Plastic Collar Quick Connect Fitting Service .
- Install the EVAP canister vent rear pipe to the retaining features (2) built into the fuel tank.
- Route the fuel pump fuel feed pipe under the EVAP canister vent rear pipe and lay into position on the fuel tank.
- Connect the fuel pump fuel feed line quick connect fitting (1) to the fuel tank module. Refer to Plastic Collar Quick Connect Fitting Service .
- Install the fuel pump fuel feed line to the retaining features (2) built into the fuel tank.
- Install the foam pad insulators (1) onto the top of the fuel tank.
- Install the fuel tank rear (4) and front (1) shields onto the fuel tank.
- Install the fuel tank front and rear shield push on nuts (2).
- Install the fuel tank front and rear shield nuts (3) until snug.
- With the aid of an assistant, remove the fuel tank from the work surface and place on the adjustable jack.
- With the aid of the assistant, raise the fuel tank into position under the vehicle.
- Install the fuel tank straps (1).
- Install the fuel tank strap bolts (1).
- Remove the adjustable jack from under the fuel tank.
- Install the left underbody side rail. Refer to Underbody Rear Side Rail Replacement .
- Connect the fuel sender wiring harness electrical connector (2) to the body wiring harness electrical connector.
- Install the fuel sender wiring harness clip (1) to the underbody side rail extension.
- Connect the vent hose to the left rear of the fuel tank.
- Connect the fuel tank EVAP canister vent front pipe quick connect fitting (5) to the chassis EVAP line. Refer to Plastic Collar Quick Connect Fitting Service .
- Connect the fuel pump fuel feed line quick connect fitting (6) to the chassis fuel line. Refer to Plastic Collar Quick Connect Fitting Service .
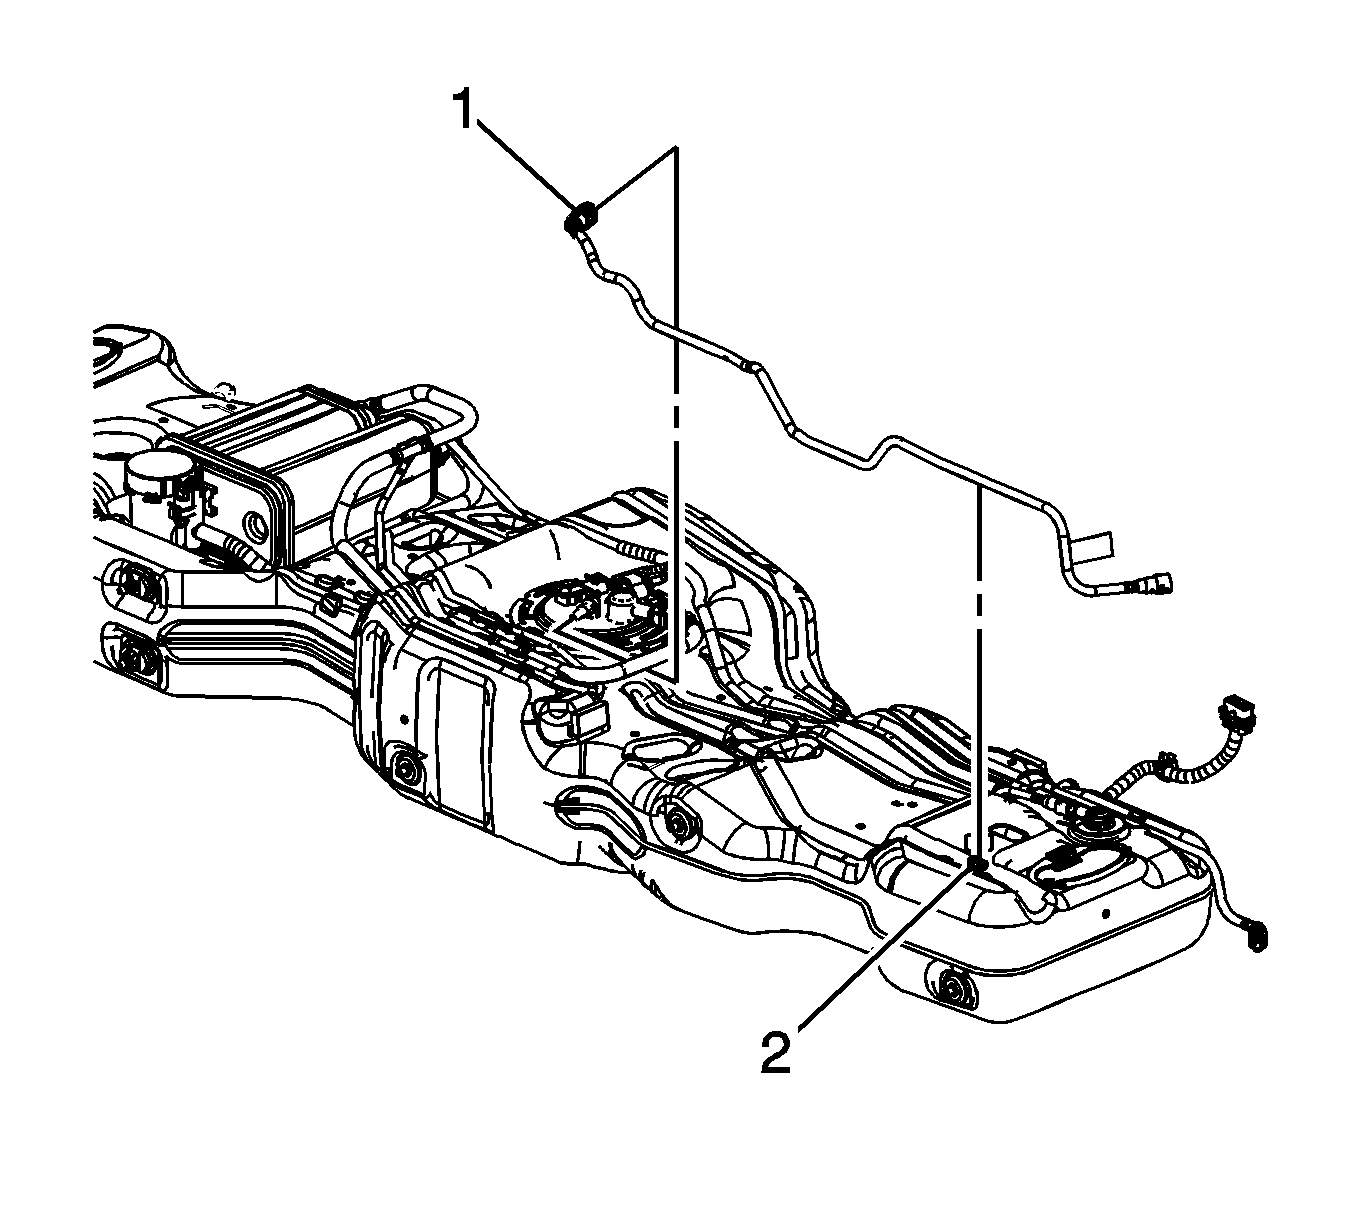
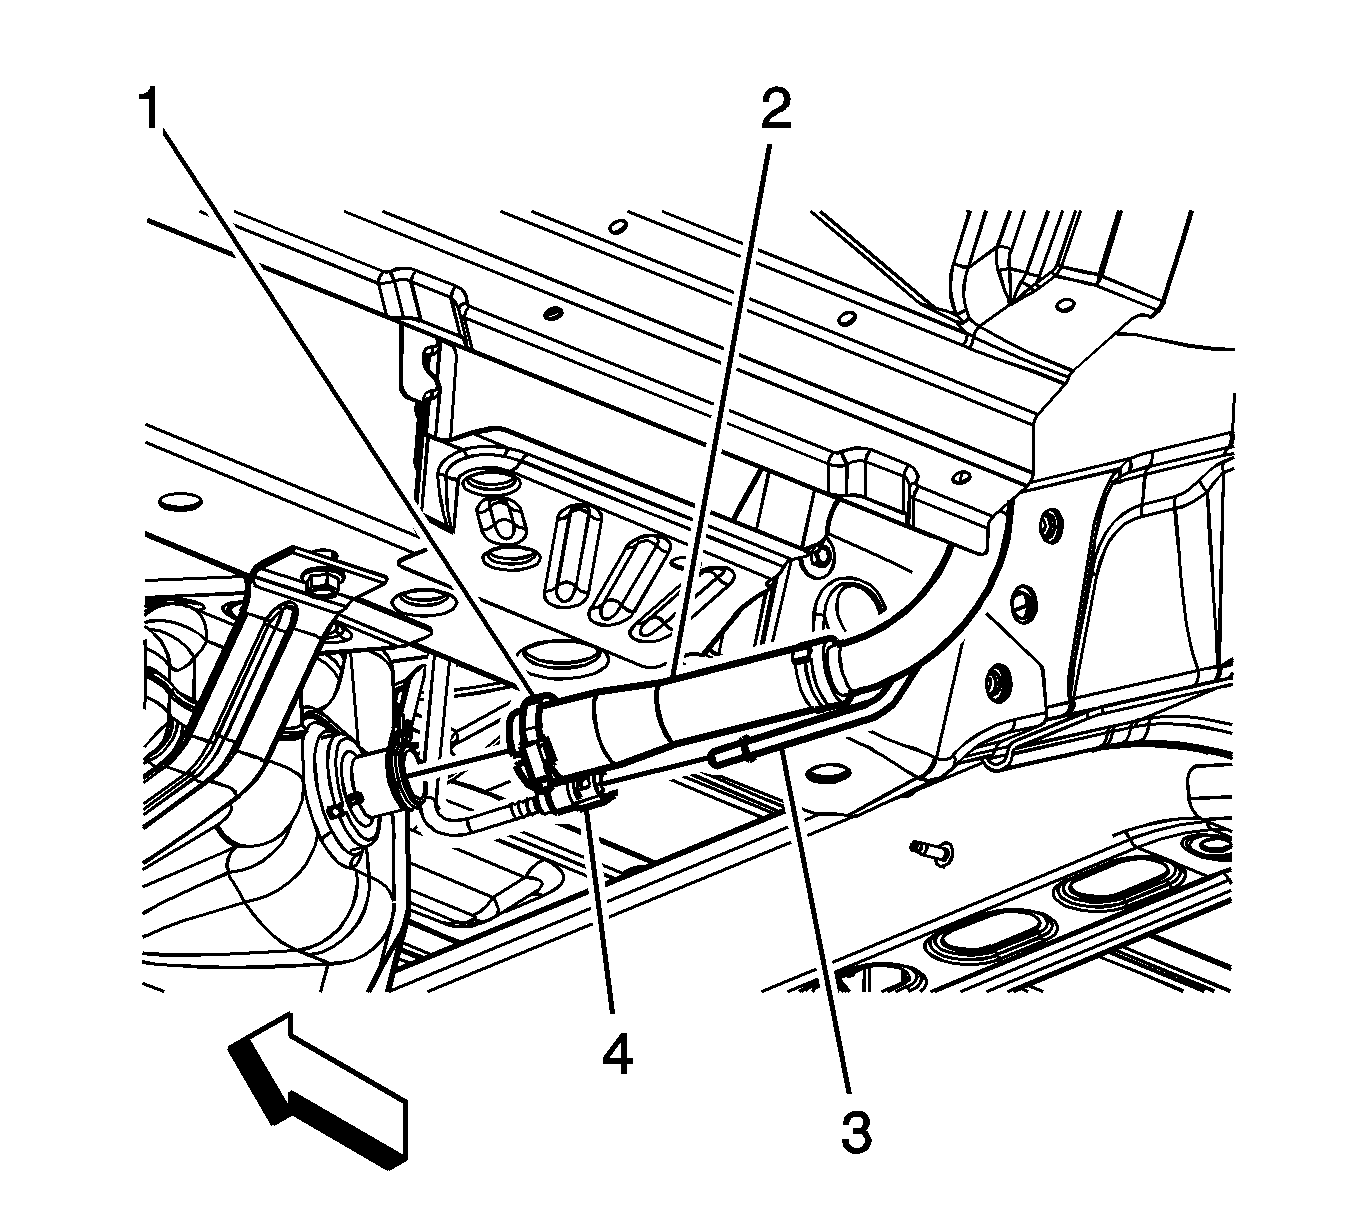
- Position and install the fuel tank fill pipe (2) to the fuel tank.
- Connect the EVAP canister vent rear pipe quick connect fitting (4) to the recirculation line on the fuel fill pipe (3). Refer to Plastic Collar Quick Connect Fitting Service .
- Tighten the fuel tank fill hose clamp (1) at the fuel tank.
- Lower the vehicle.
- Refill the fuel tank.
- Tighten the fuel fill cap.
- Use the following procedure in order the inspect for leaks:
- Install the fuel injector sight shield. Refer to Fuel Injector Sight Shield Replacement .
Notice: Refer to Fastener Notice in the Preface section.
Tighten
Tighten the bolts to 47 N·m (35 lb ft).
Important: Ensure that the notch in the fill hose aligns with the tab on the fuel tank.
Tighten
Tighten the clamp to 3.3 N·m (29 lb in).
| 38.1. | Turn the ignition ON, with the engine OFF, for 2 seconds. |
| 38.2. | Turn the ignition OFF for 10 seconds. |
| 38.3. | Turn the ignition ON, with the engine OFF. |
| 38.4. | Inspect for fuel leaks. |
