For 1990-2009 cars only
Tools Required
J 39400-A Halogen Leak Detector
Removal Procedure
- Recover the refrigerant from the air conditioning (A/C) system. Refer to Refrigerant Recovery and Recharging .
- Drain the engine coolant. Refer to Cooling System Draining and Filling .
- Raise the vehicle. Refer to Lifting and Jacking the Vehicle .
- Remove the right rear wheelhouse liner panel. Refer to Rear Wheelhouse Panel Liner Replacement .
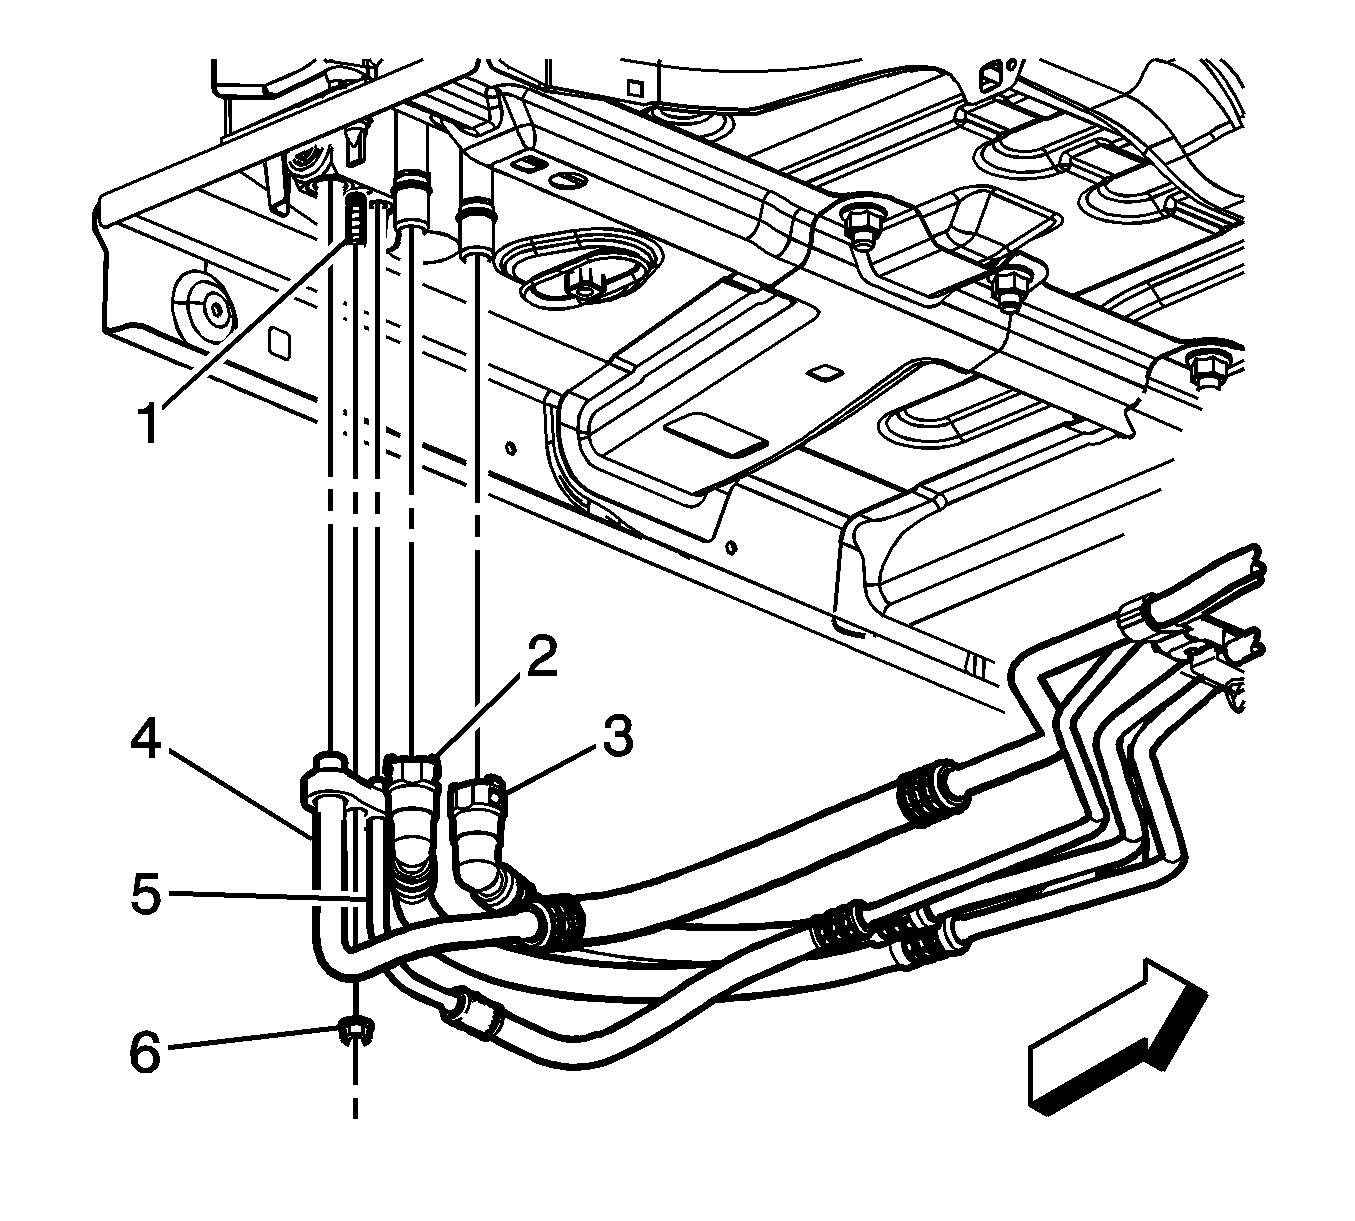
- Disconnect the heater lines (2, 3) from the auxiliary HVAC module at the underside of the vehicle.
- Disconnect the air conditioning lines (4, 5) from the auxiliary HVAC module at the underside of the vehicle.
- Remove the nuts (6) from the studs (1) that secure the auxiliary HVAC module to the underside of the vehicle.
- Lower the vehicle.
- Remove the right rear quarter trim panel. Refer to Quarter Lower Rear Trim Panel Replacement .
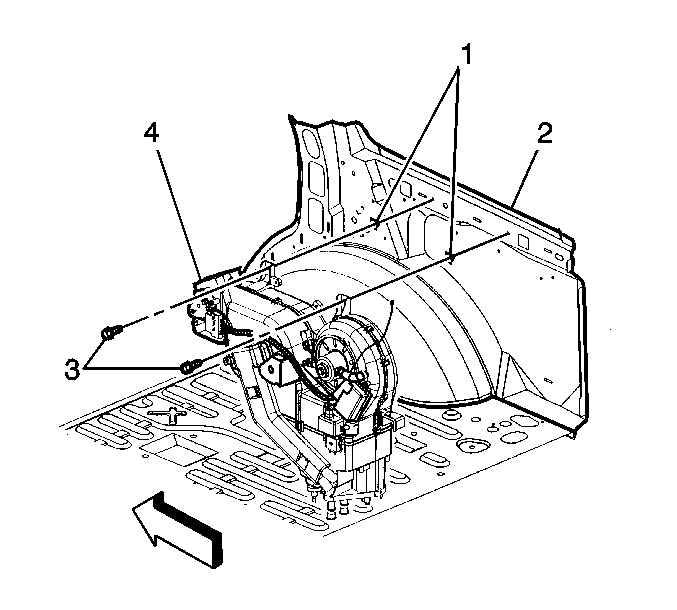
- Disconnect the electrical connectors from the auxiliary HVAC module.
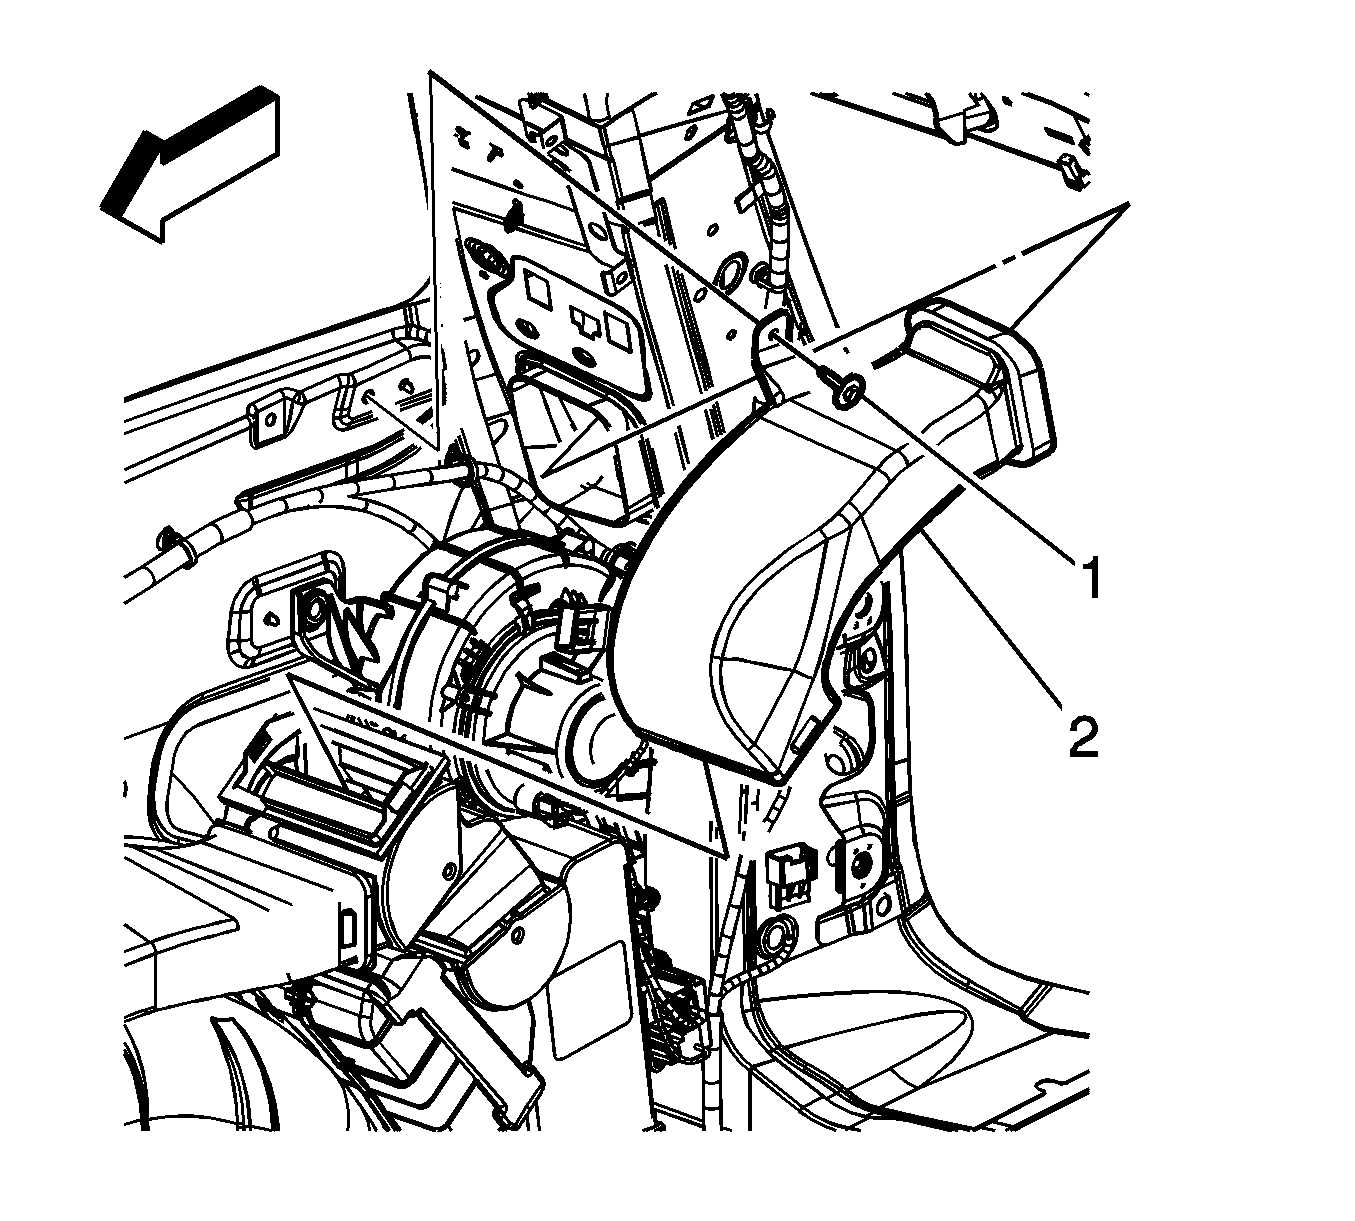
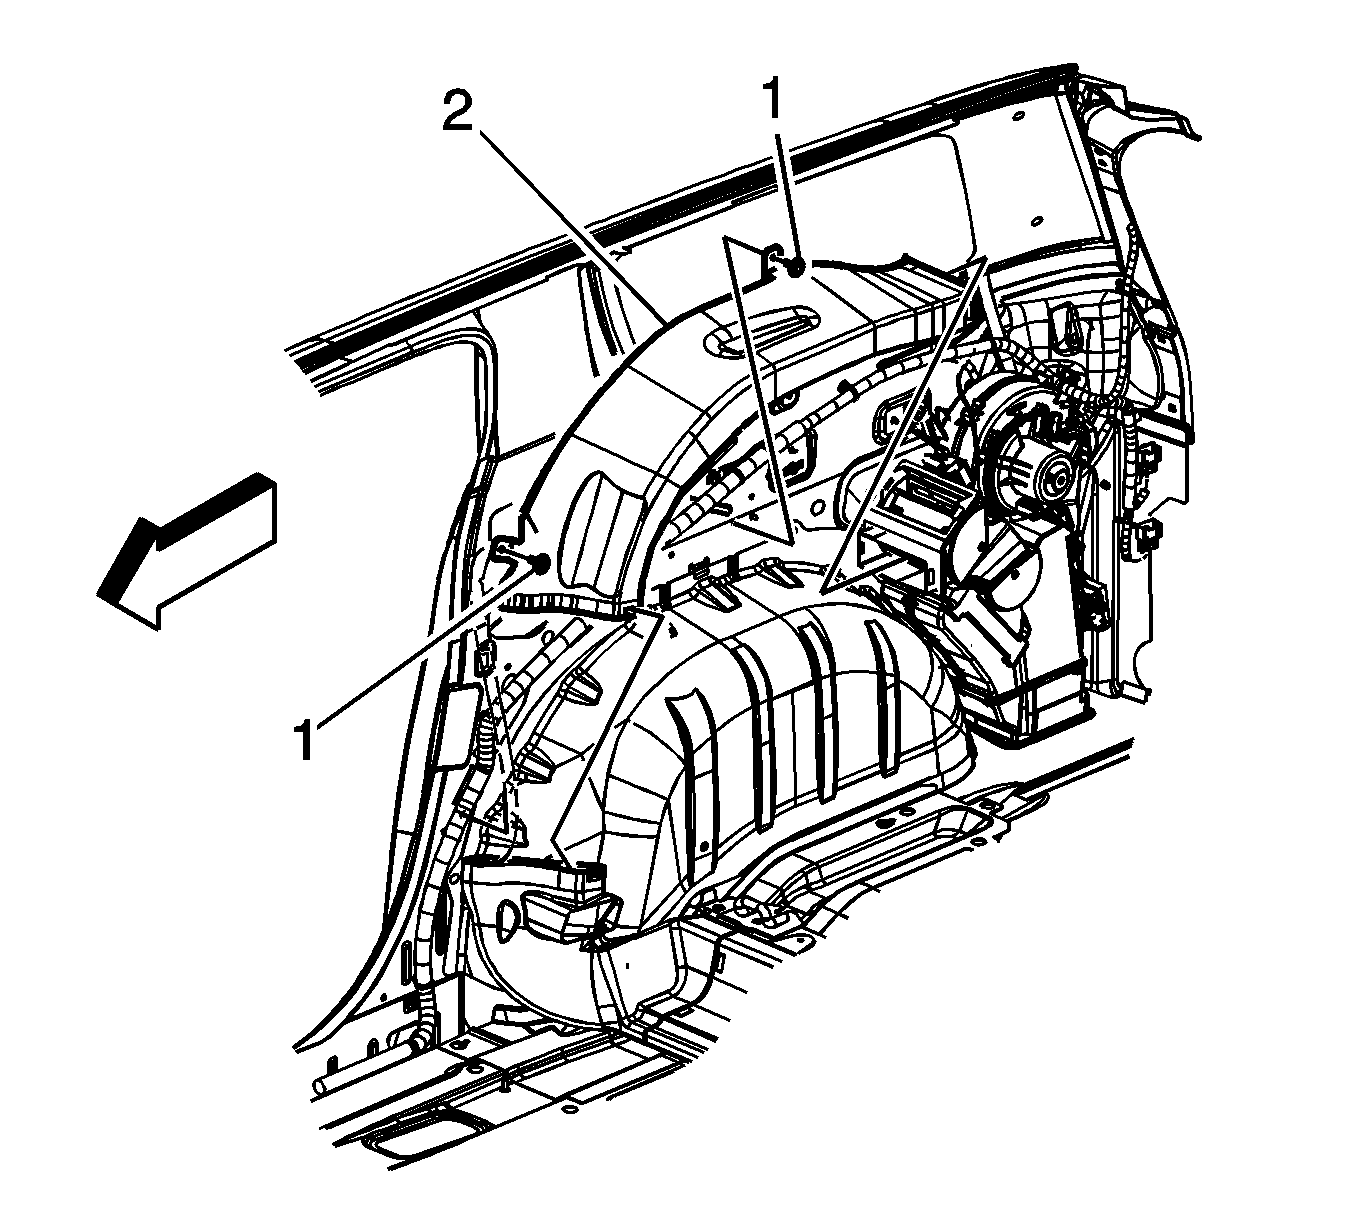
- Remove the upper auxiliary air distributor duct (2). Refer to Auxiliary Air Distributor Duct Replacement - Upper .
- Remove the lower auxiliary air distributor duct (2). Refer to Auxiliary Air Distributor Lower Duct Replacement .
- Remove the fasteners (3) retaining the auxiliary HVAC module to the vehicle.
- Remove the auxiliary HVAC module (4) from the vehicle.
Installation Procedure
- Install the auxiliary HVAC module assembly (4) to the vehicle.
- Install the 2 bolts (3) inside the vehicle in order to retain the auxiliary HVAC module to the vehicle.
- Install the upper auxiliary air distributor duct. Refer to Auxiliary Air Distributor Duct Replacement - Upper .
- Install the lower auxiliary air distributor duct. Refer to Auxiliary Air Distributor Lower Duct Replacement .
- Connect the electrical connectors to the auxiliary HVAC module.
- Install the right rear quarter trim panel. Refer to Quarter Lower Rear Trim Panel Replacement .
- Raise the vehicle.
- Install the nuts that secure the auxiliary HVAC module to the vehicle.
- Install the air conditioning lines (4, 5) and the nut (6) to the auxiliary HVAC module.
- Install the heater lines (2, 3) to the auxiliary HVAC module at the underside of vehicle.
- Install the right rear wheelhouse liner panel. Refer to Rear Wheelhouse Panel Liner Replacement .
- Lower the vehicle.
- Fill the engine coolant. Refer to Cooling System Draining and Filling .
- Recharge the refrigerant to the system. Refer to Refrigerant Recovery and Recharging .
- Leak test the fittings of the component using the J 39400-A .
Notice: Refer to Fastener Notice in the Preface section.
Tighten
Tighten the nuts to 9 N·m (80 lb in).
Tighten
Tighten the nut to 16 N·m (12 lb ft).
