Removal Procedure
Notice: Secure the steering wheel utilizing a strap to prevent rotation. Locking of the steering column will prevent damage and a possible malfunction of the SIR system. The steering wheel must be secured
in position before disconnecting the following components:
After disconnecting these components, do not move the front tires and wheels. Failure to follow these procedures may cause improper alignment of some components during installation and result in possible damage to the SIR coil.
- Remove the left side instrument panel insulator panel. Refer to
Instrument Panel Insulator Panel Replacement - Left Side
.
- Remove the knee bolster. Refer to
Knee Bolster Replacement
.
- Remove the instrument panel cluster trim plate bezel. Refer to
Instrument Panel Cluster Trim Plate Bezel Replacement
.
- Remove the steering column opening filler bolts. Refer to
Steering Column Opening Filler Replacement
.
- Disconnect all electrical connectors as needed.
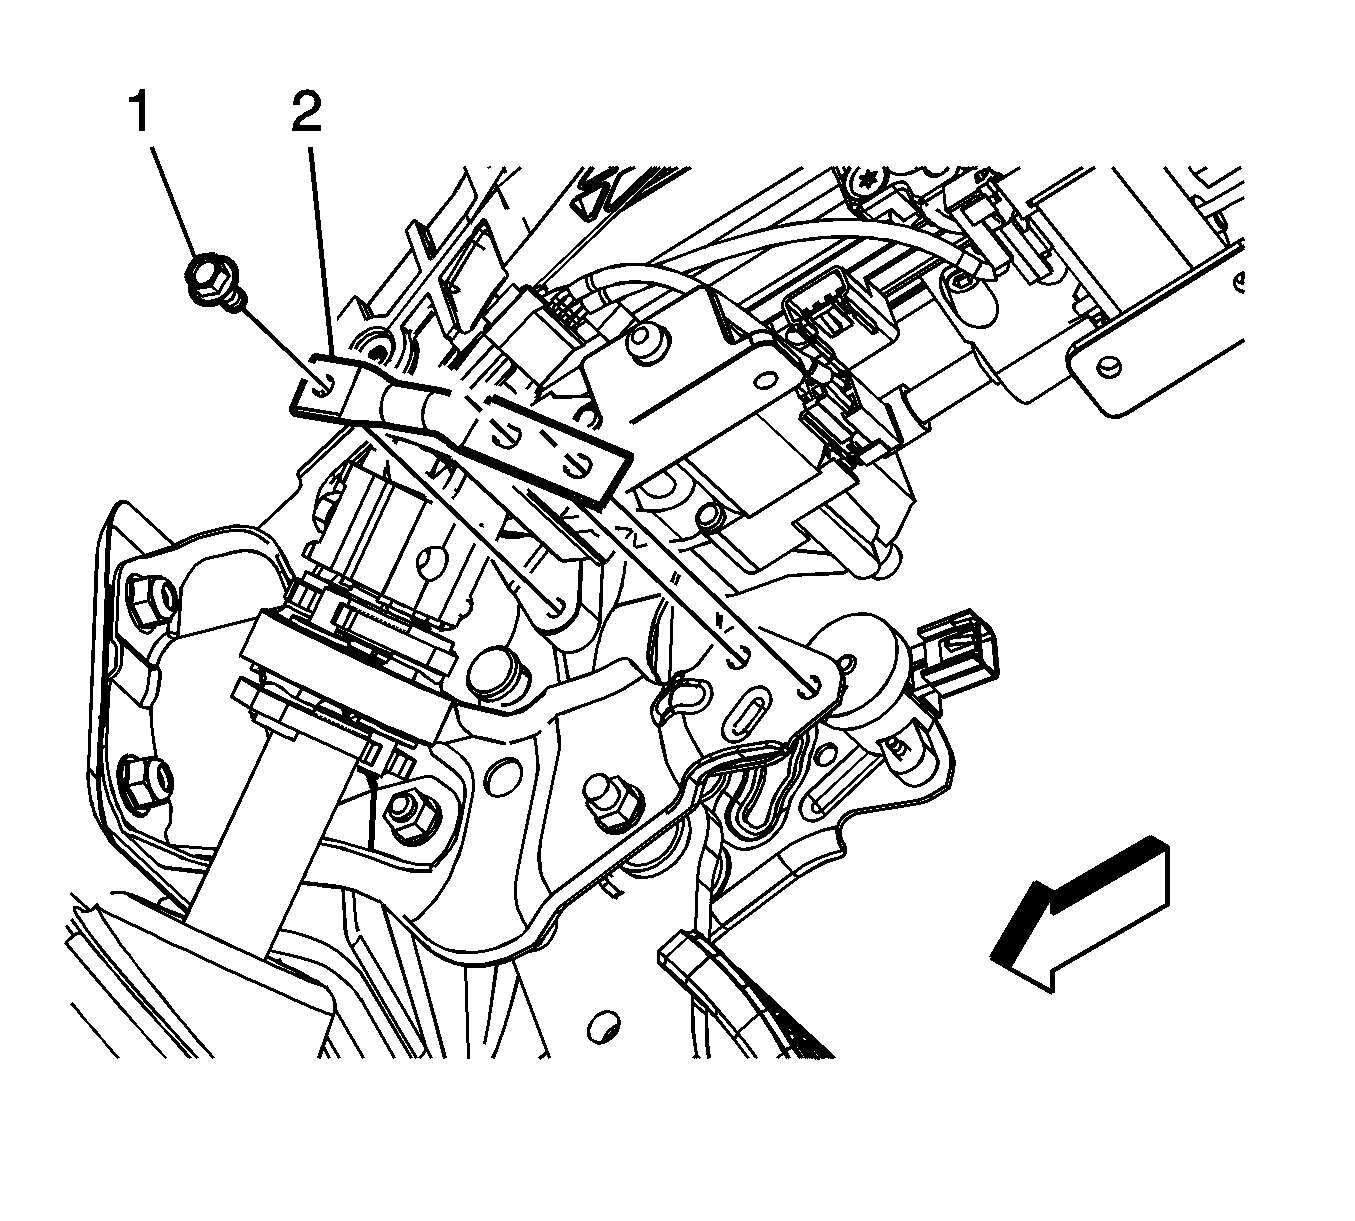
- If equipped, remove the steering column lower support brace bolts (1) and steering column lower support brace (2).
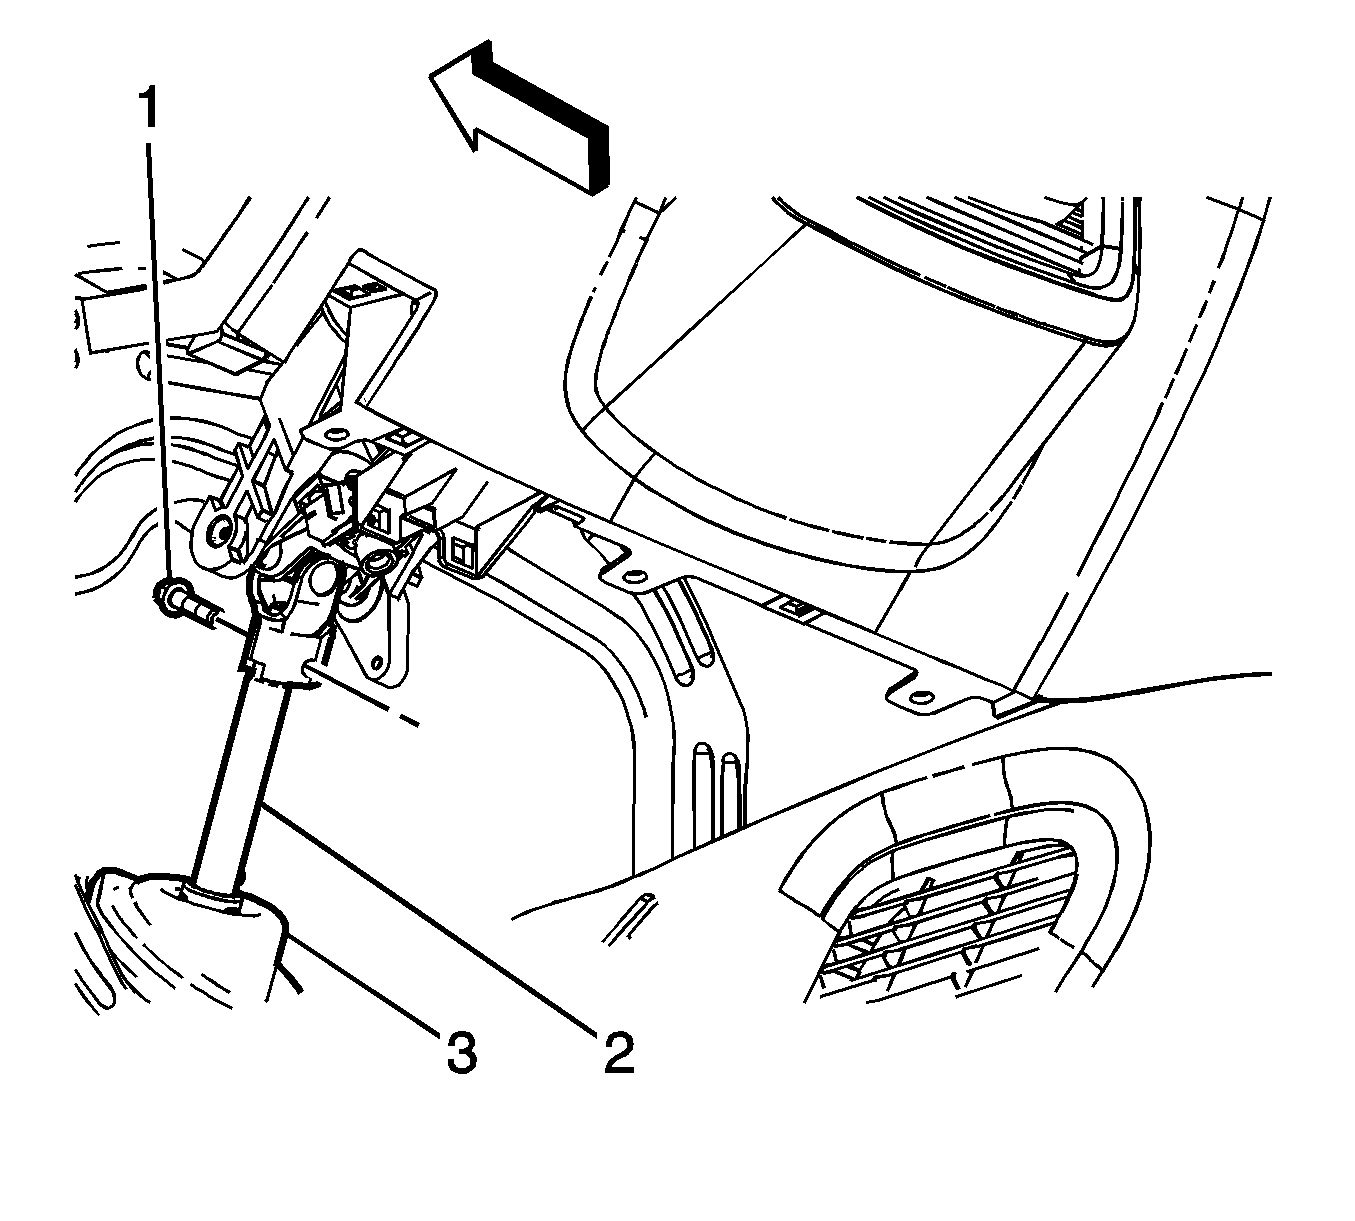
- Remove the intermediate steering shaft bolt (1) at the steering column and separate the intermediate
steering shaft (2). Do not pull the intermediate steering shaft upper seal (3) from its place.
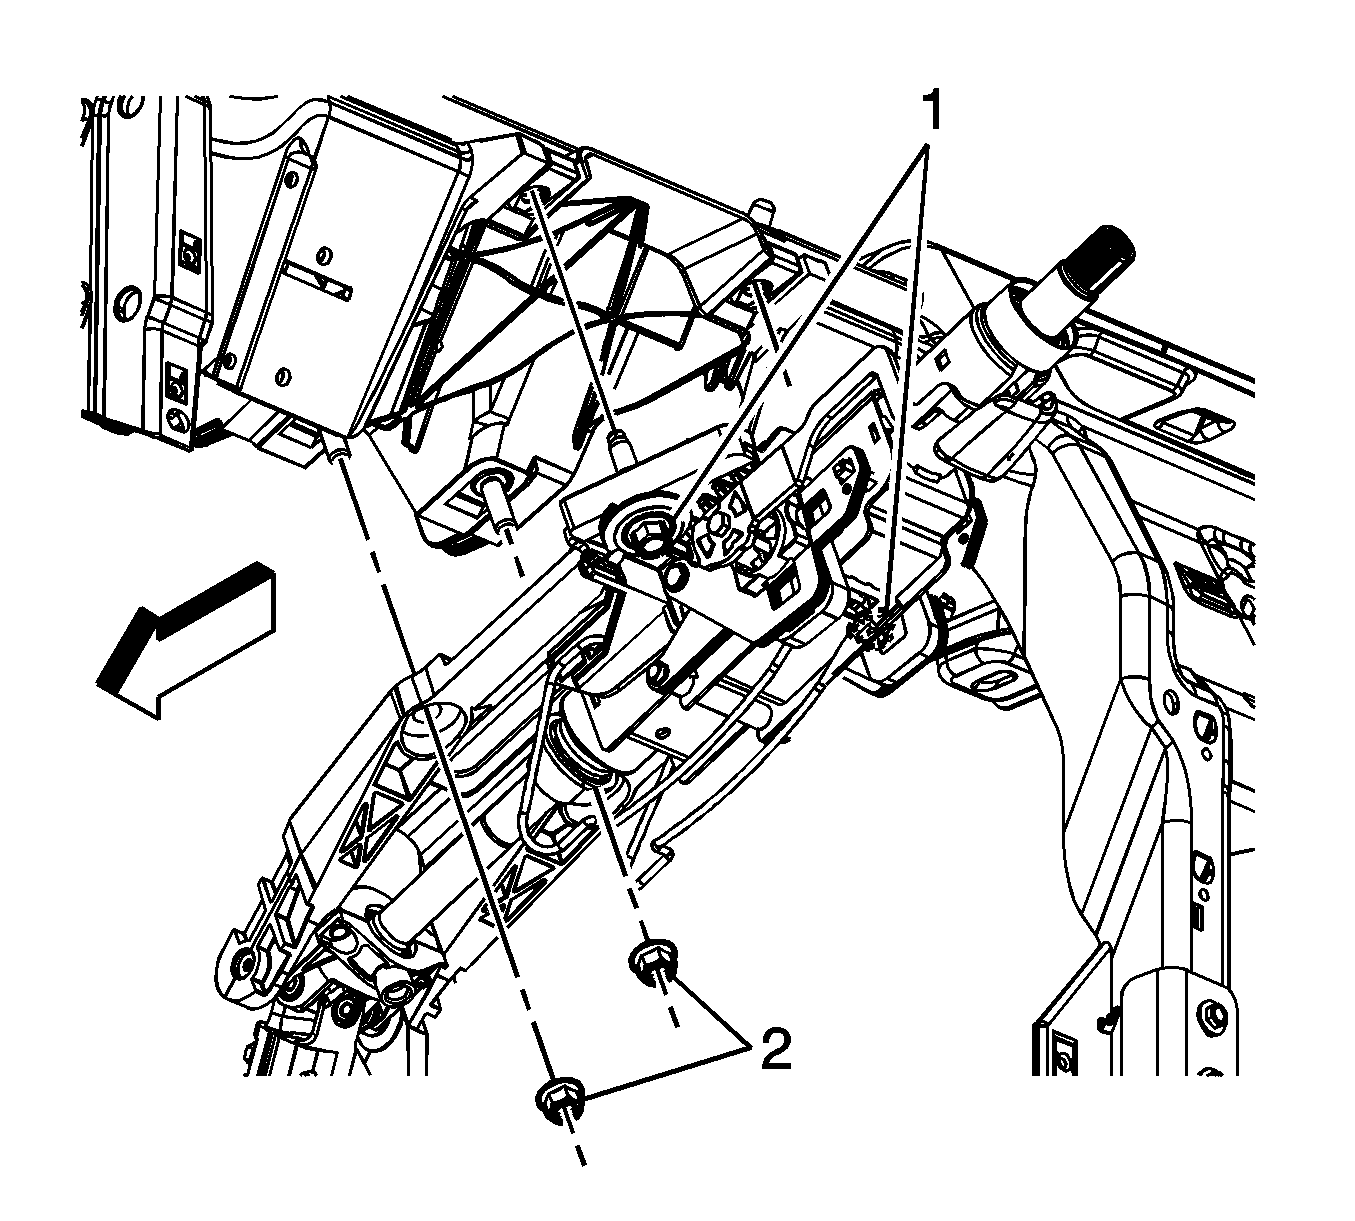
- Remove the steering column nuts (2) and the steering column bolts (1).
- Remove the steering column from the vehicle.
- Transfer any parts as needed.
Installation Procedure

Important: The following sequence MUST be followed. Make sure to hand tighten ONLY in the sequence specified and DO NOT apply any clamping force.
- Install the steering column to the vehicle and start the steering column nuts (3, 4) and bolts (1, 2) by hand using the following sequence:
| 1.1. | Place the steering column in place. |
| 1.2. | Hand start the steering column nuts (3, 4). |
| 1.3. | Hand start the steering column bolts (1, 2). |
| 1.4. | Hold the steering column flush against the instrument panel carrier. |
| 1.5. | Hand tighten steering column nut (3). |
| 1.6. | Hand tighten steering column nut (4). |
| 1.7. | Hand tighten steering column bolt (1). |
| 1.8. | Hand tighten steering column bolt (2). |
Notice: Refer to Fastener Notice in the Preface section.
Important: The following torque sequence MUST be followed.
- Tighten the steering column nuts (3, 4) and bolts (1, 2) in the following sequence:
| 2.1. | Tighten steering column nut (3). |
Tighten
Tighten the nut to 27 N·m (20 lb ft).
| 2.2. | Tighten steering column nut (4). |
Tighten
Tighten the nut to 27 N·m (20 lb ft).
| 2.3. | Tighten steering column bolt (1). |
Tighten
Tighten the bolt to 27 N·m (20 lb ft).
| 2.4. | Tighten steering column bolt (2). |
Tighten
Tighten the bolt to 27 N·m (20 lb ft).
- Install the intermediate steering shaft (2) and intermediate steering shaft bolt (1). Make sure
the intermediate steering shaft upper seal (3) is seated correctly.
- If equipped, install the steering column lower support brace (2) and steering column lower support brace bolts (1).
Tighten
Tighten the bolts to 10 N·m (89 lb in).
- Connect all electrical connectors as needed.
- Install the steering column opening filler bolts. Refer to
Steering Column Opening Filler Replacement
.
- Install the instrument panel cluster trim plate bezel. Refer to
Instrument Panel Cluster Trim Plate Bezel Replacement
.
- Install the knee bolster. Refer to
Knee Bolster Replacement
.
- Install the left side instrument panel insulator panel. Refer to
Instrument Panel Insulator Panel Replacement - Left Side
.
