Removal Procedure
- Remove as much power steering fluid from the remote power steering fluid reservoir as possible.
- Disconnect the steering linkage outer tie rods from the steering knuckles. Refer to Steering Linkage Outer Tie Rod Replacement.
- Disconnect the stabilizer shaft links at the stabilizer shaft. Refer to Stabilizer Shaft Link Replacement.
- Disconnect the intermediate steering shaft from the steering gear. Refer to Intermediate Steering Shaft Replacement.
- Remove the rear propeller shaft, if equipped. Refer to Propeller Shaft Replacement.
- Remove the underbody rear side rails. Refer to Underbody Rear Side Rail Replacement.
- Remove the frame brace. Refer to Frame Brace Replacement.
- Remove the right side catalytic convertor. Refer to Catalytic Converter Replacement - Right Side.
- Remove the steering gear heat shields. Refer to Steering Gear Heat Shield Replacement.
- Position adjustable jack stands underneath the left and right sides of the vehicle at the rear of the front frame.
- Place drain pans under the vehicle as needed.
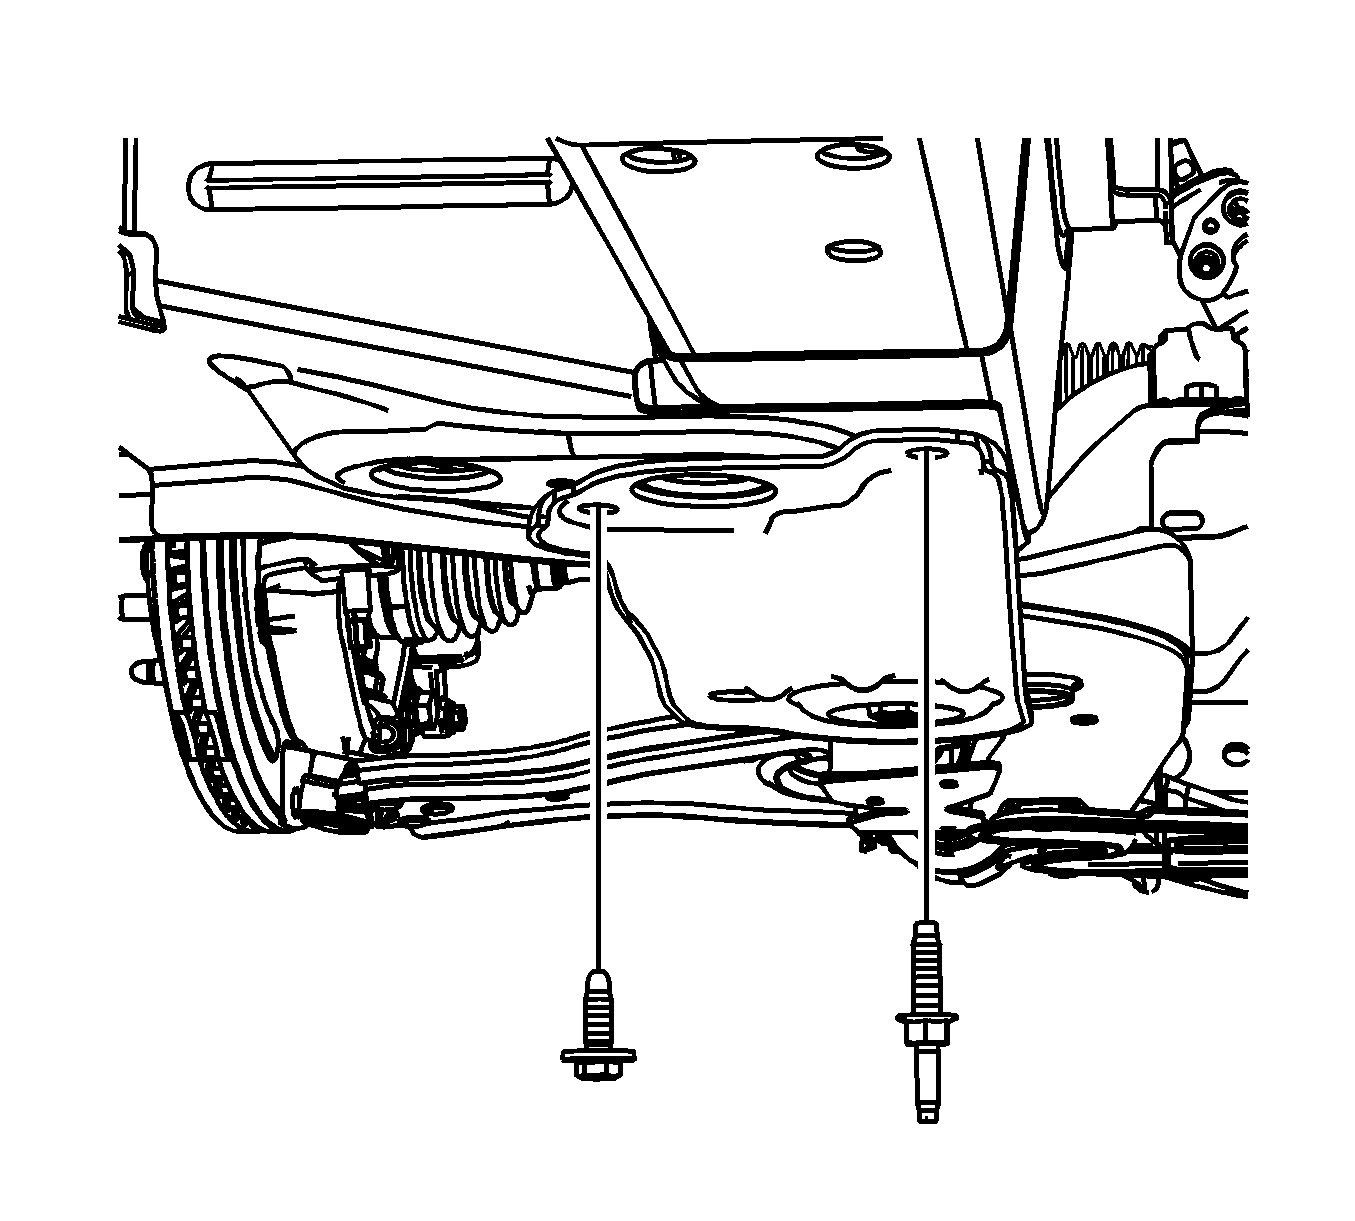
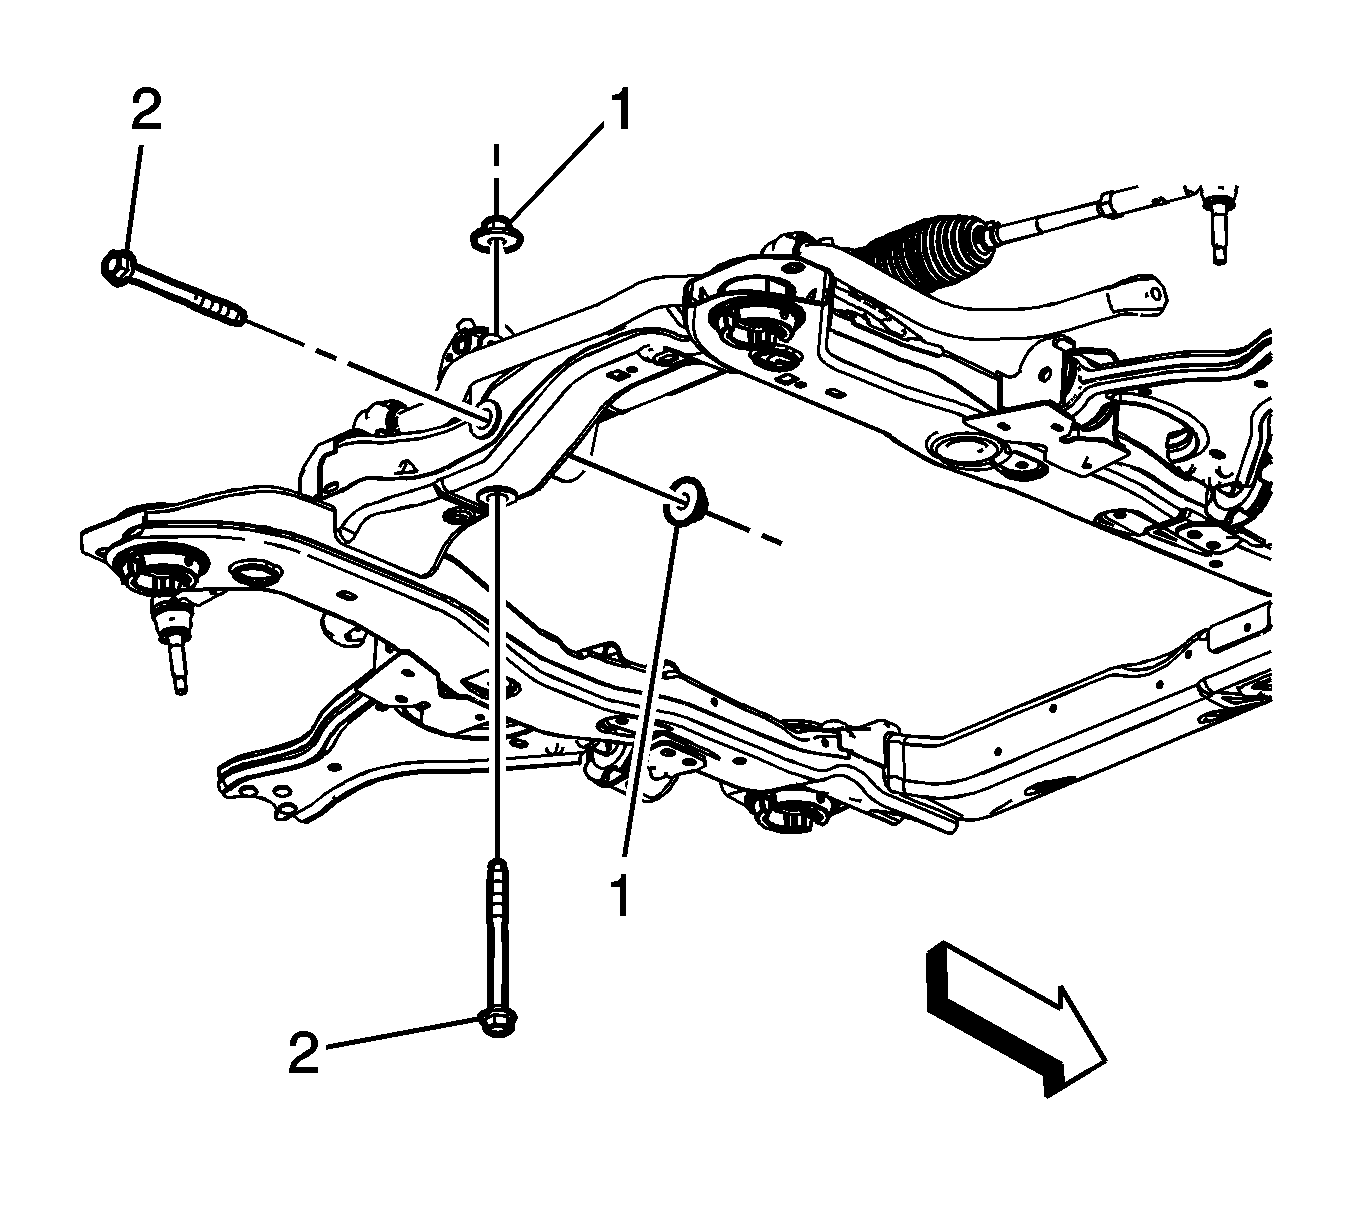
- Remove the left and right front frame reinforcement mounting bolts. Left side shown, right side similar.
- Loosen the front frame reinforcement mounting bolts (1). Left side shown, right side similar.
- Loosen the front frame mounting bolts (2). Left side shown, right side similar.
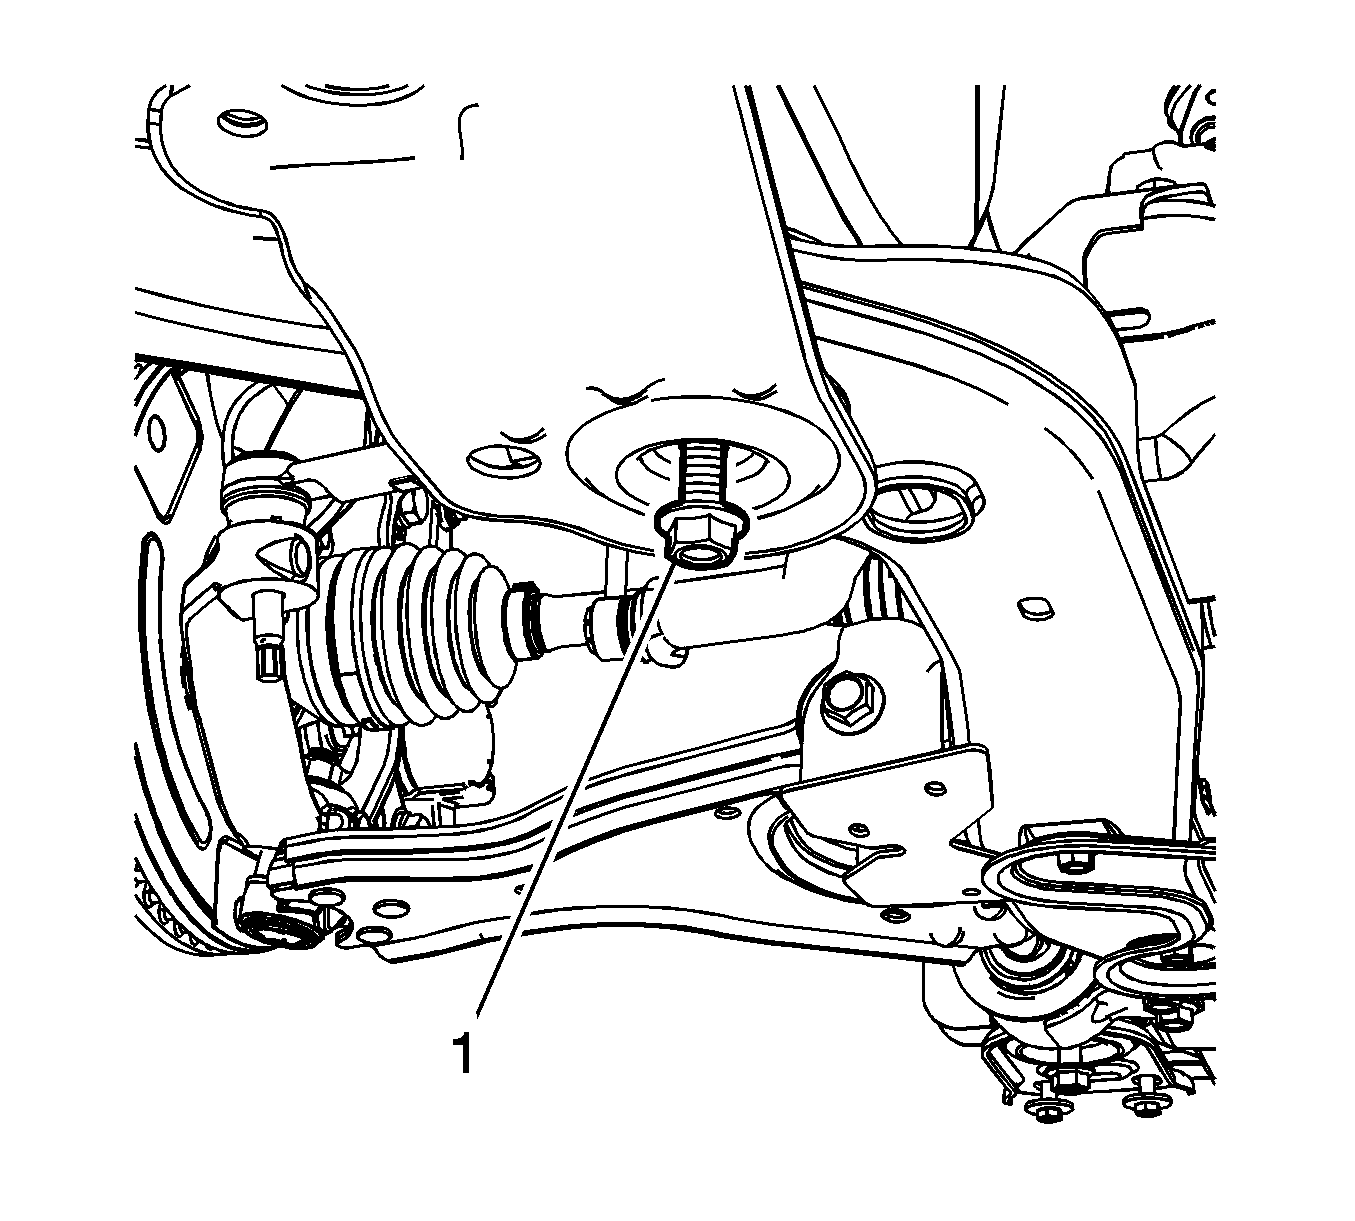
- Loosen the rear front frame mounting bolts (1).
- Lower the frame (1) from the frame rail (2) until enough clearance is gained to remove the steering gear.
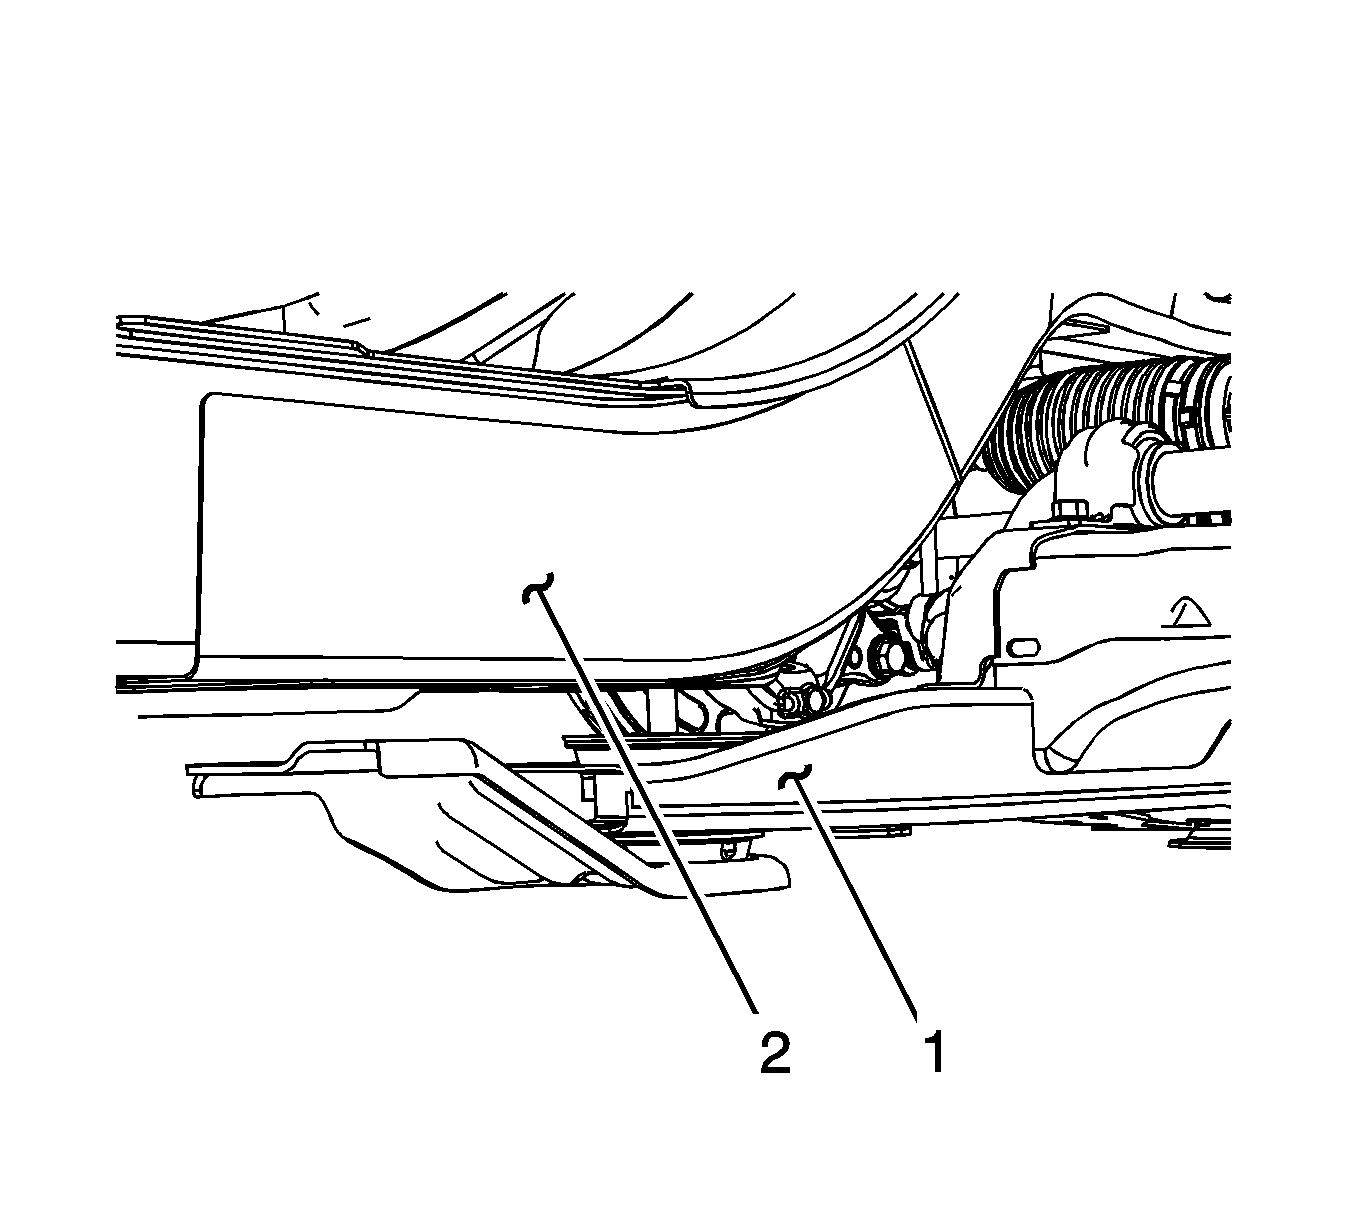
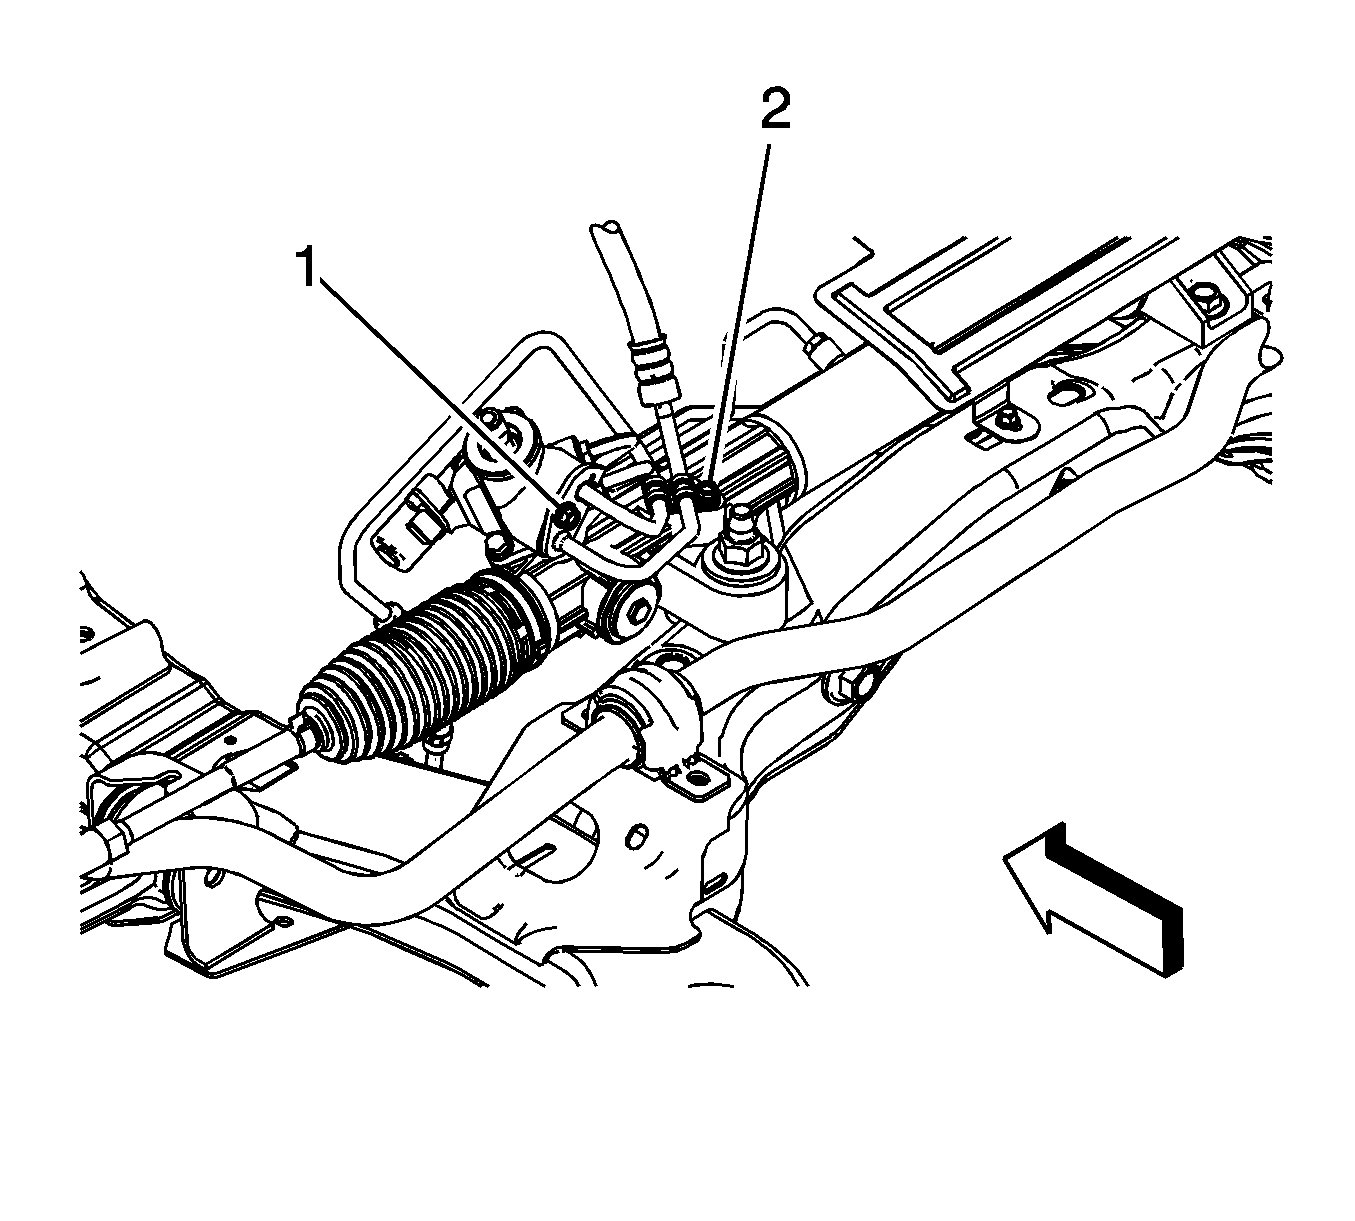
- Remove the power steering gear inlet hose retaining plate bolt (1) and the power steering gear inlet and outlet pipe clip bolt (2).
- Pull the power steering gear inlet and outlet hoses out of the steering gear and power steering gear inlet and outlet pipe clip.
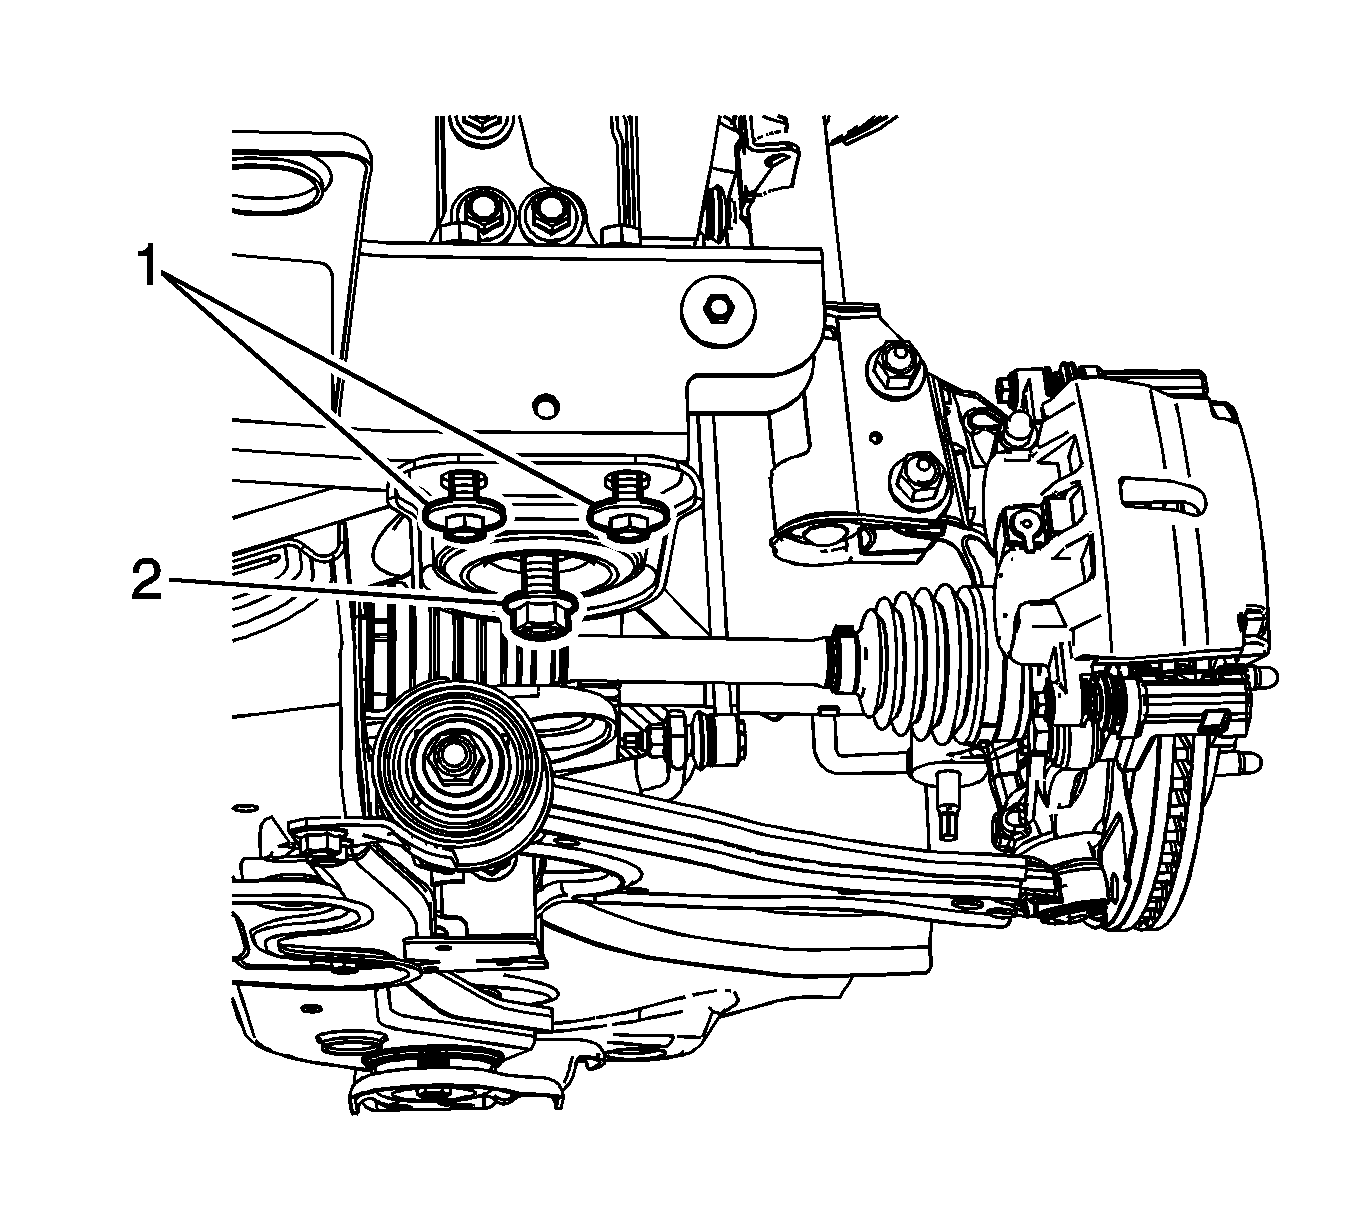
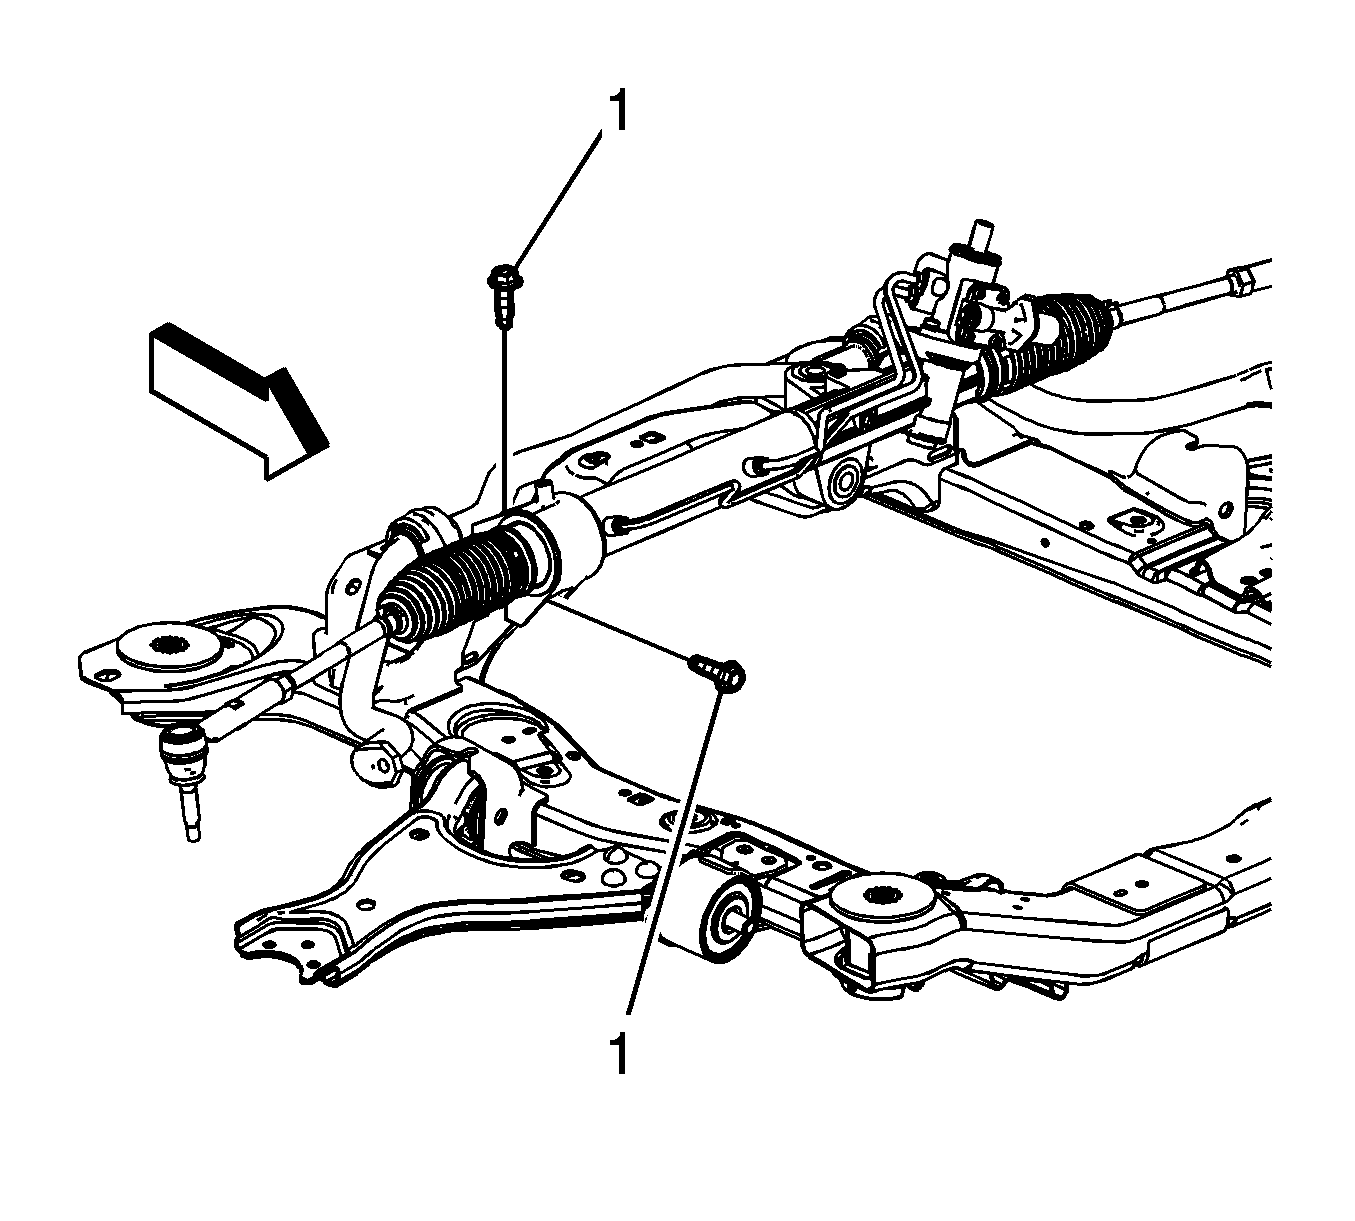
- Remove the left side steering gear nuts (1) and bolts (2).
- Remove the right side steering gear bolts (1).
- Remove the steering gear from the vehicle through the driver side of the vehicle.
Notice: Secure the steering wheel utilizing a strap to prevent rotation. Locking of the steering column will prevent damage and a possible malfunction of the SIR system. The steering wheel must be secured
in position before disconnecting the following components:
• The steering column • The intermediate shaft • The steering gear
Installation Procedure
- Install the steering gear to the vehicle through the driver's side.
- Install the right side steering gear bolts (1).
- Install the left side steering gear nuts (1) and bolts (2).
- Install the power steering gear inlet and outlet hoses to the steering gear.
- Install the power steering gear inlet hose retaining plate bolt (1).
- Install the power steering gear inlet and outlet pipe clip bolt (2).
- Raise the front frame to the vehicle body leaving approximately a half inch gap.
- Install the left and right front frame reinforcement mounting bolts. Left side shown, right side similar.
- Tighten the rear front frame mounting bolts (1).
- Tighten the front frame mounting bolts (2). Left side shown, right side similar.
- Tighten the front frame reinforcement mounting bolts (1). Left side shown, right side similar.
- Remove the adjustable jack stands from underneath the vehicle.
- Clean any excess fluid from the vehicle and remove the drain pans.
- Install the underbody rear side rails. Refer to Underbody Rear Side Rail Replacement.
- Install the rear propeller shaft, if equipped. Refer to Propeller Shaft Replacement.
- Install the steering gear heat shields. Refer to Steering Gear Heat Shield Replacement.
- Install the right side catalytic convertor. Refer to Catalytic Converter Replacement - Right Side.
- Install the frame brace. Refer to Frame Brace Replacement.
- Connect the intermediate steering shaft to the steering gear. Refer to Intermediate Steering Shaft Replacement.
- Connect the stabilizer shaft links at the stabilizer shaft. Refer to Stabilizer Shaft Link Replacement.
- Connect the steering linkage outer tie rods to the steering knuckles. Refer to Steering Linkage Outer Tie Rod Replacement.
- Fill and bleed the power steering system. Refer to Power Steering System Bleeding.
- Adjust the front toe. Refer to Front Toe Adjustment.
Notice: Refer to Fastener Notice in the Preface section.
Important: Start all bolts by hand before finalizing any torques.
Tighten
Tighten the bolts to 100 N·m (74 lb ft).
Tighten
Tighten the nuts to 75 N·m (55 lb ft).
Notice: Refer to Fastener Notice in the Preface section.
Tighten
Tighten the bolt to 12 N·m (106 lb in).
Tighten
Tighten the bolt to 9 N·m (80 lb in).
Tighten
Tighten the bolts to 50 N·m (37 lb ft).
Tighten
Tighten the bolts to 100 N·m (74 lb ft) plus 90 degrees.
Tighten
Tighten the bolts to 100 N·m (74 lb ft) plus 90 degrees.
Tighten
Tighten the bolts to 50 N·m (37 lb ft).
