For 1990-2009 cars only
Radiator Replacement 2.0L Diesel LLW
Removal Procedure
- Remove the front bumper fascia. Refer to Front Bumper Fascia Replacement.
- Remove the radiator grille reinforcement support. Refer to Radiator Grille Reinforcement Support Replacement.
- Remove the hood primary and secondary latch. Refer to Hood Primary and Secondary Latch Replacement.
- Remove the intake air duct. Refer to Intake Air Duct Replacement.
- Drain the cooling system. Refer to Cooling System Draining and Filling.
- Remove the cooling lines. Refer to Radiator Inlet Hose Replacement and Radiator Outlet Hose Replacement.
- Remove the radiator support brackets. Refer to Radiator Support Bracket Replacement.
- Remove the charge air cooler. Refer to Charge Air Cooler Replacement.
- Remove the engine coolant fan. Refer to Engine Coolant Fan Replacement.
- Remove the air conditioning condensor. Refer to Air Conditioning Condenser Replacement.
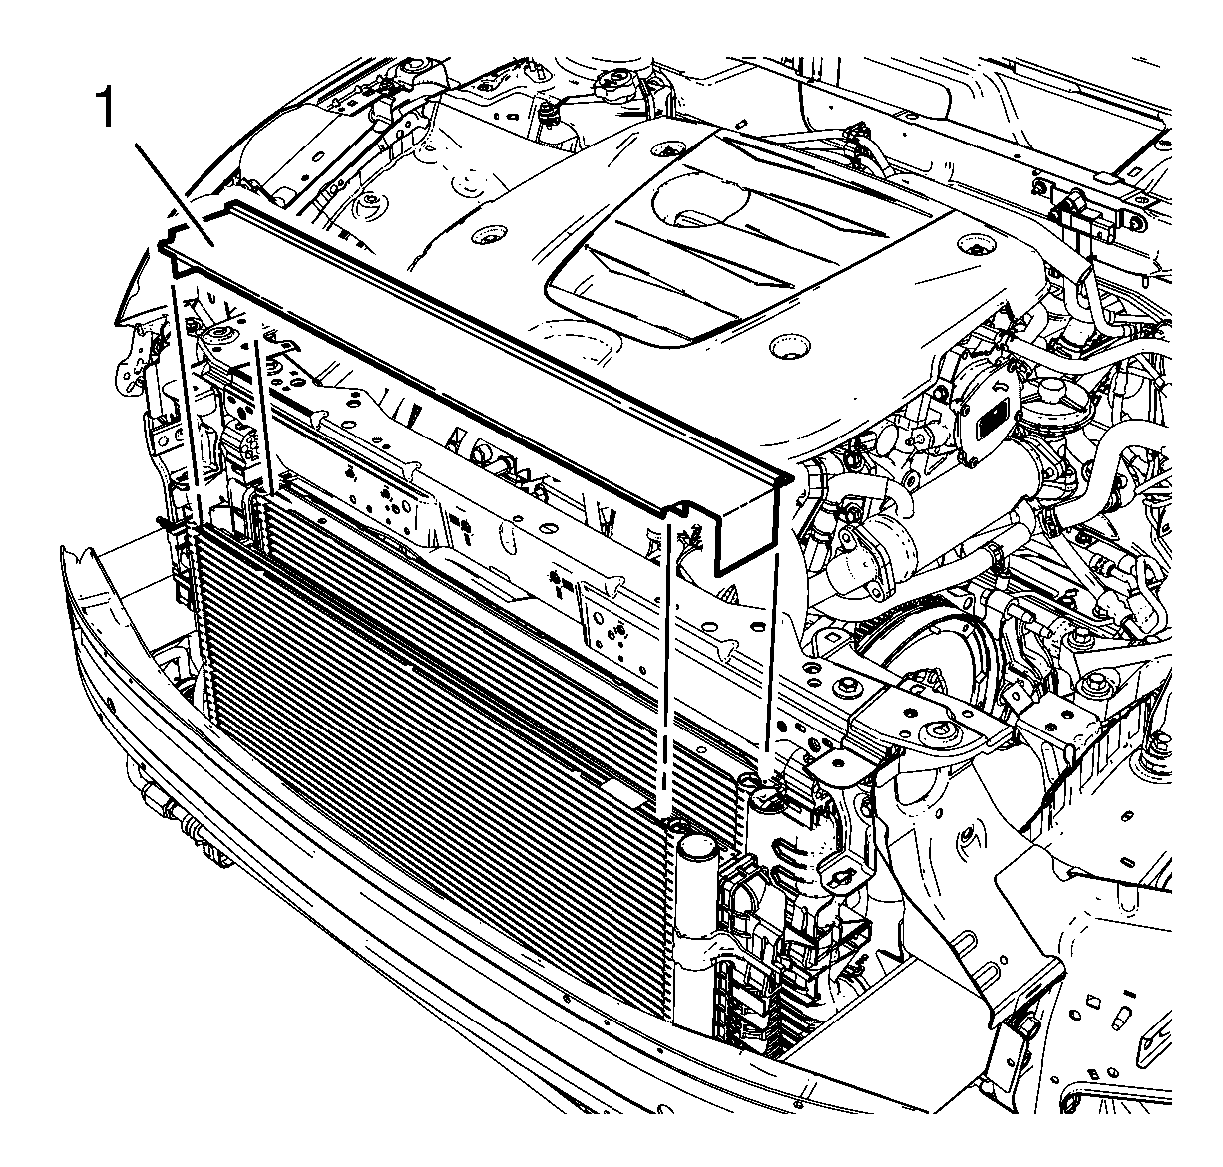
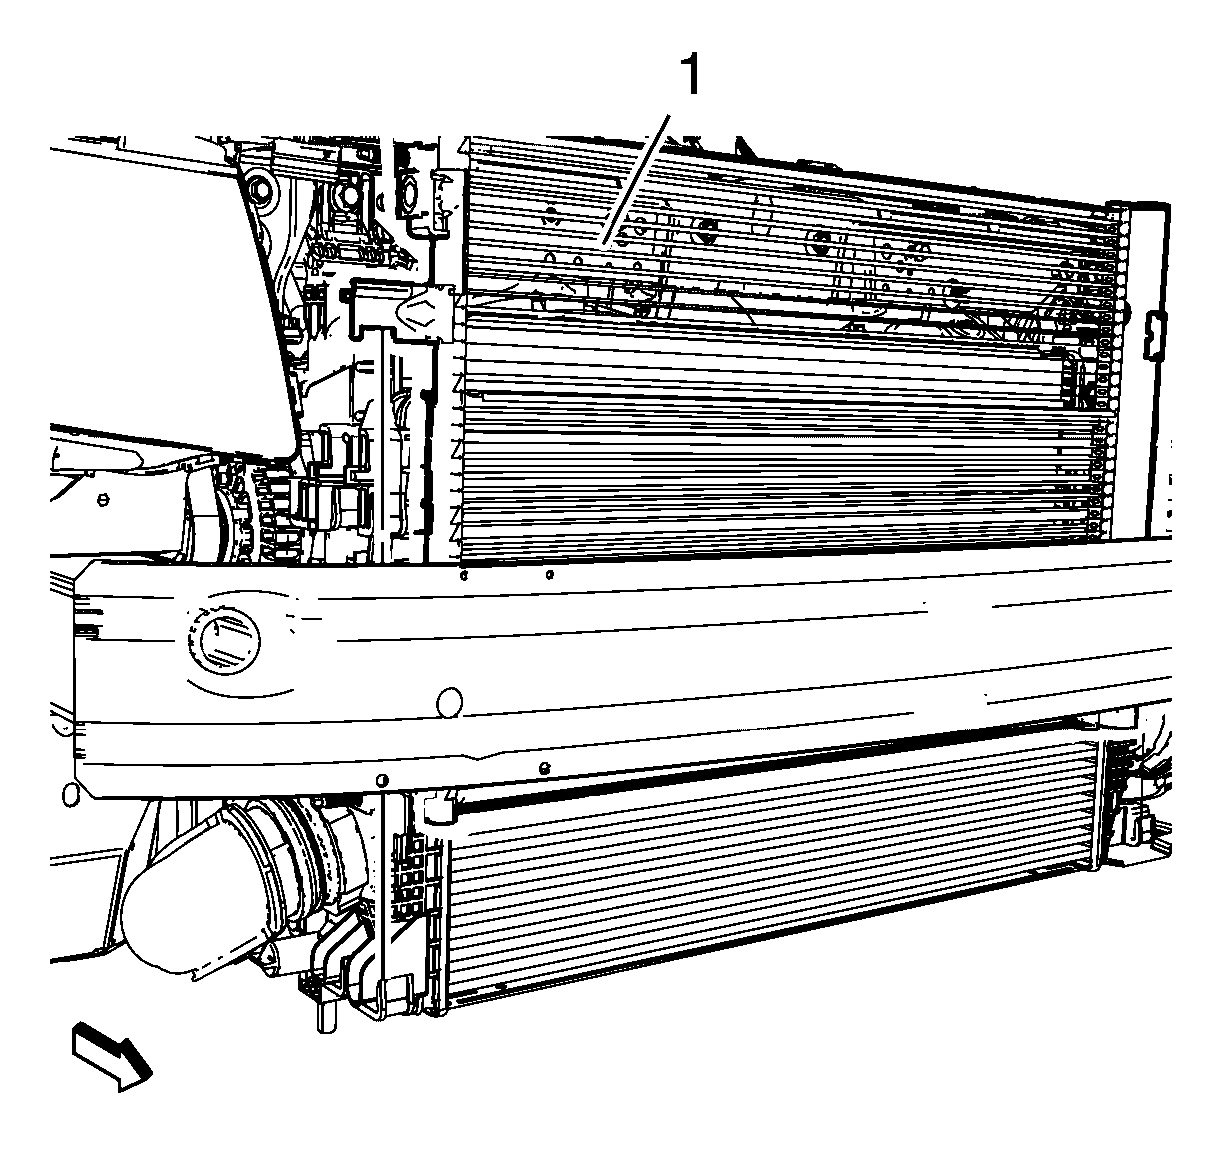
- Remove the radiator air seal (1).
- Remove the radiator (1).
Installation Procedure
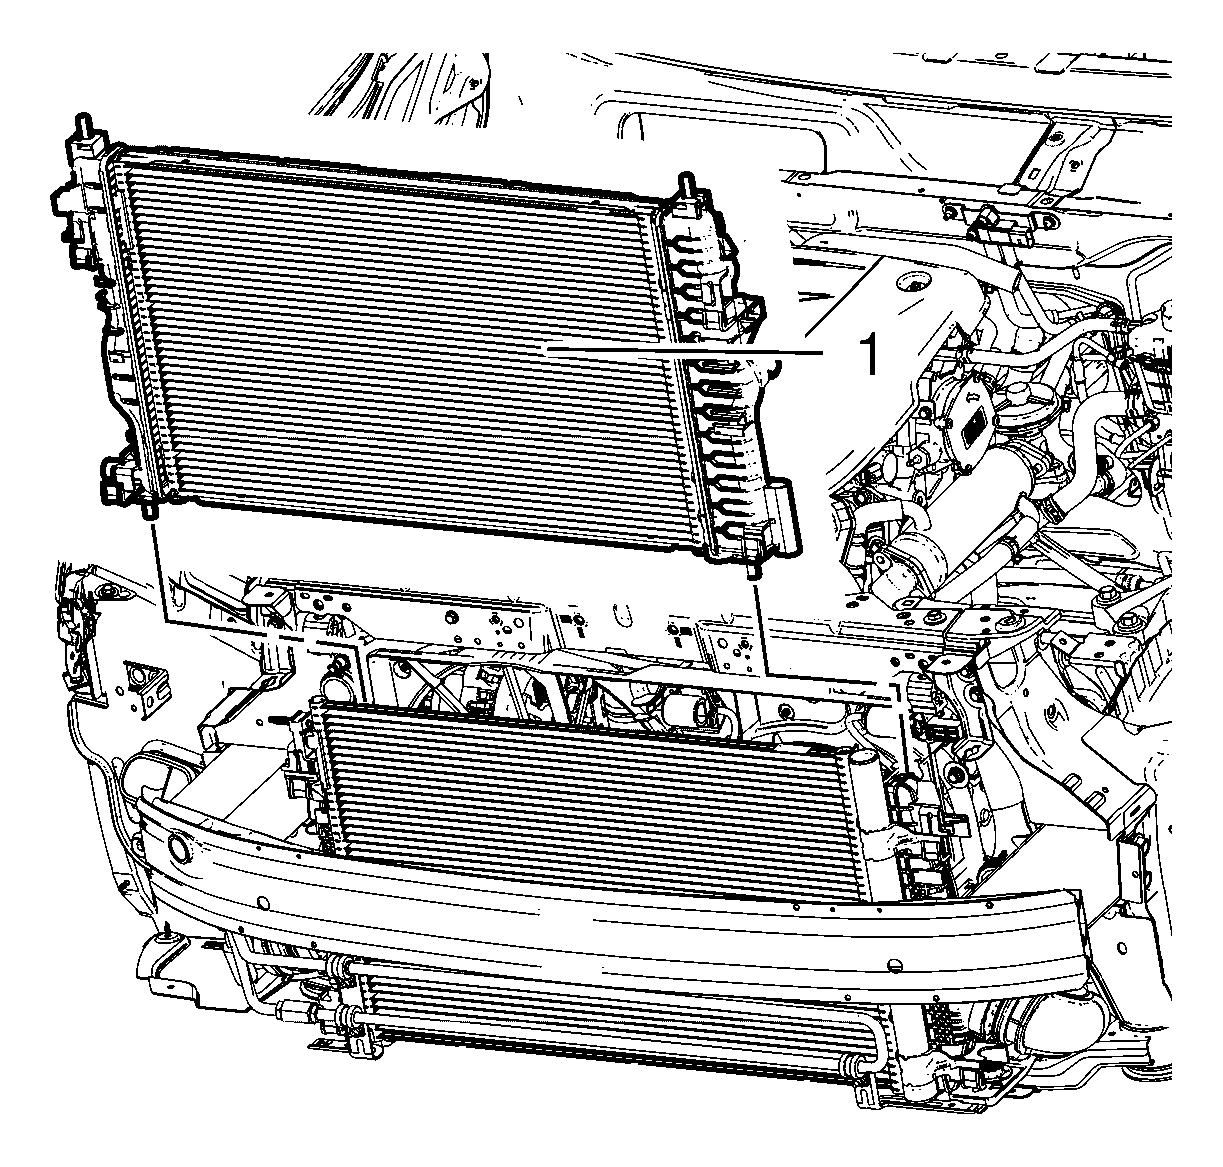
- Install the radiator (1).
- Install the radiator air seal (1)
- Install the air conditioning condensor. Refer to Air Conditioning Condenser Replacement.
- Install the engine coolant fan. Refer to Engine Coolant Fan Replacement.
- Install the charge air cooler. Refer to Charge Air Cooler Replacement.
- Install the radiator support brackets. Refer to Radiator Support Bracket Replacement.
- Install the cooling lines. Refer to Radiator Inlet Hose Replacement and Radiator Outlet Hose Replacement.
- Fill the cooling system. Refer to Cooling System Draining and Filling.
- Install the intake air duct. Refer to Intake Air Duct Replacement.
- Install the hood primary and secondary latch. Refer to Hood Primary and Secondary Latch Replacement.
- Install the radiator grille reinforcement support. Refer to Radiator Grille Reinforcement Support Replacement.
- Install the front bumper fascia. Refer to Front Bumper Fascia Replacement.
Radiator Replacement 1.6L LXV
Removal Procedure
- Open the hood.
- Disconnect the battery. Refer to Battery Negative Cable Disconnection and Connection.
- Remove the radiator grille reinforcement support. Refer to Radiator Grille Reinforcement Support Replacement.
- Remove the front bumper facia. Refer to Front Bumper Fascia Replacement.
- Remove the air inlet duct. Refer to Air Cleaner Inlet Duct Replacement.
- Remove the hood primary and secondary latch. Refer to Hood Primary and Secondary Latch Replacement.
- Drain the cooling system. Refer to Cooling System Draining and Filling.
- Remove the front compartment splash shield. Refer to Front Compartment Splash Shield Replacement.
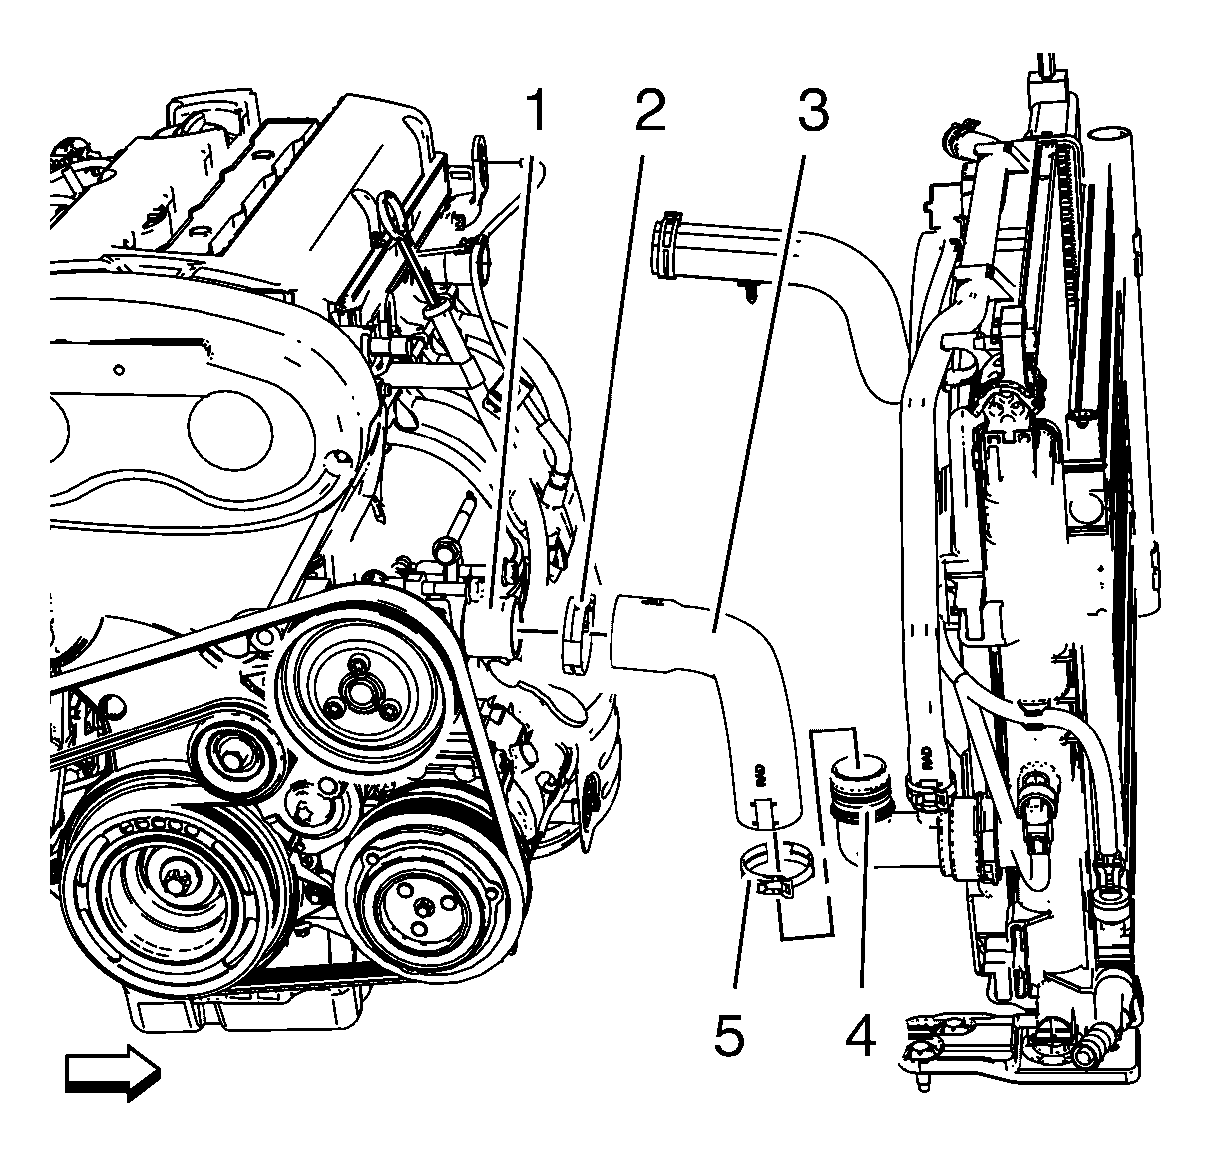
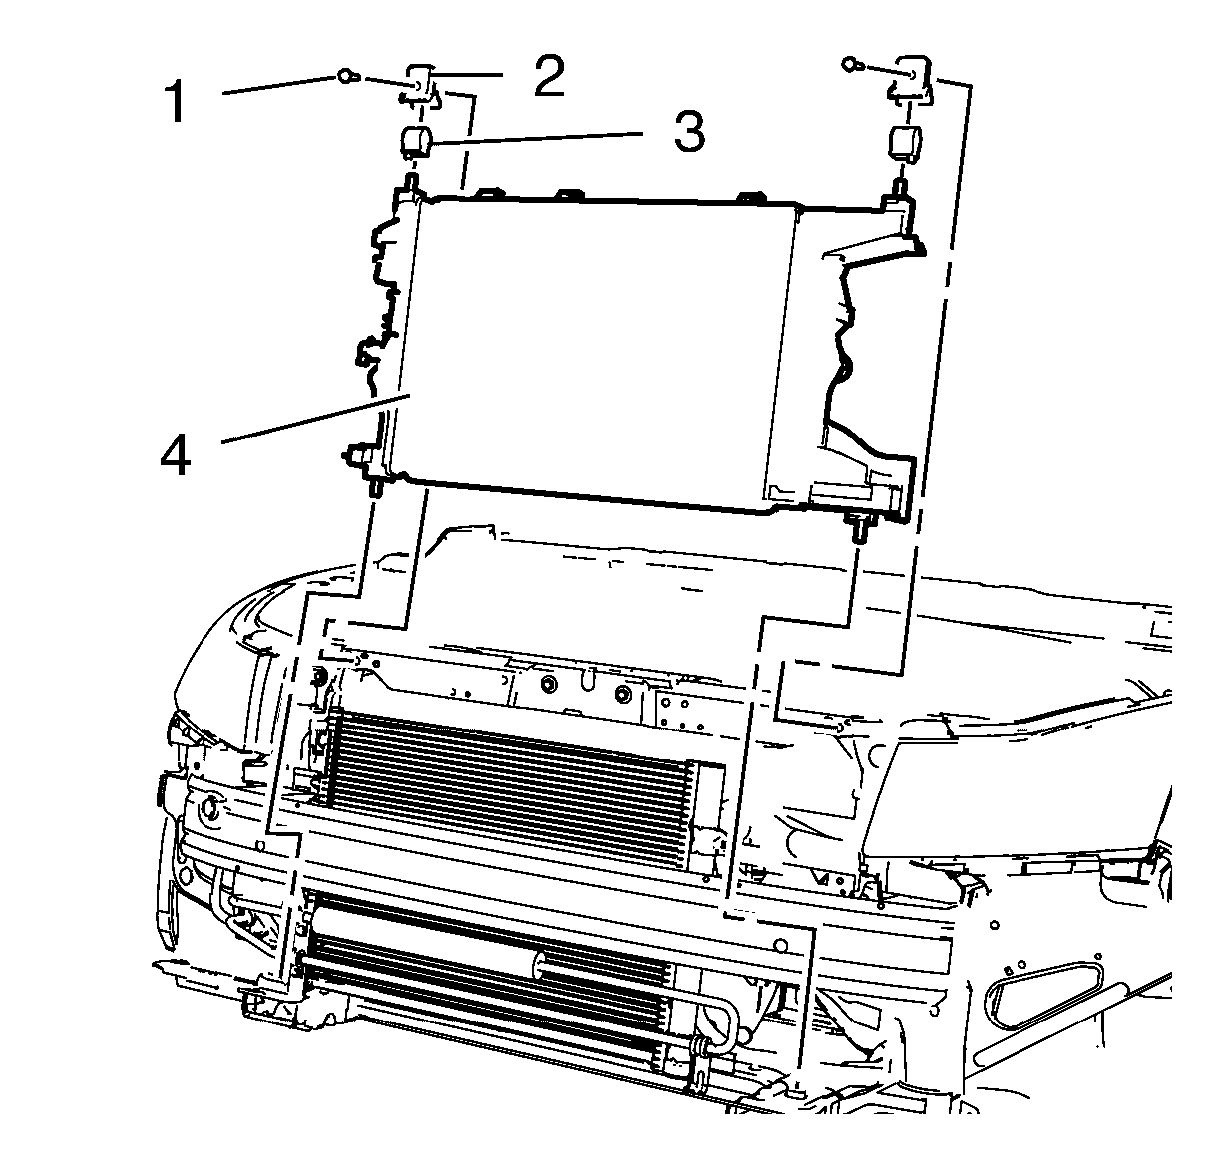
- Loosen the radiator outlet hose clamp (5).
- Remove the radiator outlet hose (3) from the radiator outlet pipe (4).
- Loosen the radiator inlet hose clamp (2).
- Remove the radiator inlet hose (3) from the radiator (1).
- For vehicle with automatic transmission:
- Lower the vehicle by its full height.
- Unclip the radiator fan from the radiator. Refer to Engine Coolant Fan Replacement.
- Unclip the radiator outlet hose from the radiator.
- Unclip the condensor (1) from the radiator.
- Remove the 2 radiator bolts (1).
- Remove the radiator upper bracket (2).
- Radiator upper insulator (3).
- Remove the radiator (4).
| • | Drain the transmission fluid. Refer to Transmission Fluid Replacement. |
| • | Remove the transmission fluid cooler outlet pipe from the radiator. Refer to Transmission Fluid Cooler Outlet Pipe Replacement. |
| • | Remove the transmission fluid cooler inlet pipe from the radiator. Refer to Transmission Fluid Cooler Inlet Pipe Replacement. |
Note: Do not remove radiator fan.
Note: Do not remove the condensor. Lift the condensor straight up high as much as required.
Installation Procedure
- Install the radiator (4).
- Install radiator upper insulator (3).
- Install the radiator upper bracket (2).
- Install the 2 radiator bolts (1) and tighten to 22 N·m (17 lb ft).
- Clip the condensor (1) to the radiator.
- Clip the radiator fan to the radiator. Refer to Engine Coolant Fan Replacement.
- Clip the radiator outlet hose into the radiator.
- Raise the vehicle by its full height.
- For vehicle with automatic transmission:
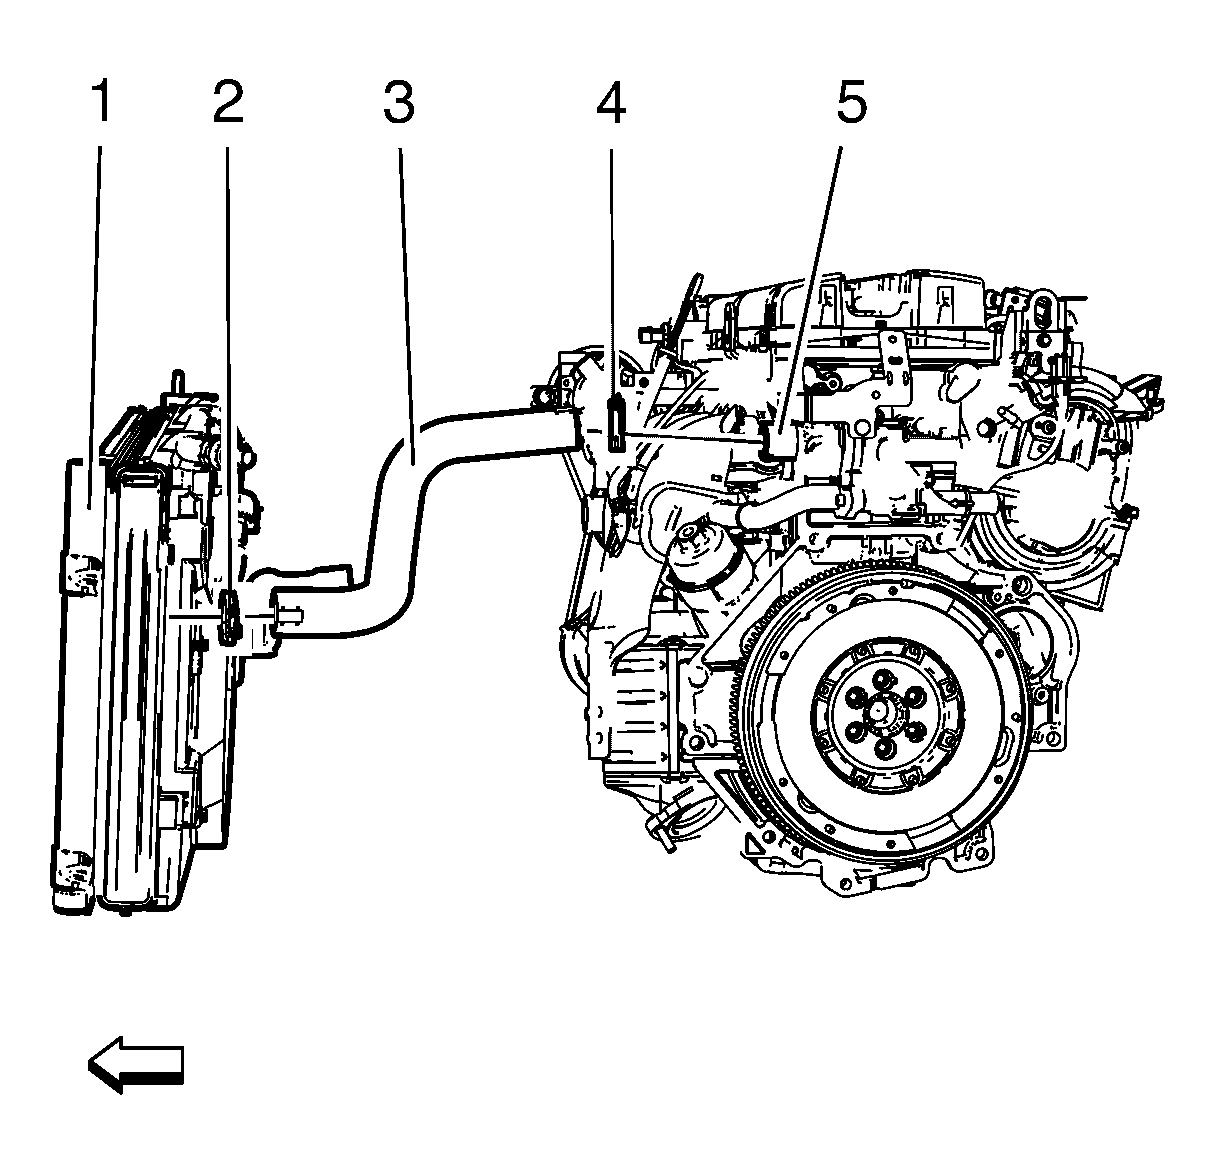
- Install the radiator inlet hose (3) to the radiator (1).
- Install the radiator inlet hose clamp (2).
- Install the radiator outlet hose (3) to the radiator outlet pipe (4).
- Install the radiator outlet hose clamp (5).
- Install the front compartment splash shield. Refer to Front Compartment Splash Shield Replacement.
- Fill the cooling system. Refer to Cooling System Draining and Filling.
- Install the hood primary and secondary latch. Refer to Hood Primary and Secondary Latch Replacement.
- Install the air inlet duct. Refer to Air Cleaner Inlet Duct Replacement.
- Install the front bumper facia. Refer to Front Bumper Fascia Replacement.
- Install the radiator grille reinforcement support. Refer to Radiator Grille Reinforcement Support Replacement.
- Connect the battery. Refer to Battery Negative Cable Disconnection and Connection.
- Close the hood.
Caution: Refer to Fastener Caution in the Preface section.
| • | Fill the transmission fluid. Refer to Transmission Fluid Replacement. |
| • | Install the transmission fluid cooler outlet pipe to the radiator. Refer to Transmission Fluid Cooler Outlet Pipe Replacement. |
| • | Install the transmission fluid cooler inlet pipe to the radiator. Refer to Transmission Fluid Cooler Inlet Pipe Replacement. |
