Tools Required
J 8087
Cylinder Bore Gage
Caution: Bodily injury may occur if the cleaning solvent is inhaled or exposed
to the skin.
Important: Measurement of all components should be taken with the components at room temperature. Do not use a wire brush in order to clean any part of the piston or connecting rod assembly.
Important: Some steps in this procedure may reflect on a disassembled oversized piston. Others will only apply to the standard size pistons that are NOT to be disassembled.
- Clean the piston and connecting rod in solvent.
- Dry off the piston and connecting rod with compressed air.
- Clean the piston ring grooves with a suitable ring groove cleaning tool.
- Clean the piston oil lubrication holes and slots.
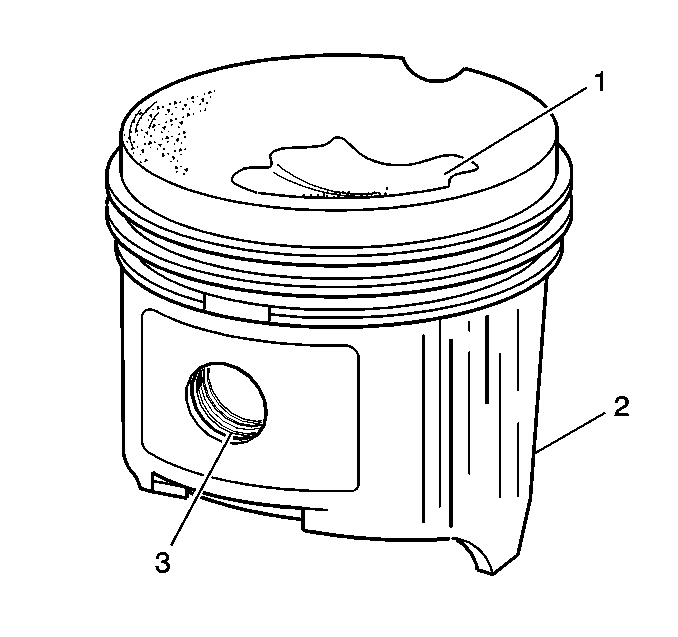
- Inspect the piston for the following:
| • | Eroded areas (1) on the top of the piston |
| • | Scuffed or damaged skirt (2) |
| • | Damage to the pin bore (3) |
| • | Cracks in the piston ring lands, the piston skirt, or the pin bosses |
| • | Piston ring grooves for nicks, burrs, or other warpage which may cause the piston ring to bind |
- Inspect the piston pin for scoring, wear or other damage.
- Measure the piston ring-to-piston ring groove side clearance.
| 7.1. | Insert the edge of the piston ring into the piston ring groove. |
| 7.2. | Roll the piston ring completely around the piston ring groove. |
| • | If binding is caused by distorted piston ring groove, replace the piston. |
| • | If binding is caused by a distorted piston ring, replace the piston ring. |
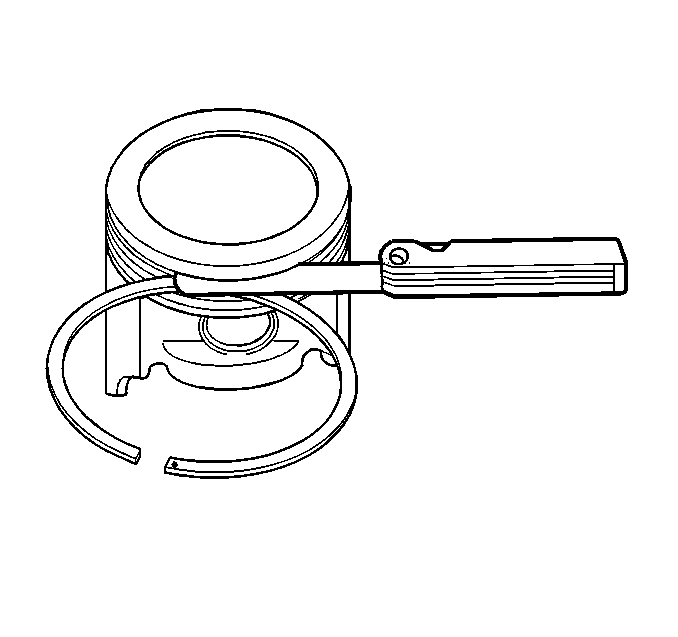
- Measure the piston ring side clearance with a feeler gage.
- If the side clearance is too small try another ring set.
- If the proper piston ring-to-piston ring groove clearance cannot be achieved, replace the piston and pin assembly.
| • | Proper ring-to-piston ring groove clearance for the top ring is 0.03-0.076 mm (0.001-0.003 in). |
| • | Proper ring-to-piston ring groove clearance for the second ring is 0.04-0.078 mm (0.002-0.003 in). |
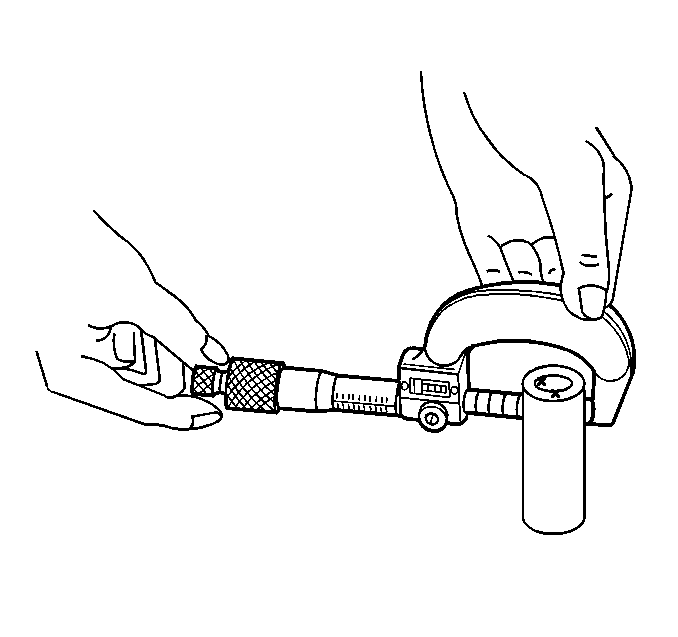
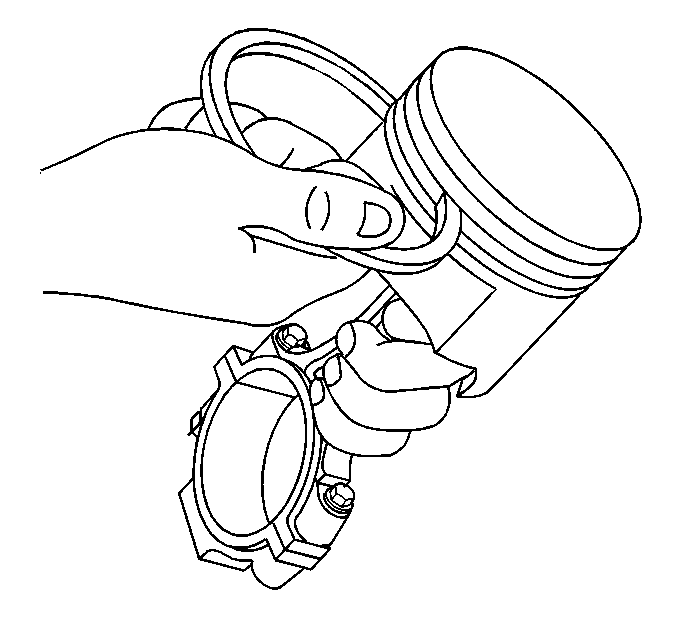
- Measure the piston pin diameter using and ouside micrometer.
Important: When fitting pistons, consider both the pistons and the cylinder bore conditions together. Production and service pistons have the same nominal weight and may be intermixed without affecting engine balance. If necessary,
used pistons may be fitted selectively to any cylinder of the engine, providing the pistons are in good condition and the same weight. Do not cut oversize pistons down or the engine balance may be affected. Finish hone when selecting the pistons.
- Measure the piston pin bore using an inside micrometer.
- Subtract the piston pin diameter from the piston pin bore diameter in order to determine the piston pin-to-piston pin bore clearance.
- Piston-to-piston pin bore clearance must measure 0.008-0.016 mm (0.0003-0.0006 in). Replace the piston and the piston pin if the piston and the piston pin are not within specifications.

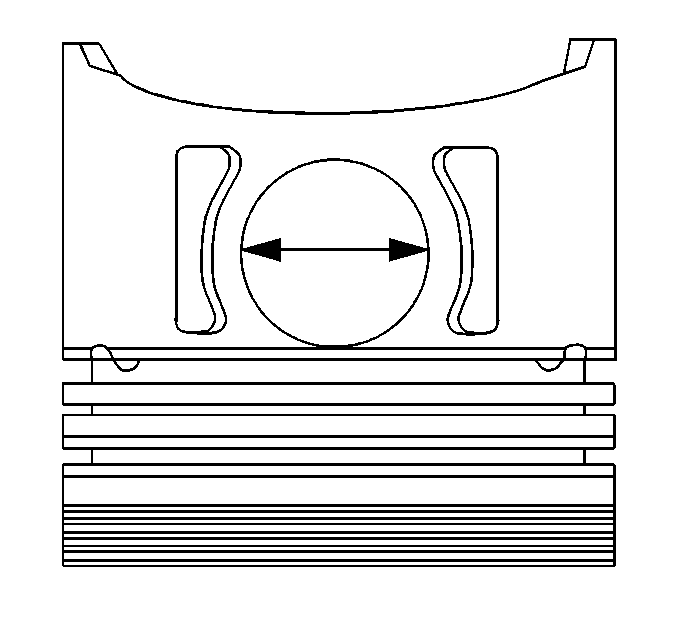
- Measure the piston diameter with a micrometer at a right angle to the piston bore with the piston pin removed, and record the measurement. Measure the piston
at 43 mm (1.692 in) from dome of piston. Piston diameter must measure no less than 93.960 mm (3.699 in). Replace the piston and the pin as an assembly if the piston is not within specifications.
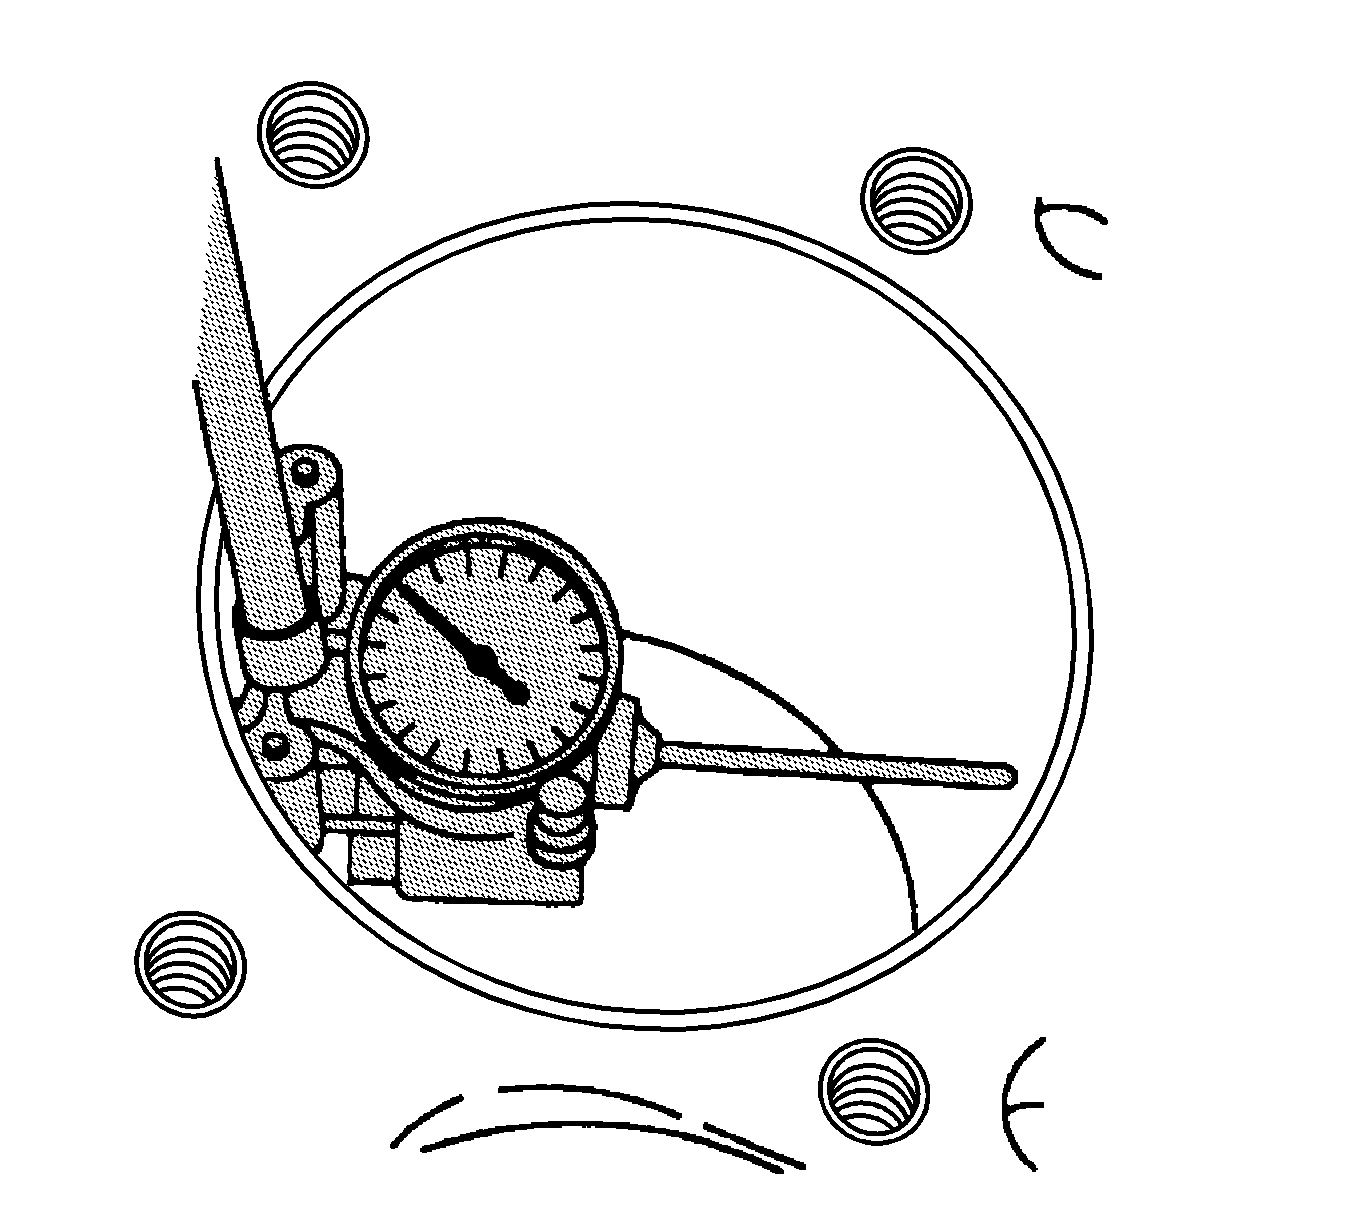
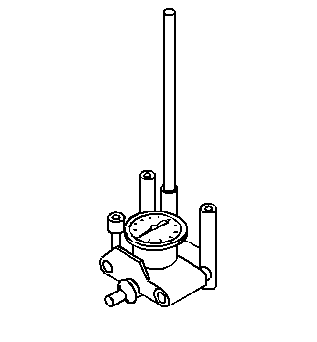
- Measure the cylinder bore, using
J 8087
.
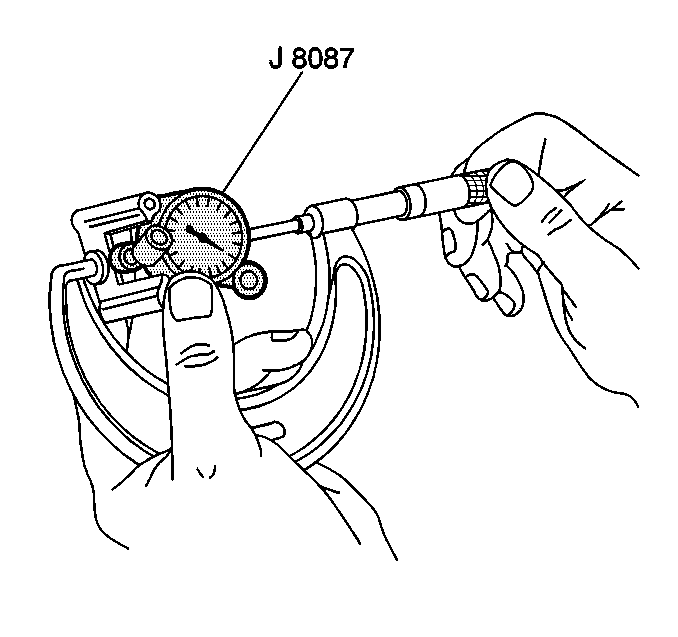
- Measure the
J 8087
. Record this reading.
- Subtract the diameter of the piston from the diameter of the cylinder bore to determine the piston-to-bore clearance. The cylinder bore clearance must be no more than 0.080 mm (0.003 in).
- If a used piston is not acceptable, inspect the service piston size and determine if a new piston may be selected. Service pistons are available in standard and 0.5 mm (0.012 in) oversize.
- When a piston has been selected, mark the piston in order to identify the cylinder for which the piston was fitted.
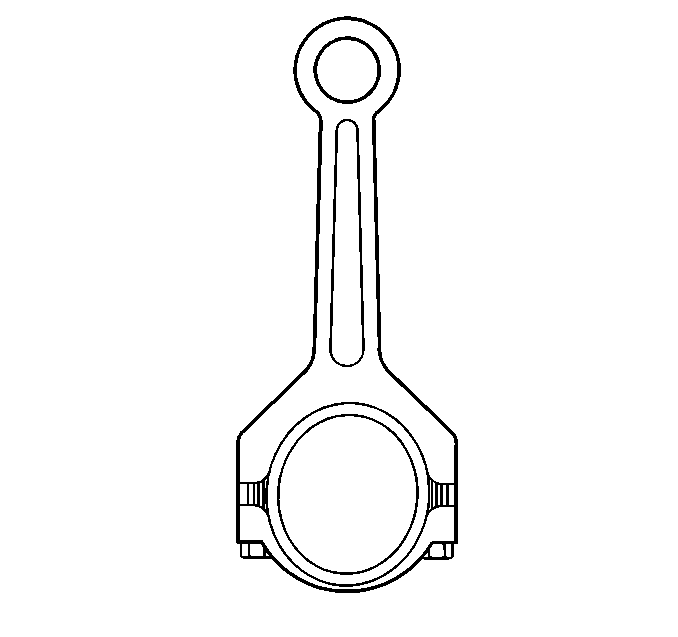
- Inspect the connecting rod for an out-of-round bearing bore. If the out-of-round measurement
exceeds 0.005 mm (0.0002 in) the connecting rod must be replaced.
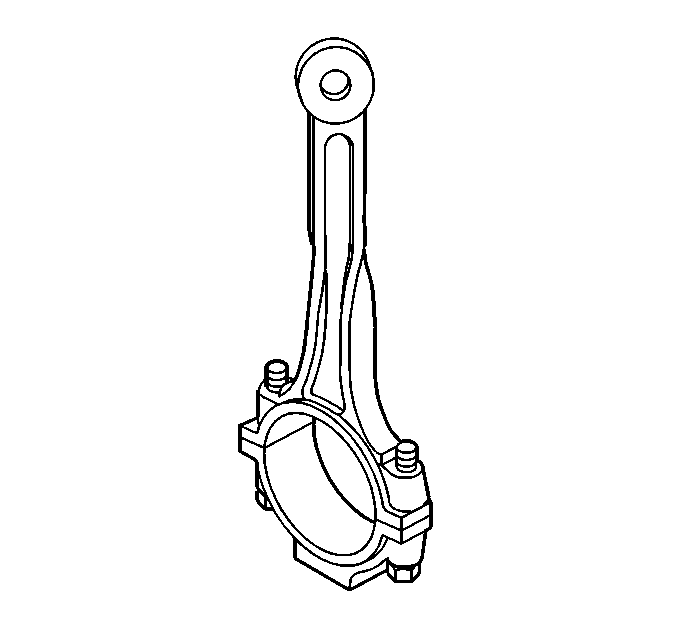
- Inspect the connecting rod for twisting.
| 22.1. | Install the connecting rod cap. |
| 22.2. | Place the connecting rod assembly on a checking fixture. Inspect the assembly for bending or twisting. |
| 22.3. | Do not attempt to straighten the connecting rod. Ensure that the connecting rod meets the following conditions: |
| • | The connecting rods are not bent more than 0.18 mm (0.007 in). |
| • | The connecting rods are not twisted more than 0.38 mm (0.015 in). |
| 22.4. | Replace any bent or twisted connecting rods. |
| 22.5. | Inspect the new connecting rods before using the new rods. |
- Inspect the connecting rod for damage to the bearing cap and bolt threads.
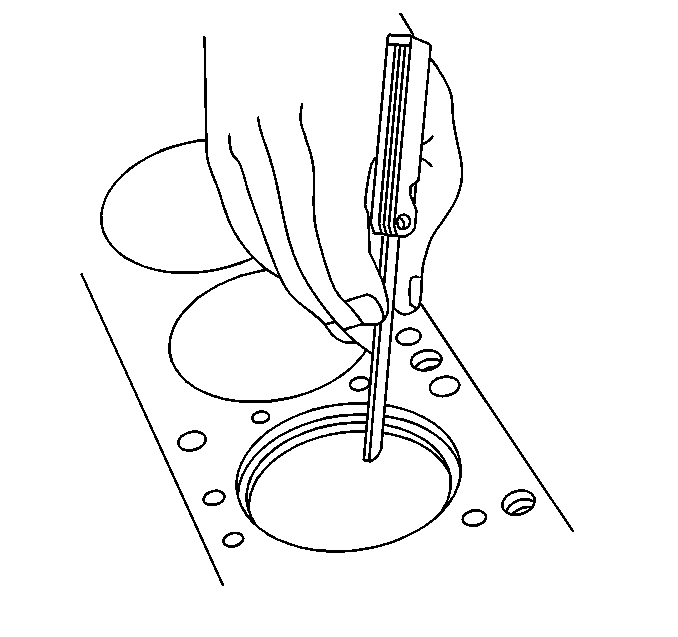
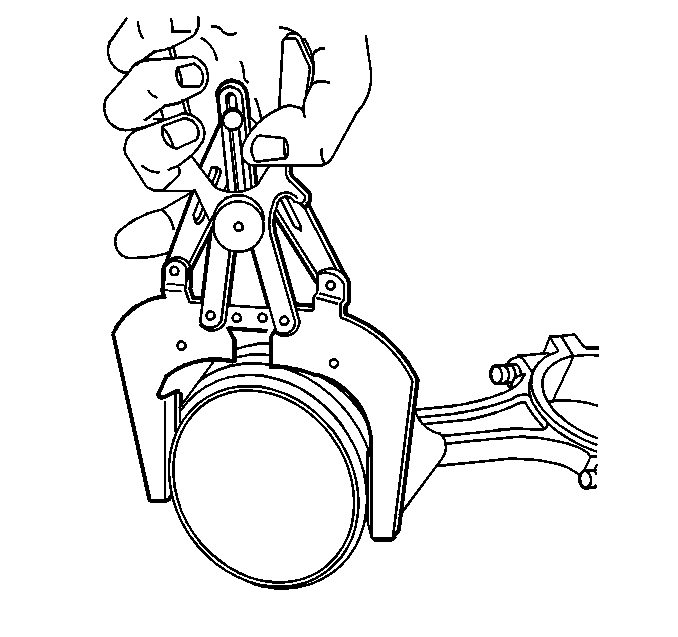
- Measure the piston compression ring end gap.
| | Important: Fit each compression ring to the cylinder in which it will be used.
|
| 24.1. | Place the compression ring into the cylinder bore. |
| 24.2. | Push the compression ring into the bottom of the cylinder bore to approximately 6.5 mm (0.25 in) above ring travel. The ring must be square to the cylinder wall. |
| 24.3. | Use a feeler gage in order to measure the end gap. The first compression ring end gap must measure 0.18-0.39 mm (0.007-0.015 in), the second compression ring must measure 0.48-0.74 mm (0.019-0.029 in). |
| 24.4. | Select another size ring set if the end gap exceeds specifications. If ring gap clearance is below specifications, increase the gap by carefully filing off excess material. |
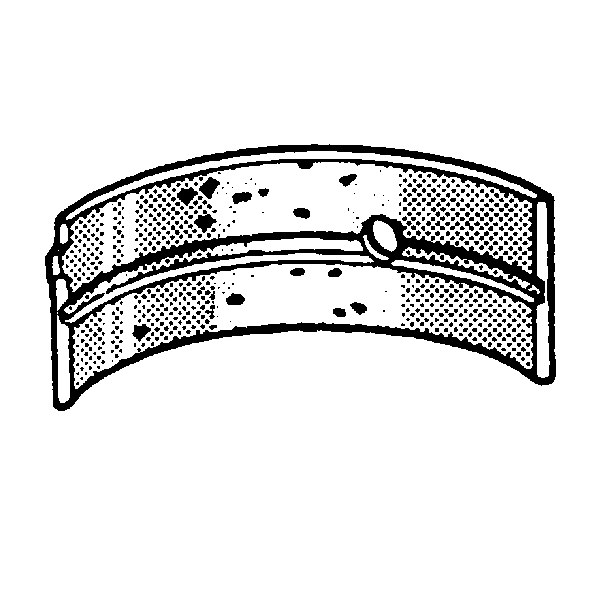
- Inspect the connecting rod bearings for craters or pockets. Flattened sections on the connecting rod bearing halves may indicate
fatique.
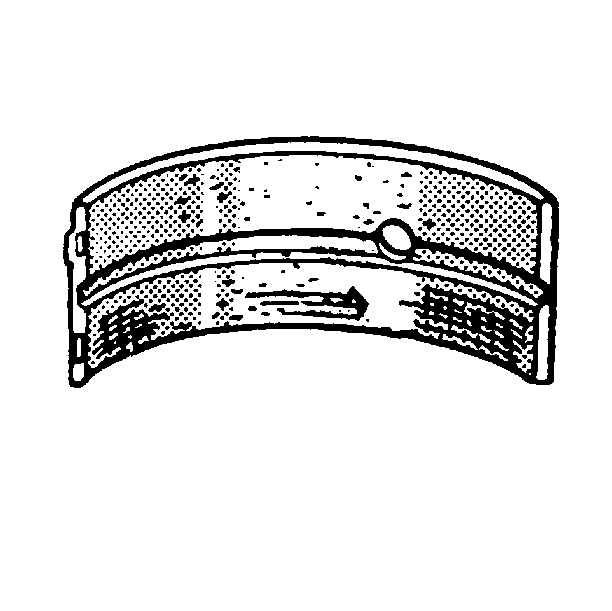
- Inspect the connecting rod bearings for excess scoring or discoloration.
- Inspect the connecting rod bearings for dirt or debris imbedded into the connecting rod bearing halves.
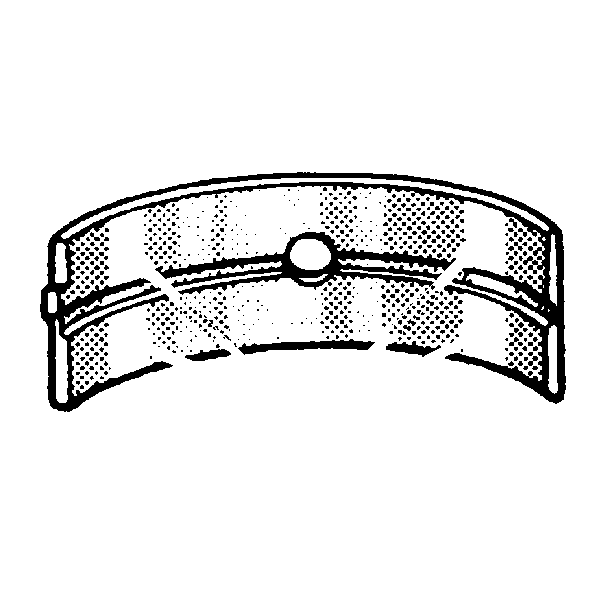
- Inspect the connecting rod bearings for improper seating indicated by bright, polished sections of the bearings.
- Inspect the inside of the connecting rod bearing and the outside diameter of the connecting rod bearing journal for wear. This indicates high spots.
