Tools Required
J 36660-A Torque Angle Meter
Removal Procedure
Important: The fuel injector wiring harness connectors must be connected to their respective fuel injectors. Failure to connect the fuel injector connectors to their respective fuel injectors may result in excessive exhaust emissions and poor engine performance.
- Remove the upper intake manifold. Refer to Upper Intake Manifold Replacement .
- Remove the engine left side valve rocker arm cover. Refer to Valve Rocker Arm Cover Replacement - Left Side .
- Remove the engine right side valve rocker arm cover. Refer to Valve Rocker Arm Cover Replacement - Right Side .
- Disconnect the wiring harness from the engine coolant temperature (ECT) sensor.
- Disconnect and remove the fuel injector, manifold air pressure (MAP) and ECT wiring harness.
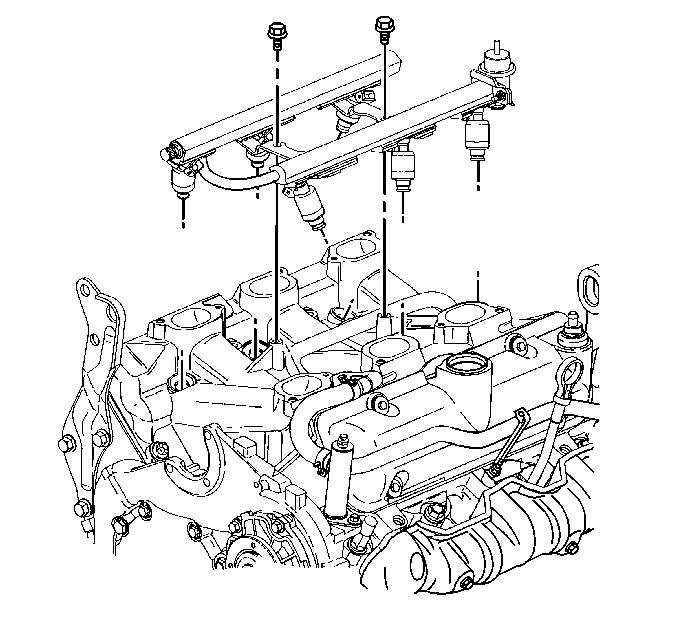
- Remove the fuel feed and return pipe from the fuel injector rail. Refer to Fuel Hose/Pipes Replacement - Engine Compartment in Engine Controls - 3.4L.
- Remove the fuel injector rail. Refer to Fuel Injection Fuel Rail Assembly Replacement in Engine Controls - 3.4L.
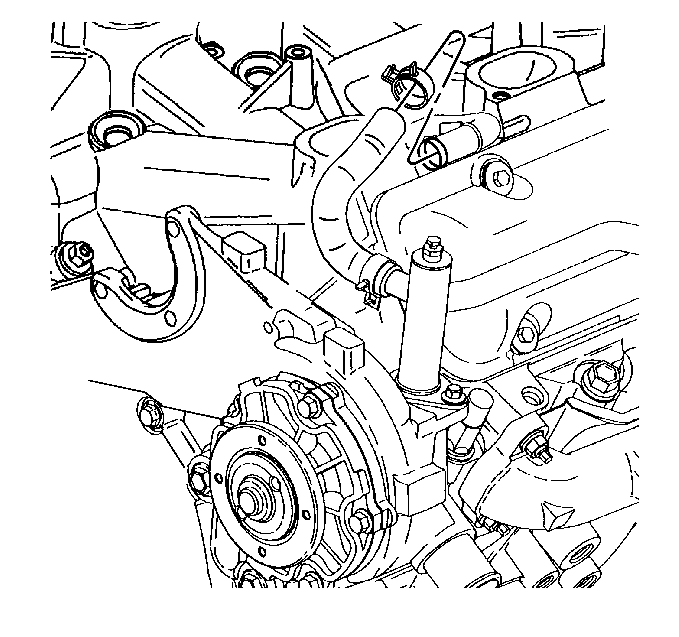
- Remove the power steering pump from the front engine cover and reposition aside. Refer to Power Steering Pump Replacement in Power Steering System.
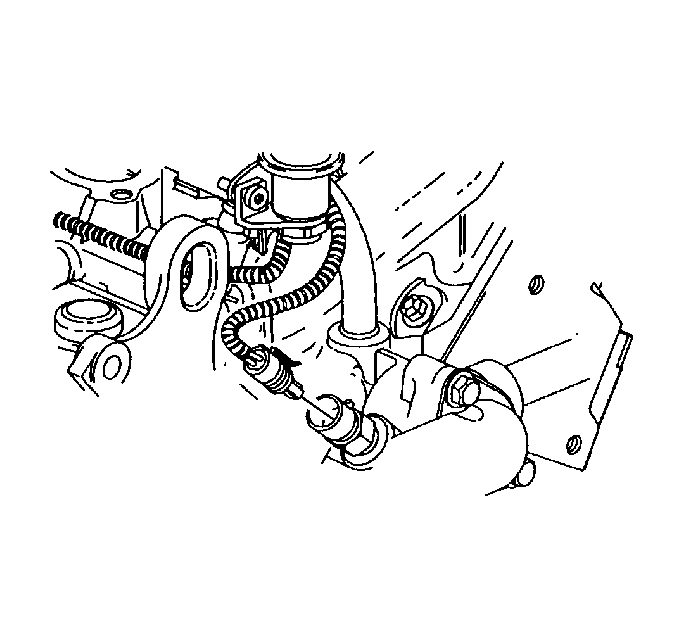
- Disconnect the heater inlet pipe with heater hose from the lower intake manifold and reposition aside. Refer to Heater Inlet Pipe Replacement in Heating, Ventilation and Air Conditioning.
- Disconnect the inlet radiator hose from the engine. Refer to Radiator Inlet Hose Replacement in Engine Cooling.
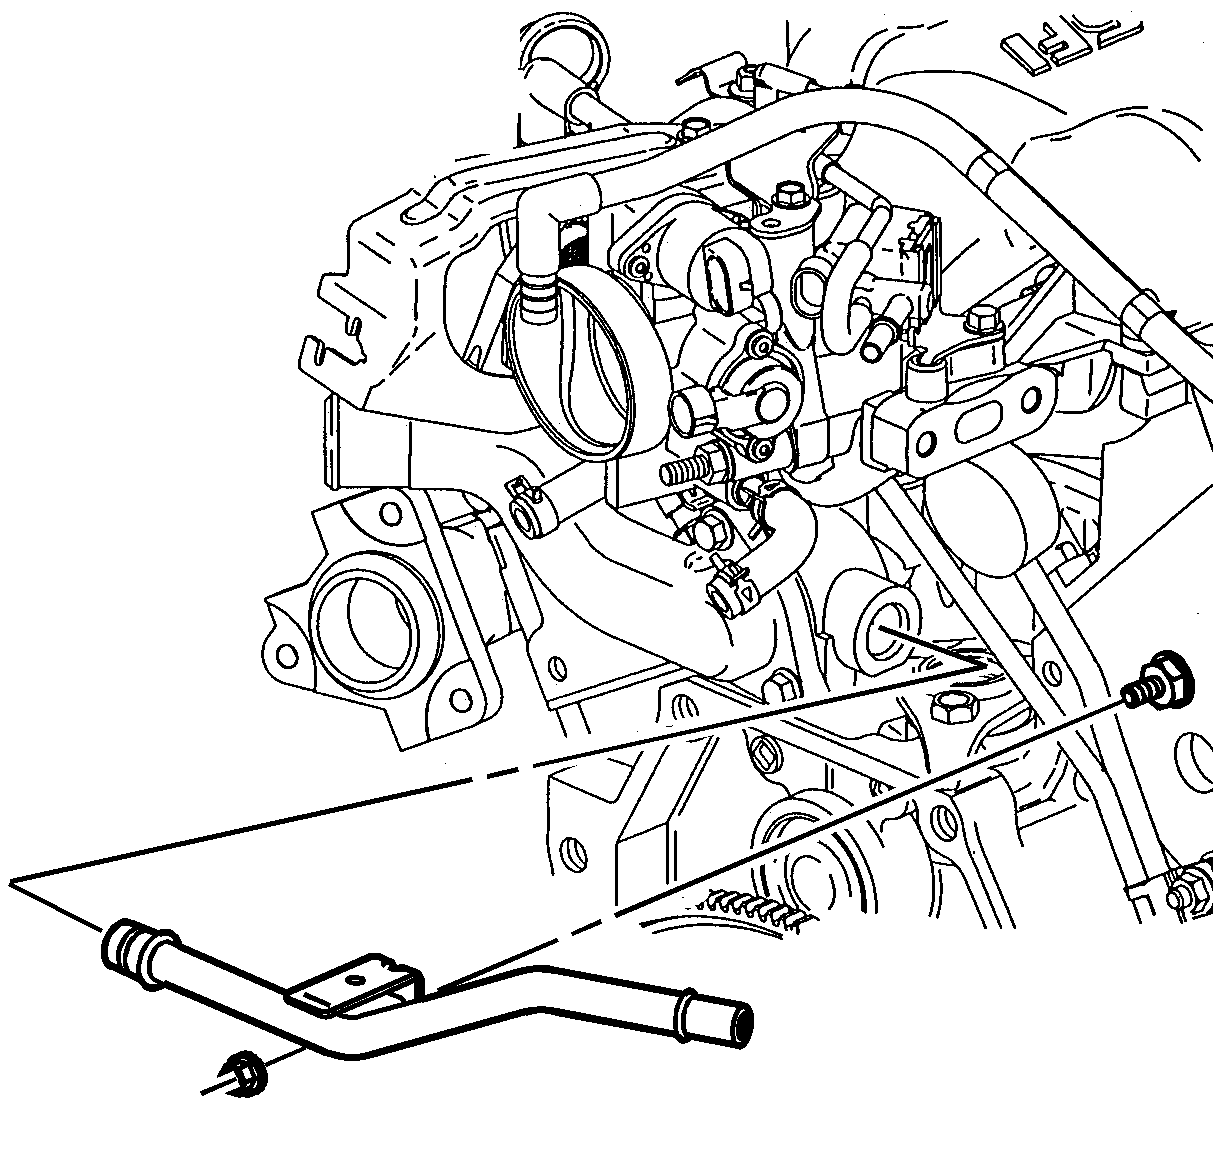
- Disconnect the thermostat bypass hose from the lower intake manifold pipe.
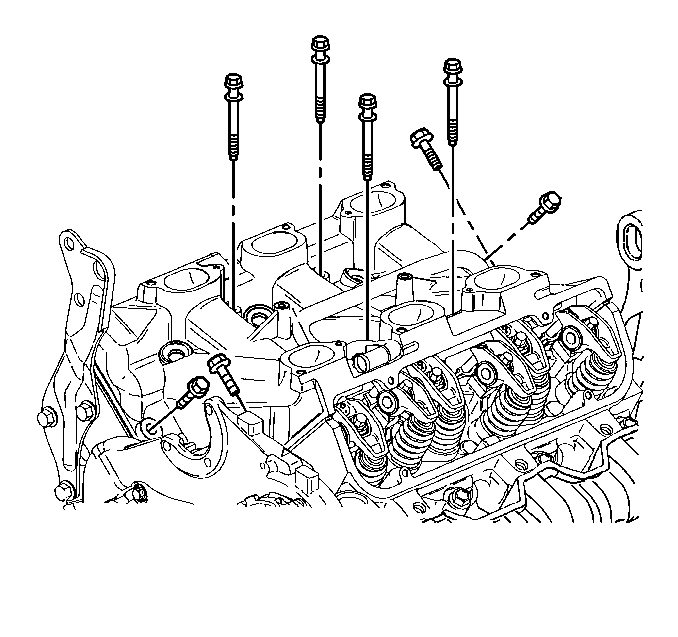
- Remove the lower intake manifold bolts and DISCARD the bolts.
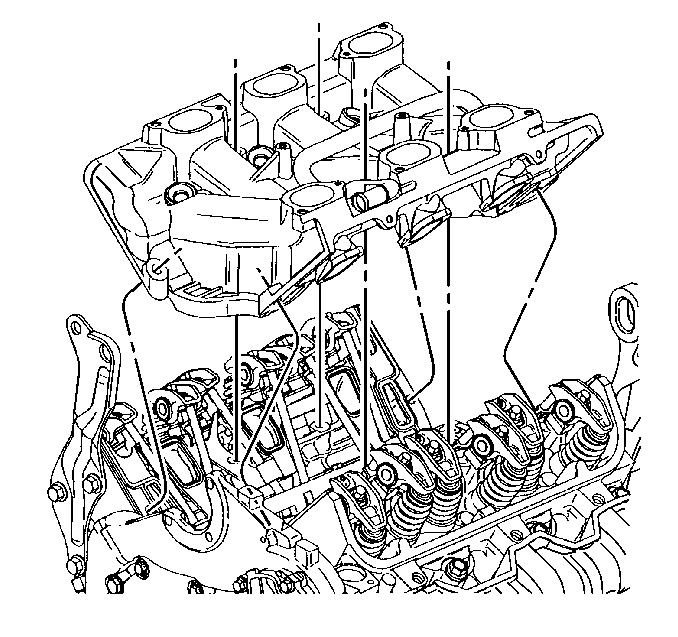
- Remove the lower intake manifold.
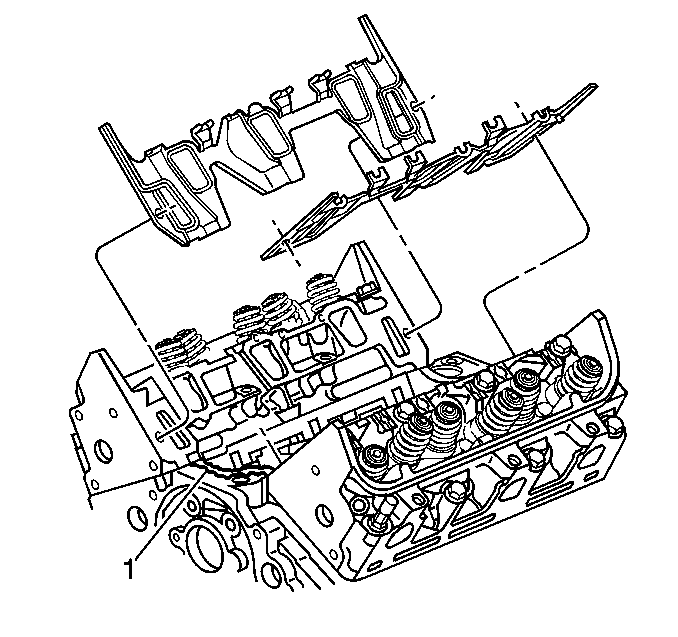
- Loosen the valve rocker arms and remove the push rods.
- Remove the lower intake manifold gaskets and seals.
- Clean the lower intake manifold gasket and seal surfaces on the cylinder heads and the engine block.
- Clean and inspect the lower intake manifold.
- If you are replacing the lower intake manifold, remove the ECT sensor. Refer to Engine Coolant Temperature Sensor Replacement in Engine Controls - 3.4L.
- If you are REPLACING the lower intake manifold, remove the thermostat. Refer to Engine Coolant Thermostat Replacement in Engine Cooling.
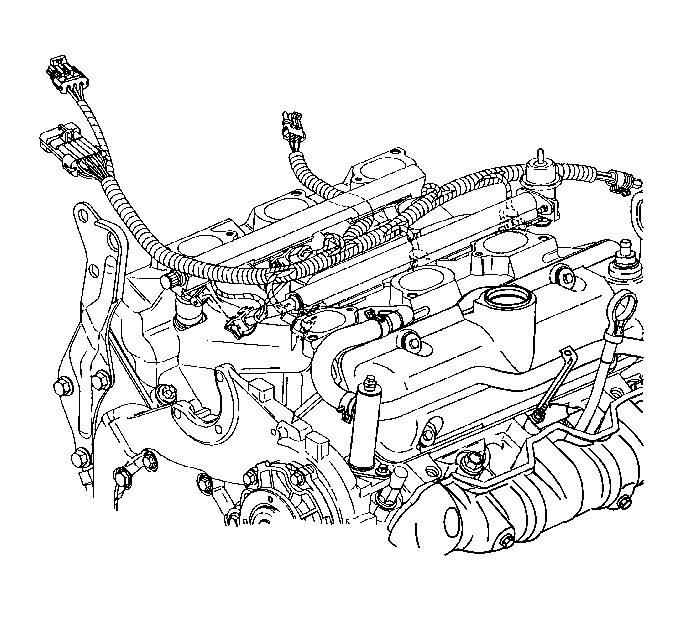
Important: Use masking tape or another appropriate method in order to identify each fuel injector wiring harness connector cylinder number.
Important: Do NOT disconnect the power steering pipes or hoses from the power steering pump.
Installation Procedure
- Install the lower intake manifold gaskets.
- Install the push rods and tighten the valve rocker arms. Refer to Valve Rocker Arm and Push Rod Replacement .
- Install the valve rocker arm bolts.
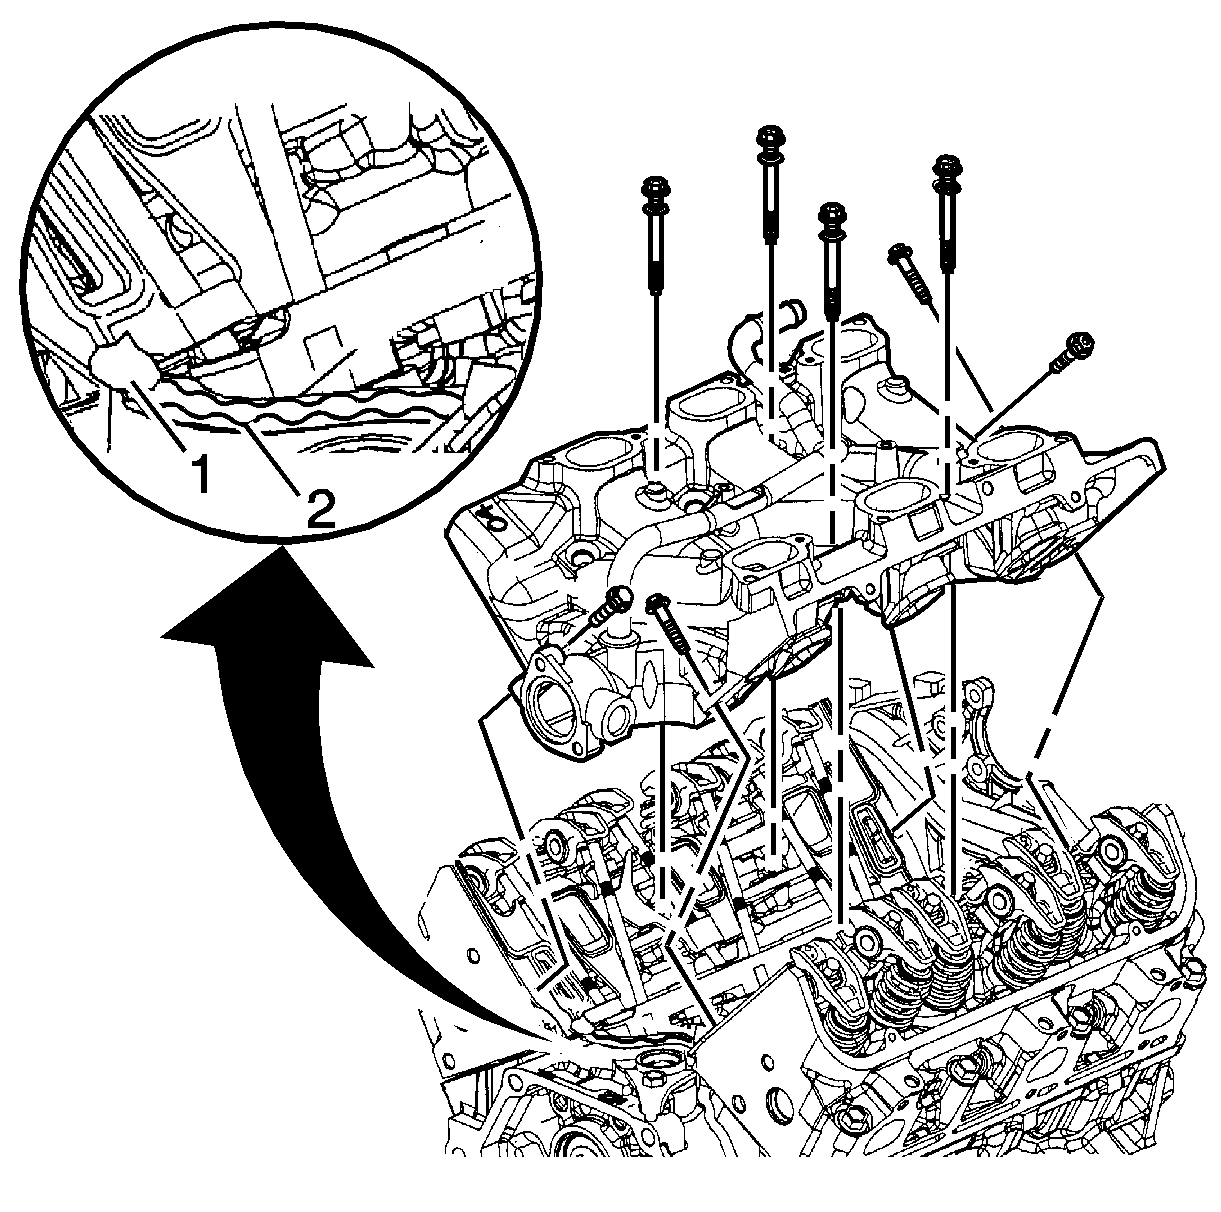
- With gaskets in place apply a small drop 8-10 mm (0.31-0.39 in) of RTV sealer GM P/N 12346141 (Canadian P/N 89022195), or equivalent to the 4 corners of the intake manifold to block joint (1).
- Connect the 2 small drops with a bead of RTV sealer that is between 8-10 mm (0.31-0.39 in) wide and 3.0-5.0 mm (0.12-0.20 in) thick (2).
- Install the lower intake manifold.
- Install NEW lower intake manifold bolts.
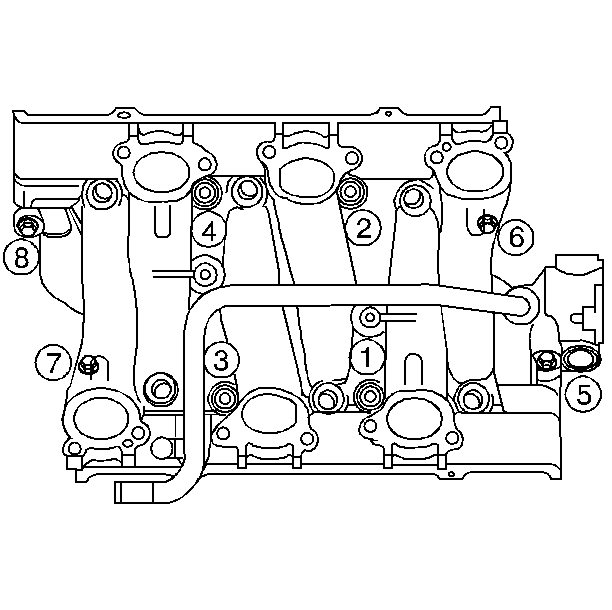
- Tighten the lower intake manifold bolts (1, 2, 3, 4) in sequence to 7 N·m (62 lb in) on the first pass.
- Tighten the lower intake manifold bolts (5, 6, 7, 8) in sequence to 13 N·m (115 lb in) on the first pass.
- Tighten the lower intake manifold bolts (1, 2, 3, 4) in sequence to 13 N·m (115 lb in) on the final pass.
- Tighten the lower intake manifold bolts (5, 6, 7, 8) in sequence to 25 N·m (18 lb ft) on the final pass.
- Connect the thermostat bypass hose to the lower intake manifold pipe.
- Connect the inlet radiator hose from the engine. Refer to Radiator Inlet Hose Replacement in Engine Cooling.
- Connect the heater inlet pipe and heater hose to the lower intake manifold. Refer to Heater Inlet Pipe Replacement in Heating, Ventilation and Air Conditioning.
- Install the power steering pump to the front engine cover. Refer to Power Steering Pump Replacement in Power Steering System.
- Install the fuel injector rail. Refer to Fuel Injection Fuel Rail Assembly Replacement in Engine Controls - 3.4L.
- Connect the fuel feed and return pipe to the fuel injector rail. Refer to Fuel Hose/Pipes Replacement - Engine Compartment in Engine Controls - 3.4L.
- Install and connect the fuel injector, MAP and ECT wiring harness.
- Install the wiring harness to the ECT sensor.
- Install the engine right side valve rocker arm cover. Refer to Valve Rocker Arm Cover Replacement - Right Side .
- Install the engine left side valve rocker arm cover. Refer to Valve Rocker Arm Cover Replacement - Left Side .
- Install the upper intake manifold. Refer to Upper Intake Manifold Replacement .
Important: All gasket-mating surfaces need to be free of oil and foreign material. Use GM P/N 12346139 (Canadian P/N 10953463), or equivalent to clean surfaces.
Notice: Refer to Fastener Notice in the Preface section.
Tighten
Use the
J 36660-A
to tighten the bolts to 19 N·m (14 lb ft) plus 30 degrees.
Notice: Failure to tighten vertical bolts before the diagonal bolts may cause an oil leak.
Important: All lower intake manifold bolts need to be cleaned and free of any foreign material, only new bolts are to be used.
Important: Manufacturer recommends the center bolts be fully torqued before the diagonal bolts to assure proper seal ability.
Important: Lower intake manifold bolts in locations 6 and 7 should be torqued to specification using a crows foot type tool.
Tighten
Important: The fuel injector wiring harness connectors must be connected to their respective fuel injectors. Failure to connect the fuel injector connectors to their respective fuel injectors may result in excessive exhaust emissions and poor engine performance.
