For 1990-2009 cars only
Tools Required
J 44246 Solenoid Testing Kit
Leak Test Procedure
- Remove the solenoid from the control valve body. Refer to 1-2 Shift Solenoid Valve Replacement or 2-3 Shift Solenoid Valve Replacement .
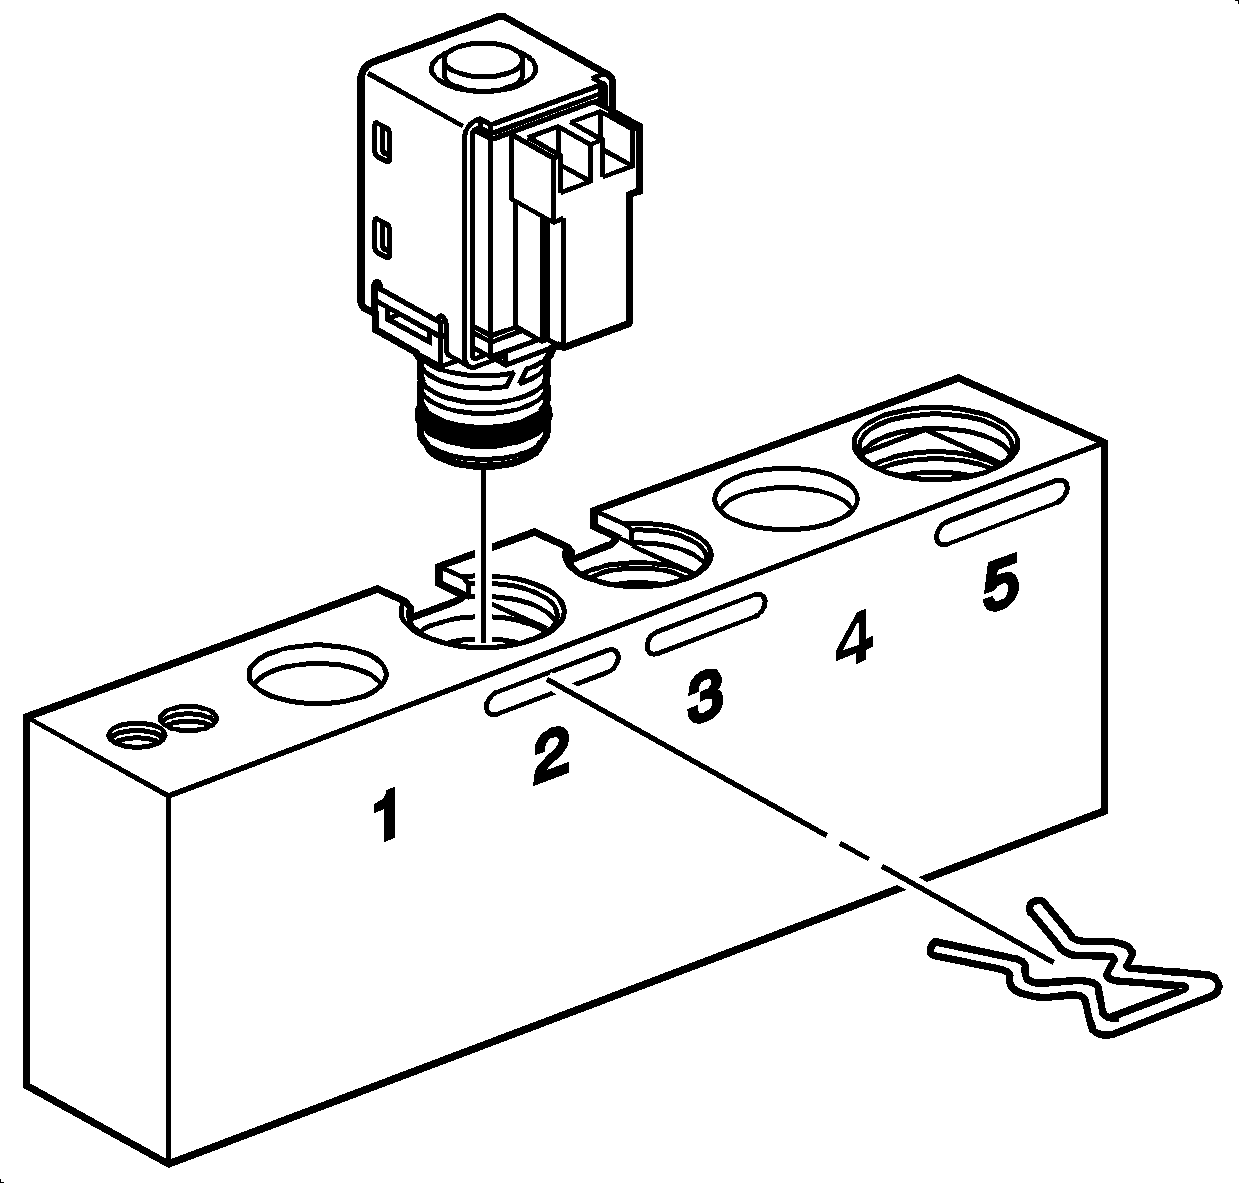
- Install the 1-2, 3-4 or the 2-3 shift solenoid valve into bore number 2 of the J 44246 and install the factory retainer clip to retain the solenoid.
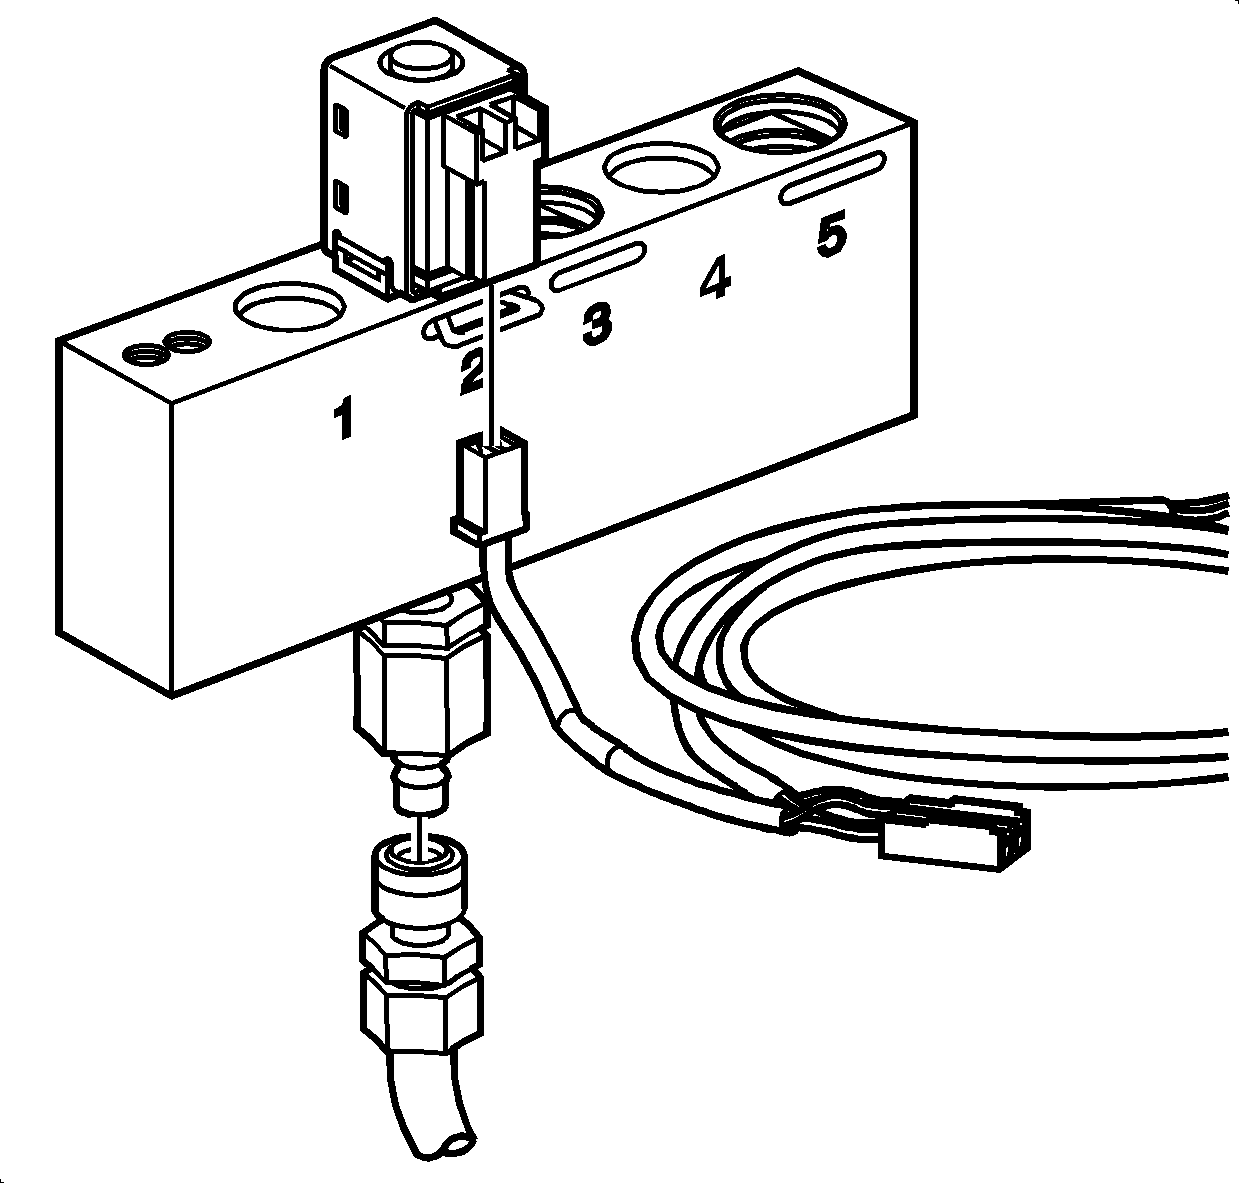
- Connect the solenoid testing harness supplied with the J 44246 to the solenoid.
- Apply compressed air to the J 44246 .
- Air should flow through the solenoid. If air does not flow through the solenoid, replace the solenoid.
- Connect the solenoid testing harness to the (12 volt) positive and negative (-) battery terminals.
- Observe if the solenoid is operating electrically. An audible clicking noise can be heard when connecting or disconnecting power.
- Observe the air flow through the solenoid. The flow will completely or nearly completely stop. Replace the solenoid if there continues to be an obvious air leak when the solenoid is energized.
- Install the solenoid into the control valve body. Refer to 1-2 Shift Solenoid Valve Replacement or 2-3 Shift Solenoid Valve Replacement .
Important:
• This procedure tests On/Off type solenoid valves. • Visually inspect the physical condition of the solenoid before testing.
Inspect the O-rings before and after the test to be sure that they
are not cut or damaged.
Important: Do not use air pressure in excess of 827 kPa (120 psi). Excessive pressure will not allow the solenoid ball check valve to seat properly. Recommended air pressure is 345 kPa (50 psi).
Important:
• All solenoids need to be energized to seal. • A small amount of air leakage is normal, 21 kPa (3 psi).
Important: Inspect the O-rings after the test to be sure that they are not cut or damaged.
