Tire and Wheel Removal and Installation PG1 Steel Wheel
Removal Procedure
- Raise and support the vehicle. Refer to
Lifting and Jacking the Vehicle
in General Information.
- Remove the wheel center hub cap. Refer to
Wheel Trim Cover Replacement
.
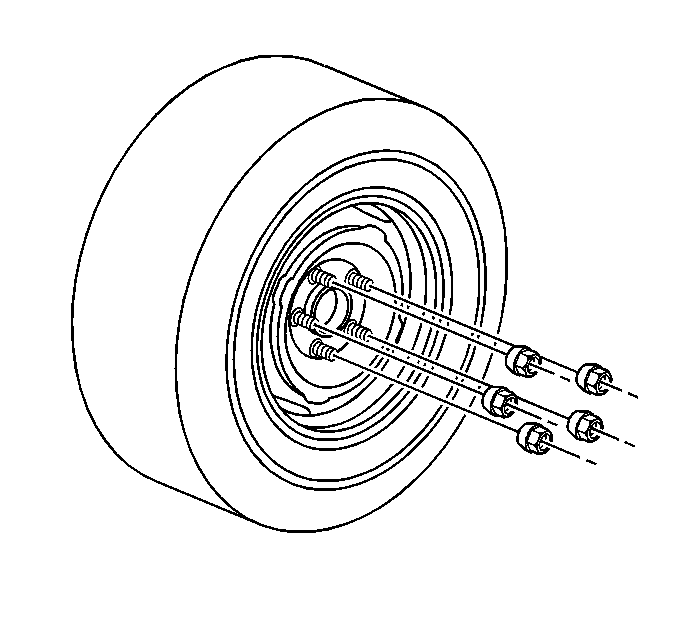
- Remove the wheel nuts.
- Mark the relationship of the wheel to the hub.
Caution: If penetrating oil gets on the vertical surfaces between the wheel and
the rotor or drum, it could cause the wheel to work loose as the vehicle is
driven, resulting in a loss of control and an injury accident.
Notice: NEVER use heat to loosen a tight wheel. It can shorten the life of the
wheel, wheel nuts and wheel bearings. Excessive force, such as hammering the
wheel or tire, can also cause damage and is not recommended. Slight tapping
of the tire side wall, such as with one's hand or a rubber mallet, is normally
acceptable.
Important: Do not apply penetrating oil to the wheel or wheel studs.
- Remove the tire and wheel. If the tire and wheel cannot be removed,
Go to Step 5.1.
| 5.1. | Install the wheel nuts. |
| 5.2. | Then loosen each wheel nut two full revolutions. |
| 5.4. | Rock the vehicle from side to side firmly. |
| 5.6. | Apply the regular brake. |
| 5.7. | Place the transmission into Drive. |
| 5.8. | Allow the vehicle to roll forward slightly. |
| 5.9. | Apply the regular brake firmly and quickly. |
| 5.10. | Place the transmission into Reverse. |
| 5.11. | Allow the vehicle to roll backward slightly. |
| 5.12. | Apply the regular brake firmly and quickly. |
| 5.13. | Repeat Steps 5.4 through 5.12 until the wheel can be removed from
the vehicle. |
- Clean the following components in order to remove any corrosion
or foreign material accumulation:
| • | The wheel mounting surface |
| • | The brake rotor/brake drum mounting surface |
Installation Procedure
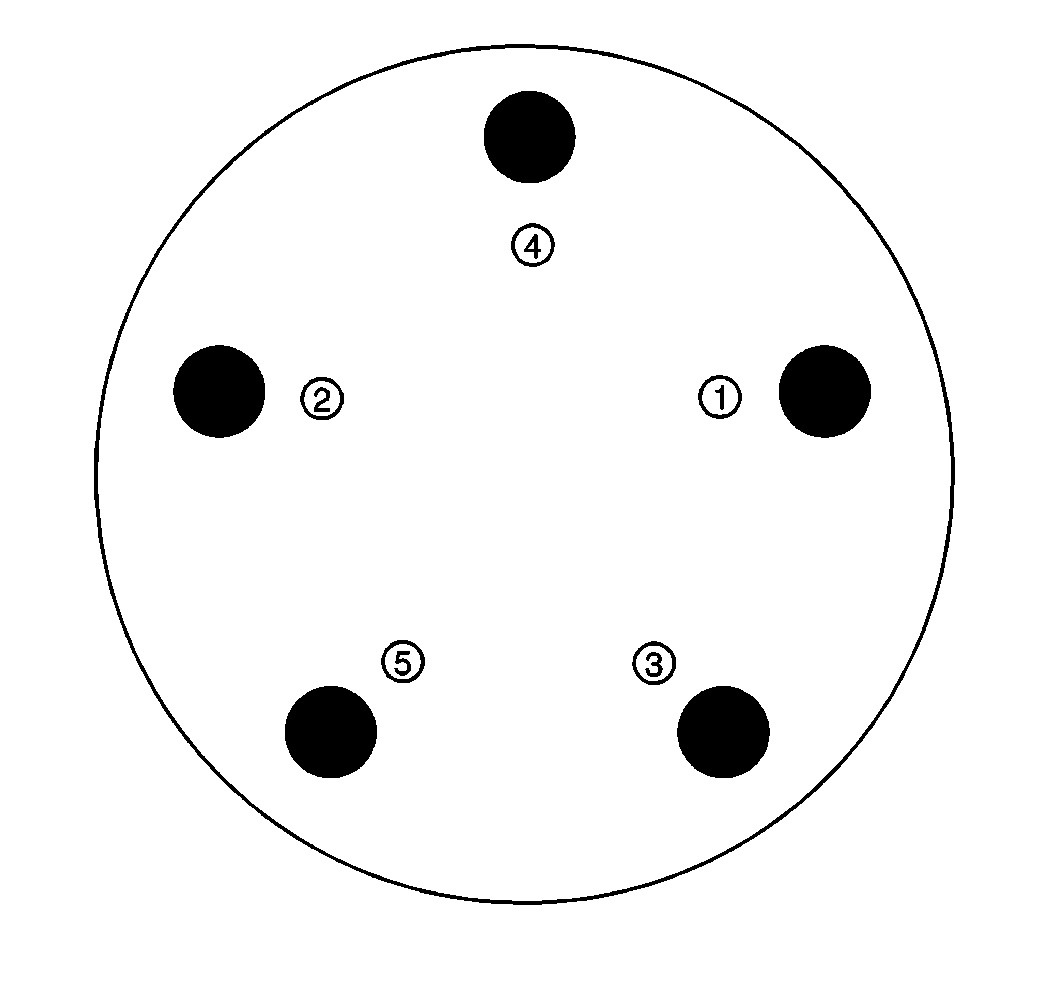
Caution: Never use oil or grease on studs or nuts. Tighten the wheel nuts with
your fingers until they are snug. Then, tighten the nuts (in the sequence
shown) to the fastener tightening specification shown in Specifications in
this Section. Improperly tightened wheel nuts could eventually allow the wheel
to come off while the vehicle is moving, possibly causing loss of control,
personal injury, and property damage.
Caution: If you are replacing the wheel(s), the wheel stud(s), the wheel nut(s)
or the wheel bolt(s), install only new GM original equipment parts. Installation
of used parts or non-GM original equipment parts may cause the wheel to loosen,
loss of tire air pressure, poor vehicle handling and loss of vehicle control
resulting in personal injury.
Notice: The use of non-GM original equipment wheels may cause:
| • | Damage to the wheel bearing, the wheel fasteners and the wheel |
| • | Tire damage caused by the modified clearance to the adjacent vehicle
components |
| • | Adverse vehicle steering stability caused by the modified
scrub radius |
| • | Damage to the vehicle caused by the modified ground clearance |
| • | Speedometer and odometer inaccuracy |
Tools Required
J 39544-KIT Complete
Torque Socket Set

- Install the tire and wheel
as marked in the Removal Procedure.
Notice: Use the correct fastener in the correct location. Replacement fasteners
must be the correct part number for that application. Fasteners requiring
replacement or fasteners requiring the use of thread locking compound or sealant
are identified in the service procedure. Do not use paints, lubricants, or
corrosion inhibitors on fasteners or fastener joint surfaces unless specified.
These coatings affect fastener torque and joint clamping force and may damage
the fastener. Use the correct tightening sequence and specifications when
installing fasteners in order to avoid damage to parts and systems.
Notice: Improperly tightened wheel bolts or nuts can lead to brake pulsation and rotor damage. In order to
avoid expensive brake repairs, evenly tighten the wheel bolts or nuts to the proper torque specification.
- Install the wheel nuts.
Tighten
Use the
J 39544-15A
or
a torque wrench in order to tighten the nuts to 140 N·m (100 lb ft)
in the proper sequence.
- Install the wheel center hub cap. Refer to
Wheel Trim Cover Replacement
.
- Lower the vehicle.
Tire and Wheel Removal and Installation Chevrolet and Oldsmobile w/PH3
Removal Procedure
- Raise and support the vehicle. Refer to
Lifting and Jacking the Vehicle
in General Information.
- Remove the wheel center hub cap. Refer to
Aluminum Wheel Hub Cap Replacement
.
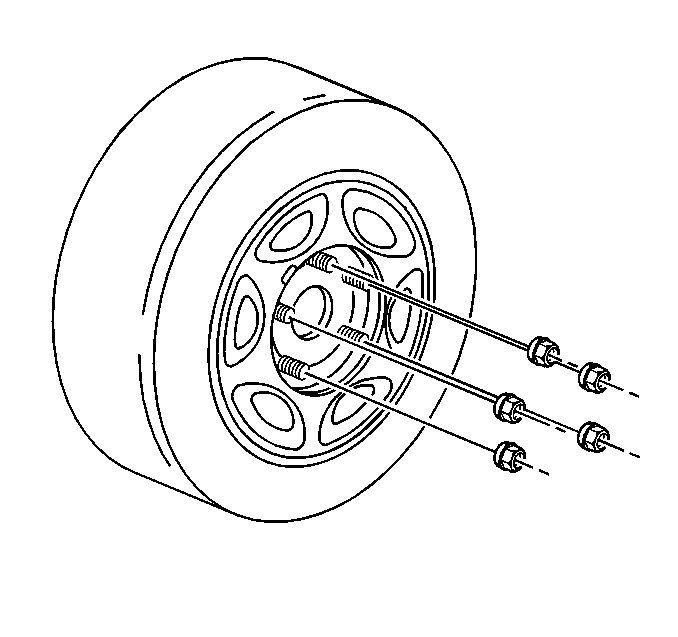
- Remove the wheel nuts.
- Mark the relationship of the wheel to the hub.
Caution: If penetrating oil gets on the vertical surfaces between the wheel and
the rotor or drum, it could cause the wheel to work loose as the vehicle is
driven, resulting in a loss of control and an injury accident.
Notice: NEVER use heat to loosen a tight wheel. It can shorten the life of the
wheel, wheel nuts and wheel bearings. Excessive force, such as hammering the
wheel or tire, can also cause damage and is not recommended. Slight tapping
of the tire side wall, such as with one's hand or a rubber mallet, is normally
acceptable.
Important: Do not apply penetrating oil to the wheel or wheel studs.
- Remove the tire and wheel. If the tire and wheel cannot be removed,
Go to Step 5.1.
| 5.1. | Install the wheel nuts. |
| 5.2. | Then loosen each wheel nut two full revolutions. |
| 5.4. | Rock the vehicle from side to side firmly. |
| 5.6. | Apply the regular brake. |
| 5.7. | Place the transmission into Drive. |
| 5.8. | Allow the vehicle to roll forward slightly. |
| 5.9. | Apply the regular brake firmly and quickly. |
| 5.10. | Place the transmission into Reverse. |
| 5.11. | Allow the vehicle to roll backward slightly. |
| 5.12. | Apply the regular brake firmly and quickly. |
| 5.13. | Repeat Steps 5.4 through 5.12 until the wheel can be removed from
the vehicle. |
- Clean the following components in order to remove any corrosion
or foreign material accumulation:
| • | The wheel mounting surface |
| • | The brake rotor/brake drum mounting surface |
Installation Procedure
Caution: Never use oil or grease on studs or nuts. Tighten the wheel nuts with
your fingers until they are snug. Then, tighten the nuts (in the sequence
shown) to the fastener tightening specification shown in Specifications in
this Section. Improperly tightened wheel nuts could eventually allow the wheel
to come off while the vehicle is moving, possibly causing loss of control,
personal injury, and property damage.
Caution: If you are replacing the wheel(s), the wheel stud(s), the wheel nut(s)
or the wheel bolt(s), install only new GM original equipment parts. Installation
of used parts or non-GM original equipment parts may cause the wheel to loosen,
loss of tire air pressure, poor vehicle handling and loss of vehicle control
resulting in personal injury.
Notice: The use of non-GM original equipment wheels may cause:
| • | Damage to the wheel bearing, the wheel fasteners and the wheel |
| • | Tire damage caused by the modified clearance to the adjacent vehicle
components |
| • | Adverse vehicle steering stability caused by the modified
scrub radius |
| • | Damage to the vehicle caused by the modified ground clearance |
| • | Speedometer and odometer inaccuracy |
Tools Required
J 39544-KIT Complete
Torque Socket Set

- Install the tire and wheel
as marked in Step 4 of the Removal Procedure.

Notice: Use the correct fastener in the correct location. Replacement fasteners
must be the correct part number for that application. Fasteners requiring
replacement or fasteners requiring the use of thread locking compound or sealant
are identified in the service procedure. Do not use paints, lubricants, or
corrosion inhibitors on fasteners or fastener joint surfaces unless specified.
These coatings affect fastener torque and joint clamping force and may damage
the fastener. Use the correct tightening sequence and specifications when
installing fasteners in order to avoid damage to parts and systems.
Notice: Improperly tightened wheel bolts or nuts can lead to brake pulsation and rotor damage. In order to
avoid expensive brake repairs, evenly tighten the wheel bolts or nuts to the proper torque specification.
- Install the wheel nuts.
Tighten
Use the
J 39544-15A
or
a torque wrench in order to tighten the nuts to 140 N·m (100 lb ft)
in the proper sequence.
- Install the wheel center hub cap. Refer to
Aluminum Wheel Hub Cap Replacement
.
- Lower the vehicle.
Tire and Wheel Removal and Installation Pontiac w/PH3 Aluminum Wheel
Removal Procedure
- Raise and support the vehicle. Refer to
Lifting and Jacking the Vehicle
in General Information.
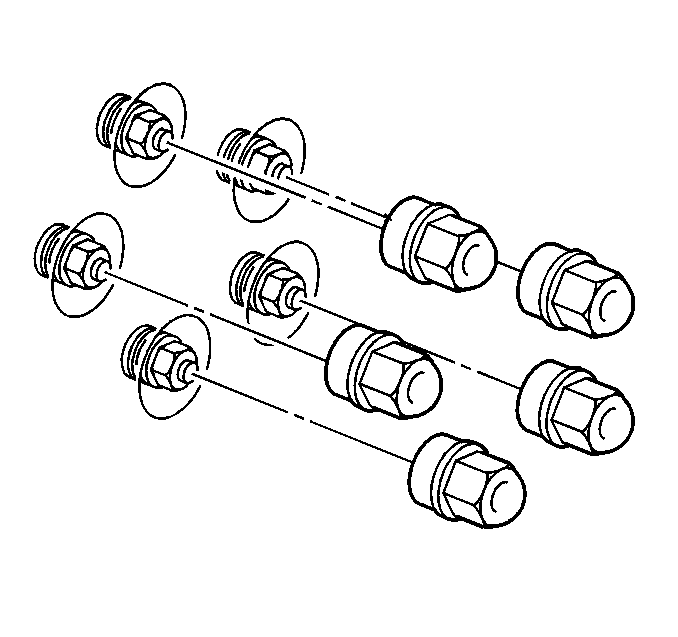
- Remove the wheel nut caps.
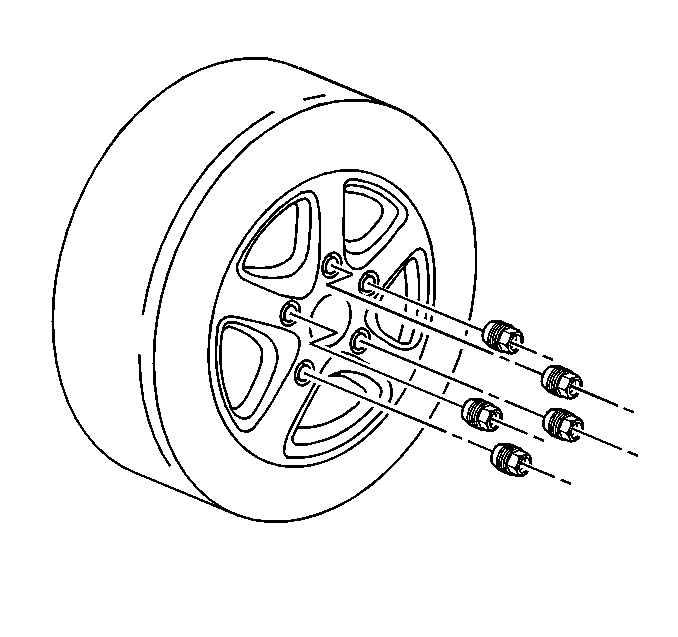
- Remove the wheel nuts.
- Mark the relationship of the wheel to the wheel studs.
Caution: If penetrating oil gets on the vertical surfaces between the wheel and
the rotor or drum, it could cause the wheel to work loose as the vehicle is
driven, resulting in a loss of control and an injury accident.
Notice: NEVER use heat to loosen a tight wheel. It can shorten the life of the
wheel, wheel nuts and wheel bearings. Excessive force, such as hammering the
wheel or tire, can also cause damage and is not recommended. Slight tapping
of the tire side wall, such as with one's hand or a rubber mallet, is normally
acceptable.
Important: Do not apply penetrating oil to the wheel or wheel studs.
- Remove the tire and wheel. If the tire and wheel cannot be removed,
Go to Step 5.1.
| 5.1. | Install the wheel nuts. |
| 5.2. | Then loosen each wheel nut two full revolutions. |
| 5.4. | Rock the vehicle from side to side firmly. |
| 5.6. | Apply the regular brake. |
| 5.7. | Place the transmission into Drive. |
| 5.8. | Allow the vehicle to roll forward slightly. |
| 5.9. | Apply the regular brake firmly and quickly. |
| 5.10. | Place the transmission into Reverse. |
| 5.11. | Allow the vehicle to roll backward slightly. |
| 5.12. | Apply the regular brake firmly and quickly. |
| 5.13. | Repeat Steps 5.4 through 5.12 until the wheel can be removed from
the vehicle. |
- Clean the following components in order to remove any corrosion
or foreign material accumulation:
| • | The wheel mounting surface |
| • | The brake rotor/brake drum mounting surface |
Installation Procedure
Caution: Never use oil or grease on studs or nuts. Tighten the wheel nuts with
your fingers until they are snug. Then, tighten the nuts (in the sequence
shown) to the fastener tightening specification shown in Specifications in
this Section. Improperly tightened wheel nuts could eventually allow the wheel
to come off while the vehicle is moving, possibly causing loss of control,
personal injury, and property damage.
Caution: If you are replacing the wheel(s), the wheel stud(s), the wheel nut(s)
or the wheel bolt(s), install only new GM original equipment parts. Installation
of used parts or non-GM original equipment parts may cause the wheel to loosen,
loss of tire air pressure, poor vehicle handling and loss of vehicle control
resulting in personal injury.
Notice: The use of non-GM original equipment wheels may cause:
| • | Damage to the wheel bearing, the wheel fasteners and the wheel |
| • | Tire damage caused by the modified clearance to the adjacent vehicle
components |
| • | Adverse vehicle steering stability caused by the modified
scrub radius |
| • | Damage to the vehicle caused by the modified ground clearance |
| • | Speedometer and odometer inaccuracy |
Tools Required
J 39544-KIT Complete
Torque Socket Set

- Install the tire and wheel
as marked in Step 4 of the Removal Procedure.

Notice: Use the correct fastener in the correct location. Replacement fasteners
must be the correct part number for that application. Fasteners requiring
replacement or fasteners requiring the use of thread locking compound or sealant
are identified in the service procedure. Do not use paints, lubricants, or
corrosion inhibitors on fasteners or fastener joint surfaces unless specified.
These coatings affect fastener torque and joint clamping force and may damage
the fastener. Use the correct tightening sequence and specifications when
installing fasteners in order to avoid damage to parts and systems.
Notice: Improperly tightened wheel bolts or nuts can lead to brake pulsation and rotor damage. In order to
avoid expensive brake repairs, evenly tighten the wheel bolts or nuts to the proper torque specification.
- Install the wheel nuts.
Tighten
Use the
J 39544-15A
or
a torque wrench in order to tighten the nuts to 140 N·m (100 lb ft)
in the proper sequence.

- Install the wheel nut
caps.
Tighten
Tighten the caps to 3 N·m (27 lb in).
- Lower the vehicle.


