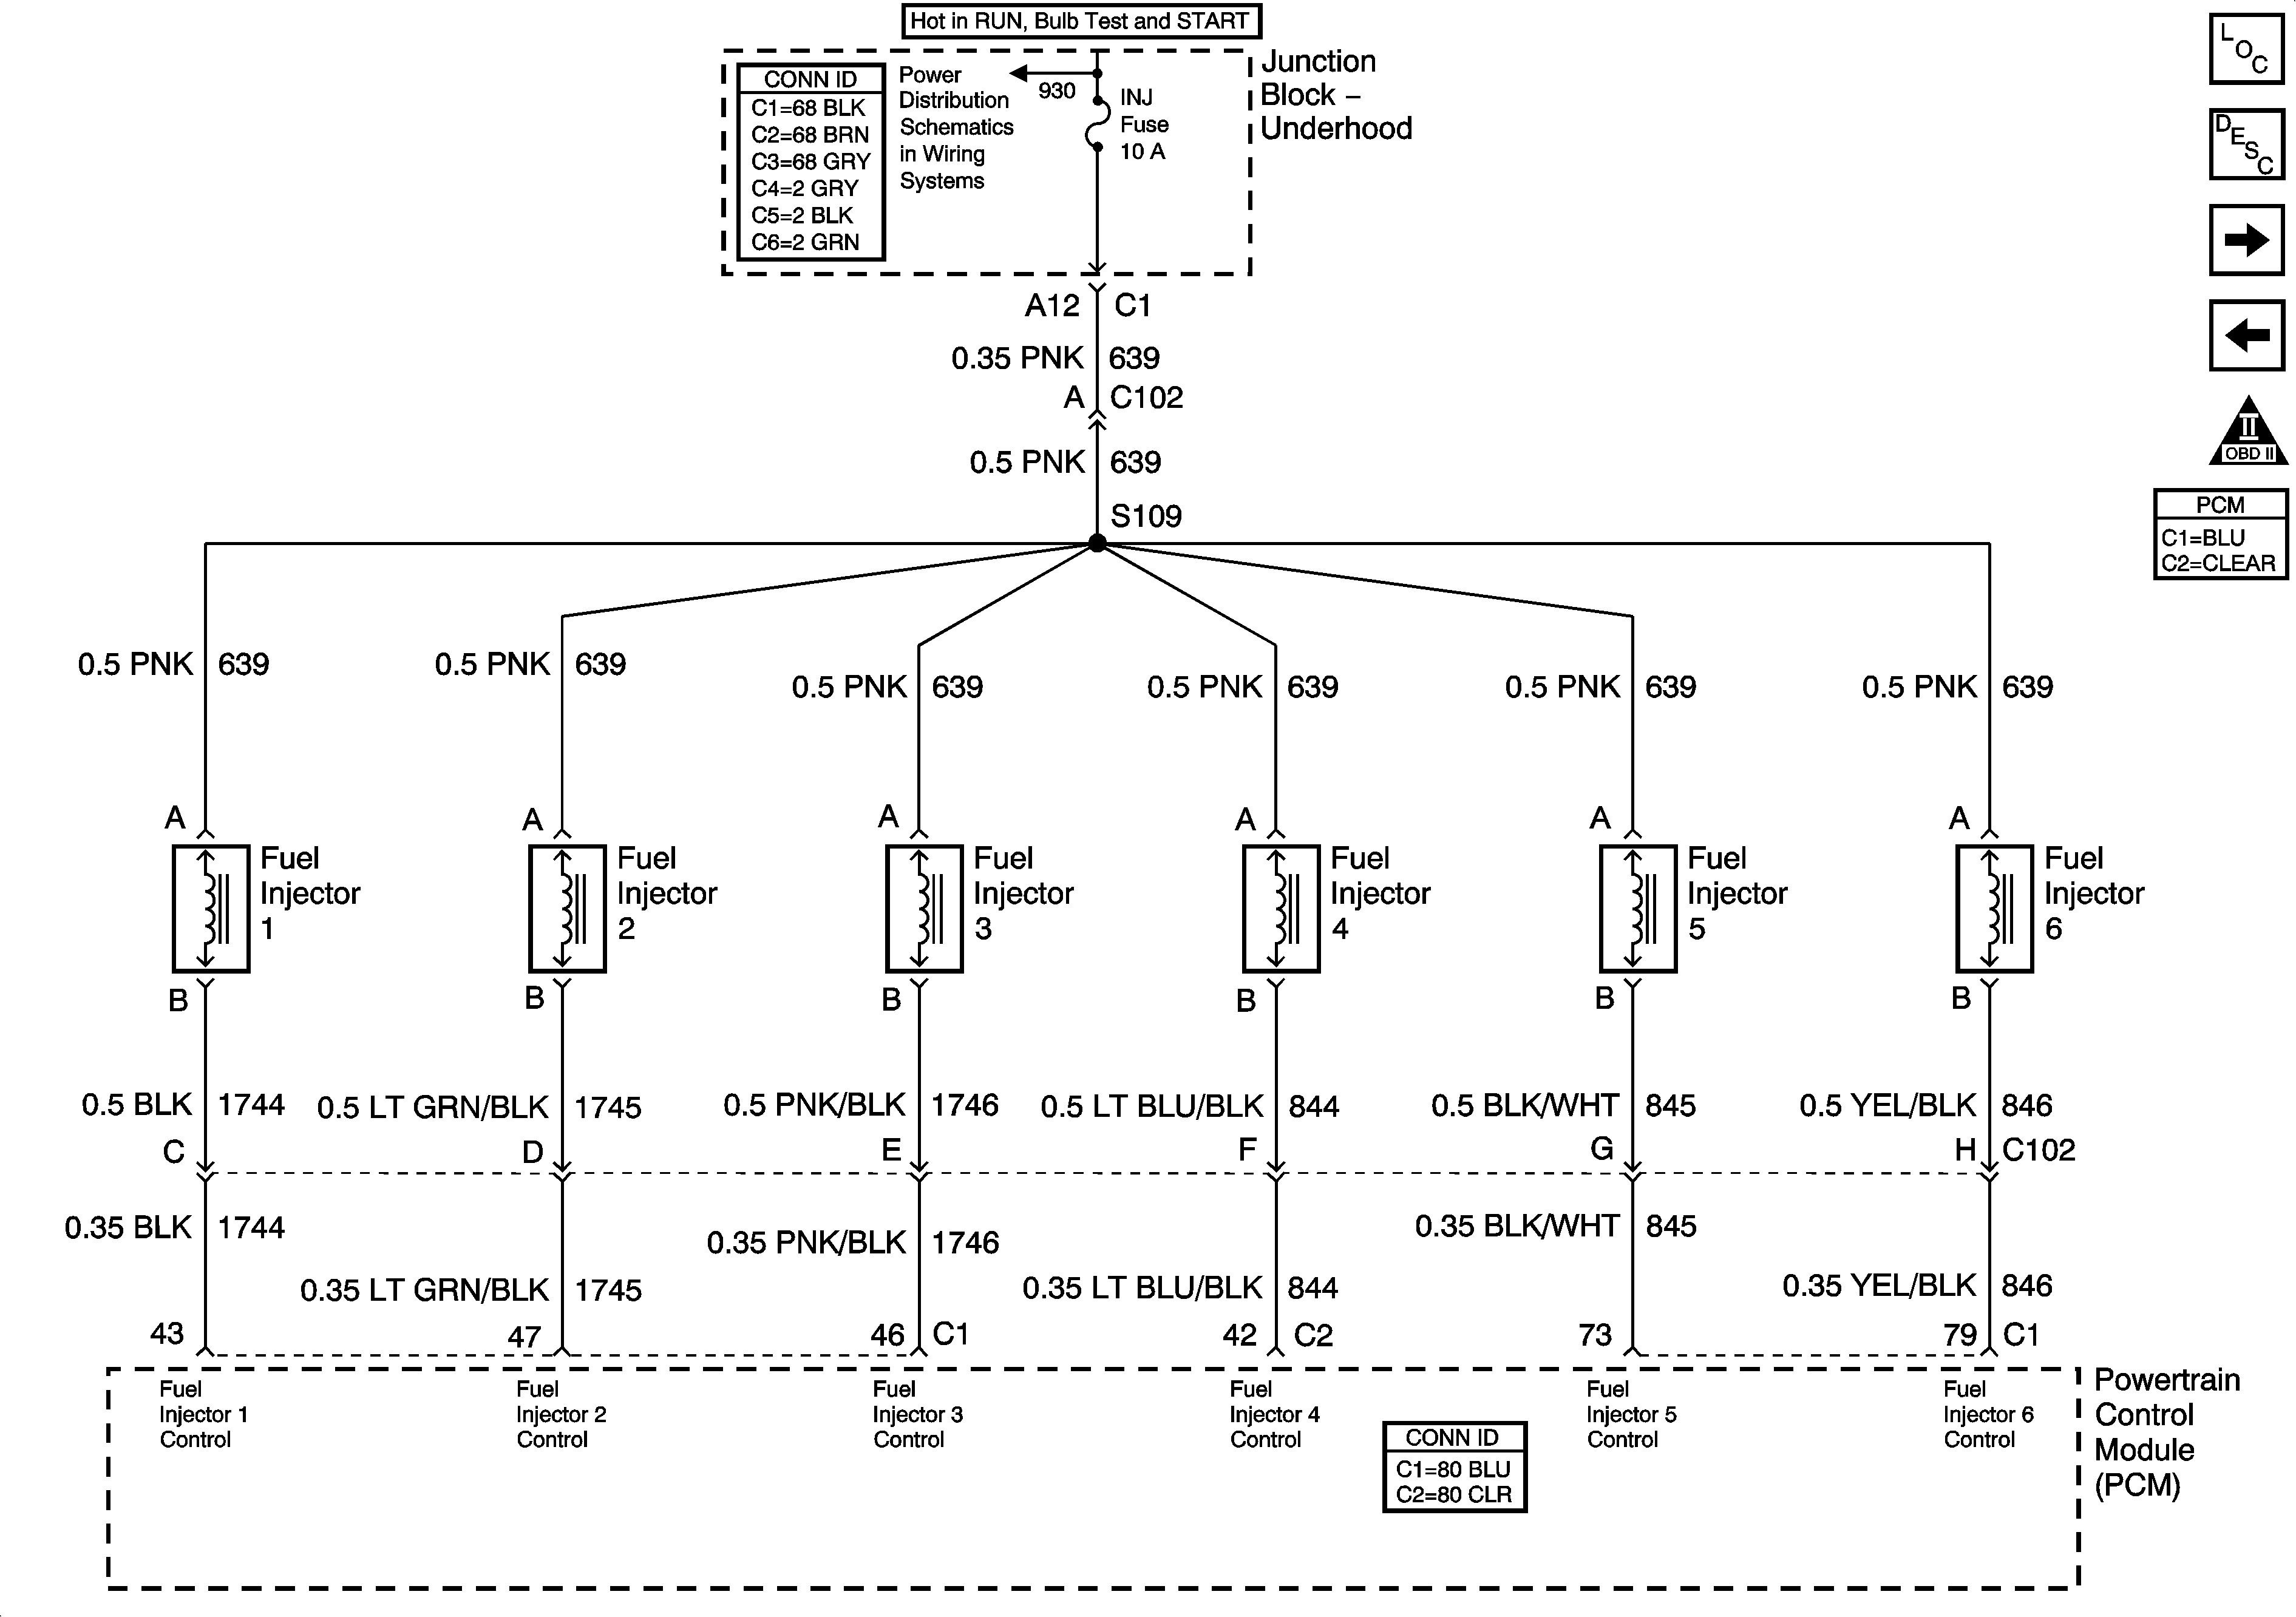
Circuit Description
The powertrain control module (PCM) enables the appropriate fuel injector on the intake stroke for each cylinder. A voltage is supplied directly to the fuel injectors. The PCM controls each fuel injector by grounding the control circuit via a solid state device called a driver.
Diagnostic Aids
| • | Monitoring the fuel injector circuit status with a scan tool, while moving the fuel injector harness, may help isolate an intermittent condition. |
| • | Performing the Fuel Injector Coil Test may help isolate an intermittent condition. Refer to Fuel Injector Solenoid Coil Test . |
| • | For an intermittent condition refer to Intermittent Conditions . |
Test Description
The numbers below refer to the step numbers on the diagnostic table.
-
This step tests for a short to ground on the fuel injector B+ supply circuit.
-
This step tests for a short to a PCM ground on the fuel injector B+ supply circuit.
-
This step tests for a short to ground between the multi-way connector and the fuel injectors.
-
This step tests for an open or high resistance between the multi-way connector and the fuel injectors.
Step | Action | Values | Yes | No |
|---|---|---|---|---|
Schematic Reference:
| ||||
1 | Did you perform the Diagnostic System Check-Engine Controls? | -- | Go to Step 2 | |
2 | Are any fuel injector DTCs set? | -- | Go to Step 3 | |
3 | Inspect the fuel injector fuse. Is the fuel injector fuse open? | -- | Go to Step 4 | Go to Step 6 |
Is the test lamp illuminated? | -- | Go to Step 9 | Go to Step 5 | |
Turn ON the ignition, with the engine OFF. Is the test lamp illuminated? | -- | Go to Step 13 | Go to Step 8 | |
Is the test lamp illuminated? | -- | Go to Step 7 | Go to Step 10 | |
Test for continuity between the ignition voltage terminal and a fuel injector terminal, at the multi-way harness connector, fuel injector side. Refer to Testing for Continuity in Wiring Systems. Does the DMM display a resistance above the specified value? | 75 ohms | Go to Step 11 | Go to Step 12 | |
8 | Test the ignition voltage circuit of the fuel injector, between the multi-way harness connector and the fuel injectors for a short to ground. Refer to Circuit Testing and Wiring Repairs in Wiring Systems. Did you find and correct the condition? | -- | Go to Step 14 | Go to Intermittent Conditions |
9 | Repair the short to ground in the ignition voltage circuit of the fuel injector. Refer to Circuit Testing in Wiring Systems. Did you complete the repair? | -- | Go to Step 14 | -- |
10 | Repair the open in the ignition voltage circuit of the fuel injector. Refer to Circuit Testing in Wiring Systems. Did you complete the repair? | -- | Go to Step 14 | -- |
11 | Repair the ignition voltage circuit of the fuel injectors for an open/high resistance, between the multi-way connector and the splice. Refer to Circuit Testing in Wiring Systems. Did you complete the repair? | -- | Go to Step 14 | -- |
12 | Repair the poor connection at the multi-way connector. Refer to Connector Repairs in Wiring Systems. Did you complete the repair? | -- | Go to Step 14 | -- |
13 | Repair the short to a PCM ground in the ignition voltage circuit of the fuel injector. Refer to Wiring Repairs in Wiring Systems. Did you complete the repair? | -- | Go to Step 14 | -- |
14 | Operate the system in order to verify the repair. Did you correct the condition? | -- | System OK | Go to Step 3 |