Tools Required
J 24086-C Piston Pin Remover and Installer Set
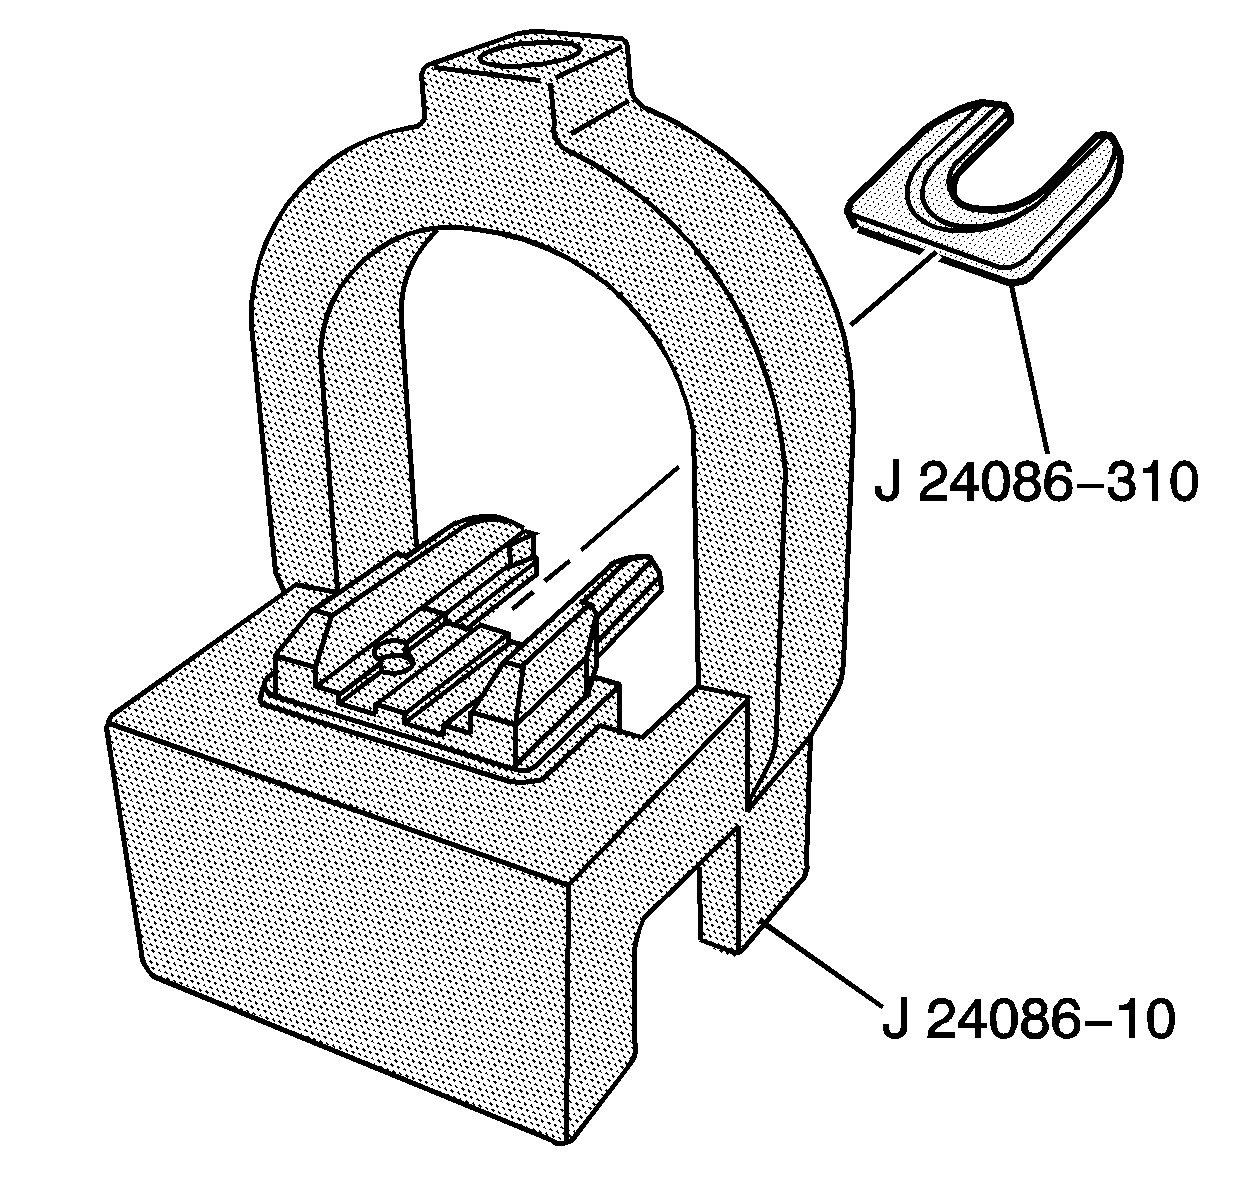
- Install the fork insert J 24086-310 into fixture J 24086-10 .
- Lubricate the piston pin with clean engine oil.
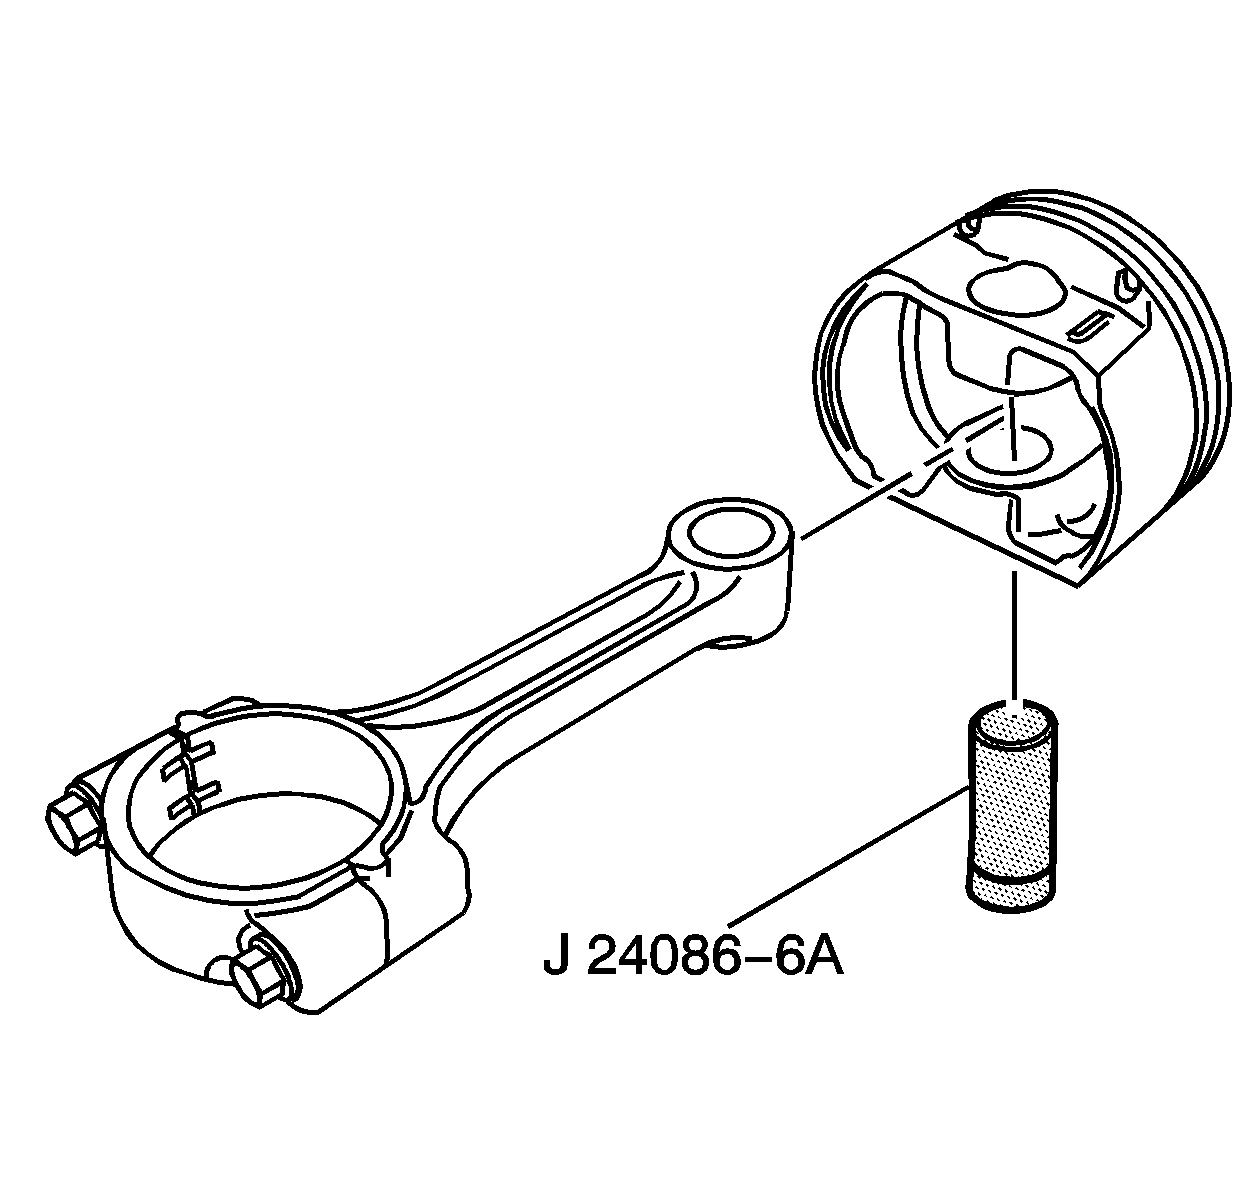
- Assemble the piston, connecting rod and adapter J 24086-6A and install onto fixture J 24086-10 .
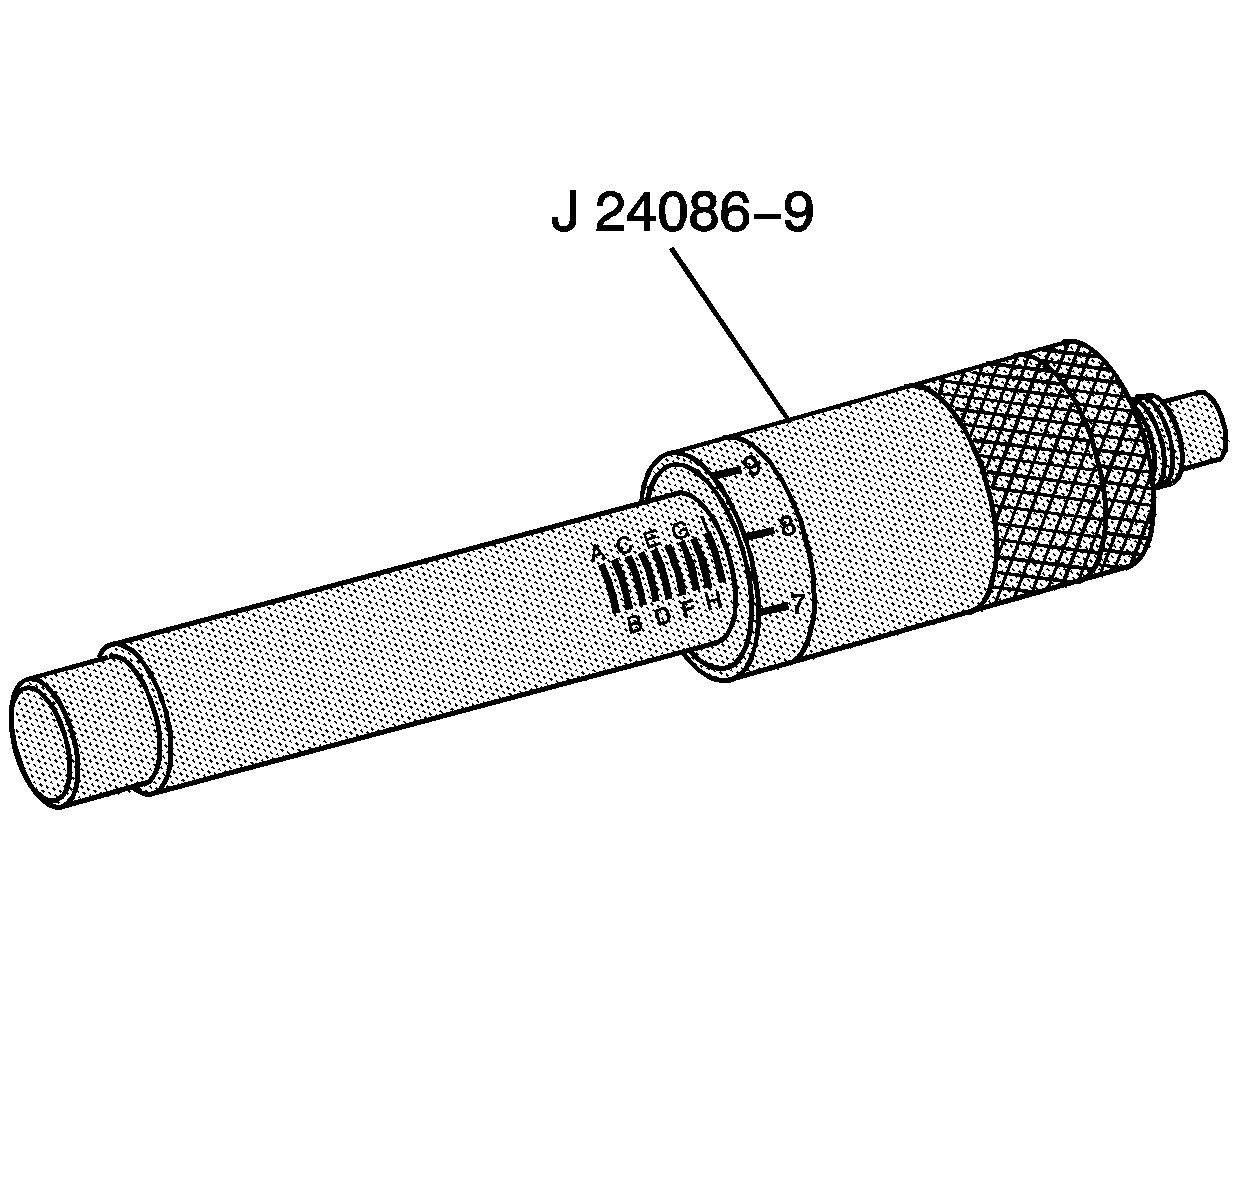
- Adjust installation pin J 24086-9 to M-0.
- Insert pin J 24086-9 through fixture J 24086-10 and to the piston pin.
- Press pin J 24086-9 until the install bottoms on fixture J 24086-10 .
- Using piston ring pliers, install the piston rings onto the piston.
Important: Assemble the piston for the specific cylinder with the connecting rod for the corresponding crankshaft journal.
Important: Ensure that the marks on the piston and connecting rod are aligned the same as when removed. If installing a new piston, ensure that the arrow on top faces towards the front of the engine. If no identification marks were made during disassembly, ensure that the flat area on the bottom of the piston pin skirt is aligned with the small dimple above the connecting rod crankshaft bearing bore.
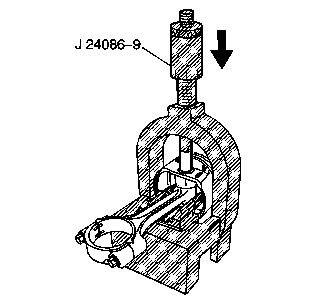
Notice: After the installer hub bottoms on the support assembly, do not exceed 35 000 kPa (5,000 psi) pressure, this could cause damage to the tool.
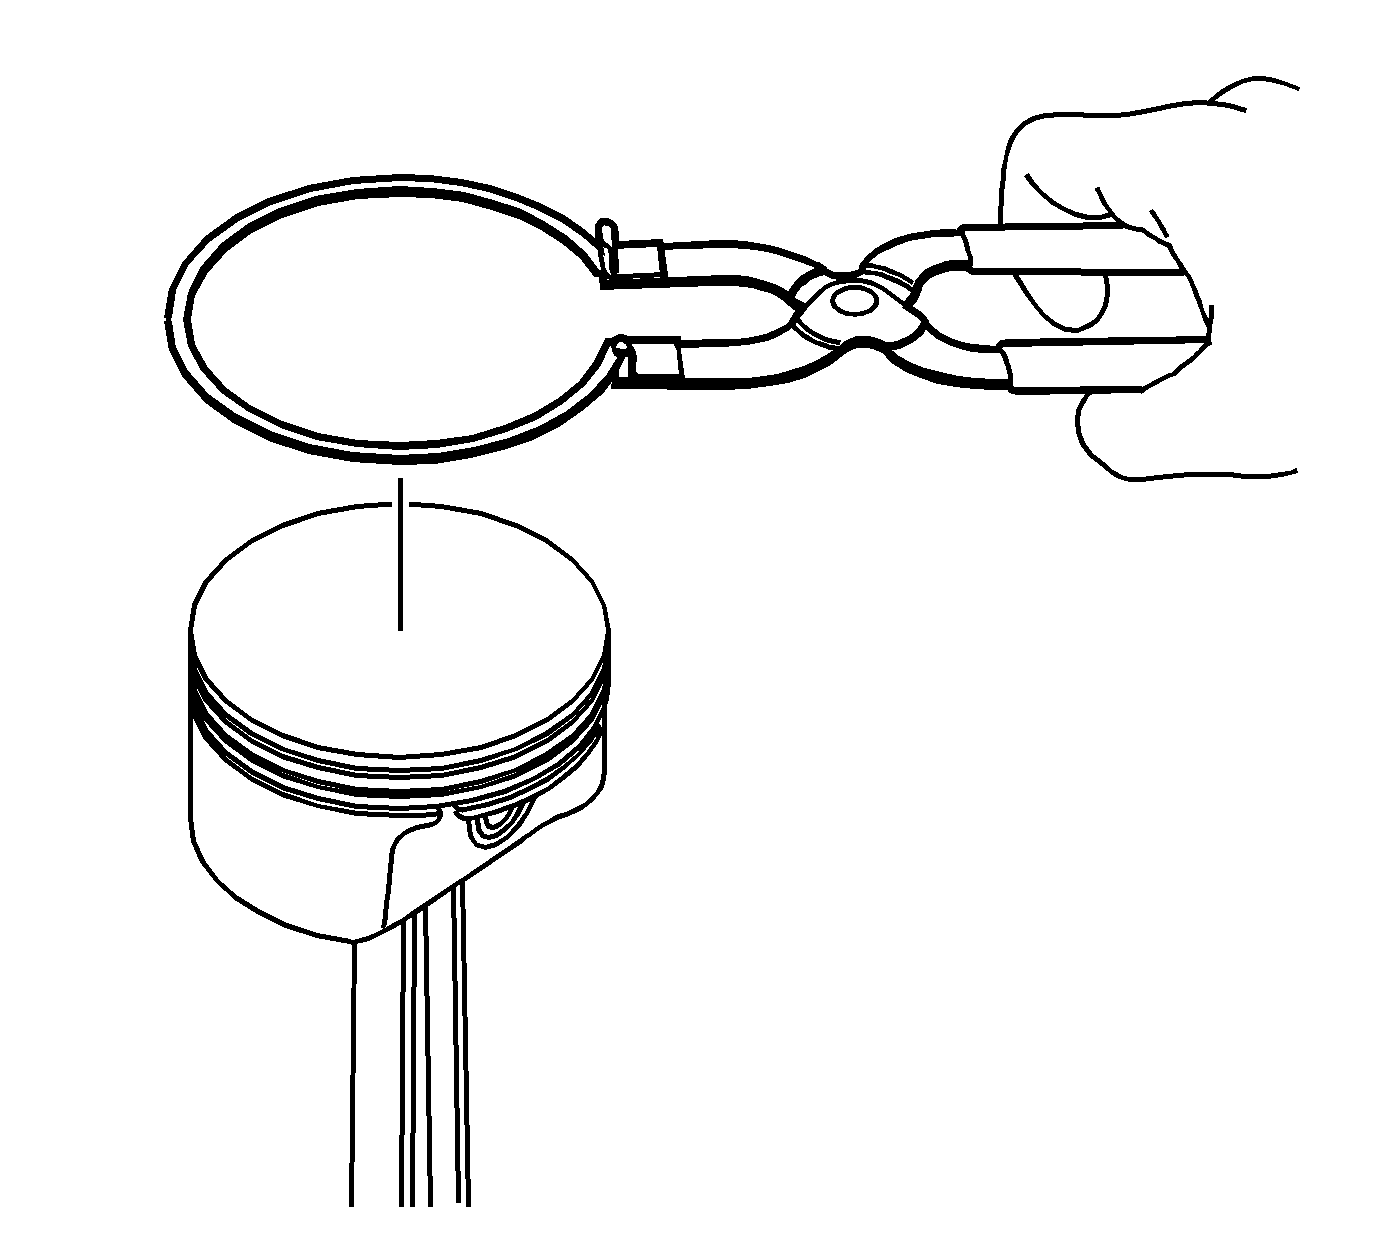
Notice: Use a piston ring expander to install the piston rings. The rings may be damaged if expanded more than necessary.
Important: To provide an effective compression seal, the ring gaps must be staggered a minimum of 90 degrees.
| 7.1. | Install the oil control ring spacer into the bottom groove of the piston. |
| 7.2. | Install the lower oil control ring. |
The oil control rings do not have a dimple or orientation mark and may be installed in either direction.
| 7.3. | Install the upper oil control ring. |
| 7.4. | Install the middle compression ring with the dot facing up. |
| 7.5. | Install the top compression ring in either direction. The ring has no orientation markings. |
