Removal Procedure
- Remove the valve rocker arm covers. Refer to Valve Rocker Arm Cover Replacement.
- Remove the rocker arm bolts.
- Remove the rocker arms.
- Remove the pushrods.
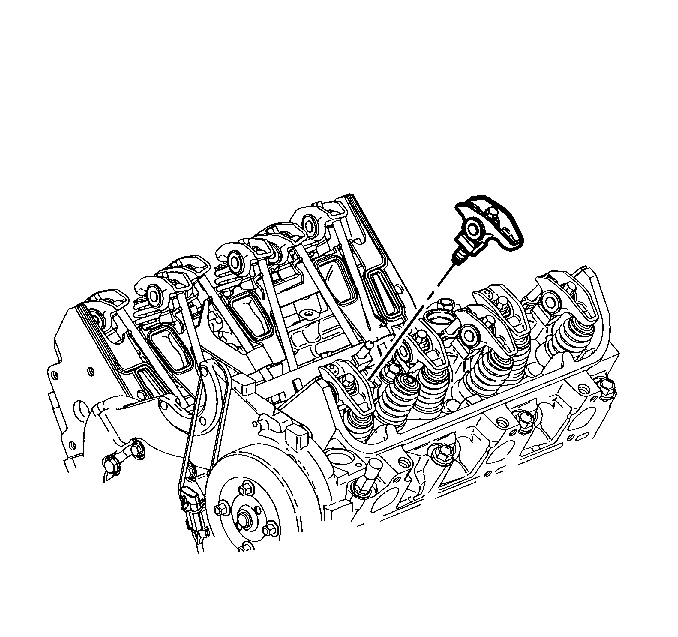
Important: Place the valve train parts in a rack in order to ensure that they are installed in the same location from which they were removed. Intake pushrods measure 144.18 mm (5.68 in). Exhaust pushrods measure 152.51 mm (6.0 in).
Important: Use care when removing the pushrods. Ensure that they do not fall down into the lifter valley.
Installation Procedure
- Perform the following steps in order to install the pushrods.
- Install the rocker arms.
- Install the rocker arm bolts.
- Install the valve rocker arm covers. Refer to Valve Rocker Arm Cover Replacement.
Important: Coat the bearing surface of the rocker arms, rocker arm bolts, and pushrods with prelube GM P/N 12345501 or GM P/N 88862586 (Canadian P/N 992704 or Canadian P/N 88862586) or equivalent. Install all of the components in their original location.
| 1.1. | Verify that the intake valve pushrods measure 144.18 mm (5.68 in) long. |
| 1.2. | Verify that the exhaust valve pushrods measure 152.51 mm (6.0 in) long. |
Notice: Use the correct fastener in the correct location. Replacement fasteners must be the correct part number for that application. Fasteners requiring replacement or fasteners requiring the use of thread locking compound or sealant are identified in the service procedure. Do not use paints, lubricants, or corrosion inhibitors on fasteners or fastener joint surfaces unless specified. These coatings affect fastener torque and joint clamping force and may damage the fastener. Use the correct tightening sequence and specifications when installing fasteners in order to avoid damage to parts and systems.
Tighten
Tighten the bolt to 19 N·m (14 lb ft).
