Transmission Assemble CTS and GTO
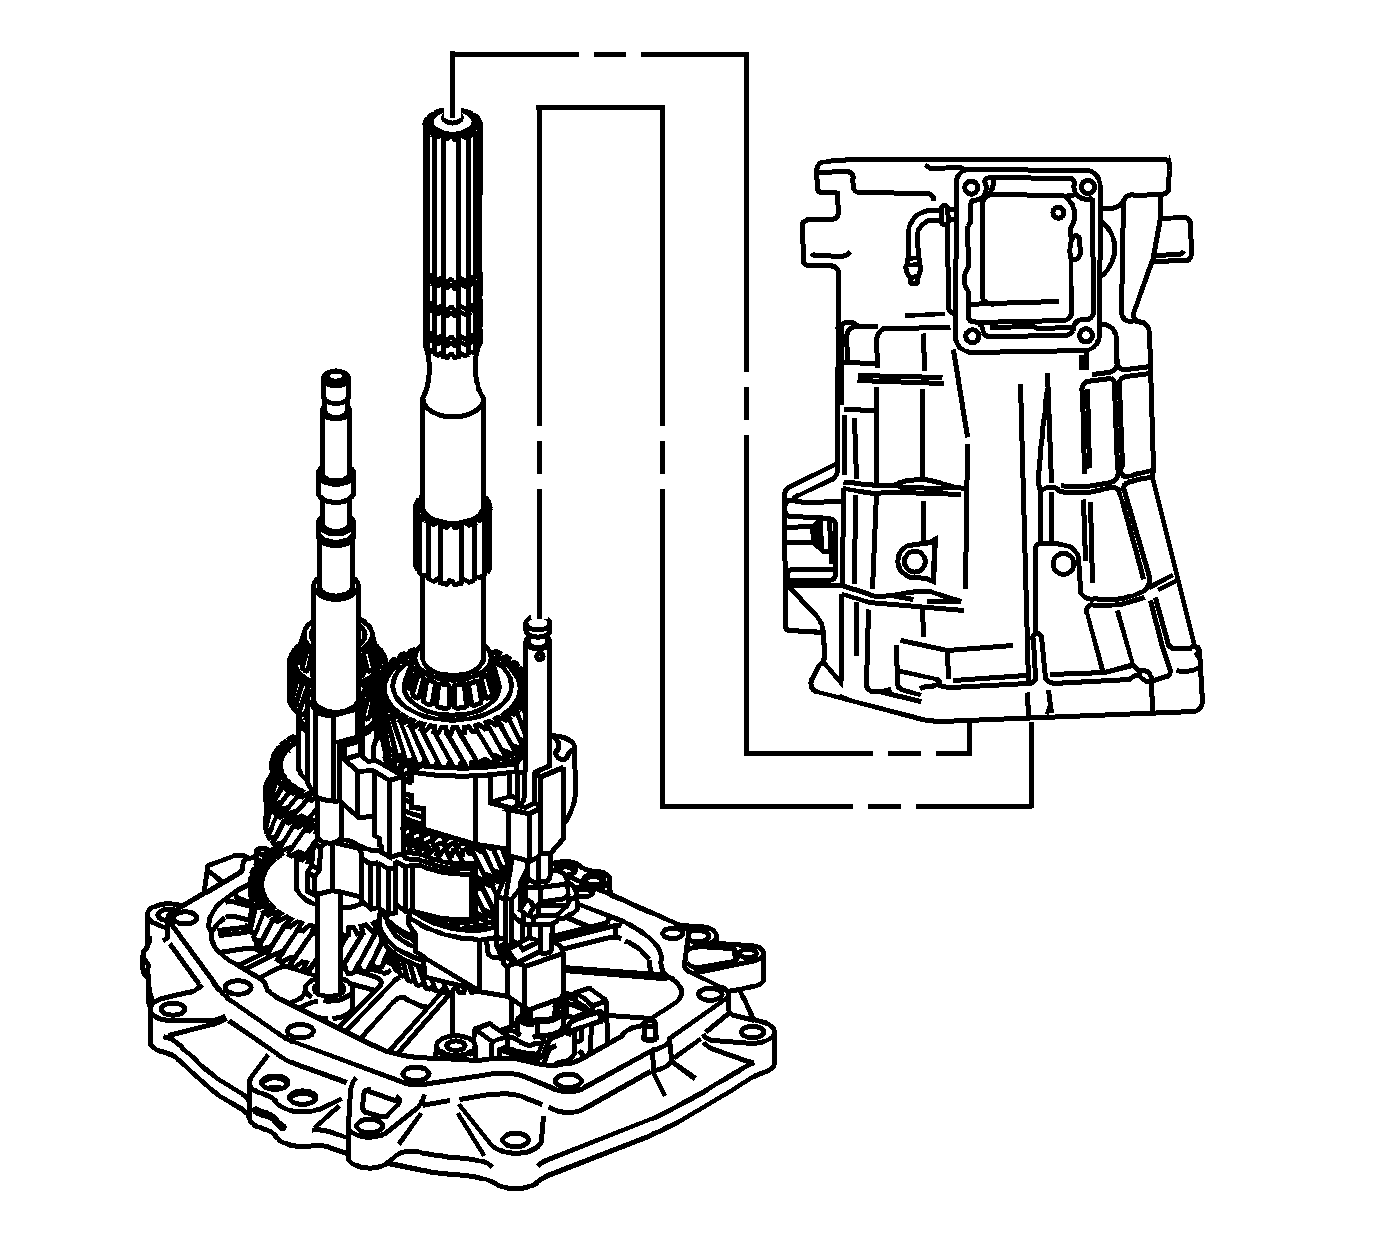
Shift Shaft Assemblies and Gear Clusters Installation
Tools Required
J 36850
Transjel® Lubricant Assembly Lube
- Lubricate all components as assembly progresses, using
J 36850
.

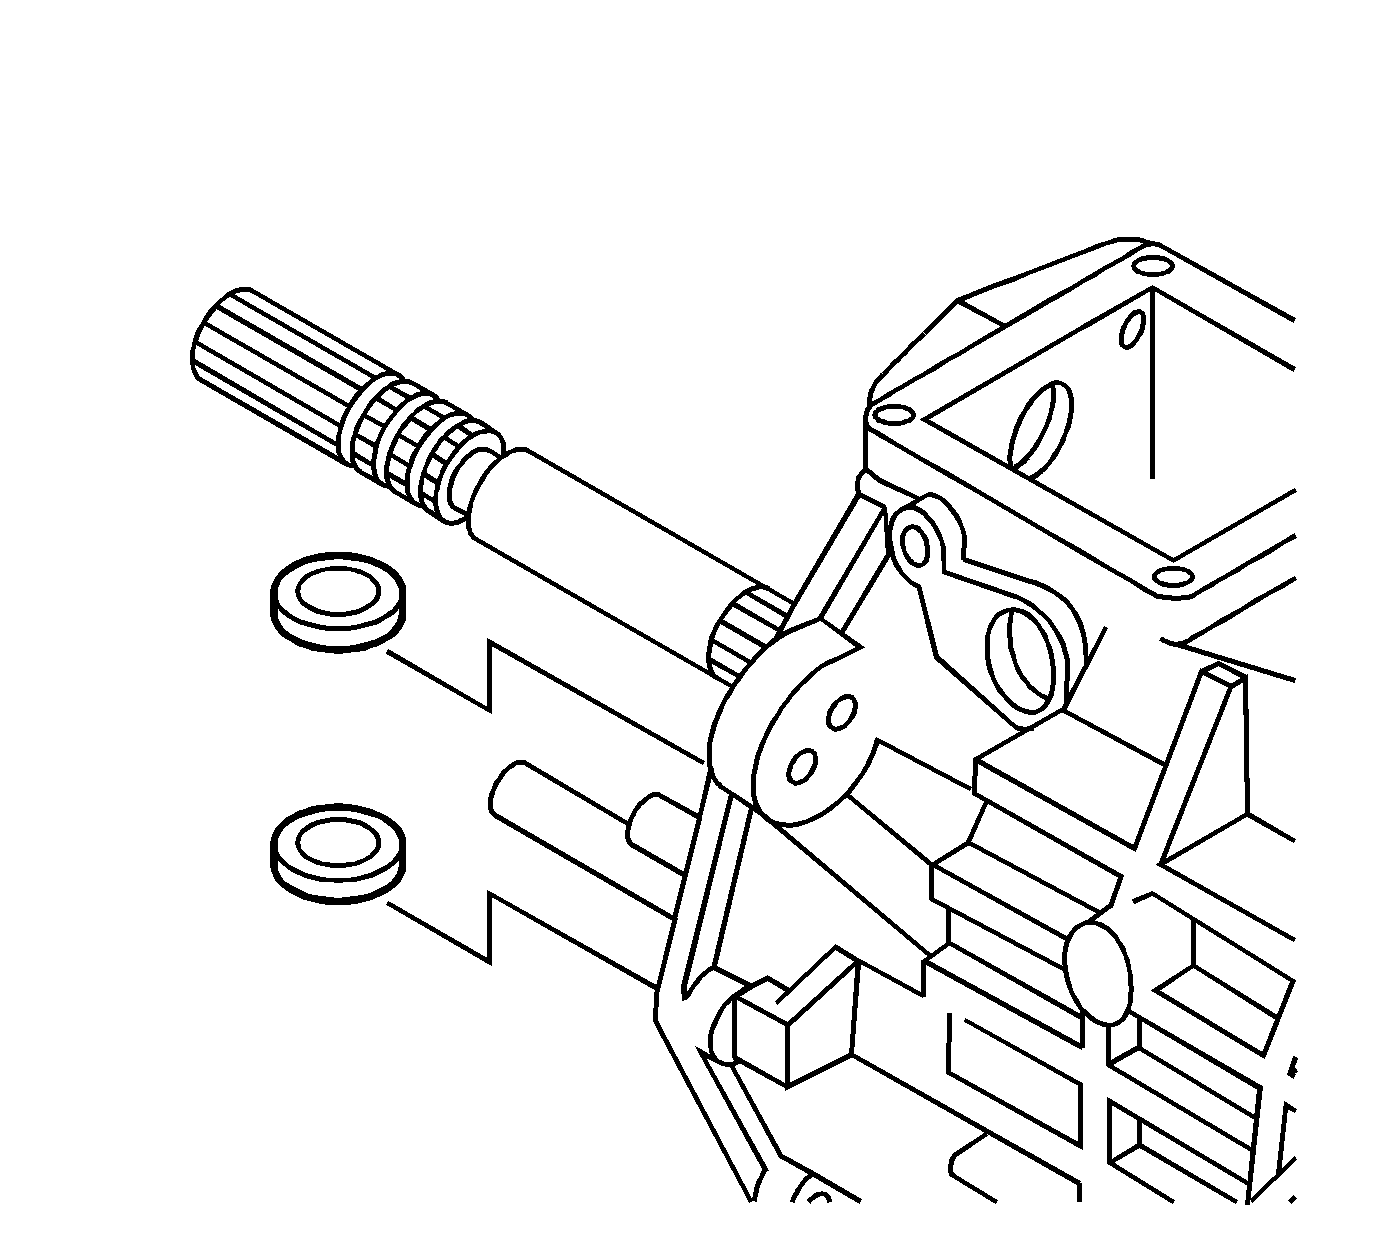
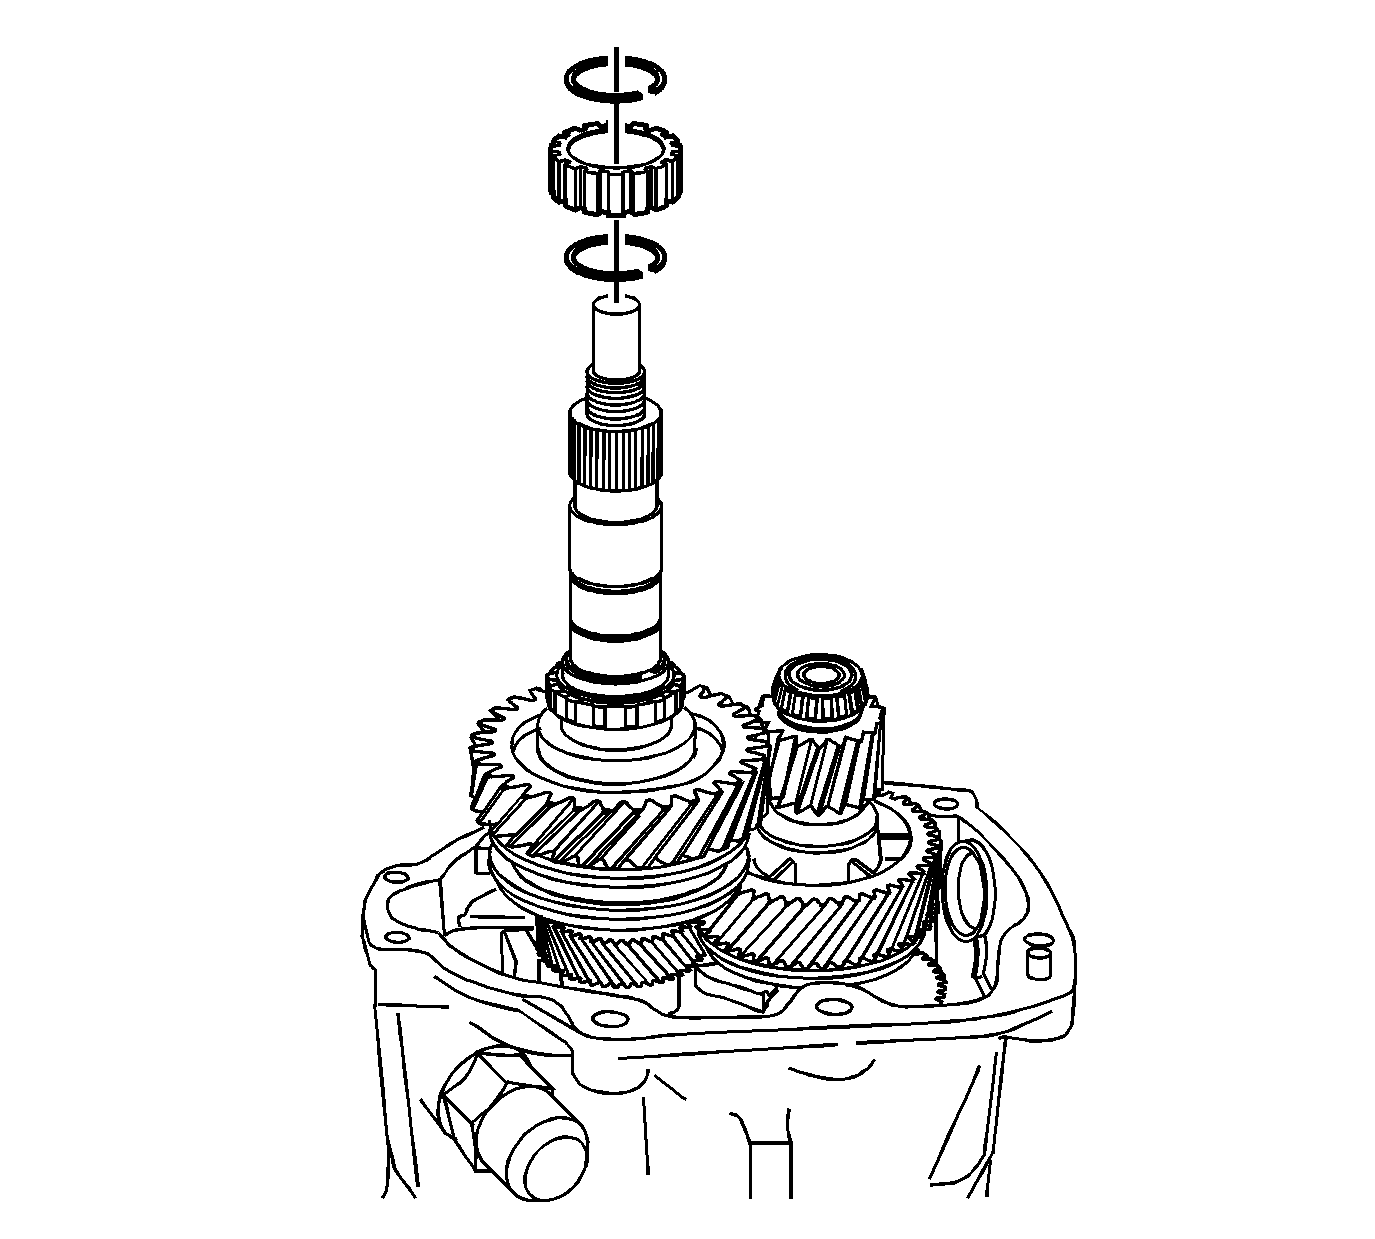
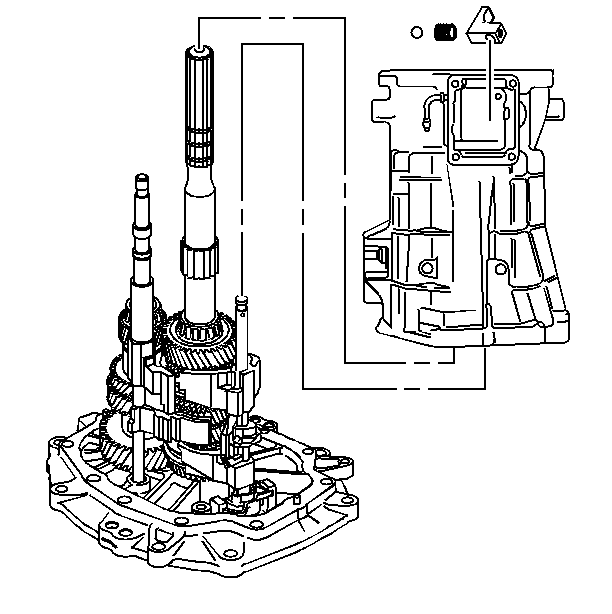
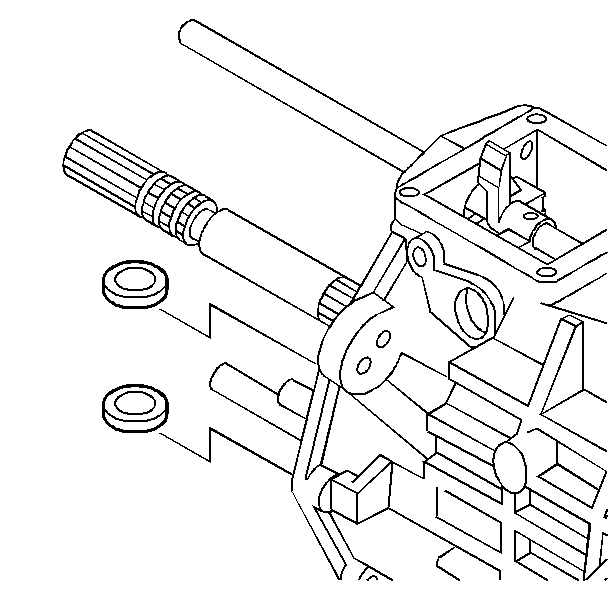
- Install the input shaft in the adapter plate.
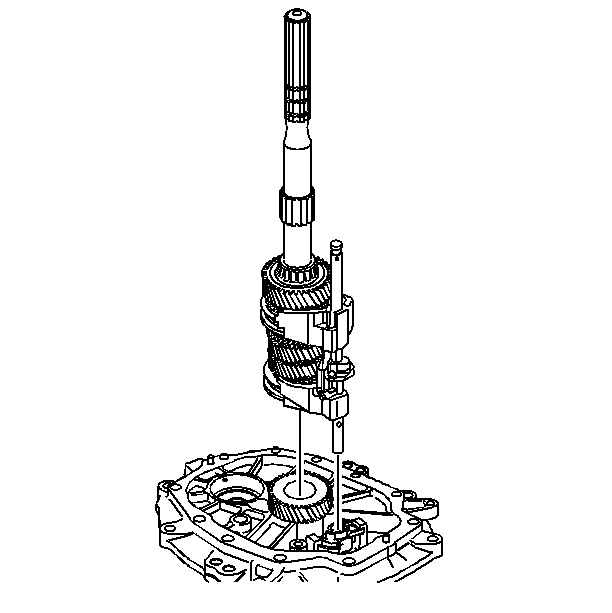
- Assemble the shift shaft to the mainshaft.
- Install the neutral return roll pin to the shift shaft.
- Install the mainshaft and the shift shaft assembly into the adapter plate.
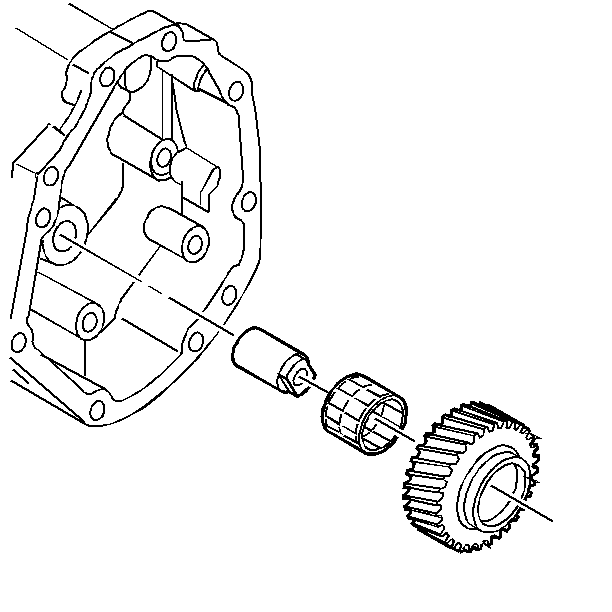
- Install the countershaft assembly using the following sequence:
| 6.1. | Lift up the mainshaft assembly enough in order to install the countershaft assembly. |
| 6.2. | Install the countershaft assembly. |
| 6.3. | Lift the mainshaft assembly enough in order to rotate the input shaft to engage the synchronizer keys with 4th gear blocking ring. |
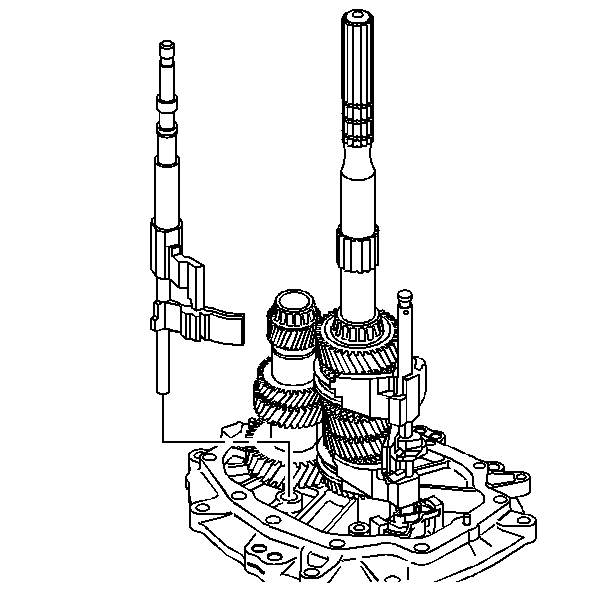
- Install the 5th/6th and the reverse shift shaft.
Align the slots of the shift shaft levers with
the interlock plate.
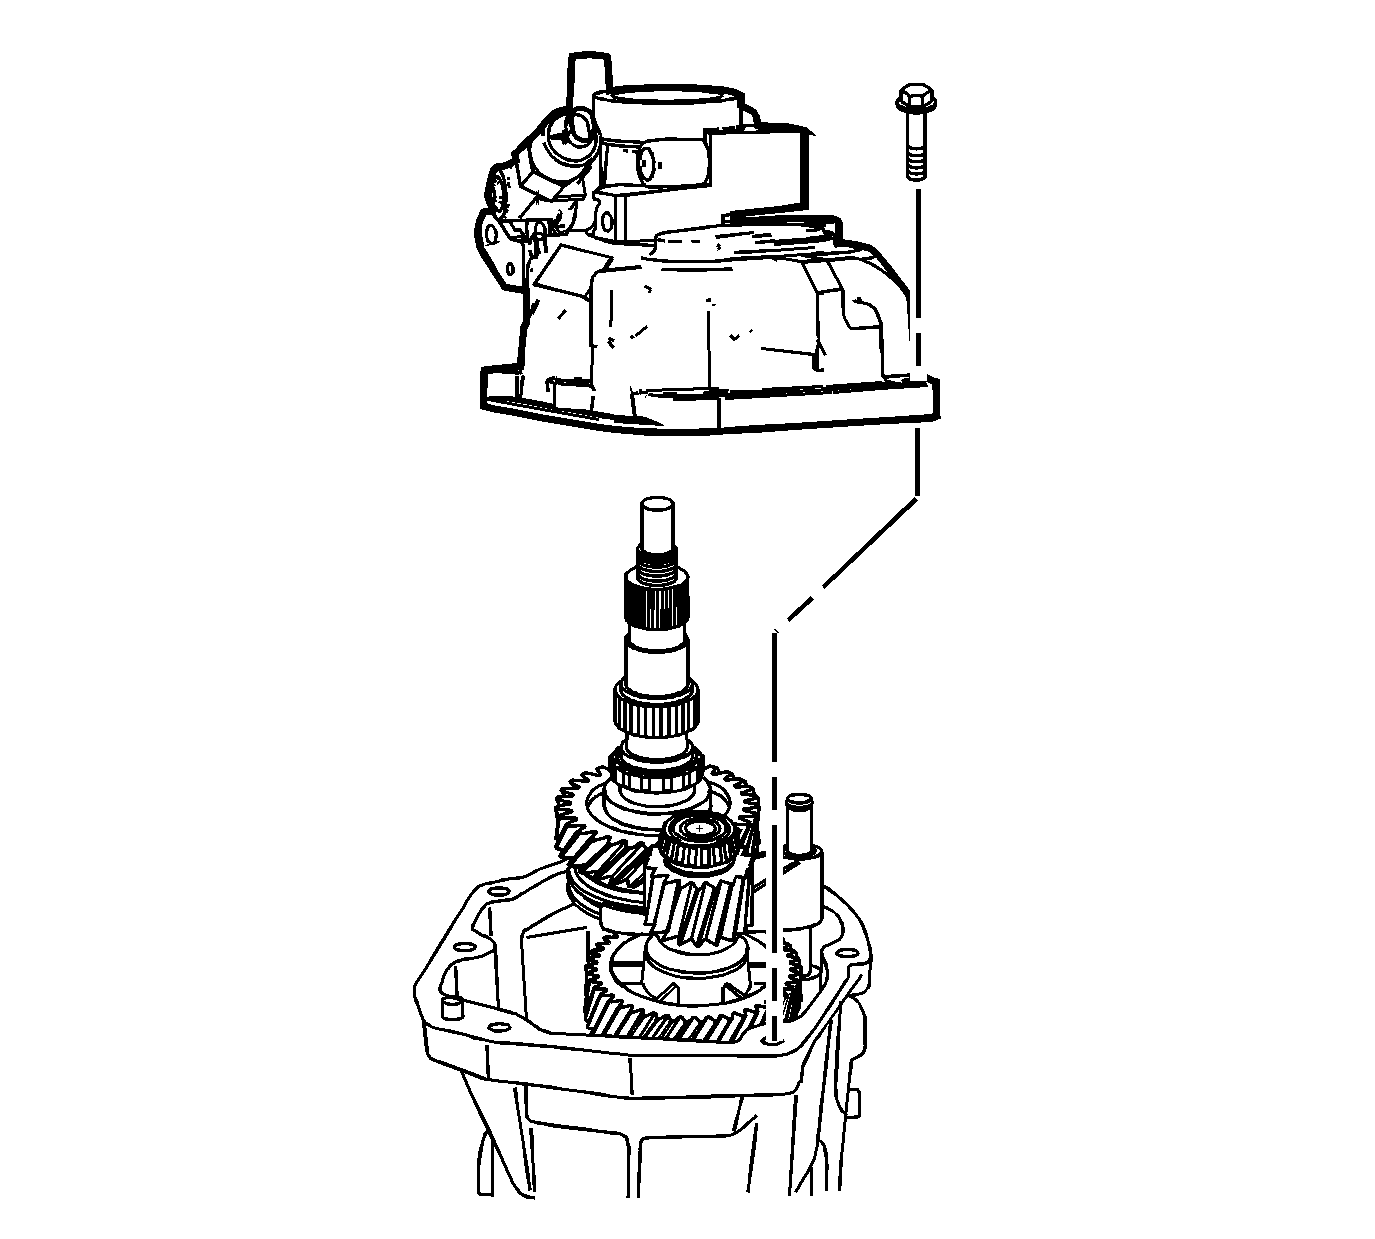
Transmission Case Installation
Tools Required
J 36850
Transjel® Lubricant
Important: Lubricate all components as the assembly progresses. Use
J 36850
or the equivalent.
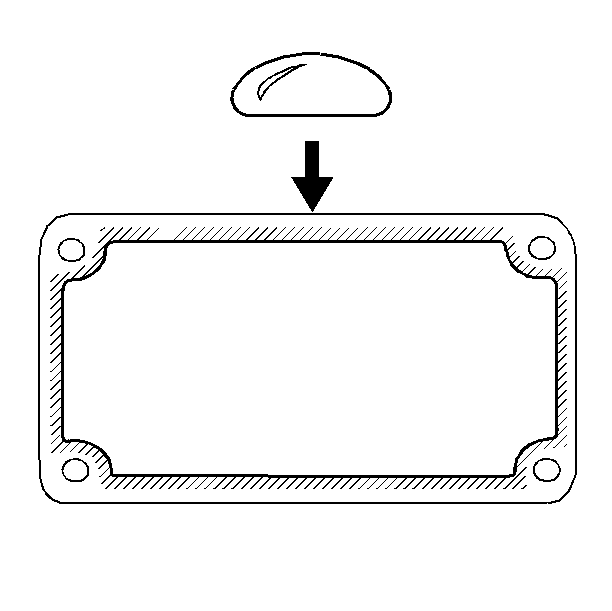
- Apply sealant GM P/N 12345739, (Canadian P/N 10953472) or equivalent to the transmission case to adapter plate mating surface.
- Do the following in order to install the transmission case and the offset lever:
| 2.1. | Shift the transmission into NEUTRAL in order to keep the 3rd/4th shift shaft from engaging. |
| 2.2. | Install the offset lever. |
| 2.3. | Slide the transmission case onto the gear clusters and the shift rail components. |
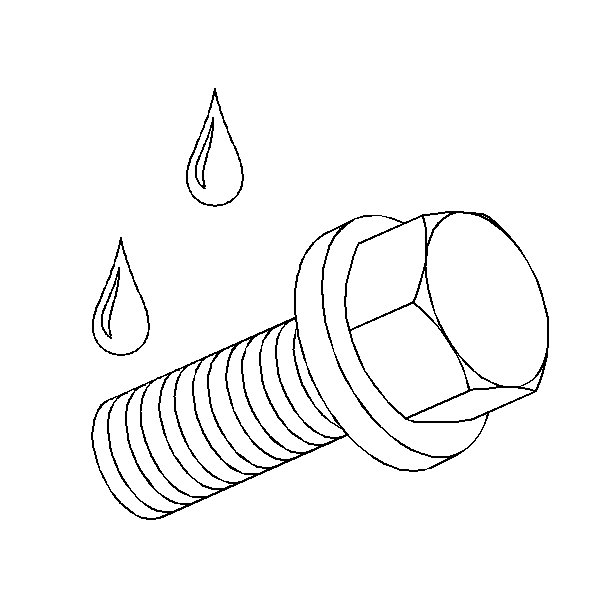
- Apply threadlock GM P/N 12346004, (Canadian P/N 10953480) or equivalent to the threads of the shift lever
guide bolts.
Notice: Use the correct fastener in the correct location. Replacement fasteners
must be the correct part number for that application. Fasteners requiring
replacement or fasteners requiring the use of thread locking compound or sealant
are identified in the service procedure. Do not use paints, lubricants, or
corrosion inhibitors on fasteners or fastener joint surfaces unless specified.
These coatings affect fastener torque and joint clamping force and may damage
the fastener. Use the correct tightening sequence and specifications when
installing fasteners in order to avoid damage to parts and systems.
- Install the shift lever guide bolts and pull up on 5th/6th and reverse shift rail assembly. This will help align the slot of the shift interlock plate with the guide bolt hole.
Tighten
Tighten the bolts to 27 N·m (20 Ib ft).
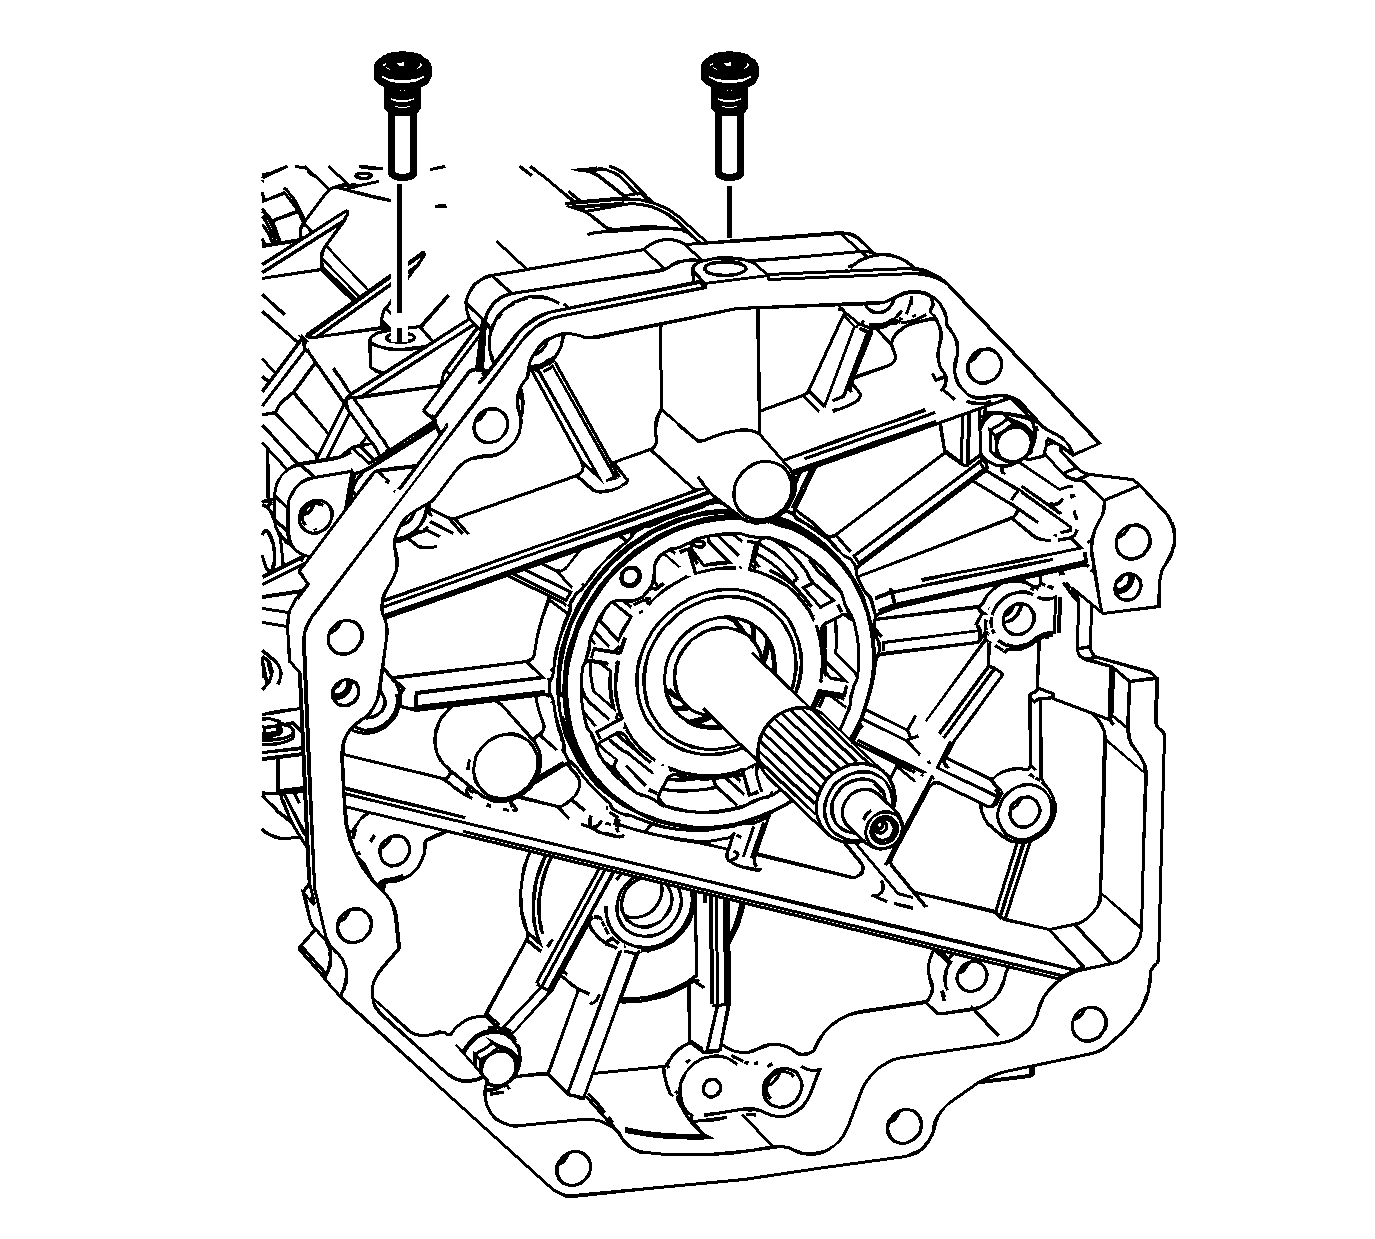
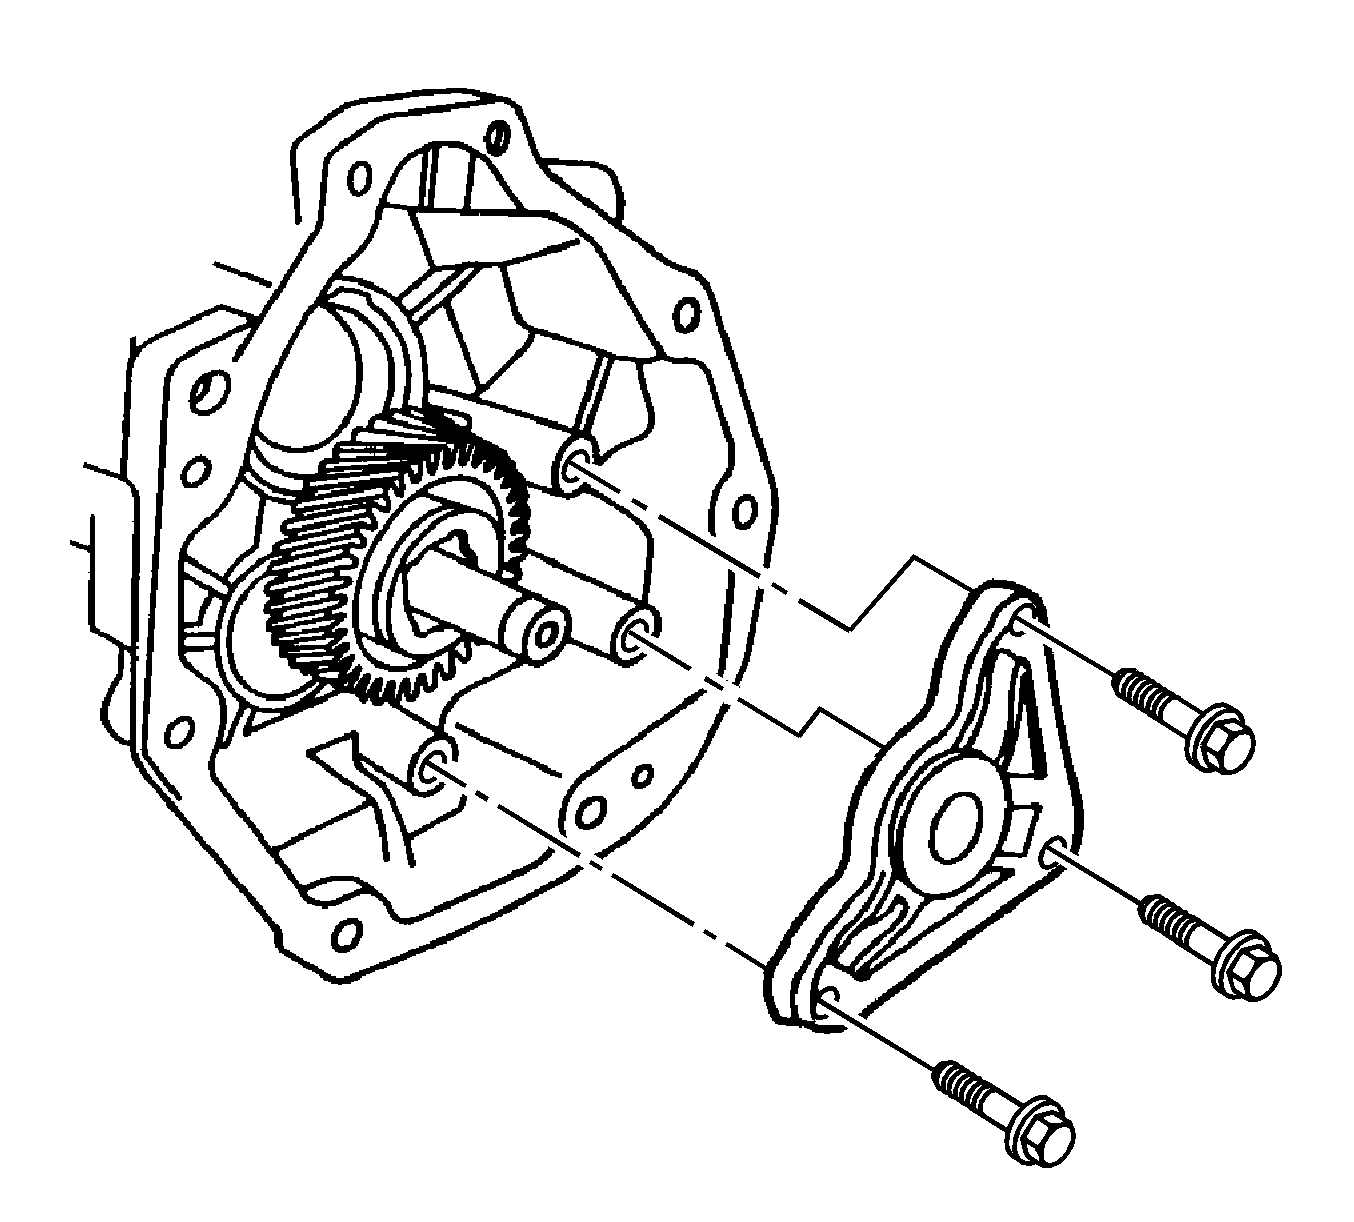
- Install the adapter plate to transmission case bolts.
Tighten
Tighten the bolts to 48 N·m (36 Ib ft).
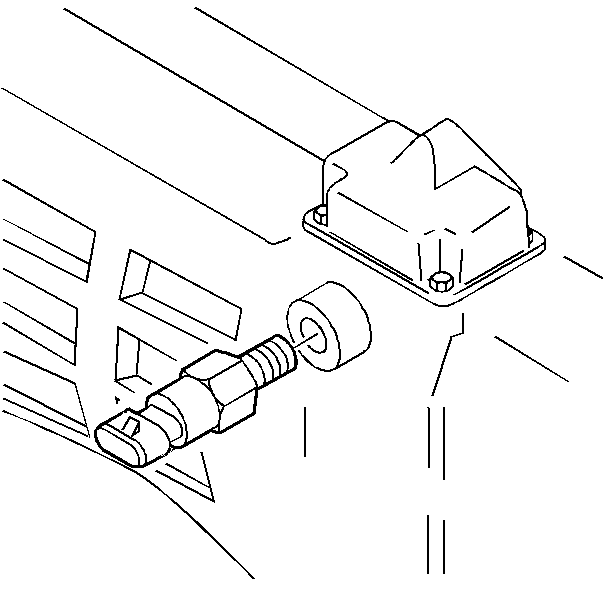
- Install the magnets into the transmission case.
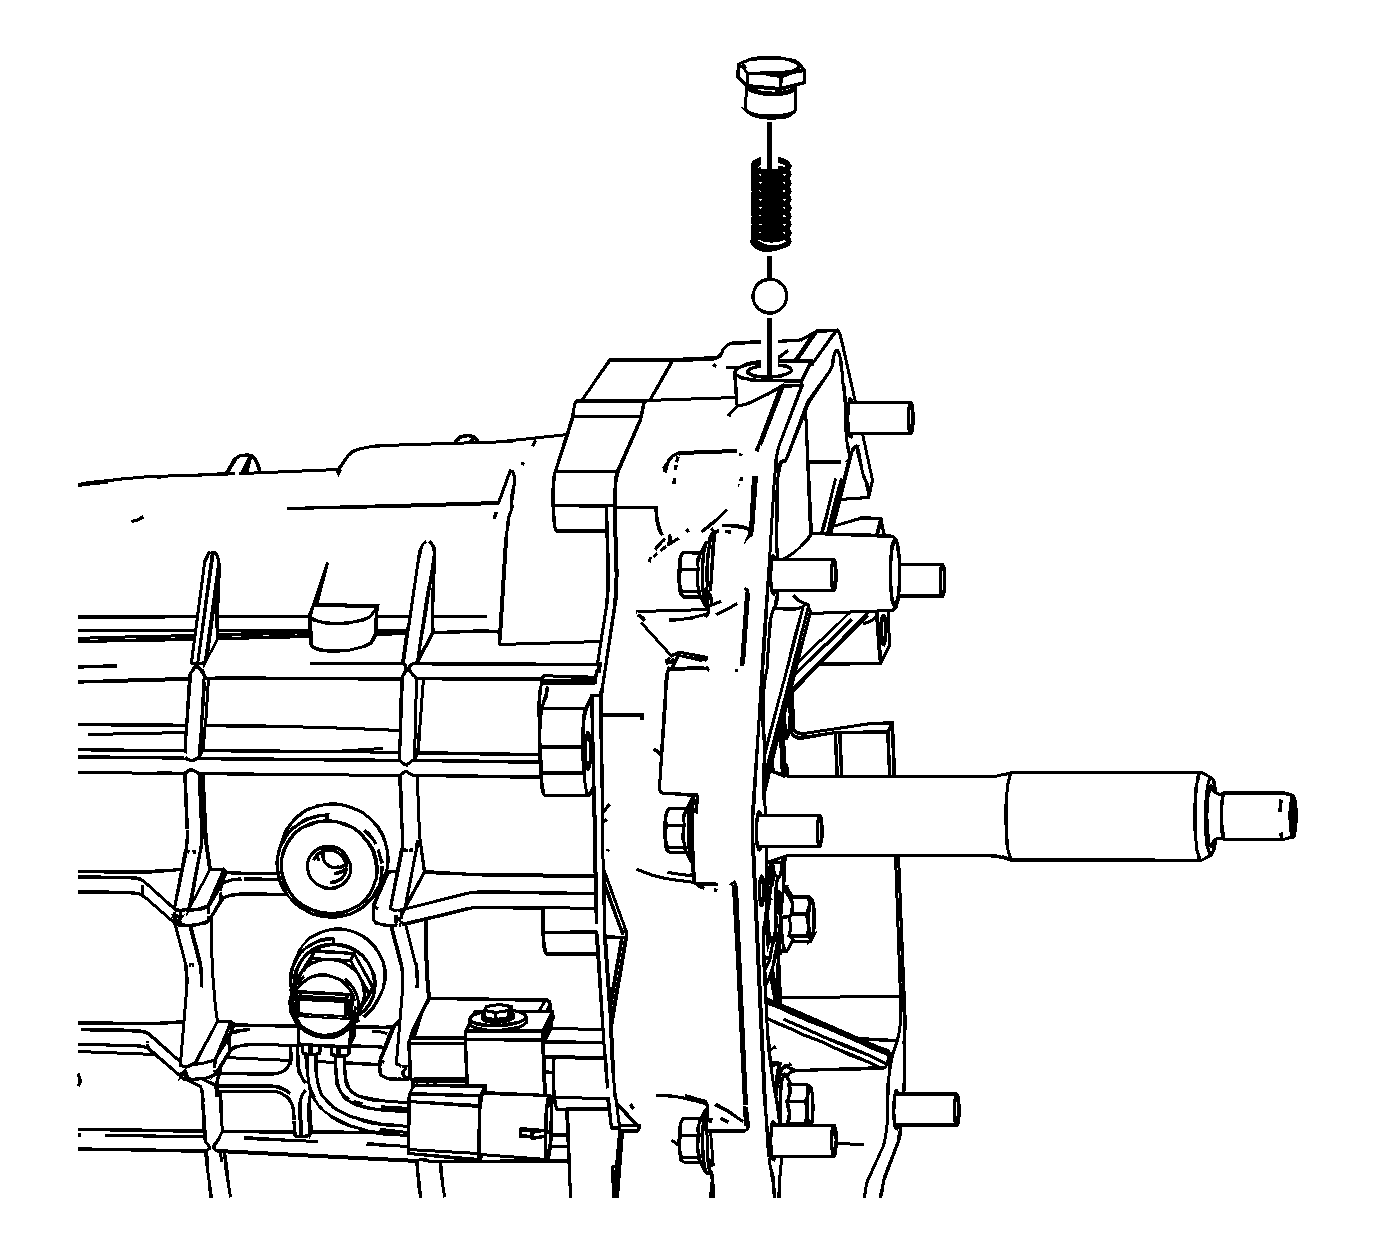
- Install the shift detent plug, spring and ball.

- Install the shift detent assembly.
Tighten
Tighten the detent assembly to 40 N·m (30 Ib ft).
- Install the computer aided gear select solenoid.
Tighten
Tighten the solenoid to 40 N·m (30 Ib ft).
Countershaft Extension Installation
- Position the transmission in the horizontal position.
- Install the countershaft extension assembly and the 5th/6th shift fork. The splines of the countershaft extension must engage the splines of the countershaft.

- Install the 5th/6th shift fork retainer ring.
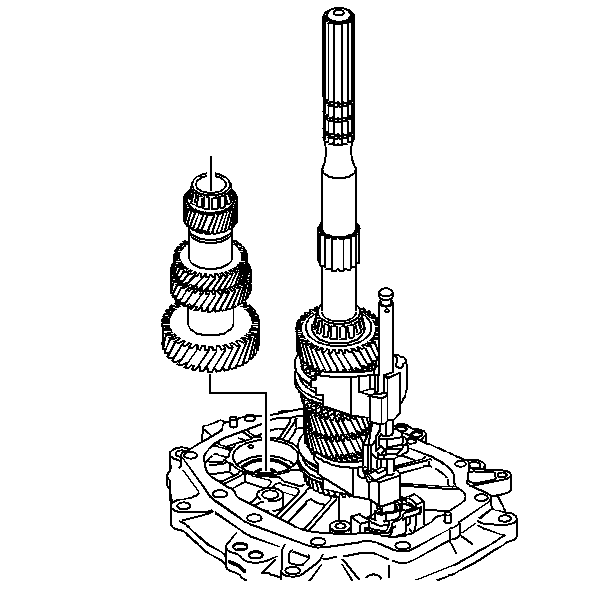
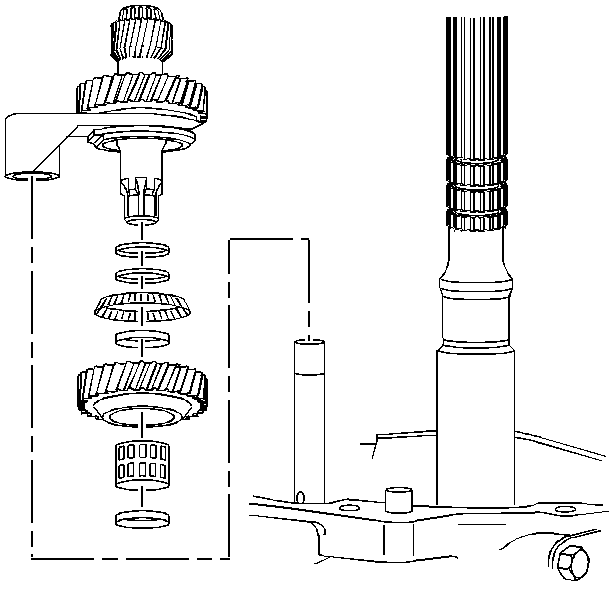
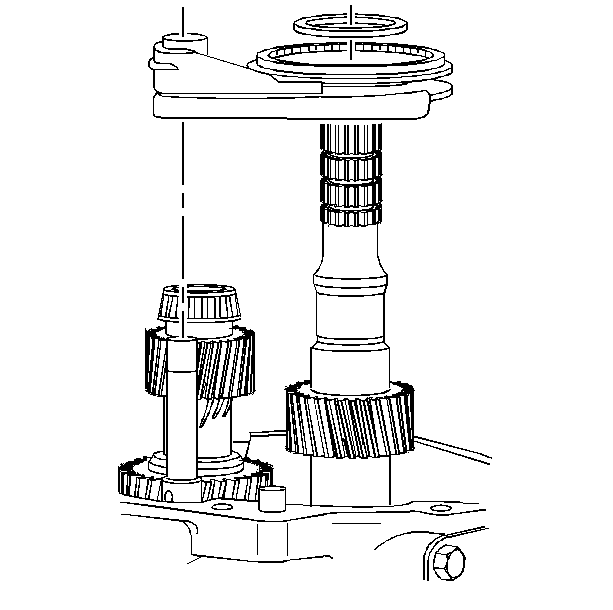
5th/6th Speed Driven Gear Installation
Tools Required
| • | J 39441
5th/6th Driven Gear Installer |
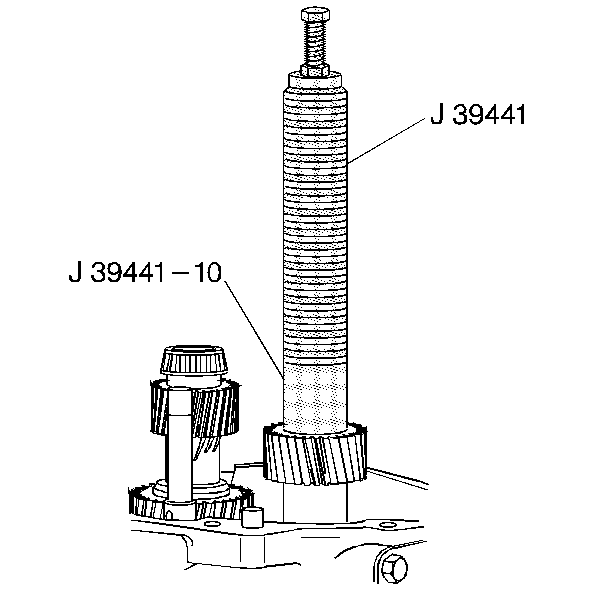
Install the 5th/6th speed driven gear using the
J 39441
and
J 39441-10
. The smaller outside diameter (OD) of the gear faces down.
Reverse Shift Fork Installation
- Install the reverse shift fork, the synchronizer and the thrust washer.
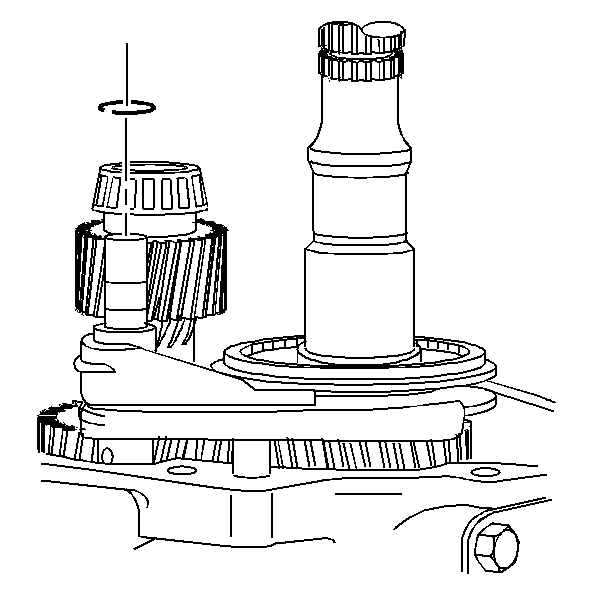
- Install a new shift fork retainer ring.
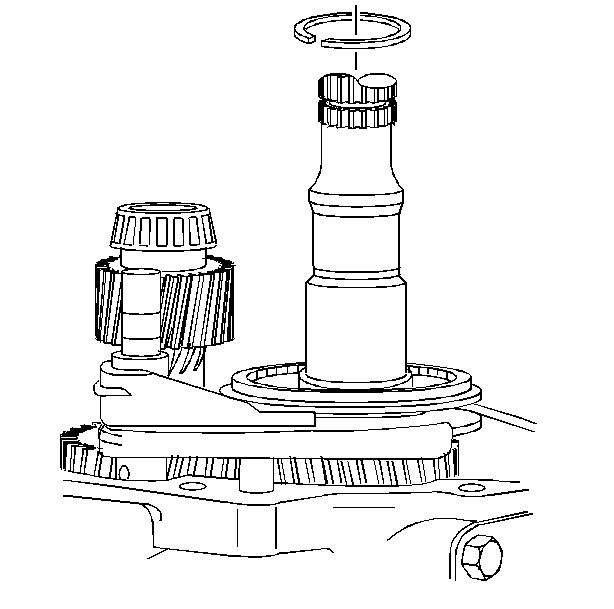
- Install the reverse synchronizer retainer ring.
Reverse Speed Gear Installation
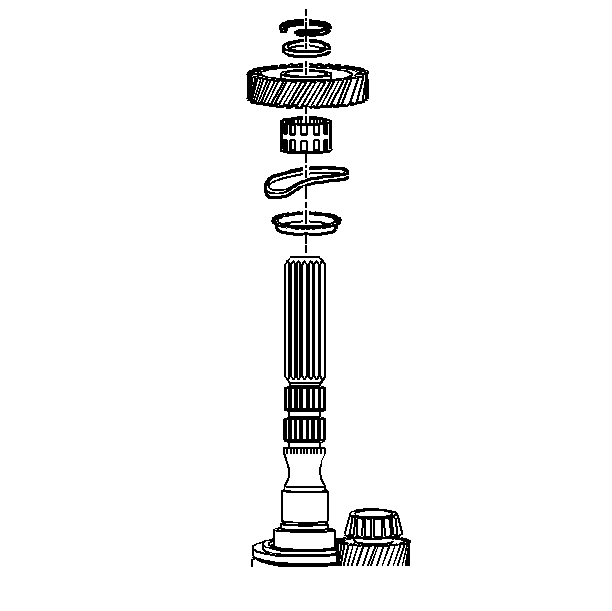
- Install the following parts in order:
| 1.3. | The wave washer so the concave side faces the blocking ring |
| 1.4. | The caged needle bearing |
| 1.5. | The reverse speed gear |
- Install the following parts in order:
| 2.4. | The roller bearing retainer ring |
- Install the following parts in order:

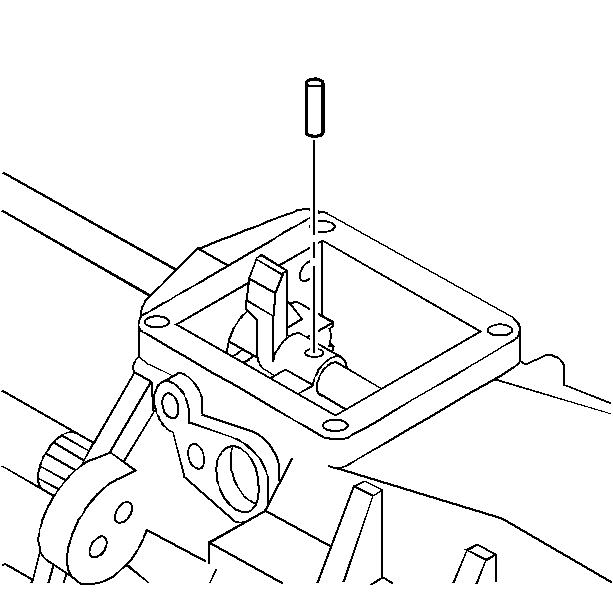
- Install the shift shaft extension.
- Install the shift guide.
- Install NEW shift guide roll pins.
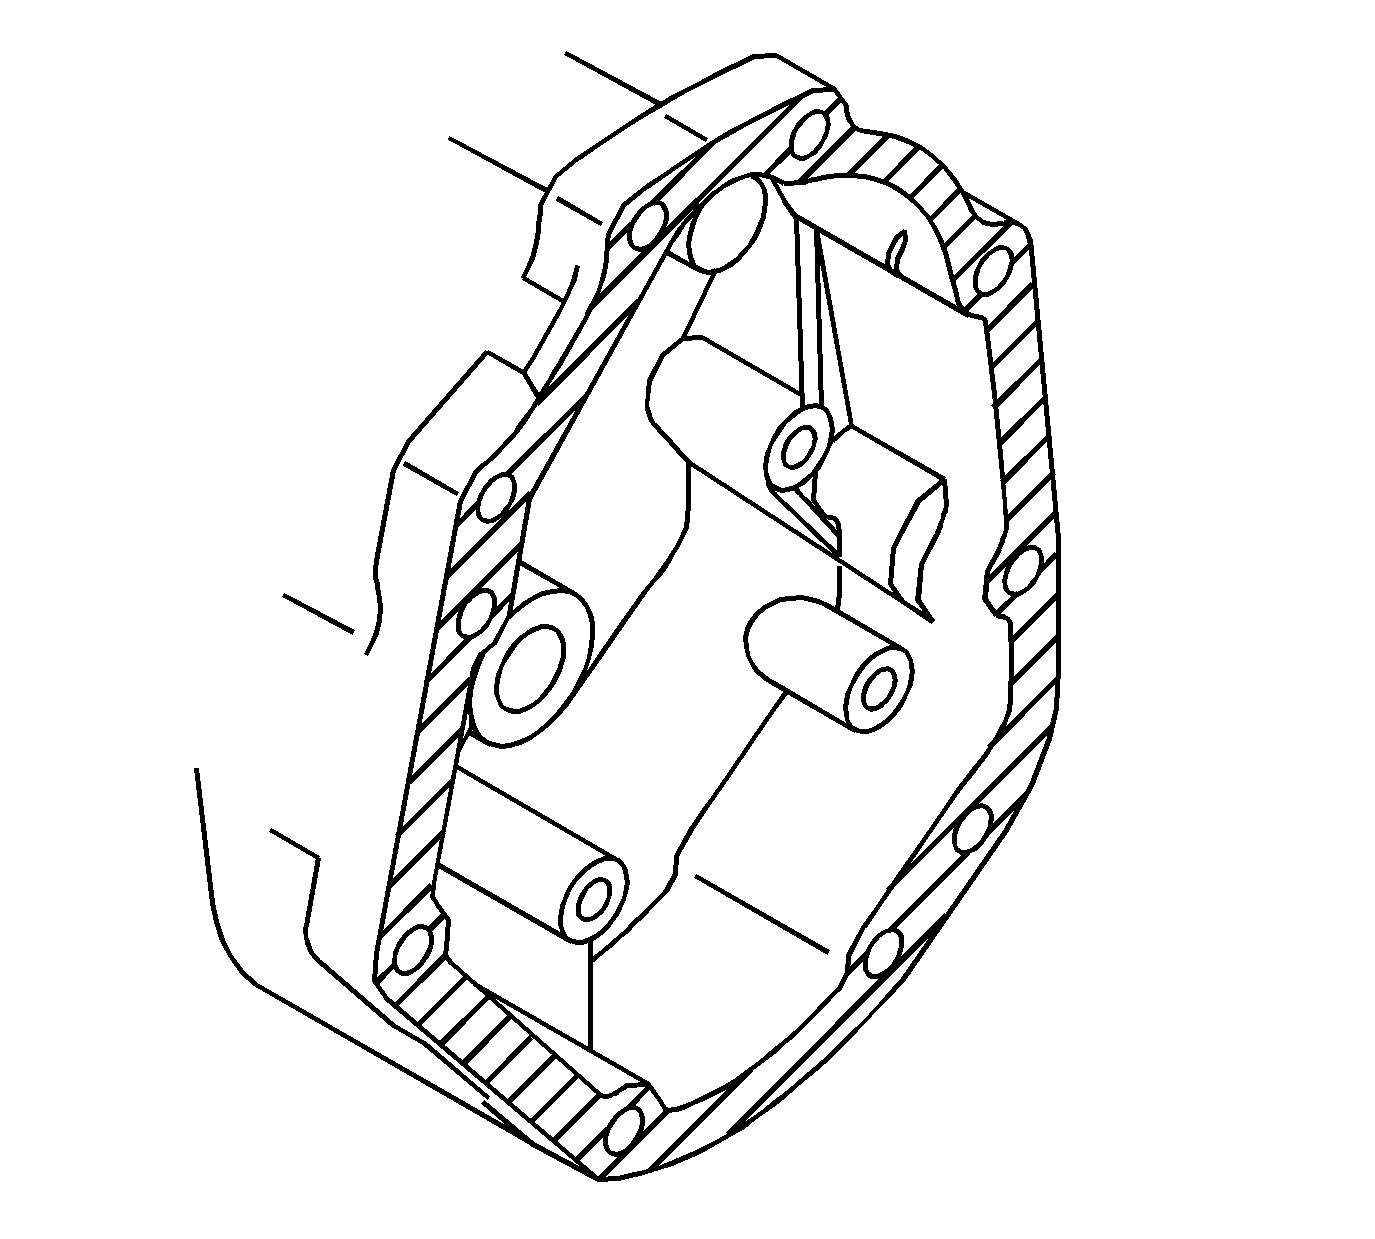
Extension Housing Assemble
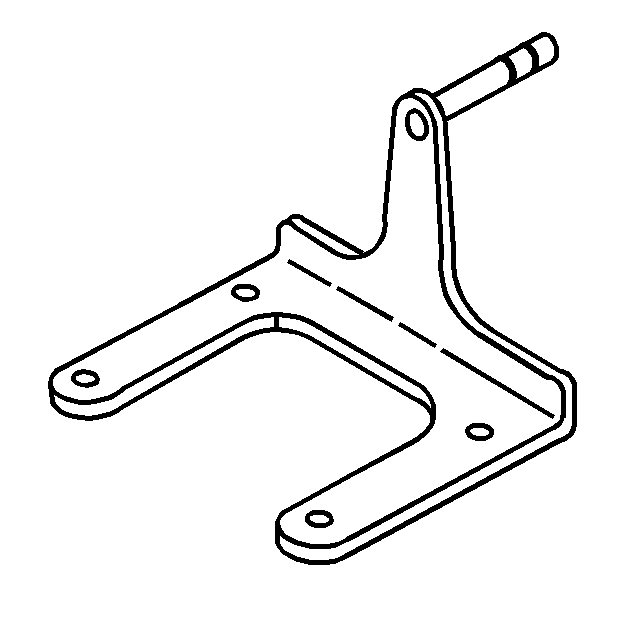
Tools Required
J 39430
Transmission Holding Fixture
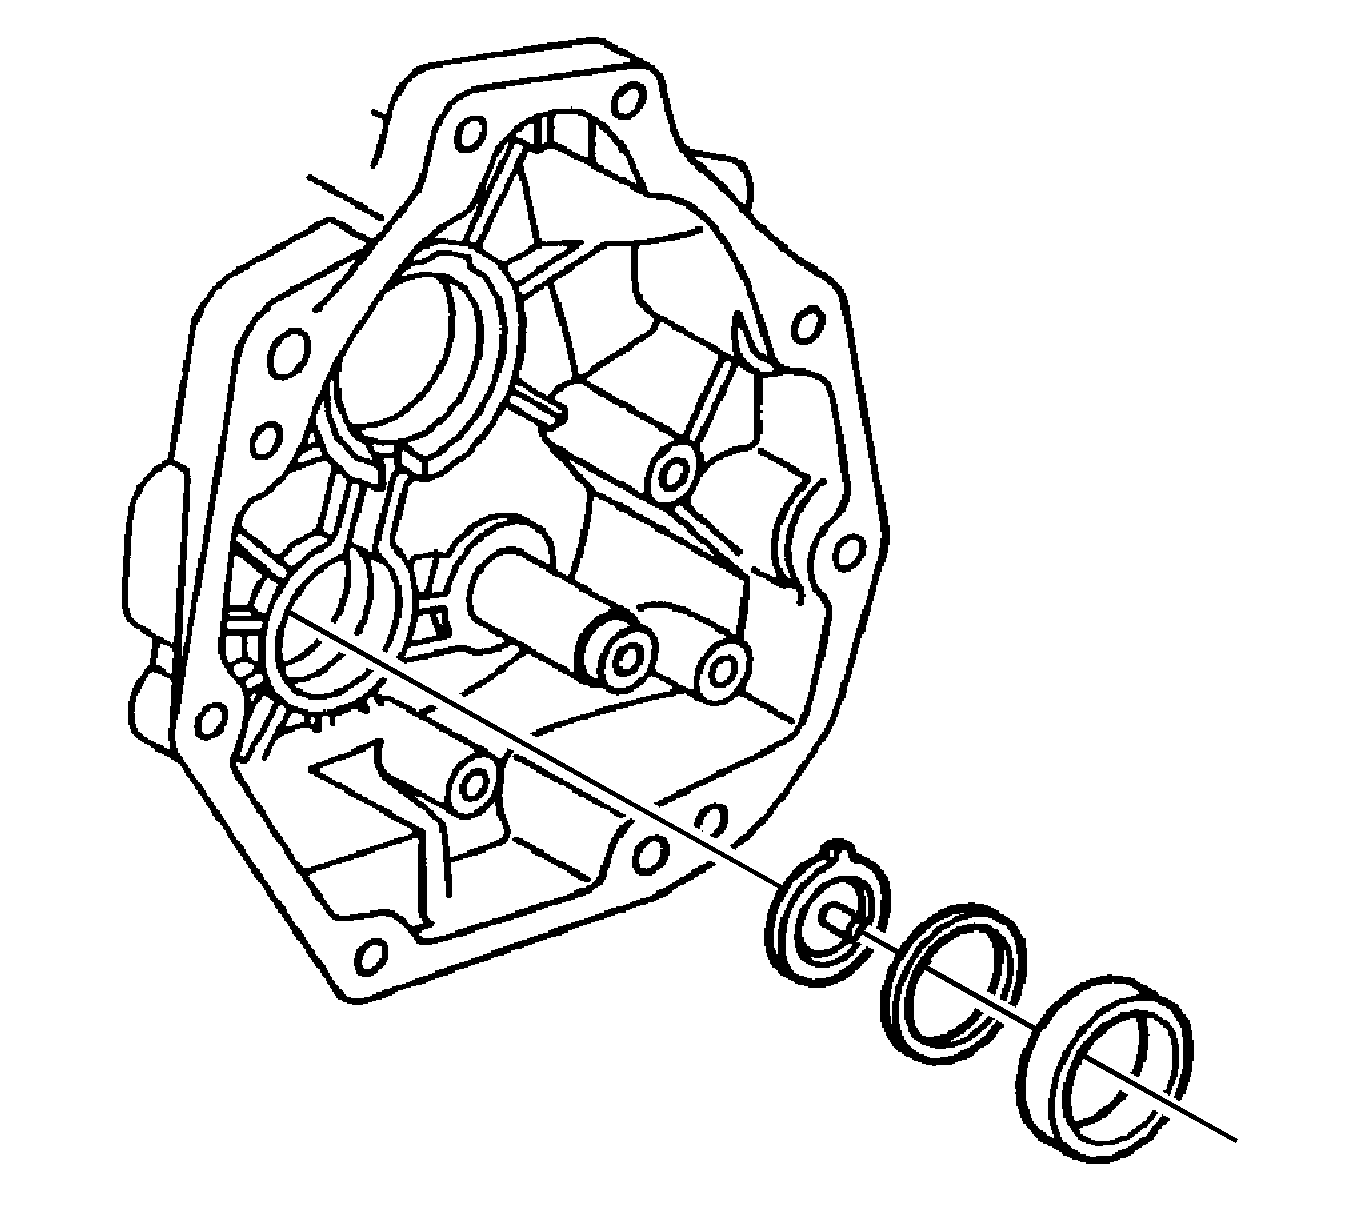
- Install the following parts in order:
| 1.3. | The countershaft extension bearing race |
- Install the following parts in order:
| 2.1. | The reverse idler shaft |
| 2.3. | The reverse idler gear |
- Apply GM P/N 12345382, (Canadian P/N 10953489) or the equivalent to the reverse idler shaft brackets
bolt threads.
Notice: Use the correct fastener in the correct location. Replacement fasteners
must be the correct part number for that application. Fasteners requiring
replacement or fasteners requiring the use of thread locking compound or sealant
are identified in the service procedure. Do not use paints, lubricants, or
corrosion inhibitors on fasteners or fastener joint surfaces unless specified.
These coatings affect fastener torque and joint clamping force and may damage
the fastener. Use the correct tightening sequence and specifications when
installing fasteners in order to avoid damage to parts and systems.
- Install the following parts in order:
| 4.1. | The reverse idler shaft bracket. |
| 4.2. | The reverse idler shaft bracket bolts. |
Tighten
Tighten the bolts to 25 N·m (18 Ib ft).
- Apply sealant GM P/N 12345739, (Canadian P/N 10953472) or equivalent to the extension
housing to the transmission case mating surface.
- Apply thread sealer GM P/N 12346004, (Canadian P/N 10953480) or equivalent to the top 2 extension
housing bolts.
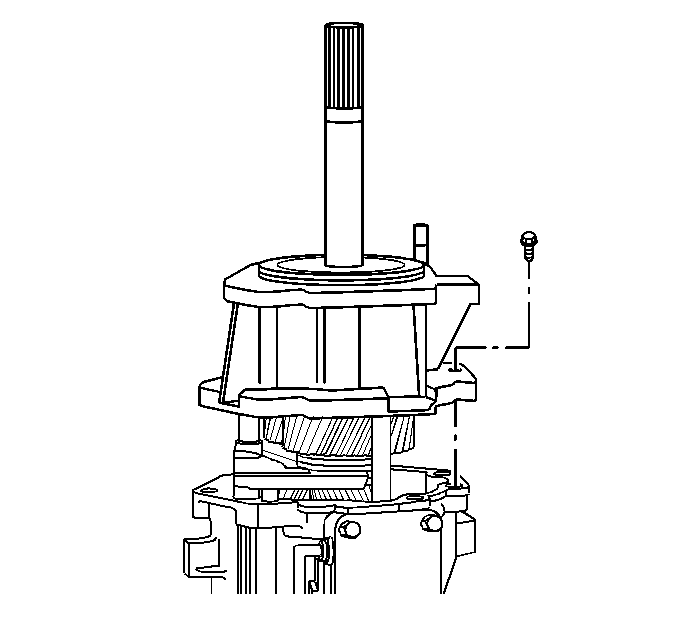
Important: Align the 5th/6th shift shaft to the extension housing bore in order to install the extension housing.
- Install the extension housing.
- Install the extension housing bolts.
Tighten
Tighten the bolts to 48 N·m (36 lb ft).
- Install the propshaft connector.
- Install the propshaft connector nut.
Tighten
For the CTS only, tighten the nut to 136 N·m (100 lb ft).
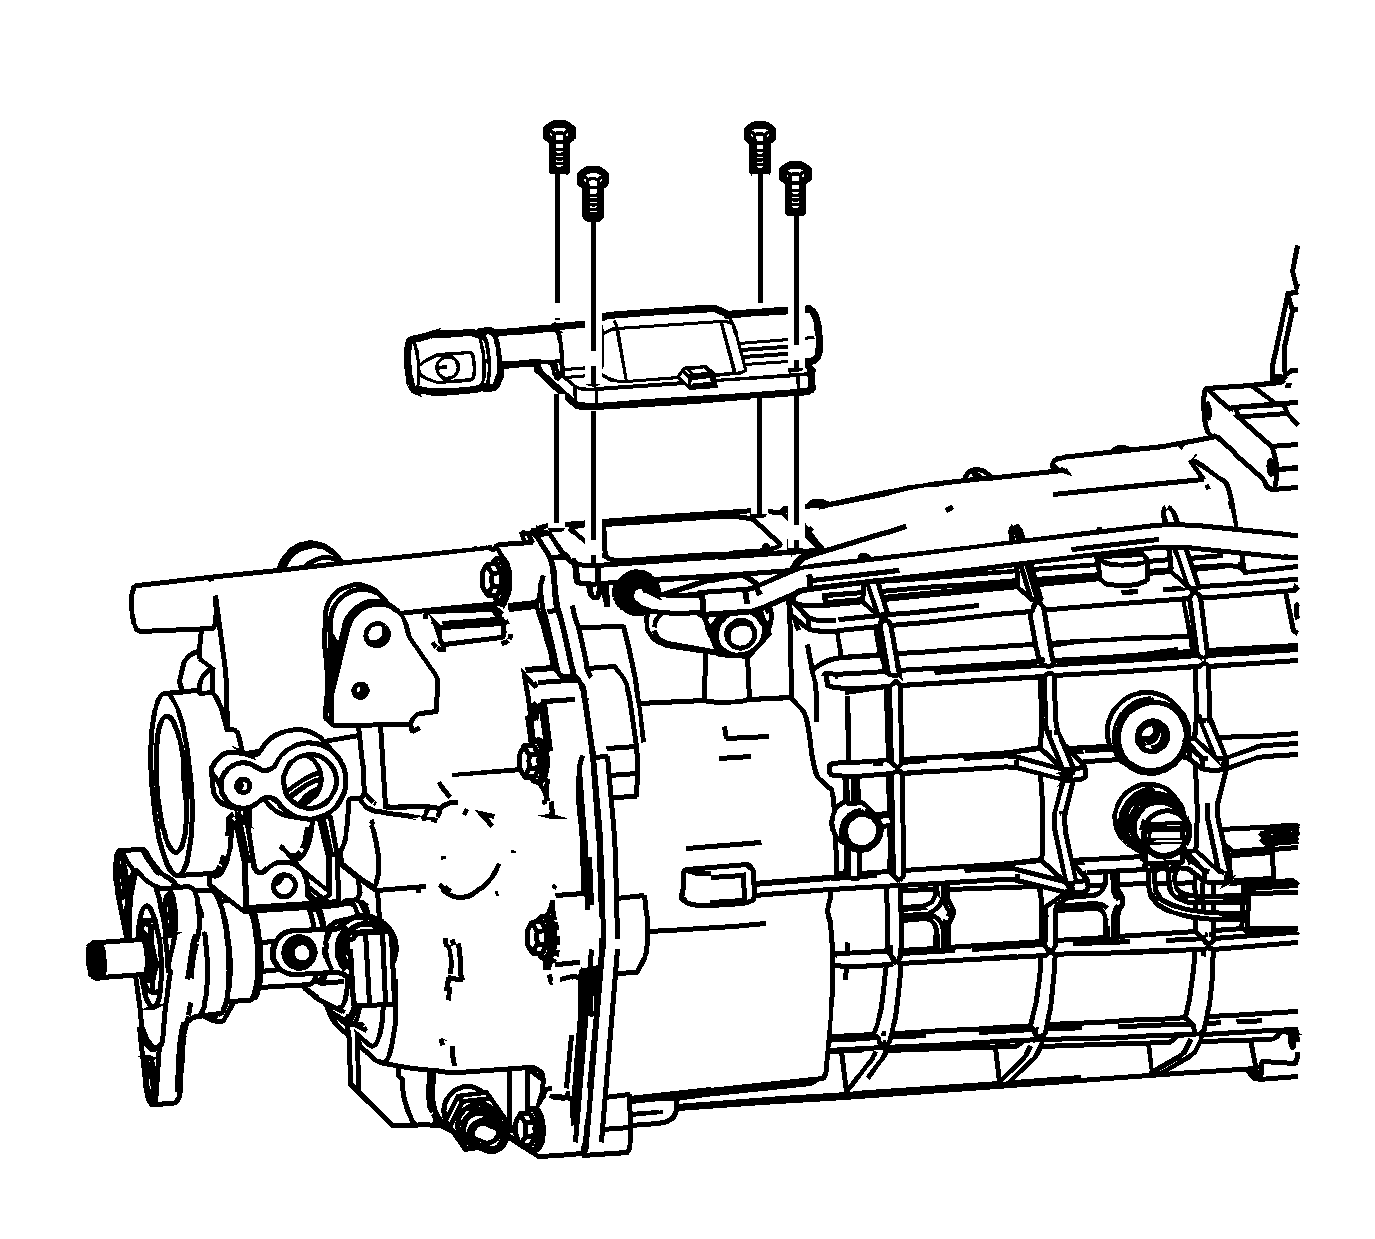
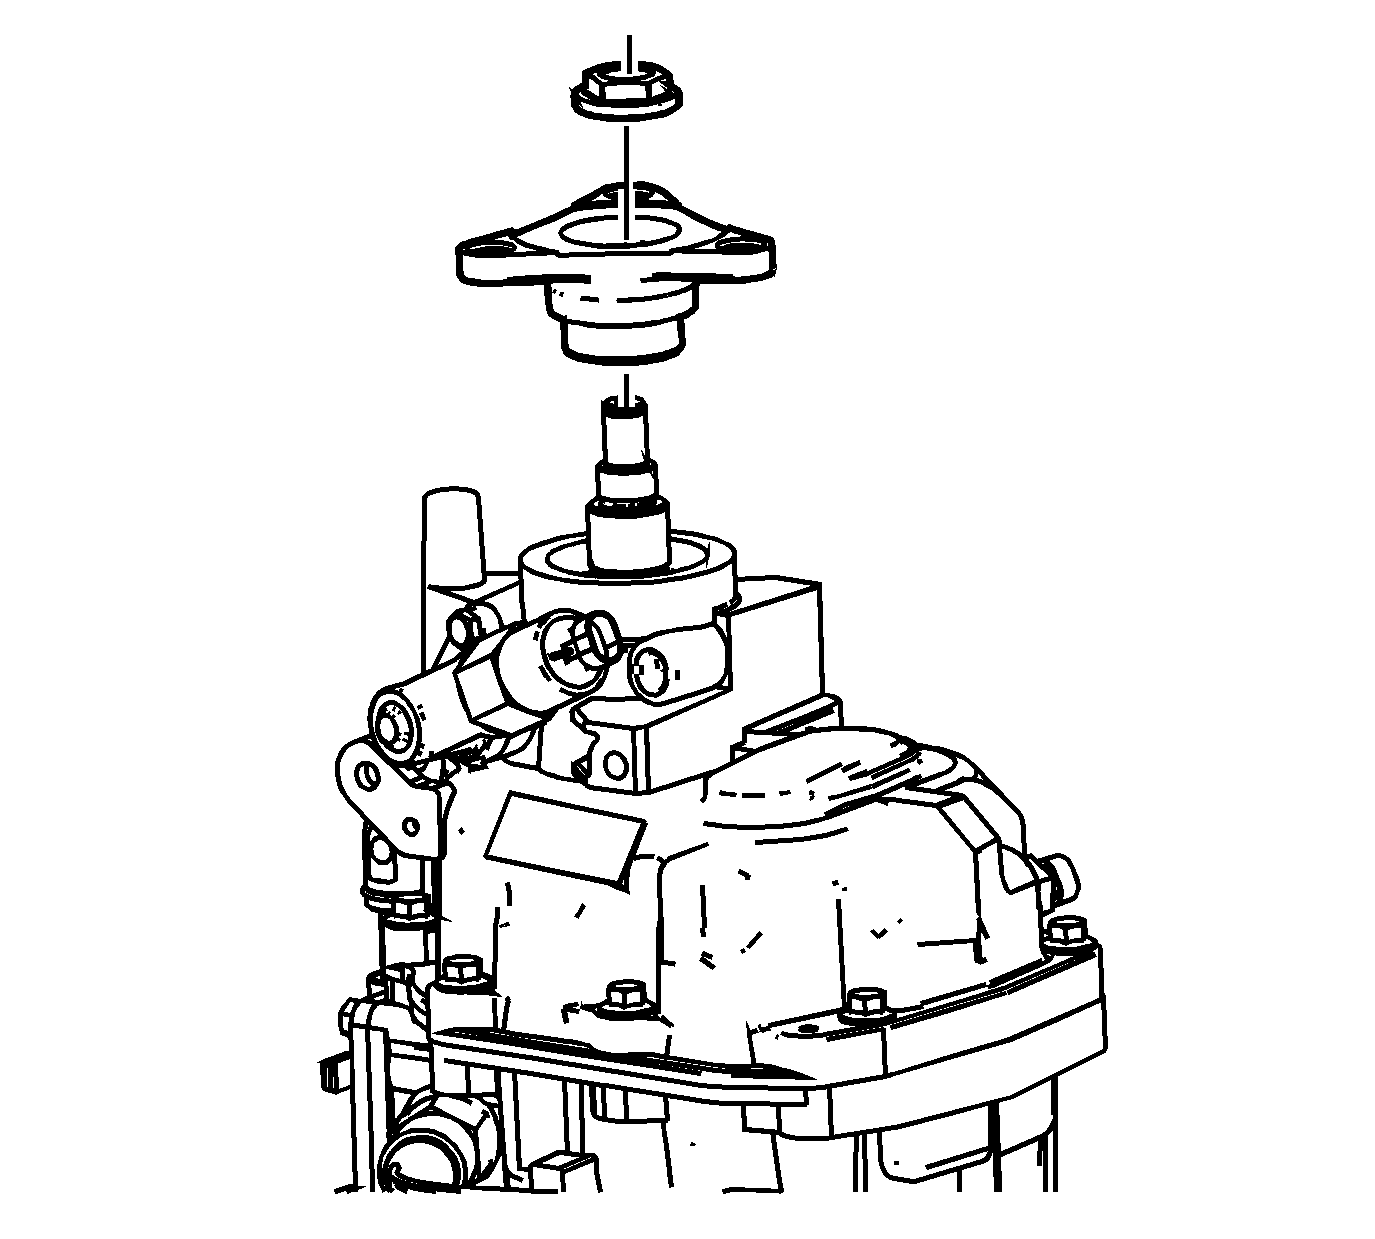
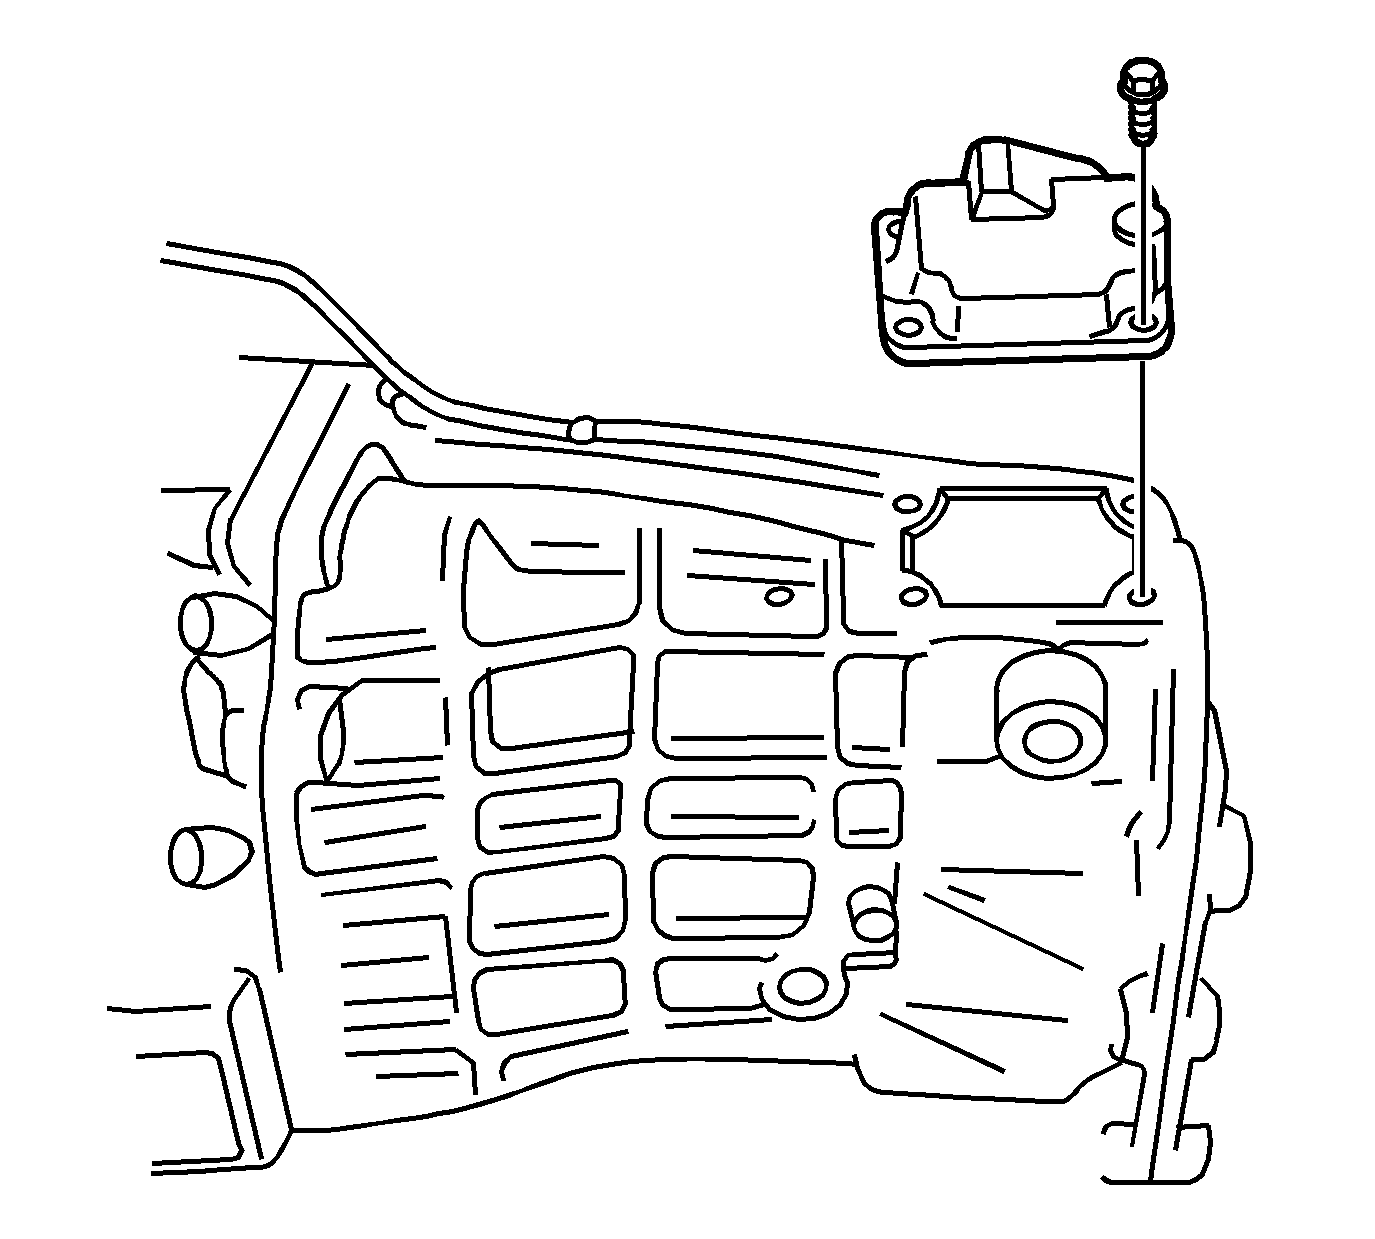
- Install the shifter cover plate.
- Install the shifter cover plate bolts.
Tighten
Tighten the bolts to 20 N·m (15 lb ft).
- Install the vent tube.
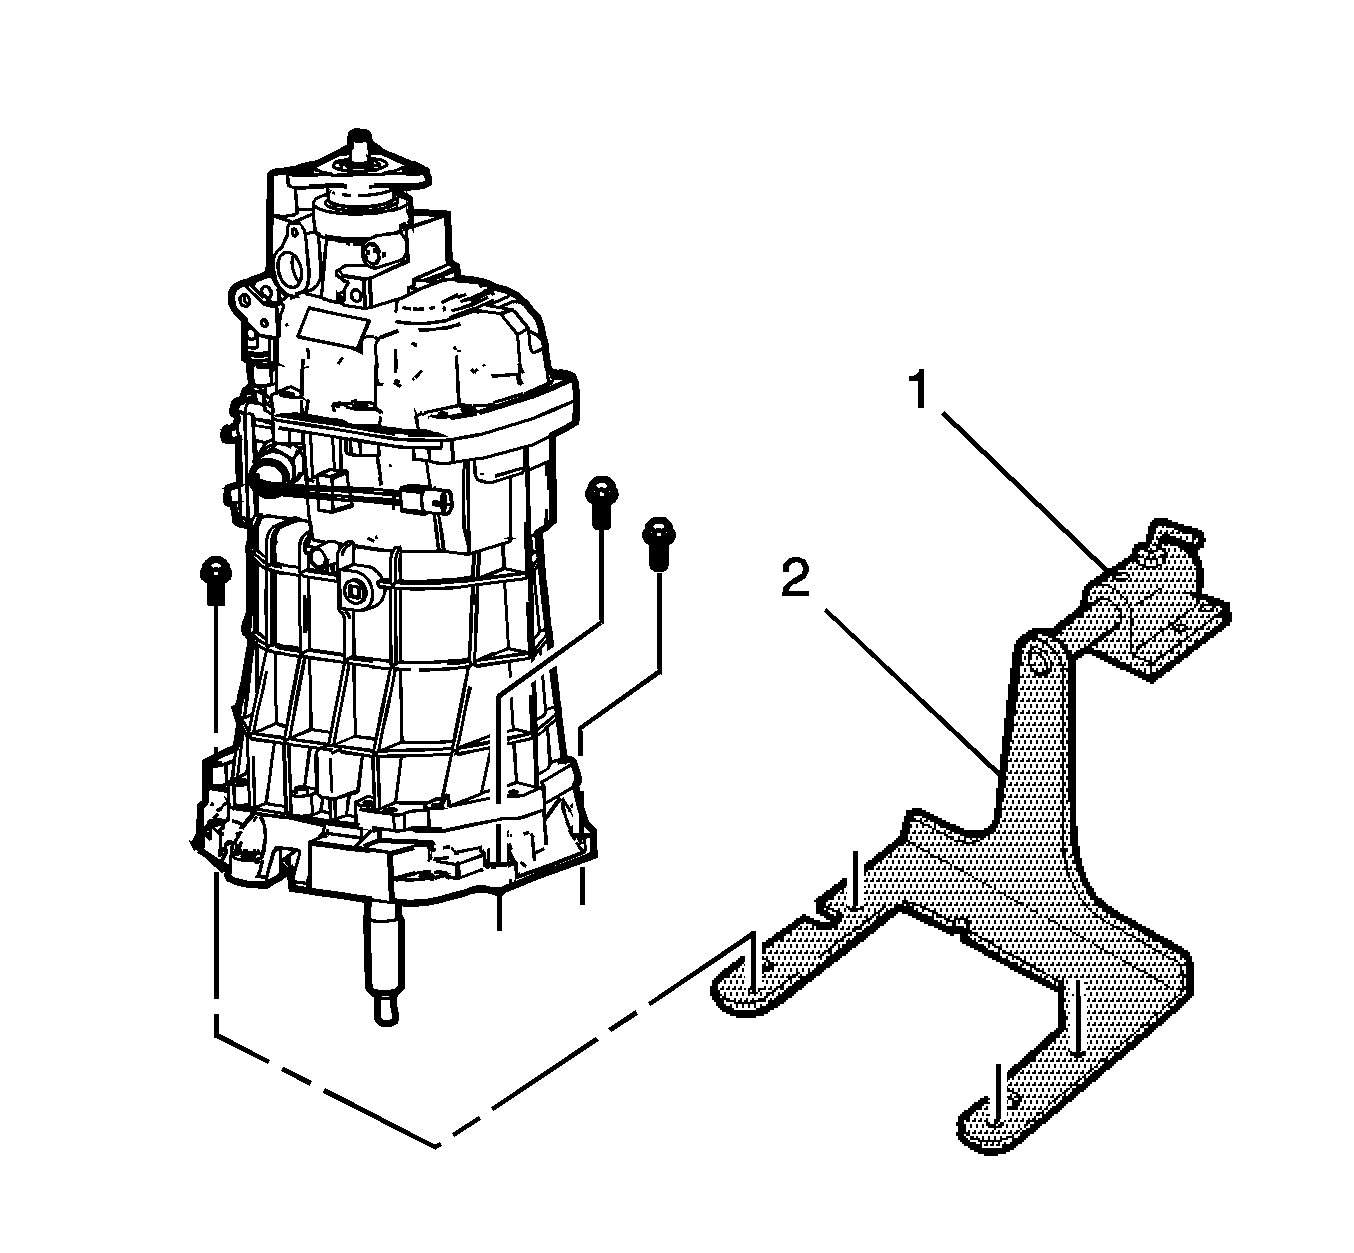
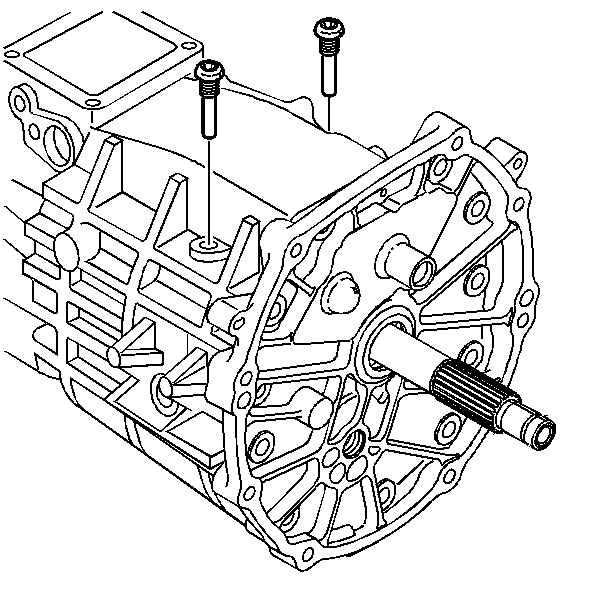
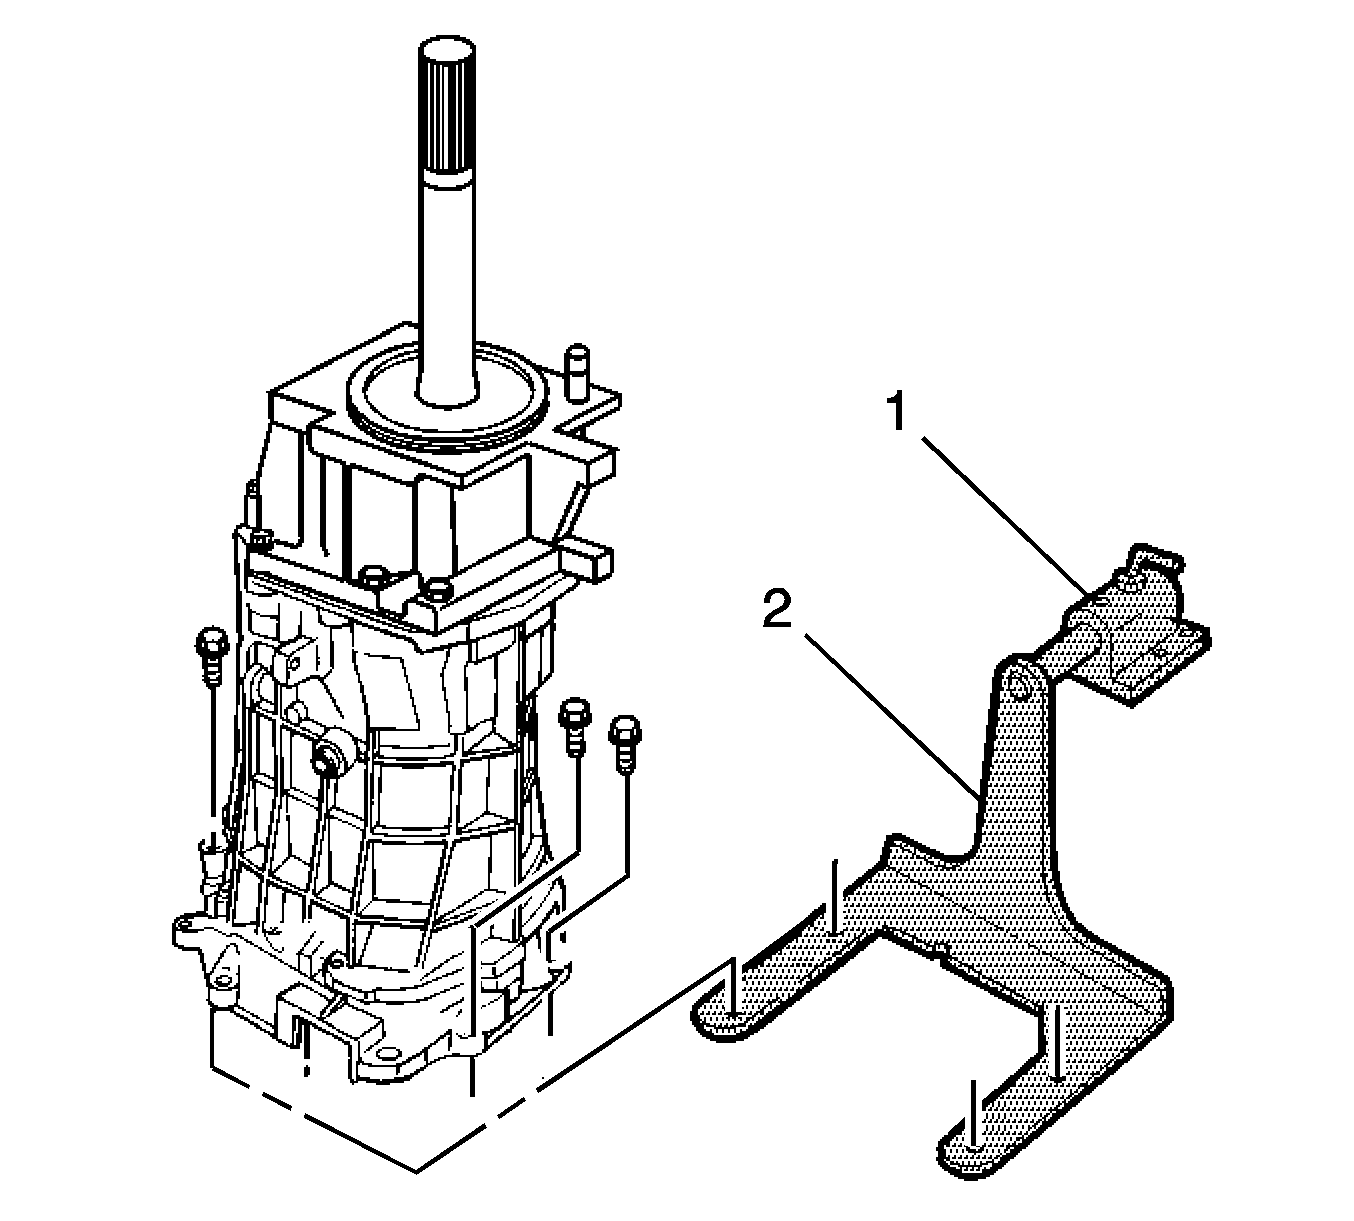
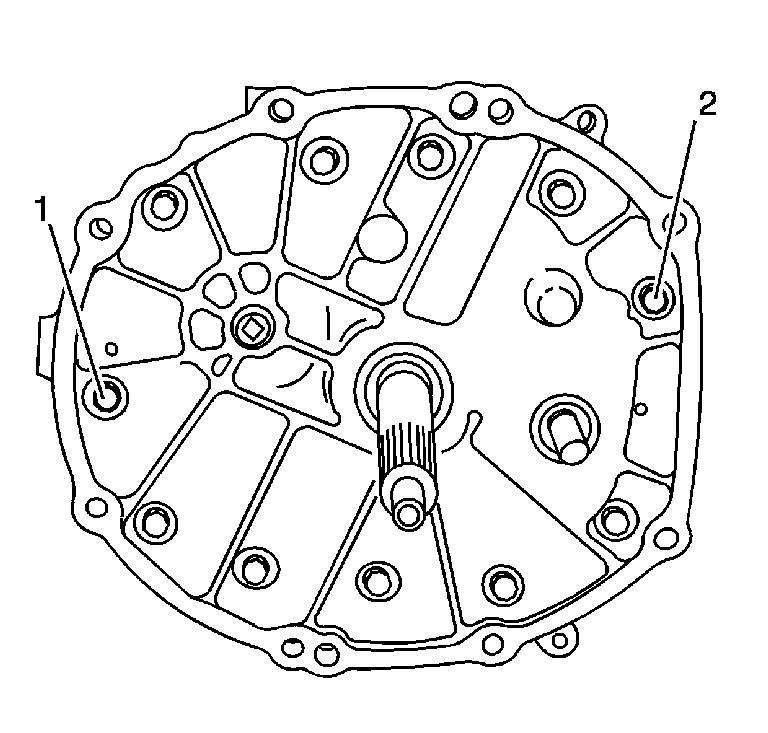
- Remove the
J 39430
(2).
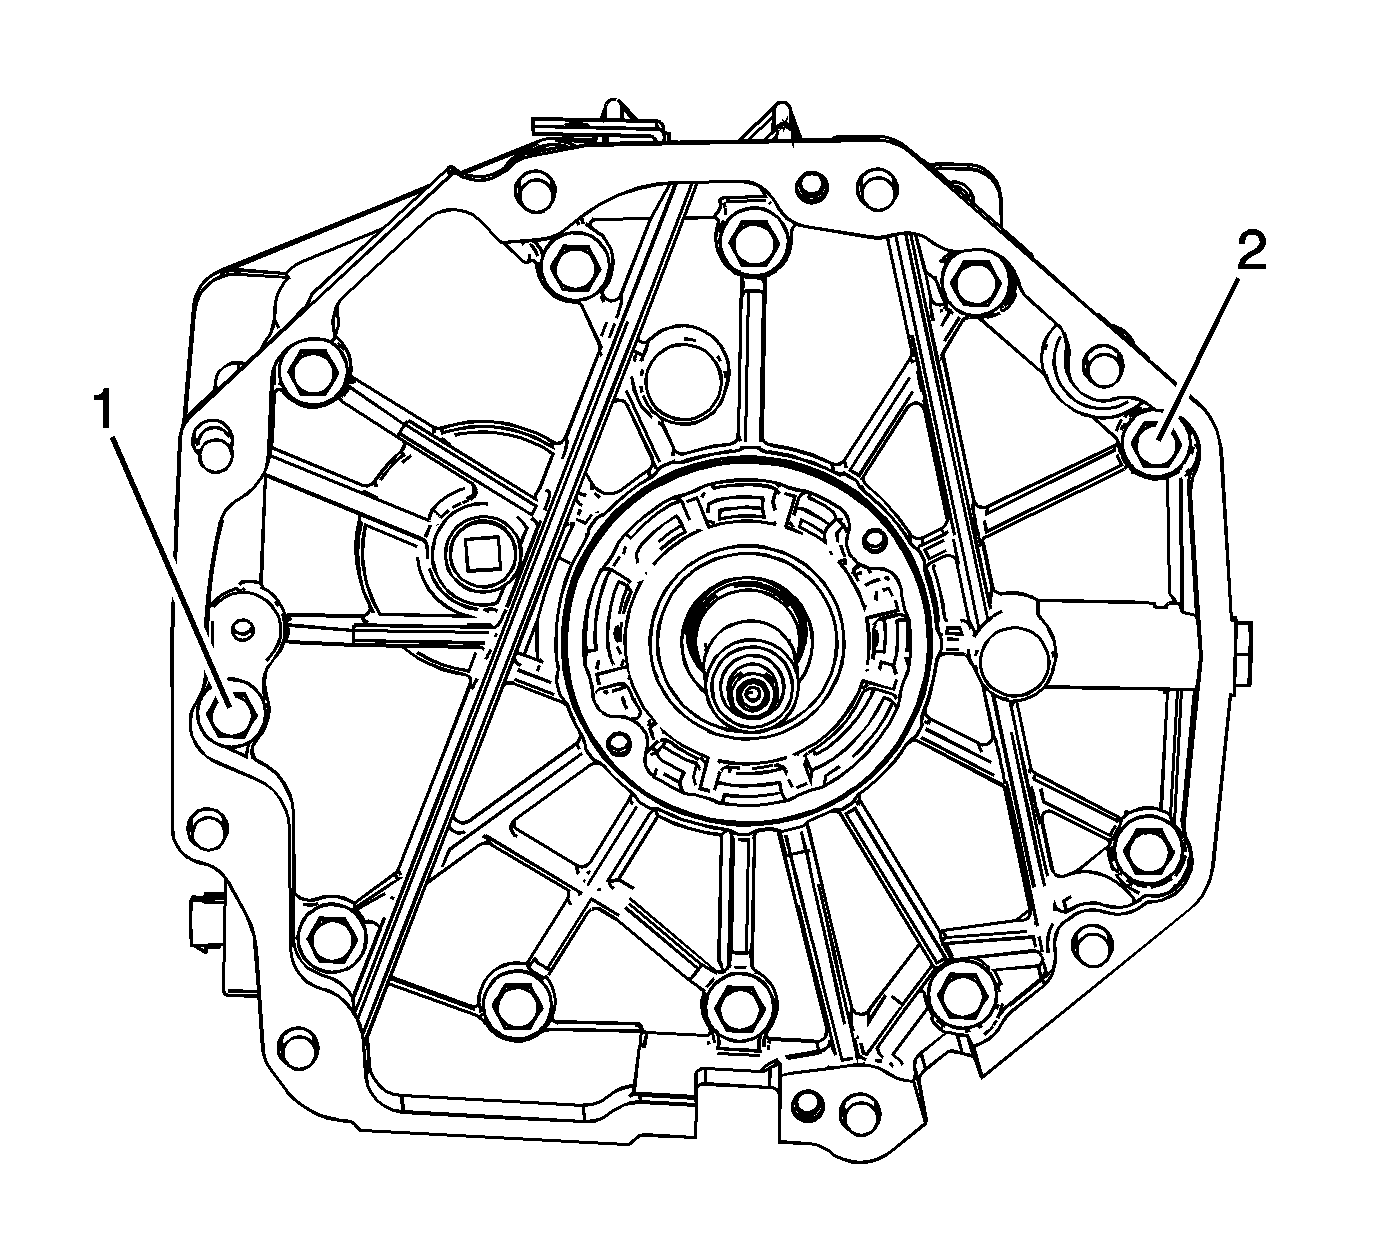
- Install the remaining 2 adapter plate bolts (1) and (2).
Tighten
Tighten the adapter plate bolts to 48 N·m (36 lb ft).
Transmission Assemble Corvette MM6 and MZ6
Shift Shaft Assemblies and Gear Clusters Installation
Tools Required
J 36850
Transjel®
Lubricant Assembly Lube
- Lubricate all components as assembly progresses, using
J 36850
.
- Install the input shaft
in the adapter plate.
- Assemble the shift shaft
to the mainshaft.
- Install the neutral return roll pin to the shift shaft.
- Install the mainshaft and the shift shaft assembly into the adapter
plate.
- Install the countershaft
assembly using the following sequence:
| 6.1. | Lift up the mainshaft assembly enough in order to install the
countershaft assembly. |
| 6.2. | Install the countershaft assembly. |
| 6.3. | Lift the mainshaft assembly enough in order to rotate the input
shaft to engage the synchronizer keys with 4th gear blocking ring. |
- Install the 5th/6th and
the reverse shift shaft.
Align the slots of the shift shaft levers with the interlock plate.
Reverse Lockout Assembly Assemble
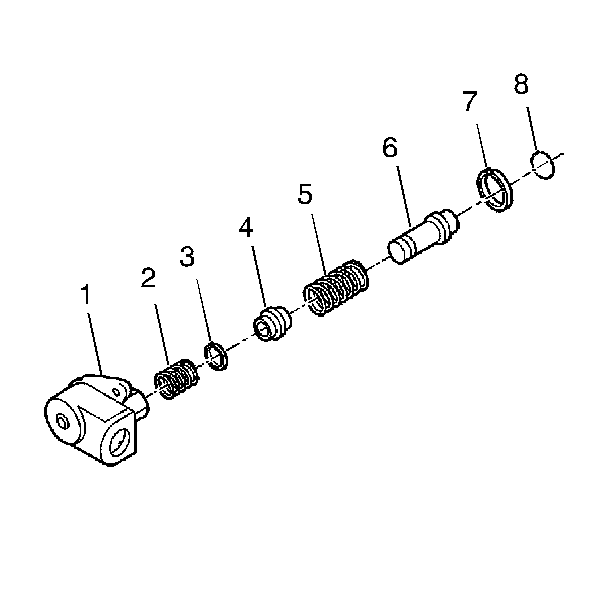
Caution: The reverse lockout assembly is under spring pressure. Exercise caution
when removing the retainer ring, as bodily injury may result.
- Install the reverse lockout plunger (6).
- Install the reverse lockout outer spring (5).
- Install the reverse lockout collar (4).
- Compress the reverse lockout plunger and the collar (4) in a vise
and Install the retainer ring (3).
- Install the reverse lockout inner spring (2).
- Install the reverse lockout components in the body (1).
- Install the retainer ring (7).
- Install the O-ring to body (8).
Transmission Case Installation
Tools Required
| • | J 41099
Skip Shift Sensor Remover/Installer |
Important: Lubricate all components as the assembly progresses. Use
J 36850
or the equivalent.
- Apply sealant GM P/N United States 12345739, GM P/N Canada 10953472 or equivalent to the transmission case to adapter plate mating surface.
- Install the ball detent and the spring in the front offset lever.
- Do the following in order to install the transmission case and the offset lever:
| 3.1. | Shift the transmission into NEUTRAL in order to keep the 3rd/4th shift shaft from engaging. |
| 3.2. | Install the offset lever. |
| 3.3. | Compress the front offset lever together while sliding it onto the shift shaft. This will prevent the spring release of the inner components. |
| 3.4. | Slide the transmission case onto the gear clusters and the shift rail components. |
- Apply threadlock GM P/N United States 12346004, GM P/N Canada 10953480 or equivalent to
the threads of the shift lever guide bolts.
Notice: Use the correct fastener in the correct location. Replacement fasteners
must be the correct part number for that application. Fasteners requiring
replacement or fasteners requiring the use of thread locking compound or sealant
are identified in the service procedure. Do not use paints, lubricants, or
corrosion inhibitors on fasteners or fastener joint surfaces unless specified.
These coatings affect fastener torque and joint clamping force and may damage
the fastener. Use the correct tightening sequence and specifications when
installing fasteners in order to avoid damage to parts and systems.
- Install the shift lever guide bolts and pull up on 5th/6th and reverse shift rail assembly. This will help align the slot of the shift interlock plate with the guide bolt hole.
Tighten
Tighten the bolts to 27 N·m (20 Ib ft).
- Install the adapter plate to transmission case bolts.
Tighten
Tighten the bolts to 48 N·m (36 Ib ft).
- Install the magnets into the transmission case.
- Install the offset lever roll pin.
- Install the shift detent assembly.
Tighten
Tighten the detent assembly to 40 N·m (30 Ib ft).
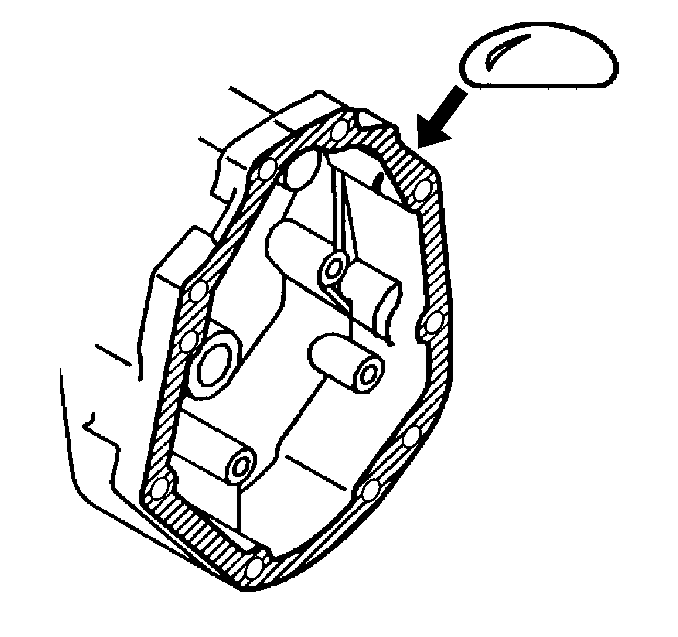
- Apply sealant GM P/N United States 12345739, GM P/N Canada 10953472 or the equivalent to the mating surface of
the cover plate.
- Install the transmission case cover and the case cover bolts.
Tighten
Tighten the bolts to 20 N·m (15 Ib ft).
- Install the reverse lockout body and bolt in the cover plate.
Tighten
Tighten the bolts to 18 N·m (13 Ib ft).
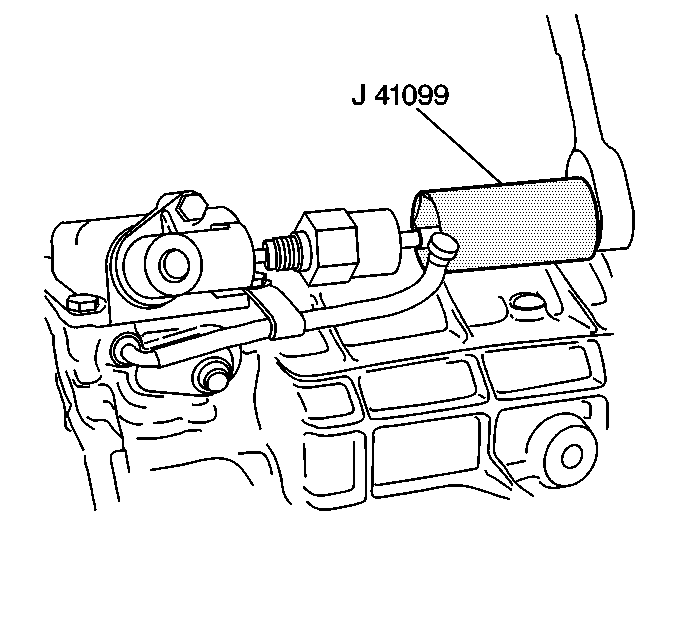
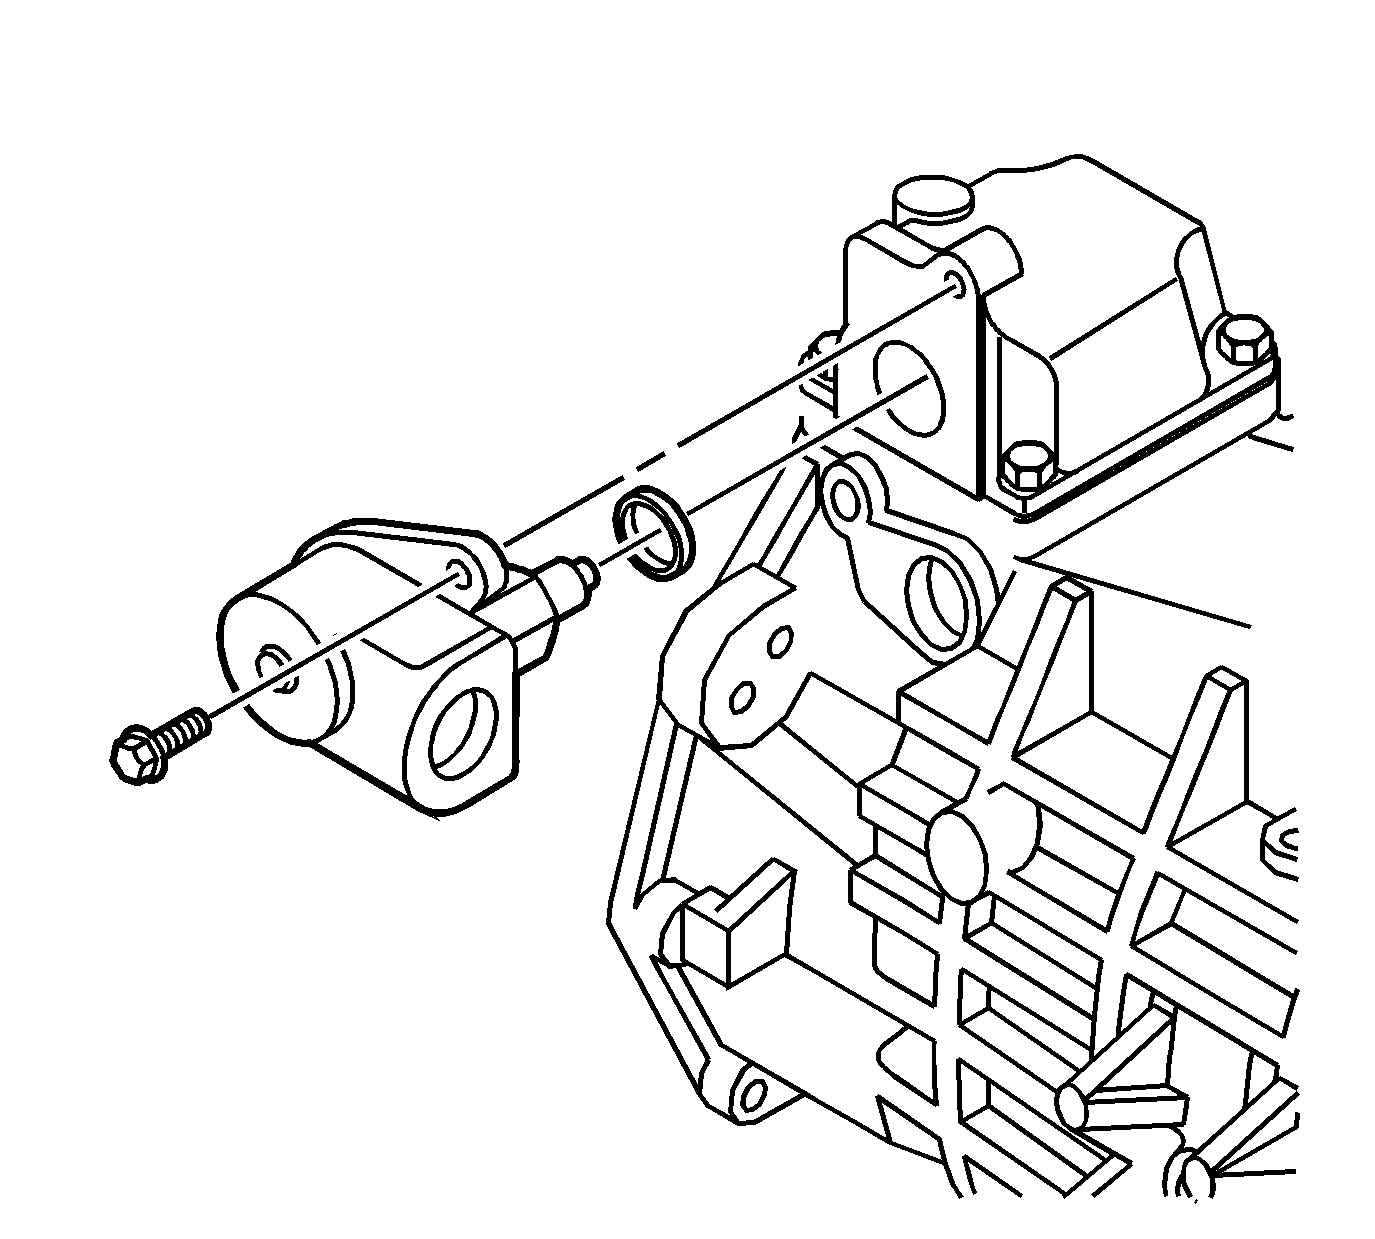
- Install the reverse lockout solenoid to reverse lockout body assembly, using the
J 41099
.
Tighten
Tighten the solenoid to 40 N·m (30 Ib ft).
- Install the computer aided gear select solenoid.
Tighten
Tighten the solenoid to 40 N·m (30 Ib ft).
Countershaft Extension Installation
- Position the transmission in the horizontal position.
- Install the countershaft extension assembly and the 5th/6th shift
fork. The splines of the countershaft extension must engage the splines
of the countershaft.
- Install the 5th/6th shift
fork retainer ring.
5th/6th Speed Driven Gear Installation
Tools Required
| • | J 39441
5th/6th
Driven Gear Installer |
Install the 5th/6th speed
driven gear using the
J 39441
and
J 39441-10
.
The smaller outside diameter (OD) of the gear faces down.
Reverse Shift Fork Installation
- Install the reverse shift fork, the synchronizer
and the thrust washer.
- Install a new shift fork retainer ring.
- Install the reverse synchronizer retainer
ring.
Reverse Speed Gear Installation
- Install the following
parts in order:
| 1.3. | The wave washer so the concave side faces the blocking ring |
| 1.4. | The caged needle bearing |
| 1.5. | The reverse speed gear |
- Install the following
parts in order:
| 2.4. | The roller bearing retainer ring |
Extension Housing Assemble
Tools Required
J 44395
Transmission Holding Fixture
- Install the following parts in order:
| 1.3. | The countershaft extension bearing race |
- Install the following parts in order:
| 2.1. | The reverse idler shaft |
| 2.3. | The reverse idler gear |
- Apply GM P/N 12345382 (Canadian P/N 10953489) or the equivalent to the reverse idler shaft brackets bolt
threads.
Notice: Use the correct fastener in the correct location. Replacement fasteners
must be the correct part number for that application. Fasteners requiring
replacement or fasteners requiring the use of thread locking compound or sealant
are identified in the service procedure. Do not use paints, lubricants, or
corrosion inhibitors on fasteners or fastener joint surfaces unless specified.
These coatings affect fastener torque and joint clamping force and may damage
the fastener. Use the correct tightening sequence and specifications when
installing fasteners in order to avoid damage to parts and systems.
- Install the following parts in order:
| 4.1. | The reverse idler shaft bracket |
| 4.2. | The reverse idler shaft bracket bolts |
Tighten
Tighten the bolts to 25 N·m (18 Ib ft).
- Install a new gasket GM P/N 89059570 on the extension housing to the
transmission case mating surface.
- Apply thread sealer GM P/N 12346004 (Canadian P/N 10953480) or equivalent to the top 2 extension
housing bolts.
Important: Align the 5th/6th shift shaft to the extension housing bore in order to install the extension housing.
- Install the extension housing.
- Install the extension housing bolts.
Tighten
Tighten the bolts to 48 N·m (36 lb ft).
- Install the vent tube.
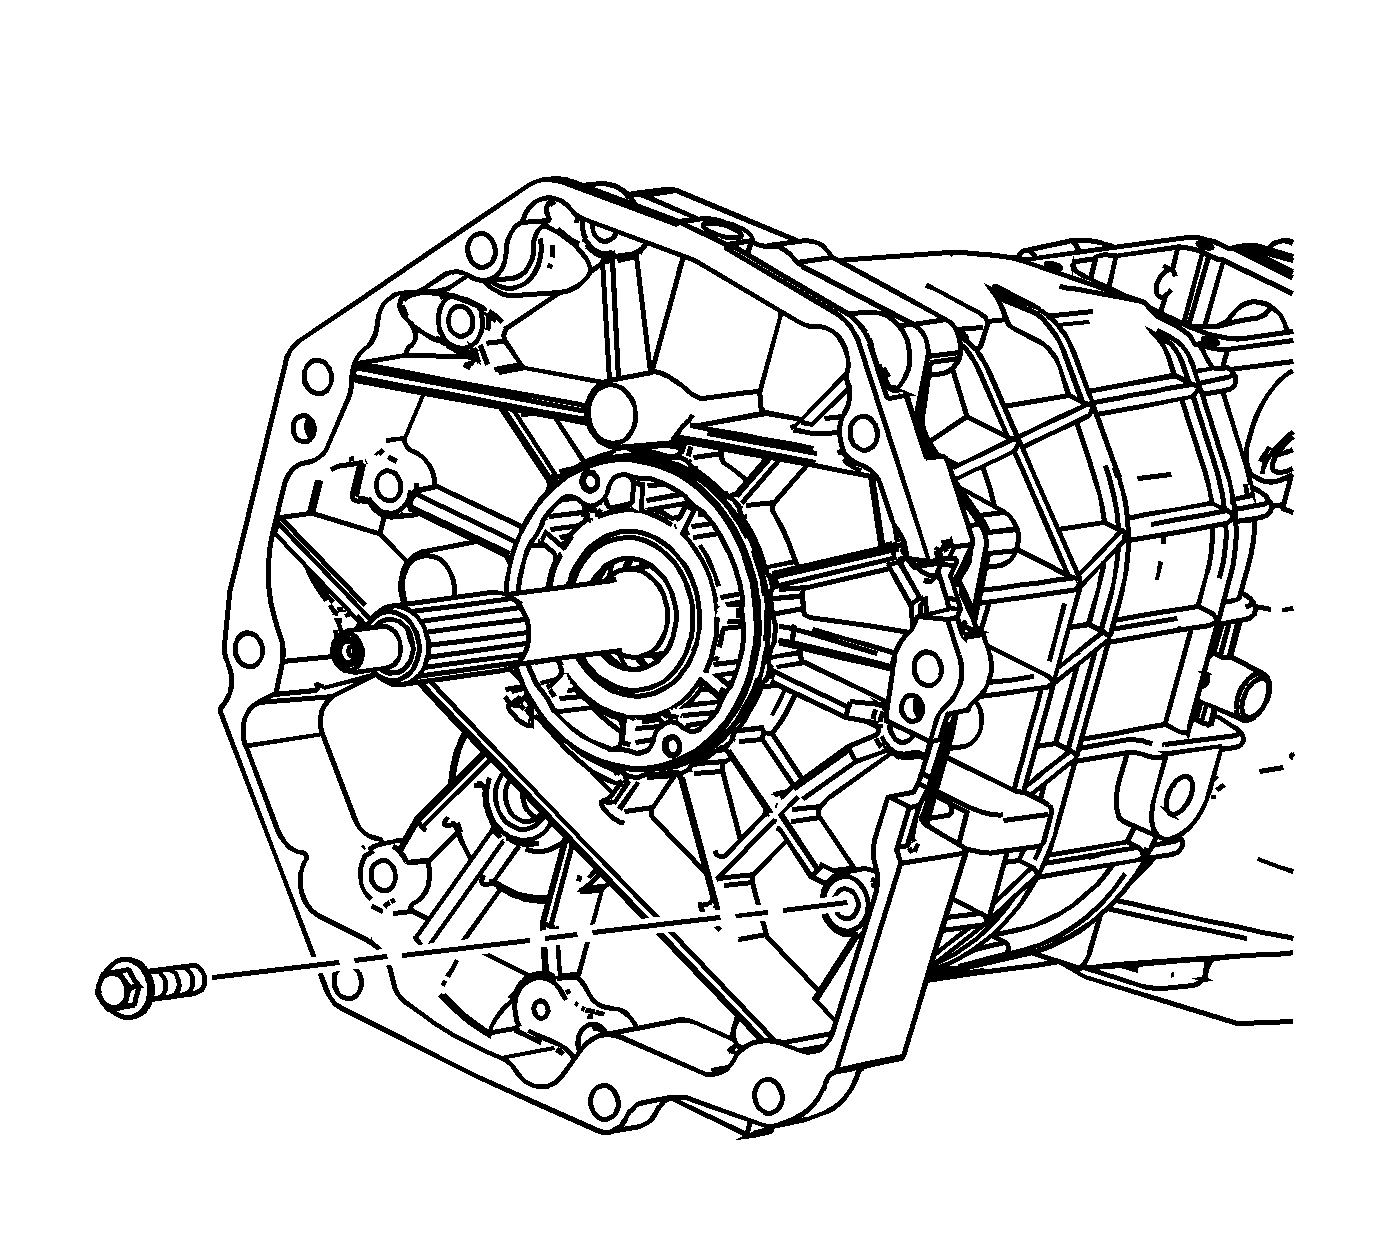
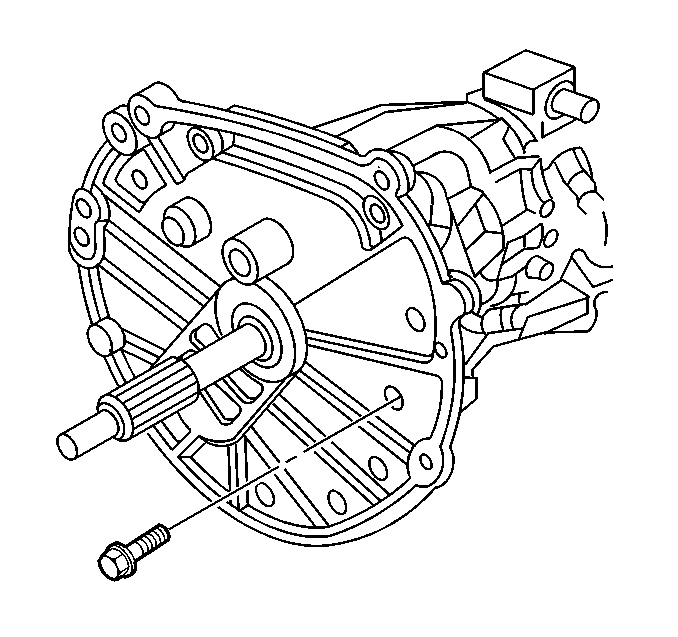
- Remove the
J 44395
.
- Install the remaining 2 adapter plate bolts (1) and (2).
Tighten
Tighten the adapter plate bolts to 48 N·m (36 lb ft).
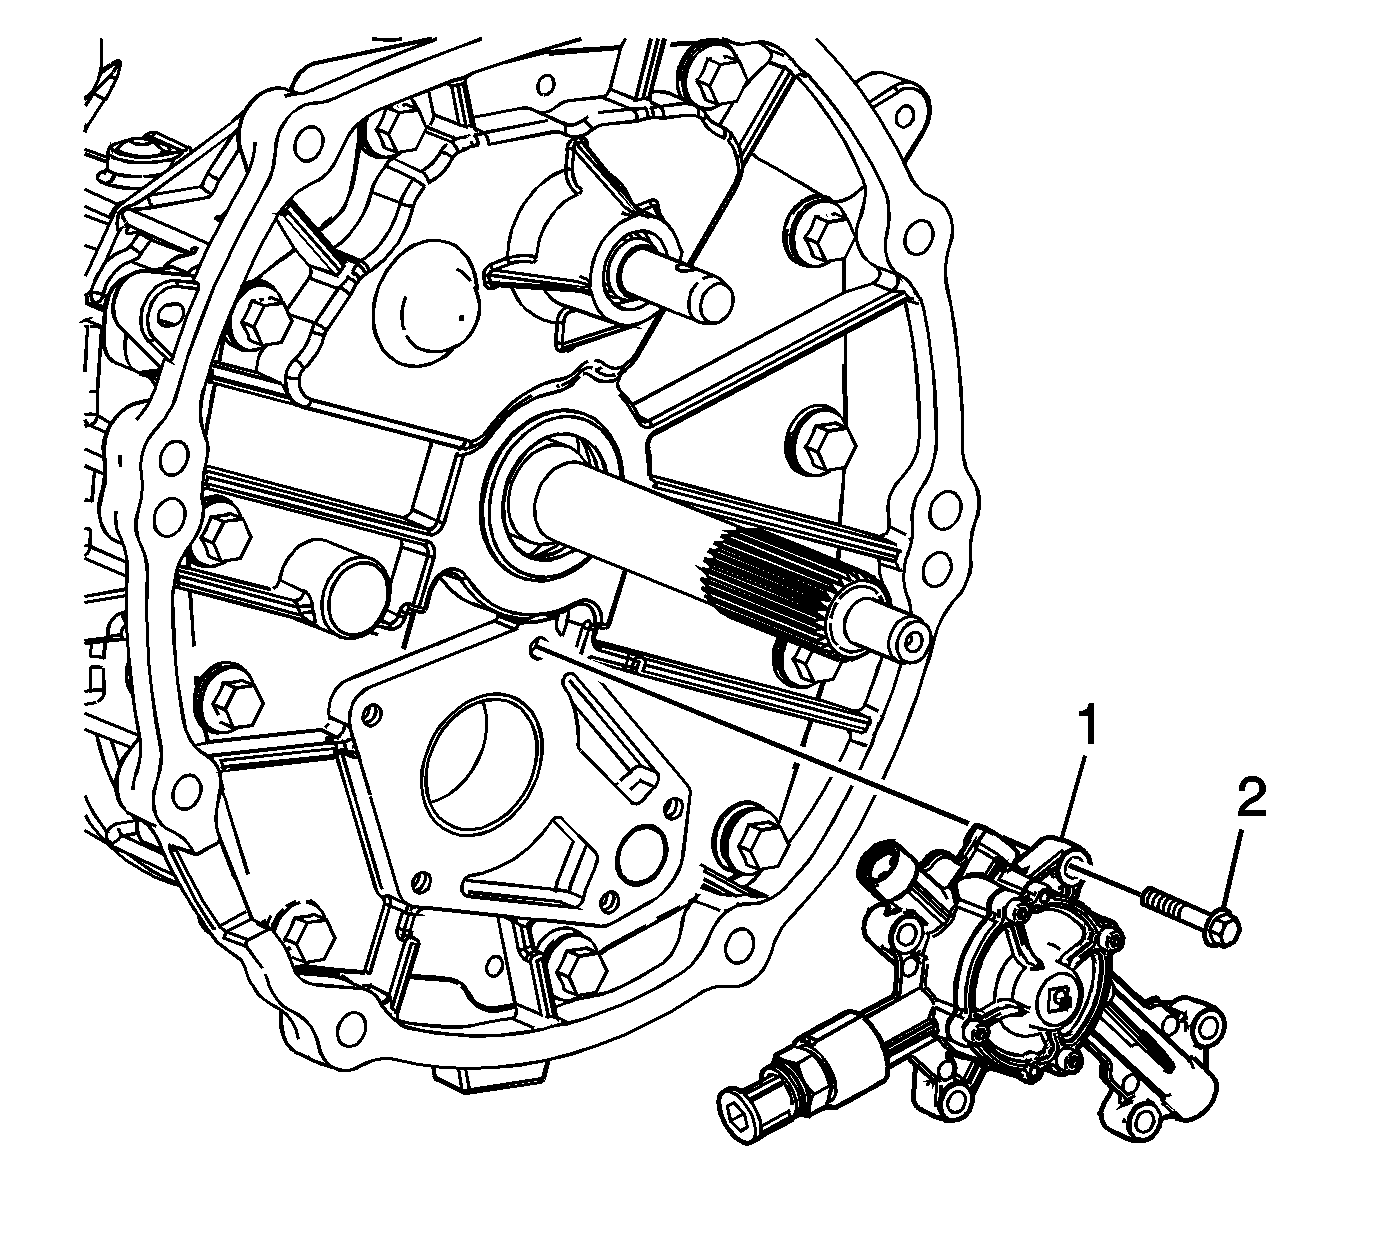
- Install the auxiliary coolant pump (1) (MZ6 only).
- Install the auxiliary coolant pump bolt (2) (MZ6 only).
Tighten
Tighten the bolt to 19 N·m (14 lb ft).
