Tools Required
| • | J 6125-1B Slide Hammer |
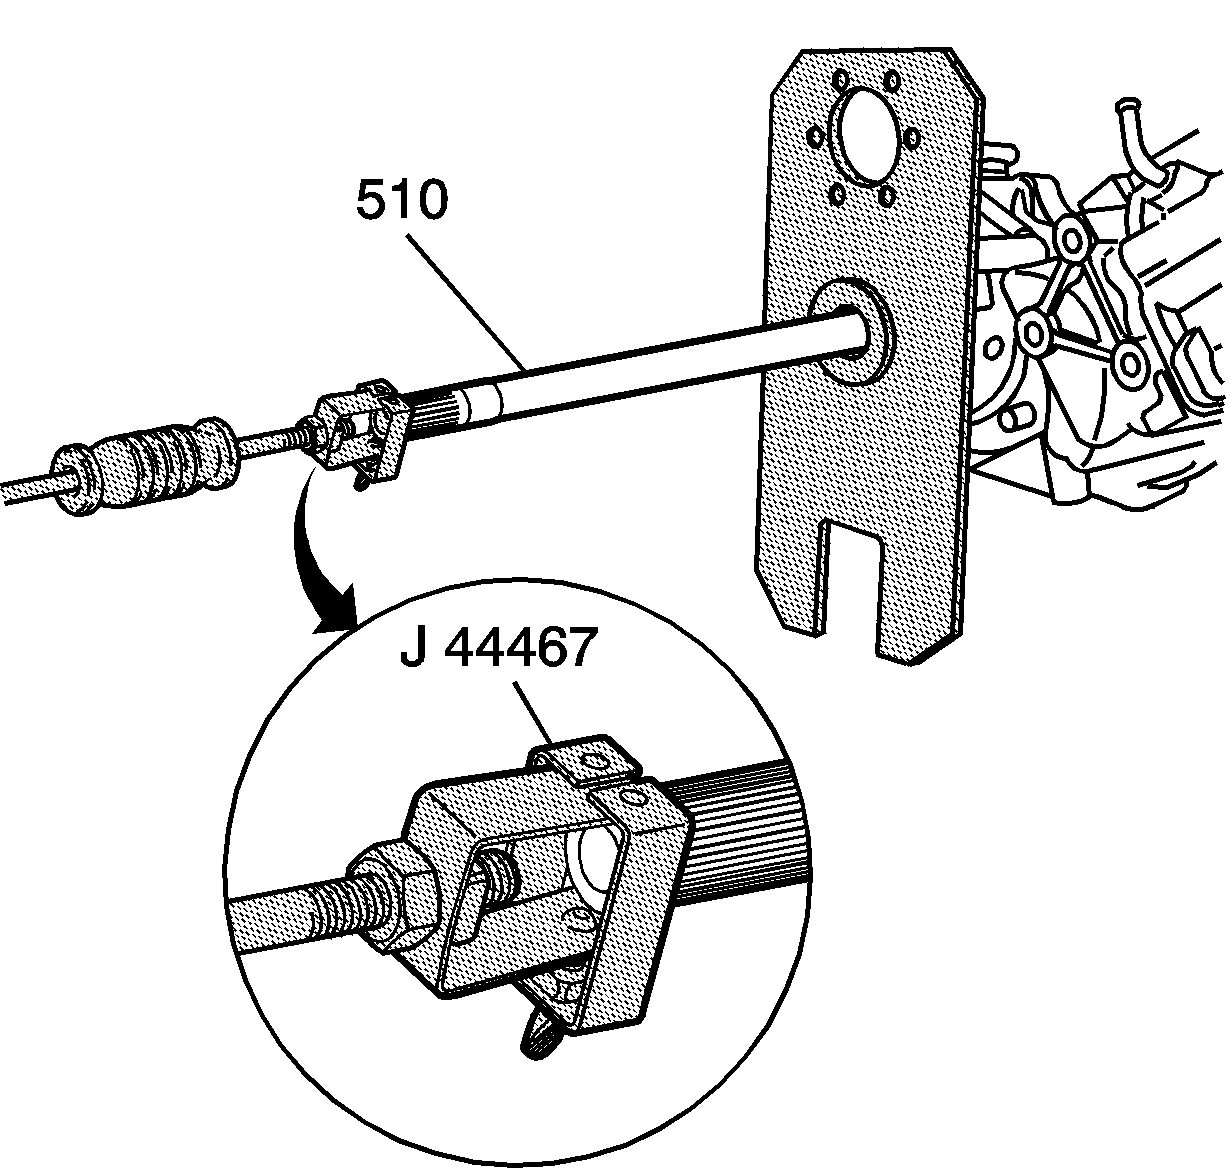
| • | J 44467 Output Shaft Assembly Remover and Installer |
| • | J 44755 Holding Fixture |
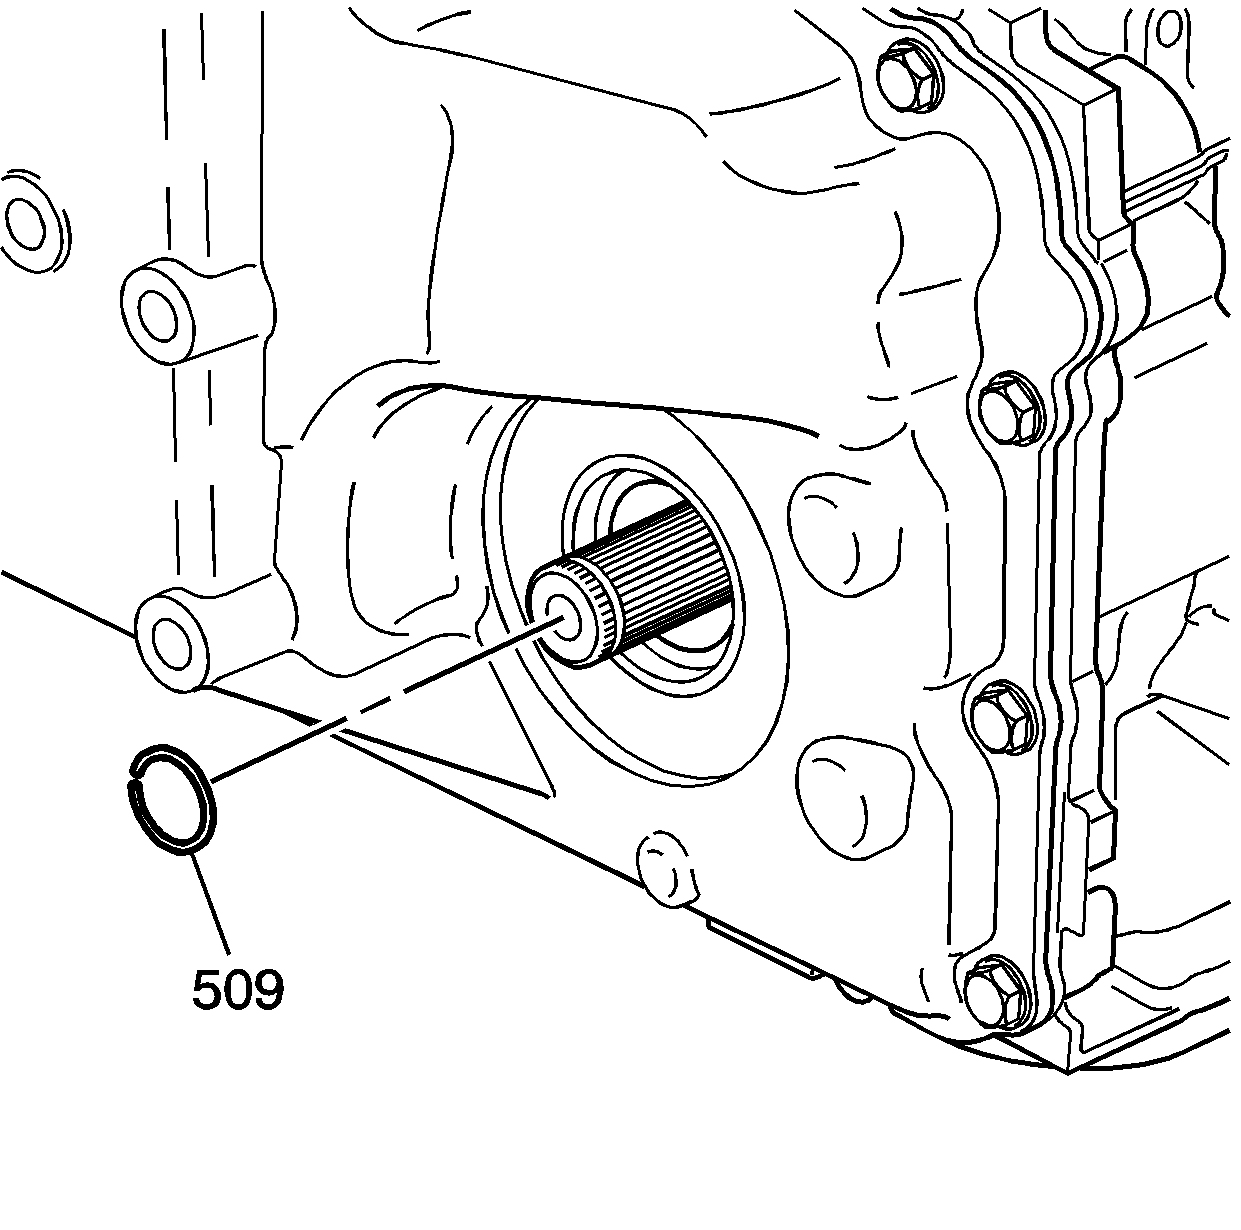
- Remove the drive shaft retaining ring (509).
- Rotate the transaxle 90 degrees.
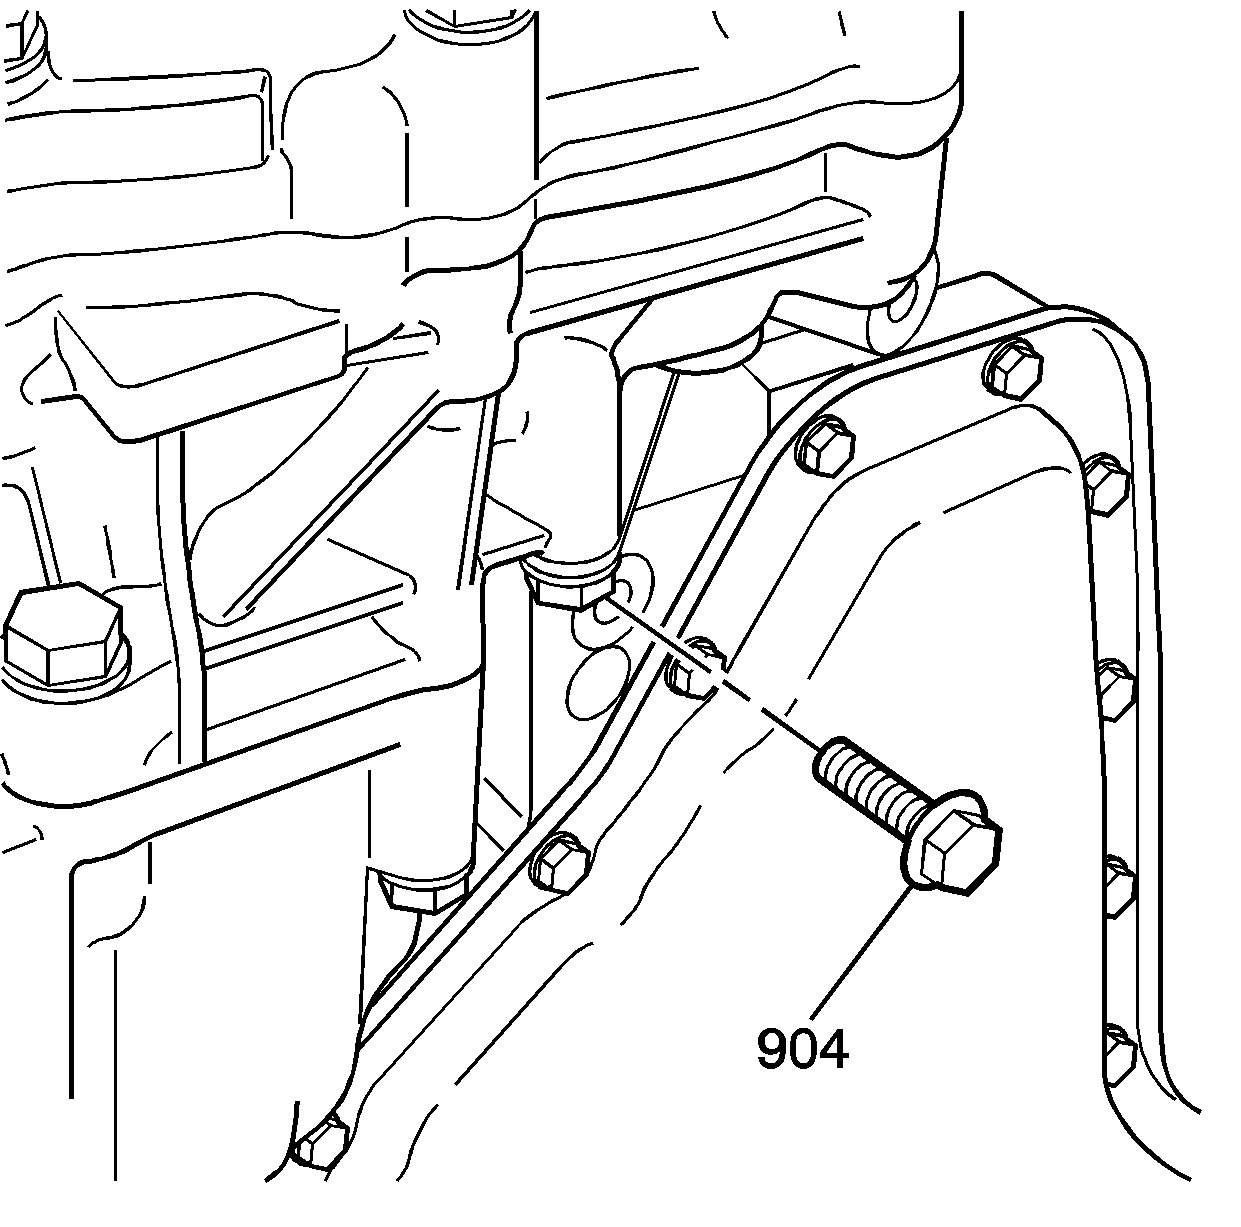
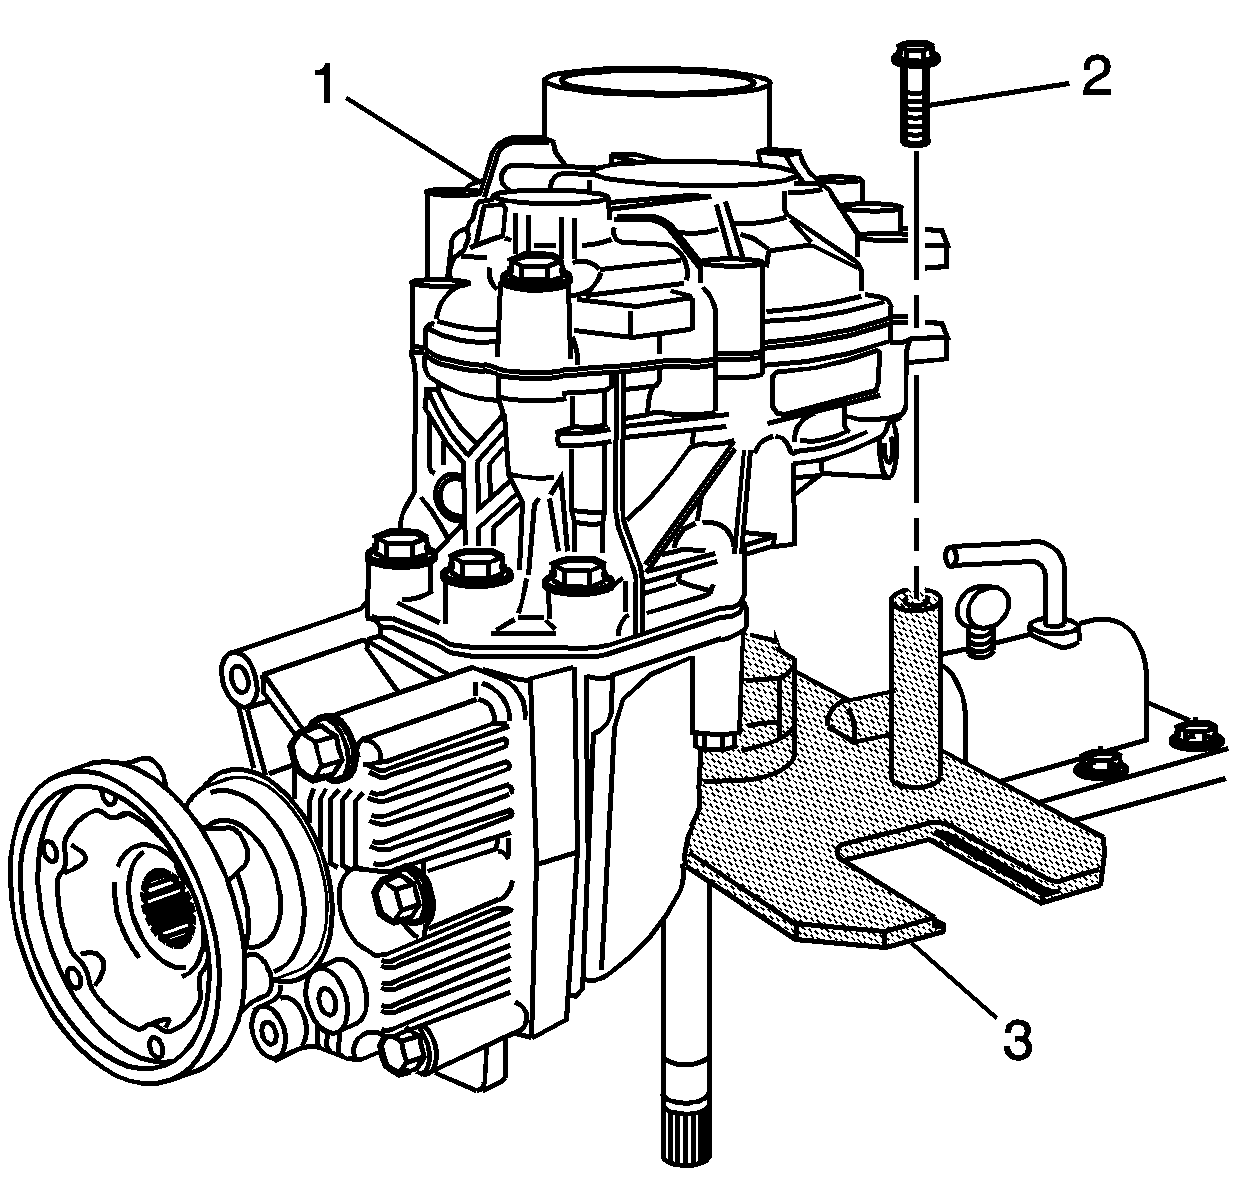
- Remove the transfer case lower brace bolt (904).
- Rotate the transaxle 90 degrees.
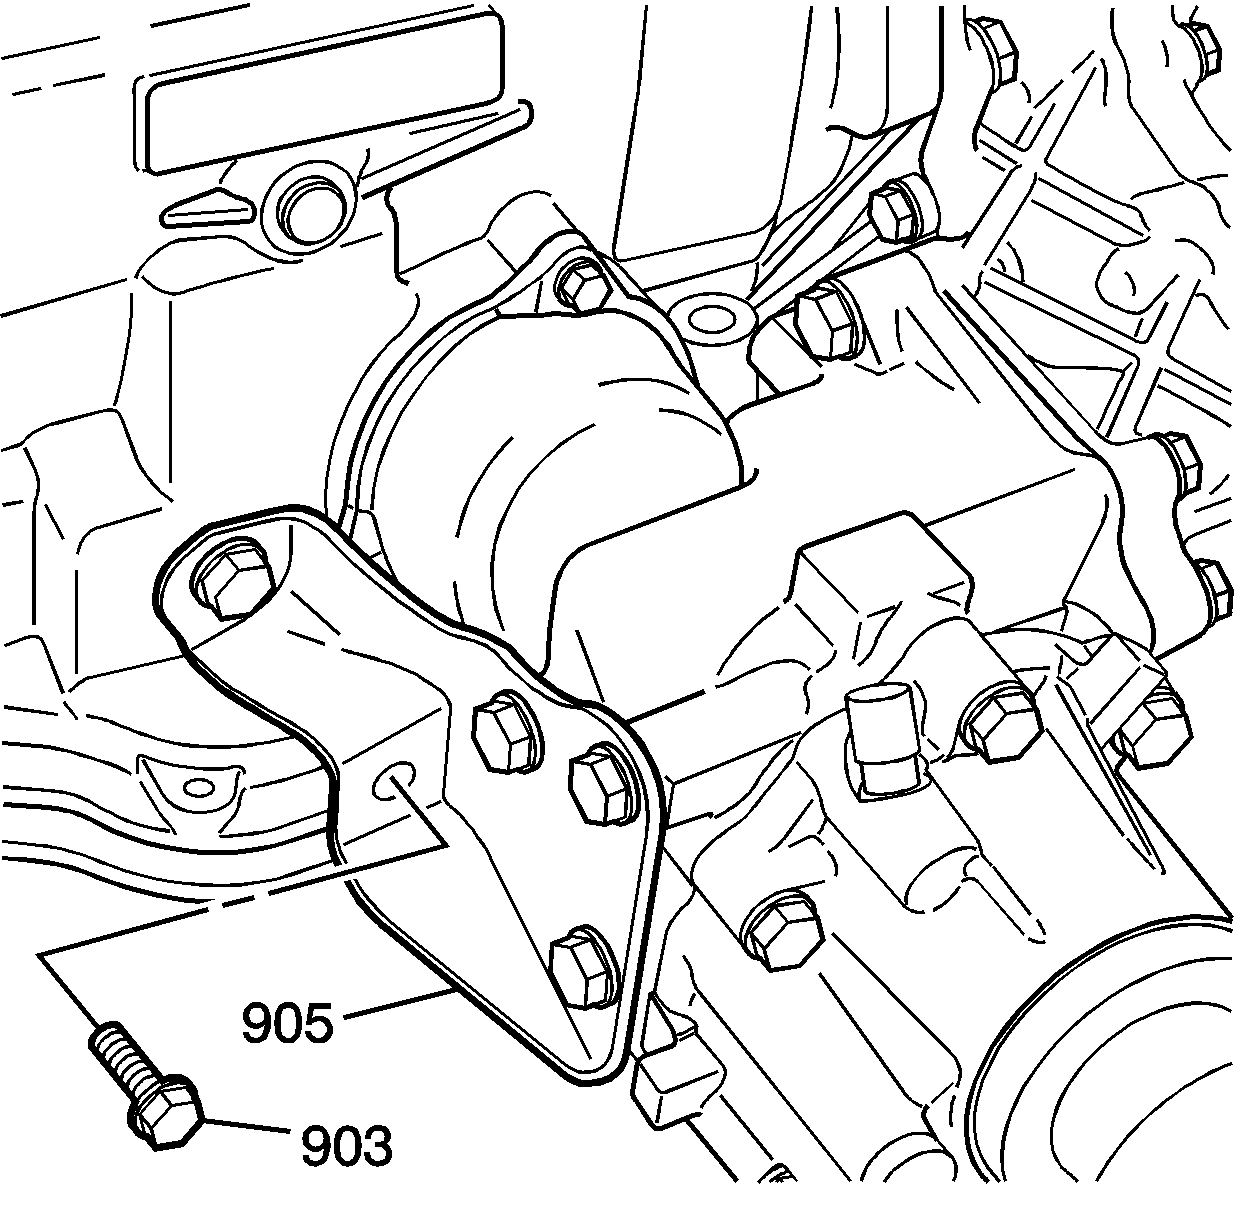
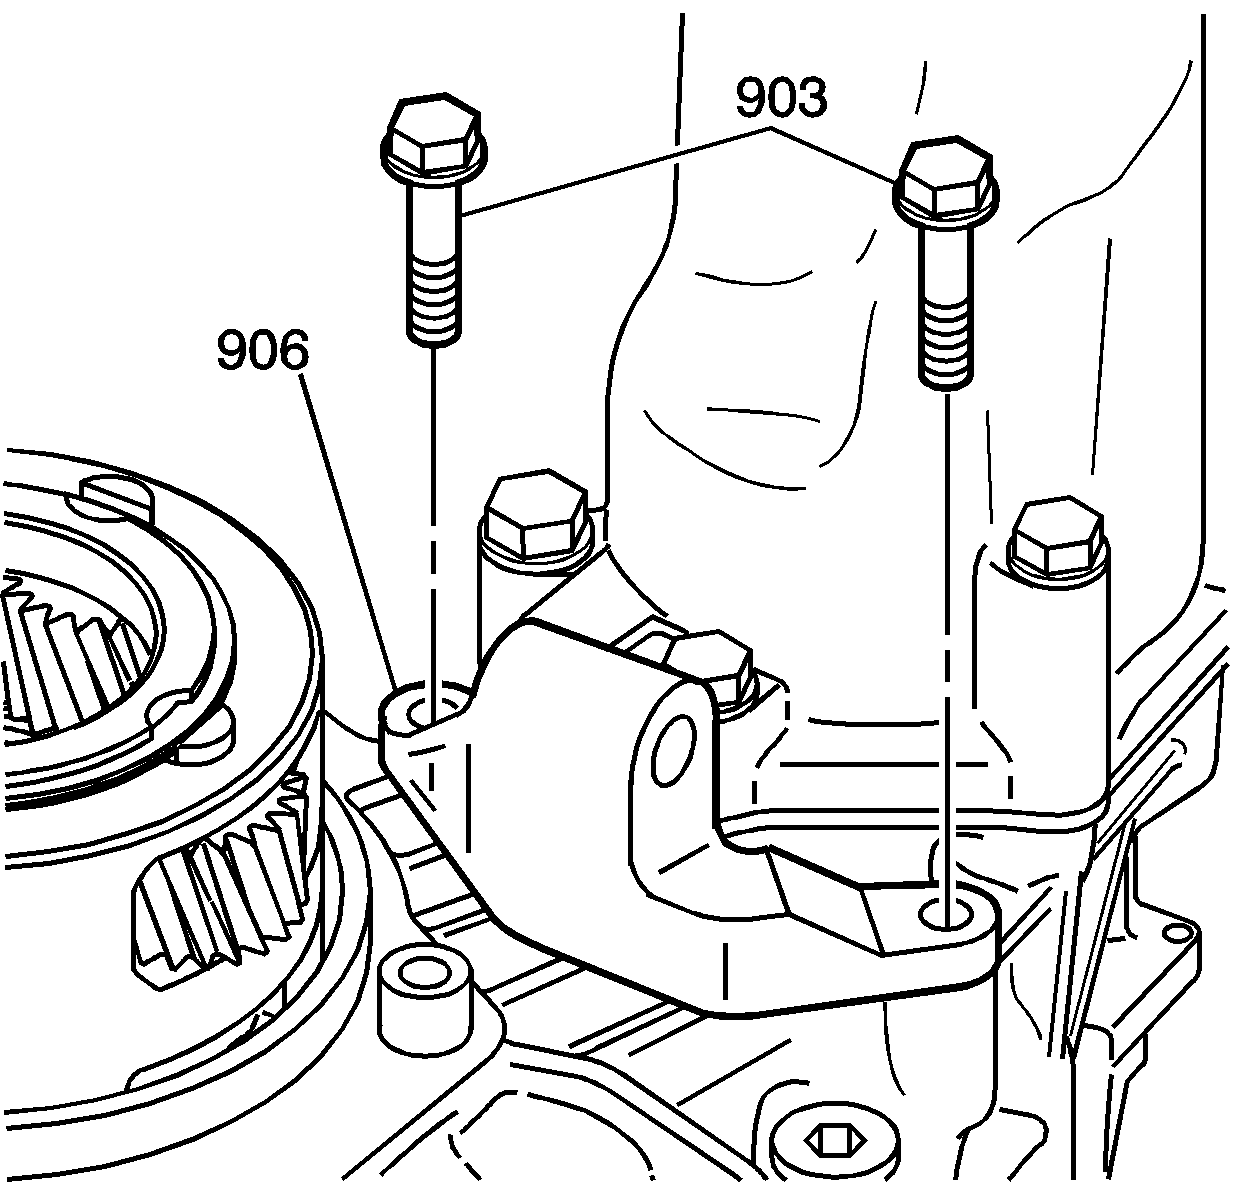
- Remove the transfer case side brace bolts (903). Remove the side brace (905).
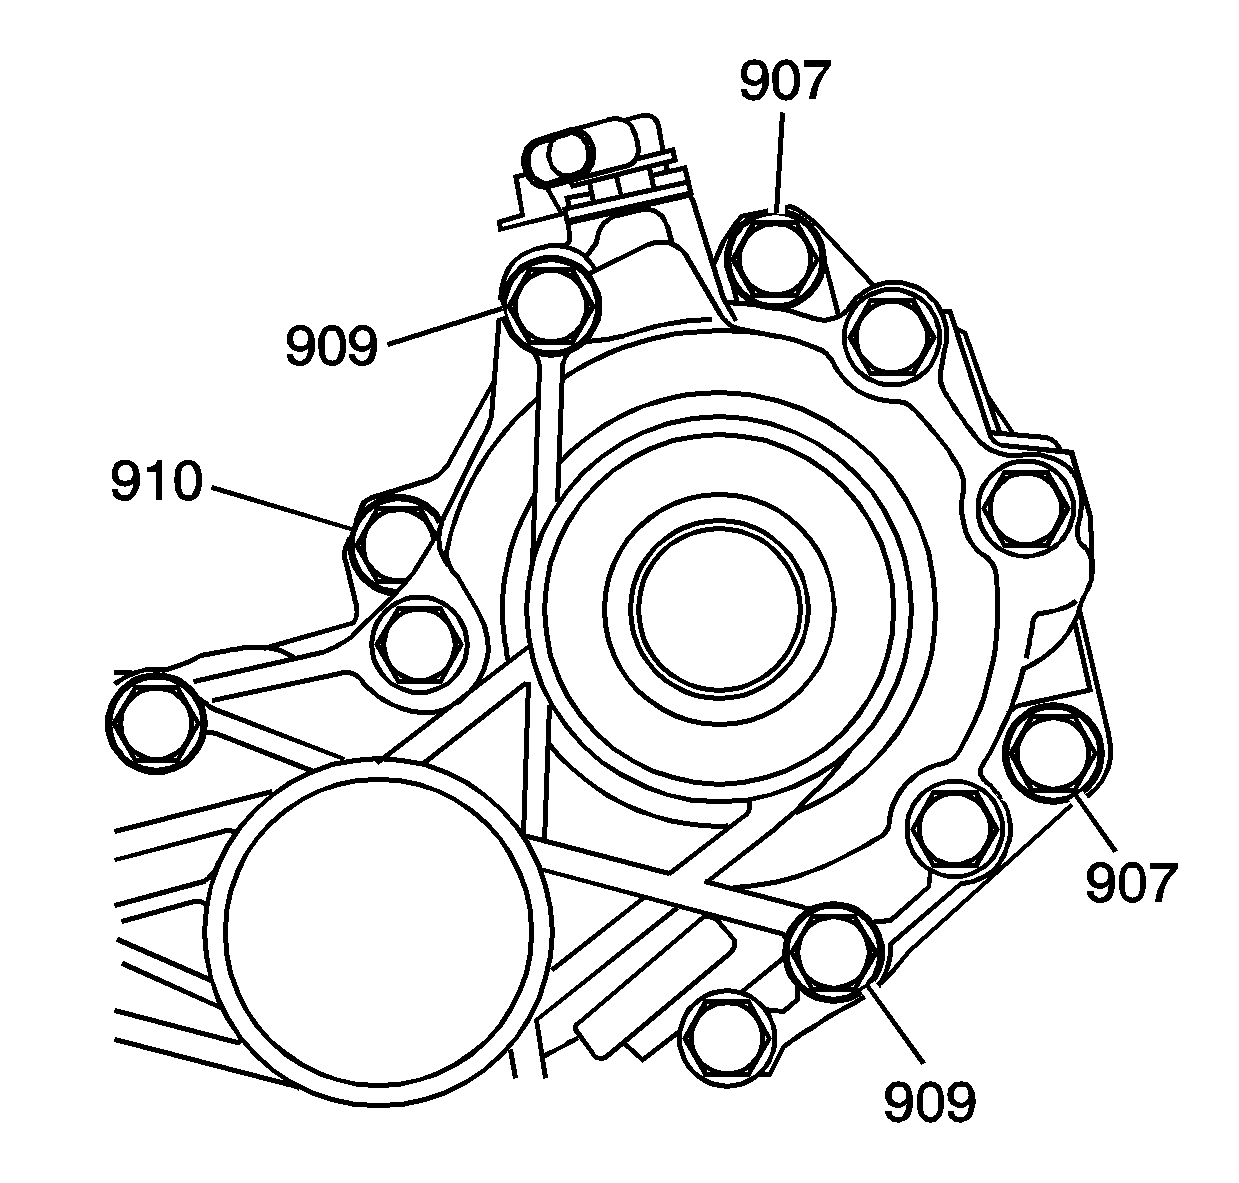
- Remove the transfer case to case bolts (907, 909, 910).
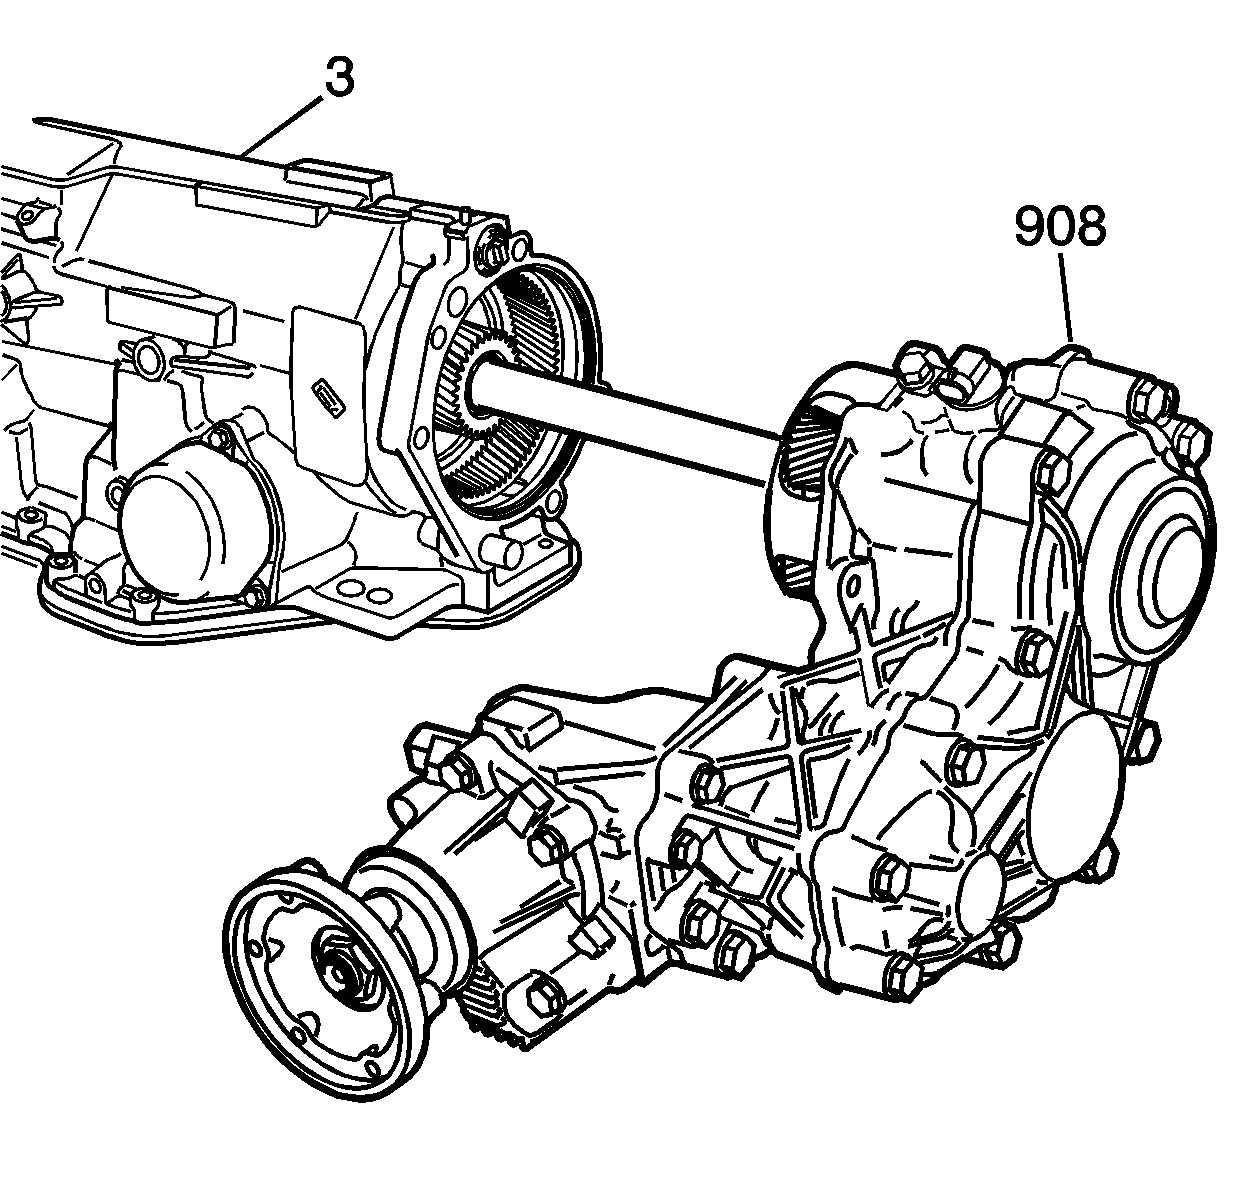
- Remove the transfer case assembly (908) from the transmission case (3).
- Remove the transfer case lower brace bolts (903).
- Remove the transfer case lower brace (906).
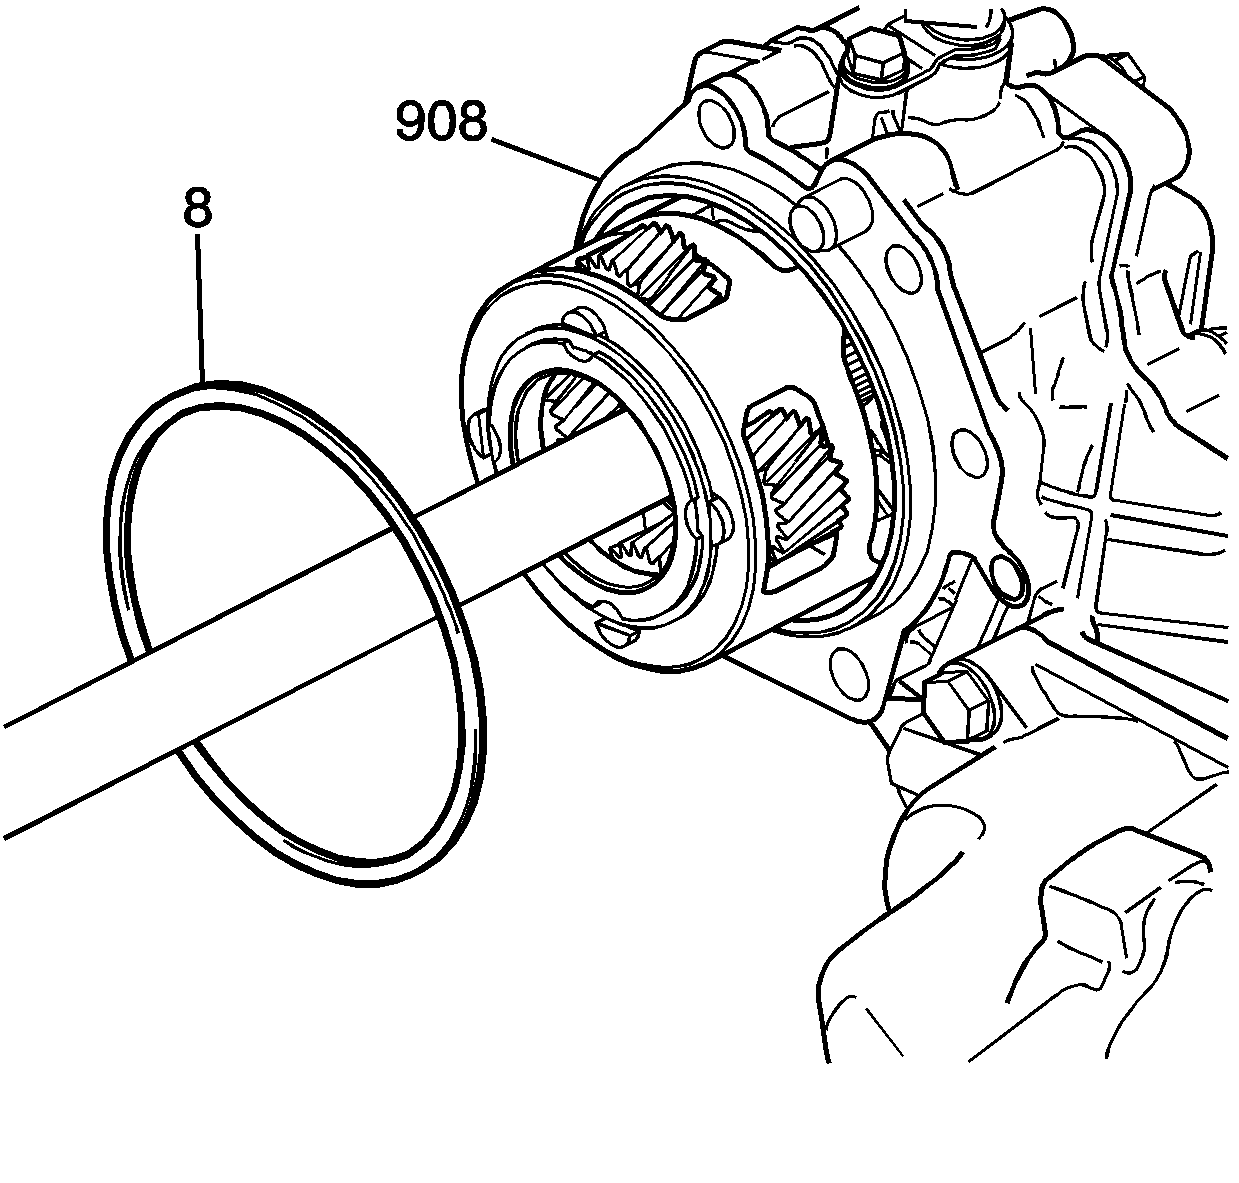
- Remove the case extension seal (8) from the transfer case (908).
- Position the transaxle so that the case side cover is facing down.
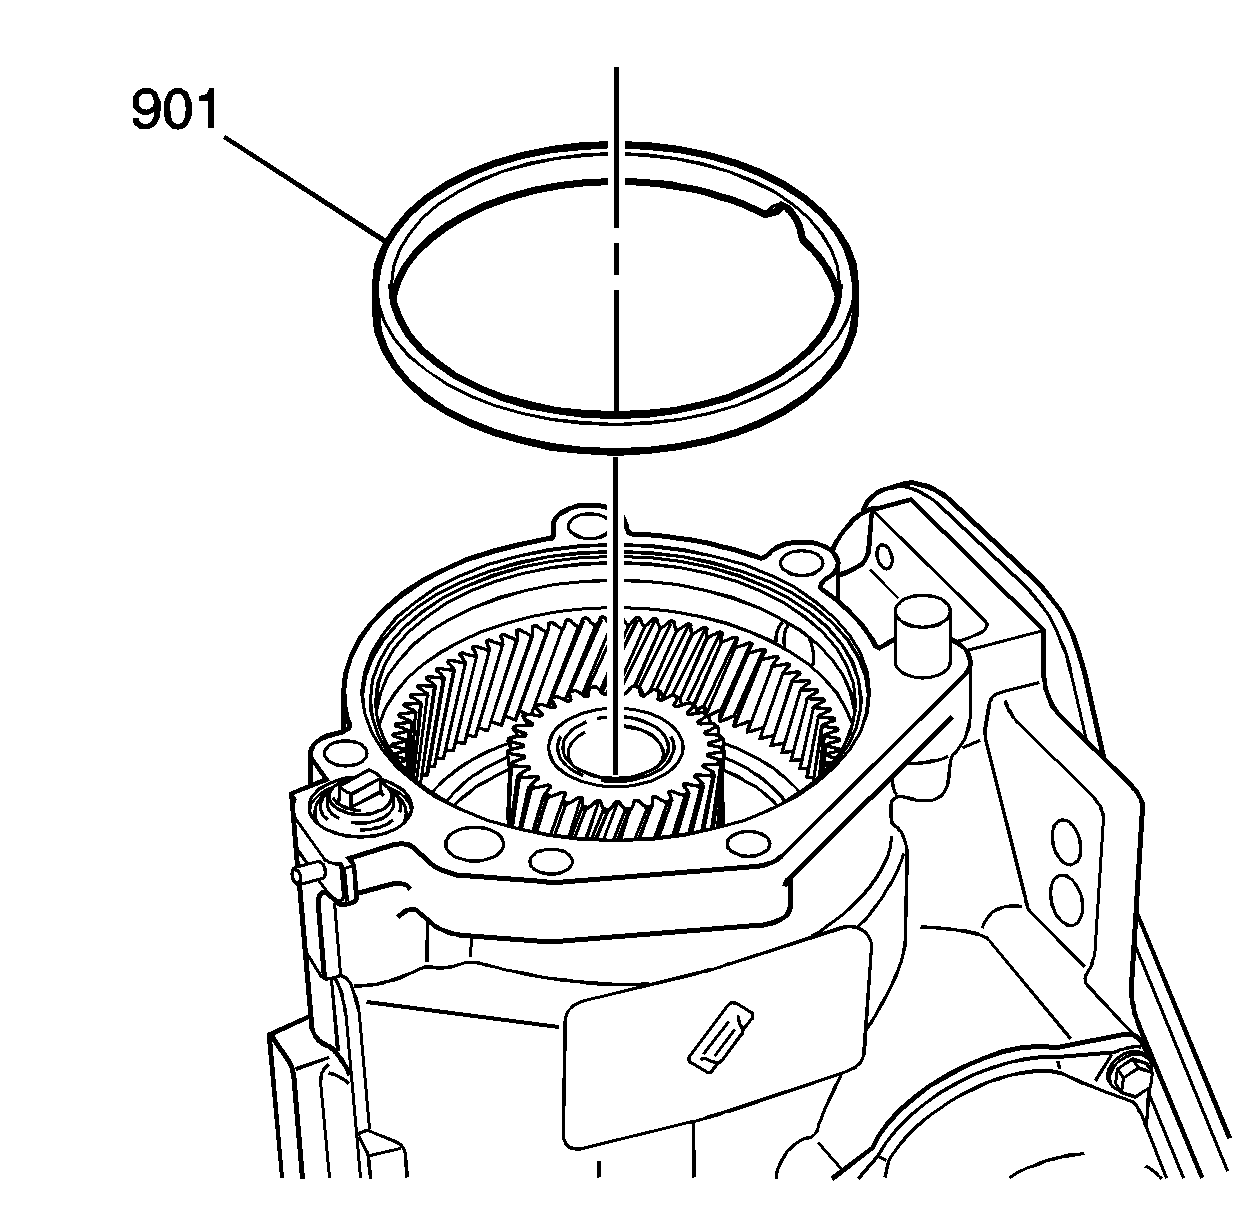
- Remove the oil dam (901) from the transaxle.
- Install the transfer case assembly onto the J 44755 . Position the carrier onto the post of the fixture.
- Install the retaining bolts.
- Attach the J 6125-1B to J 44467 . Install the J 44467 into the snap ring groove on the output shaft (510). Tighten J 44467 securely to the output shaft.
- Remove the output shaft with the slide hammer impact.
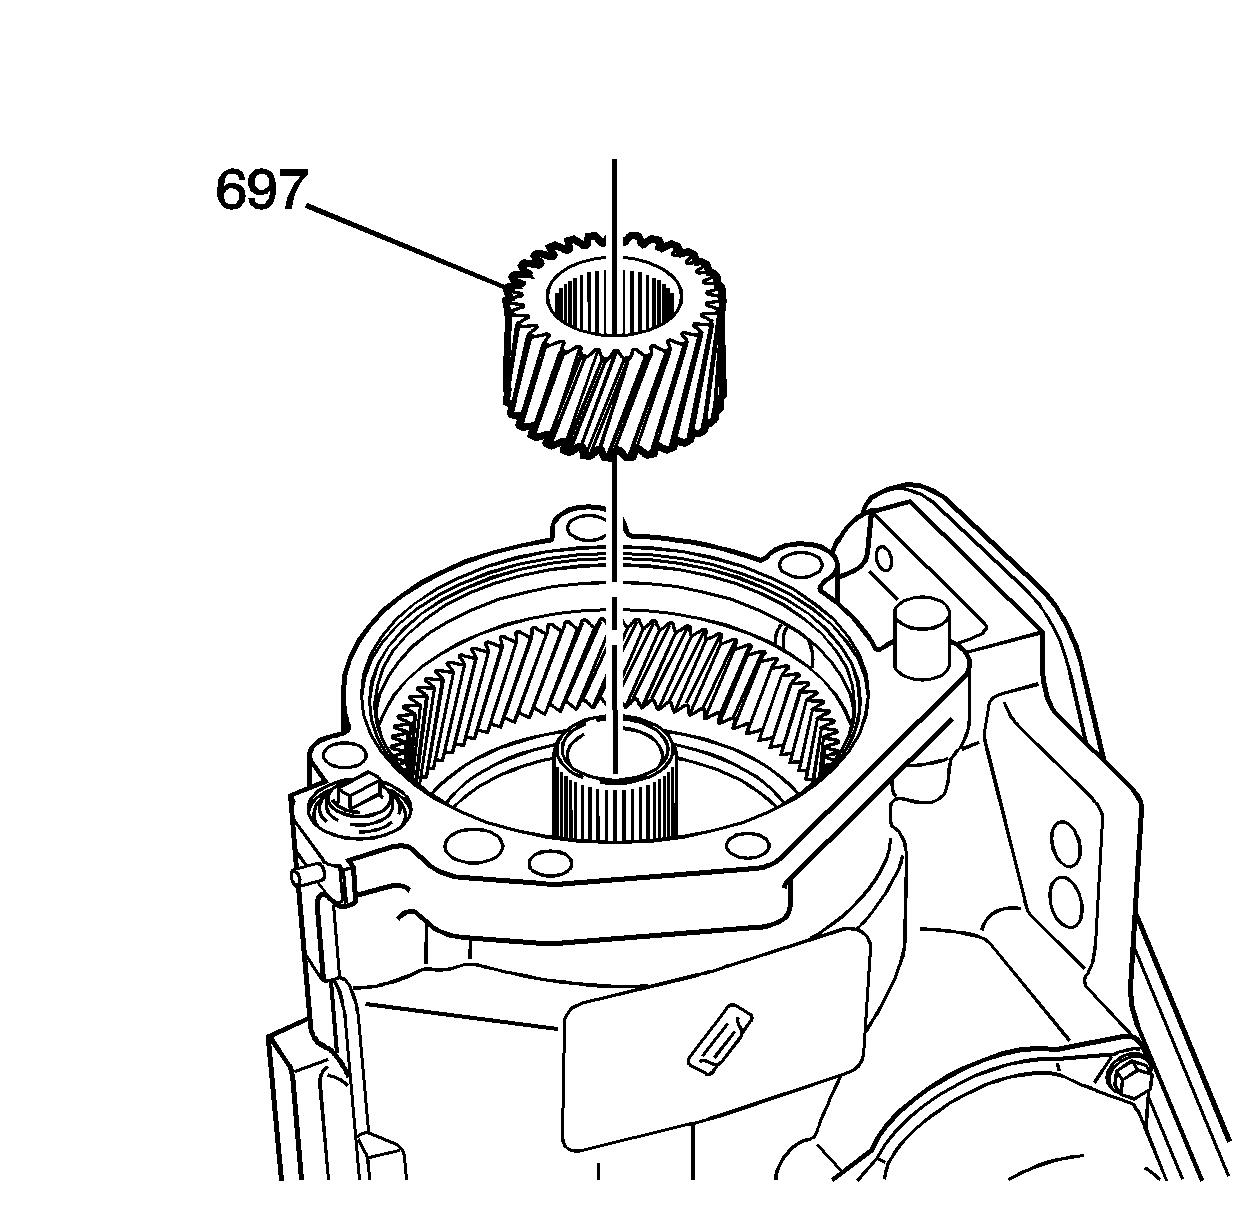
- Remove the final drive sun gear (697).
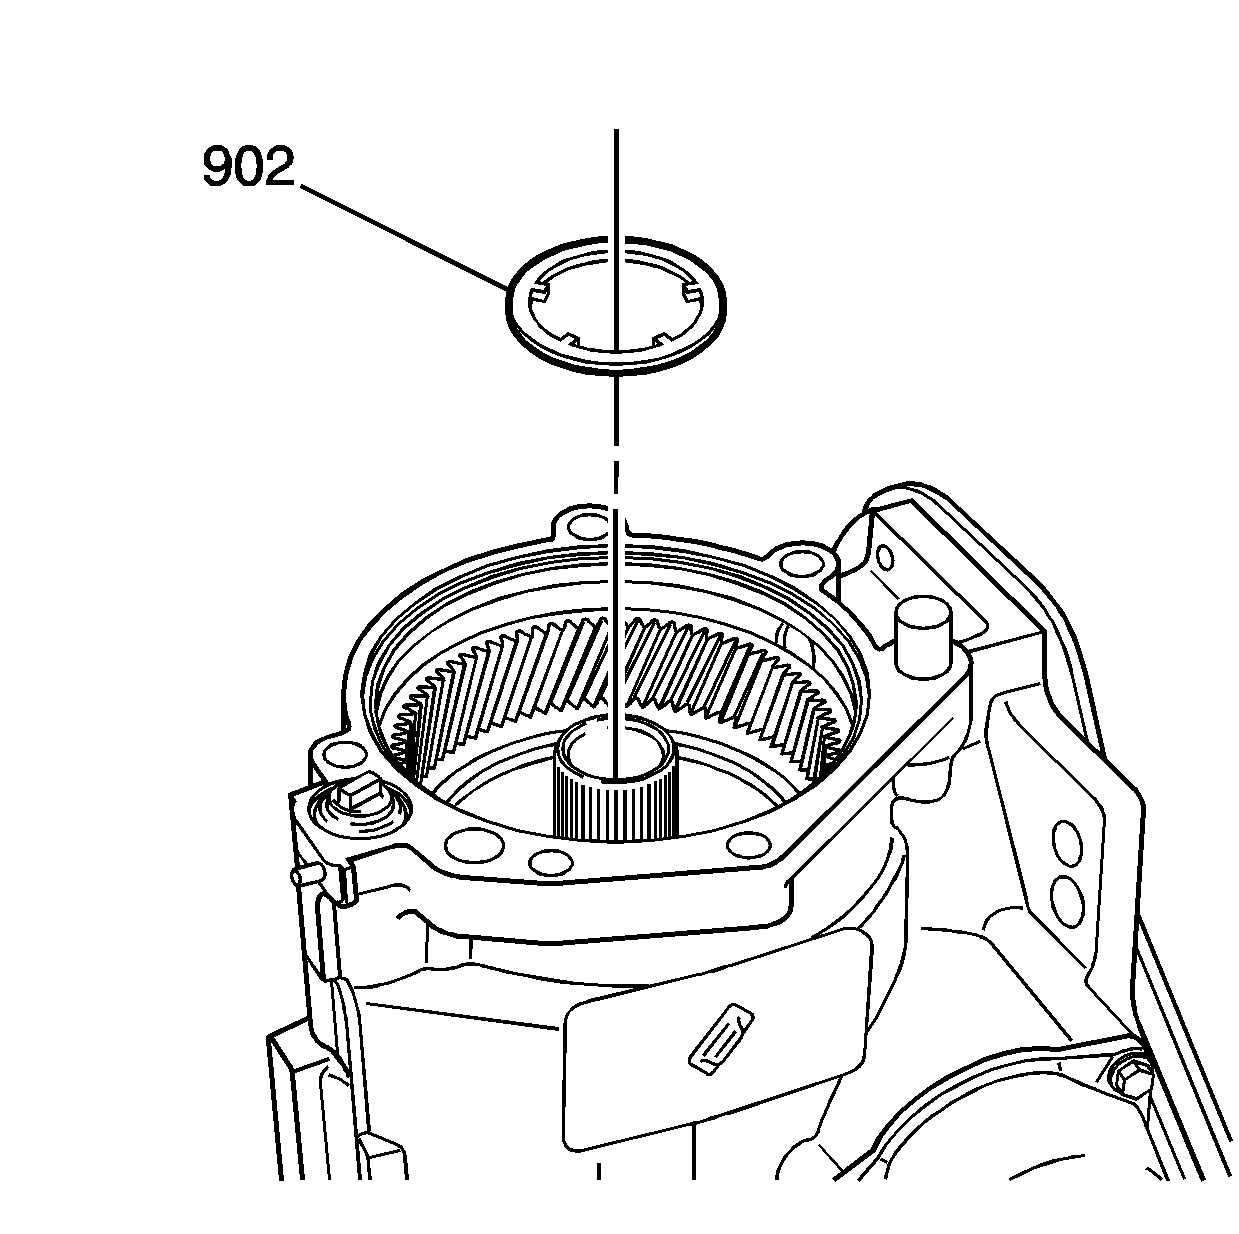
- Remove the selective washer (902).
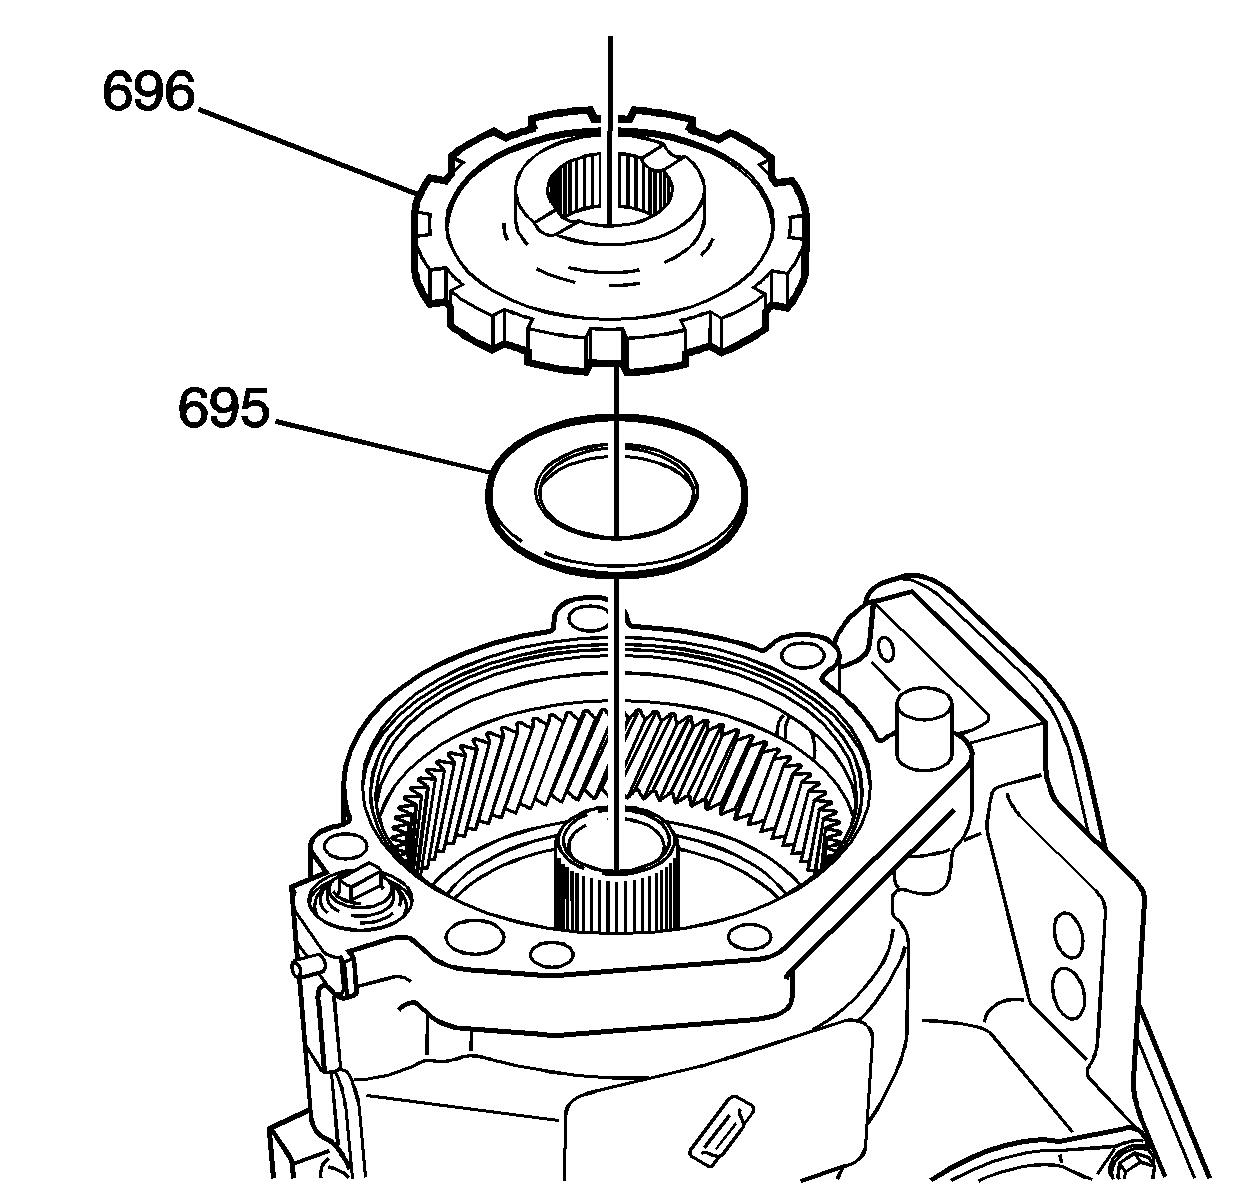
- Remove the parking gear (696) and the parking gear thrust bearing (695).
- Remove the final drive sun gear shaft (689).
Important: Transmission oil circulates between the transmission assembly and the transfer case. In situations where transmission related failures circulate debris into the transfer case, the transfer case must be disassembled, cleaned, and inspected for damage. Refer to Internal Components Cleaning and Inspection .
Caution: This component weighs approximately 60 lbs. Personal injury may result if you lift the component improperly.
Notice: During removal of the transfer case/output shaft, do not use excessive force or damage to the bushings may occur.
Notice: Use the correct fastener in the correct location. Replacement fasteners must be the correct part number for that application. Fasteners requiring replacement or fasteners requiring the use of thread locking compound or sealant are identified in the service procedure. Do not use paints, lubricants, or corrosion inhibitors on fasteners or fastener joint surfaces unless specified. These coatings affect fastener torque and joint clamping force and may damage the fastener. Use the correct tightening sequence and specifications when installing fasteners in order to avoid damage to parts and systems.
Tighten
Tighten the retaining bolts to 50 N·m (37 lb ft).