Rear Seat Number 1 Back Replacement TrailBlazer, Envoy, Rainier
Removal Procedure

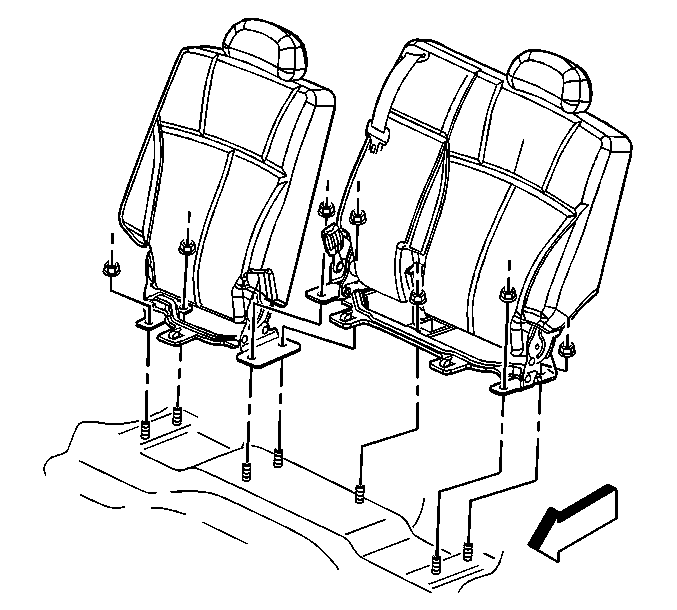
- Tumble the left seat back in order to gain access to
the left 2 rear seat back mounting nuts.
- Remove the left 3 rear seat back mounting nuts.
- Return the left seat back to the upright position.
- Remove the left 2 front seat back mounting nuts.
- Remove the left seat back from the vehicle.
- If removing the right seat back, perform the following:
| 6.1. | Remove the left seat back first. |
| 6.2. | Tumble the right seat back in order to gain access to the right rear seat
back mounting nut. |
| 6.3. | Remove the right rear seat back mounting nut. |
| 6.4. | Return the right seat back to the upright position. |
| 6.5. | Remove the right front seat back mounting nut. |
| 6.7. | Remove the right seat back from the vehicle. |
Installation Procedure
Notice: Refer to Fastener Notice in the Preface section.

- If the right seat back was removed, perform the following:
| 1.1. | Position the right seat back to the vehicle. |
| 1.3. | Install the right front rear seat back mounting nut. |
Tighten
Tighten the rear seat back mounting nut to 45 N·m
(33 lb ft).
| 1.4. | Tumble the right seat back in order to gain access to the right rear seat
stud. |
| 1.5. | Install the right rear seat back mounting nut. |
Tighten
Tighten the rear seat back mounting nut to 45 N·m
(33 lb ft).
| 1.6. | Return the right seat back to the upright position. |
- Position the left seat back to the vehicle.
- Install the left 3 front seat back mounting nuts.
Tighten
Tighten the rear seat back mounting nuts to 45 N·m
(33 lb ft).
- Tumble the left seat back in order to gain access to the left rear seat
studs.
- Install the left 2 rear seat back mounting nuts.
Tighten
Tighten the nuts to 45 N·m (33 lb ft).
- Return the left seat back to the upright position.
Rear Seat Number 1 Back Replacement TrailBlazer EXT, Envoy XL
Removal Procedure

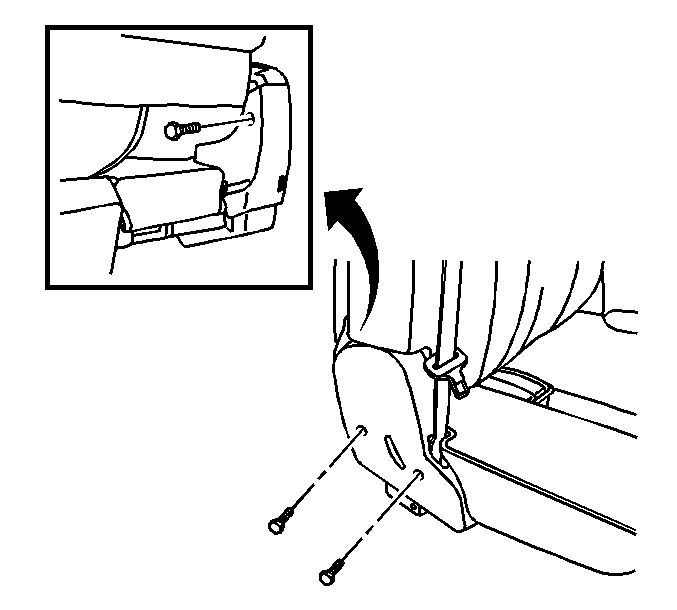
- Remove the screws from the inboard/outboard rear seat back cushion hinge covers.

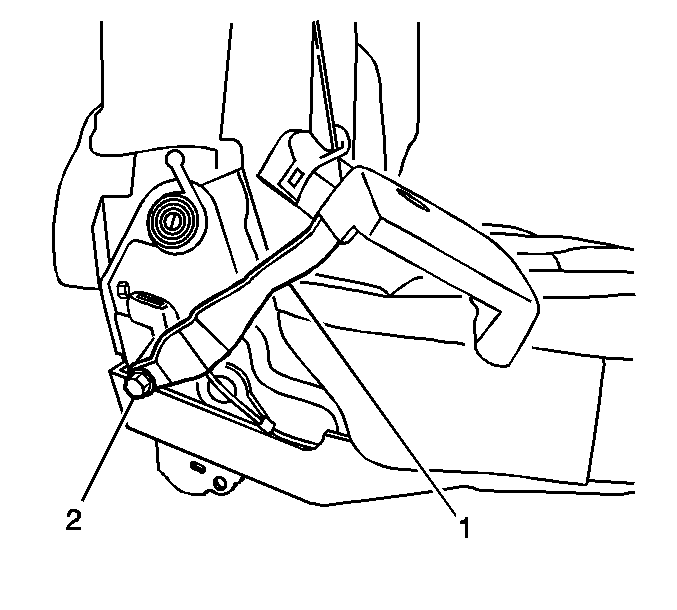
- Remove the rear seat belt anchor nut (2).
- Remove the seat back cover and pad high enough to expose the seat back cushion mounting bolts. Refer to
Rear Seat Back Cushion Cover and Pad Replacement .

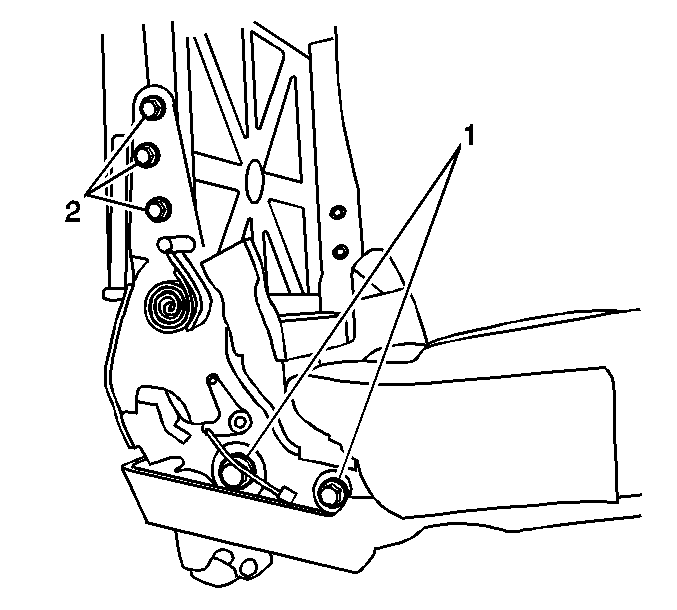
- Remove the seat back mounting bolts (2) securing the rear seat back frame to the inboard/outboard rear seat back cushion hinge assembly.
- Remove the seat back assembly.
Installation Procedure
Notice: Refer to Fastener Notice in the Preface section.

- Install the seat back cushion mounting bolts (2) securing the rear seat back frame to the inboard/outboard rear seat back cushion hinge assembly.
Tighten
Tighten all rear seat back cushion mounting bolts to 25 N·m (18 lb ft).

- Install the rear seat belt anchor nut (2).
Tighten
Tighten all rear center seat belt anchor nut to 60 N·m (44 lb ft).
- Install the seat back cover and pad to the seat back. Refer to
Rear Seat Back Cushion Cover and Pad Replacement .

- Install the inboard/outboard rear seat back cushion hinge covers with the 3 screws.
Tighten
Tighten the seat back cushion hinge cover screws to 2 N·m (18 lb in).


